Swift Development with Cocoa (2015)
Chapter 14. Networking
Many chapters in books like this begin with something like, “The ability to talk to computers over the network is an increasingly popular feature.” We won’t bore you with that. Suffice to say—it’s the 21st century, networking is huge, and your app needs to send and receive data. Let’s learn how.
In this chapter, you’ll learn how to make connections over the network and access resources with URLs. You’ll also learn how to use Bonjour to discover nearby network services so that you can connect to them. Finally, you’ll learn how to create your own network service and receive connections from other devices.
All of the content in this chapter applies to both OS X and iOS.
Connections
At the lowest level, network connections in Cocoa are the same as in every other popular OS. The Berkeley sockets API, the fundamental networking and connectivity API used on Windows and Unix OSes (which includes OS X and iOS), is available, allowing you to make connections to any computer on the network and send and receive data.
However, working with such a low-level API can be cumbersome, especially when you want to use popular, higher level protocols like HTTP. To make things more fun for developers like us, Cocoa provides a higher level API that provides a simple interface for accessing content via URLs on the Internet.
NOTE
A URL is a uniform resource locator. It’s a location on the Internet, and specifies the location of the server to connect to, the protocol to use, and the location of the resource on the server. Consider the following URL: http://oreilly.com/iphone/index.html.
In this case, oreilly.com is the location of the computer on the Internet, http is the scheme (here, the Hypertext Transfer Protocol), and /iphone/index.html is the location of the specific resource hosted by this computer.
When working with web-based network requests, there are three primary classes that you interact with: NSURL, NSURLRequest, and NSURLSession.
NSURL
The NSURL class represents a URL. NSURLs are just model objects—they contain information about the location of the resource they point to, and provide a number of useful methods for retrieving specific components of the URL, as well as creating URLs relative to other URLs.
The easiest way to create an NSURL is to use a string, like this:
let myURL = NSURL(string: "http://oreilly.com")
NOTE
If you use NSURL(string:), the string you provide must be a well formed URL. If it isn’t well formed, you’ll get a nil value.
Because calling NSURL’s constructor can result in nil, it always returns an optional. You’ll need to use ? and ! to unwrap it.
You can also create URLs that are relative to other URLs:
let relativeURL = NSURL(string: "resources/index.html",
relativeToURL: NSURL(string: "http://oreilly.com/"))
Once you have an NSURL, you can retrieve information about it. For example, to retrieve the host (the computer name), you can do the following:
let host = relativeURL?.host // = "oreilly.com"
NOTE
NSURL is an immutable class. If you want to create a URL object that you can later modify the properties of, use NSMutableURL.
URLs are also useful for indicating the location of a file or folder on the local disk, and both iOS and OS X are increasingly trending toward using them instead of strings that contain paths.
A file URL is a regular NSURL, but uses the scheme file:. A file URL, therefore, looks like this:
file://localhost/Applications/
There are special methods in NSURL that make it easier to create file URLs. For example, you can create one using the fileURLWithPath: method:
let myFileURL = NSURL(fileURLWithPath:"/Applications/")
NSURLRequest
Once you have an NSURL object that points to where your resource is located, you construct an NSURLRequest. While NSURL points to where the resource is on the network, NSURLRequest describes how it should be accessed.
NSURLRequest takes an NSURL and adds information about things like how long the request should go without an answer before timing out, whether (and how) to use caching, and, if the request is an HTTP request, which request method (GET, POST, PUT, etc.) to use and what the HTTP request’s body should be.
For most cases, you can use the NSURLRequest(URL:) method to create an NSURLRequest given an NSURL:
let urlRequest = NSURLRequest(URL:myURL!)
If you want to have more control over how the request is performed, you can use NSURLRequest(URL:cachePolicy:timeoutInterval:). This method is the same as the previous one, but you specify how the request should cache content that it downloads and how long the request should wait before giving up.
NOTE
NSURLRequest(URL:) creates a request that caches content according to the default caching policy of the protocol you’re using (e.g., HTTP caches depending on whether the server instructs it to, while FTP never caches) and times out after 60 seconds.
If you want to send a POST request or make changes to the request, you can use NSMutableURLRequest. This is the mutable version of the NSURLRequest class, and allows you to configure the request after you create it. To create a POST request, for example, you use the HTTPMethodproperty:
let mutableRequest = NSMutableURLRequest(URL: myURL!)
mutableRequest.HTTPMethod = "POST"
NSURLSession
Once you have an NSURLRequest to use, you can go ahead and execute that request on the network. Because network requests aren’t instant, your code needs to be able to manage the life cycle of the connection. This is done for you by the NSURLSession object, which represents a connection in progress.
NSURLSession was introduced into OS X 10.9 and iOS 7 as a replacement for the older NSURLConnection API, and is the new and recommended way to handle any URL-related tasks, both uploading and downloading. It is comprised of four major objects: NSURLSession,NSURLSessionDelegate, NSURLSessionConfiguration, and NSURLSessionTask.
NSURLSessionConfiguration is the object representing a configuration to be used by a session. An NSURLSessionConfiguration handles, among other things, cache, cookie policy, proxies, and timeouts. Each configuration object created is mutable and designed to be shared by multiple sessions. Apple has also provided some predefined configurations for common situations.
NSURLSessionTask represents an individual task to be handled by the session. In some ways, it is the closest object to NSURLConnection in that it contains the state of the task being performed. The NSURLSessionTask also has methods to let you cancel, suspend, and resume the task.
Finally, NSURLSession and its delegate NSURLSessionDelegate is responsible for performing any tasks sent to it. In general, when using an NSURLSession you will not need to deal with its delegate; just use completion blocks when the session finishes a task. When you wish to useNSURLSession for background downloading in iOS in your application, you will have to handle the session delegate methods as well as implement the application(_, handleEventsForBackgroundURLSession:, completionHandler:) in your application’s delegate.
NSURLSession is a large and complex class; however, to get it up and running is generally quite straightforward. We’ll cover how it works in the sample code in the section Building a Networked Application.
NSURLResponse and NSHTTPURLResponse
The response classes describe the initial response from the server about the request. This information includes the expected size of the downloaded file (in bytes) and the suggested filename that the server wants to call it. If you’re making an HTTP request, the server response is an instance of the NSHTTPURLResponse, which also includes the HTTP status code and the headers that the server sends down.
You don’t generally create your own NSURLResponse instances, but rather get them from an NSURLSession or NSURLConnection object when it first successfully gets a response from the server and starts downloading content.
NOTE
Think of it like this:
§ NSURL is a finger pointing at the moon.
§ NSURLRequest is a blueprint for a Saturn V rocket.
§ NSURLSession is an Apollo mission to the moon.
Building a Networked Application
To put all of this together, we’ll build a simple application that downloads an image from the Internet and displays it in an NSImageView.
The exact same networking code will work on iOS, but using UIImageView rather than NSImageView.
NOTE
This application downloads an image from Placekitten, the world’s most adorable placeholder image service. Of course, web services come and go, so if you’re living in the World of Tomorrow and Placekitten is long since history, find another image URL to use instead. And then eat another meal in pill form and catch a space-taxi to the moon.
1. Make a new Cocoa application called Networking.
2. Build the interface. Open MainWindow.xib, and select the main window. Drag in an NSImageView.
3. Connect the interface. Open AppDelegate.swift in the assistant.
Control-drag from the image view to AppDelegate ’s interface. Create a new outlet called imageView.
4. Add the code that performs the network request. Replace the applicationDidFinishLaunching method with the following code:
5. func applicationDidFinishLaunching(aNotification: NSNotification?) {
6.
7. // PlaceKitten.com URLs work like this:
8. // http://placekitten.com/<width>/<height>
9.
10. let width = self.imageView.bounds.size.width
11. let height = self.imageView.bounds.size.height
12.
13. let urlString = "http://placekitten.com/\(Int(width))/\(Int(height))"
14.
15. if let url = NSURL(string:urlString) {
16.
17. // Using this URL, make an NSURLSesssion and then create a data
18. // request task.
19. let session = NSURLSession(
20. configuration: NSURLSessionConfiguration
21. .defaultSessionConfiguration())
22.
23. let dataTask = session.dataTaskWithURL(url) {
24. (data: NSData?,
25. response: NSURLResponse?,
26. error: NSError?) in
27.
28. if data == nil {
29. self.imageView.image = nil
30. } else {
31. if let image = NSImage(data: data!) {
32. self.imageView.image = image;
33. }
34. }
35.
36.
37. }
38.
39. // Call resume() on the data request to start it
40. dataTask.resume()
41. }
}
CAUTION
It is very important to call resume on any NSURLSessions after giving them a task. As NSURLSession is designed to handle enqueing of multiple tasks, it needs to be told to start.
This code creates a URL based on the size of the image view, and then creates and configures an NSURLSession (using the predefined defaultSessionConfiguration class) to handle the URL. Finally, the code asks the NSURLSession to download the URL; the completion block then takes the loaded data, converts it to an NSImage, and provides the image to the image view.
Now test the application. Run the app, and feel free to squeal in delight when you see a cute kitten.
Bonjour Service Discovery
If you’re writing networking code that deals with resources on the local network, your code needs a way to figure out where they are.
Bonjour is a protocol based on multicast DNS that allows a network service to advertise its presence on a network, and provides a method for clients to find services. Bonjour doesn’t handle the actual connection, just the discovery.
When you want to find local services via Bonjour, you use an NSNetServiceBrowser object. This object, once created and started, looks for network services that match the description that you provide it. Because network services come and go, the NSNetServiceBrowser continuously notifies its delegate object when services become available and when they stop being available.
Once NSNetServiceBrowser locates a network service, you can ask for additional information about the service such as the hostname of the computer providing the service and the port number that the service is running on. This is called resolving the service, and takes a bit of extra time (which is why the service browser doesn’t do it for every service it discovers). When the service resolves (or fails to resolve), the NSNetService object informs its delegate.
To be notified of when NSNetServiceBrowser notices when services appear and disappear, your object needs to conform to the NSNetServiceBrowserDelegate protocol. To be notified of when an NSNetService resolves, your object also needs to conform to theNSNetServiceDelegate protocol.
Browsing for Shared iTunes Libraries
If you have “Share my library on the local network” turned on in iTunes, iTunes will broadcast the library via Bonjour. Specifically, it will advertise that your computer is hosting a DAAP (Digital Audio Access Protocol) server.
To discover services of this type, you get an NSNetServiceBrowser to search for _daap._tcp services. We’ll make a simple application that browses for, resolves, and logs any shared iTunes libraries it finds.
All you need to do is create a new Cocoa application called iTunesDetector and update AppDelegate.swift so that it looks like the following code:
import Cocoa
class AppDelegate: NSObject, NSApplicationDelegate, NSNetServiceDelegate,
NSNetServiceBrowserDelegate {
@IBOutlet var window: NSWindow!
let browser = NSNetServiceBrowser()
var services = [NSNetService]()
func applicationDidFinishLaunching(aNotification: NSNotification?) {
browser.delegate = self;
// Search for DAAP services that use TCP, in the default domains
browser.searchForServicesOfType("_daap._tcp", inDomain:"")
}
func netServiceBrowser(aNetServiceBrowser: NSNetServiceBrowser,
didFindService aNetService: NSNetService, moreComing: Bool) {
services.append(aNetService)
println("Found a service: \(aNetService)")
aNetService.delegate = self
aNetService.resolveWithTimeout(5.0)
}
func netServiceBrowser(aNetServiceBrowser: NSNetServiceBrowser,
didRemoveService aNetService: NSNetService, moreComing: Bool) {
services = services.filter({ $0 != aNetService})
println("A service was removed: \(aNetService)")
}
func netServiceDidResolveAddress(sender: NSNetService) {
let serviceURL = NSURL(string:"http://\(sender.hostName):\(sender.port)")
println("Resolved address for service \(sender): \(serviceURL)")
}
func netService(sender: NSNetService,
didNotResolve errorDict: NSDictionary) {
println("Couldn't resolve address for service \(sender), \(errorDict)")
}
}
This code does the following things:
1. It adds a class extension to the AppDelegate class, which makes the class conform to the NSNetServiceBrowserDelegate and NSNetServiceDelegate protocols, and adds two instance variables: an NSNetServiceBrowser and an NSMutableArray. The net service browser variable is needed to keep the net service browser in memory while it does its work; the array will be used to keep the discovered network services around.
2. In the applicationDidFinishLaunching method, the NSNetServiceBrowser is created and told to start browsing for _daap._tcp services.
3. The rest of the methods handle the cases of services being discovered, removed, resolved, or failing to be resolved.
Now run the application and watch the log to see your iTunes library get discovered. If you don’t see anything appear, make sure that iTunes is open and that you’re sharing your library. Do this by opening Preferences, going to Sharing, and turning on “Share my library on my local network.”
Multipeer Connectivity
Multipeer Connectivity is a means of identifying and connecting services together, and allows for very easy passing back and forth of data with minimal setup. If you are thinking that this seems similar to Bonjour, you are correct; however, Bonjour is for service discovery, not connection or transmission. Multipeer Connectivity handles everything in one neat package.
Multipeer Connectivity is comprised of a few different components, but it works by having applications advertise their services and asking if anyone is available to connect. The service browser listens for these advertisements and can request to create a connection between the devices. If the connection is accepted, a session is created with everyone inside the session being represented by a peer object.
To demonstrate how this works, we’ll make a simple chat application (this exercise is written for iOS, but the Multipeer Connectivity framework also works on OS X):
1. Create a new, single view iPhone application called MultipeerChat.
2. Open the project in the project navigator and the add the Multipeer Connectivity framework into the project from the Linked Frameworks and Libraries section.
3. Open the Main.storyboard, and add a UITextView. Make it take up most of the space, and set its editable field to be false in the Atrributes Inspector.
4. Add a UITextField and add two buttons. Label one Browse and the other Send.
5. Connect the UITextView up to a property called chatView.
6. Connect the UITextField up to a property called messageField.
7. Connect the browse button up to an action called showBrowser, and the Send button up to an action called sendChat.
When complete, your interface should look like Figure 14-1.
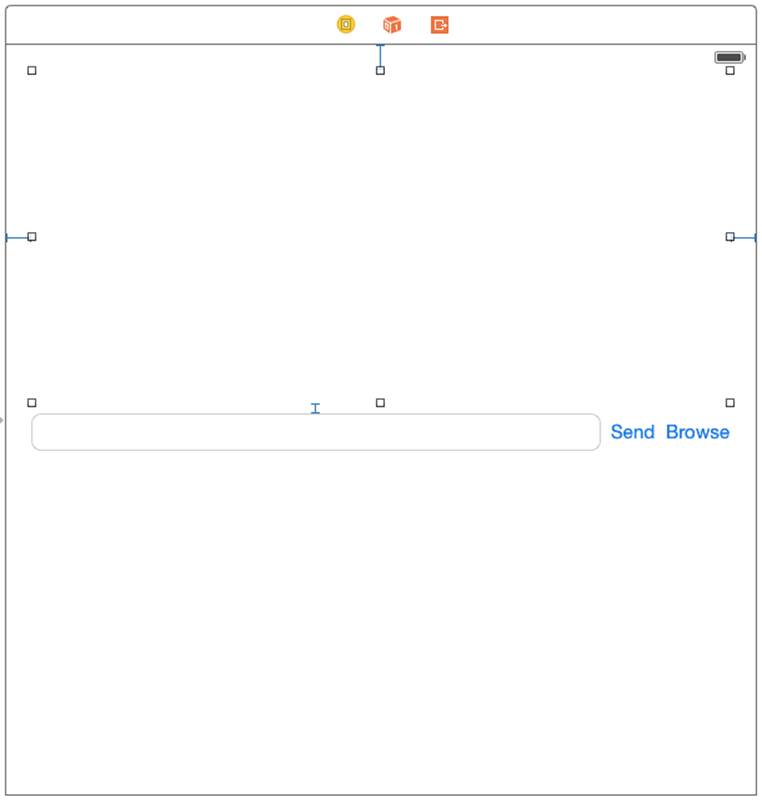
Figure 14-1. The interface for your chat program
Modify the ViewController so that it looks like the following:
import UIKit
import MultipeerConnectivity
class ViewController: UIViewController, MCBrowserViewControllerDelegate,
MCSessionDelegate {
let serviceType = "LCOC-Chat"
var browser : MCBrowserViewController!
var assistant : MCAdvertiserAssistant!
var session : MCSession!
var peerID: MCPeerID!
@IBOutlet var chatView: UITextView!
@IBOutlet var messageField: UITextField!
override func viewDidLoad() {
super.viewDidLoad()
self.peerID = MCPeerID(displayName: UIDevice.currentDevice().name)
self.session = MCSession(peer: peerID)
self.session.delegate = self
// create the browser view controller with a unique service name
self.browser = MCBrowserViewController(serviceType:serviceType,
session:self.session)
self.browser.delegate = self;
self.assistant = MCAdvertiserAssistant(serviceType:serviceType,
discoveryInfo:nil, session:self.session)
// tell the assistant to start advertising our fabulous chat
self.assistant.start()
}
@IBAction func sendChat(sender: UIButton) {
// Bundle up the text in the message field, and send it off to all
// connected peers
let msg = self.messageField.text.dataUsingEncoding(NSUTF8StringEncoding,
allowLossyConversion: false)
var error : NSError?
self.session.sendData(msg, toPeers: self.session.connectedPeers,
withMode: MCSessionSendDataMode.Unreliable, error: &error)
if error != nil {
print("Error sending data: \(error?.localizedDescription)")
}
self.updateChat(self.messageField.text, fromPeer: self.peerID)
self.messageField.text = ""
}
func updateChat(text : String, fromPeer peerID: MCPeerID) {
// Appends some text to the chat view
// If this peer ID is the local device's peer ID, then show the name
// as "Me"
var name : String
switch peerID {
case self.peerID:
name = "Me"
default:
name = peerID.displayName
}
// Add the name to the message and display it
let message = "\(name): \(text)\n"
self.chatView.text = self.chatView.text + message
}
@IBAction func showBrowser(sender: UIButton) {
// Show the browser view controller
self.presentViewController(self.browser, animated: true, completion: nil)
}
func browserViewControllerDidFinish(
browserViewController: MCBrowserViewController!) {
// Called when the browser view controller is dismissed (i.e., the Done
// button was tapped)
self.dismissViewControllerAnimated(true, completion: nil)
}
func browserViewControllerWasCancelled(
browserViewController: MCBrowserViewController!) {
// Called when the browser view controller is cancelled
self.dismissViewControllerAnimated(true, completion: nil)
}
func session(session: MCSession!, didReceiveData data: NSData!,
fromPeer peerID: MCPeerID!) {
// Called when a peer sends an NSData to us
// This needs to run on the main queue
dispatch_async(dispatch_get_main_queue()) {
if let msg = NSString(data: data, encoding: NSUTF8StringEncoding) {
self.updateChat(msg, fromPeer: peerID)
}
}
}
// The following methods do nothing, but the MCSessionDelegate protocol
// requires that we implement them.
func session(session: MCSession!,
didStartReceivingResourceWithName resourceName: String!,
fromPeer peerID: MCPeerID!, withProgress progress: NSProgress!) {
// Called when a peer starts sending a file to us
}
func session(session: MCSession!,
didFinishReceivingResourceWithName resourceName: String!,
fromPeer peerID: MCPeerID!,
atURL localURL: NSURL!, withError error: NSError!) {
// Called when a file has finished transferring from another peer
}
func session(session: MCSession!, didReceiveStream stream: NSInputStream!,
withName streamName: String!, fromPeer peerID: MCPeerID!) {
// Called when a peer establishes a stream with us
}
func session(session: MCSession!, peer peerID: MCPeerID!,
didChangeState state: MCSessionState) {
// Called when a connected peer changes state (e.g., if it goes offline)
}
}
This code does the following things:
1. It adds a class extension to the ViewController class, which makes it conform to the MCBrowserViewControllerDelegate and MCSessionDelegate protocols, as well as creating four new properties, including one to handle the multicast peer components:
o The MCBrowserViewController is a prebuilt view controller that handles and negotiates browsing for connections.
o The MCAdvertiserAssistant is another prebuilt class that advertises and negotiates creating a connection and session.
o The MCSession is the object holding the sessions once it has been negotiated.
o MCPeerID represents your peer ID for the session.
2. In the viewDidLoad method, the code initializes all the multicast peer objects before telling the advertiser to start advertising its availability.
3. In the sendChat method, the sendData(toPeers:error:) message on the session is the real meat of the application. This is the method used to send data—in our application, a string from the text field.
4. Finally, session(didReceiveData:fromPeer:) is the delegate method that is called when the session receives any data—in the case of our application, it appends the new data to the text view, showing the received text to the text view.
Now if you and another friend both run the application, you should have an amazing chat app!