Swift Development with Cocoa (2015)
Chapter 15. Working with the Real World
Desktops, laptops, iPhones, and iPads are all physical devices existing in the real world—either on your desk, on your lap, or in your hand. For a long time, your apps were largely confined to your computer, and weren’t able to do much with the outside world besides instructing a printer to print a document.
Starting with iOS and OS X 10.6, however, things began to change, and your code is now able to learn about the user’s location, how the device is moving and being held, and how far away the computer is from landmarks.
In this chapter, you’ll learn about how your programs can interact with the outside world. Specifically, you’ll learn how to use Core Location to determine where your computer or device is on the planet, how to use MapKit to show and annotate maps, how to use Core Motion to learn about how the user is holding the device, how to use the printing services available on OS X and iOS to work with printers, how to connect game controllers into your apps, and how to make sure your apps don’t excessively drain the user’s battery.
NOTE
Most of the technology discussed in this chapter works on both OS X and iOS. Some of the technologies have identical APIs on both platforms (Core Location, MapKit, and Game Controllers), some have different APIs on the two platforms (print services), and some are only available on iOS (Core Motion) or OS X (App Nap). We’ll let you know which technology is available where.
Working with Location
Almost every user of your software will be located on Earth.[6]
Knowing where the user is on the planet is tremendously useful because it enables you to provide more relevant information. For example, while the business review and social networking site Yelp works just fine as a search engine for businesses and restaurants, it only becomes truly useful when it limits its results to businesses and restaurants near the user.
Location awareness is a technology that is at its most helpful on mobile devices (like an iPhone or iPad), because their locations are more likely to change. However, it’s also applicable to a more fixed-location device (like a desktop) to know where it is in the world. A great example of this is the time-zone system in OS X—if you move your computer from one country to another, your time zone will have likely changed, and OS X uses its built-in location systems to work out how to set the clock to local time.
Location Hardware
There are a number of different techniques for determining where a computer is on the planet, and each requires different hardware. The ones in use by iOS and OS X are:
§ GPS, the Global Positioning System
§ WiFi base station lookups
§ Cell tower lookups
§ iBeacons
GPS
GPS devices first became popular as navigation assistants for cars, and later as features built into smartphones. Initially developed by the U.S. military, GPS is a constellation of satellites that contain extremely precise clocks and continuously broadcast time information. A GPS receiver can listen for these time signals and compare them to determine where the user is.
Depending on how many satellites the GPS receiver can see, GPS is capable of working out a location to less than one meter of accuracy.
The GPS receiver is only included on the iPhone, and on iPad models that contain 3G or 4G cellular radios. It’s not included on any desktop, laptop, or iPod touch, or on WiFi-only iPads.
Since the introduction of the iPhone 4S and later models, iOS devices capable of receiving GPS signals are also capable of receiving signals from GLONASS,[7] a Russian satellite navigation system, all transparently handled and combined with GPS to give you a better location.
WiFi base station lookups
While a device that uses WiFi to access the Internet may move around a lot, the base stations that provide that connection generally don’t move around at all. This fact can be used to determine the location of a user if a GPS receiver isn’t available.
Apple maintains a gigantic database of WiFi hotspots, along with rough coordinates that indicate where those hotspots are. If a device can see WiFi hotspots and is also connected to the Internet, it can tell Apple’s servers, “I can see hotspots A, B, and C.” Apple’s servers can then reply, “If you can see them, then you must be near them, and therefore you must be near location X.” The device keeps a subset of this database locally, in case a WiFi lookup is necessary when the device has no access to the Internet.
Usually, this method of locating the user isn’t terribly precise, but it can get within 100 meters of accuracy in urban areas (where there’s lots of WiFi around). Because it uses hardware that’s built into all devices that can run OS X and iOS, this capability is available on every device.
Cell tower lookups
If a device uses cell towers to communicate with the Internet, it can perform a similar trick with the towers as with WiFi base stations. The exact same technique is used, although the results are slightly less accurate—because cell towers are less numerous than WiFi stations, cell tower lookups can only get within a kilometer or so of accuracy.
Cell tower lookups are available on any device that includes a cell radio, meaning the iPhone, and all models of the iPad that have a cell radio. They’re not available on iPods, because they don’t have any cell radio capability.
iBeacons
iBeacons are a new means of determining location using low-energy Bluetooth devices. By constantly broadcasting their existence via a unique identifier, they can be detected by an iOS device, allowing you to determine where you are based on the iBeacon’s location. iBeacon location and accuracy is much more subjective than any of the other location methods: instead of pinpointing your position on the planet, iBeacons can tell you when you are near or far from them. iBeacons are designed more to determine the store you’re near in a shopping mall or the artwork you’re close to in a museum, rather than to work out where you are for navigation or tracking.
iBeacons are available on any device capable of running iOS 7 or later. Additionally, these devices can also be set up to act as an iBeacon themselves.
The Core Location Framework
As you can see, not every piece of location-sensing hardware is available on all devices. Because it would be tremendously painful to have to write three different chunks of code for three different location services and then switch between them depending on hardware availability, OS X and iOS provide a single location services API that handles all the details of working with the location hardware.
Core Location is the framework that your applications use to work out where they are on the planet. Core Location accesses whatever location hardware is available, puts the results together, and lets your code know its best guess for the user’s location. It’s also able to determine the user’s altitude, heading, and speed.
When you work with Core Location, you work with an instance of CLLocationManager. This class is your interface to the Core Location framework—you create a manager, optionally provide it with additional information on how you want it to behave (such as how precise you want the location information to be), and then provide it with a delegate object. The location manager will then periodically contact the delegate object and inform it of the user’s changing location.
CLLocationManager is actually a slightly incomplete name for the class, because it doesn’t just provide geographic location information. It also provides heading information (i.e., the direction the user is facing relative to magnetic north or true north). This information is only available on devices that contain a magnetometer, which acts as a digital compass. At the time of writing, all currently shipping iOS devices contain one, but devices older than the iPhone 3GS, iPod touch 3rd generation, and iPad 2 don’t.
To work with Core Location, you create the CLLocationManager delegate, configure it, and then send it the startUpdatingLocation() message. When you’re done needing to know about the user’s location, you send it the stopUpdatingLocation() message.
NOTE
You should always turn off a CLLocationManager when you’re done, as location technologies are CPU-intensive and can require the use of power-hungry hardware. Think of the user’s battery!
To work with Core Location, you provide it with an object that conforms to the CLLocationManagerDelegate protocol. The key method in this protocol is locationManager(manager: didUpdateLocations:), which is sent periodically by the location manager.
This method receives both the user’s current location (as far as Core Location can tell) and his previous location. These two locations are represented as CLLocation objects, which contain information like the latitude and longitude, altitude, speed, and accuracy.
Core Location may also fail to get the user’s location at all. If, for example, GPS is unavailable and neither WiFi base stations nor cell towers can be found, no location information will be available. If this happens, the CLLocationManager will send its delegate thelocationManager(manager: didFailWithError:) message.
Working with Core Location
To demonstrate Core Location, we’ll create a simple application that attempts to display the user’s location. This will be an OS X application, but the same API applies to iOS.
To get started with Core Location, create a new Cocoa application called Location.
Now that we have a blank application we’ll build the interface. The interface for this app will be deliberately simple—it will show the user’s latitude and longitude coordinates, as well as the radius of uncertainty that Core Location has about the user.
No location technology is completely precise, so unless you’re willing to spend millions of dollars on (probably classified) technology, the best any consumer GPS device will get is about 5 to 10 meters of accuracy. If you’re not using GPS, which is the case when using a device that doesn’t have it built in, Core Location will use less-accurate technologies like WiFi or cell tower triangulation.
This means that Core Location is always inaccurate to some extent. When Core Location updates its delegate with the location, the latitude and longitude provided are actually the center of a circle that the user is in, and the value of the CLLocation property horizontalAccuracyindicates the radius of that circle, represented in meters.
The interface of this demo application, therefore, will show the user’s location as well as how accurate Core Location says it is:
1. Open MainMenu.xib and select the window.
2. Now add the latitude, longitude, and accuracy labels. Drag in three labels and make them read Latitude, Longitude, and Accuracy. Lay them out vertically.
3. Drag in another three labels, and lay them out vertically next to the first three.
4. Finally, drag in a circular progress indicator and place it below the labels.
When you’re done, your interface should look like Figure 15-1.
You’ll now connect the interface to the app delegate. Open AppDelegate.swift in the assistant and Control-drag from each of the labels on the right. Create outlets for each of them called longitudeLabel, latitudeLabel, and accuracyLabel, respectively. Control-drag from the progress indicator, and create an outlet for it called spinner.
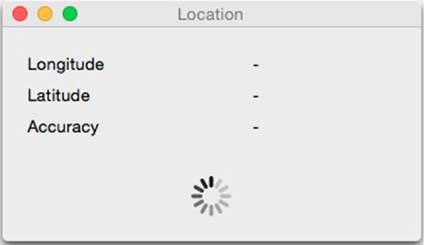
Figure 15-1. The completed interface for our Location app
Now make the app delegate conform to the CLLocationManagerDelegate protocol and finally, but very importantly, import the Core Location framework. When you’re done, the top of AppDelegate.swift should look like the following code:
import Cocoa
import CoreLocation
class AppDelegate: NSObject, NSApplicationDelegate,CLLocationManagerDelegate {
@IBOutlet weak var window: NSWindow!
@IBOutlet weak var longitudeLabel: NSTextField!
@IBOutlet weak var latitudeLabel: NSTextField!
@IBOutlet weak var accuracyLabel: NSTextField!
@IBOutlet weak var spinner: NSProgressIndicator!
var locationManager = CLLocationManager()
Now we need to tell the CLLocationManager to start finding the users location. Update the applicationDidFinishingLaunching method in AppDelegate.swift to look like the following:
func applicationDidFinishLaunching(aNotification: NSNotification?) {
self.locationManager.delegate = self
self.locationManager.startUpdatingLocation()
self.spinner.startAnimation(nil)
}
This code does the following things:
§ Sets the delegate for the CLLocationManager; in this case we are setting the delegate to be the app delegate.
§ Tells the location manager to start updating the user’s location.
§ Finally, it instructs the progress indicator to start animating.
Now we need to implement two CLLocationManagerDelegate methods—locationManager(manager: didUpdateLocations:) and locationManager(manager: didFailWithError:)—to handle when we get a location and when we fail to get a location.
Add the following code to the app delegate:
func locationManager(manager: CLLocationManager!,
didUpdateLocations locations: [AnyObject]!)
{
// collecting the most recent location from the array of locations
if let newLocation = locations.last as? CLLocation
{
self.longitudeLabel.stringValue = NSString(format: "%.2f",
newLocation.coordinate.longitude)
self.latitudeLabel.stringValue = NSString(format: "%.2f",
newLocation.coordinate.latitude)
self.accuracyLabel.stringValue = NSString(format: "%.1fm",
newLocation.horizontalAccuracy)
self.spinner.stopAnimation(nil);
}
else
{
println("No location found")
}
}
func locationManager(manager: CLLocationManager!,
didFailWithError error: NSError!)
{
// locationManager failed to find a location
self.longitudeLabel.stringValue = "-"
self.latitudeLabel.stringValue = "-"
self.accuracyLabel.stringValue = "-"
self.spinner.startAnimation(nil)
}
These two methods do the following:
§ Inside locationManager(manager: didUpdateLocations:), a CLLocation object holding all the user’s location information is created from the array of locations the location manager found. Then the labels are updated with the relevant information and the spinner is stopped.
§ Inside locationManager(manager: didFailWithError:), the labels are updated to show dashes, and the spinner is started again.
It’s possible for the location manager to successfully determine the user’s location and then later fail (or vice versa). This means that a failure isn’t necessarily the end of the line—the location manager will keep trying, so your application should keep this in mind.
Now run the application. On its first run, it will ask the user if it’s allowed to access his location. If the user grants permission, the application will attempt to get the user’s location. If it can find it, the labels will be updated to show the user’s approximate location, and how accurate Core Location thinks it is.
Geocoding
When you get the user’s location, Core Location returns a latitude and longitude coordinate pair. This is useful inside an application and great for showing on a map, but isn’t terribly helpful for a human being. Nobody looks at the coordinates “-37.813611, 144.963056” and immediately thinks, “Melbourne, Australia.”
Because people deal with addresses, which in America are composed of a sequence of decreasingly precise place names[8] (“1 Infinite Loop,” “Cupertino,” “Santa Clara,” “California,” etc.), Core Location includes a tool for converting coordinates to addresses and back again. Converting an address to coordinates is called geocoding; converting coordinates to an address is called reverse geocoding.
Core Location implements this via the CLGeocoder class, which allows for both forward and reverse geocoding. Because geocoding requires contacting a server to do the conversion, it will only work when an Internet connection is available.
To geocode an address, you create a CLGeocoder and then use one of its built-in geocoding methods. You can provide either a string that contains an address (like “1 Infinite Loop Cupertino California USA”) and the geocoder will attempt to figure out where you mean, or you can provide a dictionary that contains more precisely delineated information. Optionally, you can restrict a geocode to a specific region (to prevent confusion between, say, Hobart, Minnesota and Hobart, Tasmania).
We’re going to add reverse geocoding to the application, which will show the user her current address. To do this, we’ll add a CLGeocoder to the AppDelegate class. When Core Location gets a fix on the user’s location, we’ll ask the geocoder to perform a reverse geocode with theCLLocation provided by Core Location.
When you reverse geocode, you receive an array that contains a number of CLPlacemark objects. An array is used because it’s possible for the reverse geocode to return with a number of possible coordinates that your address may resolve to. CLPlacemark objects contain a number of properties that contain address information. Note that not all of the properties may contain information; for example, if you reverse geocode a location that’s in the middle of a desert, you probably won’t receive any street information.
The available properties you can access include:
§ The name of the location (e.g., “Apple Inc.”)
§ The street address (e.g., “1 Infinite Loop”)
§ The locality (e.g., “Cupertino”)
§ The sublocality—that is, the neighborhood or name for that area (e.g., “Mission District”)
§ The administrative area—that is, the state name or other main subdivision of a country (e.g., “California”)
§ The subadministrative area—that is, the county (e.g., “Santa Clara”)
§ The postal code (e.g., “95014”)
§ The two- or three-letter ISO country code for that country (e.g., “US”)
§ The country name (e.g., “United States”)
Some placemarks may contain additional data, if relevant:
§ The name of the inland body of water that the placemark is located at or very near to (e.g., “Derwent River”)
§ The name of the ocean where the placemark is located (e.g., “Pacific Ocean”)
§ An array containing any additional areas of interest (e.g., “Golden Gate Park”)
You can use this information to create a string that can be shown to the user.
We’ll start by creating a label that will display the user’s address.
Open MainMenu.xib and drag in a new label under the current set of labels. The updated interface should look like Figure 15-2. Then open AppDelegate.swift in the assistant and Control-drag from the new label into the app delegate. Create a new outlet for the label called addressLabel.
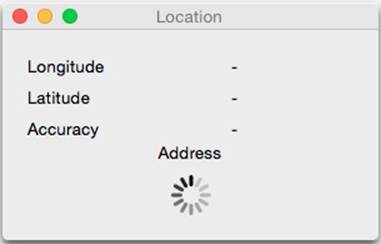
Figure 15-2. The completed interface for our Location app with geocoding
Then add CLGeocoder to the app delegate by updating AppDelegate.swift to have the following property:
@IBOutlet weak var addressLabel: NSTextField!
var geocoder = CLGeocoder()
When the user’s location is determined, perform a reverse geocode by updating the locationManager(manager: didUpdateLocations:) method with the following code:
func locationManager(manager: CLLocationManager!,
didUpdateLocations locations: [AnyObject]!)
{
// collecting the most recent location from the array of locations
if let newLocation = locations.last as? CLLocation
{
self.longitudeLabel.stringValue = NSString(format: "%.2f",
newLocation.coordinate.longitude)
self.latitudeLabel.stringValue = NSString(format: "%.2f",
newLocation.coordinate.latitude)
self.accuracyLabel.stringValue = NSString(format: "%.1fm",
newLocation.horizontalAccuracy)
self.spinner.stopAnimation(nil);
self.geocoder.reverseGeocodeLocation(newLocation)
{
(placemarks, error) in
if error == nil
{
let placemark = placemarks[0] as CLPlacemark
let address = NSString(format: "%@ %@, %@, %@ %@",
placemark.subThoroughfare,
placemark.thoroughfare,
placemark.locality,
placemark.administrativeArea,
placemark.country)
self.addressLabel.stringValue = address
}
else
{
// failed to reverse geocode the address
self.addressLabel.stringValue = "Failed to find an address"
}
}
}
else
{
NSLog("No location found")
}
}
Now run the application. Shortly after the user’s location is displayed, the approximate address of your location will appear. If it doesn’t, check to make sure that you’re connected to the Internet.
Region Monitoring and iBeacons
Depending on what your app’s goals are, it might be more useful to know when your user enters an area as opposed to knowing their precise location. To help with this, Core Location provides region monitoring.
There are two types of region monitors: geographical and iBeacon. Region monitoring lets you set up virtual boundaries around the Earth and be informed via delegate callbacks when the user enters or exits one of the regions; iBeacon monitoring lets your app be informed when a user is near an iBeacon region represented by a low energy Bluetooth signal.
NOTE
Currently iBeacons are only available on iOS. Sorry, Mac developers.
Monitoring when the user enters and exits a geographical region is straightforward. If you wanted to add region monitoring to our existing location app, all you’d need to do is add the following to the bottom of the applicationDidFinishLaunching method:
let location = CLLocationCoordinate2DMake(-42.883317, 147.328277)
let region = CLCircularRegion( center: location,
radius: 1000,
identifier: "Hobart")
locationManager.startMonitoringForRegion(region)
This does several things: first, it creates a location to use as the center of the region (in this case, the city of Hobart, in Australia). It then creates a region around this center point with a radius of 1,000 meters, and gives it an identifier to help you differentiate it later. Finally, it tells the location manager to start monitoring whether a user has entered or exited a region.
NOTE
The way CLRegion works on OS X is a little bit different than on iOS. CLRegion is an abstract class in iOS that is meant to be subclassed for the specific different types of regions. So to get the same functionality in iOS, we would instead use the CLRegion subclass CLCircularRegion, the region subclass designed for monitoring circular regions.
To know when a user has entered or exited a region, there are two delegate methods: locationManager(manager: didExitRegion:) and locationManager(manager: didEnterRegion:). Both of these callbacks pass in a CLRegion with a string identifier property that you can use to determine the region that the user has entered or exited:
func locationManager(manager: CLLocationManager!, didEnterRegion
region: CLRegion!) {
// have entered the region
NSLog("Entered %@", region.identifier)
}
func locationManager(manager: CLLocationManager!, didExitRegion
region: CLRegion!) {
// have exited the region
NSLog("Exited %@", region.identifier)
}
iBeacon regions function a little bit differently when working with circular regions. Because of the nature of Bluetooth radio devices, you will never be able to guarantee a radius for each beacon. Additionally, a device might encounter multiple beacons within a single area that might not all be relevant to your app. Therefore, a radius and an identifier are not enough to be able to use iBeacons. The principle is the same though—you create a region to represent the beacon and you tell your CLLocationManager to start looking for that region. Say you wanted to create an iBeacon region for a particular painting in a gallery:
// the UUID string was generated using the uuidgen command
let uuid = NSUUID(UUIDString:"F7769B0E-BF97-4485-B63E-8CE121988EAF")
let beaconRegion = CLBeaconRegion(proximityUUID: uuid,
major: 1,
minor: 2,
identifier: "Awesome painting");
This code does several things. First, it creates a CLBeaconRegion with both an identifier string that works exactly the same as it does in the circular region, and a proximity UUID. The proximity UUID is a unique identifier to be used by all the beacons in your app. In the case of a gallery, the UUID would be the same for all iBeacons in the gallery or any other gallery that your app works in. The major and minor properties are numbers that can be used to help identify exactly which beacon the user is near. In the case of a gallery, the major property could represent a section of the museum and the minor property a particular artwork.
NOTE
The UUID and major and minor properties of the beacon region must match the settings you put into your actual hardware iBeacons. How to set these will change from iBeacon to iBeacon.
Just like with geographical regions, your app gets delegate callbacks for any beacon regions that your app enounters. Unlike geographical regions, however, you have a couple of options when using iBeacons; your app can receive the delegate callbacks for circular regionslocationManager(manager: didEnterRegion:) and locationManager(manager: didExitRegion:) by calling the standard startMonitoringForRegion(region:) on your CLLocationManager. Alternatively, you can callstartRangingBeaconsInRegion(region:) on your location manager. This will result in the delegate method locationManager(manager: didRangeBeacons: inRegion:) being called, with all the beacons in range being passed in as an array of CLBeacon objects as well as the region object that was used to locate the beacons. The closest beacon will have a proximity property equal to the system-defined CLProximityNear value.
When testing your iBeacon apps, you need an iBeacon to make sure that your app is doing what it needs to do when it finds a beacon. Buying lots of iBeacons just for testing is going to be a bit expensive, but Apple has thankfully provided a way to turn your iOS devices into iBeacons. It is quite easy to do this, but first you need to add a CBPeripheralManager, an object for managing Bluetooth peripherals, to your app and make your app conform to the CBPeripheralDelegate protocol:
import CoreLocation
import CoreBluetooth
class ViewController: UIViewController,CBPeripheralManagerDelegate{
var bluetoothManager : CBPeripheralManager?
override func viewDidLoad() {
super.viewDidLoad()
self.bluetoothManager = CBPeripheralManager(delegate: self, queue: nil)
}
Then to create an iBeacon for a specific region, you need to create a CLBeaconRegion that matches the beacon you want to simulate. Finally you need to tell the Bluetooth manager to start advertising the iBeacon:
func peripheralManagerDidUpdateState(peripheral: CBPeripheralManager!) {
if (self.bluetoothManager?.state == CBPeripheralManagerState.PoweredOn)
{
// the UUID string was generated using the uuidgen command
let uuid = NSUUID(UUIDString:"F7769B0E-BF97-4485-B63E-8CE121988EAF")
let beaconRegion = CLBeaconRegion(proximityUUID: uuid,
major: 1,
minor: 2,
identifier: "Awesome painting");
var beaconData = beaconRegion.peripheralDataWithMeasuredPower(nil)
self.bluetoothManager?.startAdvertising(beaconData)
}
}
Locations and Privacy
The user’s location is private information, and your application must be granted explicit permission by the user on at least the first occasion that it tries to access it.
People are understandably wary about software knowing where they are—it’s a privacy issue and potentially a safety risk. To avoid problems, follow these guidelines in your application:
§ Be very clear about what your application is using location information for.
§ Never share the user’s location with a server or other users unless the user has explicitly given permission.
§ The user can always see when an application is accessing location information because a small icon appears at the top of the screen (on both iOS and OS X). Once your app has performed the task that location information is needed for, turn off Core Location—both to save power and to let the user know that they are no longer being tracked.
Maps
The MapKit framework provides an everything-but-the-kitchen-sink approach to maps, allowing you to create, annotate, overlay, and adjust maps as needed for your applications. It plays very well with the location tracking and region monitoring technology that Apple provides.
Previously, MapKit was only available on iOS, but since the release of OS X 10.9, MapKit is now available on OS X as well and the framework functions in virtually the same way on both platforms.
The base of all maps is the MKMapView, which is the actual view containing map data that your application can use. The map data that the map view displays comes from Apple Maps data, although in the past the view used Google Maps data.
Using Maps
Getting a map up and running is quite straightforward, so let’s get cracking!
1. Create a new, single view iPhone application and call it Maps.
2. Next, create the interface. Open the Main.storyboard file. Drag in a map view and make it take up the entire view.
3. Then connect the interface. Open ViewController.swift in the assistant. Control-drag from the map view to the view controller and make a new outlet for the map view. Call it mapView.
4. You then need to extend the view controller. Open ViewController.swift, import the MapKit framework, and set the controller to be a map view delegate. Finally, add the MapKit framework into the project.
When you are done, ViewController.swift should look like this:
import MapKit
class ViewController: UIViewController,MKMapViewDelegate {
@IBOutlet weak var mapView: MKMapView!
5. Finally, configure the map. By default, the map view will be centered over Apple’s headquarters in Cupertino, so we want to move that somewhere a bit different. Update viewDidLoad() to look like this:
6. override func viewDidLoad() {
7. super.viewDidLoad()
8.
9. self.mapView.delegate = self;
10. let center = CLLocationCoordinate2DMake(-37.813611, 144.963056)
11. let span = MKCoordinateSpanMake(2, 2);
self.mapView.region = MKCoordinateRegionMake(center, span)
Now if you run the app, your map should be centered over Melbourne. The span is how many degrees of longitudinal and latitudinal delta the view should cover.
Annotating Maps
Just having a map all by itself isn’t a lot of fun. What if we want to see where something interesting is? Luckily for us, Apple has included an easy way of annotating the map, which you may have seen in the built-in Maps app as little red, green, and purple pins. These additions to the map are called annotations.
The annotations are broken up into two object types: MKAnnotation, which represents the annotation data, including its location and any other data such as a name; and MKAnnotationView, which will be the view that the map displays when needed.
Apple has provided a built-in annotation class for when all you need is a simple pin called MKPointAnnotation. This class has built-in properties for a title and subtitle, and will automatically draw a pin view when needed, making it very easy to use. MapKit on both OS X and iOS supports custom annotation and custom views for the annotations, but for this example we will stick to the built-in pin annotations.
So let’s start dropping those little pins. Open ViewController.swift and add the following to the bottom of the viewDidLoad method:
// creating an new annotation
var annotation = MKPointAnnotation()
annotation.coordinate = center
annotation.title = "Melbourne"
annotation.subtitle = "Victoria"
// adding the annotation to the map
self.mapView.addAnnotation(annotation);
This code creates a new point annotation at Melbourne, sets a title and subtitle string, and then finally adds it to the map. If you run the app, a red pin will be on top of Melbourne and if you tap it, you’ll get a little window with the title and subtitle strings.
Maps and Overlays
Annotations are good and all, but sometimes you need a bit more than what a pin can provide. This is where overlays come in handy. Unlike an annotation, they don’t represent a single point but instead cover an area on the map.
Overlays, much like annotations, are broken up into two parts: an MKOverlay object representing the data, and a view object called MKOverlayRender. Also much like annotations, Apple has provided some prebuilt overlays to make life simpler, including overlays and associated renderers for circles, lines, and polygons—and if you want, you can build your own.
With that understood, let’s add a 100 km circle around the pin we dropped before. Add the following to the bottom of the viewDidLoad() method:
// creating and adding a new circle overlay to the map
var overlay = MKCircle(centerCoordinate: center, radius: 50000)
self.mapView.addOverlay(overlay)
This creates a circular region with a radius of 50 km around the same location where we added the pin, and then it adds the overlay to the map. Nothing will be displayed, though, until the map view’s delegate provides an appropriate renderer for that overlay.
Add the following map view delegate method to ViewController.swift:
func mapView(
mapView: MKMapView!, rendererForOverlay
overlay: MKOverlay!) -> MKOverlayRenderer! {
if (overlay.isKindOfClass(MKCircle))
{
var circleRenderer = MKCircleRenderer(overlay: overlay)
circleRenderer.strokeColor = UIColor.greenColor()
circleRenderer.fillColor = UIColor(
red: 0,
green: 1.0,
blue: 0,
alpha: 0.5)
return circleRenderer
}
return nil
}
NOTE
Terra, as you might know, is a sphere, and your screen is a rectangle, so there are going to be some issues when trying to squish the planet into a rectangle. Apple has used what is known as the Mercator projection to overcome this. The Mercator projection is just one of many different projections, and they all have their own strengths and weaknesses.
One of the side effects of the Mercator projection is if you add a lot of overlays spread all over the place, they might look different if you zoom the map all the way out than they do up close. Thankfully, most of the time you are using maps, you will likely be zoomed close enough in that you won’t notice this.
Now if you run the app, you should see a rather large green circle hovering ominously over Melbourne, as seen in Figure 15-3.
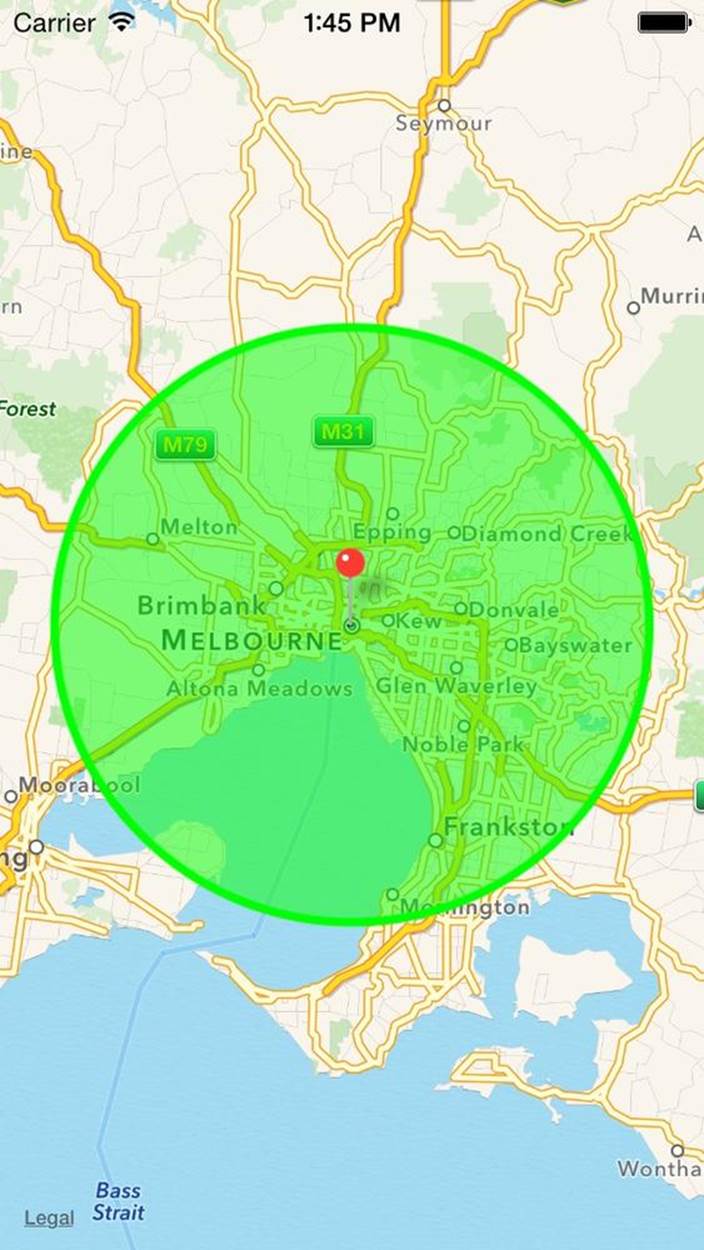
Figure 15-3. The map, with an overlay drawn over it
Device Motion
An iOS device is often held in the user’s hands, which means that it’s subject to movement and rotation. iOS allows your code to receive information about how the device is moving, how it’s being rotated, and how it’s oriented. All of this information is available through the Core Motion framework, which provides a unified interface to the various relevant sensors built into the device.
NOTE
Core Motion is only available on iOS, as laptops and desktops don’t generally get shaken around while being used. While some Mac laptops include an accelerometer, it isn’t available to your code through any publicly accessible APIs.
Core Motion provides device motion information to your application by measuring data from the sensors available to the device:
§ The accelerometer, which measures forces applied to the device
§ The gyroscope, which measures rotation
§ The magnetometer, which measures magnetic fields
The first iOS devices only included an accelerometer, which is actually sufficient for getting quite a lot of information about device motion. For example, based on the forces being applied to the device over time, you can determine the direction of gravity, which gives you information about how the device is being held, as well as determine if the device is being shaken. If a gyroscope is available, you can refine this information and determine if the device is rotating around an axis of gravity. If a magnetometer is available, it’s possible to determine a frame of reference, so that it can determine which way north is—something that’s not possible when all you have is relative rotation information.
Core Motion collects data from all the available sensors and provides direct access to the sensor information. You can therefore ask Core Motion to give you the angles that define the device’s orientation in space, as well as get raw accelerometer information.
NOTE
Raw sensor data can lead to some very cool tricks. For example, the magnetometer measures magnetic fields, which means that the device can actually be used as a metal detector by measuring changes in the magnetic field.
Working with Core Motion
Core Motion works in a very similar manner to Core Location: it uses a manager object that provides periodic updates on device motion. However, the means by which the manager object provides these updates differs from how CLLocationManager does—instead of providing a delegate object, you instruct the motion manager to call a block that you provide. In this block, you handle the movement event.
NOTE
The iOS Simulator doesn’t simulate any of the motion hardware that Core Motion uses. If you want to test Core Motion, you need to use a real iOS device.
The motion manager class is called CMMotionManager. To start getting motion information, you create an instance of this class and instruct it to begin generating motion updates. You can also optionally ask for only accelerometer, gyroscope, or magnetometer information.
You can also get information from the CMMotionManager by querying it at any time. If your application doesn’t need to get information about device motion very often, it’s more efficient to simply ask for the information when it’s needed. To do this, you send the CMMotionManagerobject the startDeviceMotionUpdates() method (or the startAccelerometerUpdates() or startGyroUpdates() methods), and then, when you need the data, you access the CMMotionManager’s accelerometerData, gyroData, or deviceMotion properties.
NOTE
The fewer devices that Core Motion needs to activate in order to give you the information you need, the more power is saved. As always, consider the user’s battery!
Core Motion separates out “user motion” from the sum total of forces being applied to the device. There’s still only one accelerometer in there, though, so what Core Motion does is use a combination of low- and high-pass filtering to separate out parts of the signal, with the assistance of the gyroscope, to determine which forces are gravity and which forces are “user motion”—forces like shaking or throwing your device. (Note: The authors do not recommend throwing your device, no matter how much fun it is. The authors specifically do not recommend making an awesome app that takes a photo at the peak of a throw. You will break your phone.)
You can also configure how often the CMMotionManager updates the accelerometer and gyro—the less often it uses it, the more power you save (and, as a trade-off, the more imprecise your measurements become).
To work with Core Motion, you’ll need to add the Core Motion framework to your project. We’ll now build a small iPhone app that reports on how it’s being moved and how the device is oriented:
1. Create a new, single view iPhone application and call it Motion.
2. Add the Core Motion framework. Select the project at the top of the project navigator. The project settings will appear in the main editor; select the Motion target.
Scroll down to Linked Frameworks and Libraries, and click the + button.
The frameworks sheet will appear; browse or search for CoreMotion.framework and add it to the project.
3. Once the framework has been added, we’ll begin building the interface for the app. This will be similar to the Core Location app: it will report on the numbers being sent by Core Motion. However, you can (and should!) use the information for all kinds of things—game controls, data logging, and more. The authors once used Core Motion to build an app that tracks human sleeping activity. It’s a tremendously flexible framework.
Open Main.storyboard. First, we’ll create the labels that display the user motion.
Drag in three labels and lay them out vertically on the lefthand side of the screen. Make their text X, Y, and Z, respectively.
Drag in another three labels and lay them out vertically to the right of the first three. Next, we’ll create the labels that display orientation.
Drag in another three labels and lay them out vertically on the lefthand side of the screen, under the existing set of labels. Make their text Pitch, Yaw, and Roll, respectively.
Drag in a final set of three labels and lay them out vertically and to the right.
Once you’re done, your interface should look like Figure 15-4.
4. Connect the interface to the view controller. Open ViewController.swift in the assistant.
Control-drag from each of the labels on the right and create outlets for each of them. From top to bottom, the labels should be called xLabel, yLabel, zLabel, pitchLabel, yawLabel, and rollLabel.
While you have ViewController.swift open, import CoreMotion.
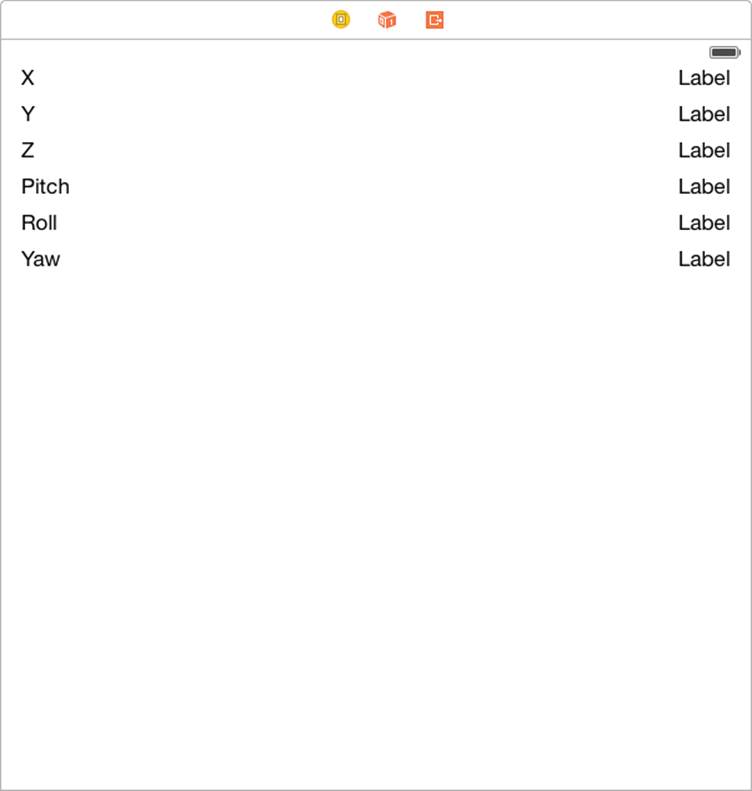
Figure 15-4. The interface for the accelerometer application
When you’re done, the top of ViewController.swift should look like the following:
import UIKit
import CoreMotion
class ViewController: UIViewController {
@IBOutlet weak var xLabel: UILabel!
@IBOutlet weak var yLabel: UILabel!
@IBOutlet weak var zLabel: UILabel!
@IBOutlet weak var pitchLabel: UILabel!
@IBOutlet weak var yawLabel: UILabel!
@IBOutlet weak var rollLabel: UILabel!
5. Now that the view controller’s header file has been set up, we’ll write the code that actually creates the motion manager and then starts updating the labels as device motion updates arrive.
We’ll store a reference to the CMMotionManager as an instance variable in the class, and start and stop the device motion updates when the view controller appears and disappears.
Update ViewController.swift so that it looks like the following code:
override func viewDidAppear(animated: Bool) {
self.motionManager.startDeviceMotionUpdatesToQueue(
NSOperationQueue.mainQueue(),
withHandler: { (motion: CMDeviceMotion!, error: NSError!) -> Void in
let xString = NSString(format:"%.1f", motion.userAcceleration.x)
let yString = NSString(format:"%.1f", motion.userAcceleration.y)
let zString = NSString(format:"%.1f", motion.userAcceleration.z)
self.xLabel.text = xString
self.yLabel.text = yString
self.zLabel.text = zString
//convert the pitch, yaw and roll to degrees
let pitchDegrees = motion.attitude.pitch * 180 / M_PI
let yawDegress = motion.attitude.yaw * 180 / M_PI
let rollDegress = motion.attitude.roll * 180 / M_PI
let pitchString = NSString(format: "%.1f", pitchDegrees)
let yawString = NSString(format: "%.1f", yawDegress)
let rollString = NSString(format: "%.1f", rollDegress)
self.pitchLabel.text = pitchString
self.yawLabel.text = yawString
self.rollLabel.text = rollString
})
}
Finally, connect an iOS device and run the application on it. Watch the numbers on the screen change as you shake and rotate the device.
Using the Built-in Altimeter
Some iOS devices have a built-in barometer, which can be used to get information about the current atmospheric pressure. This data can be analyzed to work out relative altitude (i.e., the change in altitude since recording began).
Not all devices have the hardware needed to use the altimeter. To find out, you ask the CMAltimeter class whether altitude data is available, using the isRelativeAltitudeAvailable method:
if CMAltimeter.isRelativeAltitudeAvailable() {
println("Altimeter is available")
} else {
println("Altimeter is not available")
}
To use the altimeter, you create an instance of the CMAltimeter class:
let altimeter = CMAltimeter()
var currentAltitude : Float = 0.0
Once that’s done, you ask it to begin sending you information about changes in the user’s altitude:
let mainQueue = NSOperationQueue.mainQueue()
altimeter.startRelativeAltitudeUpdatesToQueue(mainQueue) { (data, error) in
// data.relativeAltitude is the change in
// altitude since the last time this closure
// ran, measured in meters.
// For example, you can keep track of the total
// change in altitude, relative to where we started:
self.currentAltitude += Float(data.relativeAltitude)
self.altitudeLabel.text = "\(self.currentAltitude)m"
}
Using the Pedometer
A pedometer is a piece of hardware that keeps track of the number of steps the user has walked or run. Your apps can access live updates from the pedometer (i.e., they can be updated in near real time as the user moves around) or they can ask the system for information about how the user has moved around over the last seven days.
Before you can access the pedometer, you need to first check to see if pedometer information is available:
if CMPedometer.isStepCountingAvailable() {
println("Pedometer is available")
} else {
println("Pedometer is not available")
}
If the pedometer is available, you create an instance of the CMPedometer class:
let pedometer = CMPedometer()
To query the system to find information about how many steps the user has taken over a date range—for example, in the last day—you use the queryPedometerDataFromDate(_,toDate:) method, and provide the date range as well as a handler closure that runs when data is available:
// Create NSDate objects that refer to 1. right now
// and 2. one day ago
let calendar = NSCalendar.currentCalendar()
let now = NSDate()
let oneDayAgo = calendar.dateByAddingUnit(NSCalendarUnit.DayCalendarUnit,
value: -1,
toDate: now,
options: NSCalendarOptions())
// Ask the pedometer to give us info about that date range
pedometer.queryPedometerDataFromDate(oneDayAgo, toDate: now) {
(pedometerData, error) in
// This closure is called on a background queue,
// so run any changes to the GUI on the main queue
NSOperationQueue.mainQueue().addOperationWithBlock() {
if let data = pedometerData {
self.stepsSinceLastDayLabel.text =
"\(data.numberOfSteps) steps"
}
}
}
If you want to receive live updates on the user’s step count, use the startPedometerUpdatesFromDate method instead:
// Start getting live updates on step count, starting from now
pedometer.startPedometerUpdatesFromDate(now) { (pedometerData, error) in
if let data = pedometerData {
// Run the update on the background
NSOperationQueue.mainQueue().addOperationWithBlock() {
self.stepsSinceAppStartLabel.text =
"\(data.numberOfSteps) steps"
}
}
}
Printing Documents
Despite decades of promises, the “paperless office” has never really materialized. Users like having documents on paper, and both OS X and iOS provide ways of getting stuff printed on dead trees.
The APIs and methods for printing on OS X and iOS are completely different. On OS X, individual NSViews are printed, either directly or via an intermediary system. On iOS, you print via a separate system of print renderer and formatter objects.
We’ll build two demo apps that show how to print documents on OS X and iOS.
Printing on OS X
One of the happy quirks of OS X’s development is that the entire graphics system traces its lineage to PostScript, the language of printers. On OS X, drawing graphics is very easily translatable to printer commands—so much so, in fact, that the translation is done for you by the OS.
Given any NSView, you can print it by sending it the print() message. OS X takes over from that point—the print panel appears, the user chooses which printer to use and how, and the printer prints the document.
When a view is printed, its drawRect() method is called—however, the graphics context that is prepared before the method is called is designed for generating printer commands (specifically EPS or PDF content). This means that any custom NSView subclass that you make is already set up for printing.
To demonstrate printing, we’ll build a small sample application that prints an NSTextView:
1. Create a new Cocoa application named OSXPrinting.
2. Then create the interface. Open MainMenu.xib.
Drag an NSTextView into the app’s main window. Make it fill the window, but leave some room at the bottom.
Drag in an NSButton and place it at the lower right of the window. Change its label to Print.
3. Next, connect the interface. We don’t need to write any code for this, since the button can be directly connected to the print function of the view.
Select the text view.
Open the Connections Inspector in the righthand sidebar.
Drag from the print: in Received Actions onto the button.
4. Finally, test the application. Run the application and type some text into the text view. Click the Print button and try printing the document. (If you don’t want to waste paper, you can print to PDF by choosing “Save as PDF” in the PDF menu, just like in all applications on OS X.)
NOTE
You can also choose Print from your application’s File menu, or press ⌘-P. The reason this works without having connected the views is that the Print menu item is connected to the First Responder, which is the object that corresponds to whichever view is currently responding to user input.
Printing on iOS
While OS X machines are often permanently connected to a printer (usually via USB, and sometimes over the network), iOS printing is much more ad hoc and on the fly. In iOS, all printing is done over AirPrint, the WiFi-based printer discovery system. When you print a document, iOS shows you a list of nearby printers, and you send your document to the printer you want to use.
The printing system is more complex than on OS X, but more flexible. When you want to print a document, you ask iOS for the shared instance of the UIPrintInteractionController, which is a view controller that allows the user to configure the print job and works in the same way as the print panel on OS X. You then provide the print interaction controller with the items you want to have printed.
There are several ways you can indicate to the print interaction controller what should be printed. If you have a UIImage, or an NSData that contains PDF or image data, you can give it directly to the print controller. You can also provide an NSArray of these objects if you have multiple things you want to print.
If you want to print content like text, markup, or custom views, you create a UIPrintFormatter object for each piece of content. For example, if you have a block of text, you can create an instance of UISimpleTextPrintFormatter, give it the NSString that contains your text, and then provide the print formatter to the print controller.
If you want to have total control over what gets printed, you can also use the UIPrintPageRenderer class, which allows for advanced customization and drawing.
In this section, we’ll create a simple iOS application that does the same thing as the OS X application in the previous section—a simple text box, plus a print button:
1. Create a new single view application for iOS named PrintingiOS.
2. Next, we’ll create the inteface. Open Main.storyboard.
Drag a UINavigationBar into the window and place it at the top.
Drag a UIBarButtonItem into the navigation bar. Change its label to Print.
Finally, drag in a UITextView and make it fill the rest of the space.
3. Now, we’ll connect the interface to the view controller. Open ViewController.swift in the assistant.
Control-drag from the text view into ViewController, and create an outlet called textView.
Control-drag from the Print button into ViewController, and create an action called print.
We’re done with the interface. The next step is to make the Print button actually print.
4. Add the printing code. Open ViewController.swift. Replace the print: method with the following code:
5. @IBAction func print(sender: AnyObject) {
6. var printInteraction =
7. UIPrintInteractionController.sharedPrintController()
8.
9. var textFormatter =
10. UISimpleTextPrintFormatter(text: self.textView.text)
11. printInteraction?.printFormatter = textFormatter
12.
13. printInteraction?.presentAnimated(true,
14. completionHandler: {
15. (printController:UIPrintInteractionController!,
16. completed:Bool!,
17. error:NSError!) -> Void in
18. })
}
In order to test the printing system without using actual paper, Xcode provides a tool called the Printer Simulator that simulates printers on the network. It’s not a substitute for actually printing on paper—if you’re doing anything with graphics, for example, the colors will likely be quite different, and a simulated printer won’t demonstrate effects like ink bleed—but it’s sufficient for demonstrating that it actually works.
5. Launch the Printer Simulator. To do so, open the iOS Simulator if it isn’t open already, and choose Open Printer Simulator from the File menu.
6. Finally, test the application. Launch the application and hit the Print button. Choose one of the simulated printers and tap Print. The Print Simulator will simulate printing and show you the final result.
Game Controllers
Game Controller is another new framework included with the release of iOS 7 and OS X 10.9 and the implementation is the same on both platforms. Each controller is represented by a GCController object and the operating system handles the discovery and connection of controllers automatically, leaving you free to just use them.
WARNING
Apple requires you to make controllers an optional interface of a game. You must provide a fallback option of mouse and keyboard in OS X, or touch controls in iOS if the user doesn’t have a game controller.
There are two profiles for game controllers, called gamepad and extendedGamepad. The standard gamepad has a four-way directional pad, four front-facing buttons in a diamond pattern, and two shoulder buttons. The extendedGamepad not only has all the elements of a gamepad (and can be detected as one by the application), but also has a left and right trigger to accompany the shoulder buttons and two joysticks to go along with the d-pad.
To demonstrate how to connect to and use the controllers, we’ll create a simple OS X application (it is worth noting that if you don’t have a controller, this app will be a little unexciting):
1. Create a new Cocoa application and call it Controllers.
2. Include the framework. Open the project inside the project navigator. In the General tab, scroll down to the Linked Frameworks and Libraries section and add the GameController.framework into the project.
3. If you haven’t already done so, now would be a great time to connect any controllers you have—either plug it into your device, or pair it over Bluetooth as per the instructions that come with the controller.
Open applicationDidFinishLaunching() and add the following:
var controllers = GCController.controllers()
if (controllers.count != 0)
{
// grabbing a reference to the first controller
self.myController = controllers[0] as GCController
// un-set the player number
self.myController.playerIndex = GCControllerPlayerIndexUnset
if ((self.myController.extendedGamepad) != nil)
{
NSLog("This is an extended controller")
// adding a callback handler for when a value has changed
var profile = self.myController.extendedGamepad
profile.valueChangedHandler =
{( gamepad: GCExtendedGamepad!,
element:GCControllerElement!) -> Void in
if (element == gamepad.rightTrigger)
{
if (gamepad.rightTrigger.pressed)
{
NSLog("Right trigger pressed")
}
}
}
profile.leftTrigger.valueChangedHandler =
{( input:GCControllerButtonInput!,
value:Float!,
pressed:Bool!) -> Void in
if((pressed) != nil)
{
NSLog("left trigger pressed")
}
}
}
else
{
NSLog("controller is a simple controller")
}
}
else
{
NSLog("There are no controllers connected")
}
This code does a few things. First, it creates a property to hold the controller as soon as we can access one. Then applicationDidFinishLaunching() uses the class method on GCController to get access to all currently connected controllers. We then store the first controller in our previously defined property and set its player index to be unset, as we are not going to be using more than one player at a time.
Then we set up two callback handlers: one that responds to every element on the controller and one that responds only to the left trigger.
If you run the application and have an extended game controller connected when you press in either of the triggers, you will get a log message.
App Nap
App Nap is a feature for OS X apps that’s designed to improve battery life without impinging upon an app’s responsiveness. It accomplishes this through a bunch of different heuristics to determine what apps should be suspended. The heuristics that determine if your app may be suspended by the OS are as follows:
§ The app is not visible.
§ The app is not making any noise.
§ The app has not disabled automatic termination.
§ The app has not made any power management assertions.
When asleep, your app is put in a scheduling queue that rarely gets any processing time. Any user activity that brings your app to the foreground or the receipt of an OS event will awaken your app and return it to normal processing priority. App Nap is essentially trying to keep your computer’s CPU idling for a long as possible, only leaving the idle state when necessary before returning to the idle state as quickly as possible. With this goal in mind, Apple has provided three new APIs:
Application visibility
Application visibility is a simple idea: when your app isn’t visible, it is likely that it doesn’t need to be doing as much as if it were in the foreground. Since the release of 10.9, a new application delegate method is called when your app’s visibility changes. To detect this change, add something similar to the following in your application’s delegate:
func applicationDidChangeOcclusionState(notification: NSNotification!)
{
if (NSApp.occlusionState & NSApplicationOcclusionState.Visible != nil)
{
println("You are in the foreground, go nuts")
}
else
{
println("You are in the background, best slow down")
}
}
Timer tolerance
Timers are a great source of causing the system to leave idle state—even two timers mere milliseconds apart cause the system to switch to normal running from idle. Timer tolerances allows the OS to slightly shift your timers to be in sync with other timers that are also running, which allows the system to keep itself idle longer. To use timer tolerance, simply call the setTolerance method on your timers before starting them. Apple recommends a default of 10% of a timer’s interval, but this will need to change on an app-by-app basis.
User actvities
User activities are a way of declaring to the system what you are doing and how important it is. When your app declares these activities, the system can begin to optimize the heuristics it uses to know when to nap apps. To declare one of these activities, implement code similar to the following:
let queue = NSOperationQueue.mainQueue()
var token = NSProcessInfo.processInfo()
token.beginActivityWithOptions(NSActivityOptions.UserInitiated,
reason: "Important stuff")
queue.addOperationWithBlock { () -> Void in
// do important stuff in here
}
NSProcessInfo.processInfo().endActivity(token)
The option parameter allows you to declare to the system what kind of work it is. This example is saying that it is user-initiated activity, and as such is very important and should stop the app from being napped while it is occurring. By contrast, specifying the optionNSActivityBackground indicates to the system that it is low priority, and napping the app won’t affect the user.
Authenticating Using Touch ID
Many apps need to ensure that the user has given permission to do certain things. The most common example is purchasing—an app needs to make super-sure that the users really do want to spend their money on a virtual kitten app. Other examples include password managers, where you need to ensure that the user attempting to look at the stored information is the owner of the device.
Several iOS devices, starting with the iPhone 5S, include the Touch ID sensor, which is a fingerprint scanner that iOS uses to unlock the device. The Touch ID sensor stores its fingerprint information in a secure area of the device’s CPU, where it cannot be directly accessed—the device may only store new information and query whether a scan matches the existing data. Additionally, because scanned fingerprint information can never be read from the chip, the device has no way to send fingerprint information to a third party.
Your app has access to the Touch ID sensor, through the Local Authentication framework. This framework is designed to provide a general way to ask the system to authenticate the user.
NOTE
As of iOS 8, the only authentication system available through Local Authentication is the Touch ID fingerprint scanner. However, the API is designed so that additional methods can be added in future releases of iOS.
To use the LocalAuthentication framework, you first import LocalAuthentication:
import LocalAuthentication
Once you’ve done that, create and store an LAContext object. The context is the environment in which you check to see whether the user is authenticated or not:
let authenticationContext = LAContext()
When your code needs to determine whether the device’s owner has granted authorization, you need to do two things. First, you need to determine whether the app has the ability to authenticate the user or not. For example, your app may be running on a device that doesn’t have the Touch ID sensor, which means that Local Authentication won’t be able to authenticate the user at all.
Local Authentication refers to the different methods of authenticating the user as policies. Asking the system to authenticate the user via a policy is referred to as evaluating the policy.
As of iOS 8, Local Authentication currently only supports a single policy: the Touch ID scanner. Local Authentication refers to this policy as LAPolicy.DeviceOwnerAuthenticationWithBiometrics.
Using Local Authentication means doing three things:
1. Selecting a policy to use (in iOS 8, this will always be LAPolicy.DeviceOwnerAuthenticationWithBiometrics).
2. Asking the LAContext if it’s possible to evaluate that policy.
3. If it is possible, evaluate the policy, and proceed from there.
NOTE
If a policy isn’t available, your app will need to use an alternative method of authenticating the user. The specifics will depend on your app—if you’re making an app that’s tied to a web-based login system, ask the user to enter a username and password manually. Never rely on just Local Authentication, because it might not be available.
In order to check to see whether Local Authentication can evaluate a policy, you call the canEvaluatePolicy method. This method returns true or false to indicate whether evaluating the policy is possible, and also supports passing back detailed information on why it’s not possible through an NSError:
// Specify how we want to authenticate. (As of iOS 8.0, the only option
// is with the Touch ID biometric fingerprint scanner.)
let policy = LAPolicy.DeviceOwnerAuthenticationWithBiometrics
// Ask the system if it's possible for this authentication check to
// succeed. (The device might not have a fingerprint scanner, or
// the user may not have enrolled their fingerprints, for example.)
var error : NSError? = nil
let canAuthenticate =
authenticationContext.canEvaluatePolicy(policy, error: &error)
if canAuthenticate == false {
// If we can't use it, bail out and present an alternative way of
// authenticating.
println("Can't use the authentication system! \(error)")
return
}
NOTE
The LAPolicy.DeviceOwnerAuthenticationWithBiometrics policy is not available on the iOS Simulator. Calling canEvaluatePolicy when running on the iOS Simulator will always return false.
If Local Authentication indicates that it’s possible to evaluate a policy, you can then proceed to the third and final stage: actually evaluating it.
To evaluate the policy, you call the evaluatePolicy method. You provide the policy you want to evaluate, a string of text that explains to users why you want them to authenticate themselves, and a closure to run when the evaluation is done:
// Explain why they need to authenticate; for example:
let authenticationReason = "You're about to spend money."
// Fire off the authenticator!
authenticationContext.evaluatePolicy(policy,
localizedReason: authenticationReason) {
(succeeded, error) -> Void in
if succeeded {
// We're in! Go ahead and perform the sensitive transaction.
println("Authenticated!")
} else {
// Didn't work! This can happen for a number of reasons,
// including the user canceling an incoming phone call,
// or choosing to enter a password instead.
// Check the error code in the 'error' variable to determine
// what the app should do next.
println("Not authenticated! \(error)")
// Some possible error codes:
if error.code == LAError.UserFallback.rawValue {
// The user decided to enter a password instead of scanning
// her fingerprint; present a different way to authenticate.
}
if error.code == LAError.UserCancel.rawValue {
// The user cancelled authentication.
}
}
}
This is the stage at which users are presented with instructions on how to authenticate themselves: the Touch ID window will appear, and they’ll be prompted to scan their fingerprint (see Figure 15-5)
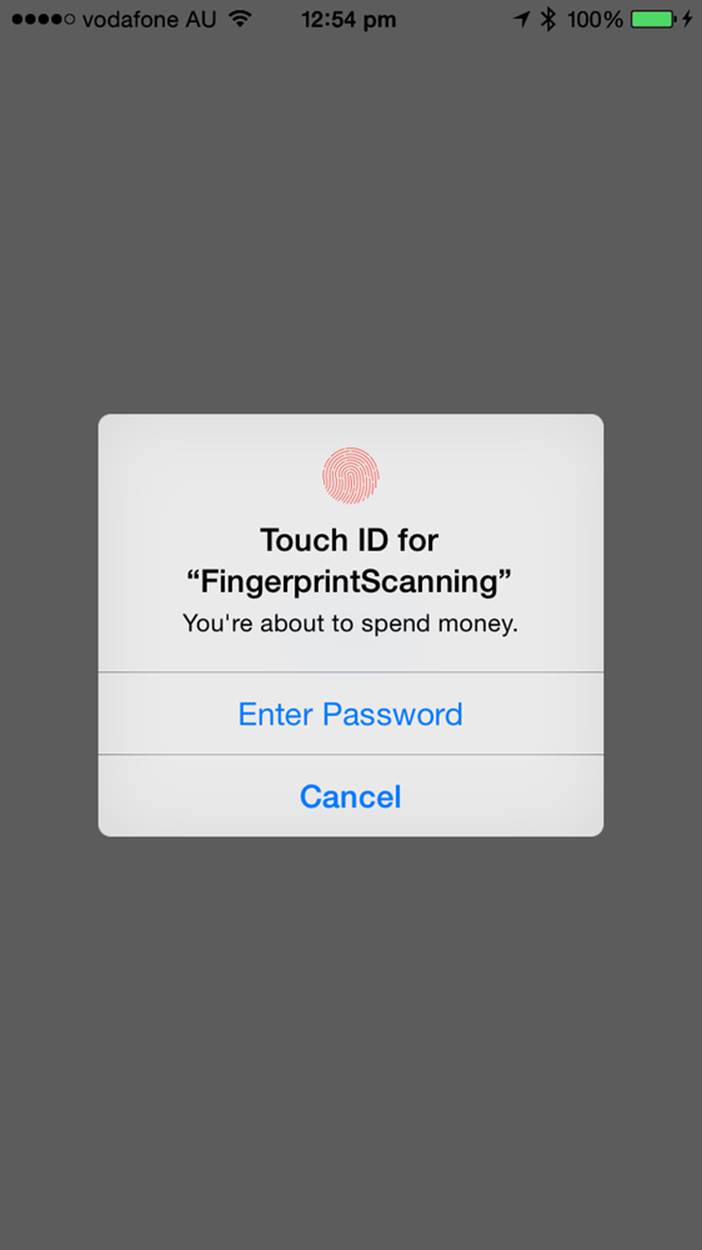
Figure 15-5. The Touch ID window, which is presented when you call evaluatePolicy; the user may either scan her fingerprint, enter a password, or cancel
It’s important to note that users can choose to not scan their fingerprint, and enter a password instead. They might do this for several reasons: it might be impractical or impossible to scan their finger, or the fingerprint scanner might not be working properly (wet fingers are a lot more difficult to scan, for example.)
If the user decides to manually enter a password, the closure provided to the evaluatePolicy method will receive a false value, to indicate that scanning failed, and the NSError passed to the closure will have an error code that indicates that choice.
Handoff
Handoff is a feature available from iOS 8 that allows the user to begin an activity on one device, and continue it from another. One of the simplest examples of how this can be useful is in email: imagine you start writing an email on your iPhone, and decide that you want to finish writing it on your laptop. When you look at your laptop’s screen, a little icon appears on the dock—when you click it, Mail appears, with your half-finished draft all ready for you to finish up and send.
The Handoff system is designed to make it simple for your app to make this kind of story possible. Handoff works by getting apps to tell the operating system when they’re doing an activity that can be handed off to another device, such as drafting an email, or looking at a web page. In addition, the Handoff system uses the multipeer connectivity system (discussed in Multipeer Connectivity) to make the operating system aware of nearby computers that have the ability to have the activity handed off to them.
To demonstrate Handoff, we’ll build an app for iOS that allows the user to hand off an activity from one device to another.
NOTE
This example app is designed for iOS. However, handoffs work on OS X as well—you can hand off activities from one Mac to another, as well as handing off from a Mac to an iOS device and back. For information, see the Handoff Programming Guide in the Xcode documentation.
Handoff doesn’t work in the iOS Simulator. To use Handoff, you need at least two iPhones, iPads, iPod touches, or Macs. Additionally, all of the devices need to be using the same iCloud account.
The app’s “activity” will be a collection of switches; you can flip them on and off, and if you have another device in range, you can hand off the state of the switches to that device. You can see the app in action in Figure 15-6.
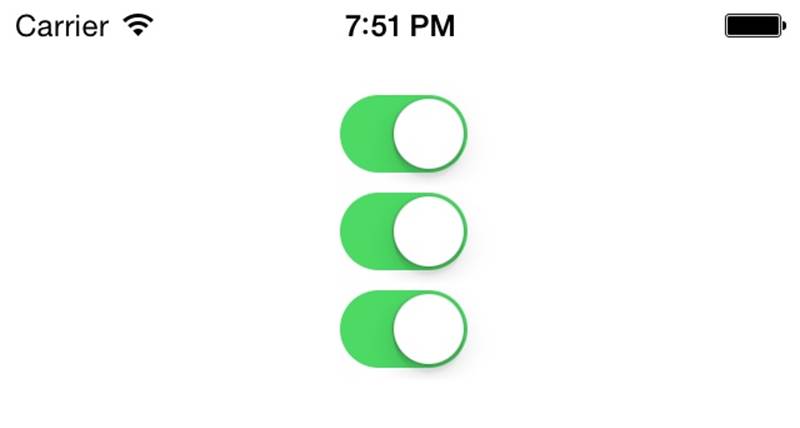
Figure 15-6. The Handoff demo app
Here are the steps you’ll need to follow:
1. Create a new, single view iOS application and call it Handoffs.
2. Create the interface, which will consist of three switches, all connected to their own outlets.
Open Main.storyboard, and drag in three UISwitches.
3. Connect the interface to the code.
Open ViewController.swift in the assistant editor. Then hold down the Control key, and drag from each of the switches into the ViewController class. Create a new outlet for each one. Name the first one switch1, the second switch2, and the third switch3.
We also want to know when each of the switches changes state, so that we can let the Handoff system know. Control-drag from the first switch into the ViewController class, and make a new action. Make sure that the Event is “Value Changed.” Name the action switchUpdated.
Once you’ve done that, Control-drag from the other two switches onto the newly created switchUpdated method.
The interface is now complete. The rest of the work is accomplished via the code.
In Handoff, the state of the activity that the user is performing is stored inside an NSUserActivity object. This object is responsible for both broadcasting to nearby devices that the user is performing an activity that can be handed off, as well as storing all of the information that another device would need to resume the activity. For example, if the activity was drafting an email, the NSUserActivity object would store the text of the draft.
In order for the Handoff system to work, you need to tell the system what type of activity you’re dealing with. Activity types are string that look like a reverse domain name, much like bundle identifiers. For example: com.oreilly.MyAmazingApplication.writing-email. Your app needs to register each different activity type that it supports with the system.
To do this, you add each activity type to your application’s Info.plist file (in this example, the app will have a single activity type: com.oreilly.Handoffs.switches):
1. Register the activity type. Select the project at the top of the project navigator.
Select the Info tab, and insert a new row into the list of “Custom iOS Target Properties.” Set the name of the new row to be NSUserActivityTypes, and set its type to be Array.
With the new row selected, press Enter. A new entry in this array will appear. Set the new row’s type to String, and set its value to be com.oreilly.Handoffs.switches.
The application will now register with the operating system that it’s capable of accepting incoming activities with the com.oreilly.Handoffs.switches type. The next step is to make the application actually broadcast these.
To do this, we’ll create a property on the ViewController class that stores an instance of the NSUserActivity.
2. Open the ViewController.swift file.
3. Add the NSUserActivity property to the ViewController class:
var activity : NSUserActivity?
The next step is to add a method that takes the current state of the switches, and stores it in a dictionary. This will be used a couple of times in the app, so it pays to make it a method that can be called repeatedly.
4. Add the activityInfoDictionary method to ViewController.swift:
5. // Creates and returns a dictionary containing the state of the activity
6. func activityInfoDictionary() -> [String: Bool] {
7. return [
8. "switch1": switch1.on,
9. "switch2": switch2.on,
10. "switch3": switch3.on
11. ]
}
Next, the activity itself will be created and set up. This is done inside the viewWillAppear method, so that when the view appears, it indicates to the system that the user is participating in an activity.
5. Add the viewWillAppear method to ViewController.swift:
6. override func viewWillAppear(animated: Bool) {
7. // When the view appears, create and set up the activity
8. activity =
9. NSUserActivity(activityType: "com.oreilly.Handoffs.switches")
10. activity?.userInfo = activityInfoDictionary()
11. activity?.title = "Switches"
12. activity?.delegate = self
13.
14. // Becoming current means that this activity will be broadcast
15. // to all other nearby devices that have the same iCloud account
16. activity?.becomeCurrent()
}
We also need to make sure that the activity is turned off if the view disappears. This frees up system resources that are used by the NSUserActivity, and stops the app from broadcasting. We’ll do this by calling the invalidate method on the activity when the view disappears.
6. Add the viewWillDisappear method to ViewController.swift:
7. override func viewWillDisappear(animated: Bool) {
8. // When the view disappears, turn off the activity
9. activity?.invalidate()
10. activity = nil
}
As part of being set up, the activity is told to use self as the delegate. This is important, because it allows the activity to contact the view controller when it needs to get the most recent state of the activity. To make this work properly, you need to make the class conform to the correct protocol.
7. At the top of the class’s definition, add the NSUserActivityDelegate protocol, like so:
class ViewController: UIViewController, NSUserActivityDelegate {
When the user changes the state of the switches, we need to indicate to NSUserActivity that the activity’s state has changed. However, you don’t update the activity directly. Instead, you indicate to the activity that something’s changed, and that it needs to get in touch with its delegate (in this example, the view controller) to get the latest state.
Doing this means that the system can be more efficient. Instead of updating every time the user does anything, which could be as often as every time the user types a new character on the keyboard, the system can check in every so often and get the latest information.
You indicate to the activity object that new information is available by setting its needsSave property to true. Later, the activity will call the userActivityWillSave method, which is responsible for actually giving the activity new information.
8. Notify the activity when the state changes. To do that, add the following code to the switchUpdated method:
9. // A switch has changed state, so we need to update activity
10. @IBAction func switchUpdated(sender: UISwitch) {
11. self.activity?.needsSave = true
}
12.Store the activity information by adding the following method to the ViewController class:
13. // Called at some point after you set needsSave on the activity to true
14. func userActivityWillSave(userActivity: NSUserActivity) {
15. userActivity.userInfo = activityInfoDictionary()
}
If you run your app on two devices, and then lock one of them, you’ll see a small icon in the lower-left corner of the screen. If you swipe up from this icon, your app will launch. You’re half done!
Unfortunately, the app isn’t actually handing information about the activity off from one device to the next. The final piece is to implement the functionality that receives the Handoff.
You do this by implementing a method in the application delegate, called application(_, continueUserActivity:, restorationHandler:). This method is called when the user swipes up from that icon on the lock screen, and receives both the NSUserActivity object that contains the activity state, as well as a closure that needs to be run.
10.Implement the continuation method by opening AppDelegate.swift and adding the following method to the AppDelegate class:
11. func application(application: UIApplication,
12. continueUserActivity userActivity: NSUserActivity,
13. restorationHandler: ([AnyObject]!) -> Void) -> Bool {
14.
15. // Any objects we pass to the restorationHandler function will
16. // have restoreUserActivityState called on them, in which they'll
17. // get data out of the activity and make themselves ready for the
18. // user to resume the activity
19.
20. // In this example, we only have a single view controller,
21. // so pass that in
22.
23. if let rootViewController = self.window?.rootViewController {
24.
25. restorationHandler([rootViewController])
26.
27. return true
28. } else {
29. return false
30. }
31.
}
The last step is to add the restoreUserActivityState method, which is called by the system to restore the state from the activity object.
11.Open ViewController.swift, and add the restoreUserActivityState method to the ViewController class:
12. // Called by the system when we need to
13. // restore from an incoming activity
14. override func restoreUserActivityState(activity: NSUserActivity) {
15.
16. if activity.activityType == "com.oreilly.Handoffs.switches" {
17. let userInfo = activity.userInfo as [String : Bool]
18.
19. switch1.on = userInfo["switch1"] as Bool!
20. switch2.on = userInfo["switch2"] as Bool!
21. switch3.on = userInfo["switch3"] as Bool!
22. }
}
You’re done! You can now hand off the state of the activity from one device to another.
[6] Unless, of course, you’re taking your iPhone to space.
[7] Because you asked, it stands for GLObalnaya NAvigatsionnaya Sputnikovaya Sistema.
[8] This is the case in most Western locales, but isn’t the case everywhere on the planet. Japanese addresses, for example, often go from widest area to smallest area.