iOS Drawing: Practical UIKit Solutions (2014)
Chapter 8. Drawing Text
So far in this book, you’ve seen bits and pieces about strings, but strings haven’t formed the focus of a discussion. Their story, as you’ll discover in this chapter, extends well beyond picking a point within the drawing context to paint some text or transforming a string into a Bezier path. This chapter dives deep into text, covering techniques for drawing, measuring, and laying out strings.
Drawing Strings
In iOS, it’s easy to use labels and text views to display strings. However, when your text acts as a component of a larger layout or drawing, it’s time to move to direct string drawing. Doing so unlocks the door to a wide, varied, and powerful set of text layout tools that enable you to add string elements to your contexts.
At the simplest end of the spectrum, you can draw text by telling a string to paint itself. The drawAtPoint:withAttributes: method draws any string to the current context. Example 8-1 demonstrates this approach, specifying a font and a text color.
Example 8-1 Drawing Hello World in Gray
NSString *string = @"Hello World";
UIFont *font = [UIFont fontWithName:@"Futura" size:36.0f];
// Starting in iOS 7, all string drawing uses attributes
NSDictionary *attributes = @{
NSFontAttributeName:font,
NSForegroundColorAttributeName:[UIColor grayColor]
};
// Draw the string
[string drawAtPoint:drawingPoint withAttributes:attributes];
The system uses UIKit geometry (top to bottom) to draw your string. Figure 8-1 shows the output of Example 8-1’s commands: text drawn in large gray letters.

Figure 8-1 Every NSString instance can draw itself at a point you specify.
Point Versus Rect Methods
String drawing methods offer two kinds of API calls: points and rects. This applies to both the NSString and NSAttributedString classes. The rule of thumb is this:
![]() A point method, like the one used in Example 8-1, draws a single line—regardless of any word wrapping attributes you’ve specified. The width of the rendering area is treated as unlimited.
A point method, like the one used in Example 8-1, draws a single line—regardless of any word wrapping attributes you’ve specified. The width of the rendering area is treated as unlimited.
![]() A rect version draws wrapped text within the boundaries you’ve provided. Any material that extends beyond those bounds is clipped.
A rect version draws wrapped text within the boundaries you’ve provided. Any material that extends beyond those bounds is clipped.
iOS 7 Changes
The drawAtPoint:withAttributes: method used in Example 8-1 is new to iOS 7. Most older string drawing methods, such as drawAtPoint:withFont:, have been deprecated (see Figure 8-2). New technologies such as layout managers and dynamic text have brought about a revolution in this arena. But as you will see, not all of these methods are ready for direct context drawing yet.
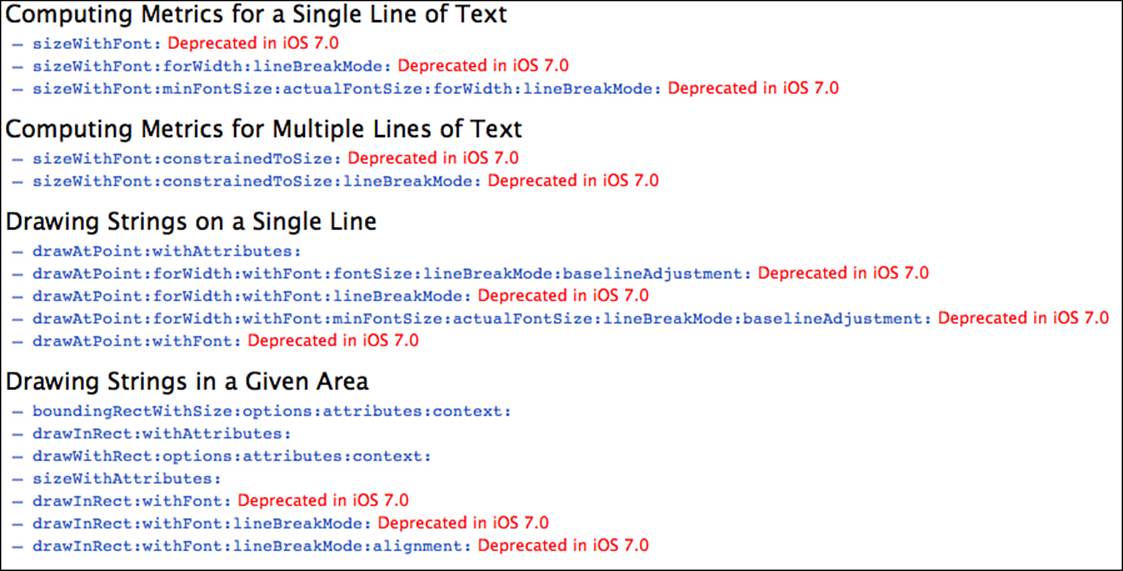
Figure 8-2 iOS 7 introduced many changes to string drawing.
Dynamic Text
Dynamic text is a technology that automatically adapts the members of a font family to fill user interface roles. For example, a “headline” font introduces material sections onscreen. For one user with limited vision, that font might be much larger than the same “headline” font for another user who has 20/20 eyesight. As a user adjusts his or her sizing preferences, the font roles adjust—changing both size and overall weight to preserve text readability beyond simple scaling.
These new features do not match well to UIKit drawing. Drawing creates static images. The dimensions of each context used to draw affects how a font is presented with respect to the overall size of the device. When the drawing context is not a pixel-perfect match to the screen, a font can be stretched, squashed, or otherwise distorted from its “ideal” user-driven size.
In addition, a drawn element cannot automatically update to dynamic text notifications. These notifications are generated whenever a user tweaks text settings. If elements need to adapt to dynamic text, avoid drawing them. Use labels and text views instead.
When you’re producing material for PDFs, for application art, or for other image output, avoid dynamic text. Use specific fonts, with specific traits and sizes, to do your drawing. This is why this chapter applies exact faces and sizing in its examples.
Text Kit
Text Kit is another exciting development to grow out of iOS 7. It enables you to apply Core Text–style typesetting to text views. Core Text is Apple’s C-based technology that enables you to create flexible and powerful typeset solutions from code. Text Kit, which is built on top of Core Text, extends that functionality to UIKit views.
You can use Text Kit to draw to UIKit contexts as well. As you see in Figure 8-3, when you attempt to do anything too challenging, such as draw inside shapes or use column-based drawing outside the intended UITextView target, the results can be problematic. Text Kit is still very new, very young, and somewhat buggy.
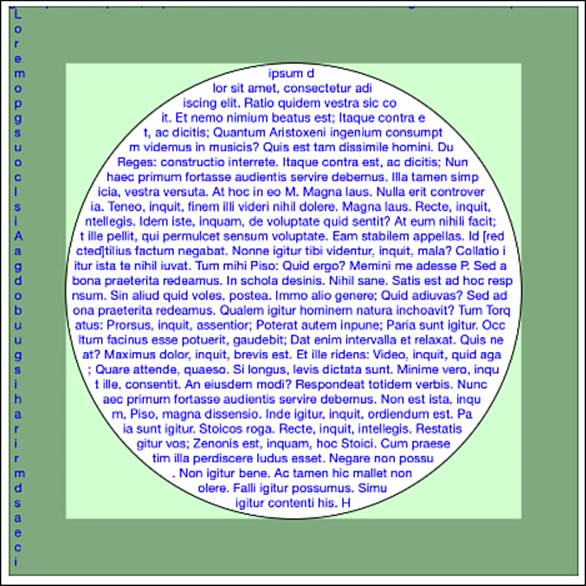
Figure 8-3 Text Kit is experiencing some growing pains, as you see with the bug displayed in this screen shot. Text that should remain in the center circle has crept out both to the left and, if you look carefully for descenders, to the top of the surrounding view.
This chapter discusses Core Text solutions instead of Text Kit ones for drawing. Despite its C-based API, Core Text remains the more powerful and reliable solution for complex text layout.
Text Attributes
Much of the iOS typesetting story consists of understanding attributes. Attributes are a set of features, like font choice or text color, applied to text within a certain range. Attributed strings, as the name implies, add characteristics to select substrings. Each attributed string contains both source text and range-specific attributes applied to that string. To get a sense of how attributes work and can combine, consider Figure 8-4. It shows a string with added foreground color and drop shadow attributes.
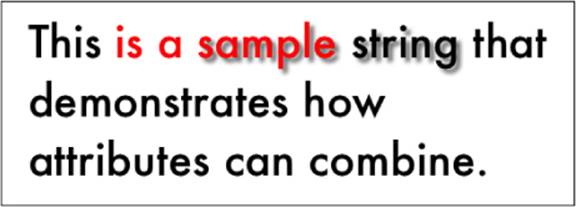
Figure 8-4 Text attributes include fonts, colors, and shadows. They can be arbitrarily combined and overlapped.
Creating Attributed Strings
When building text with typesetting traits, you work with members of the NSAttributedString class and, more typically, its mutable cousin NSMutableAttributedString. The mutable version offers more flexibility, allowing you to layer attributes individually rather than having to add all traits at once.
To create a nonmutable attributed string, you allocate it and initialize it with text and an attribute dictionary. Example 8-2 draws the same large gray “Hello World” you saw in Figure 8-1, but this time it does so using an attributed string rather than an NSString instance. ThedrawAtPoint: method fetches all the details, such as text color and font, from the attributes stored within the string.
Example 8-2 Creating an Attributed String with an Attributes Dictionary
// Create an attributes dictionary
NSMutableDictionary *attributes =
[NSMutableDictionary dictionary];
// Set the font
attributes[NSFontAttributeName] =
[UIFont fontWithName:@"Futura" size:36.0f];
// Set the foreground color
attributes[NSForegroundColorAttributeName] =
[UIColor grayColor];
// Build an attributed string with the dictionary
attributedString = [[NSAttributedString alloc]
initWithString:@"Hello World" attributes: attributes];
// Draw the attributed string
[attributedString drawAtPoint: drawingPoint];
Mutable Attributed Strings
Mutable instances enable you to add each attribute individually, to the entire string at once (as demonstrated in Example 8-3), or to subranges (as you see in Figure 8-2). You use addAttribute:value:range: requests to specify the attribute, the range, and the value.
Other methods enable you to set attributes with dictionaries, as you would with nonmutable instances (setAttributes:range:), or remove attributes (removeAttributes:range:) from ranges within the string. You can also insert and append attributed strings (insertAttributedString:atIndex: and appendAttributedString:) to build up complex instances.
Ultimately, Example 8-3 draws the same large gray “Hello World” output you saw in Figure 8-1, using the same drawAtPoint: entry point as Example 8-2.
Example 8-3 Layering Attributes into a Mutable Attributed String
// Build mutable attributed string
attributedString = [[NSMutableAttributedString alloc]
initWithString:@"Hello World"];
// Set the range for adding attributes
NSRange r = NSMakeRange(0, attributedString.length);
// Set the font
[attributedString
addAttribute:NSFontAttributeName
value:[UIFont fontWithName:@"Futura" size:36.0f] range:r];
// Set the color
[attributedString
addAttribute:NSForegroundColorAttributeName
value:[UIColor grayColor] range:r];
// Draw the attributed string
[attributedString drawAtPoint: inset.origin];
Kinds of Attributes
iOS typesetting attributes define the way text is drawn and styled into the context. The following sections enumerate the attributes you work with and the values you assign to them.
Fonts
Attribute: NSFontAttributeName
Assign a UIFont object to set the text font. Examples 8-2 and 8-3 set this attribute to 36-point Futura. Figure 8-5 shows a variety of faces (Chalkboard, Helvetica, and Times New Roman) applied as font attributes.

Figure 8-5 Font attributes applied to text.
Text Colors
Attributes: NSForegroundColorAttributeName and NSBackgroundColorAttributeName
UIColor objects set the color of the text and the color shown behind the text. Figure 8-6 shows text drawn with a green foreground color on a purple background.

Figure 8-6 Foreground and background colors specify the text fill color and the background drawn behind the text.
Attribute: NSStrokeColorAttributeName
A UIColor specifies a stroke color. This is, for the most part, synonymous with the foreground color in that it’s only used when you specify a stroke width attribute. You see it distinguished from that foreground color only when you apply a negative stroke width, as in the next section.
Stroke Style
Attribute: NSStrokeWidthAttributeName
Assign an NSNumber object that stores a floating-point value that defines the stroke width, as a percentage of the font point size. For example, in Figure 8-7, you see several widths (1, 4, and 8) applied.
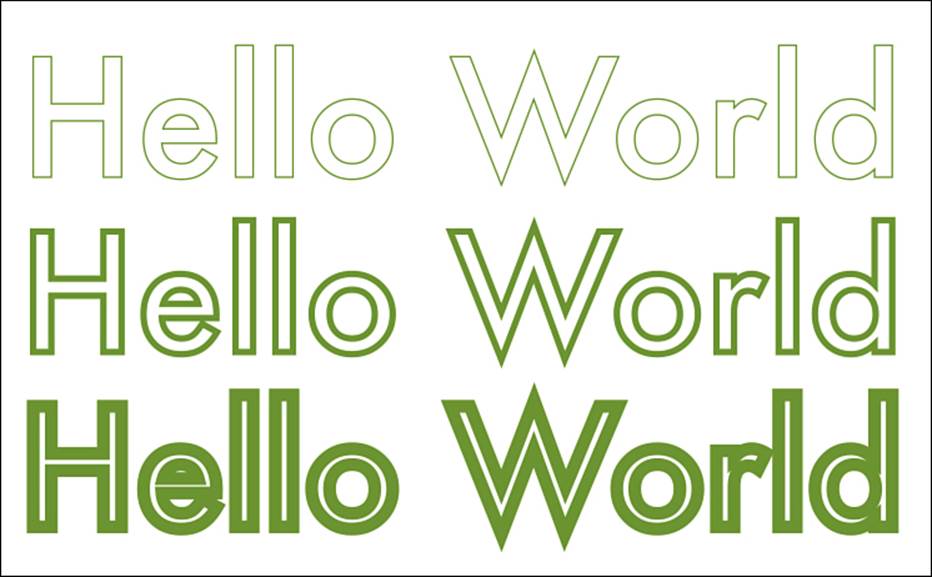
Figure 8-7 Positive stroke widths outline text. From top to bottom, the stroke widths applied are 1, 4, and 8.
Negative numbers both stroke (using the stroke color) and fill (using the foreground color) the text. Positive numbers create a “hollow” presentation, stroking the edges of each character glyph, as shown in Figure 8-8.
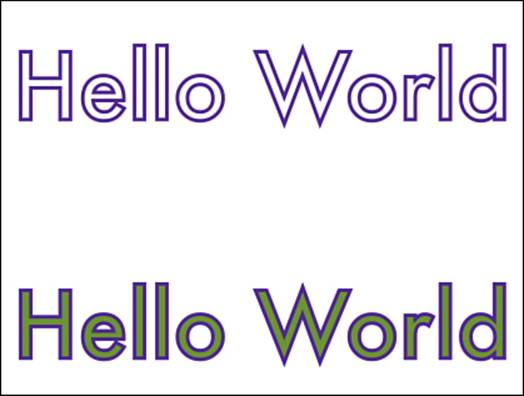
Figure 8-8 Top: Positive stroke values outline character glyphs using the current stroke color (or foreground color, if a stroke color is not set) but do not fill the interior. Bottom: Negative stroke values fill text with the foreground color and stroke the edges with the stroke color.
Strikethroughs
Attribute: NSStrikethroughStyleAttributeName
This key specifies whether an item uses strikethrough. Pass an NSNumber instance: either 0 (disable striking) or 1 (enable striking).
Attribute: NSStrikethroughColorAttributeName
Pass a color for this attribute to assign a custom tint to your strikethroughs.
Strikethroughs are a typographical convention that adds a horizontal line to text, indicating that material has been redacted away. Figure 8-9 shows strikethroughs, highlighting the new iOS 7 attribute that assigns a color to the strike.
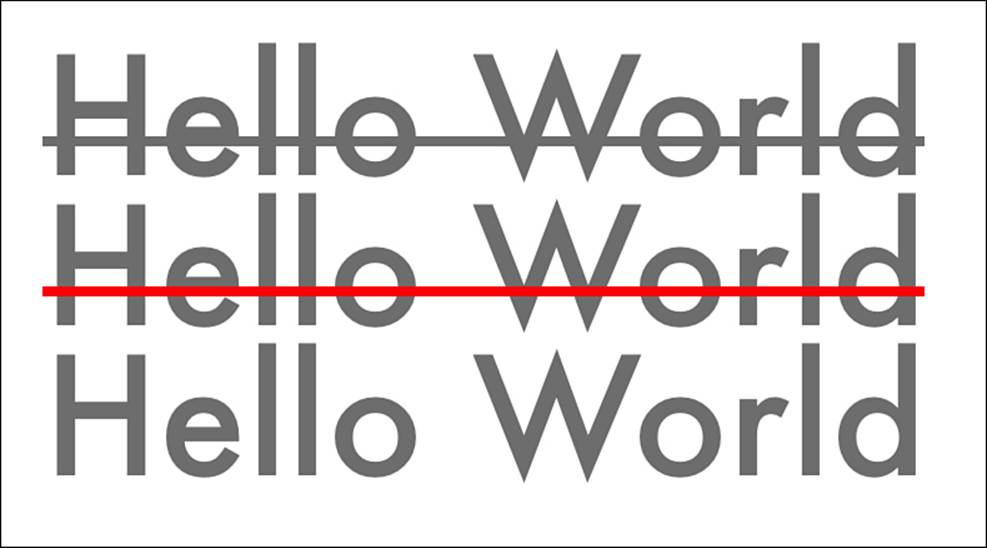
Figure 8-9 iOS 7 strikethrough formats now enable you to add custom colors.
Underlines
Attribute: NSUnderlineStyleAttributeName
iOS 7 introduces a variety of new underlining styles. Styles include single, double, and thick lines, as well as dashed, dotted, and word-by-word options. You can assign an NSNumber you create by masking together underline options.
An attributed string’s underline attribute (NSUnderlineStyleAttributeName) provides four base styles. These values are NSUnderlineStyleNone (0, basically no underline), NSUnderlineStyleSingle (1), NSUnderlineStyleThick (2), andNSUnderlineStyleDouble (9). Figure 8-10 shows these options.

Figure 8-10 Basic underlines include single, double, and thick styles.
In addition to the base styles, you might want to add underline patterns. Choose from solid (NSUnderlinePatternSolid, the default), dots (NSUnderlinePatternDot), dashes (NSUnderlinePatternDash), dash-dots (NSUnderlinePatternDashDot), and dash-dot-dots (NSUnderlinePatternDashDotDot). Mask these together with whatever basic underline style you use, as in the following example:
attributes[NSUnderlineStyleAttributeName] =
@(NSUnderlineStyleThick | NSUnderlinePatternDash);
Figure 8-11 shows examples of these patterns in use, OR’ed together with the single underline style.
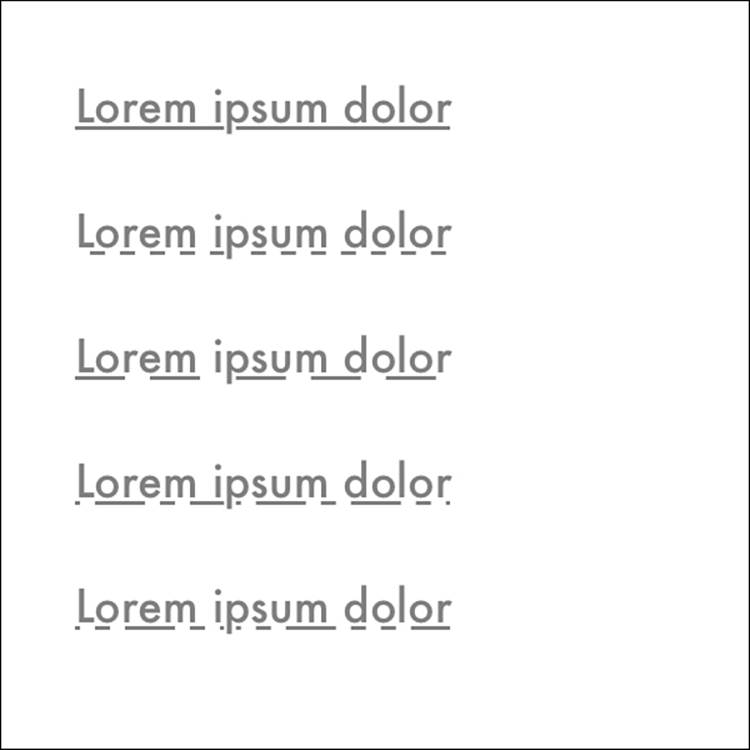
Figure 8-11 New iOS 7 underlining patterns include (top to bottom): solid, dotted, dashed, dash-dot, and dash-dot-dot.
A final option is NSUnderlineByWord. When you OR it into your attribute mask, it underlines each word individually. You see this in Figure 8-12.
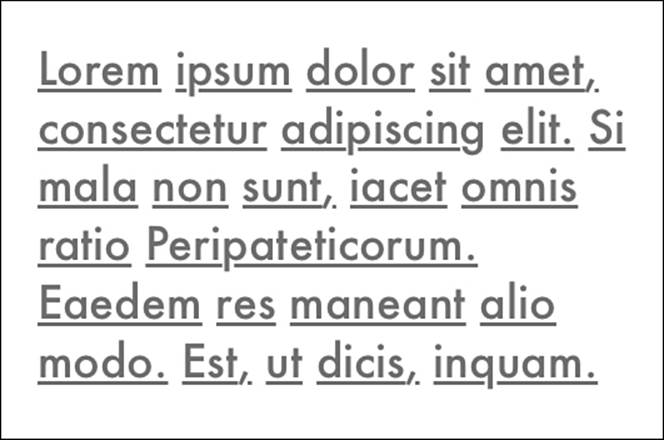
Figure 8-12 The underline-by-word option applies whatever underline style and pattern you’ve selected to each word, leaving gaps between.
Attribute: NSUnderlineColorAttributeName
Assign a color instance to set a distinct underline color. This is shown in Figure 8-13.

Figure 8-13 This underline has a green tint attribute applied.
Shadows
Attribute: NSShadowAttributeName
Assign an NSShadow object. This class sets a shadow’s color, offset, and blur radius, as you see in Figure 8-14. Shadows work as they do in contexts. You supply a size for the shadow offset, a float for the blur radius, and a UIColor for the shadow color:
NSShadow *shadow = [[NSShadow alloc] init];
shadow.shadowBlurRadius = 2.0f;
shadow.shadowOffset = CGSizeMake(2.0f, 2.0f);
shadow.shadowColor = [UIColor grayColor];
attributes[NSShadowAttributeName] = shadow;

Figure 8-14 Use the NSShadow class to add shadow attributes.
Note
On OS X, you can set an NSShadow instance to apply its parameters to the active drawing context. This feature has not yet migrated to iOS.
Baselines
Attribute: NSBaselineOffsetAttributeName
This attribute, assigned as an NSNumber, adds an offset from the normal text drawing position, as you see in Figure 8-15. Use it for vertically positioned elements like subscripts and superscripts:
[string addAttribute:NSBaselineOffsetAttributeName
value:@(20) range:NSMakeRange(6, 5)];

Figure 8-15 Baseline offsets move text up or down from the normal text line. I underlined this example to highlight the difference.
Text Effects
Attribute: NSTextEffectAttributeName
Assign an effect through a predefined NSString constant.
iOS 7 introduced a new kind of text attribute that applies effects to fonts. It shipped with just one option, the “letterpress” effect (NSTextEffectLetterpressStyle). This attribute style creates a slightly 3D text effect, shown in Figure 8-16:
attributes[NSTextEffectAttributeName] =
NSTextEffectLetterpressStyle;
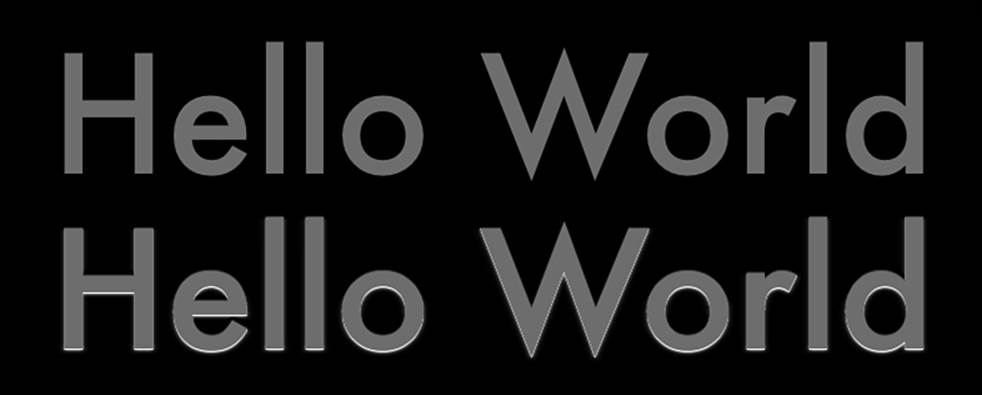
Figure 8-16 The letterpress attribute (bottom) creates a subtle 3D effect. The top text draws the text without adding letterpress.
This figure uses a dark background to showcase the difference between the two examples. On a light background, the letterpress changes can be hard to recognize. The text at the bottom of Figure 8-16 uses letterpress; the text at the top does not. Other text effects are expected in future iOS updates.
Obliqueness and Expansion
Attribute: NSObliquenessAttributeName
Assign an NSNumber value from @(-1.0) to @(1.0).
The NSObliquenessAttributeName attribute, which is new to iOS 7, adds a slant to your text. You select a skew from -1 to 1. Figure 8-17 shows a nonslanted item along with two examples of the applied attribute.
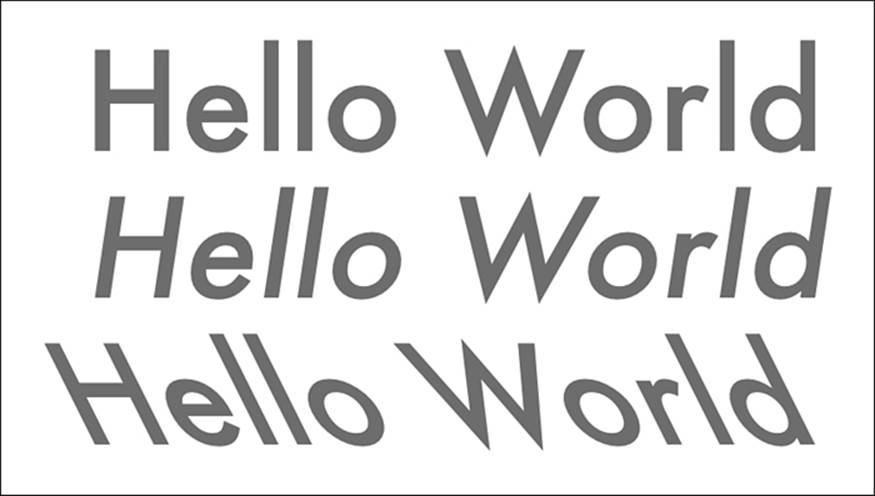
Figure 8-17 From top to bottom, these examples show obliqueness values of 0 (no slant), 0.15 (slight positive slant to the right), and -0.5 (strong negative slant to the left).
Attribute: NSExpansionAttributeName
You can assign an NSNumber value from @(0.0) and up.
The NSExpansionAttributeName attribute, introduced in iOS 7, provides a horizontal multiplier that spaces out text. Figure 8-18 shows how expansion applies to text.

Figure 8-18 From top to bottom, these examples highlight how expansion values work. They show 0 (no expansion), 0.15 (moderate expansion), and 0.25 (strong expansion). Both text and spacing are affected by this attribute.
Ligatures and Kerning
Attribute: NSLigatureAttributeName
This attribute references an NSNumber that selects from “use no ligatures” (0) and “use the default ligature” (1).
Ligatures refer to the way that individual glyphs (character pictures) can be bound together, such as f with i, as shown in Figure 8-19. When enabled, iOS replaces separate letters with a single combined image for certain sequences. These pairs generally occur when a feature of one letter extends into the space occupied by another. Common English ligatures include fi, fj, fl, ff, ffi, and ffl. These vary by font implementation.
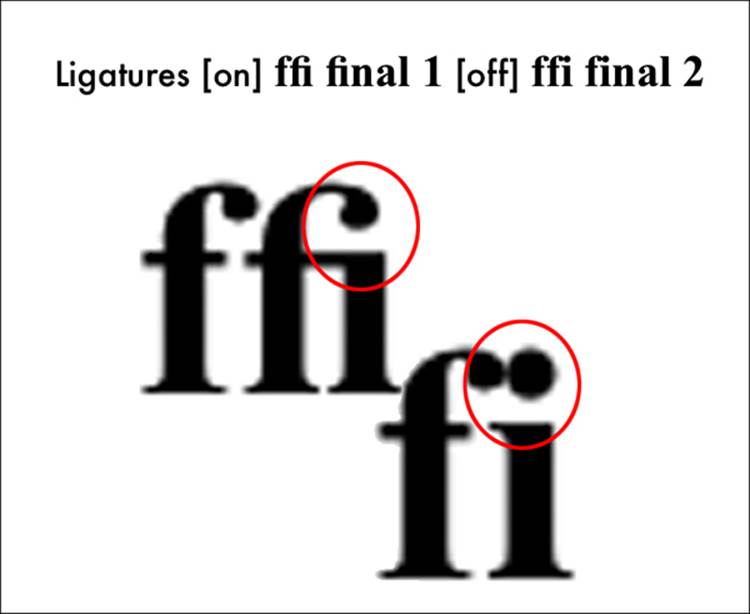
Figure 8-19 Ligatures combine certain letter combinations like f and i into a single character glyph. Notice the separate dot on the i when ligatures are disabled.
Attribute: NSKernAttributeName
This NSNumber indicates whether kerning is enabled (1) or disabled (0, the default).
Kerning allows typesetters to adjust the space between letters so they naturally overlap, such as when placing a capital A next to a capital V. Figure 8-20 shows kerning in action.
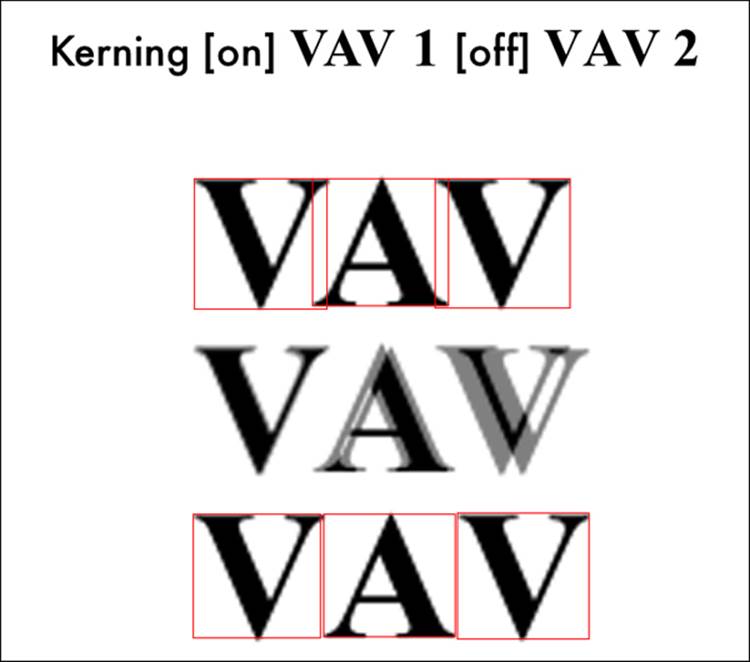
Figure 8-20 Kerning reduces the space between characters to overlap appropriate letter pairs. Top: Kerning is enabled, and character bounding boxes partially cover each other. Bottom: Kerning is disabled, so each character is freestanding.
Paragraph Styles
Attribute: NSParagraphStyleAttributeName
The NSParagraphStyle object is used to specify a number of paragraph settings, including alignment, line break mode, and indentation.
Paragraph styles are stored in their own objects, members of the NSParagraphStyle class. You use the mutable version of the class NSMutableParagraphStyle to iteratively set style specifics. Example 8-4 creates the presentation shown in Figure 8-21, using extra-large spacing between paragraphs and a generous first-line indent.
Example 8-4 Layering Attributes into a Mutable Attributed String
NSMutableParagraphStyle *paragraphStyle =
[[NSMutableParagraphStyle alloc] init];
paragraphStyle.alignment = NSTextAlignmentLeft;
paragraphStyle.lineBreakMode = NSLineBreakByWordWrapping;
paragraphStyle.firstLineHeadIndent = 36.0f;
paragraphStyle.lineSpacing = 8.0f;
paragraphStyle.paragraphSpacing = 24.0f; // Big!
[attributedString addAttribute:NSParagraphStyleAttributeName
value:paragraphStyle range:r];
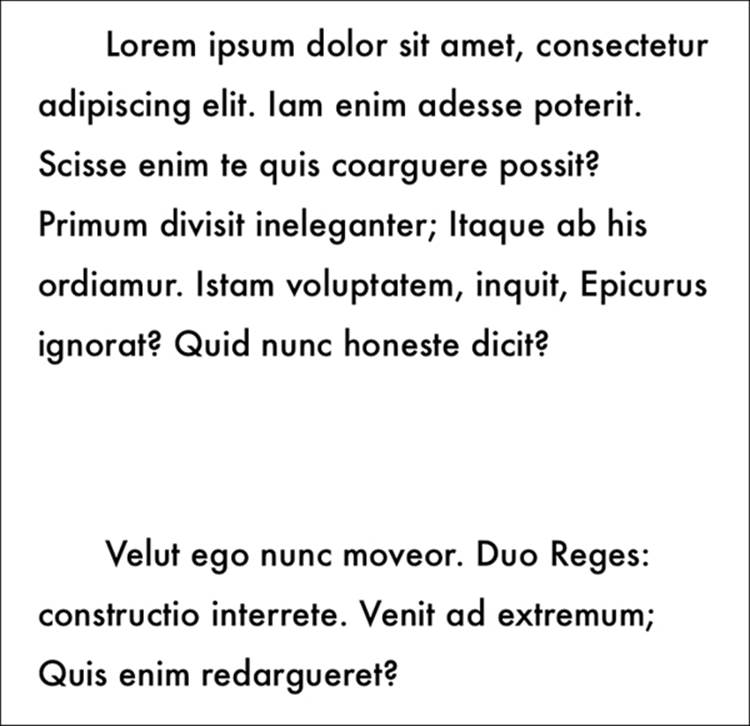
Figure 8-21 Paragraph style attributes include indentation, paragraph-to-paragraph spacing, alignment, and more.
Most of these values refer to points, such as the spacing between lines or paragraphs, and indentation. If you’re careful, you can control these features on a paragraph-by-paragraph basis. Style objects are assigned, not copied. One secret lies in making sure to assign distinct paragraph style objects for each paragraph. If you do not, as I discovered the hard way long ago, you may create an attributed result whose paragraph styles all point to the same object: Update one, and you update them all.
Paragraph Style Properties
The following list enumerates paragraph style properties. Apply these to attributed strings to specify how iOS draws that text content:
![]() alignment—The paragraph alignment, as an NSTextAlignment value. Generally, you align paragraphs left, right, center, or justified.
alignment—The paragraph alignment, as an NSTextAlignment value. Generally, you align paragraphs left, right, center, or justified.
![]() firstLineHeadIndent—The indentation leading into each paragraph’s first line. Supply a nonnegative value. Example 8-4 uses a 36-point first-line head indent.
firstLineHeadIndent—The indentation leading into each paragraph’s first line. Supply a nonnegative value. Example 8-4 uses a 36-point first-line head indent.
![]() headIndent—The indentation on the leading edge of the paragraph—that is, the left edge in left-to-right languages like English, and the right edge in right-to-left languages like Arabic and Hebrew. Typically used when working with block quotes and other indented material, this property enables you to move in away from the text container.
headIndent—The indentation on the leading edge of the paragraph—that is, the left edge in left-to-right languages like English, and the right edge in right-to-left languages like Arabic and Hebrew. Typically used when working with block quotes and other indented material, this property enables you to move in away from the text container.
![]() tailIndent—The opposite of head indentation, this indents from the trailing edge of the paragraph with respect to its text drawing container. As with other indentations, it uses a nonnegative floating-point value.
tailIndent—The opposite of head indentation, this indents from the trailing edge of the paragraph with respect to its text drawing container. As with other indentations, it uses a nonnegative floating-point value.
![]() maximumLineHeight and minimumLineHeight—The maximum/minimum height, in points, that a line occupies.
maximumLineHeight and minimumLineHeight—The maximum/minimum height, in points, that a line occupies.
![]() lineHeightMultiple—According to Apple documentation, “The natural line height of the receiver is multiplied by this factor (if positive) before being constrained by minimum and maximum line height.”
lineHeightMultiple—According to Apple documentation, “The natural line height of the receiver is multiplied by this factor (if positive) before being constrained by minimum and maximum line height.”
![]() lineSpacing—Otherwise known as leading, refers to the space (in points) between paragraph lines.
lineSpacing—Otherwise known as leading, refers to the space (in points) between paragraph lines.
![]() paragraphSpacing—Extra space, in points, between one paragraph and the next. In Example 8-4, this was set to 24 points.
paragraphSpacing—Extra space, in points, between one paragraph and the next. In Example 8-4, this was set to 24 points.
![]() paragraphSpacingBefore—This additional space is added before the first paragraph at the start of the drawing area.
paragraphSpacingBefore—This additional space is added before the first paragraph at the start of the drawing area.
![]() lineBreakMode—An instance of NSLineBreakMode that specifies the kind of wrapping, truncation, or clipping to apply. Options include word wrapping (entire words wrap), character wrapping (words may wrap in the middle), clipping, head truncation (for example, “...lo World”), tail truncation (for example, “Hello Wor...”), and middle truncation (for example, “Hel...orld”).
lineBreakMode—An instance of NSLineBreakMode that specifies the kind of wrapping, truncation, or clipping to apply. Options include word wrapping (entire words wrap), character wrapping (words may wrap in the middle), clipping, head truncation (for example, “...lo World”), tail truncation (for example, “Hello Wor...”), and middle truncation (for example, “Hel...orld”).
![]() hyphenationFactor—The threshold for hyphenation. Apple writes, “Hyphenation is attempted when the ratio of the text width (as broken without hyphenation) to the width of the line fragment is less than the hyphenation factor. When the paragraph’s hyphenation factor is 0.0, the layout manager’s hyphenation factor is used instead. When both are 0.0, hyphenation is disabled.”
hyphenationFactor—The threshold for hyphenation. Apple writes, “Hyphenation is attempted when the ratio of the text width (as broken without hyphenation) to the width of the line fragment is less than the hyphenation factor. When the paragraph’s hyphenation factor is 0.0, the layout manager’s hyphenation factor is used instead. When both are 0.0, hyphenation is disabled.”
![]() baseWritingDirection—When set to the natural direction, the paragraph defaults to whatever value has been set in the locale associated with the current language settings—left to right or right to left.
baseWritingDirection—When set to the natural direction, the paragraph defaults to whatever value has been set in the locale associated with the current language settings—left to right or right to left.
Drawing with Core Text
iOS 7’s Text Kit made great inroads into providing high-end typesetting technologies traditionally associated with Core Text. Text Kit provides an Objective-C–based set of classes and protocols that supply typesetting features for UITextView. Core Text, in contrast, is a C-based API. Both typesetting features can be drawn directly to contexts. As Figure 8-3 showed, Text Kit isn’t quite fully cooked yet. For that reason, this section covers Core Text instead of Text Kit.
In Core Text, Bezier paths enable you to draw text into any shape or layout you specify. Figure 8-22 shows a simple example. This image uses Core Text layout within a star shape.

Figure 8-22 Drawing attributed text into a path. The text wraps along the path edges.
Figure 8-22 uses character wrapping, so partial words are split between lines, but no characters or words are missing from the layout, the way they would be if you used addClip and drew into the shape’s bounds. All the text appears within the path but is wrapped to the surrounding shape.
Normally, of course, you don’t draw text into such an odd shape. I did so here because I wanted to demonstrate the function in Listing 8-1. It accepts a path and an attributed string, and it draws that string into that path. It does this courtesy of a Core Text frame setter, an object that builds containers (“frames”) for drawing text.
The Core Text framework offers a powerful text layout and font management feature set. Intended for apps that work in the text processing space, Core Text includes tools like frame setters that enable you to define geometric destinations for drawing complex string layouts. These layouts respect paragraph styles like alignment, tab stops, line spacing, and indentation that you apply through attributed strings.
Thanks to the Core Text framework, all drawing takes place in Quartz space. The CGPath you supply must also be defined in Quartz geometry. That’s why I picked a shape for Figure 8-11 that is not vertically symmetrical. Listing 8-1 handles this drawing issue by copying whatever path you supply and mirroring that copy vertically within the context. Without this step, you end up with the results shown in Figure 8-23: The text still draws top to bottom, but the path uses the Quartz coordinate system.
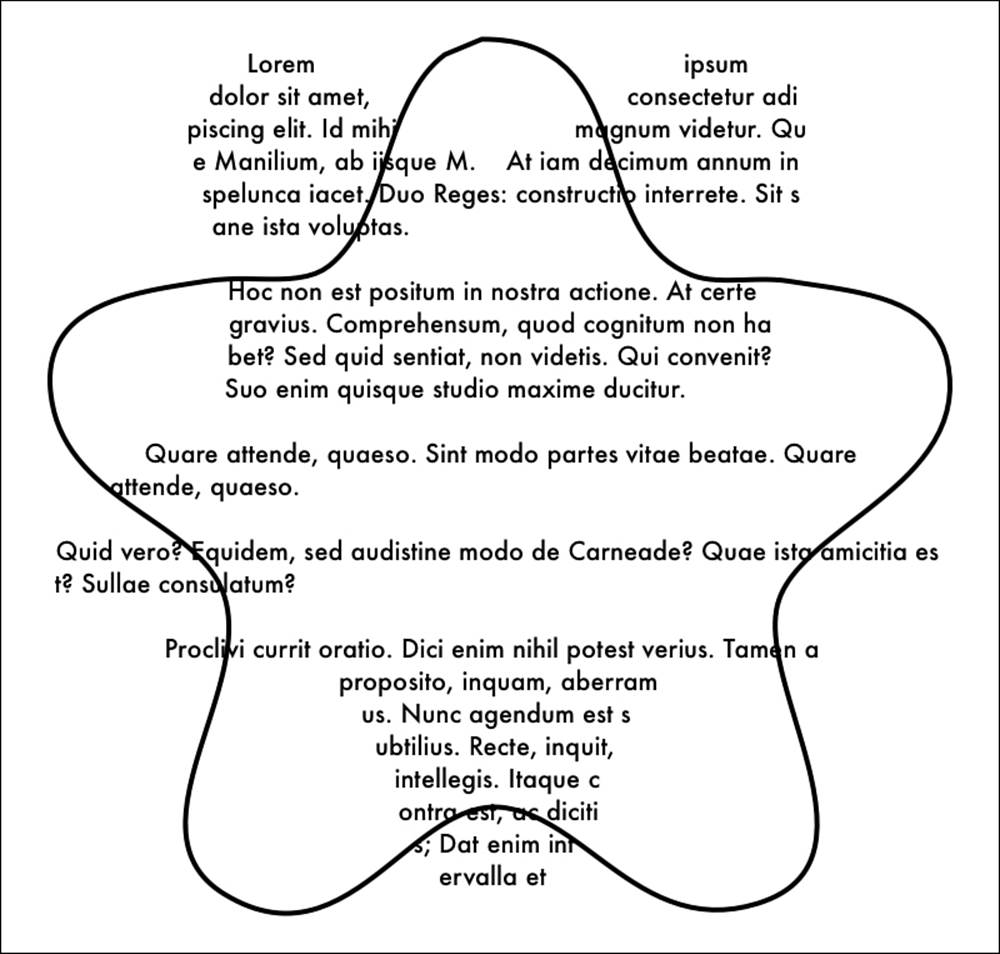
Figure 8-23 Core Text expects paths to use the Quartz coordinate system.
Listing 8-1 Drawing Attributed Strings into Path Containers
void DrawAttributedStringInBezierPath(
UIBezierPath *path,
NSAttributedString *attributedString)
{
CGContextRef context = UIGraphicsGetCurrentContext();
if (context == NULL)
COMPLAIN_AND_BAIL(
@"No context to draw into", nil);
// Mirror a copy of the path
UIBezierPath *copy = [path safeCopy];
MirrorPathVerticallyInContext(copy);
// Build a framesetter and extract a frame destination
CTFramesetterRef framesetter =
CTFramesetterCreateWithAttributedString(
(__bridge CFAttributedStringRef) attributedString);
CTFrameRef theFrame = CTFramesetterCreateFrame(
framesetter, CFRangeMake(0, attributedString.length),
copy.CGPath, NULL);
// Draw into the frame
PushDraw(^{
CGContextSetTextMatrix(context, CGAffineTransformIdentity);
FlipContextVertically(GetUIKitContextSize());
CTFrameDraw(theFrame, UIGraphicsGetCurrentContext());
});
CFRelease(theFrame);
CFRelease(framesetter);
}
// Flip the path vertically with respect to the context
void MirrorPathVerticallyInContext(UIBezierPath *path)
{
CGContextRef context = UIGraphicsGetCurrentContext();
if (context == NULL) COMPLAIN_AND_BAIL(
@"No context to draw into", nil);
CGSize size = GetUIKitContextSize();
CGRect contextRect = SizeMakeRect(size);
CGPoint center = RectGetCenter(contextRect);
// Flip path with respect to the context size
CGAffineTransform t = CGAffineTransformIdentity;
t = CGAffineTransformTranslate(t, center.x, center.y);
t = CGAffineTransformScale(t, 1, -1);
t = CGAffineTransformTranslate(t, -center.x, -center.y);
[path applyTransform:t];
}
Text Matrices
Text matrices define transformations that individually apply to each character rather than to the context as a whole. They are stored as part of each context’s GState. When intermingling UIKit and Core Text drawing, make sure to reset the text matrix in your Core Text calls as Listing 8-1does within its PushDraw() block.
Let’s look at how you perform that update. The following call resets any text transforms used to render strings into the context:
CGContextSetTextMatrix(context, CGAffineTransformIdentity);
To understand why you must perform this step, consider Figure 8-24. The text in this figure was drawn twice—first using UIKit attributed string drawing and then using Core Text. The Core Text output appears upside down. Each letter is individually reflected vertically.
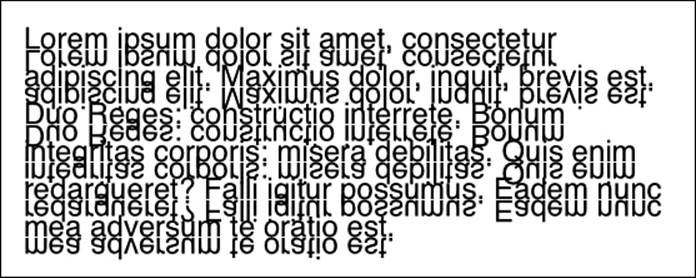
Figure 8-24 Drawing text into a complex Bezier path may produce unexpected results.
This odd effect happens because UIKit string drawing changed the context’s text matrix. You see how this happens in Example 8-5.
Example 8-5 Drawing Attributed Strings into Paths
UIGraphicsBeginImageContextWithOptions(size, NO, 0.0);
CGAffineTransform t;
// Retrieve the initial text matrix
t = CGContextGetTextMatrix(UIGraphicsGetCurrentContext());
NSLog(@"Before: %f", atan2f(t.c, t.d));
// Draw the string
[string drawInRect:targetRect];
// Retrieve the changed text matrix
t = CGContextGetTextMatrix(UIGraphicsGetCurrentContext());
NSLog(@"After: %f", atan2f(t.c, t.d));
UIGraphicsEndImageContext();
You might expect both log statements to report no rotation. Instead, here’s what actually happens. The resulting 180-degree rotation used to support UIKit string drawing explains the output shown in Figure 8-24:
2013-05-10 09:38:06.434 HelloWorld[49888:c07] Before: 0.000000
2013-05-10 09:38:06.438 HelloWorld[49888:c07] After: 3.141593
Unfortunately, you cannot work around this by saving and restoring the context’s graphic state. According to Apple, “Note that the text matrix is not a part of the graphics state—saving or restoring the graphics state has no effect on the text matrix. The text matrix is an attribute of the graphics context, not of the current font.”
Instead, you explicitly reset the text matrix when you switch to Core Text drawing, as in Listing 8-1:
CGContextSetTextMatrix(context, CGAffineTransformIdentity);
Drawing Columns
Figure 8-25 demonstrates a fundamental problem in Core Text. This involves drawing Core Text into columns. When you lay out columns, text should wrap at the edge of each column and not continue between them, as happens here. For example, at the top of the right column, the wordsitting should appear on the second line of the first column, as it continues on from tired of. Instead, it’s placed to the right on the top line of the second column of the drawing. The text flows across columns and then down rather than all the way down one column and then all the way down the next.
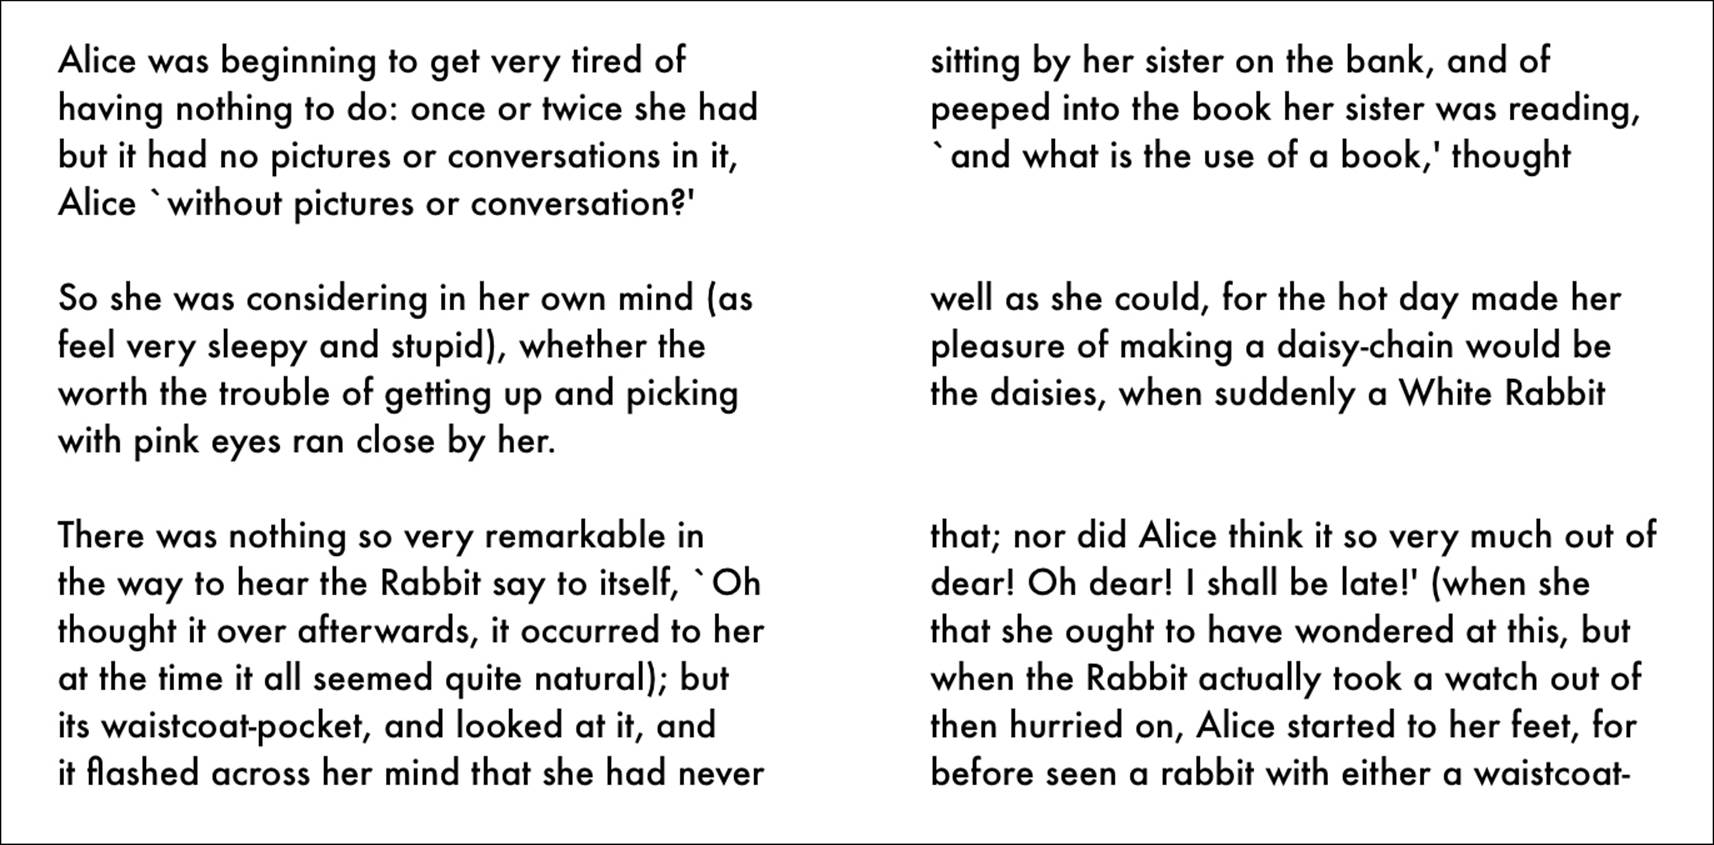
Figure 8-25 Text does not naturally know where to wrap in this complex path. Instead of moving down each column, the text flows across both columns before starting the next line.
The problem is that the Core Text framesetter treats this entire Bezier path (you see the path in Figure 8-26) as a single shape. Its two vertical rectangles are meant to display independent columns of text. What’s happening, however, is that the Core Text framesetter builds its frame using only one test. It determines points inside the path and points outside the path. All other considerations are omitted. Core Text and iOS in general have no concept of “column,” so the default technology doesn’t support my expectation of column-by-column layout.
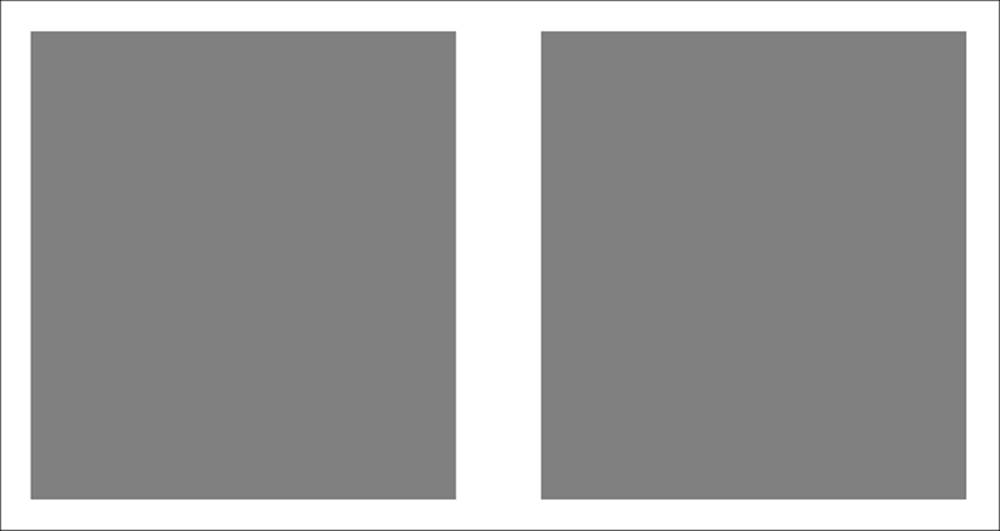
Figure 8-26 This path contains two rectangles.
Figure 8-27 shows what I want this layout to do. Here, sitting wraps properly after tired of. The text proceeds down the first column and then continues to the second. This layout treats the two columns as a single output flow. Text moves from one column to the next.

Figure 8-27 This text properly respects column layout.
Compare the visual styles in Figures 8-25 and 8-27. Figure 8-27 looks properly “text”-y, with a series of well-formed, short paragraphs. Figure 8-25 displays many more gap lines and less text in the right column. Its layout looks slightly less appealing than the layout in Figure 8-27.
I generated the “before” image of Figure 8-25 by calling DrawAttributedStringInBezierPath() from Listing 8-1. It actually takes very little work to adapt this function to move from the incorrect flow in Figure 8-25 to the proper layout in Figure 8-27. Listing 8-2 shows how.
This new function is called DrawAttributedStringIntoSubpath(). It works on a subpath-by-subpath basis and updates a string remainder parameter with any attributed string content that could not be drawn into the path. To accomplish this, it queries the Core Text frame for its visible string range. This function calculates the remainder of the attributed string—that is, the portion that was not visible—and assigns that to the remainder parameter.
The second function in Listing 8-2 is DrawAttributedStringInBezierSubpaths(). This entry point iterates through a path’s subpaths. At each stage, it retrieves the “remainder” string and applies it to the next stage of drawing. The function returns when it finishes drawing subpaths or when the remainder’s length drops to zero.
Listing 8-2 Drawing Attributed Strings into Independent Subpaths
void DrawAttributedStringIntoSubpath(
UIBezierPath *path, NSAttributedString *attributedString,
NSAttributedString **remainder)
{
CGContextRef context = UIGraphicsGetCurrentContext();
if (context == NULL)
COMPLAIN_AND_BAIL(@"No context to draw into", nil);
// Handle vertical mirroring
UIBezierPath *copy = [path safeCopy];
MirrorPathVerticallyInContext(copy);
// Establish the framesetter and retrieve the frame
CTFramesetterRef framesetter =
CTFramesetterCreateWithAttributedString(
(__bridge CFAttributedStringRef) attributedString);
CTFrameRef theFrame = CTFramesetterCreateFrame(framesetter,
CFRangeMake(0, attributedString.length), copy.CGPath, NULL);
// If the remainder can be dereferenced, calculate
// the remaining attributed string
if (remainder)
{
CFRange range = CTFrameGetVisibleStringRange(theFrame);
NSInteger startLocation = range.location + range.length;
NSInteger extent = attributedString.length - startLocation;
NSAttributedString *substring =
[attributedString attributedSubstringFromRange:
NSMakeRange(startLocation, extent)];
*remainder = substring;
}
// Perform the drawing in Quartz coordinates
PushDraw(^{
FlipContextVertically(GetUIKitContextSize());
CTFrameDraw(theFrame, UIGraphicsGetCurrentContext());
});
// Clean up the Core Text objects
CFRelease(theFrame);
CFRelease(framesetter);
}
void DrawAttributedStringInBezierSubpaths(UIBezierPath *path,
NSAttributedString *attributedString)
{
NSAttributedString *string;
NSAttributedString *remainder = attributedString;
// Iterate through subpaths, drawing the
// attributed string into each section
for (UIBezierPath *subpath in path.subpaths)
{
string = remainder;
DrawAttributedStringIntoSubpath(
subpath, string, &remainder);
if (remainder.length == 0) return;
}
}
Image Cutouts
Listing 8-2 works best for columns or other standalone elements in your drawing context. It does not work for layouts with holes you create using the even/odd fill rule. If you use the DrawAttributedStringInBezierSubpaths() function, you’ll end up drawing the text across the entire path, and then again into the hole, as the outer path and its inner hole will separate into two distinct subpaths.
To work with complex paths that leverage the even/odd fill rule, perform your own path decomposition in a way that makes topological sense. Then, call directly into the DrawAttributedStringIntoSubpath() function.
That said, the even/odd fill rule does enable you to create simple cutouts within your paths. These can accommodate image drawing, as you see in Figure 8-28. To draw this, I created an internal rectangle and added it to my path. This established a “hole” big enough to draw my image.
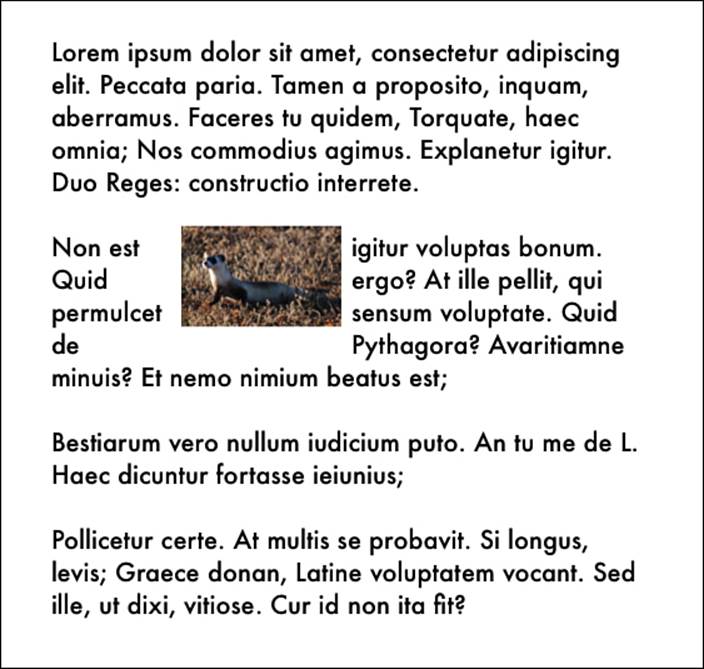
Figure 8-28 Drawing an image onto a path cutout.
Drawing Attributed Text Along a Path
Drawing text along a path presents another common typesetting challenge. Figure 8-29 shows a string drawn onto a star-shaped path. To highlight the fact that the input is an attributed string, I’ve randomly colored each letter before performing any drawing.
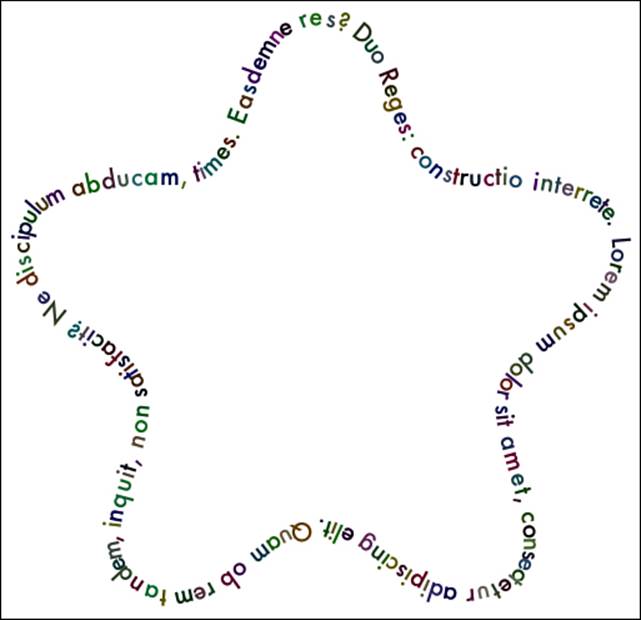
Figure 8-29 Typesetting along a path.
Listing 8-3 calculates the rendered size of each character in the attributed string, determining the bounding height and width. Knowing this size allows the drawing function to determine how much of the path each character (or “glyph,” if you want to use Core Text terms) consumes:
CGRect bounding = [item boundingRectWithSize:CGSizeMake(
CGFLOAT_MAX, CGFLOAT_MAX) options:0 context:nil];
This bounding rectangle establishes where the glyph center would appear if laid out along a line. Listing 8-3 uses that distance to calculate a percentage of the path’s length, and Chapter 5’s path interpolation returns a position and slope for placement. As you saw in Chapter 1, you can translate and rotate the context to position and orient your text exactly. This allows the string to render using NSAttributedString’s drawAtPoint: method.
After consuming the entire path, the routine stops. This clips any remaining characters; they simply don’t get drawn. If you want to ensure that the entire string appears, you need to fiddle with your font choices to match the path length.
Listing 8-3 Laying Out Text Along a Bezier Path
@implementation UIBezierPath (TextUtilities)
- (void) drawAttributedString:
(NSAttributedString *) string
{
if (!string) return;
CGContextRef context = UIGraphicsGetCurrentContext();
if (context == NULL) COMPLAIN_AND_BAIL(
@"No context to draw into", nil);
// Check the points
if (self.elements.count < 2) return;
// Keep a running tab of how far the glyphs have traveled to
// be able to calculate the percent along the point path
float glyphDistance = 0.0f;
float lineLength = self.pathLength;
for (int loc = 0; loc < string.length; loc++)
{
// Retrieve the character
NSRange range = NSMakeRange(loc, 1);
NSAttributedString *item =
[string attributedSubstringFromRange:range];
// Start halfway through each character
CGRect bounding = [item boundingRectWithSize:
CGSizeMake(CGFLOAT_MAX, CGFLOAT_MAX)
options:0 context:nil];
glyphDistance += bounding.size.width / 2;
// Find new point on path
CGPoint slope;
CGFloat percentConsumed = glyphDistance / lineLength;
CGPoint targetPoint =
[self pointAtPercent:percentConsumed
withSlope:&slope];
// Accommodate the forward progress
glyphDistance += bounding.size.width / 2;
if (percentConsumed >= 1.0f) break;
// Calculate the rotation
float angle = atan(slope.y / slope.x);
if (slope.x < 0) angle += M_PI;
// Draw the glyph
PushDraw(^{
// Translate to target on path
CGContextTranslateCTM(context,
targetPoint.x, targetPoint.y);
// Rotate along the slope
CGContextRotateCTM(context, angle);
// Adjust for the character size
CGContextTranslateCTM(context,
-bounding.size.width / 2,
-item.size.height / 2);
// Draw the character
[item drawAtPoint:CGPointZero];
});
}
}
@end
Fitting Text
Several UIKit classes include size-to-fit options. However, there are no equivalent functions for general string drawing tasks. It’s up to you to find a font that “fits” a string to a destination. Take rectangles, for example. Nearly any text will “fit” into a rectangle if its font is small enough. Unfortunately, that results in teeny-tiny single lines of text. The challenge is to find the biggest font that wraps to match a target, so the drawn text’s aspect corresponds to the aspect of that rectangle. Figure 8-30 shows text strings of different lengths. Each drawing fits its destination by adjusting the font’s size while testing for aspect.
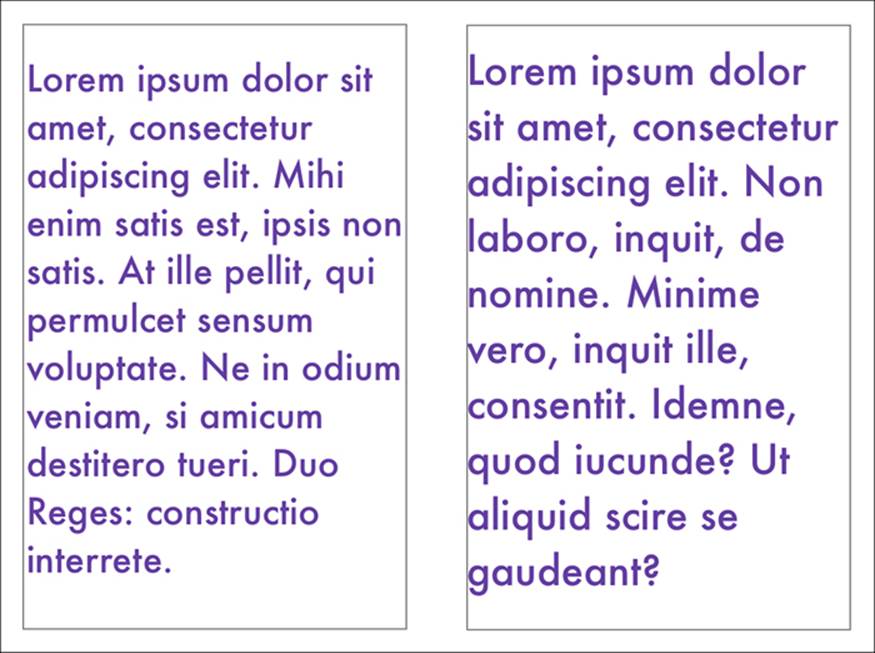
Figure 8-30 Font fitting.
Listing 8-4 details the algorithm I used to create the output in Figure 8-30. It’s not a precise system because I’ve added a bit of flexibility through the tolerance parameter. Because of that, this implementation can sometimes slightly overshoot the destination. For that reason, consider calling this function with a slightly smaller destination than you actually intend to use.
This function iteratively selects a font. It tests its output size, and when the aspect of the output approaches the aspect of the destination rectangle, the algorithm stops and returns the most recently successful font.
As with all the other material in this chapter, Listing 8-4 has been updated to use iOS 7 calls. The new method that retrieves a bounding box for text cannot be deployed to pre-iOS 7 systems.
Listing 8-4 Choosing a Fitting Font
UIFont *FontForWrappedString(
NSString *string, NSString *fontFace,
CGRect rect, CGFloat tolerance)
{
if (rect.size.height < 1.0f) return nil;
CGFloat adjustedWidth = tolerance * rect.size.width;
CGSize measureSize =
CGSizeMake(adjustedWidth, CGFLOAT_MAX);
// Initialize the proposed font
CGFloat fontSize = 1;
UIFont *proposedFont =
[UIFont fontWithName:fontFace size:fontSize];
NSMutableParagraphStyle *paragraphStyle =
[[NSMutableParagraphStyle alloc] init];
paragraphStyle.lineBreakMode = NSLineBreakByWordWrapping;
NSMutableDictionary *attributes =
[NSMutableDictionary dictionary];
attributes[NSParagraphStyleAttributeName] = paragraphStyle;
attributes[NSFontAttributeName] = proposedFont;
// Measure the target
CGSize targetSize =
[string boundingRectWithSize:measureSize
options:NSStringDrawingUsesLineFragmentOrigin
attributes:attributes context:nil].size;
// Double until the size is exceeded
while (targetSize.height <= rect.size.height)
{
// Establish a new proposed font
fontSize *= 2;
proposedFont =
[UIFont fontWithName:fontFace size:fontSize];
// Measure the target
attributes[NSFontAttributeName] = proposedFont;
targetSize =
[string boundingRectWithSize:measureSize
options:NSStringDrawingUsesLineFragmentOrigin
attributes:attributes context:nil].size;
// Break when the calculated height is too much
if (targetSize.height > rect.size.height)
break;
}
// Search between the previous and current font sizes
CGFloat minFontSize = fontSize / 2;
CGFloat maxFontSize = fontSize;
while (1)
{
// Get the midpoint between the two
CGFloat midPoint = (minFontSize +
(maxFontSize - minFontSize) / 2);
proposedFont =
[UIFont fontWithName:fontFace size:midPoint];
attributes[NSFontAttributeName] = proposedFont;
targetSize =
[string boundingRectWithSize:measureSize
options:NSStringDrawingUsesLineFragmentOrigin
attributes:attributes context:nil].size;
// Look up one font size
UIFont *nextFont =
[UIFont fontWithName:fontFace size:midPoint + 1];
attributes[NSFontAttributeName] = nextFont;
CGSize nextTargetSize =
[string boundingRectWithSize:measureSize
options:NSStringDrawingUsesLineFragmentOrigin
attributes:attributes context:nil].size;;
// Test both fonts
CGFloat tooBig = targetSize.height > rect.size.height;
CGFloat nextIsTooBig =
nextTargetSize.height > rect.size.height;
// If the current is sized right
// but the next is too big, it's a win
if (!tooBig && nextIsTooBig)
return [UIFont fontWithName:fontFace size:midPoint];
// Adjust the search space
if (tooBig)
maxFontSize = midPoint;
else
minFontSize = midPoint;
}
// Should never get here
return [UIFont fontWithName:fontFace size:fontSize / 2];
}
Summary
This chapter explores challenges you encounter when drawing text in iOS. You read about attributed strings and their features, as well as how to draw strings into paths using Core Text. Here are a few final thoughts about this topic:
![]() This is not the original chapter I wrote for this book. After iOS 7 debuted, my editorial team and I made the judgment call that updated material would be far more valuable to you as a reader. For that reason, I revised all the material to exclude deprecated calls such assizeWithFont: and drawInRect:withFont:. This means that the vast majority of this chapter will not run directly on iOS 6 and earlier installs without retrofitting. The road back to iOS 6 or earlier isn’t hard for many of these algorithms. Let Xcode be your guide in returning from “with attribute” calls to “with font” calls and so forth.
This is not the original chapter I wrote for this book. After iOS 7 debuted, my editorial team and I made the judgment call that updated material would be far more valuable to you as a reader. For that reason, I revised all the material to exclude deprecated calls such assizeWithFont: and drawInRect:withFont:. This means that the vast majority of this chapter will not run directly on iOS 6 and earlier installs without retrofitting. The road back to iOS 6 or earlier isn’t hard for many of these algorithms. Let Xcode be your guide in returning from “with attribute” calls to “with font” calls and so forth.
![]() I developed the ancestors of the fitting algorithm you see in Listing 8-4 long before I came up with the string-to-UIBezierPath solutions you saw in Chapter 4. These days, when working with short strings, I’m far more likely to convert the string to a path and fit it to a rectangle. For long strings with wrapping, however, Listing 8-4 remains my go-to.
I developed the ancestors of the fitting algorithm you see in Listing 8-4 long before I came up with the string-to-UIBezierPath solutions you saw in Chapter 4. These days, when working with short strings, I’m far more likely to convert the string to a path and fit it to a rectangle. For long strings with wrapping, however, Listing 8-4 remains my go-to.
![]() Don’t forget the centered string drawing solution introduced in Chapter 2. It provides an easy way to paint a string into the middle of a destination rectangle or onto shapes drawn into that rectangle’s bounds.
Don’t forget the centered string drawing solution introduced in Chapter 2. It provides an easy way to paint a string into the middle of a destination rectangle or onto shapes drawn into that rectangle’s bounds.