MacBook in easy steps: Covers OS X Yosemite (10.10) (2015)
4
Getting Up and Running
This chapter looks at some of the essential features of Yosemite. These include the Dock for organizing and accessing all of the elements of your MacBook and items for arranging folders and files. It also introduces the online sharing service, iCloud, which can be used to back up a variety of content and also share items such as music, books, calendars and apps with up to six other family members.
Introducing the Dock
Setting Dock Preferences
Stacks on the Dock
Dock Menus
Working with Dock Items
Trash
About iCloud
Setting up iCloud
About the iCloud Drive
Continuity
Handoff
About Family Sharing
Using Family Sharing
iCloud Keychain
Using iCloud Keychain
Resuming
Introducing the Dock
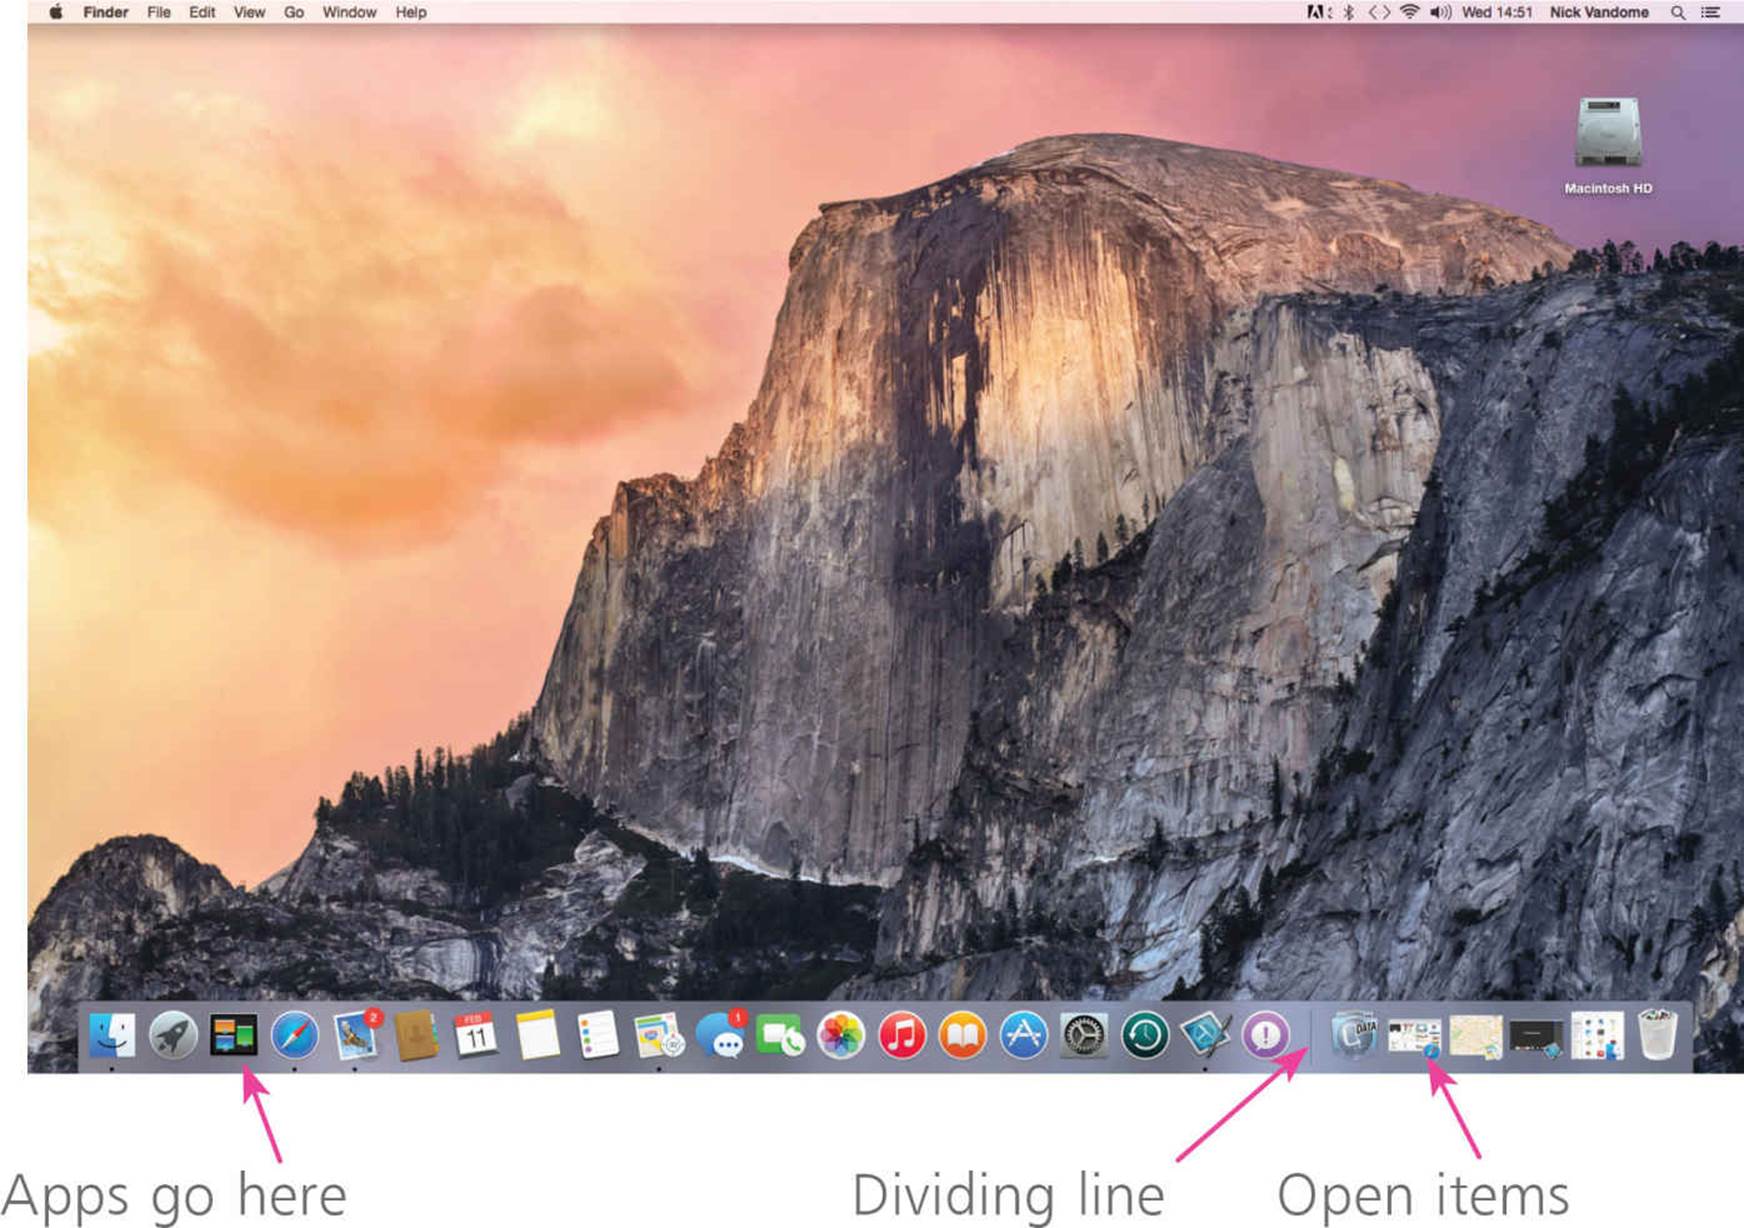
The Dock is one of the main organizational elements of OS X. Its main function is to help organize and access apps, folders and files. In addition, with its rich translucent colors and elegant graphical icons, it also makes an aesthetically pleasing addition to the Desktop. The main things to remember about the Dock are:
•It is divided into two: apps go on the left of the dividing line; all other items go on the right

•It can be customized in a number of ways
By default the Dock appears at the bottom of the screen

The Dock is always displayed as a line of icons, but this can be orientated either vertically or horizontally.

Items on the Dock can be opened by clicking on them once, rather than having to double-click on them. Once they have been accessed the icon bobs up and down until the item is available.
If an app window is closed, the app remains open and the window is placed within the app icon on the Dock. If an item is minimized it goes on the right of the Dock dividing line.
Setting Dock Preferences
As with most elements of OS X, the Dock can be modified in numerous ways. This can affect both the appearance of the Dock and the way it operates. To set Dock preferences:
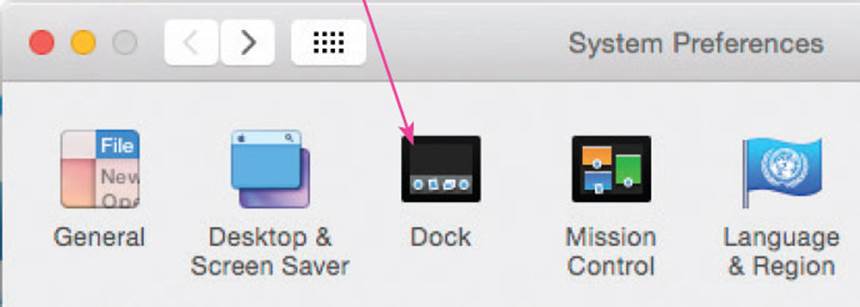
![]() Select Apple menu > System Preferences from the Menu bar
Select Apple menu > System Preferences from the Menu bar
![]() Click on the Dock button
Click on the Dock button

The Apple menu is constantly available in OS X, regardless of the app in which you are working. The menu options are also constant in all apps.
The Dock Preferences allow you to change its size, orientation, the way icons appear and effects for when items are minimized:
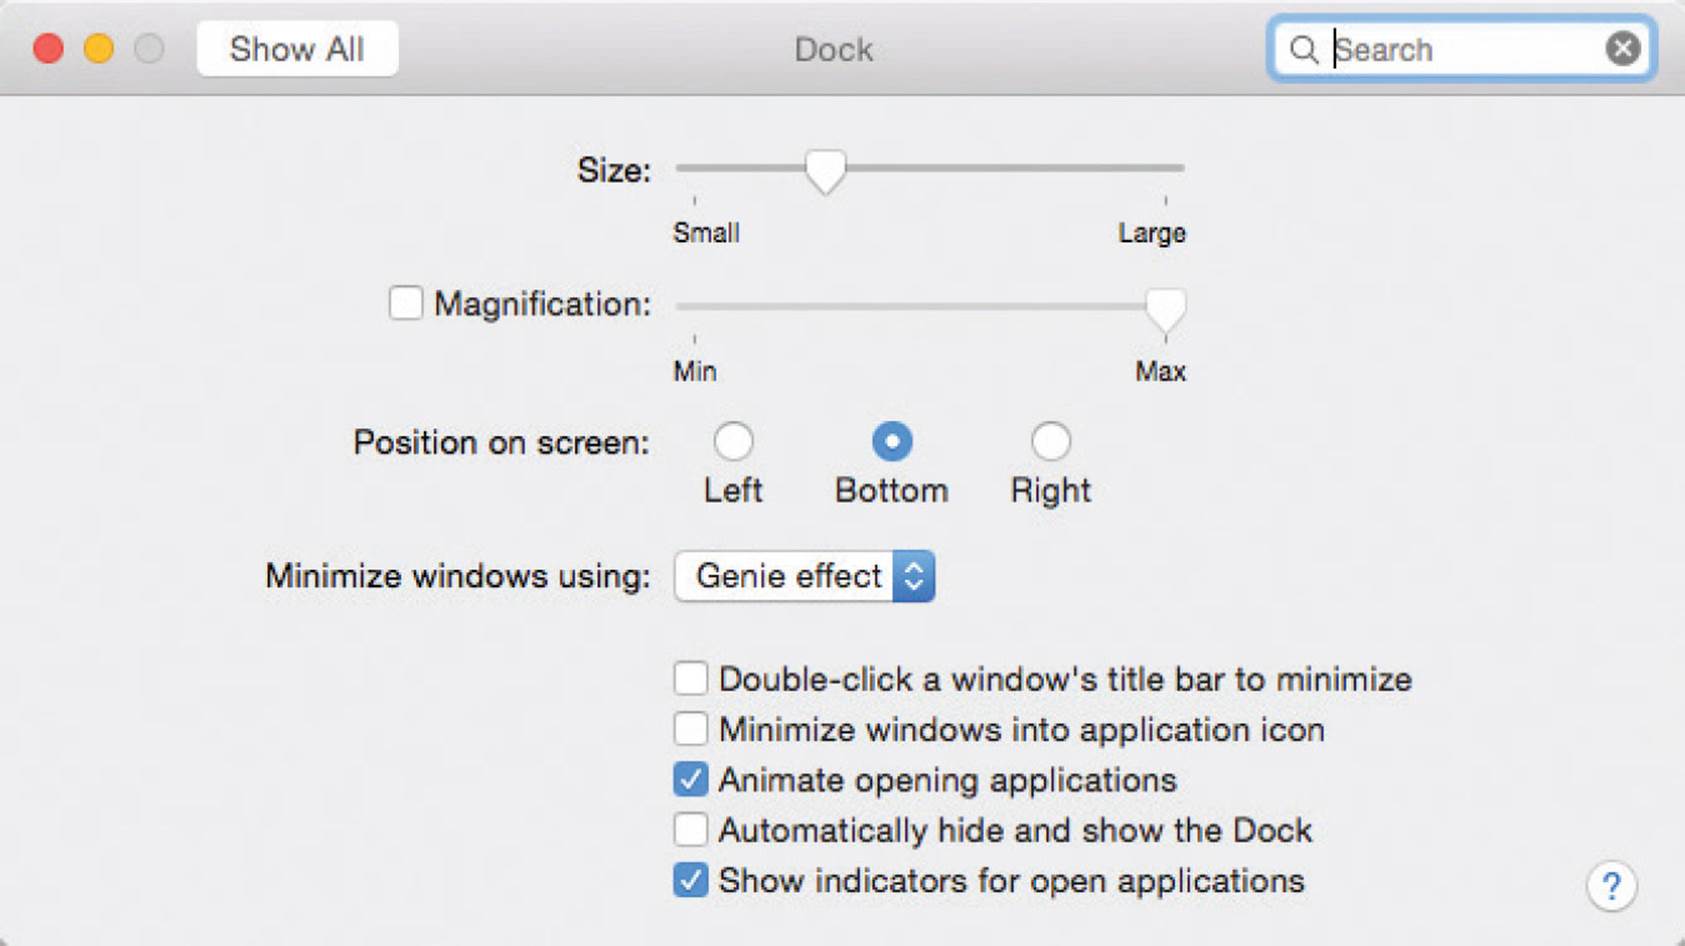

You will not be able to make the Dock size too large so that some of the icons would not be visible on the Desktop. By default, the Dock is resized so that everything is always visible.
The Position on screen options enable you to place the Dock on the left, right or bottom of the screen
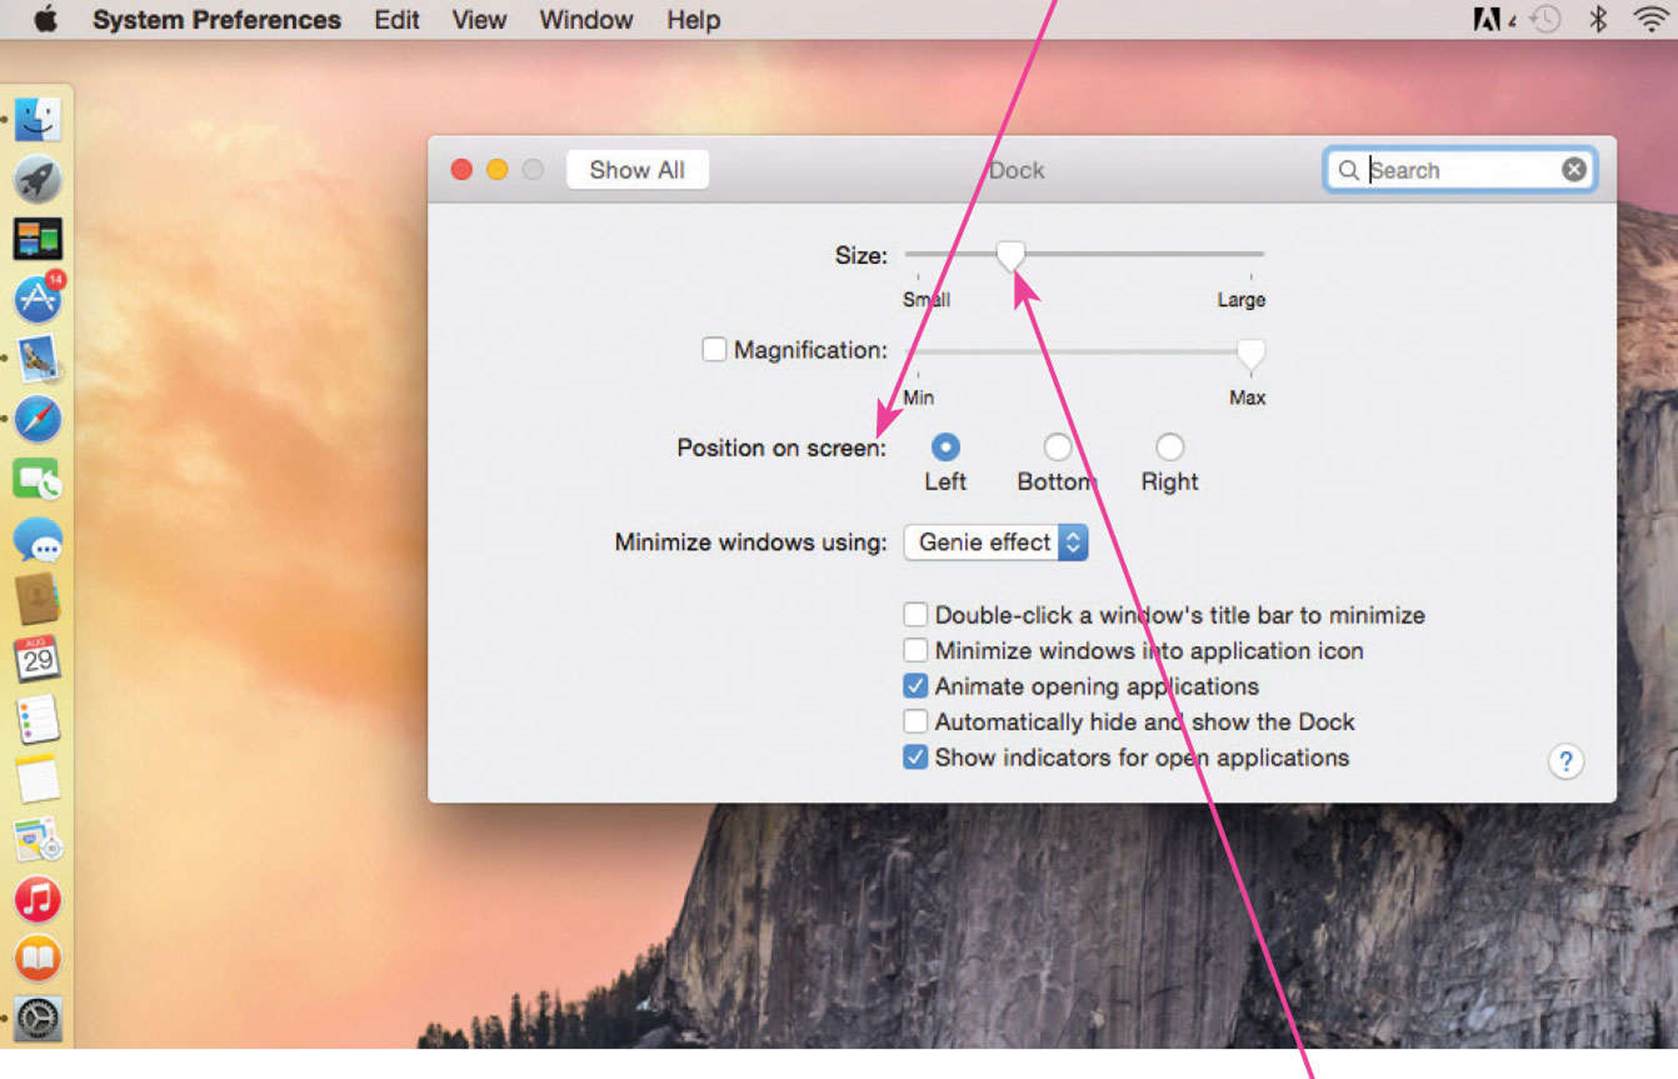
Drag the Dock Size slider to increase or decrease the size of the Dock
The Dock cannot be moved by dragging it physically, this can only be done in the Dock Preferences window.

Check on the Magnification box and drag the slider to determine the size to which icons are enlarged when the cursor is moved over them

When the cursor is moved over an item in the Dock, the name of that item is displayed above it.
The effects that are applied to items when they are minimized is one of the features of OS X (it is not absolutely necessary but it sums up the Apple ethos of trying to enhance the user experience as much as possible).
The Genie effect shrinks the item to be minimized like a genie going back into its lamp
Open windows can also be minimized by double-clicking on their title bar (the thinly lined bar at the top of the window, next to the three window buttons.)
Manual resizing
In addition to changing the size of the Dock by using the Dock Preference dialog box, it can also be resized manually:
Drag vertically on the Dock dividing line to increase or decrease its size

Stacks on the Dock
Stacking items
To save space on the Dock it is possible to add folders to the Dock, from where their contents can be accessed. This is known as Stacks. By default, a stack for downloaded files is created on the Dock. To use Stacks:
![]() Stacked items are placed on the right of the Dock dividing line
Stacked items are placed on the right of the Dock dividing line
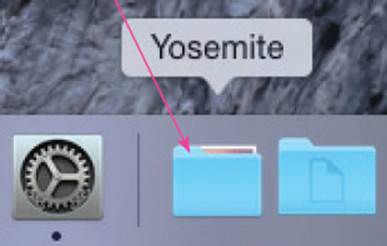
To create a new Stack, drag a folder to the right-hand side of the Dock, i.e. to the right of the dividing line.
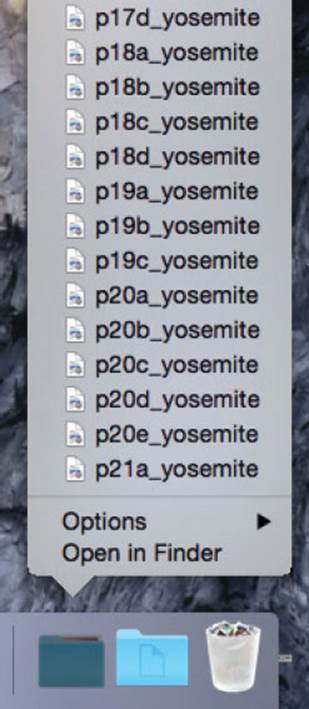
![]() Click on a Stack to view its contents
Click on a Stack to view its contents
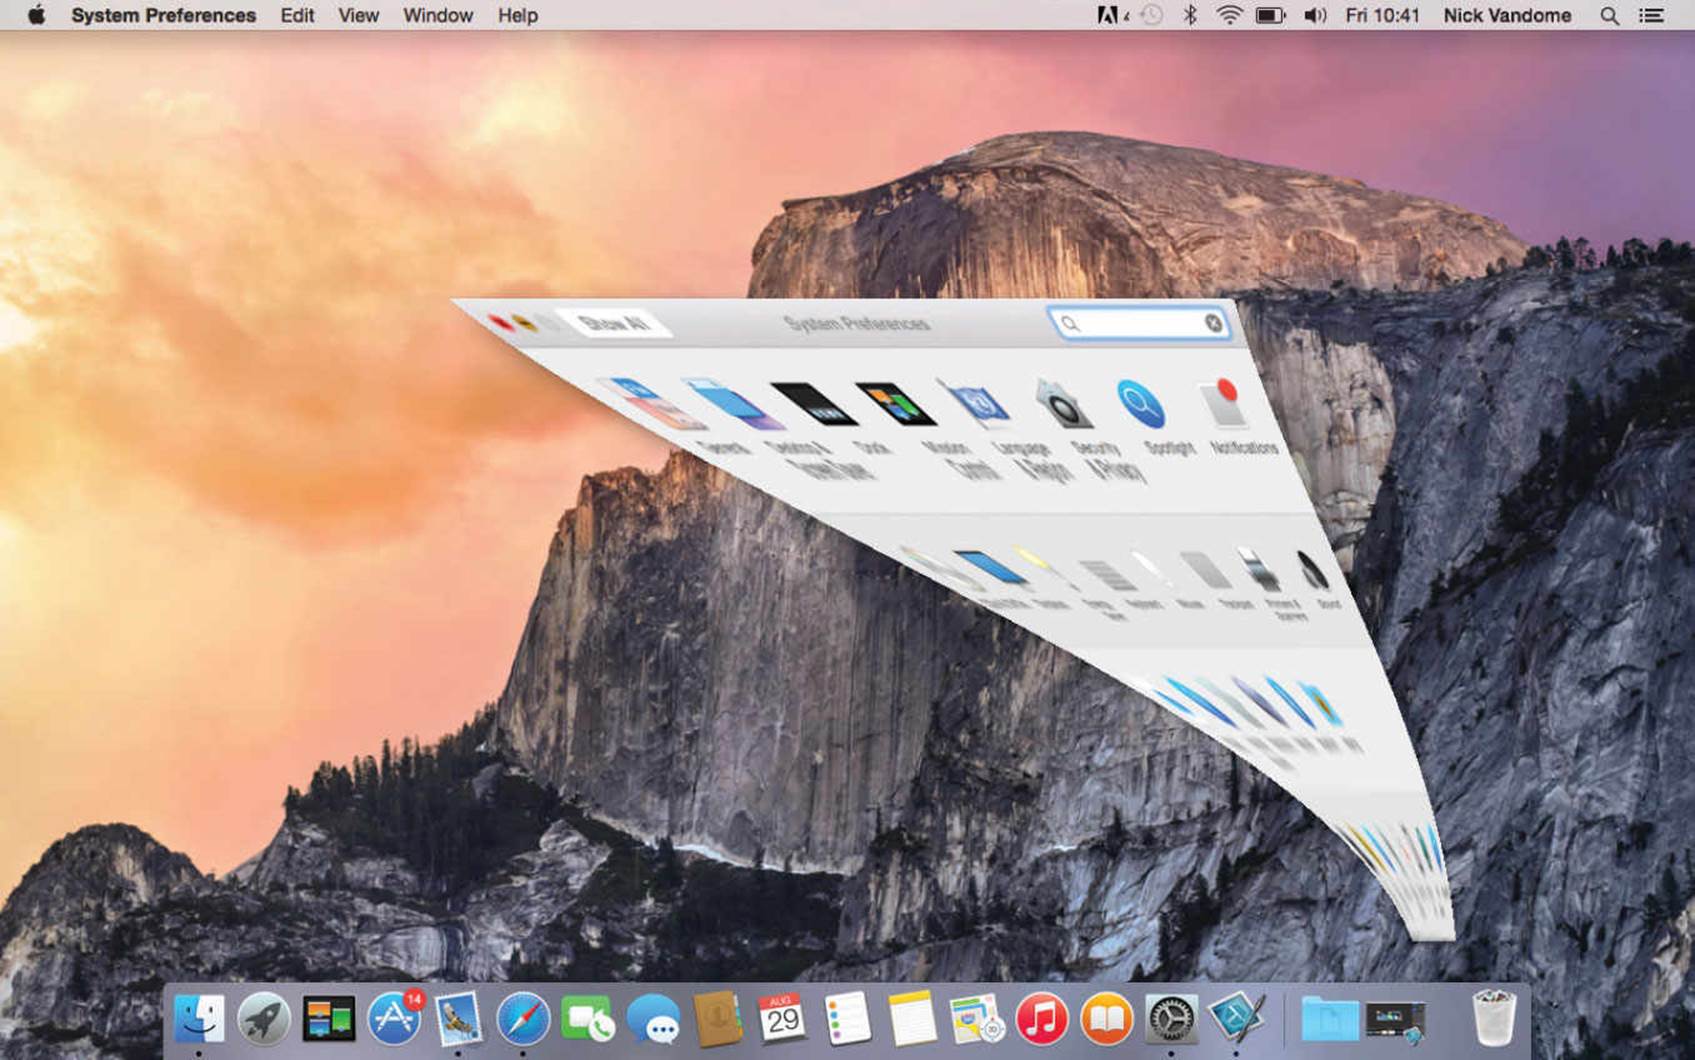
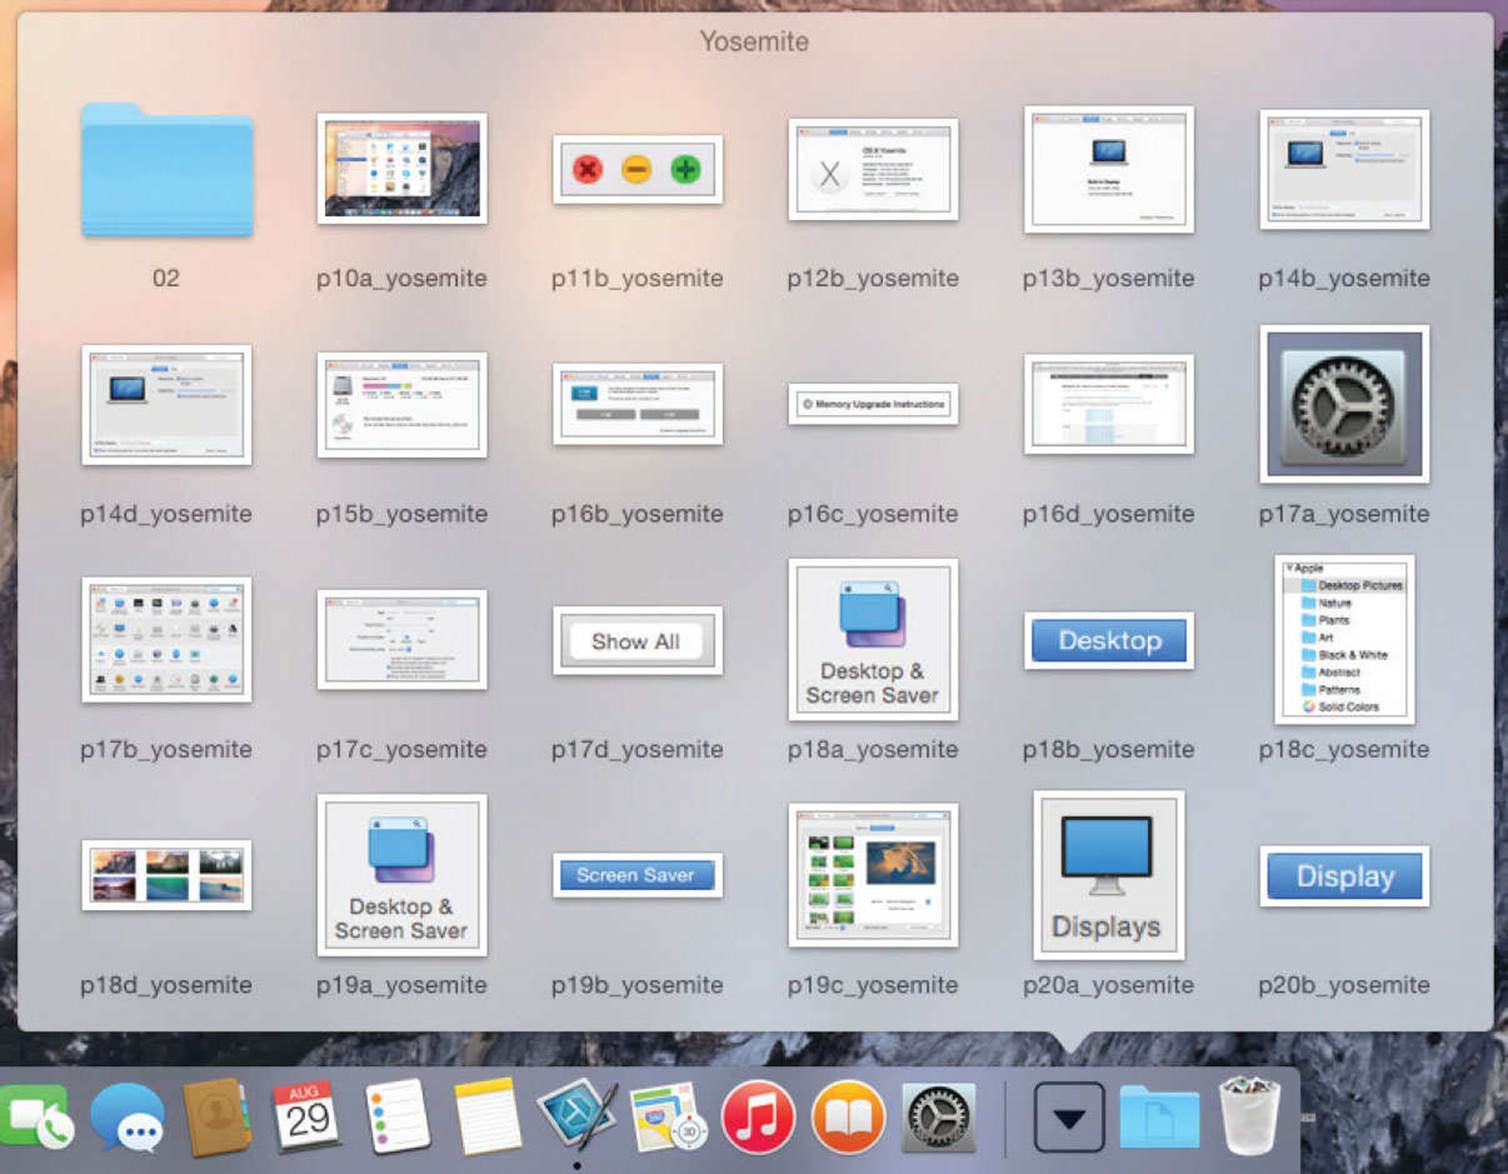
![]() Stacks can be viewed as a grid, or
Stacks can be viewed as a grid, or
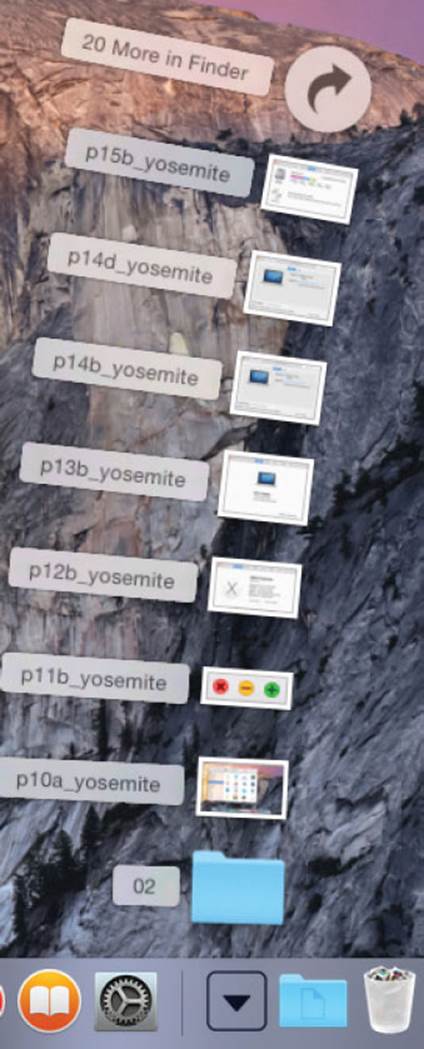
![]() As a fan, depending on the number of items it contains, or
As a fan, depending on the number of items it contains, or
![]() As a list. Click on a folder to view its contents within a Stack. Click on files to open them in their relevant app
As a list. Click on a folder to view its contents within a Stack. Click on files to open them in their relevant app
![]() To create a new Stack, drag a folder onto the Dock. Any new items that are added to the folder will also be visible through the Stack
To create a new Stack, drag a folder onto the Dock. Any new items that are added to the folder will also be visible through the Stack
Move the cursor over a Stack and press Ctrl+click to access options for how that Stack is displayed.
Dock Menus
One of the features of the Dock is that it can display contextual menus for selected items. This means that it shows menus with options that are applicable to the item that is being accessed. This can only be done when an item has been opened.
![]() Click and hold on the black button below an app’s icon to display an item’s individual menu
Click and hold on the black button below an app’s icon to display an item’s individual menu
![]() Click on Show in Finder to see where the item is located on your computer
Click on Show in Finder to see where the item is located on your computer
Click on Quit on the Dock’s contextual menu to close an open app or file, depending on which side of the dividing bar the item is located.
Working with Dock Items
Adding items
As many items as you like can be added to the Dock; the only restriction is the size of monitor in which to display all of the Dock items (the size of the Dock can be reduced to accommodate more icons but you have to be careful that all of the icons are still legible). To add items to the Dock:
Locate the required item and drag it onto the Dock. All of the other icons move along to make space for the new one

Icons on the Dock are shortcuts to the related item, rather than the item itself, which remains in its original location.
Keep in Dock
Every time you open a new app, its icon will appear in the Dock for the duration that the program is open, even if it has not previously been put in the Dock. If you then decide that you would like to keep it in the Dock, you can do so as follows:
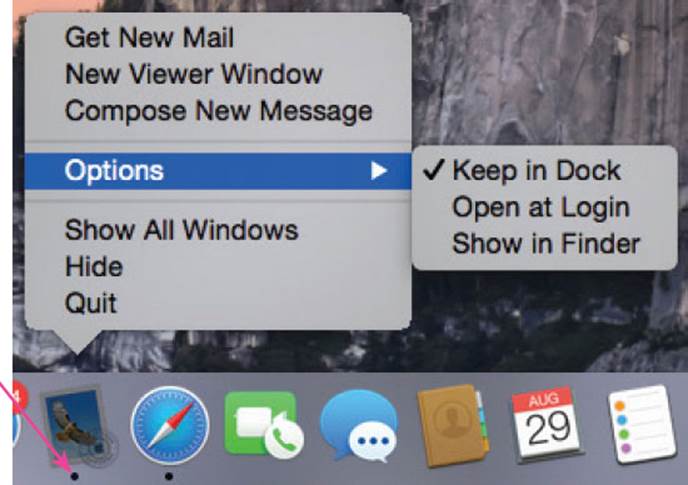
![]() Click and hold on the button below an open app
Click and hold on the button below an open app
![]() Click on Keep in Dock to ensure the app remains in the Dock when it is closed
Click on Keep in Dock to ensure the app remains in the Dock when it is closed
You can add as many items as you like to the Dock, but it will automatically shrink to display all of its items if it becomes too big for the available space.
Removing items
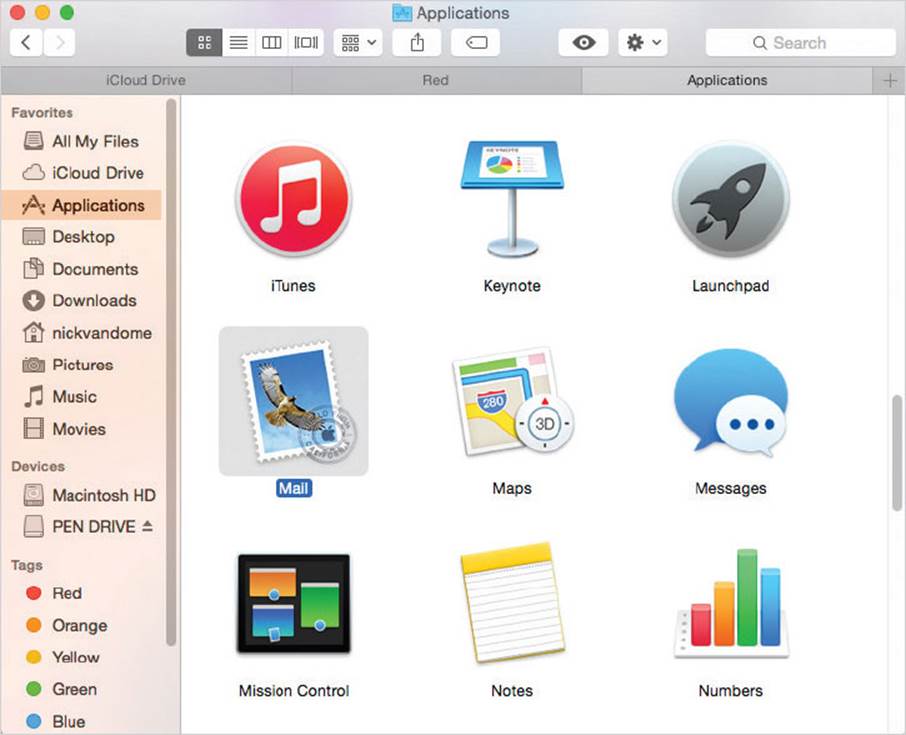
Any item, except the Finder, can be removed from the Dock. However, this does not remove it from your computer, it just removes the shortcut for accessing it. You will still be able to locate it in its folder on your hard drive and, if required, drag it back onto the Dock. To remove items from the Dock:
![]() Drag it away from the Dock and release. The Remove box appears when the app can be removed from the Dock. Release the cursor. All of the other icons then move up to fill in the space on the Dock
Drag it away from the Dock and release. The Remove box appears when the app can be removed from the Dock. Release the cursor. All of the other icons then move up to fill in the space on the Dock

Removing open apps
You can remove an app from the Dock, even if it is open and running. To do this:
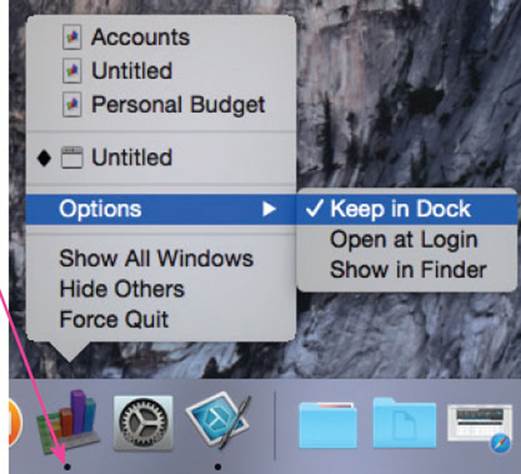
![]() Drag an app off the Dock while it is running. Initially, the icon will remain on the Dock because the app is still open
Drag an app off the Dock while it is running. Initially, the icon will remain on the Dock because the app is still open

![]() When the app is closed its icon will be removed from the Dock (unless Keep in Dock has been selected from the item’s Dock menu)
When the app is closed its icon will be removed from the Dock (unless Keep in Dock has been selected from the item’s Dock menu)

Trash
The Trash folder is a location for placing items that you do not want to use anymore. However, when items are placed in the Trash, they are not removed from your computer. This requires another command, as the Trash is really a holding area before you decide you want to remove items permanently. The Trash can also be used for ejecting removable disks attached to your MacBook.
Items can also be sent to the Trash by selecting them and then selecting File > Move to Trash from the Menu bar.
Sending items to the Trash
Items can be sent to the Trash by dragging them from the location in which they are stored:
![]() Drag an item over the Trash icon to place it in the Trash folder
Drag an item over the Trash icon to place it in the Trash folder
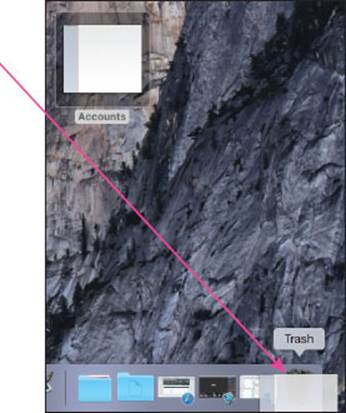
![]() Click once on the Trash icon on the Dock to view its contents
Click once on the Trash icon on the Dock to view its contents
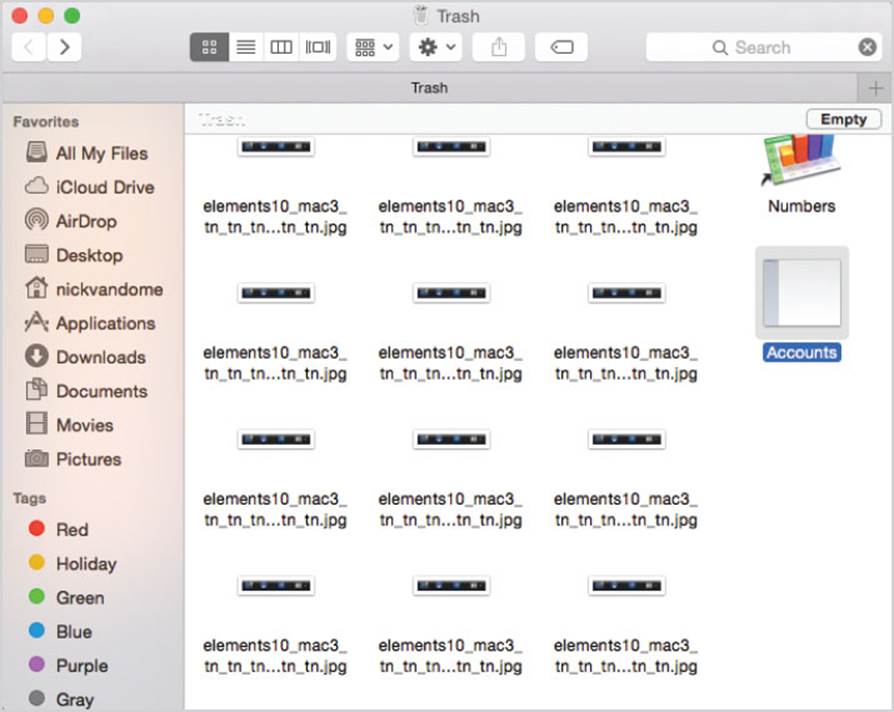
All of the items within the Trash can be removed in a single command: Select Finder > Empty Trash from the Menu bar to remove all of the items in the Trash folder.
About iCloud
Cloud computing is an attractive proposition and one that has gained greatly in popularity in recent years. As a concept, it consists of storing your content on an external computer server. This not only gives you added security in terms of backing up your information, it also means that the content can then be shared over a variety of mobile devices.
iCloud is Apple’s consumer cloud computing product that consists of online services such as email, a calendar, contacts and saving documents. iCloud provides users with a way to save their files and content to the online service and then use them across their Apple devices such as other Mac computers, iPhones, iPads and iPod Touches.
The standard iCloud service is free and this includes an iCloud email address and 5GB of online storage (at the time of printing).
About iCloud
iCloud can be set up from this icon with System Preferences:

You can use iCloud to save and share the following:
•Music
•Photos
•Documents
•Apps
•Books
•Backups
•Contacts and calendars
When you save an item to the iCloud it automatically pushes it to all of your other compatible devices; you do not have to manually sync anything, iCloud does it all for you.
There is also a version of iCloud for Windows.
Setting up iCloud
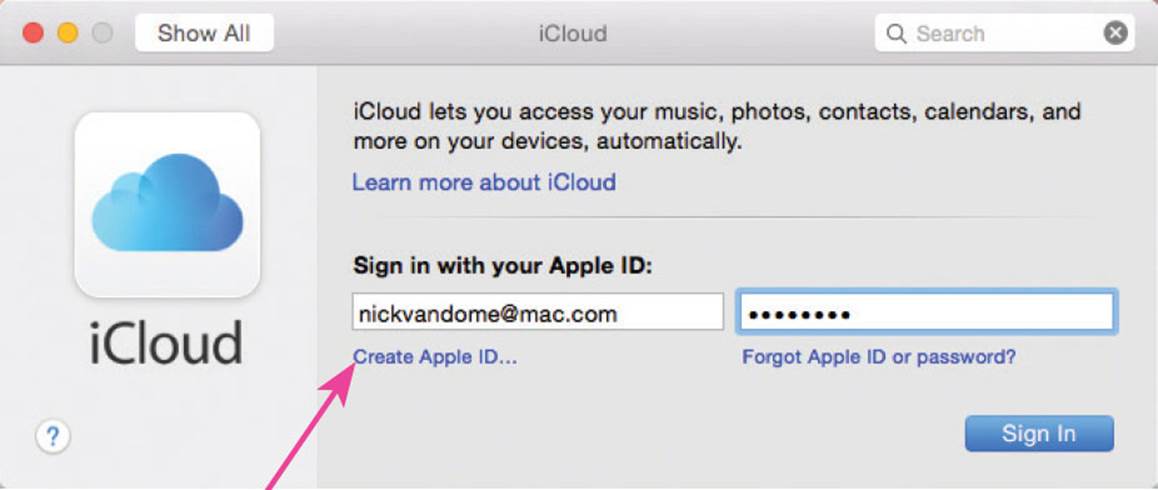
To use iCloud with Yosemite you need to first have an Apple ID. This is a service you can register for to be able to access a range of Apple facilities, including iCloud. You can register with an email address and a password. When you first start using iCloud you will be prompted for your Apple ID details. If you do not have an Apple ID you can apply for one at this point:
![]() Sign in with your Apple ID, or
Sign in with your Apple ID, or
![]() Click on the Create an Apple ID… button
Click on the Create an Apple ID… button
![]()
Setting up iCloud
To use iCloud
![]() Open System Preferences and click on the iCloud button
Open System Preferences and click on the iCloud button

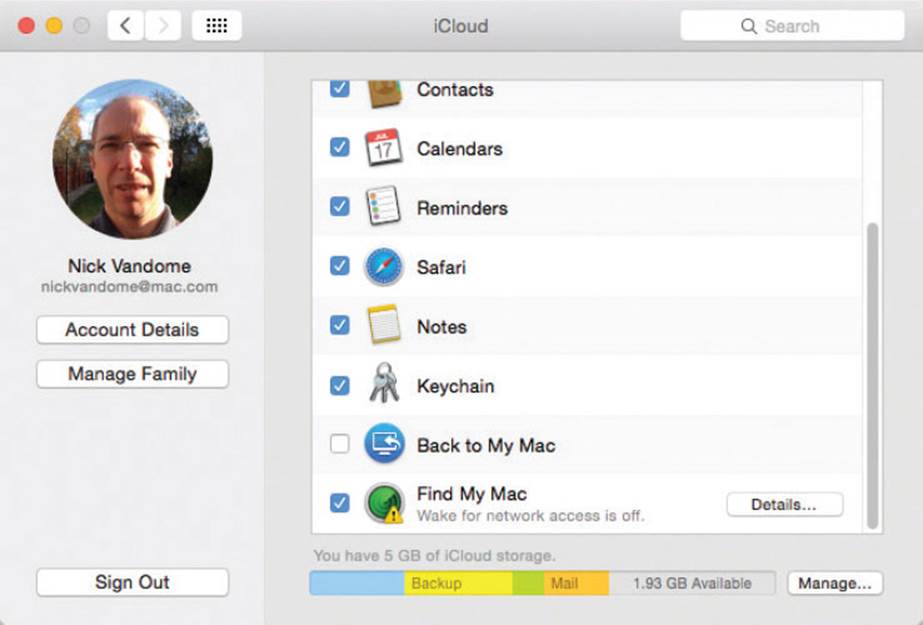
![]() Check on the items you want included within iCloud. All of these items will be backed up and shared across all of your Apple devices
Check on the items you want included within iCloud. All of these items will be backed up and shared across all of your Apple devices
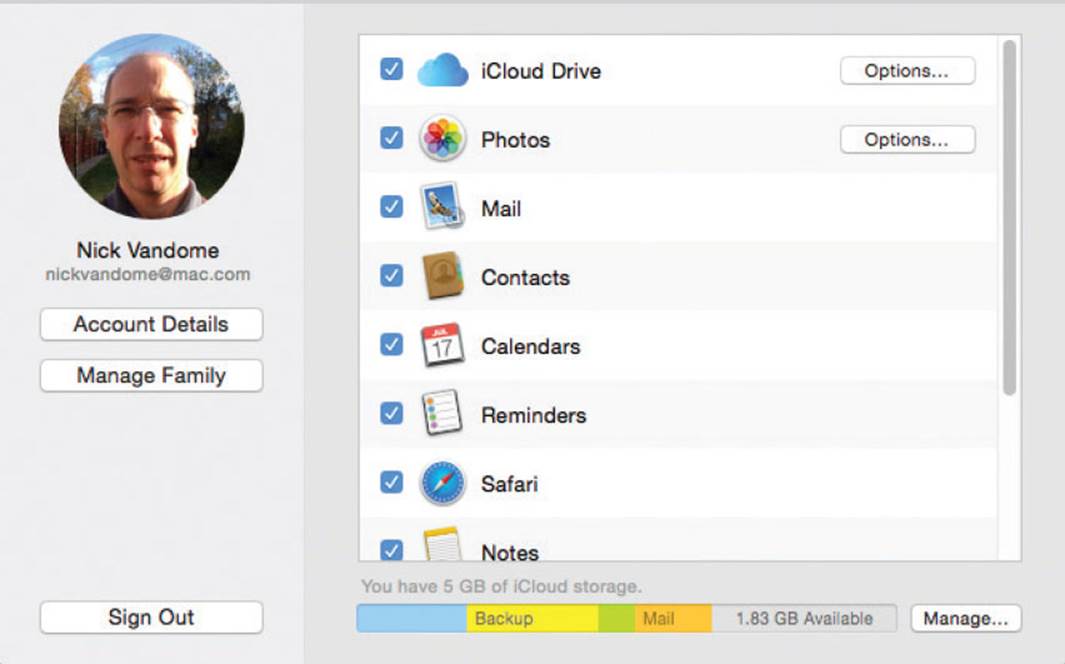
Music and photos are not included in your 5GB storage limit on iCloud. This only includes emails, documents, account information, Camera Roll (for saved or edited photos) and account settings.
About the iCloud Drive

One of the options in the iCloud section is for the Cloud Drive. This can be used to store documents and other content so that you can use them on any other Apple devices that you have, such as an iPhone or an iPad. With iCloud Drive you can start work on a document on one device and continue on another device from where you left off. To setup the iCloud Drive:
![]() Click on the iCloud button in System Preferences
Click on the iCloud button in System Preferences

![]() Check On the iCloud Drive option and click on the Options button
Check On the iCloud Drive option and click on the Options button
![]()
![]() Select the apps that you want to use with the iCloud Drive
Select the apps that you want to use with the iCloud Drive
![]() Click on the Done button
Click on the Done button
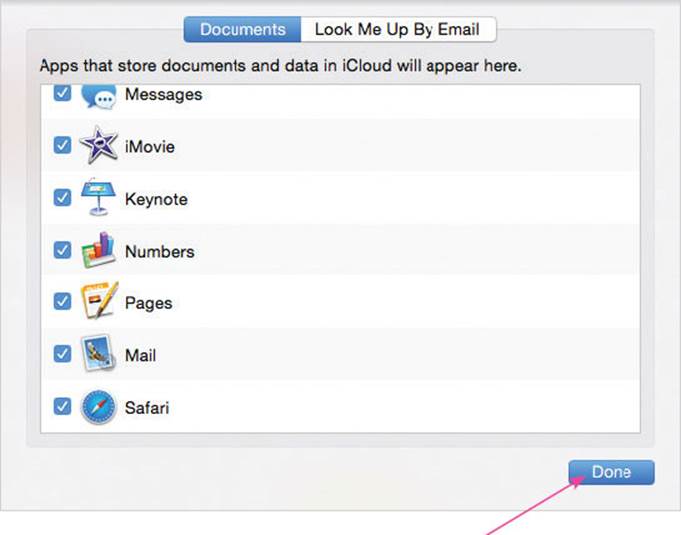
Pages is the Apple app for word processing, Numbers for spreadsheets and Keynote for presentations.
Using the iCloud Drive
To work with files in the iCloud Drive:
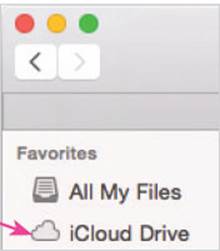
![]() In the Finder Sidebar click on the iCloud Drive button
In the Finder Sidebar click on the iCloud Drive button
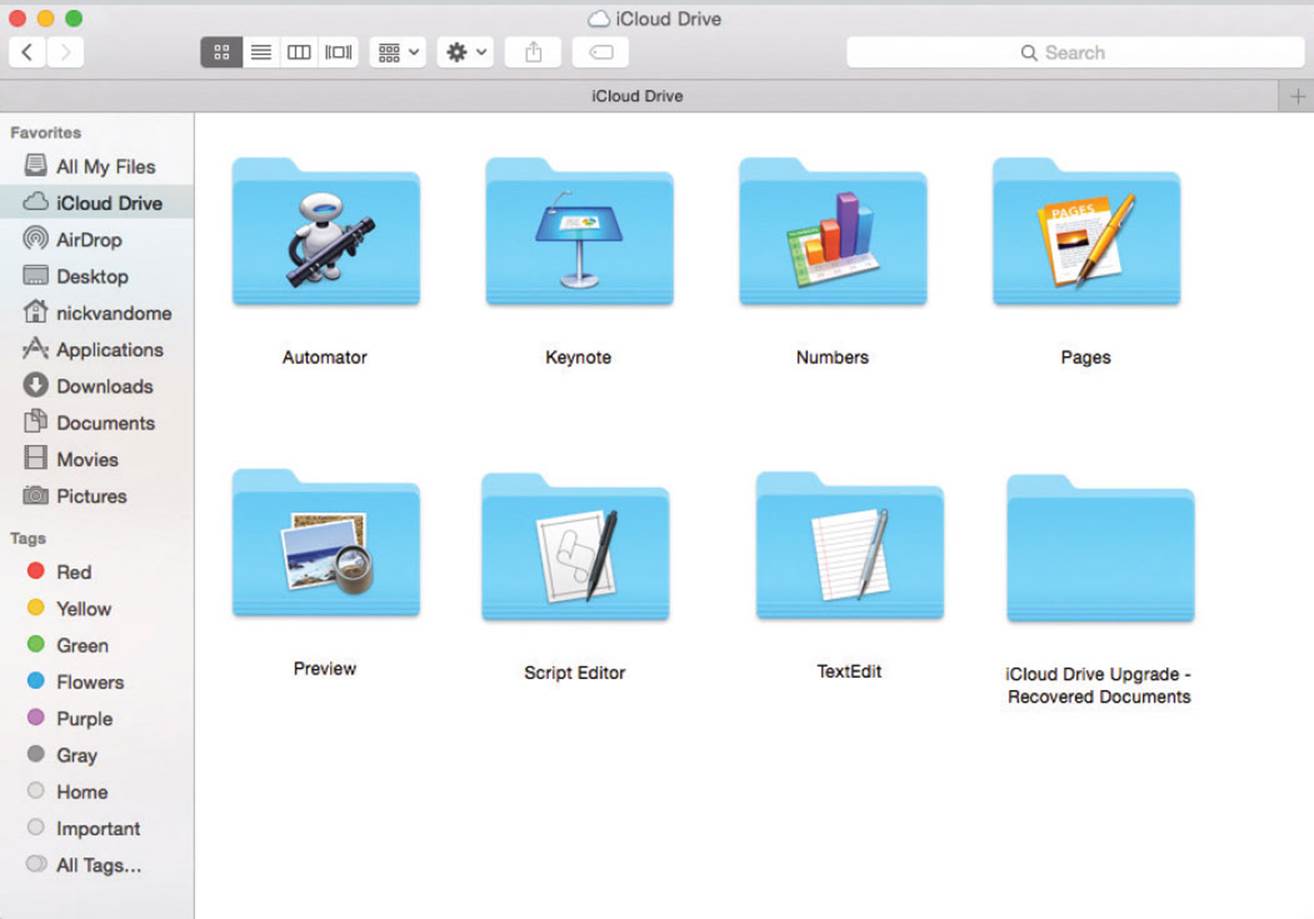
![]() Certain iCloud Drive folders are already created, based on the apps that you have selected on the previous page. These are the default folders into which content from their respective apps will be placed (although others can also be selected, if required). Double-click on a folder to view its contents
Certain iCloud Drive folders are already created, based on the apps that you have selected on the previous page. These are the default folders into which content from their respective apps will be placed (although others can also be selected, if required). Double-click on a folder to view its contents
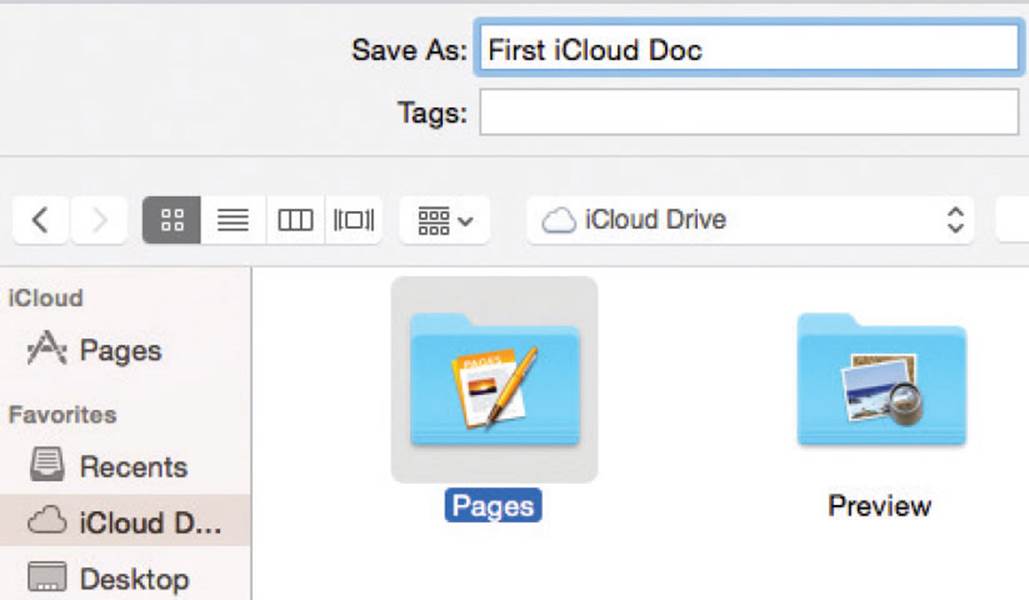
![]() To save files into an iCloud Drive folder, select File > Save As from the Menu bar, click on the iCloud Drive button in the Finder Sidebar and navigate to the required folder for the file
To save files into an iCloud Drive folder, select File > Save As from the Menu bar, click on the iCloud Drive button in the Finder Sidebar and navigate to the required folder for the file
Another useful iCloud function is the iCloud Keychain (see here for details).
Continuity
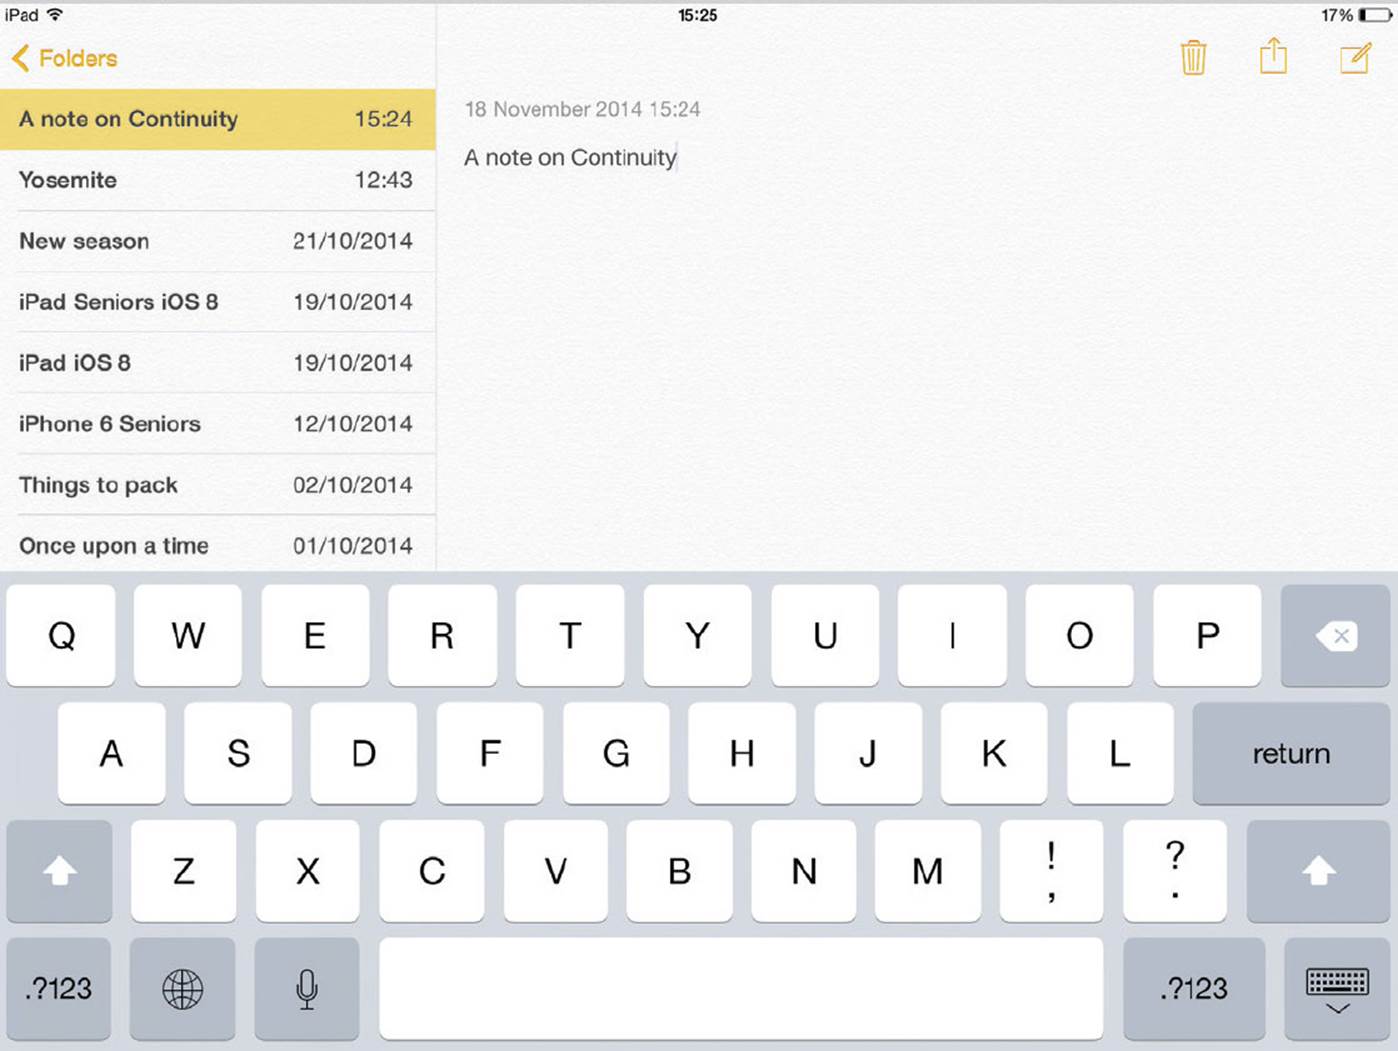
One of the main themes of OS X Yosemite, and iOS 8 for mobile devices, is to make all of your content available on all of your Apple devices. This is known as Continuity: when you create something on one device you can then pick it up and finish it on another device. This is done through iCloud. To do this:
![]() Ensure the app has iCloud activated, as here
Ensure the app has iCloud activated, as here
![]() Create the content on the app on your MacBook
Create the content on the app on your MacBook

![]() Open the same app on another Apple device, e.g. an iPad. The item created on your MacBook should be available to view and edit. Any changes will then show up on the file on your MacBook too
Open the same app on another Apple device, e.g. an iPad. The item created on your MacBook should be available to view and edit. Any changes will then show up on the file on your MacBook too
It is also possible to continue an email with the continuity feature. First create it on your Mac and then close it. You will be prompted to save the email as a draft and, if you do this, you will be able to open it from the Drafts mailbox on another Apple device.
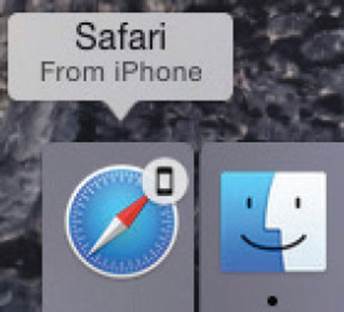
Handoff
Handoff is one of the key features of Continuity and it displays icons of items that you have opened on another device, such as Safari web pages. Handoff does not work with all devices and it only works if both devices have OS X Yosemite and iOS 8, for mobile devices.
Handoff has had some teething problems and it sometimes takes a bit of trial and error to make it work properly. To use Handoff you will need to do the following:
•Your Mac must be running OS X Yosemite and your mobile device (iPhone 5 and later, iPad 4th generation and later, all models of iPad mini and the 5th generation iPod Touch) must have iOS 8.
•Your Mac has to support Bluetooth 4.0, which means that most pre-2012 Macs are not compatible with Handoff.
•To check if your Mac supports Handoff, select Apple Menu > About This Mac > System Report. Click on Bluetooth to see if Handoff is supported.

•Turn on Bluetooth on your Mac (System Preferences) and on your mobile device (Settings).
•Turn on Handoff on your Mac (System Preferences > General and check on Allow Handoff Between this Mac and your iCloud Devices) and on your mobile device (Settings > General > Handoff & Suggested Apps).
•When Handoff is activated, compatible apps will be displayed at the left-hand side of the Dock when then have been opened on another device.
The apps that work with Handoff are Mail, Safari, Maps, Messages, Reminders, Calendar, Contacts, Notes, Pages, Numbers and Keynote.
Handoff does not always work perfectly, even between compatible devices. If it is not working, try turning both devices off and on and do the same with Bluetooth. Also, try logging out, and then back in, of your iCloud account on both devices.
About Family Sharing
As everyone gets more and more digital devices it is becoming increasingly important to be able to share content with other people, particularly family members. In OS X Yosemite, and iCloud, the Family Sharing function enables you to share items that you have downloaded from the App Store, such as music and movies, with up to six other family members, as long as they have an Apple Account. Once this has been set up it is also possible to share items such as family calendars, photos and even see where family members’ devices are located. To set up Family Sharing:
![]() Click on the iCloud button in System Preferences
Click on the iCloud button in System Preferences

![]() Click on the Set Up Family Sharing (or the Manage Family button if Family Sharing has already been set up)
Click on the Set Up Family Sharing (or the Manage Family button if Family Sharing has already been set up)

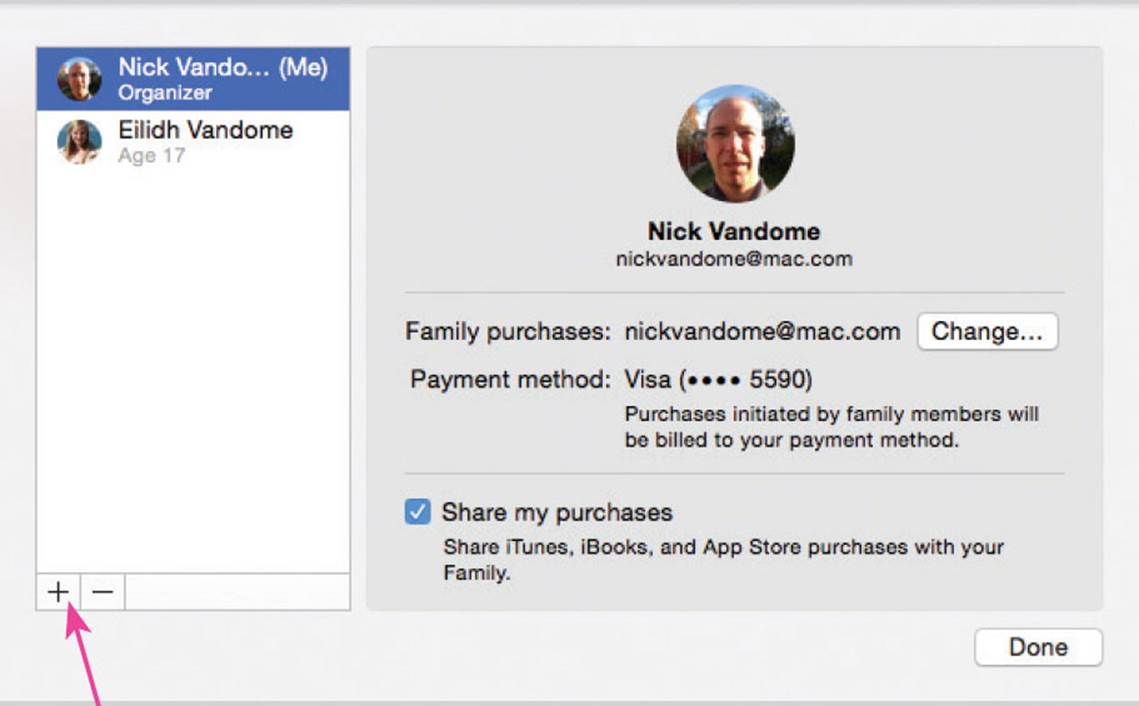
![]() One person will be the organizer of Family Sharing, i.e. in charge of it, and if you set it up then it will be you. Click on the + button to add other family members
One person will be the organizer of Family Sharing, i.e. in charge of it, and if you set it up then it will be you. Click on the + button to add other family members
To use Family Sharing, other family members must have an Apple device using either iOS 8 for a mobile device (iPad, iPhone or iPod Touch) or OS X Yosemite for a desktop or laptop Mac computer.
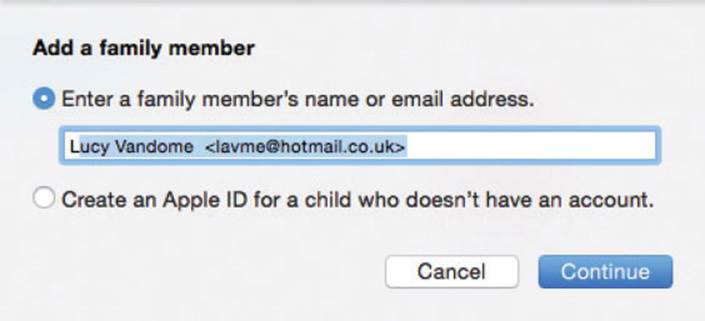
![]() Enter the name or email address of a family member and click on the Continue button
Enter the name or email address of a family member and click on the Continue button
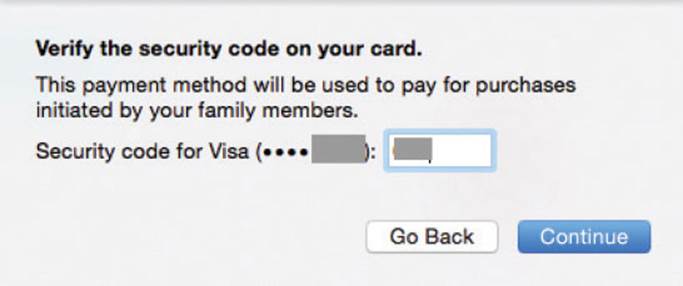
![]() Verify your debit or credit card information for your iCloud account as this will be used by the family member for making purchases. Click on the Continue button
Verify your debit or credit card information for your iCloud account as this will be used by the family member for making purchases. Click on the Continue button
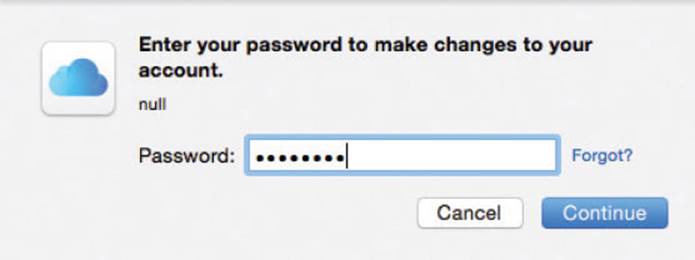
![]() Enter your Apple ID password and click on the Continue button
Enter your Apple ID password and click on the Continue button
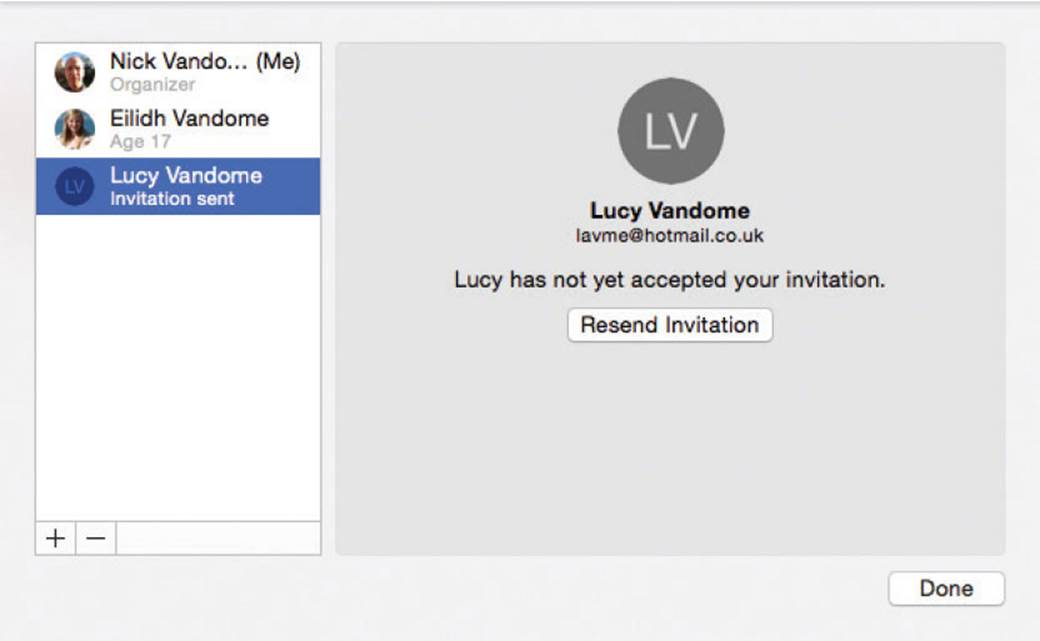
![]() An invitation is sent to the selected person. They have to accept this before they can participate in Family Sharing
An invitation is sent to the selected person. They have to accept this before they can participate in Family Sharing
If children are part of the Family Sharing group you can specify that they need your permission before downloading any items from the iTunes Store, the App Store or the iBooks Store. To do this, click on iCloudin System Preferences and click on the Manage Family button. Select a family member and check On the Ask to Buy button. You will then receive a notification whenever they want to buy something and you can either allow or deny their request.
Using Family Sharing
Once Family Sharing has been set up it can be used by members of the groups to share music, apps, movies and books. There is also a shared Family calendar that can be used and it is also possible to view the location of the devices of the family members.
Sharing music
To share music, and other content from the iTunes Store such as movies and TV shows:
![]() Click on the iTunes app on the Dock
Click on the iTunes app on the Dock

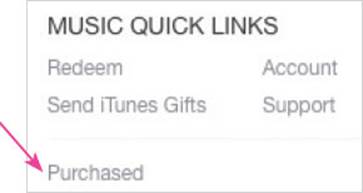
![]() Click on the Purchased link
Click on the Purchased link
![]() By default, your own purchases are displayed. Click on the Purchased button to view other members of Family Sharing
By default, your own purchases are displayed. Click on the Purchased button to view other members of Family Sharing

![]() Click on another family member to view their purchases (they will be able to do this for your purchases too)
Click on another family member to view their purchases (they will be able to do this for your purchases too)

![]() Click on the iCloud button to download the other family member’s music tracks or albums
Click on the iCloud button to download the other family member’s music tracks or albums
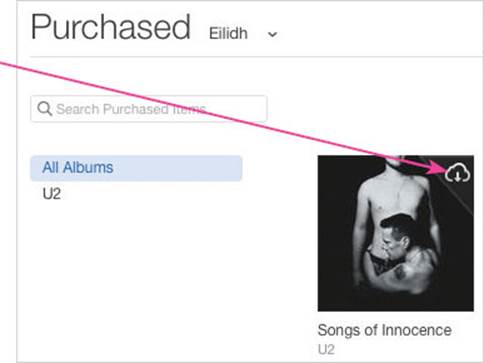
You have to be connected to the Internet and online to access the iTunes Store and view purchases from other family members. When you do this, you can play their songs without having to download them. However, if you want to be able to use them when you are offline then you will have to download them first, as in Step 5.
Sharing apps
Apps can also be shared from the App Store. To do this:
![]() Click on the App Store app on the Dock
Click on the App Store app on the Dock

![]() Click on the Purchases button
Click on the Purchases button

![]() By default, your own purchases are displayed. Click on the My Purchases button to view other members of Family Sharing
By default, your own purchases are displayed. Click on the My Purchases button to view other members of Family Sharing
![]()
![]() Click on another family member to view and download their purchased apps (they will be able to do this for your apps too)
Click on another family member to view and download their purchased apps (they will be able to do this for your apps too)

Sharing books
Books can also be shared in a similar way to items from the iTunes Store and the App Store. To do this:
![]() Click on the iBooks app on the Dock
Click on the iBooks app on the Dock

![]() Click on the iBooks Store button
Click on the iBooks Store button

![]() Click on the Purchased link
Click on the Purchased link

![]() By default, your own purchases are displayed. Click on the Purchased button to view other members of Family Sharing and any books they have downloaded
By default, your own purchases are displayed. Click on the Purchased button to view other members of Family Sharing and any books they have downloaded
More than one family member can use content in the Family Sharing group at the same time.
Sharing calendars
Family Sharing also generates a Family calendar that can be used by all Family Sharing members:
![]() Open the Calendar app
Open the Calendar app

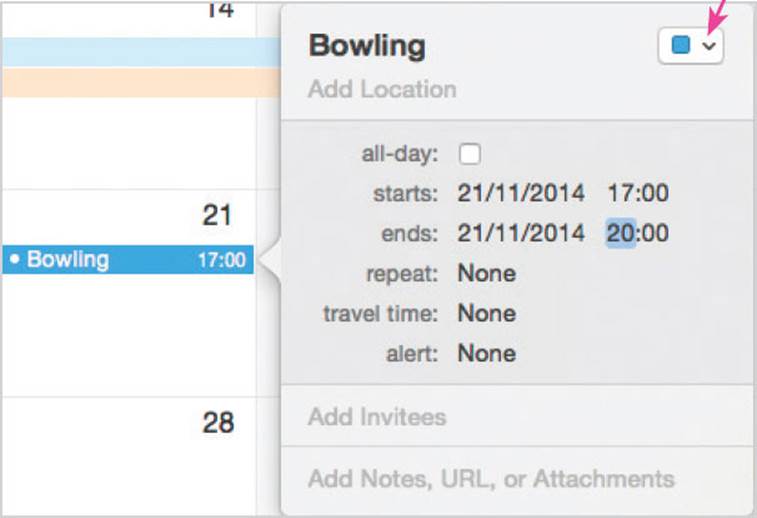
![]() Click and hold on a date to create a New Event. The current calendar (shown in the top right-hand corner) will probably not be the Family one. Click on this button to change the calendar
Click and hold on a date to create a New Event. The current calendar (shown in the top right-hand corner) will probably not be the Family one. Click on this button to change the calendar
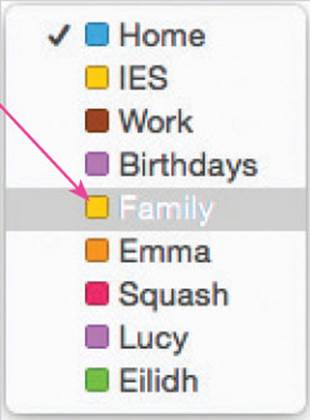
![]() Click on the Family calendar
Click on the Family calendar
![]() Complete the details for the event. It will be added to your calendar, with the Family color tag. Other people in your Family Sharing circle will have this event added to their Family calendar too and they will be sent a notification
Complete the details for the event. It will be added to your calendar, with the Family color tag. Other people in your Family Sharing circle will have this event added to their Family calendar too and they will be sent a notification

Other members of the Family Sharing group can add items to the Family calendar and, when they do, you will be sent a notification that appears on your Mac.
Finding lost family devices
Family Sharing also makes it possible to see where everyone’s devices are, which can be useful for locating people, but particularly if a device belonging to a Family Sharing member is lost or stolen. To do this:
![]() Ensure that the Find My Mac function is turned on in the iCloud System Preferences and log in to your online iCloud account at www.icloud.com
Ensure that the Find My Mac function is turned on in the iCloud System Preferences and log in to your online iCloud account at www.icloud.com
![]() Click on the Find My iPhone button (this works for other Apple devices too)
Click on the Find My iPhone button (this works for other Apple devices too)

![]() Devices that are turned on, online and with iCloud activated are shown by green dots
Devices that are turned on, online and with iCloud activated are shown by green dots

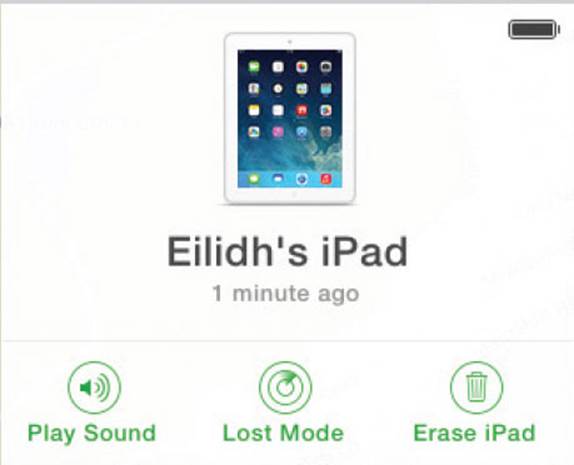
![]() Click on a green dot to display information about the device. Click on the i symbol to access options for managing the device remotely
Click on a green dot to display information about the device. Click on the i symbol to access options for managing the device remotely
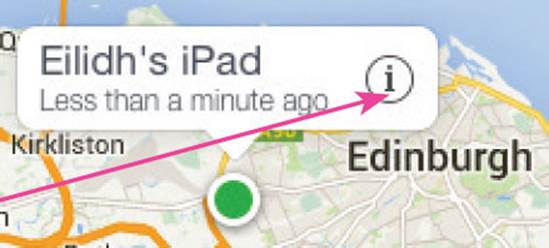
![]() There are options to send an alert sound to the device, lock it remotely or erase its contents (if you are concerned about it having fallen into the wrong hands)
There are options to send an alert sound to the device, lock it remotely or erase its contents (if you are concerned about it having fallen into the wrong hands)
The locations of devices are shown on a map and you can zoom in on the map to see their locations more exactly.
iCloud Keychain
One of the big issues of online activity is remembering passwords on websites and also ensuring that they are as secure as possible. This is made all the more significant if you are using different devices to access websites.
On Mac computers and iOS 8 mobile devices, password management and security is handled through the iCloud Keychain function, using Safari as your web browser. This can be used to save passwords and credit card information when you enter them into websites and also generate new, secure, passwords, if required. This information is stored in the iCloud and so is available on all of the compatible Apple devices on which you are accessing the Web with Safari. To set up iCloud Keychain:
![]() Click on the iCloud button in System Preferences
Click on the iCloud button in System Preferences

![]() In the iCloud window, click on the Keychain checkbox
In the iCloud window, click on the Keychain checkbox
![]() Enter your Apple ID to set up iCloud Keychain. Click on the OK button
Enter your Apple ID to set up iCloud Keychain. Click on the OK button
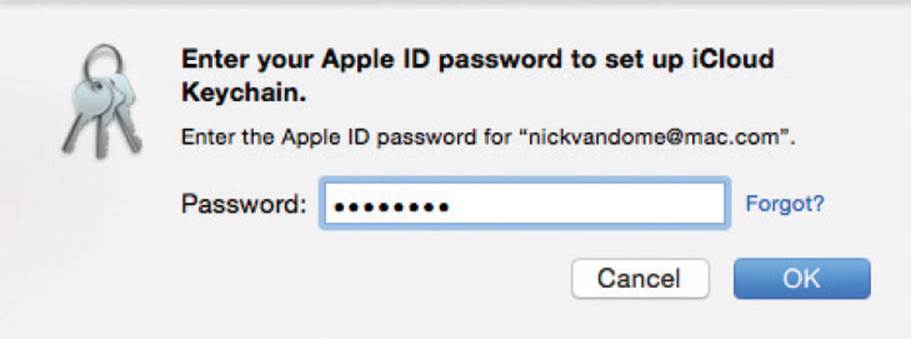

You have to have an Apple ID and have iCloud turned on in order to use the iCloud Keychain functionality.
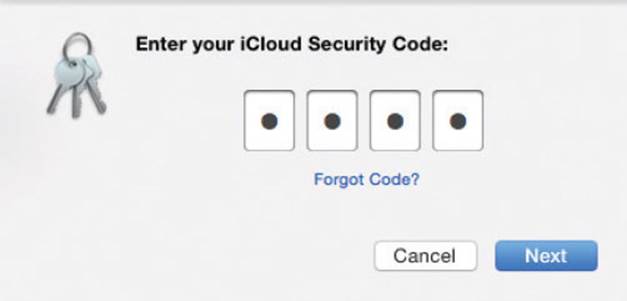
![]() Enter a security code for iCloud Keychain, then Click on the Next button
Enter a security code for iCloud Keychain, then Click on the Next button
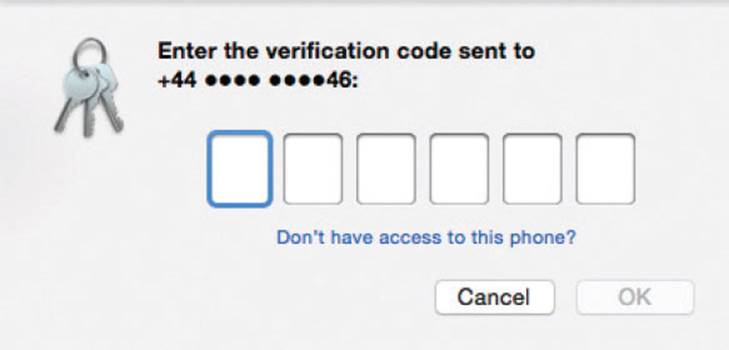
![]() If it is the first time you have set up iCloud Keychain, you will be sent a verification code to the mobile/cell number that you have included in your Apple ID
If it is the first time you have set up iCloud Keychain, you will be sent a verification code to the mobile/cell number that you have included in your Apple ID
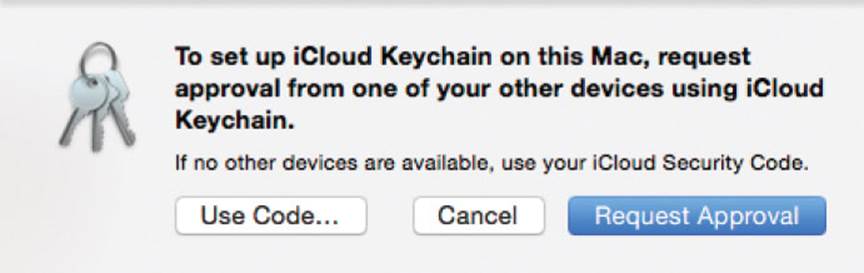
![]() If you have set up iCloud Keychain on another Apple device, you can request approval from that device, which will then provide the Keychain details that it has stored. Click on the Request Approval button
If you have set up iCloud Keychain on another Apple device, you can request approval from that device, which will then provide the Keychain details that it has stored. Click on the Request Approval button
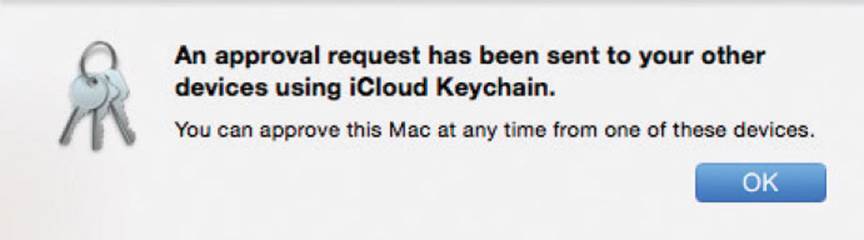
![]() Click on the OK button and confirm the approval on the other device
Click on the OK button and confirm the approval on the other device
When iCloud Keychain is first set up, the iCloud Security Code is created for the first time in Step 4. This can be used subsequently to make any changes to your iCloud Keychain settings.

Make sure that you have the correct mobile/ cell number registered with your Apple ID, so that you can receive the verification code in Step 5, if required.
Using iCloud Keychain
Once iCloud Keychain has been set up, it can be used to remember passwords and credit card information on websites and ensure this information is available across all of your compatible Apple devices. Passwords can also be autofilled so that you do not have to enter them each time. This can be set up within the Preferences of the Safari browser app. To do this:
![]() Open Safari and select Safari > Preferences from the Menu bar
Open Safari and select Safari > Preferences from the Menu bar
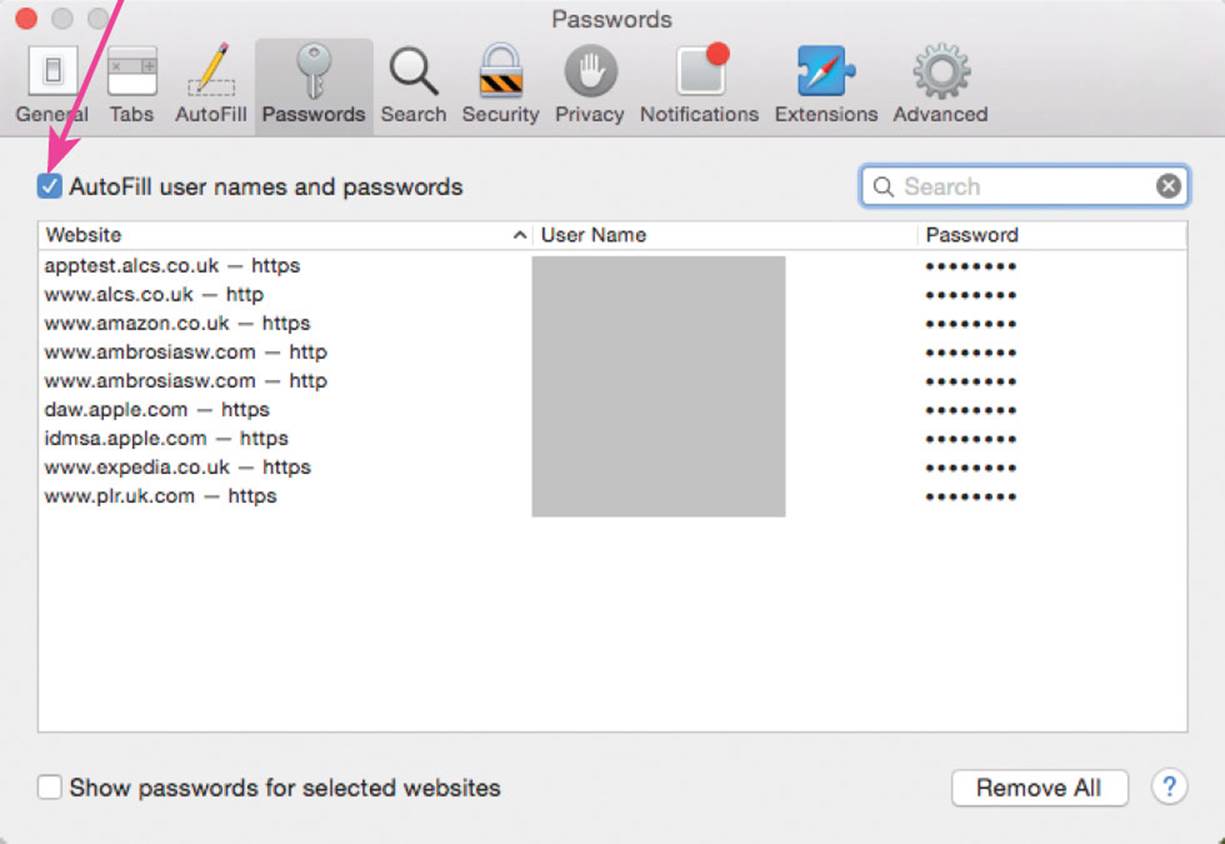
![]() Click on the Passwords tab and check On the AutoFill user names and passwords checkbox
Click on the Passwords tab and check On the AutoFill user names and passwords checkbox
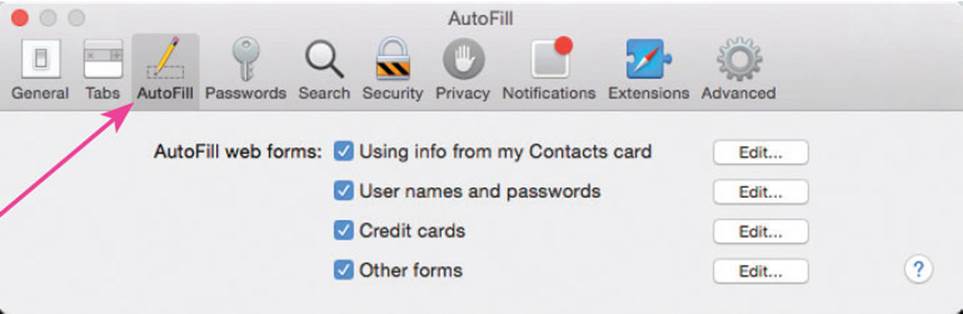
![]() Click on the AutoFill tab and select the items that you want to be included for AutoFill
Click on the AutoFill tab and select the items that you want to be included for AutoFill
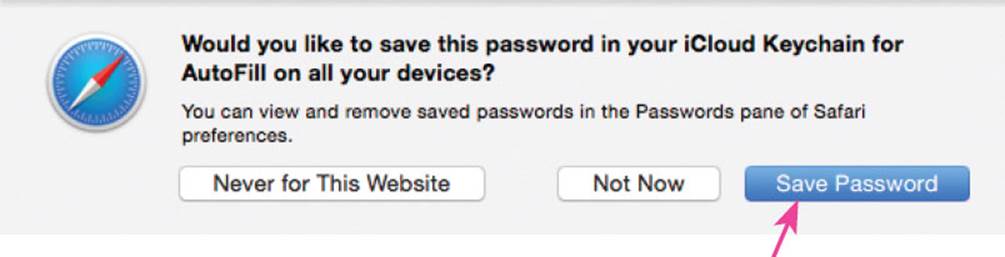
![]() When you first enter an existing password into a website you will be prompted to save it in iCloud Keychain. Click on the Save Password button to do this
When you first enter an existing password into a website you will be prompted to save it in iCloud Keychain. Click on the Save Password button to do this
If AutoFill is turned On, and iCloud Keychain is being used, Safari will remember usernames and passwords and pre-insert them whenever you visit a website that has been set up for this.
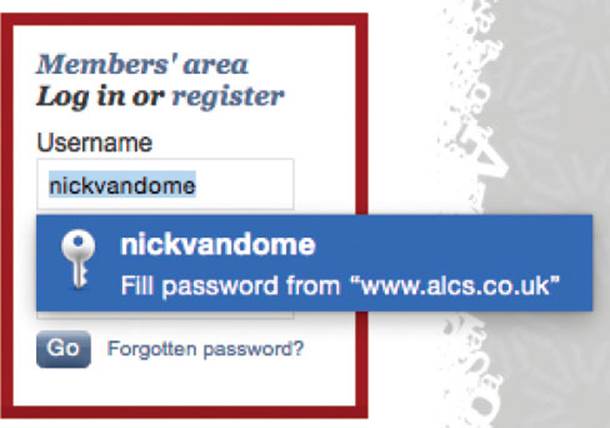
![]() Once AutoFill has been activated, when you start to fill in the username and password on a website that has been used before, you will be prompted to fill the fields from the AutoFill information
Once AutoFill has been activated, when you start to fill in the username and password on a website that has been used before, you will be prompted to fill the fields from the AutoFill information
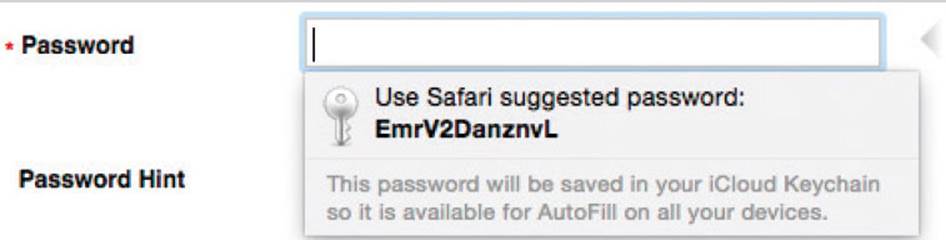
![]() For a website on which you have not created a password, you will be prompted by iCloud Keychain to use the Safari suggested one
For a website on which you have not created a password, you will be prompted by iCloud Keychain to use the Safari suggested one
Although the passwords created by iCloud Keychain are generally more secure than the ones created by individuals, they are not always considered the most secure in terms of Internet security. However, for most purposes they will provide a good level of online security.
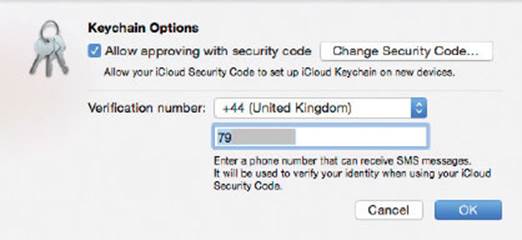
Keychain settings
Some of the Keychain settings can be changed within the iCloud System Preferences:
![]() Click on the Keychain Options button
Click on the Keychain Options button

![]() Make any changes to the options, as required. These include allowing approval for your iCloud security code to be used to set up Keychain on other devices and also the phone number needed for verification purposes
Make any changes to the options, as required. These include allowing approval for your iCloud security code to be used to set up Keychain on other devices and also the phone number needed for verification purposes
Resuming
One of the chores of computing is that when you close down your computer you have to first close down all of your open documents and apps and then open them all again when you turn your machine back on again. However, OS X has an innovative feature that allows you to continue working exactly where you left off, even if you turn off your computer. To do this:
![]() Before you close down, all of your open documents and apps will be available as shown
Before you close down, all of your open documents and apps will be available as shown
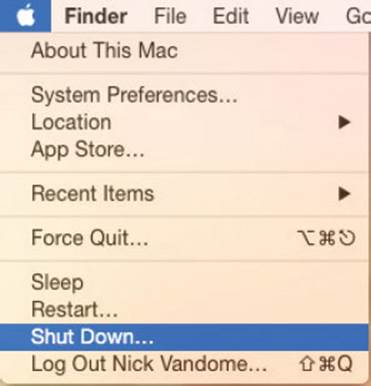
![]() Select the Shut Down or Restart option from the Apple menu
Select the Shut Down or Restart option from the Apple menu
![]() Make sure this box is checked on (this will ensure that all of your items will appear as before once the MacBook is closed down and then opened again)
Make sure this box is checked on (this will ensure that all of your items will appear as before once the MacBook is closed down and then opened again)

![]() Confirm the Shut Down or Restart command
Confirm the Shut Down or Restart command