MacBook in easy steps: Covers OS X Yosemite (10.10) (2015)
5
Finder
The principal way of moving around Yosemite is the Finder. This enables you to access items and organize your apps, folders and files. This chapter looks at how to use the Finder and get the most out of this powerful tool for navigating around Yosemite. It covers how to customize the interface and numerous options for working with folders and files and also sharing items with other apps, directly from the Finder.
Working with the Finder
Finder Folders
Finder Views
Covers and Quick Look
Finder Toolbar
Finder Sidebar
Finder Tabs
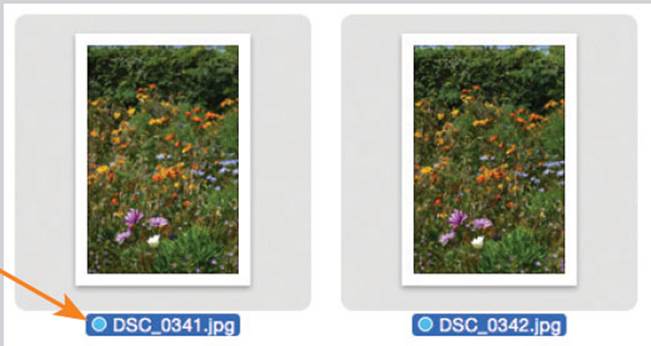
Finder Tags
Searching for Items
Copying and Moving Items
Working with Folders
Spring-loaded Folders
Smart Folders
Selecting Items
Actions Button
Sharing from the Finder
Menus
Working with the Finder
If you were only able to use one item on the Dock it would be the Finder. This is the gateway to all of the elements of your computer. It is possible to get to selected items through other routes, but the Finder is the only location where you can gain access to everything on your system. If you ever feel that you are getting lost within OS X, click on the Finder and then you should begin to feel more at home. To access the Finder:

Click once on this icon on the Dock
Overview
The Finder has its own toolbar, a Sidebar from which items can be accessed and a main window where the contents of selected items can be viewed:
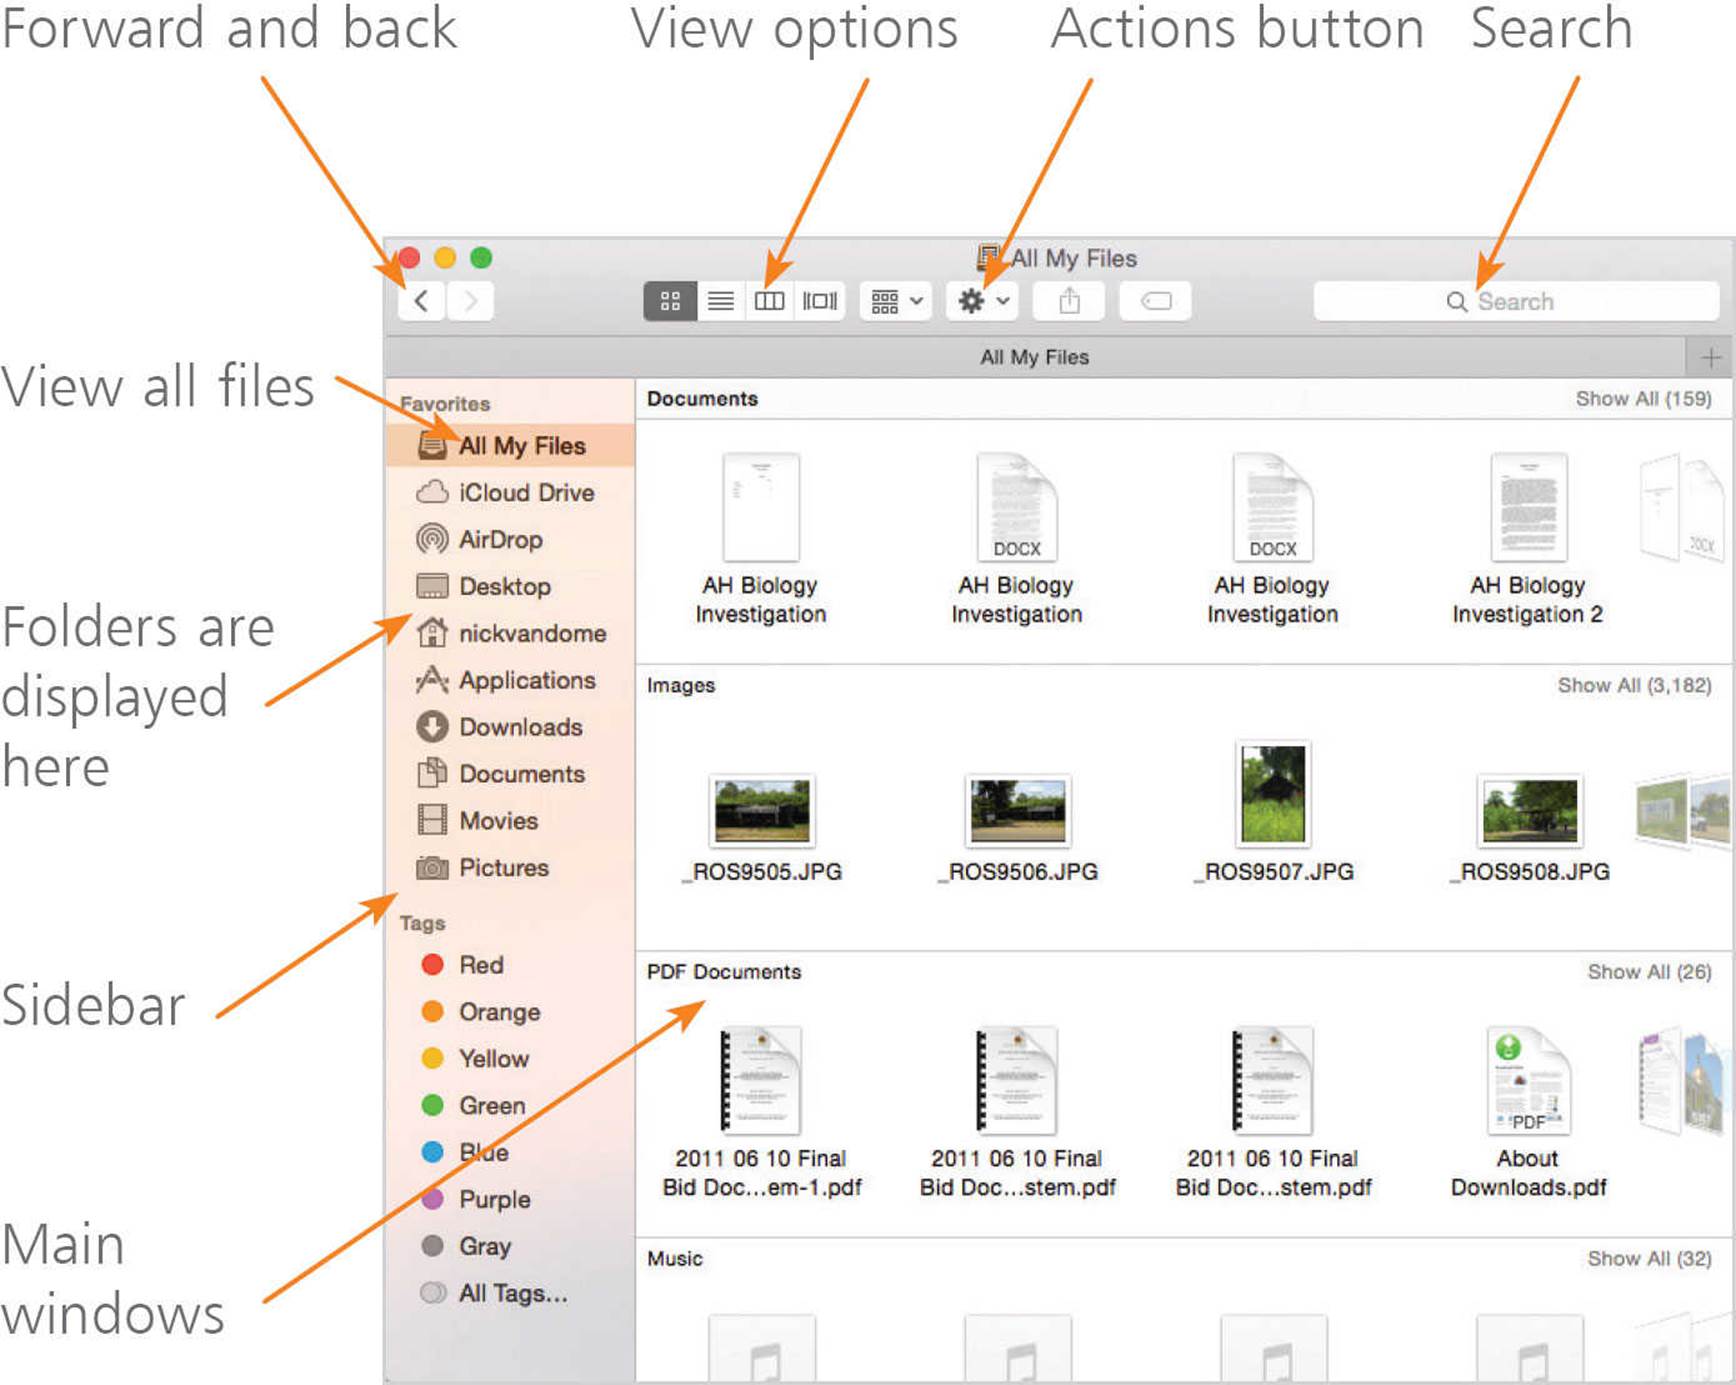

The Finder Sidebar is transparent so shows through the background window behind it.
The Actions button has options for displaying information about a selected item and also options for how it is displayed within the Finder.
Finder Folders
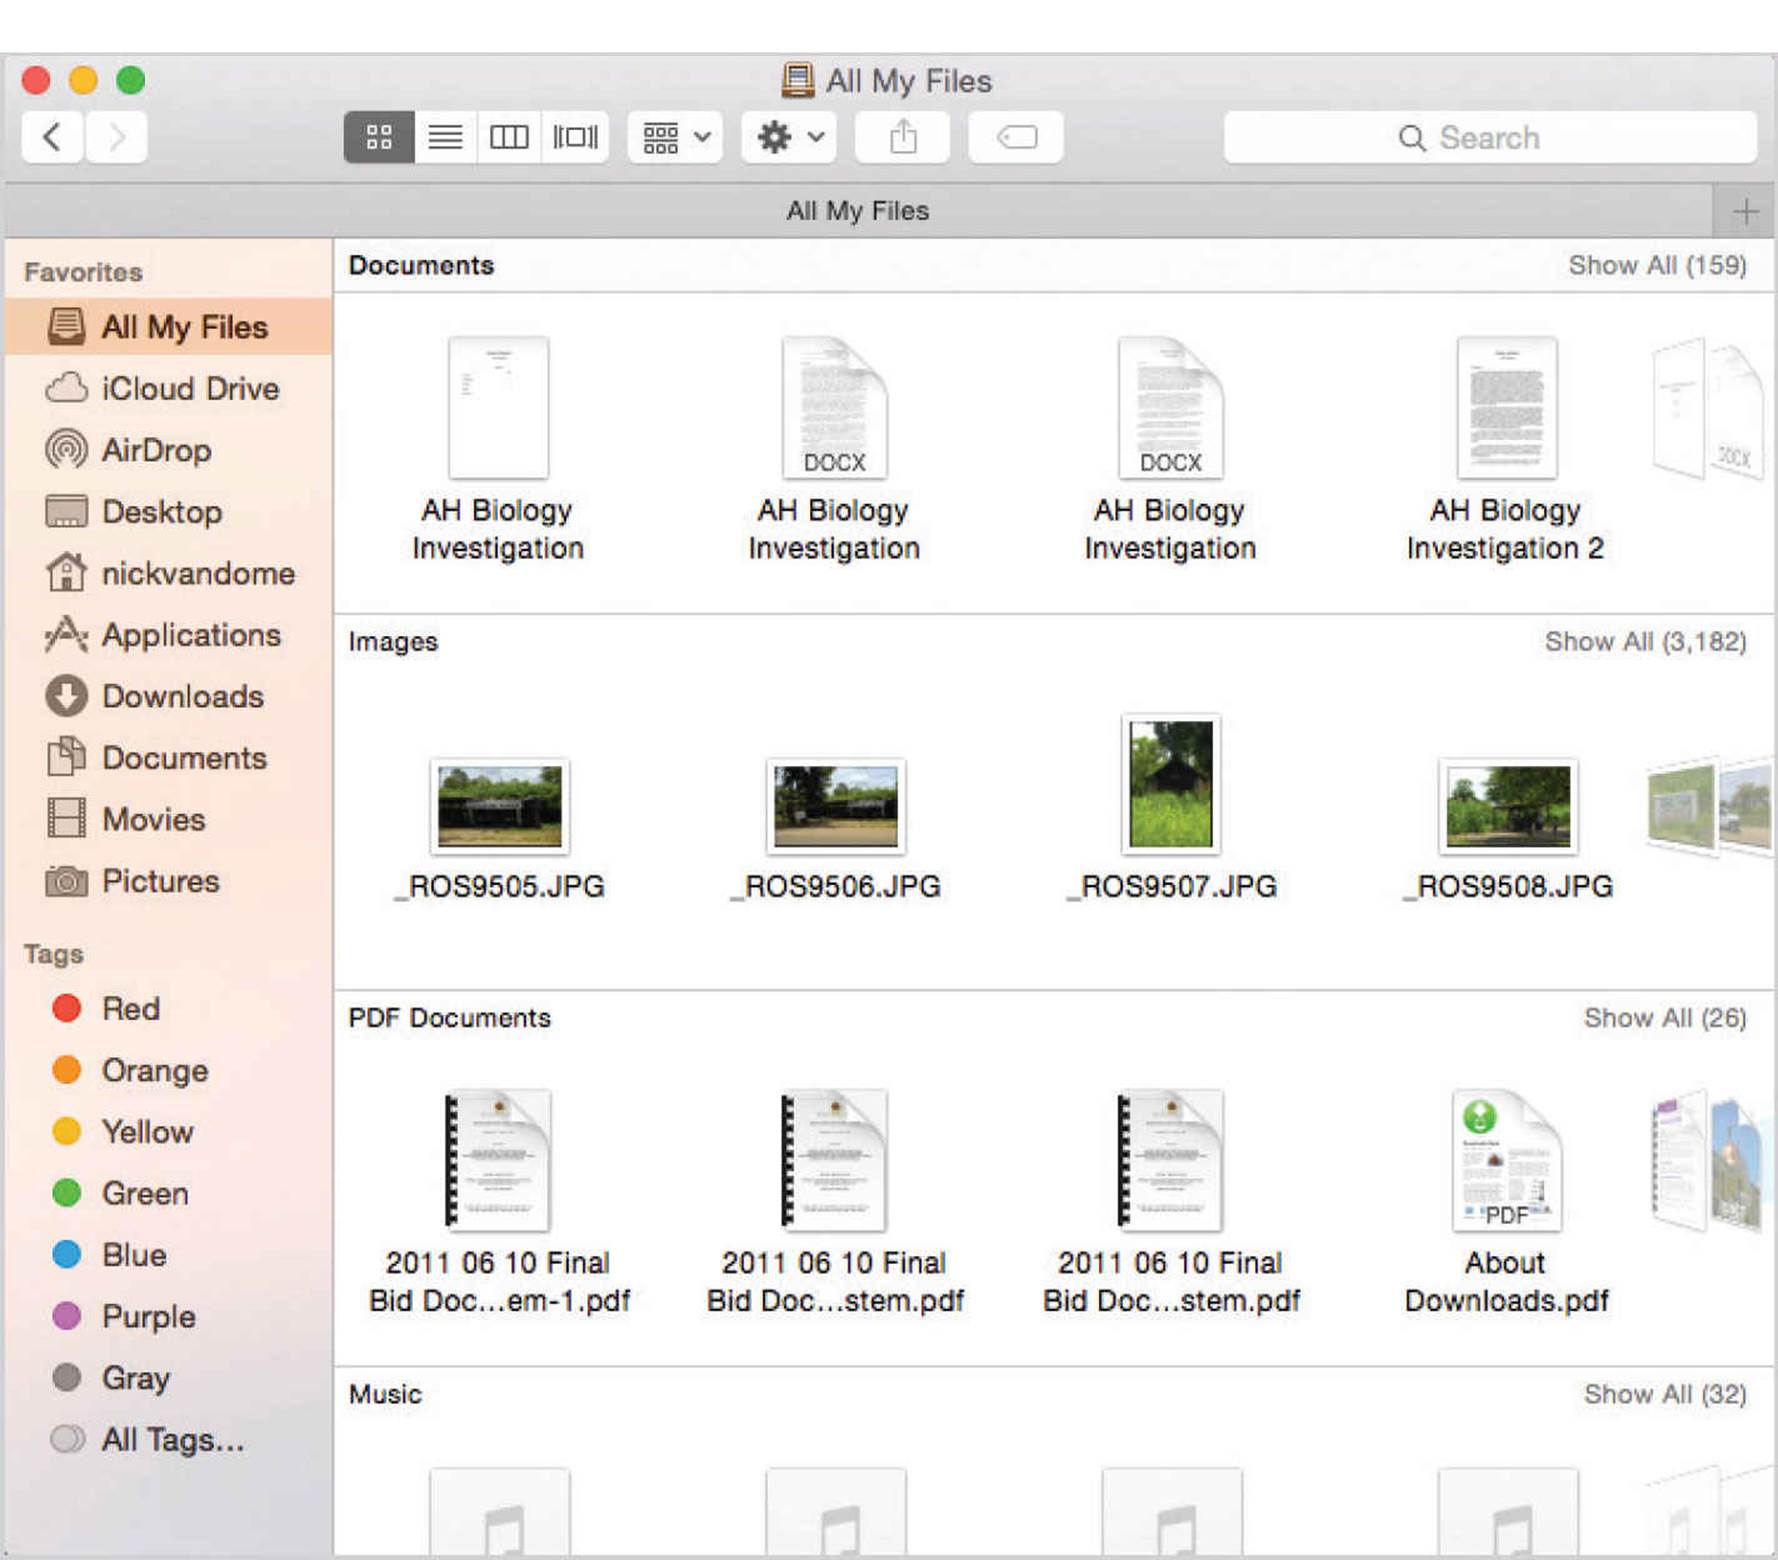
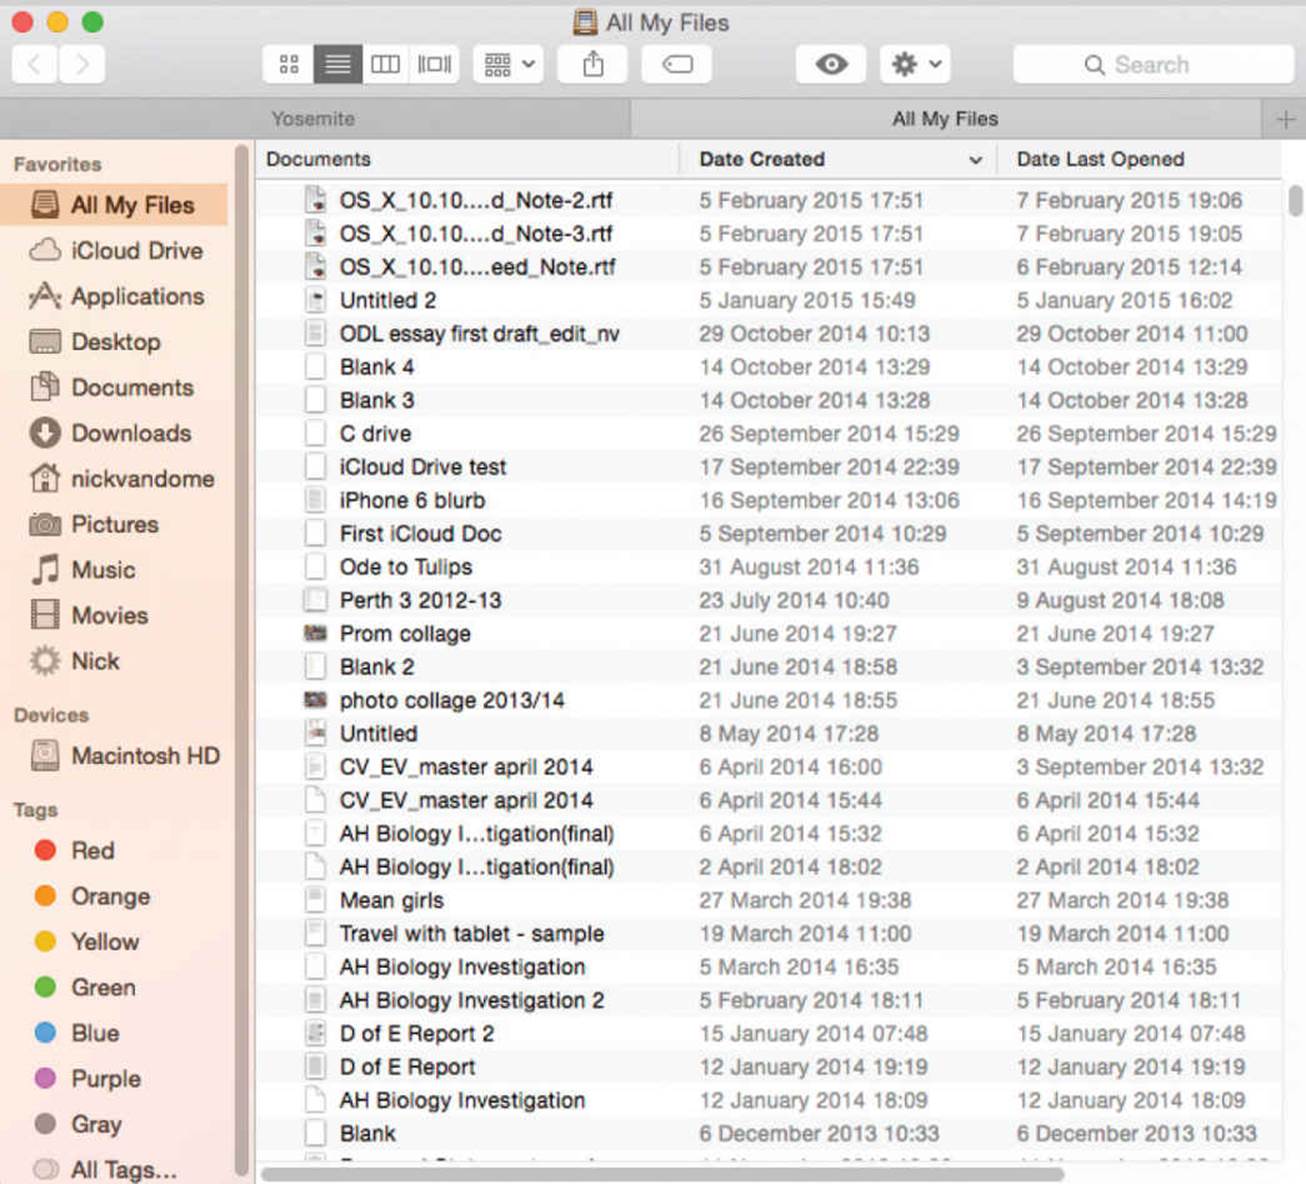
All My Files
This contains all of the latest files on which you have been working. They are sorted into categories according to file type so that you can search through them quickly. This is an excellent way to locate items without having to look through a lot of folders. To access this:
![]() Click on this link in the Finder Sidebar to access the contents of your All My Files folder
Click on this link in the Finder Sidebar to access the contents of your All My Files folder
![]()
![]() All of your files are displayed in individual categories. Click on the headings at the top of each category to view all of the items in the category
All of your files are displayed in individual categories. Click on the headings at the top of each category to view all of the items in the category
The Finder is always open (as denoted by the graphic underneath its icon on the Dock) and it cannot readily be closed down or removed.
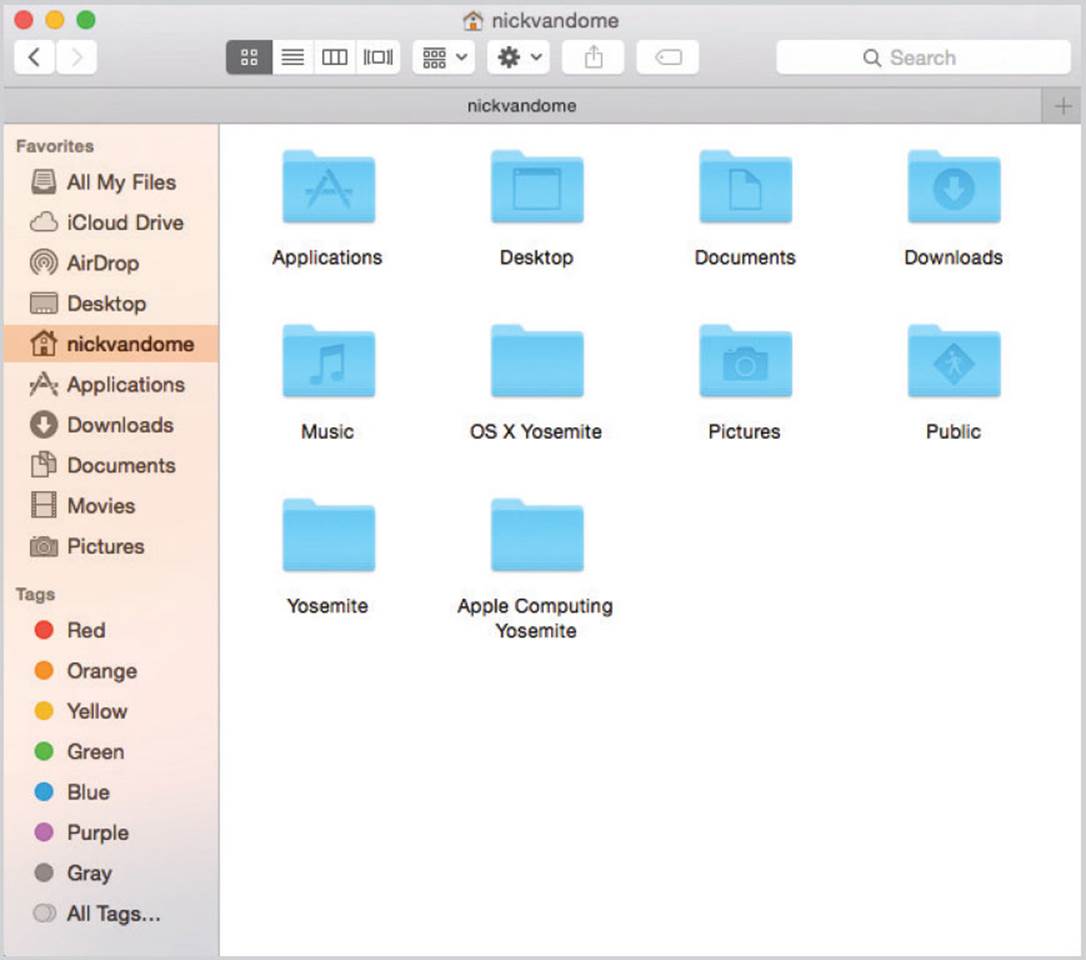
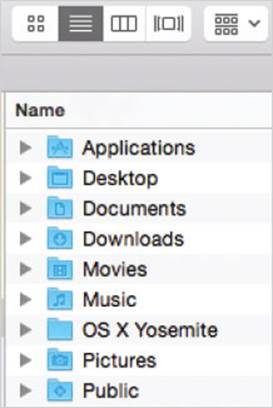
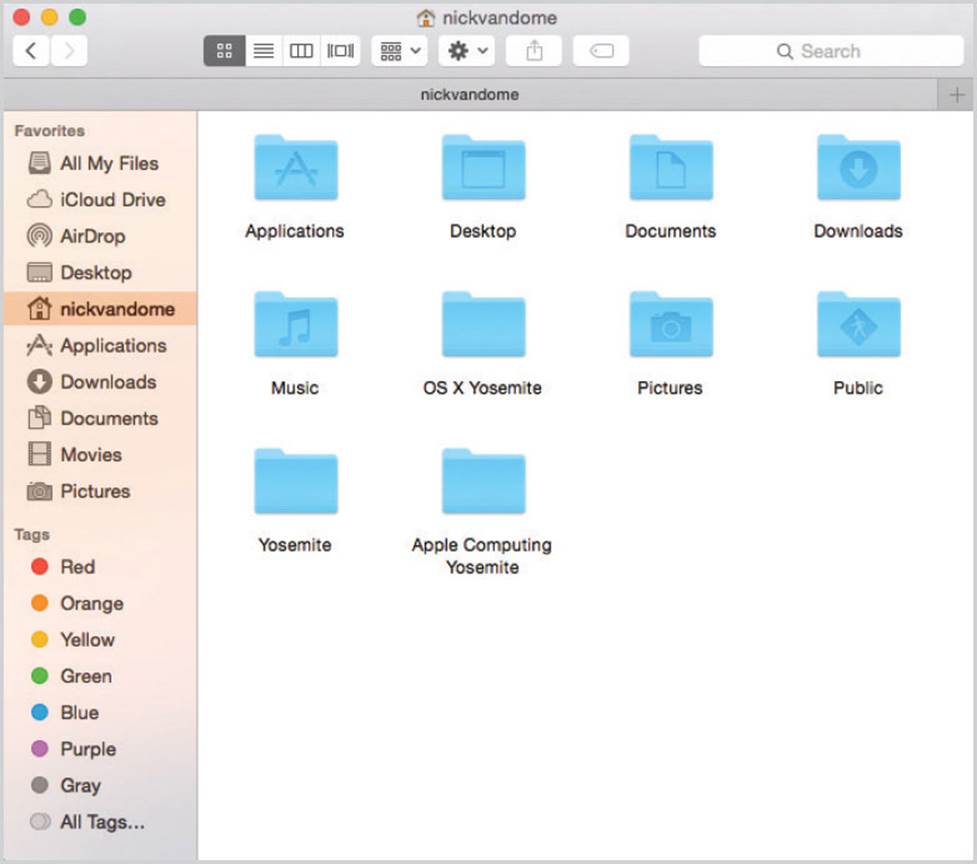
Home folder
This contains the contents of your own home directory, containing your personal folders and files. OS X inserts some pre-named folders which it thinks will be useful, but it is possible to rename, rearrange or delete these as you please. It is also possible to add as many more folders as you want.
![]() Click on this link to access the contents of your Home folder
Click on this link to access the contents of your Home folder
![]()
![]() The Home folder contains the Public folder that can be used to share files with other users if the computer is part of a network
The Home folder contains the Public folder that can be used to share files with other users if the computer is part of a network

When you are creating documents OS X, by default, recognizes their type and then, when you save them, suggests the most applicable folder in your Home directory in which to save them. So, if you have created a word processed document, OS X will suggest you save it in Documents; if it is a photograph it will suggest Pictures; if it is a video it will suggest Movies, and so on.
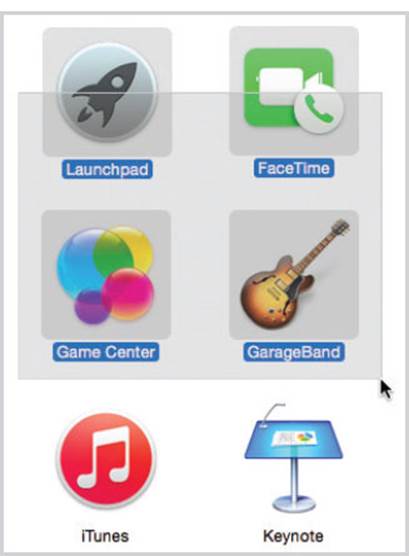
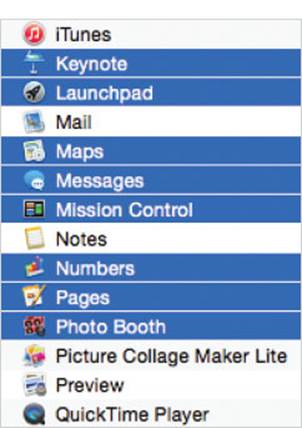
Applications
This folder contains all of the applications on your MacBook. They can also be accessed from the Launchpad as shown here.
![]()
Downloads
This is the default folder for any files or apps that you download (other than those from the Apple App Store).
![]()
Documents
This is part of your Home folder but is put on the Finder Sidebar for ease of access. New folders can be created for different types of documents.
![]()
Finder Views
The way in which items are displayed within the Finder can be amended in a variety of ways, depending on how you want to view the contents of a folder. Different folders can have their own viewing options applied to them and these will stay in place until a new option is specified.

Use the Back and Forward buttons at the top of the Finder to move between windows that you have previously visited.
![]()
Icon view
One of the viewing options for displaying items within the Finder is as icons. This provides a graphical representation of the items in the Finder. It is also possible to customize Icon view:
![]() Click here on the Finder toolbar to access Icon view
Click here on the Finder toolbar to access Icon view
![]()
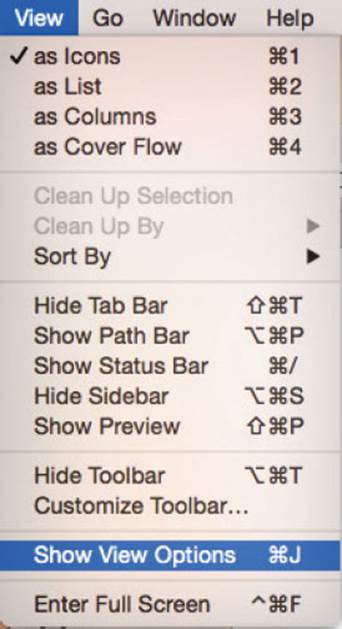
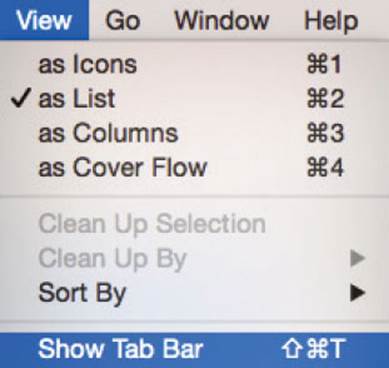
![]() Select View from the Menu bar, check on as Icons and select Show View Options to access the options for customizing Icon view
Select View from the Menu bar, check on as Icons and select Show View Options to access the options for customizing Icon view
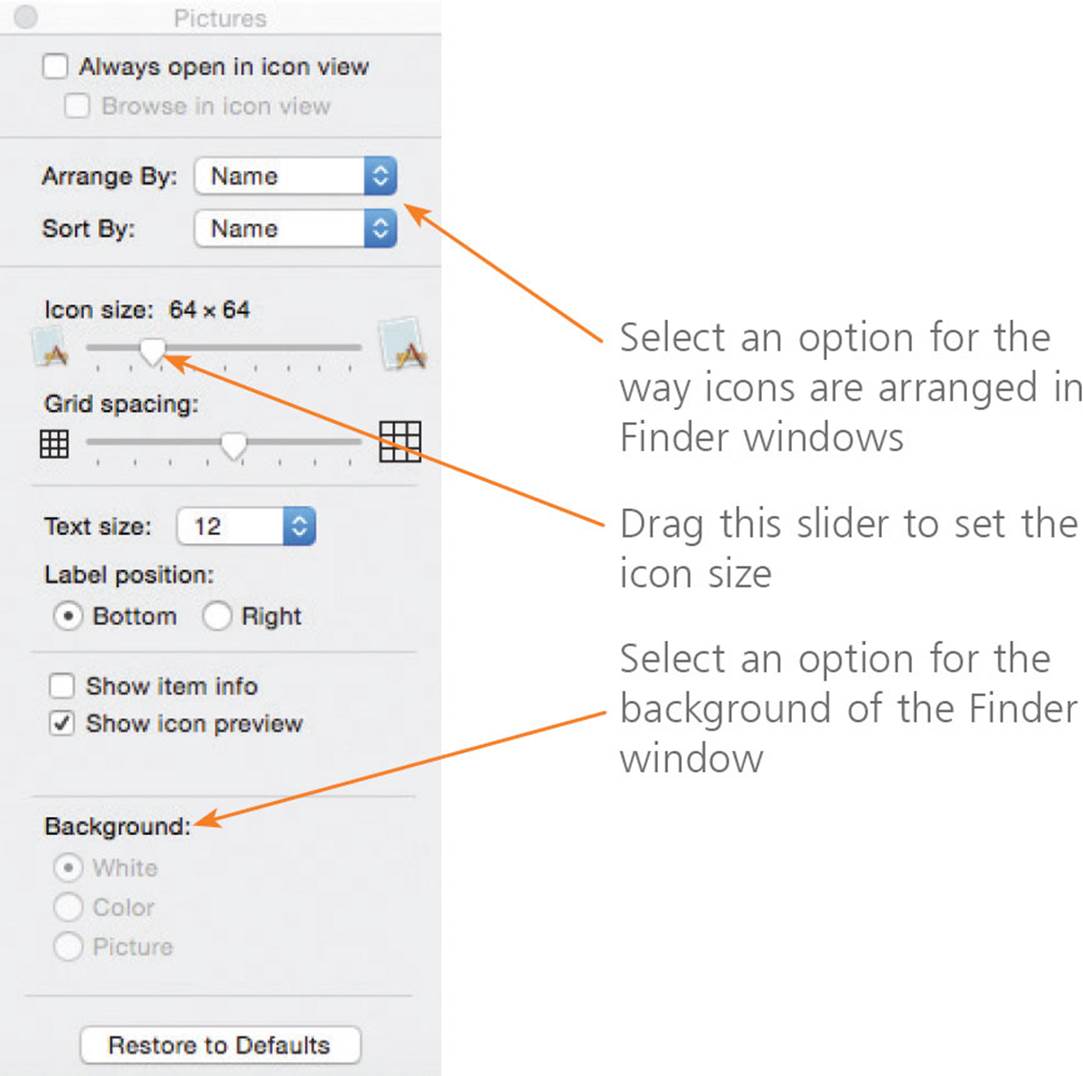
The Arrange By options can be used to arrange icons into specific groups, e.g. by name or type, or to snap them to an invisible grid so that they have an ordered appearance.
A very large icon size can be useful for people with poor eyesight, but it does take up a lot more space in a window.
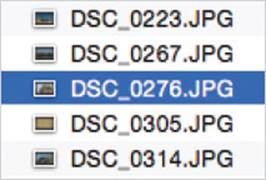
List view
List view can be used to show the items within a Finder window as a list, with additional information shown next to them. This can be a more efficient method than Icon view if there are a lot of items within a folder: List view enables you to see more items at one time and also view the additional information.
![]() Click here on the Finder toolbar to access List view
Click here on the Finder toolbar to access List view

![]() The name of each folder or file is displayed here. If any item has additional elements within it, this is represented by a small triangle next to it. Additional information in List view, such as file size and last modified date, is included in columns to the right
The name of each folder or file is displayed here. If any item has additional elements within it, this is represented by a small triangle next to it. Additional information in List view, such as file size and last modified date, is included in columns to the right
List view can be customized to include a variety of information such as file size and date last modified.
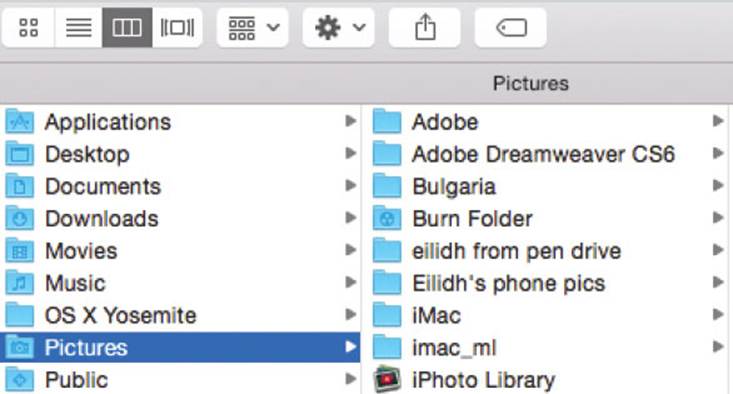
Column view
Column view is a useful option if you want to trace the location of a particular item, i.e. see the full path of its location, starting from the hard drive.
![]() Click here on the Finder toolbar to access Column view
Click here on the Finder toolbar to access Column view

![]() Click on an item to see everything within that folder. If an arrow follows an item it means that there are further items to view
Click on an item to see everything within that folder. If an arrow follows an item it means that there are further items to view
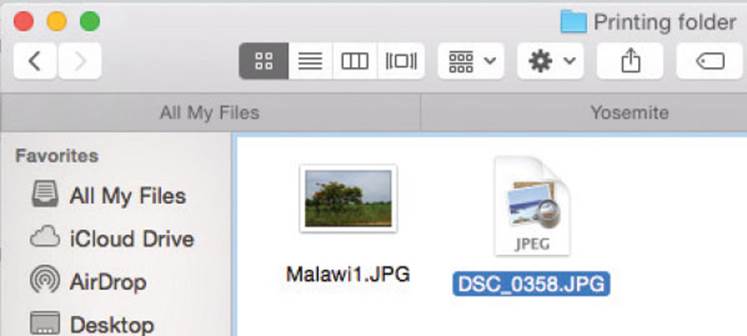
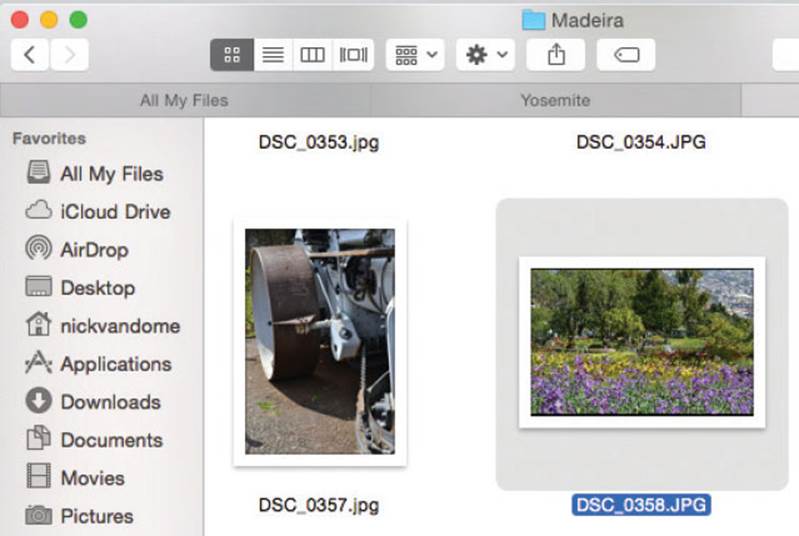
Covers and Quick Look
Covers
Covers is feature on the MacBook that enables you to view items as large icons. To use Covers:
![]() Select a folder and at the top of the Finder window click on this button
Select a folder and at the top of the Finder window click on this button

![]() The items within the folder are displayed in their cover state
The items within the folder are displayed in their cover state
![]() Drag each item to view the next one, or click on the slider at the bottom of the window. You can also move between items by swiping left or right on a trackpad
Drag each item to view the next one, or click on the slider at the bottom of the window. You can also move between items by swiping left or right on a trackpad
Quick Look
Through a Finder option called Quick Look, it is possible to view the content of a file without having to first open it. To do this:
![]() Select a file within the Finder
Select a file within the Finder
![]() Press the Space bar
Press the Space bar
![]() The contents of the file are displayed without it opening in its default app
The contents of the file are displayed without it opening in its default app

![]() Click on the cross to close Quick Look
Click on the cross to close Quick Look

In Quick Look it is even possible to preview videos or presentations without having to first open them in their default app.
Finder Toolbar
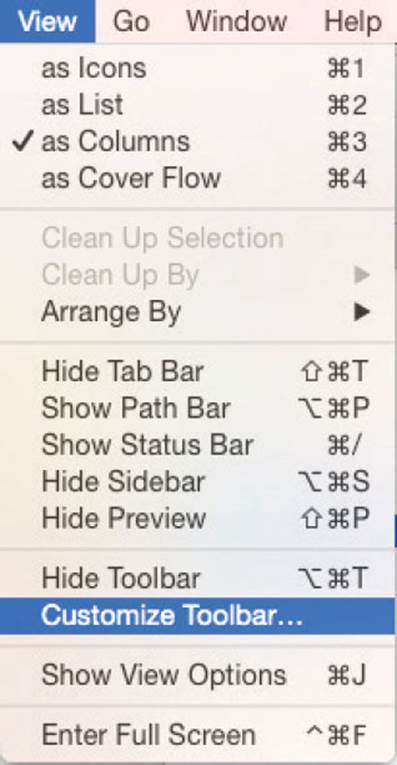
Customizing the toolbar
As with most elements of OS X, it is possible to customize the Finder toolbar:
![]() Select View > Customize Toolbar from the Menu bar
Select View > Customize Toolbar from the Menu bar
![]() Drag items from the window into the toolbar, or
Drag items from the window into the toolbar, or
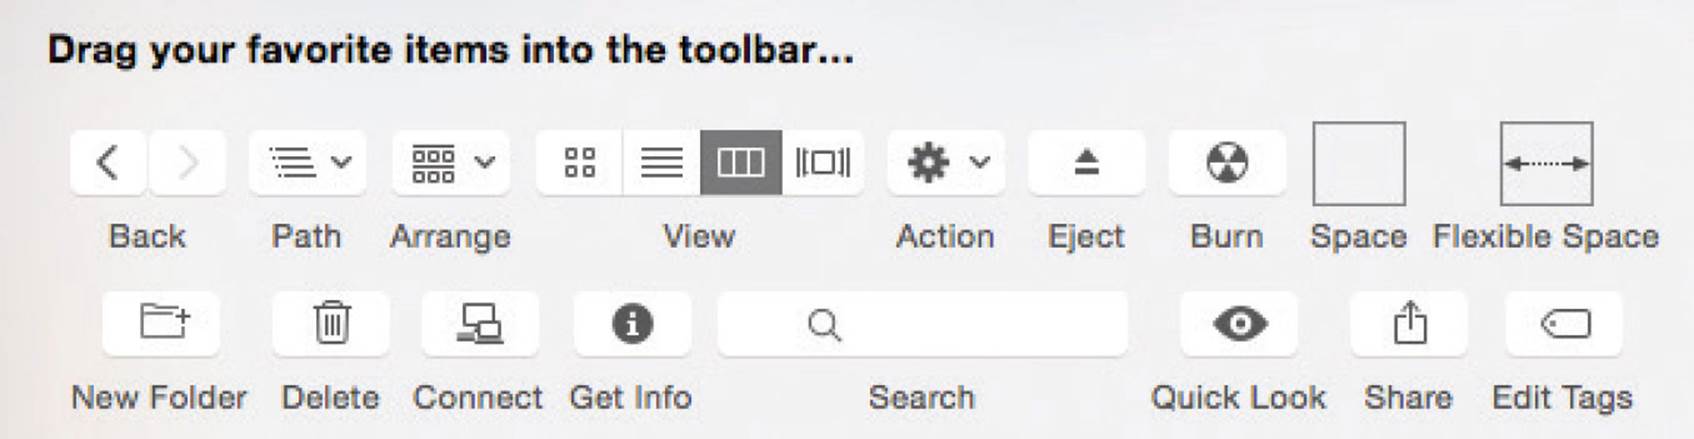
![]() Drag the default set of icons into the toolbar
Drag the default set of icons into the toolbar

![]() Click Done at the bottom of the window
Click Done at the bottom of the window
Do not put too many items on the Finder toolbar, because you may not be able to see them all in the Finder window. If there are additional toolbar items, there will be a directional arrow indicating this. Click on the arrow to view the available items.
Finder Sidebar
Using the Sidebar
The Sidebar is the left-hand panel of the Finder which can be used to access items on your MacBook:
![]() Click on a button on the Sidebar
Click on a button on the Sidebar
![]()
![]() Its contents are displayed in the main Finder window
Its contents are displayed in the main Finder window
When you click on an item in the Sidebar, its contents are shown in the main Finder window to its right.
When items are added to the Finder Sidebar a shortcut, or alias, is inserted into the Sidebar, not the actual item.
Adding to the Sidebar
Items that you access most frequently can be added to the Sidebar. To do this:
![]() Drag an item from the main Finder window onto the Sidebar
Drag an item from the main Finder window onto the Sidebar
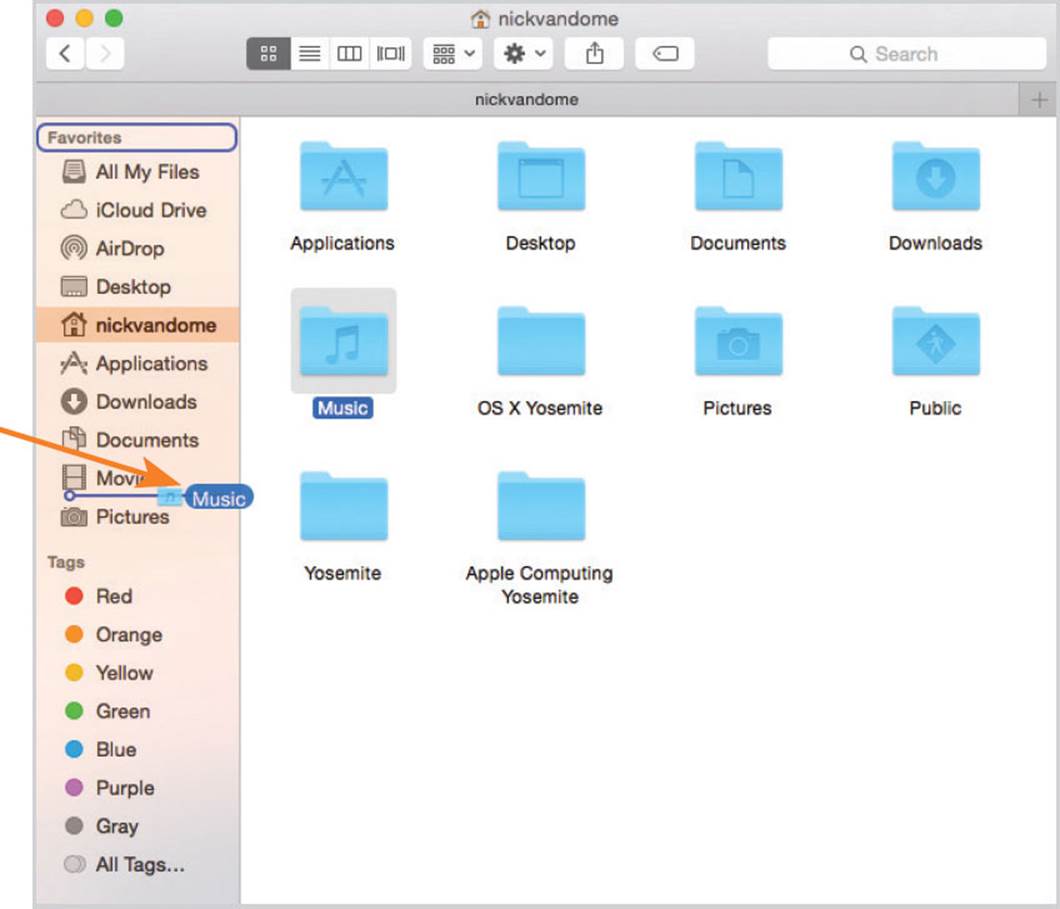
![]() The item is added to the Sidebar. You can do this with apps, folders and files
The item is added to the Sidebar. You can do this with apps, folders and files
Items can be removed from the Sidebar by Ctrl+clicking on them and selecting Remove from Sidebar from the contextual menu.
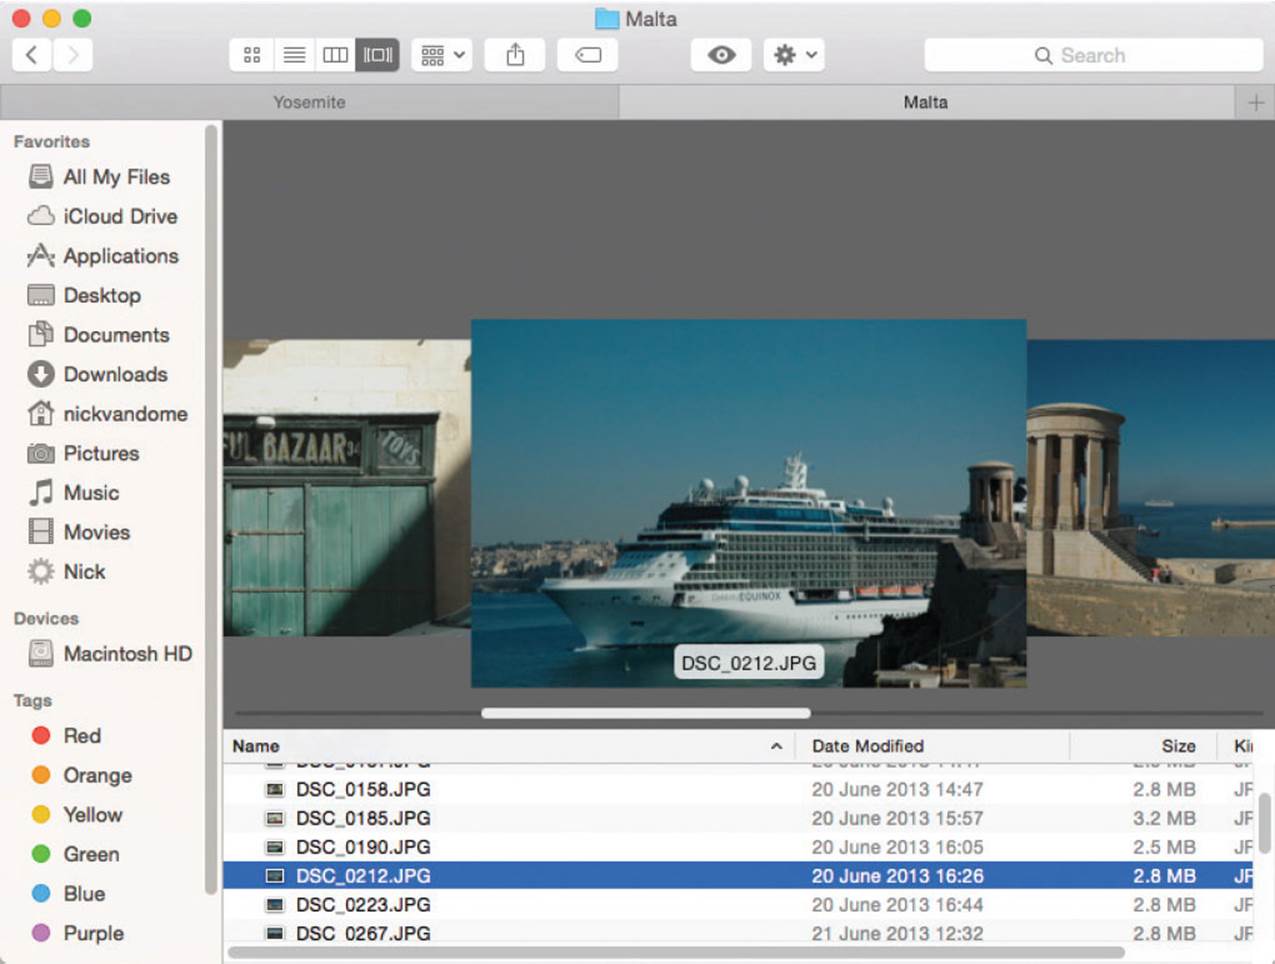
Finder Tabs
Tabs in web browsers are now well established, where you can have several pages open within the same browser window. This technology is utilized in the Finder in OS X Yosemite with the use of Finder Tabs. This enables different folders to be open in different tabs within the Finder so that you can organize your content exactly how you want. To do this:
![]() Select View > Show Tab Bar from the Finder menu bar
Select View > Show Tab Bar from the Finder menu bar
![]() A new tab is opened at the right-hand side of the Finder
A new tab is opened at the right-hand side of the Finder

![]() Click on this button to view the new tab
Click on this button to view the new tab

![]() At this point the content in the new tab is displayed for the window (see tip)
At this point the content in the new tab is displayed for the window (see tip)
![]() Each tab view can be customized and this is independent of the other tabs
Each tab view can be customized and this is independent of the other tabs
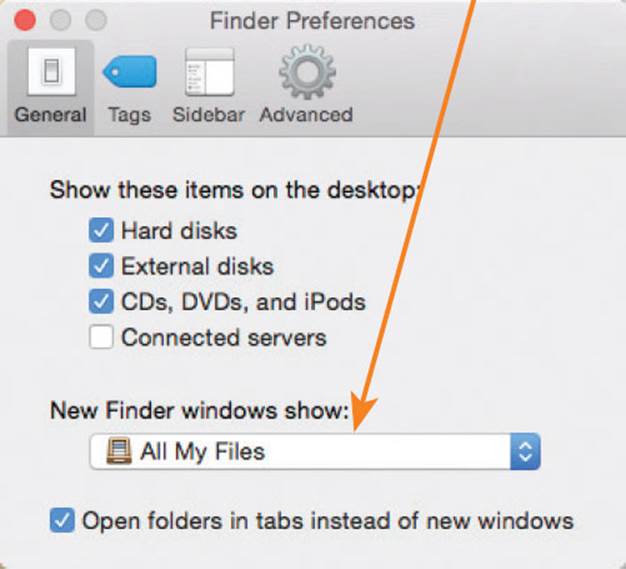
To specify an option for what appears as the default for a new Finder window, click on the Finder menu and click on Preferences and the General tab. Under New Finder windows show, select the default window to be used.
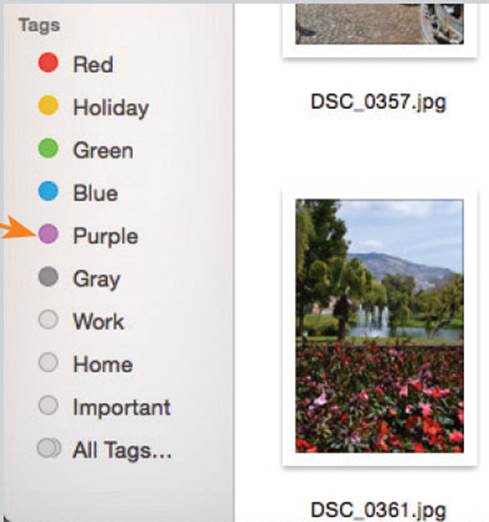
Finder Tags
When creating content in OS X Yosemite you may find that you have documents of different types that cover the same topic. For instance, you may have work-related documents in Pages for reports, Keynote for presentations and Numbers for spreadsheets. With the Finder Tags function it is possible to link related content items through the use of colored tags. These can be added to items in the Finder and also in apps when content is created.
Tags can also be added to items by Ctrl+clicking on them and selecting the required tag from the menu that appears. Also, they can be added from this button on the main Finder toolbar.
![]()
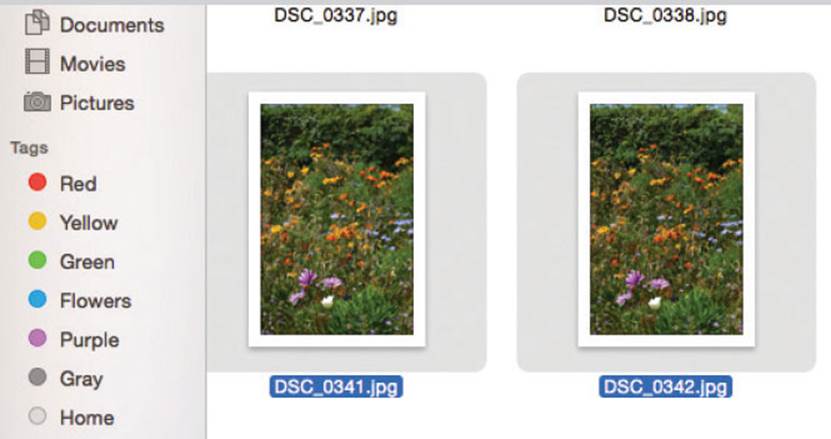
![]() The tags are listed in the Finder Sidebar
The tags are listed in the Finder Sidebar
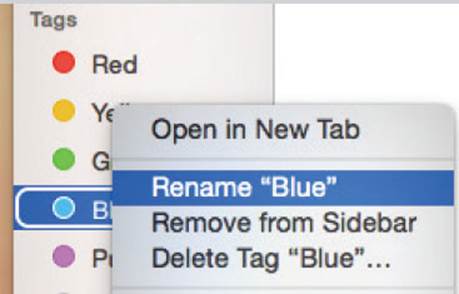
![]() To give tags specific names, Ctrl+click on one and click on the Rename link
To give tags specific names, Ctrl+click on one and click on the Rename link
![]() To add tags, select the required items in the Finder window
To add tags, select the required items in the Finder window
![]() Drag the selected items over the appropriate tag
Drag the selected items over the appropriate tag

![]() The tags are added to the selected items
The tags are added to the selected items
Tags can also be added when documents are created in certain apps, such as Pages, Keynote and Numbers: Select File > Save, click in the Tags box and select the required tag. Click on the Save button.
Searching for Items
On MacBooks it is also possible to search your folders and files, using the built-in search facilities. This can be done either through the Finder or with the Spotlight search app.
Using Finder
![]() In the Finder window, enter the search keyword(s) in this box and select the search criteria. The results are shown in the Finder
In the Finder window, enter the search keyword(s) in this box and select the search criteria. The results are shown in the Finder

![]() Select the areas over which you want the search performed, e.g. Home folder or Documents
Select the areas over which you want the search performed, e.g. Home folder or Documents

![]() Double-click on a folder to see its contents or double-click on a file to open it
Double-click on a folder to see its contents or double-click on a file to open it
When entering search keywords try to be as specific as possible. This will cut down on the number of unwanted results.
Both folders and files will be displayed in the Finder as part of the search results.
Using Spotlight

The Spotlight search option can also search over your MacBook:
![]() Click on this button in the right corner of the screen on the top toolbar
Click on this button in the right corner of the screen on the top toolbar

![]() Enter a search word or phrase. Click on an item to view it, including items from the Web and Wikipedia
Enter a search word or phrase. Click on an item to view it, including items from the Web and Wikipedia
Spotlight search can show results from your Mac, the Internet, iTunes, the App Store and also items such as movies nearby and local restaurants.
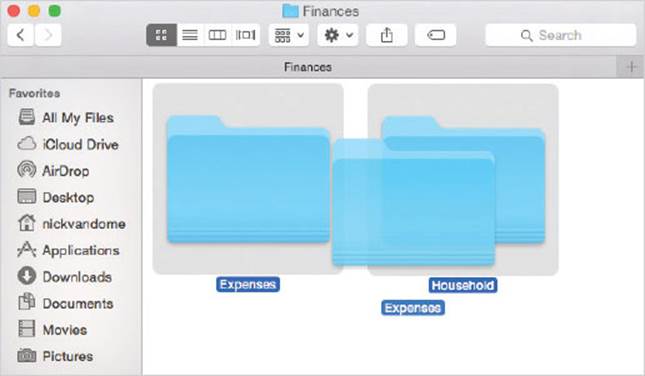
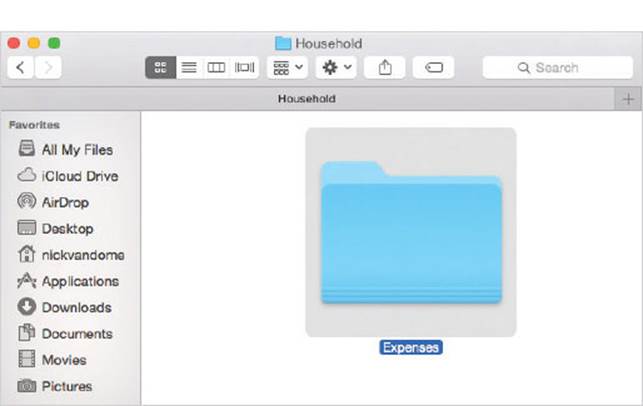
Copying and Moving Items
Items can be copied and moved within OS X by using the copy and paste method or by dragging:
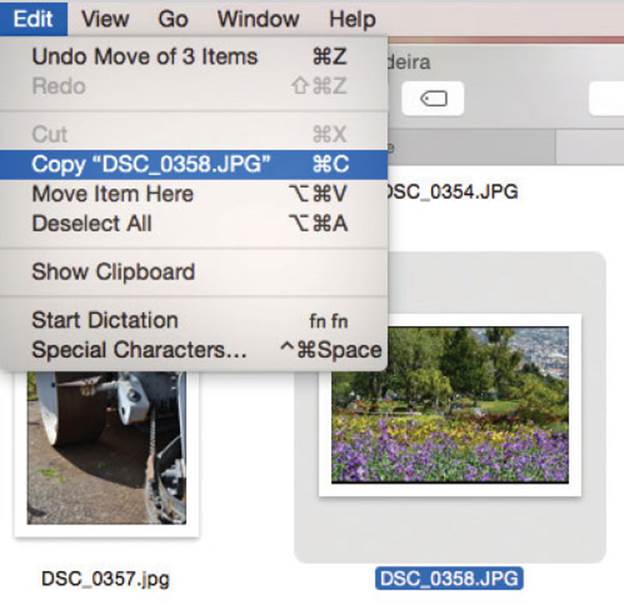
Copy and paste
![]() Select an item and select Edit > Copy from the Menu bar
Select an item and select Edit > Copy from the Menu bar
![]() Move to the target location and select Edit > Paste Item from the Menu bar. The item is then pasted into the new location
Move to the target location and select Edit > Paste Item from the Menu bar. The item is then pasted into the new location
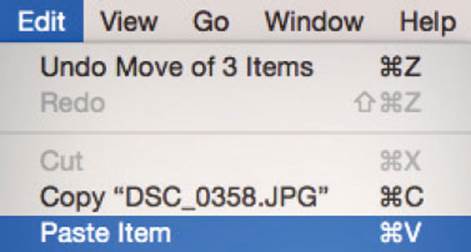
When an item is copied, it is placed on the Clipboard and remains there until another item is copied.
Dragging
Drag a file from one location into another to move it to that location
Hold down the Option key while dragging to copy an item rather than moving it.
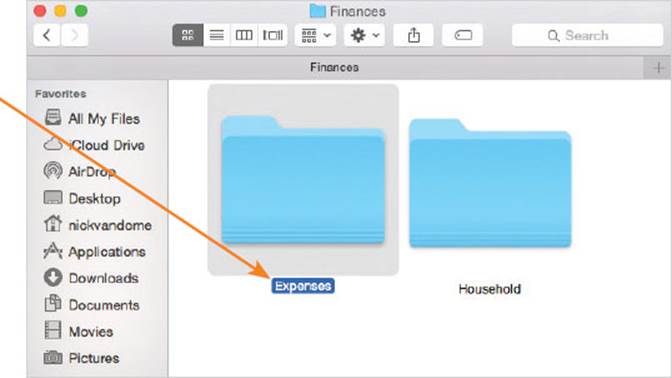
Working with Folders
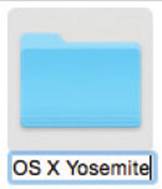
When OS X is installed, there are various folders that have already been created to hold apps and files. Some of these are essential (i.e. those containing apps) while others are created as an aid for where you might want to store the files that you create (such as the Pictures and Movies folders). Once you start working with OS X you will probably want to create your own folders in which to store and organize your documents. This can be done on the Desktop or within any level of your existing folder structure. To create a new folder:
![]() Access the location in which you want to create the new folder (e.g. your Home folder) and select File > New Folder from the Menu bar
Access the location in which you want to create the new folder (e.g. your Home folder) and select File > New Folder from the Menu bar
![]() A new, empty, folder is inserted at the selected location (named “untitled folder”)
A new, empty, folder is inserted at the selected location (named “untitled folder”)
![]() Overtype the file name with a new one. Press Enter on the keyboard
Overtype the file name with a new one. Press Enter on the keyboard
![]() Double-click on a folder to view its contents (at this point it should be empty)
Double-click on a folder to view its contents (at this point it should be empty)
Folders are always denoted by a folder icon. This is the same regardless of the Finder view which is selected. The only difference is that the icon is larger in Icon view than in List or Column views.
You can create as many “nested” folders (i.e. folders within other folders) as you want. However, this makes your folder structure more complicated and, after time, you may forget where all your folders are and what they contain.
Content can be added to an empty folder by dragging it from another folder and dropping it into the new one.
Spring-loaded Folders
Another method for moving items with the Finder is to use the spring-loaded folder option. This enables you to drag items into a folder and then view the contents of the folder before you drop the item into it. This means that you can drag items into nested folders in a single operation. To do this:
![]() Select the item you want to move
Select the item you want to move
![]() Drag the selected item over the folder into which you want to place it. Keep the mouse held down
Drag the selected item over the folder into which you want to place it. Keep the mouse held down
![]() The folder will open, revealing its contents. The selected item can either be dropped into the folder or, if there are sub-folders, the same operation can be repeated until you find the folder into which you want to place the selected item
The folder will open, revealing its contents. The selected item can either be dropped into the folder or, if there are sub-folders, the same operation can be repeated until you find the folder into which you want to place the selected item
The spring-loaded folder technique can be used to move items between different locations within the Finder, e.g. for moving files from your Pictures folder into your Home folder.
Do not release the mouse button until you have reached the location into which you want to place the selected item.
Smart Folders
When working on any computer it is inevitable that you will soon have a number of related files in different locations. This could be because you save your images in one folder, your word processing documents in another, web pages in another and so on. This can cause difficulties when you are trying to keep track of a lot of related documents. OS X overcomes this problem through the use of Smart Folders. These are folders that you set up using Finder search results as the foundation. Then, when new items are created that meet the original criteria, they are automatically included within the Smart Folder. To create a Smart Folder:
![]() Conduct a search with the Finder search box
Conduct a search with the Finder search box

![]() Once the search is completed, click the Save button to create a Smart Folder
Once the search is completed, click the Save button to create a Smart Folder
![]()
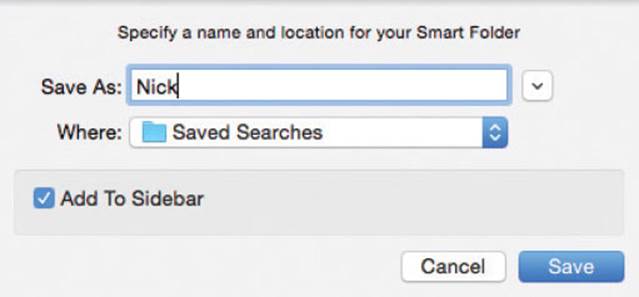
![]() Enter a name for the new Smart Folder and click Save
Enter a name for the new Smart Folder and click Save
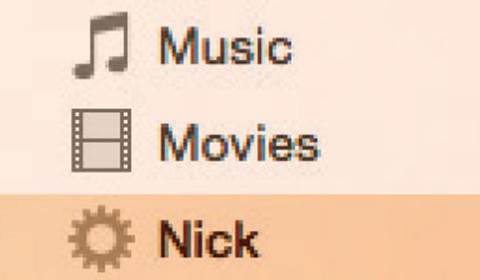
![]() The Smart Folder is added to the Finder Sidebar. Click the Smart Folder to view its contents
The Smart Folder is added to the Finder Sidebar. Click the Smart Folder to view its contents
Numerous different Smart Folders can be created, for different types of files and information.
If you set very precise criteria for a Smart Folder this will result in a smaller number of items being included within it.
Selecting Items
Apps and files within OS X folders can be selected by a variety of different methods:
Selecting by dragging
Drag the cursor to encompass the items to be selected. The selected items will become highlighted.
Once items have been selected, a single command can be applied to all of them. For instance, you can copy a group of items by selecting them and then applying the Copy command from the Menu bar.
Selecting by clicking
Click once on an item to select it, hold down Shift and then click on another item in a list to select a consecutive group of items.
To select a non-consecutive group, select the first item by clicking on it once, then hold down the Command key and select the other required items. The selected items will appear highlighted.
Select All
To select all of the items in a folder, select Edit > Select All from the Menu bar:

The Select All command selects all of the elements within the active item. For instance, if the active item is a word processing document, the Select All command will select all of the items within the document; if it is a folder it will select all of the items within that folder.
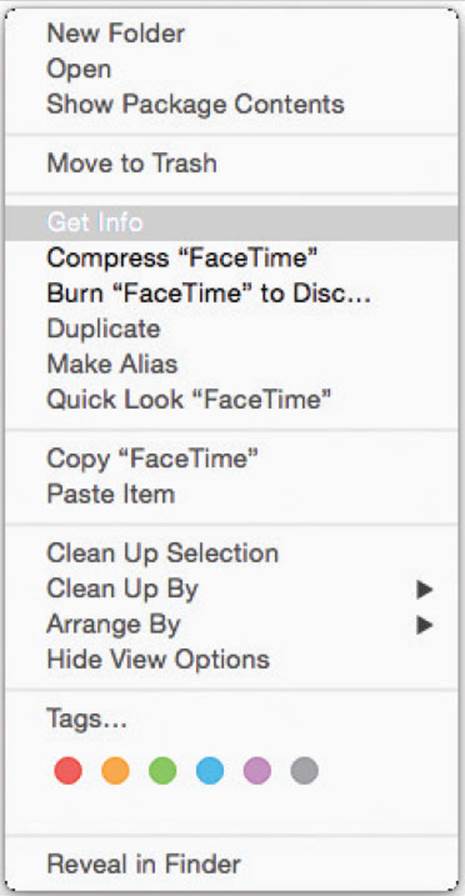
Actions Button
The Finder Actions button provides a variety of options for any item, or items, selected in the Finder. To use this:
![]() Select an item, or group of items, about which you want to find out additional information
Select an item, or group of items, about which you want to find out additional information

![]() Click on the Actions button on the Finder toolbar
Click on the Actions button on the Finder toolbar

![]() The available options for the selected item, or items, are displayed. These include Get Info, which displays additional information about an item, such as file type, file size, creation and modification dates and the default app for opening the item
The available options for the selected item, or items, are displayed. These include Get Info, which displays additional information about an item, such as file type, file size, creation and modification dates and the default app for opening the item
If an image has been selected, the Actions button can be used to set it as the Desktop Picture, by selecting this option at the bottom of the Actions menu.
The Actions button can also be used for labeling items. To do this, select the required items in the Finder and click on the colored buttons at the bottom of the Actions button menu. The selected color will be applied to the item names in the Finder.
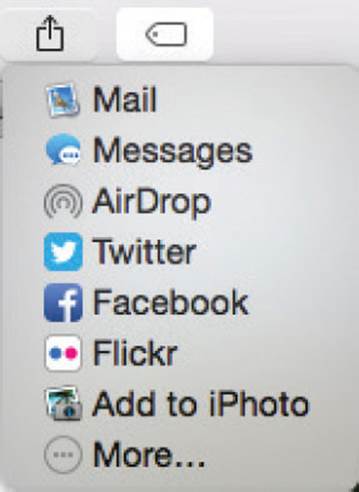
Sharing from the Finder
Next but one to the Actions button on the Finder is the Share button. This can be used to share a selected item, or items, in a variety of ways appropriate to the type of file that has been selected. For instance, a photo will have options including the photo-sharing site Flickr while a text document will have fewer options. To share items directly from the Finder:
![]() Locate and select the item(s) that you want to share
Locate and select the item(s) that you want to share
![]() Click on the Share button on the Finder toolbar and select one of the options
Click on the Share button on the Finder toolbar and select one of the options
![]()
![]() For some of the options, such as Twitter and Flickr, you will be asked to add an account. If you already have an account with these services you can enter the details or, if not, you can create a new account
For some of the options, such as Twitter and Flickr, you will be asked to add an account. If you already have an account with these services you can enter the details or, if not, you can create a new account

The Share button is available from many apps throughout Yosemite. This means that there is increased functionality for sharing items. For instance, you can share web pages from Safari or share photos from iPhoto.
To the left of the Share button on the Finder toolbar is a button for changing the arrangement of items within the Finder. Click on this button to access arrangement options such as Name, Kind, Date and Size.
![]()
Menus
The main Apple menu bar in OS X Yosemite contains a variety of menus, which are accessed when the Finder is the active window. When individual apps are open they have their own menu bars, although in a lot of cases these are similar to the standard menu bar, particularly for the built-in OS X Yosemite apps such as the Calendar, Contacts and Notes.
•Apple menu. This is denoted by a translucent gray apple and contains general information about the computer, a preferences option for changing the functionality and appearance of your MacBook and options for closing down the computer.
•Finder menu. This contains preferences options for amending the functionality and appearance of the Finder and also options for emptying the Trash and accessing other apps (under the Services option).
•File menu. This contains common commands for working with open documents, such as opening and closing files, creating aliases, moving to the Trash, ejecting external devices and burning discs.
•Edit menu. This contains common commands that apply to the majority of apps used on the Mac. These include undo, cut, copy, paste, select all and show the contents of the clipboard, i.e. items that have been cut or copied.
•View. This contains options for how windows and folders are displayed within the Finder and for customizing the Finder toolbar. This includes showing or hiding the Finder Sidebar and selecting view options for the size at which icons are displayed within Finder windows.
•Go. This can be used to navigate around your computer. This includes moving to your All My Files folder, your Home folder, your Applications folder and recently accessed folders.
•Window. This contains commands to organize the currently open apps and files on your Desktop.
•Help. This contains the Mac Help files which contain information about all aspects of OS X Yosemite.