Photos for Mac: A Take Control Crash Course (1.0.1) (2015)
Define Smart Albums in Photos
Smart albums are a great way to collect items based on their attributes, whether they’re inherent to the item itself (such as what camera took a picture) or based on information that you’ve added (such as keywords). Smart albums let you slice your library in endlessly interesting ways ①.
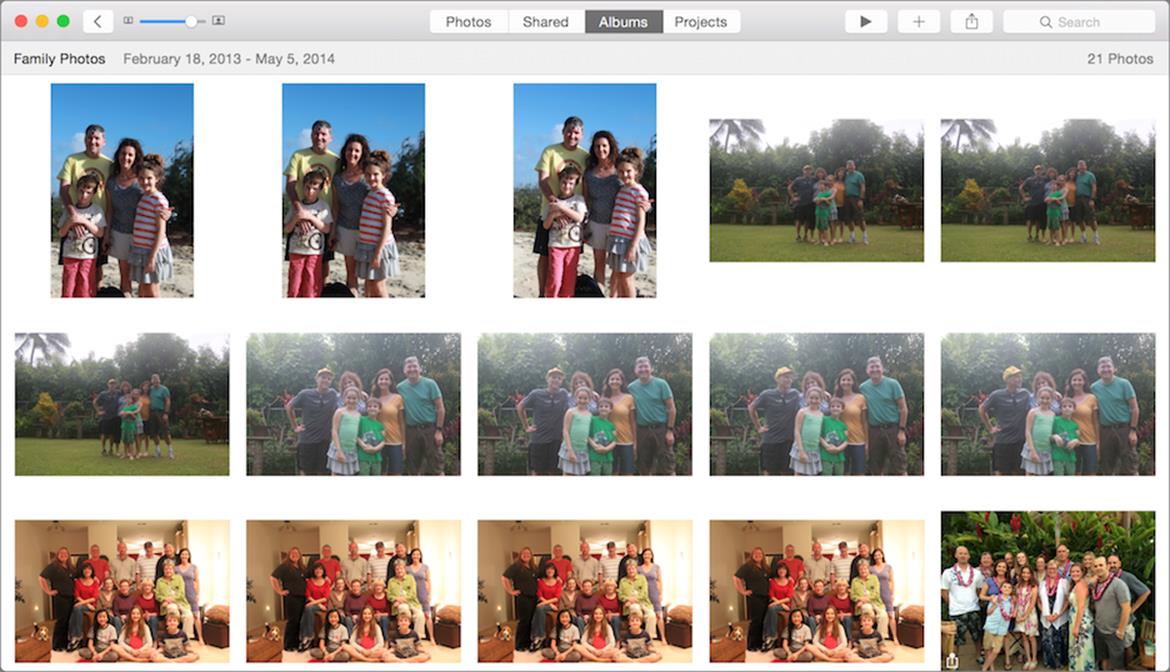
① This smart album displays only images containing the faces of me, my wife, and our kids, as recognized by the Faces feature of Photos. We are really terrible about taking group pictures.
Create a New Smart Album
1. Choose File > New Smart Album (Command-Option-N).
2. In the dialog that appears ②, name your smart album.
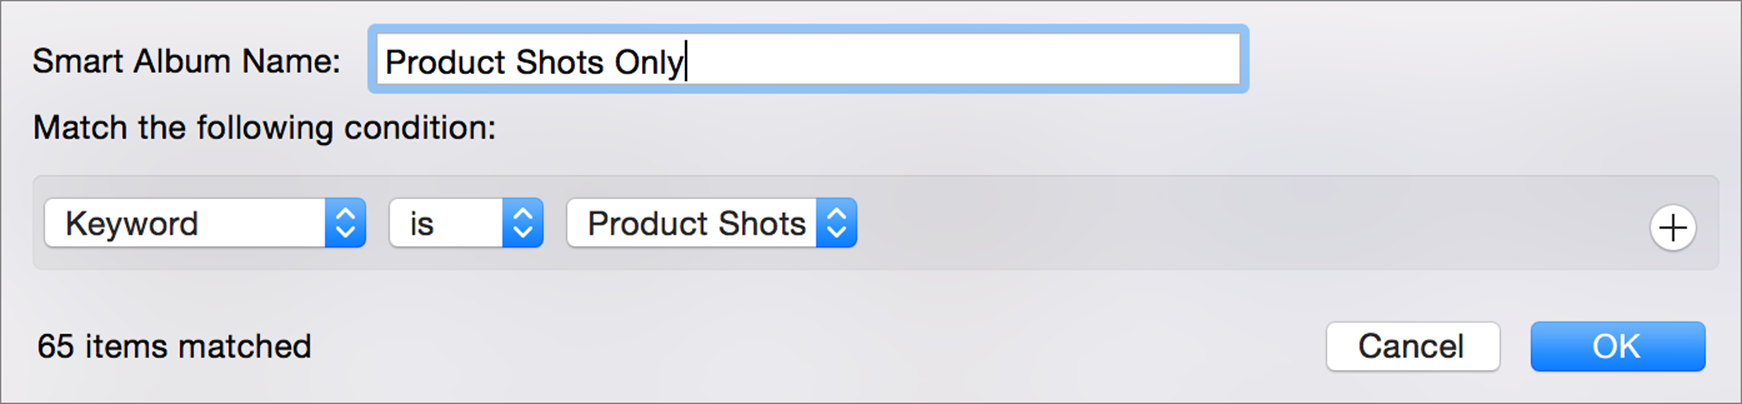
② The basic Smart Album dialog.
3. Define the rules of your album as described ahead in this chapter.
4. Click OK.
Note: In the Albums pane and the Albums section of the sidebar, smart albums always stand out from other albums: a small gear ![]() icon appears next to their names.
icon appears next to their names.
Editing Smart Album Settings
You can always edit the settings of your smart album later to change or fine-tune what it searches for. Select a smart album, and choose File > Edit Smart Album; or Control-click the album itself, and choose Edit Smart Album.
Choose Smart Options
Photos lets you find photos and videos based on more than a dozen different criteria (see the nearby “Conditions You Can Choose“ sidebar for a list). If you can imagine a way to slice your Photos library, you can probably find a way to make a smart album to do it. Photos of your cousin taken in May 2007; iPhone photos tagged with the keyword Family, favorite images without written descriptions… the works.
Smart albums work by responding to different conditions, such as [Face] [includes] Grandma Mary or [Keyword] [is not] [Vacation].
You only need one condition in a smart album, but they become more powerful when you add more conditions ③ by clicking the plus icon to the right of the first condition.
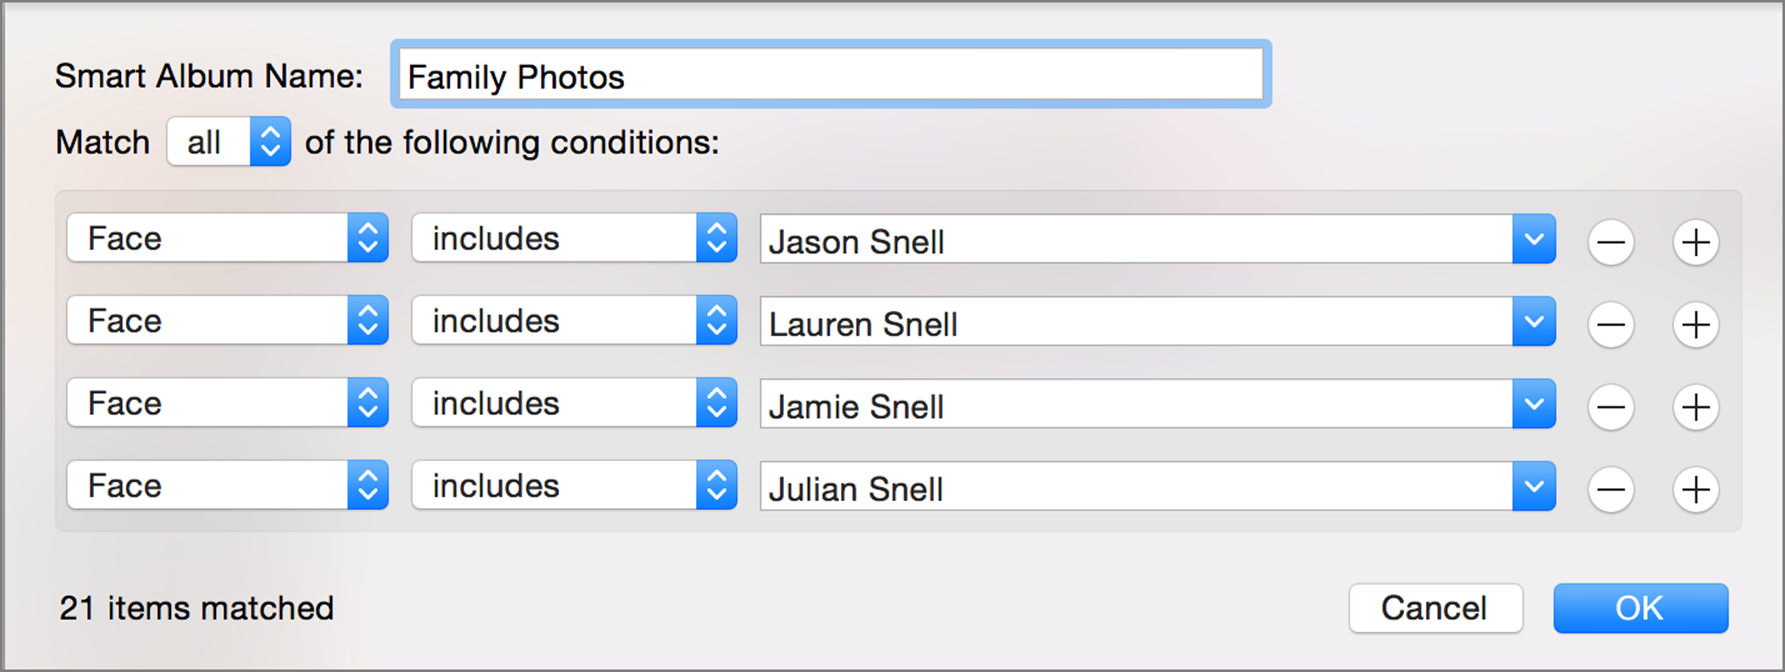
③ This smart album uses four different rules, and is set to match all conditions. (The total items matched is listed in the lower left corner.)
Expand or Shrink the Search
You can set a smart album to match any of the conditions you set, or all of them, by changing the pop-up option just above the stack of conditions. This option can result in very different searches.
The Match All of the Following option is best when you’re trying to capture a small group of items—think of the stack of conditions as a set of statements separated by the word “and”: show me photos with the keyword Vacation and the keyword Holiday. Each condition narrows the search results to fewer items.
In contrast, think of the Match Any of the Following option as conditions separated by “or” ④: show me photos with the keyword Vacation or the face of Grandma Mary. Each condition finds more items.
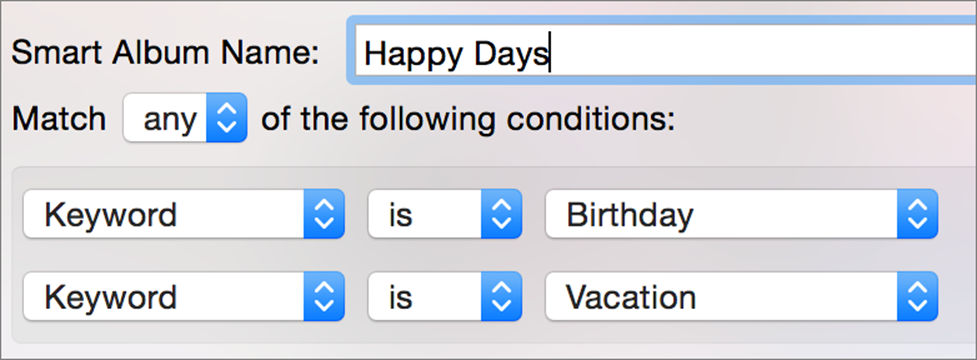
④ Using the Match Any option lets you gather images with different attributes together in a single album.
Conditions You Can Choose
There are plenty of different kinds of data that you can use to build a smart album, including:
· Items in a specific (non-smart) album
· The date the image was taken
· Description text you entered
· Faces identified in an image
· The name of the original file
· Keywords
· Favorites
· File type (image, movie, raw)
· If an image has been edited
· If an image contains geotagging
· Model of camera
· If the camera flash was used
· Type of lens used
· Camera settings, including aperture, focal length, ISO, and shutter speed
Use the Info Window
If you’re looking for smart-album inspiration, a good place to start is the Info window. Loaded with details about the currently selected image ⑤, the Info window is one of the most valuable bits of real estate in the Photos interface.
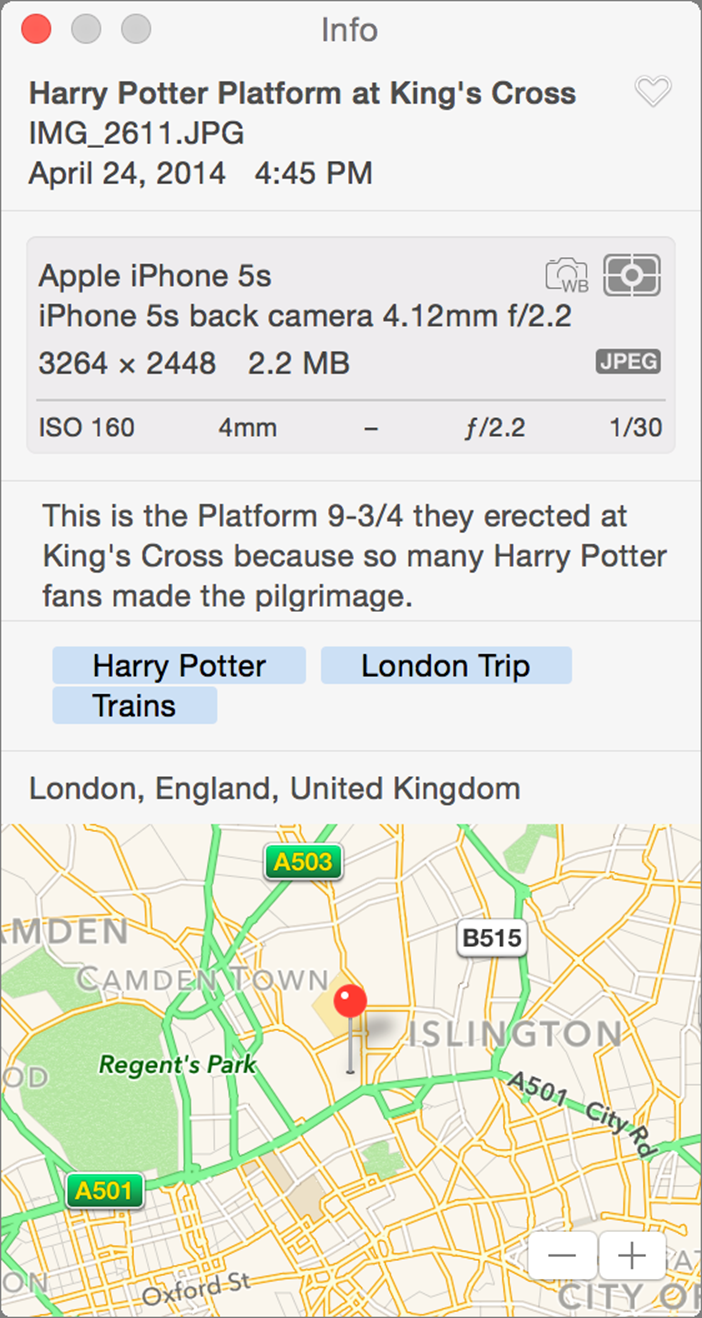
⑤ The Info window is packed with all the behind-the-scenes information about your photo.
How to Display the Info Window
· Press Command-I.
· Choose Window > Info.
· When you’re zoomed in to a single photo, click the Info ![]() button on the right side of the title bar.
button on the right side of the title bar.
What You Can See and Do
· The title you’ve given the image (which you can edit)
· Its base filename
· Date and time the image was taken
· Whether it’s a Favorite (it’s a fave if the heart icon is filled in; click the heart to toggle favorite status on or off)
The next section down, shaded in gray, displays metadata (also known as EXIF data) from your camera, including:
· Camera name and type of lens
· Image dimensions, file size, and file format
· ISO, f-stop, flash, white balance, and aperture settings
Below the EXIF data, you can:
· View or enter a description
· View or add keywords
· Add faces
· If your photo is geotagged, see on a map where it was taken
Adding More Info
The Info Window isn’t just for looking. It’s a good place to enter an image’s title, description, keywords, and even tag faces.
Note: You can’t edit any EXIF or geotag information in Photos itself, though you can do so via an external editor and then manually import the images. See Import Your Files into Photos for more.
All materials on the site are licensed Creative Commons Attribution-Sharealike 3.0 Unported CC BY-SA 3.0 & GNU Free Documentation License (GFDL)
If you are the copyright holder of any material contained on our site and intend to remove it, please contact our site administrator for approval.
© 2016-2026 All site design rights belong to S.Y.A.