Sparrow iOS Game Framework Beginner's Guide (2014)
Chapter 6. Adding Game Logic
In the previous chapter, we learned about animating our objects on the screen using tweens; we also learned about sprite sheets, generated our very own sprite sheet with texture information, and animated it.
Let's take a quick look at what kind of topics we will tackle in this chapter:
· Shooting cannonballs, which is pretty much a core mechanic of our game
· Once a cannonball is displayed on the battlefield, it should be able to collide with the enemy ship
· Destroying the enemy ship, if enough cannonballs hit the ship
Extending the asset manager
In the previous chapter, we loaded our very first texture atlas and displayed each subtexture as frames in a movie clip. We did not use our asset manager for this as we hadn't implemented this functionality yet.
So, let's go ahead and allow our asset manager to deal with texture atlases.
Time for action – adding texture atlases to the asset manager
We can extend our asset manager with the following steps:
1. Open our game's project file, if it's not already open.
2. Switch to the TextureManager.h file and declare the method registerTextureAtlas, as shown in the following code:
-(SPTextureAtlas *) registerTextureAtlas:(NSString *) filename;
3. Switch to the TextureManager.m file and implement the registerTextureAtlas method, as shown in the following code:
4. -(SPTextureAtlas *) registerTextureAtlas:(NSString *) filename
5. {
6. if ([_dict objectForKey:filename] == nil) {
7. return (SPTextureAtlas *) [self registerAsset:filename withContent:[SPTextureAtlas atlasWithContentsOfFile:filename]];
8. } else {
9. return (SPTextureAtlas *) [self registerAsset:filename withContent:nil];
10. }
}
11. Head over to the Assets.h file and add the static method textureAtlas:
+(SPTextureAtlas *) textureAtlas:(NSString*)filename;
12. In the Assets.m file, implement the following method by referring to its TextureManager instance:
13.+(SPTextureAtlas *) textureAtlas:(NSString*)filename
14.{
15. return [textureAssets registerTextureAtlas:filename];
}
16. In the battlefield scene (Battlefield.m), navigate to where we are loading the texture atlas and getting the textures:
17.SPTextureAtlas *atlas = [SPTextureAtlas atlasWithContentsOfFile:@"ship_pirate_small_cannon.xml"];
18.
NSArray *textures = [atlas texturesStartingWith:@"00"];
Replace the preceding code with the following line of code:
NSArray *textures = [[Assets textureAtlas:@"ship_pirate_small_cannon.xml"] texturesStartingWith:@"00"];
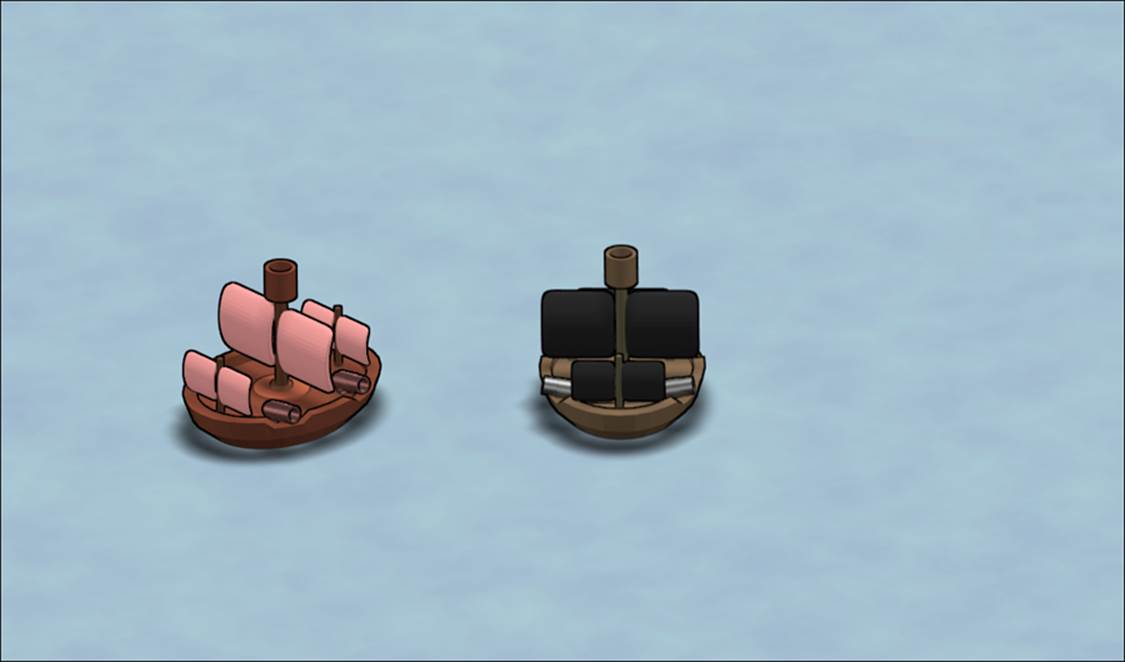
19. Run the example. We will see the following constellation of ships on the screen:
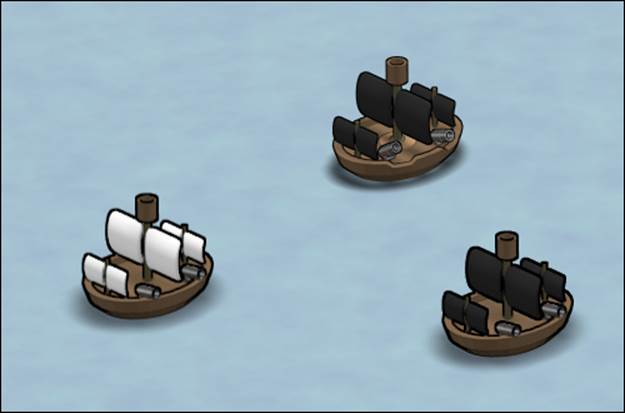
What just happened?
In step 1, we opened our Xcode template from where we left off in the previous chapter. In order to load texture atlases, we needed to switch to the texture manager, which we designated to load everything that is remotely connected to textures. In step 2, we declared the method we used in order to use texture atlases through the asset management system. To keep the method names consistent, we will name this method registerTextureAtlas to make it similar to registerTexture. The signature resembles that ofregisterTexture, but it returns an instance of SPTextureAtlas instead of SPTexture.
In the next step, we implemented the registerTextureAtlas method that loads the texture through the filename parameter, and we used the SPTextureAtlas factory method just like we did when we learned about texture atlases.
Once we finished extending the texture manager part, we needed to extend the Assets class, which we did in step 4 by adding the function head which we implemented in step 5. To keep the naming scheme consistent, we named this method textureAtlas. In this method, we just called the registerTextureAtlas method of our texture manager and returned the result.
We updated the lines in the battlefield to load the texture atlas for the movie clip through the asset management system. Instead of two lines—one for setting up the texture atlas instance and another for getting the needed textures out of the atlas—we now have only a single line that gets our texture atlas with the textureAtlas method from the last two steps and then gets the necessary textures for the movie clip.
When we ran the example in the last step, we had the exact result as we did at the end of the previous chapter, which is a good sign and an indication that the changes work as they should.
Structuring our ships
So far, our ships are just instances of SPImage with tweens attached to them right inside our battlefield scene. In order to keep code duplication to a minimum, let's refactor the ship logic into its own class.
Time for action – creating a ship class
To structure the code of our ship, follow these steps:
1. Add a new group called Entities.
2. Inside this group, add a new Objective-C class called Ship, which is derived from SPSprite.
3. Open the Ship.h file. Add one instance variable for the ship image and another for the movie clip of the ship shooting cannonballs, as shown in the following code:
4. SPMovieClip *_shootingClip;
SPImage *_idleImage;
5. Declare an alternative initializer called initWithContentsOfFile, which takes an NSString as its parameter:
-(id)initWithContentsOfFile:(NSString *)filename;
6. Declare a method called shoot, as shown in the following code:
-(void) shoot;
7. Declare another method called moveTo that takes the x value as its first parameter and the y value as its second parameter, as shown in the following code:
-(void) moveToX:(float) x andY:(float) y;
8. Declare a method called stop, as shown in the following code:
-(void) stop;
9. Define the default initializer for the Ship class with the following lines of code:
10.-(id) init
11.{
12. if ((self = [super init])) {
13. NSArray *textures = [[Assets textureAtlas:@"ship_pirate_small_cannon.xml"] texturesStartingWith:@"00"];
14.
15. _shootingClip = [SPMovieClip movieWithFrames:textures fps:20.0f];
16.
17. if (_idleImage == nil) {
18. _idleImage = [[SPImage alloc] init];
19. }
20.
21. [self addChild:_shootingClip];
22. [self addChild:_idleImage];
23. }
24.
25. return self;
}
26. Now, define the alternate initializer that takes filename as its parameter, as shown in the following code:
27.-(id) initWithContentsOfFile:(NSString *)filename
28.{
29. _idleImage = [[SPImage alloc] initWithTexture:[Assets texture:filename]];
30.
31. return [self init];
}
32. Implement the shoot method with the following lines:
33.-(void) shoot
34.{
35. [_shootingClip play];
36. [Sparrow.juggler addObject:_shootingClip];
}
37. The content of the moveTo method should look like the following code:
38.-(void) moveToX:(float)x andY:(float)y
39.{
40. [self stop];
41.
42. float targetX = x - (self.width / 2);
43. float targetY = y - (self.height / 2);
44.
45. float distanceX = fabsf(self.x - targetX);
46. float distanceY = fabsf(self.y - targetY);
47.
48. float penalty = (distanceX + distanceY) / 80.0f;
49.
50. float shipInitial = 0.25f + penalty;
51.
52. float speedX = shipInitial + (distanceX /
53. Sparrow.stage.width) * penalty * penalty;
54. float speedY = shipInitial + (distanceY / Sparrow.stage.height) * penalty * penalty;
55.
56. SPTween *tweenX = [SPTween tweenWithTarget:self time:speedX];
57. SPTween *tweenY = [SPTween tweenWithTarget:self time:speedY];
58.
59.
60. [tweenX animateProperty:@"x" targetValue:targetX];
61. [tweenY animateProperty:@"y" targetValue:targetY];
62.
63. [Sparrow.juggler addObject:tweenX];
64. [Sparrow.juggler addObject:tweenY];
}
65. Implement the stop method, as shown in the following code:
66.-(void) stop
67.{
68. [Sparrow.juggler removeObjectsWithTarget:self];
}
69. Switch to the Battlefield.h file and update the class so that the instance variable _pirateShip is from the type Ship, as shown in the following code:
70.#import "Scene.h"
71.#import "Ship.h"
72.
73.@interface Battlefield : Scene {
74. Ship *_pirateShip;
}
75. Now, switch to the Battlefield.m file.
76. Update the onBackgroundTouch method in the scene, as shown in the following code:
77.SPTouch *touch = [[event touchesWithTarget:self] anyObject];
78.
79.if (touch) {
80. [_pirateShip moveToX:touch.globalX andY:touch.globalY];
}
81. Next, update the onShipStop method, as shown in the following code:
82.SPTouch *touch = [[event touchesWithTarget:self andPhase:SPTouchPhaseBegan] anyObject];
83.
84.if (touch) {
85. [_pirateShip stop];
}
86. Update the remaining references from SPImage to the Ship class and remove all occurrences of the cannon ship, as shown in the following code:
87._pirateShip = [[Ship alloc] initWithContentsOfFile:@"ship_pirate.png"];
88._pirateShip.x = (Sparrow.stage.width - _pirateShip.width) / 2;
89._pirateShip.y = (Sparrow.stage.height - _pirateShip.height) / 2;
90.
91.Ship *ship = [[Ship alloc] initWithContentsOfFile:@"ship.png"];
92.ship.x = 100;
ship.y = 100;
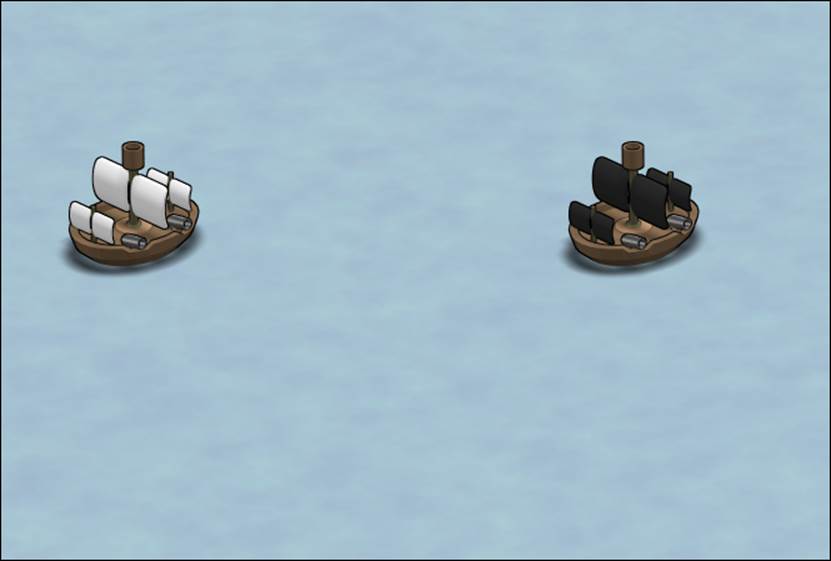
93. Run the example. We now see the pirate and enemy ships on the screen:
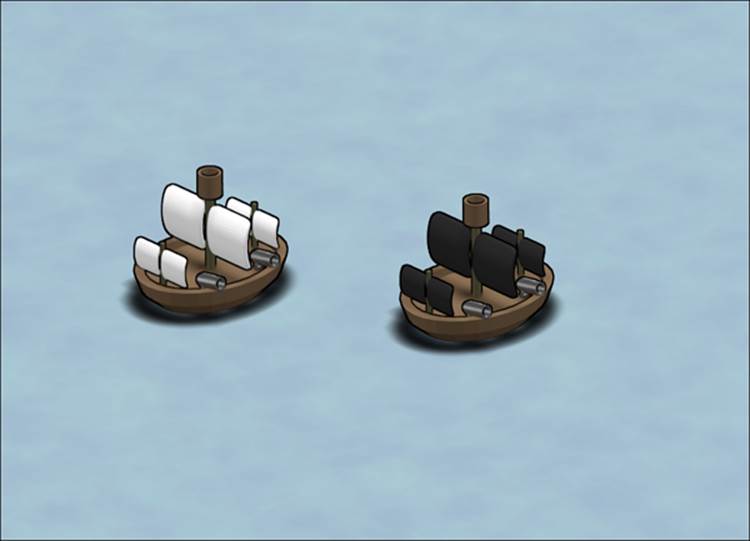
What just happened?
In game development, the term entity usually refers to an object on the screen which interacts with other objects. Let's take a 2D action side-scroller as an example: the enemy ships as well as the ship controlled by the player were entities. The bullets were entities too. A bullet, for example, interacted with the player ship as it spawned from it. The enemy ships interacted with the bullets; if a bullet hit an enemy ship, it needed to react by losing hit points or by being destroyed. The same applied to the player ship.
Entities also feature in more advanced game development techniques such as the entity-component pattern, where the interaction is described as components. These components are then attached to entities.
What we need to take away from our game is a clear separation between the different elements of the game. In step 1, we added a new group called Entities. In the next step, we defined our very first entity called Ship, which is a subclass of SPSprite. It was also possible to add a prefix before the class name, just like all Sparrow classes have the prefix SP. For our game, the prefix PG would make sense as it stands for PirateGame.
The ship had two instance variables, which we declared in step 3: one was the cannonball-shooting animation we previously saw in the battlefield scene and the second was the image of the ship itself.
In addition to the default initializer, we declared a second initializer in step 4. This method takes filename as a parameter. We didn't want to create a separate class for the pirate ship. We can use the same class for both types. We just needed a different filenameparameter for either the enemy or the pirate ship.
Our ship class needed to have the following behaviors:
· Shooting (step 5)
· Moving the ship to a certain position (step 6)
· Stopping the movement (step 7)
Our Ship.h file now looks like the following code:
#import "SPSprite.h"
@interface Ship : SPSprite {
SPMovieClip *_shootingClip;
SPImage *_idleImage;
}
-(id)initWithContentsOfFile:(NSString *)filename;
-(void) shoot;
-(void) moveToX:(float) x andY:(float) y;
-(void) stop;
@end
Once all methods and instance variables for the Ship class were declared, we went on to implement the methods. Before we did that, we defined the initializer in step 8: we initialized the movie clip—with the texture atlas from the shooting pirate ship—and the ship image itself. The only difference to what we know so far is that we are initializing the image if it hasn't been initialized yet.
In the second initializer that we implemented in step 9, we initialized the image with the filename we passed in and we called the default initializer. So, if the alternate initializer was called, we didn't overwrite the _idleImage instance variable with a fresh instance ofSPImage.
The full piece of code of Ship.m up to this point is as follows:
#import "Ship.h"
#import "Assets.h"
@implementation Ship
-(id) init
{
if ((self = [super init])) {
NSArray *textures = [[Assets textureAtlas:@"ship_pirate_small_cannon.xml"] texturesStartingWith:@"00"];
_shootingClip = [SPMovieClip movieWithFrames:textures fps:20.0f];
if (_idleImage == nil) {
_idleImage = [[SPImage alloc] init];
}
[self addChild:_shootingClip];
[self addChild:_idleImage];
}
return self;
}
-(id) initWithContentsOfFile:(NSString *)filename
{
_idleImage = [[SPImage alloc] initWithTexture:[Assets texture:filename]];
return [self init];
}
In the next steps, we implemented methods for the ship's actions:
· Shooting: Plays the _shooting movie clip (step 10).
· Moving: This is the moving logic of the ship we previously had in the backgroundTouch method in the battlefield scene. Instead of removing all tweens from the ship instance, we called the stop method from the ship instance (step 11).
· Stopping: Removes all tweens from the current instance (step 12).
In its completeness, these methods look like the following piece of code:
-(void) shoot
{
[_shootingClip play];
[Sparrow.juggler addObject:_shootingClip];
}
-(void) moveToX:(float)x andY:(float)y
{
[self stop];
float targetX = x - (self.width / 2);
float targetY = y - (self.height / 2);
float distanceX = fabsf(self.x - targetX);
float distanceY = fabsf(self.y - targetY);
float penalty = (distanceX + distanceY) / 80.0f;
float shipInitial = 0.25f + penalty;
float speedX = shipInitial + (distanceX / Sparrow.stage.width) * penalty * penalty;
float speedY = shipInitial + (distanceY / Sparrow.stage.height) * penalty * penalty;
SPTween *tweenX = [SPTween tweenWithTarget:self time:speedX];
SPTween *tweenY = [SPTween tweenWithTarget:self time:speedY];
[tweenX animateProperty:@"x" targetValue:targetX];
[tweenY animateProperty:@"y" targetValue:targetY];
[Sparrow.juggler addObject:tweenX];
[Sparrow.juggler addObject:tweenY];
}
-(void) stop
{
[Sparrow.juggler removeObjectsWithTarget:self];
}
@end
In the last steps, we updated the battlefield scene. First, we updated the header file. We needed to import the Ship.h file, and instead of being a pointer to SPImage, the _pirateShip instance variable was a pointer to the Ship class.
After this step, our Battlefield.h file had the following content:
#import "Scene.h"
#import "Ship.h"
@interface Battlefield : Scene {
Ship* _pirateShip;
}
@end
We updated the touch interactions in the battlefield scene:
· onBackgroundTouch: Since we moved the movement logic to the Ship class, we just needed to call the correct method, which was moveTo, and pass in the x and y coordinate of touch (step 15)
· onShipStop: Similar to the moveTo method, we just needed to call the stop method of the ship itself (step 16)
The touch events inside the Battlefield.m file should resemble the following piece of code:
#import "Battlefield.h"
#import "Assets.h"
@implementation Battlefield
-(void) onBackgroundTouch:(SPTouchEvent*) event
{
SPTouch *touch = [[event touchesWithTarget:self] anyObject];
if (touch) {
[_pirateShip moveToX:touch.globalX andY:touch.globalY];
}
}
-(void) onShipStop:(SPTouchEvent*) event
{
SPTouch *touch = [[event touchesWithTarget:self andPhase:SPTouchPhaseBegan] anyObject];
if (touch) {
[_pirateShip stop];
}
}
In the next step, we updated the initializer for the ships. We didn't need the cannonShip movie clip anymore as this was an instance variable inside the Ship class.
Let's take a look at the initializer in the following code that binds these touch selectors and sets up the ship itself:
-(id) init
{
if ((self = [super init])) {
SPImage *background = [SPImage imageWithTexture:[Assets texture:@"water.png"]];
background.x = (Sparrow.stage.width - background.width) / 2;
background.y = (Sparrow.stage.height - background.height) / 2;
_pirateShip = [[Ship alloc] initWithContentsOfFile:@"ship_pirate.png"];
_pirateShip.x = (Sparrow.stage.width - _pirateShip.width) / 2;
_pirateShip.y = (Sparrow.stage.height - _pirateShip.height) / 2;
Ship *ship = [[Ship alloc] initWithContentsOfFile:@"ship.png"];
ship.x = 100;
ship.y = 100;
SPTween *shipTween = [SPTween tweenWithTarget:ship time:4.0f transition:SP_TRANSITION_EASE_IN_OUT];
[shipTween animateProperty:@"y" targetValue:250];
shipTween.repeatCount = 5;
shipTween.reverse = YES;
shipTween.delay = 2.0f;
[Sparrow.juggler addObject:shipTween];
[background addEventListener:@selector(onBackgroundTouch:) atObject:self forType:SP_EVENT_TYPE_TOUCH];
[_pirateShip addEventListener:@selector(onShipStop:) atObject:self forType:SP_EVENT_TYPE_TOUCH];
[self addChild:background];
[self addChild:ship];
[self addChild:_pirateShip];
}
return self;
}
@end
When we ran the example, we saw two ships on the screen; if we tapped anywhere, our pirate ship moved to that point, just like we expected it to. If we touched the ship during movement, it stopped.
Extending the ship class
Now that the base of our ship class is done, let's think of what we need for the ship class:
· Hit points: If a ship is hit, the hit points should reflect this state. The ship will start out with a given number of hit points, say 20 for example, and it will lose some each time it is hit. When it finally reaches zero hit points, it will be completely destroyed.
· Direction: This is the direction the ship is facing. Depending on the direction, the cannonballs will be fired from each side of the ship.
We should abstain from using filenames where we don't necessarily need to, for example now, when initializing our ship instances.
Before we go ahead and get to the coding part of things, let's download the latest images from https://github.com/freezedev/pirategame-assets/releases/download/0.6/Graphics_06.zip. These images include updated sprite sheets for both the pirate ship and a cannonball that we will use later.
Delete the ship_small_cannon files and copy the newer files to the project. This can be done easily, but Xcode doesn't always like replacing existing files.
Time for action – adding more functionality to the ship class
Let's extend the ship class using the following steps:
1. Open the Ship.h file.
2. Add enum for the eight directions of the ship, as shown in the following code:
3. typedef NS_ENUM(NSInteger, ShipDirection) {
4. DirectionNorth,
5. DirectionSouth,
6. DirectionWest,
7. DirectionEast,
8. DirectionNorthWest,
9. DirectionNorthEast,
10. DirectionSouthWest,
11. DirectionSouthEast
};
12. Add another enum for the type of the ship, as shown in the following code:
13.typedef NS_ENUM(NSInteger, ShipType) {
14. ShipPirate,
15. ShipNormal
};
16. Change the _shootingClip instance variable to be a pointer to the NSArray class and remove the _idleImage instance variable, as shown in the following code:
NSArray *_shootingClip;
17. Add a property for the ship's hitpoints, as shown in the following line of code:
@property int hitpoints;
18. Add another property for type, as shown in the following line of code:
@property ShipType type;
19. The third property is the direction of the ship:
@property (nonatomic) ShipDirection direction;
Because we will need to write custom getters and setters for this property as well, we will need an instance variable of the same name, prefixed with an underscore:
@interface Ship : SPSprite {
NSArray *_shootingClip;
ShipDirection _direction;
}
20. Replace the initWithContentsOfFile method declaration with initWithType. This method takes ShipType as its parameter, as shown in the following line of code:
-(id)initWithType:(ShipType)type;
21. Switch to the Ship.m file.
22. Let's implement the initWithType method with the following lines of code:
23.-(id) initWithType:(ShipType)type
24.{
25. if ((self = [super init])) {
26. self.hitpoints = 100;
27. self.type = type;
28.
29. SPTextureAtlas *atlas = (type == ShipPirate) ? [Assets textureAtlas:@"ship_pirate_small_cannon.xml"] : [Assets textureAtlas:@"ship_small_cannon.xml"] ;
30.
31. NSArray *texturesNorth = [atlas texturesStartingWith:@"n_00"];
32. // ...
33.
34. float animationFPS = 12.0f;
35.
36. SPMovieClip *clipNorth = [SPMovieClip movieWithFrames:texturesNorth fps:animationFPS];
37. // ...
38.
39. _shootingClip = [NSArray arrayWithObjects:clipNorth, clipSouth, clipWest, clipEast, clipNorthWest, clipNorthEast, clipSouthWest, clipSouthEast, nil];
40.
41. for (SPMovieClip* clip in _shootingClip) {
42. clip.loop = NO;
43. [self addChild:clip];
44. }
45.
46. self.direction = DirectionSouthWest;
47. }
48.
49. return self;
}
50. Remove the initWithContentsOfFile method and update the default initializer to use the initWithType method, as shown in the following code:
51.-(id) init
52.{
53. return [self initWithType:ShipNormal];
}
54. Implement the custom getter for the direction property by simply returning the _direction instance variable.
55. The setter for the direction property needs to have the following code:
56._direction = direction;
57.
58.for (SPMovieClip* clip in _shootingClip) {
59. clip.visible = NO;
60.}
61.
((SPMovieClip *) _shootingClip[_direction]).visible = YES;
62. Replace the content of the shoot method with the following lines:
63.for (SPMovieClip* clip in _shootingClip) {
64. [Sparrow.juggler removeObjectsWithTarget:clip];
65.}
66.
67.[_shootingClip[self.direction] play];
68.[Sparrow.juggler addObject:_shootingClip[self.direction]];
69.
70.[_shootingClip[self.direction] addEventListenerForType:SP_EVENT_TYPE_COMPLETED block:^(SPEvent *event)
71.{
72. [_shootingClip[self.direction] stop];
}];
73. Within the moveTo method, after the creation of the tweenX and tweenY objects, declare and define two variables that should detect which direction the ship will be rotated to, as shown in the following code:
74.int signX = 0;
int signY = 0;
75. Only update the values if a certain threshold has been broken, as shown in the following code:
76.if (distanceX > 40) {
77. signX = (self.x - targetX) / distanceX;
78.}
79.
80.if (distanceY > 40) {
81. signY = (self.y - targetY) / distanceY;
}
82. Change direction to DirectionEast if signX has the value 1 and signY still has the value 0, as shown in the following code:
83.if ((signX == 1) && (signY == 0)) {
84. self.direction = DirectionEast;
}
85. Repeat this for all the remaining directions.
86. Switch to the Battlefield.m file.
87. Update the initializers to the pirate and enemy ships. Only the pirate ship needs to have the PirateShip value from the ShipType type.
88. Inside the onShipStop method, add the functionality to shoot when the pirate ship is tapped twice and stop if the ship is tapped once, as shown in the following code:
89.if (touch) {
90. if (touch.tapCount == 1) {
91. [_pirateShip stop];
92. } else if (touch.tapCount == 2) {
93. [_pirateShip shoot];
94. }
}
95. Rename onShipStop and all its references to onShipTap.
96. Run the example.
We now see that the ship is moving in the direction where we touched the screen.
What just happened?
First, we opened the ship header file, and then we defined an enum for all the direction states. Objective-C provides a handy NS_ENUM macro which lets us do exactly that. As the first parameter, we need the type the enum will be represented as. The second parameter is the name of the enum type. This enum type has eight states: north, south, west, east, and a combination of these.
In step 3, we defined a second enum for the type of ship. It can either be a pirate ship or a normal enemy ship without black flags.
In step 4, we redefined the type of the _shootingClip instance. The reasoning behind this change is that we hold all movie clips in an array and can access a specific movie clip through the index.
In the next few steps, we added a few properties to the class, as listed:
· hitpoints: This indicates how many hit points the ship currently has (step 5)
· type: This indicates the type of the ship (step 6)
· direction: This indicates the direction the ship is facing (step 7)
While it would have been fine to just add the filename to each initializer call when we created an instance of the ship class, it would get messy once we either changed all of these filenames or if we had more than just a few ships on the screen. This is why we replaced the initWithContentsOfFile method with the initWithType method.
Next, we implemented all of the methods we just declared. We started with the one we declared last. As this was our go-to initializer, we got through what was happening here:
· We set the hitpoints property to 100. While 100 is more or less a random number, it is a good starting point to balance from as it's very easy to calculate with. For example, let's say we require four hits to destroy any ships; the damage potential of a cannonball is 25.
· We set the type property to the value of the type parameter.
· We set the texture atlas to either the pirate ship atlas or the other option, depending on the type. A ternary operation was just a fancy way of writing an if statement, as shown in the following line of code:
if (type == ShipPirate) { ... } else { ... }
The advantage of the ternary operation was that we could assign its result directly to a variable.
· We got the textures for each direction. Within the texture atlas, every direction of the shooting animation was prefixed with the abbreviation of the direction: n for north, nw for northwest, and so on.
· We then defined the speed for the animations. We set it to 12 frames per second as we didn't want the animation to be slower than usual. After all, operating the cannons is tough.
· Just like we made an instance of NSArray for every direction, we needed to do the same for all the movie clips. We could also write this line as follows:
_shootingClip = @[clipNorth, clipSouth, clipWest, clipEast, clipNorthWest, clipNorthEast, clipSouthWest, clipSouthEast];
· We added all movie clips to the _shootingClip instance variable.
· All the movie clips were added to the display tree by iterating over the _shootingClip instance variable. We also wanted the movie clips to play only once, which is why we set the loop property to NO.
· The default direction of a ship was south-west.
In step 11, we significantly simplified the default initializer by just calling the initWithType initializer with the ShipNormal type.
We started with creating the custom getters and setters for the direction property. We added the nonatomic keyword to the property definition. This was a performance optimization method to make the generated accessor faster, but non-thread safe. Since Sparrow should only be used single-threaded, it was safe to use nonatomic in our game. Internally, Objective-C had already defined the getters and setters as propertyName and setPropertyName, or in our case, direction and setDirection.
To use our own code, we just needed to overwrite these methods. The getter for the direction property was pretty simple as it just needed to return the _direction instance variable.
In our custom setter for the direction property, we needed to set the instance variable _direction to the value of the parameter first. Then, we iterated through all the movie clips and set its visible property to NO. We then showed the movie clip of the current direction. This was very similar to how we show scenes through the scene director.
In step 14, we updated the shoot method using the following steps:
· We removed all animatable objects from the juggler which originate from any of the movie clips.
· We played the movie clip from the current direction and added it to the juggler.
· We added an event listener to the movie clip that fired when the movie clip animation was complete. Instead of a selector, we used a block. A block (also called a closure in non-Objective-C environments) is a function which has access to non-local variables. So, while we could define variables inside the block, we accessed the variables as if we were declaring a statement inside the shoot method. A block had a certain appeal to it as we didn't need to define a separate selector for just a few lines of code. There were few things we needed to be careful about when using blocks, but Xcode usually warned us about potential side effects.
· Inside our block, we stopped the movie clip as it didn't reset itself. It was like rewinding a VHS tape.
At this time, we updated the ship's direction when it moved. To achieve this, we defined two variables inside the moveTo method: signX and signY. Their default values were 0.
The idea behind that was to map the direction from the values we got in our moveTo method to a value from the ShipDirection values. If signY was 1, it would map to DirectionNorth; if signX was -1, it would map to DirectionWest; and if both had the values at the same time, they would map to DirectionNorthWest.
We had set the signX variables to the x coordinate of the object minus the target x coordinate and dividing that by distanceX. So, our values for signX were either 1 or -1. The same happened for the signY variable.
Now, if we moved the ship, we only got directions such as DirectionNorthWest, DirectionNorthEast, DirectionSouthEast, and DirectionSouthWest. It is pretty much impossible to tap the same pixel on a line twice. This was why we needed a threshold. We only set signXand signY to 1 or -1, respectively, if distance was more than 40 points. In this case, 40 was not a random number; a rectangle with 40 x 40 points is the average size of a tap, according to Apple.
In steps 17 and 18, we mapped the signX and signY variables to the ShipDirection values, and we set the direction property accordingly.
Within the battlefield scene, we needed to create our ship instances. For the enemy ship, we used the default initializer.
In step 21, we updated the onShipStop method. We utilized the tapCount property of the touch object to see how many times the object had been tapped. If the ship had been tapped once, it would stop its movement, and if it had been tapped twice, it would shoot.
Since the onShipStop method did not only stop the ship but also shot if tapped twice, it was a good call to rename this method to onShipTap.
When we ran the example, the ship changed its direction depending on where we tapped on the screen, and when we double-tapped the ship, we saw the cannon animation.
Shooting cannonballs
When we double-tap our ship, the animation plays. However, there is one obvious thing missing, the cannonballs! Let's go ahead and add some cannonballs.
Time for action – allowing the ship to shoot cannonballs
Let's allow the pirate ship to shoot cannonballs by following these steps:
1. Open the Ship.h file.
2. Add a read-only property called isShooting, which has an instance variable counterpart called _isShooting, as shown in the following code:
@property (readonly) BOOL isShooting;
3. Add a cannonball for the left-hand side and the right-hand side of the ship. Both of them are pointers to SPImage, as shown in the following code:
4. @property SPImage *cannonBallLeft;
@property SPImage *cannonBallRight;
5. Switch to the Ship.m file.
6. Inside the initWithType method, set the _isShooting instance variable to NO at the top of the method.
7. Inside the initWithType method, create both cannonballs with the cannonball.png image, set their visible property to NO, and add them to the display tree.
8. Inside the shoot method, abort if _isShooting is set to YES, else set _isShooting to YES, as shown:
9. if (_isShooting) {
10. return;
11.}
12.
_isShooting = YES;
13. Set some default values for the animation speed and target position, as shown in the following code:
14.float shootingTime = 1.25f;
15.float innerBox = 25.0f;
float targetPos = 30.0f;
16. Add a reference to the movie clip with the current direction, as shown in the following line of code:
SPMovieClip *currentClip = _shootingClip[self.direction];
17. Create a tween object for each cannonball and their respective x and y properties:
18.SPTween *tweenCbLeftX = [SPTween tweenWithTarget:self.cannonBallLeft time:shootingTime];
19.SPTween *tweenCbLeftY = [SPTween tweenWithTarget:self.cannonBallLeft time:shootingTime];
20.SPTween *tweenCbRightX = [SPTween tweenWithTarget:self.cannonBallRight time:shootingTime];
SPTween *tweenCbRightY = [SPTween tweenWithTarget:self.cannonBallRight time:shootingTime];
21. Set up the cannonballs and their tween properties for a direction pair, as shown in the following code:
22.switch (self.direction) {
23. case DirectionNorth:
24. case DirectionSouth:
25. self.cannonBallLeft.x = (-self.cannonBallLeft.width / 2) + innerBox;
26. self.cannonBallLeft.y = (currentClip.height - self.cannonBallLeft.height) / 2;
27.
28. self.cannonBallRight.x = (-self.cannonBallRight.width / 2) + currentClip.width - innerBox;
29. self.cannonBallRight.y = (currentClip.height - self.cannonBallRight.height) / 2;
30.
31. [tweenCbLeftX animateProperty:@"x" targetValue:self.cannonBallLeft.x - targetPos];
32. [tweenCbRightX animateProperty:@"x" targetValue:self.cannonBallRight.x + targetPos];
33.
34. break;
35.
36. default:
37. break;
}
38. Set up the cannonballs for the DirectionEast/DirectionWest pair.
39. Set both cannonballs to be visible on the screen and add all cannonball-related tweens to the main juggler.
40. Remove all tweens that originate from the cannonballs just after the line where we removed all tweens originating from the movie clips.
41. Once the movie clip is finished, set the _isShooting instance variable to NO and hide both cannonballs.
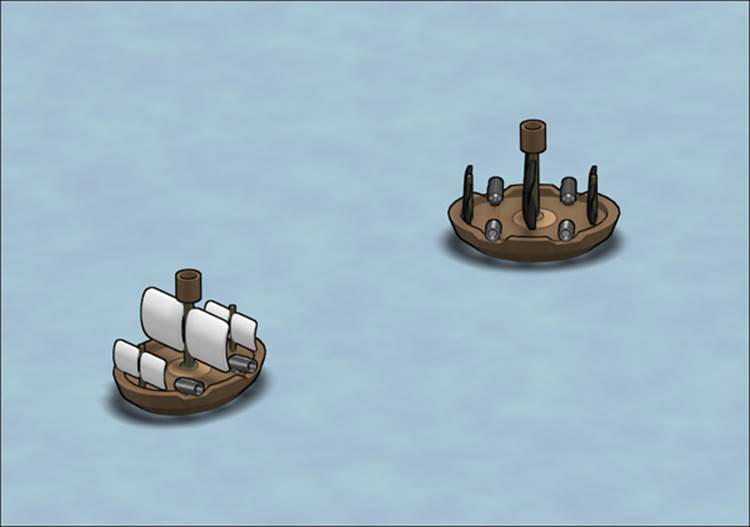
42. Run the example. Our pirate ship can now shoot cannonballs, as shown in the following screenshot:
What just happened?
We started this example in the header file of the Ship class, where we added a few new properties, such as:
· isShooting: This indicates if the ship is currently shooting (step 2)
· cannonBallLeft: This indicates the cannonball shooting from the left-hand side of the ship (step 3)
· cannonBallRight: This indicates the cannonball shooting from the right-hand side of the ship (step 3)
In the next steps, we modified the initWithType method using the following steps:
· We set _isShooting to a default value, which is NO (step 5)
· We created the cannonball objects (step 6)
· We hid both cannonballs (step 6)
· We added the cannonballs to the display tree (step 6)
Let's head into the shoot method and see what changed here:
· We only executed the method if the ship was not shooting to minimize potential side effects and prevent someone from tapping on the ship all the time (step 7).
· We defined the variable shootingTime at the time the shooting took place. It is set to 1.2 seconds because this is the approximate length of the movie clip animation (step 8).
· The variable innerBox was the distance from the edge of the ship image to the actual image itself (step 8).
· The variable targetPos stored how far the cannonballs would fly (step 8).
· For convenience, we defined the currentClip variable, so we didn't have to type _shootingClip[self.direction] each time we wanted to access the movie clip of the current direction (step 9).
· We defined a tween for each coordinate and cannonball, so in total, we had four tweens at this point (step 10).
· In steps 11 and 12, we set up the positions and the tweens for the cannonballs.
· We needed to see the cannonballs on the screen, which is why we set them to be visible. To see the corresponding animation, we needed to add the tweens to the juggler (step 13).
· We also removed all tweens originating from the cannonballs before we actually played the animation (step 14).
· The last thing we needed to update in the shoot method was setting the _isShooting instance variable to NO once the animation was complete, and we hid both cannonballs in the same block (step 15).
When we ran the example and double-tapped our pirate ship, the movie clip played and two huge cannonballs emerged from both sides of the ship.
Have a go hero
So far, the ship cannot shoot diagonally. Go ahead and implement this functionality on your own.
Collision detection
Before we implement collision detection, let's take a look at different types of collision detections:
· Bounding box collision: We check the bounds of the entities (which is a rectangle). If these rectangles intersect, we have a collision.
· Bounding sphere collision: We calculate the distance between two entities. If the distance is smaller than the radius of both entities combined, these entities are colliding.
· Pixel collision: We check if all the pixels of one entity intersect with the pixels of another entity. While this is definitely the most detailed and comprehensive collision check, it is also the most CPU-intensive one.
Now that our pirate ship is actually shooting cannonballs, let's implement the functionality that can hit and sink the enemy ship. We use the bounding box collision because this is one of the easiest collision detection types to implement.
Time for action – letting cannonballs collide with ships
To check if cannonballs collide against the enemy ship, follow these steps:
1. Open the Ship.h file.
2. We need to add custom getters and setters to the hitpoints property, so let's make this property nonatomic and add an instance variable called _hitpoints.
3. Declare the methods abortShooting and hit.
4. Switch to the Ship.m file.
5. The custom hitpoints getter just returns the instance variable _hitpoints.
6. The custom setter for hitpoints contains the following code:
7. -(void) setHitpoints:(int)hitpoints
8. {
9. _hitpoints = hitpoints;
10. if (_hitpoints <= 0) {
11. self.visible = NO;
12. }
}
13. The abortShooting method consists of the following lines:
14.-(void) abortShooting
15.{
16. _isShooting = NO;
17.
18. [Sparrow.juggler removeObjectsWithTarget:self.cannonBallLeft];
19. [Sparrow.juggler removeObjectsWithTarget:self.cannonBallRight];
20.
21. self.cannonBallLeft.visible = NO;
22. self.cannonBallRight.visible = NO;
}
23. The hit method has the following content:
24.-(void) hit
25.{
26. self.hitpoints = self.hitpoints - 25;
27.
28. for (SPMovieClip* clip in _shootingClip) {
29. SPTween *tween = [SPTween tweenWithTarget:clip time:0.3f];
30. tween.reverse = YES;
31. tween.repeatCount = 2;
32.
33. [tween animateProperty:@"color" targetValue:SP_RED];
34. [Sparrow.juggler addObject:tween];
35. }
}
36. In the battlefield header file, we need to add an instance variable called _enemyShip, which is a pointer to the class Ship.
37. Update the references from ship to _enemyShip.
38. Add an event listener to the SP_EVENT_TYPE_ENTER_FRAME event, as shown in the following code:
[self addEventListener:@selector(onEnterFrame:) atObject:self forType:SP_EVENT_TYPE_ENTER_FRAME];
39. Implement the onEnterFrame method with the following lines of code:
40.-(void) onEnterFrame:(SPEvent *)event
41.{
42. if (_pirateShip.isShooting) {
43. SPRectangle *enemyShipBounds = [_enemyShip boundsInSpace:self];
44. SPRectangle *ball1 = [_pirateShip.cannonBallLeft boundsInSpace:self];
45. SPRectangle *ball2 = [_pirateShip.cannonBallRight boundsInSpace:self];
46.
47. if ([enemyShipBounds intersectsRectangle:ball1] || [enemyShipBounds intersectsRectangle:ball2]) {
48. if (_pirateShip.cannonBallLeft.visible || _pirateShip.cannonBallRight.visible) {
49. [_pirateShip abortShooting];
50. [_enemyShip hit];
51. }
52. }
53. }
}
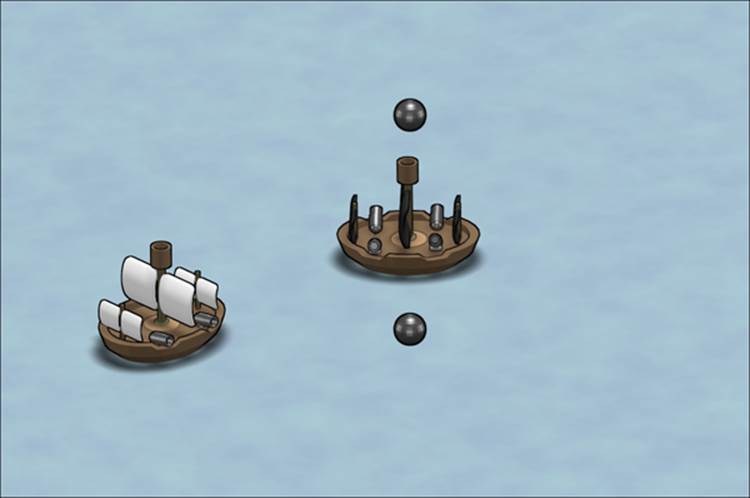
54. Run the example. When the enemy ship is hit, it flashes red for a moment, as shown in the following screenshot:
What just happened?
In step 2, we updated our hitpoints property so that we can add custom getters and setters. In the next step, we declared the methods abortShooting and hit. We needed the first method to cancel the current shooting animations and the second method to do something when a ship has been hit.
We defined the custom getter and setter in steps 5 and 6, respectively. For the getter, we just returned the instance variable _hitpoints that we declared in step 2. For the setter, we set this instance variable; but when _hitpoints equals or was below zero, we hid the ship.
The abortShooting method in step 7 set the _isShooting instance variable, removed all tweens from the cannonballs, and hid the cannonballs as well.
The hit method subtracted 25 points from hitpoints and added an animation that let the ship flash red for a very short amount of time to get some visual feedback if a ship had been hit.
In the next two steps, we refactored the enemy ship instance to be an instance variable, instead of being a local variable inside the initializer. We also updated all references to the enemy ship.
In step 11, we added an event listener. This event listener was called on each frame. In the next step, we implemented the collision between the enemy ship and the cannonballs from the pirate ship.
First, we needed to get the bounds from each of these objects relative to the current scene. We needed to see if any of the cannonballs intersected with the enemy ship. In order to make sure that the cannons were actually firing, we checked for the visibility of the cannonballs, and then we called the hit method from the enemy ship and the abortShooting method from the pirate ship. The latter was necessary, otherwise the check would happen again with a positive result, so much so that the enemy ship would be destroyedinstantly and we wouldn't even get to see the red flashing ship.
When we ran the example, we needed to hit the enemy ship exactly four times for it to disappear. Each time the enemy ship was hit, it flashed red for a moment.
Loading gameplay-relevant data
Let's reflect on what kind of gameplay-relevant data we have at this moment. They are:
· Hit points for each ship
· The damage a cannonball inflicts
· Positions for each ship in the battlefield
We should put this data in a file and load it in the game.
Time for action – avoiding hardcoded values
To separate and load our gameplay-relevant data, we need to follow these steps:
1. Add a new file called gameplay.json in the Resources folder with the following content:
2. {
3. "hitpoints": 100,
4. "damage": 25,
5. "battlefield": {
6. "enemy": {
7. "x": 100,
8. "y": 100
9. },
10. "pirate": {
11. "x": 300,
12. "y": 100
13. }
14. }
}
15. Open the Ship.h file.
16. Add a property called maxHitpoints, as shown in the following line of code:
@property int maxHitpoints;
17. Inside the Ship initializer, replace the piece of code where we set hitpoints with the following lines of code:
18.self.maxHitpoints = [(NSNumber *) [Assets dictionaryFromJSON:@"gameplay.json"][@"hitpoints"] intValue];
19.
self.hitpoints = self.maxHitpoints;
20. Inside the hit method, replace the hardcoded damage value to load from the gameplay.json file, as shown in the following code:
self.hitpoints = self.hitpoints - [(NSNumber *) [Assets dictionaryFromJSON:@"gameplay.json"][@"damage"] intValue];
21. Inside the Battlefield.m file, replace the hardcoded ship positions with those from the gameplay.json file, as shown in the following code:
22.NSDictionary *gameplayFile = [Assets dictionaryFromJSON:@"gameplay.json"];
23.
24._pirateShip = [[Ship alloc] initWithType:ShipPirate];
25._pirateShip.x = [(NSNumber *) gameplayFile[@"battlefield"][@"pirate"][@"x"] floatValue];
26._pirateShip.y = [(NSNumber *) gameplayFile[@"battlefield"][@"pirate"][@"y"] floatValue];
27.
28._enemyShip = [[Ship alloc] init];
29._enemyShip.x = [(NSNumber *) gameplayFile[@"battlefield"][@"enemy"][@"x"] floatValue];
_enemyShip.y = [(NSNumber *) gameplayFile[@"battlefield"][@"enemy"][@"y"] floatValue];
30. Run the example.
Instead of having hardcoded values in our code, we are now loading the values from a file. As a result, the ships are at different starting positions, as shown in the following screenshot:
What just happened?
In step 1, we created the JSON file with values that we will load later on. The values we have so far are the hit points, damage, and of course, positions of the ships.
Inside the Ship.h file, we added a new property called maxHitpoints, which indicates the maximum health of any ship.
In step 4, we first set the maxHitpoints property with the hitpoints property from the gameplay.json file. Since a property is loaded from the gameplay.json file and it is from the type id, we need to cast it into a more familiar data type. We casted it into a pointer toNSNumber and then used its integer value through the intValue method.
In the next step, we did the same for the damage property.
In step 6, we switched to the battlefield scene and updated the positions for the ships to reflect the same from the gameplay.json file.
When we ran the example, our ships were at the position we defined in the gameplay.json file. Shooting and destroying an enemy worked as expected.
Pop quiz
Q1. How can event listeners be described?
1. Using blocks
2. Using selectors
3. Using selectors or blocks
Q2. When is an event registered to SP_TYPE_EVENT_ENTER_FRAME called?
1. Once in the first frame after it's added to the display tree
2. Once every frame
3. Never
Q3. Detecting double taps is not possible with Sparrow.
1. True
2. False
Summary
In this chapter, we learned about adding the basic game logic elements to our game.
Specifically, we covered how to structure our code. We got a deeper knowledge of touches, event listeners, and collision detections.
Now that our pirate ship can actually shoot and hit things, let's add user-interface elements—which is the topic of the next chapter.