Sparrow iOS Game Framework Beginner's Guide (2014)
Chapter 7. User Interface
In the previous chapter, we learned about adding the first gameplay elements into our game. Our pirate ship can now shoot cannonballs, and if the cannonballs hit the enemy enough number of times, the enemy ship will be destroyed.
In this chapter, we are going to add user interface elements. Specifically, we will improve our game in the following aspects:
· Display and update the health of each ship
· Add buttons on the screen
· Display text on the screen
So, let's start by adding a visual representation for hit points on the screen.
Displaying the hit points of each ship
By default, each ship has 100 hit points, and each cannonball does 25 points of damage to those hit points. We do have some visual feedback when a cannonball hits a ship, but we don't know how many hit points a ship has once hit a few times.
Time for action – placing a health bar on top of each ship
To display the hit points for each ship, we just need to follow these steps:
1. Open our game's project file if it's not already open.
2. Switch to the Ship.h file.
3. Add an instance variable called _quadHitpoints, which is a pointer to SPQuad, as shown in the following line of code:
SPQuad *_quadHitpoints;
4. Switch to the Ship.m file. Just after where we create the cannonball images in the initializer, we add a quad which should be the border for our hit point representation, as shown in the following code:
5. float hitpointsHeight = 5.0f;
SPQuad *hitpointsBorder = [SPQuad quadWithWidth:clipNorth.width height:hitpointsHeight color:SP_BLACK];
6. We add the background for the hit points box, as shown in the following code:
7. uint redColor = SP_COLOR(200, 0, 0);
SPQuad *quadMaxHitpoints = [SPQuad quadWithWidth:hitpointsBorder.width - 2.0f height:hitpointsHeight - 2.0f color:redColor];
8. We set the background for the hit points box to have a one point margin, which means its position needs to be one point to the left and one point up from the local coordinate system:
9. quadMaxHitpoints.x = 1.0f;
quadMaxHitpoints.y = 1.0f;
10. We then create SPQuad from the _quadHitpoints instance variable, as shown in the following code:
11.uint greenColor = SP_COLOR(0, 180, 0);
_quadHitpoints = [SPQuad quadWithWidth:hitpointsBorder.width - 2.0f height:hitpointsHeight - 2.0f color:greenColor];
12. As shown in the following code, we set the hit points to the same coordinates as the background:
13._quadHitpoints.x = quadMaxHitpoints.x;
_quadHitpoints.y = quadMaxHitpoints.y;
14. We then add all of the hit point quads to the display tree, as shown in the following code:
15.[self addChild:hitpointsBorder];
16.[self addChild:quadMaxHitpoints];
[self addChild:_quadHitpoints];
17. Inside the setHitpoints method, add the following line of code just after the statement where we set the instance variable to the value of the parameter:
_quadHitpoints.scaleX = (float) _hitpoints / self.maxHitpoints;
18. Run the example.
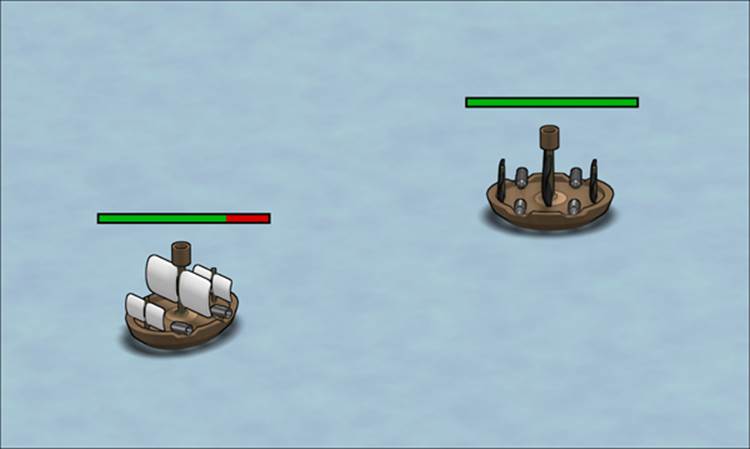
As seen in the following screenshot, both ships now have the amount of their hit points represented as red and green bars:
What just happened?
In step 1, we opened our Xcode template from where we had left off in the previous chapter. First of all, we need an instance variable that should represent our hit points. If we think about how other games display the current hit points, in strategy games mostly, the hit points are represented as little green and red bars above each unit. In fighting games, the hit points are displayed at the top left- and right-hand sides for each player. As we might have more than one enemy on the screen, the best representation will be to have red and green bars above each of the ship. The green portion of the bar would be the amount of hit points the ship currently has and the red portion is the amount that is currently missing.
In step 2, we switched to the Ship.h file as we wanted to define an instance variable. To represent the hit points, we chose SPQuad and called our variable _quadHitpoints. To actually implement the hit point mechanics, we switched to the Ship.m file. Our hit points bar actually consists of three different boxes:
· A border around the hit points
· The background for the hit points (a red bar)
· The actual hit point bar (a green bar which is represented by our _quadHitpoints instance variable)
In step 5, we defined a black rectangle that will act as the border for our hit point bar. The width of the rectangle should be the width of the ship. We got the width from the clipNorth movie clip. Actually, we can also get the ship's width from any other movie clips. We set the height of the black rectangle to five points. We don't want the hit points bar to be too thick, but it has to be easily visible and recognizable.
In the next step, we set the background of the hit points. We defined a SPQuad instance, which we call quadMaxHitpoints. It should be one point smaller than the black rectangle on each side. We used the width from the hitpointsBorder instance and had set the height to three points.
We set the left and the top of the quadMaxHitpoints instance to one point each so that it will actually look as if the hit point bar has a border.
We then initialized the quadHitpoints instance variable in step 8. It's a SPQuad class as well and has the same dimensions as our background hit point bar.
With the quadMaxHitpoints instance, we want _quadHitpoints to be displayed inside the border. So, we set the position of_quadHitpoints one point to the left and top relative to the ship itself. In this case, we can adjust the position from the quadMaxHitpoints quad.
For the red and green rectangles, we refrained from using bright colors, as this might strain the eyes and distract us from the action. Also, as we are going for a darker tone in general, having bright colors would not fit in this context. Keep in mind when coloring and designing the user interface that the elements should be tested on the actual device. The brightness is usually not at its maximum, especially if the device is running on battery. In some cases, graphics are even given additional contrast or are brightened so that they don't look too dark on mobile devices.
In step 10, we added all of the quads to the display tree; all of the quads are children of the Ship class.
After this point, our code snippet will look like the following:
SPMovieClip *clipSouthWest = [SPMovieClip movieWithFrames:texturesSouthWest fps:animationFPS];
SPMovieClip *clipSouthEast = [SPMovieClip movieWithFrames:texturesSouthEast fps:animationFPS];
_shootingClip = [NSArray arrayWithObjects:clipNorth, clipSouth, clipWest, clipEast, clipNorthWest, clipNorthEast, clipSouthWest, clipSouthEast, nil];
self.cannonBallLeft = [SPImage imageWithTexture:[Assets texture:@"cannonball.png"]];
self.cannonBallRight = [SPImage imageWithTexture:[Assets texture:@"cannonball.png"]];
float hitpointsHeight = 5.0f;
SPQuad *hitpointsBorder = [SPQuad quadWithWidth:clipNorth.width height:hitpointsHeight color:SP_BLACK];
uint redColor = SP_COLOR(200, 0, 0);
SPQuad *quadMaxHitpoints = [SPQuadquadWithWidth:hitpointsBorder.width - 2.0fheight:hitpointsHeight - 2.0f color:redColor];
quadMaxHitpoints.x = 1.0f;
quadMaxHitpoints.y = 1.0f;
uint greenColor = SP_COLOR(0, 180, 0);
_quadHitpoints = [SPQuad quadWithWidth:hitpointsBorder.width - 2.0f height:hitpointsHeight - 2.0f color:greenColor];
_quadHitpoints.x = quadMaxHitpoints.x;
_quadHitpoints.y = quadMaxHitpoints.y;
for (SPMovieClip* clip in _shootingClip) {
clip.loop = NO;
[self addChild:clip];
}
self.cannonBallLeft.visible = NO;
self.cannonBallRight.visible = NO;
[self addChild:self.cannonBallLeft];
[self addChild:self.cannonBallRight];
[self addChild:hitpointsBorder];
[self addChild:quadMaxHitpoints];
[self addChild:_quadHitpoints];
self.direction = DirectionSouthWest;
If we were to use the hit points' creation code more than once, it is considered a best practice to put this piece of code into a separate method.
In the next step, we updated the hit points setter. The _quadHitpoints instance will be scaled horizontally. As both _hitpoints and self.maxHitpoints are integer values, we needed to cast it to a float value. If we don't do this, the hit points bar would either be red or green with nothing in between.
The setHitpoints method will look like the following piece of code after step 10:
-(void) setHitpoints:(int)hitpoints
{
_hitpoints = hitpoints;
_quadHitpoints.scaleX = (float) _hitpoints / self.maxHitpoints;
if (_hitpoints <= 0) {
self.visible = FALSE;
}
}
We ran the example in the last step and saw that the enemy ship as well as our ship have hit point bars on top of them. When the ships moved, the hit point bars also moved with them, and when we hit the enemy ship, the hit points bar updated itself accordingly.
Adding buttons to the screen
Now that we have hit point bars on the screen, let's add some things that the user can actually interact with.
Pausing and resuming the game
The first thing we are going to add is the ability to pause and resume the game at will. This is actually quite important, especially for mobile action games. If a call comes on the mobile device (iPhone) and we don't have a pause functionality, the player might get frustrated by not being able to pause the game and lose their progress or winning streak.
Before we get into implementing these buttons, let's download the necessary graphics for this chapter which are available at https://github.com/freezedev/pirategame-assets/releases/download/0.7/Graphics_07.zip. Copy the contents of the extracted file into the project.
Let's think of what we need to do when pausing the game:
· Display a button to pause the game
· Display a button to resume the game
· Stop all current tweens when the player clicks on the pause button
· Resume all current tweens when the player clicks on the resume button
As this is a bigger task, we are splitting it into two parts; first, we are going to display the buttons, and then we will implement the functionality.
Displaying the pause and resume buttons on the screen
In this example, we are going to add all of the buttons we need and will display them at the correct position on the screen.
Time for action – putting buttons on the screen
To add our first buttons, follow these steps:
1. Open the Battlefield.h file.
2. Add one instance variable for each button. We will use the SPButton type, as shown in the following code:
3. SPButton *_buttonPause;
SPButton *_buttonResume;
4. Switch to the Battlefield.m file.
5. Construct the instances for our two instance variables, as shown in the following code:
6. _buttonPause = [SPButton buttonWithUpState:[[Assets textureAtlas:@"ui.xml"] textureByName:@"button_pause"]];
_buttonResume = [SPButton buttonWithUpState:[[Assets textureAtlas:@"ui.xml"] textureByName:@"button_play"]];
7. Set the position of both the pause and resume buttons to the top-right corner of the screen using the following code:
8. _buttonPause.x = Sparrow.stage.width - _buttonPause.width - 4.0f;
9. _buttonPause.y = 4.0f;
10.
11._buttonResume.x = _buttonPause.x;
_buttonResume.y = _buttonPause.y;
12. Hide the resume button using the following line of code:
_buttonResume.visible = NO;
13. For later usage, create methods to tap the pause and resume buttons, as shown in the following code:
14.-(void) onButtonPause:(SPTouchEvent *)event
15.{
16.
17.}
18.
19.-(void) onButtonResume:(SPTouchEvent *)event
20.{
21.
}
22. Bind the newly created methods to the pause and resume buttons, as shown in the following code:
23.[_buttonPause addEventListener:@selector(onButtonPause:) atObject:self forType:SP_EVENT_TYPE_TRIGGERED ];
[_buttonResume addEventListener:@selector(onButtonResume:) atObject:self forType:SP_EVENT_TYPE_TRIGGERED ];
24. Add both buttons to the display tree as follows:
25.[self addChild:_buttonPause];
[self addChild:_buttonResume];
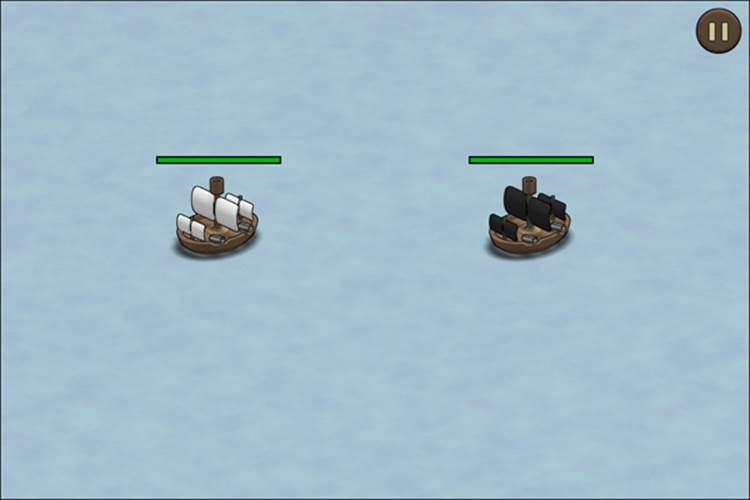
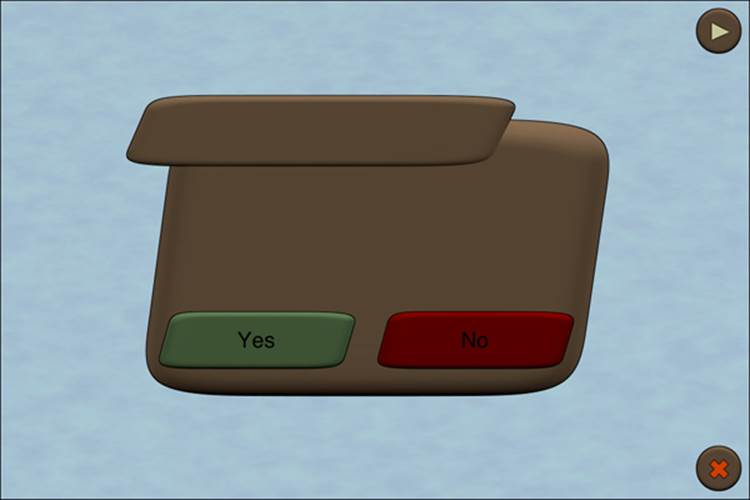
26. Run the example to see the result. We now have a pause button on the screen, as shown in the following screenshot:
What just happened?
In step 1, we opened the Battlefield.h file. We added two instance variables to this class, one for the pause button and one for the resume button. We used the SPButton class, which is pretty much an image, and optionally displayed some text on top of it.
Next, we switched to the Battlefield.m file. In step 4, we initialized both buttons. We need to take a closer look at the following two points:
· We already know that we can get an array of textures if we use the texturesStartingWith method. If we want only a single texture, we need to use textureByName, and we also have to specify the correct name.
· SPButton provides several factory methods. The one we are using is the buttonWithUpState method in which we have to pass an SPTexture instance. The up state is the texture that is visible all the time. If we were to specify a down state, the down state would be visible once the button is tapped. Another factory method lets us specify either the down state or even some text.
In the next step, we positioned the buttons at the top-right of the screen. We left a bit of space (four points) so that the button is not too close to the edge of the screen.
In step 6, we hid the resume button so that we only see the pause button the first time the scene is being shown.
In the next step, we added some dummy methods to pause and resume the game. We left these empty for now, but we'll fill them in a little bit.
Next, we linked these methods to the buttons so that they will be called when we touch these buttons.
To actually show the buttons on the screen, we need to add them to the display tree, which we did in step 9.
Let's take a look at what exactly changed in the initializer:
SPTween *shipTween = [SPTween tweenWithTarget:_enemyShip time:4.0f transition:SP_TRANSITION_EASE_IN_OUT];
[shipTween animateProperty:@"y" targetValue:250];
shipTween.repeatCount = 5;
shipTween.reverse = YES;
shipTween.delay = 2.0f;
_buttonPause = [SPButton buttonWithUpState:[[Assets textureAtlas:@"ui.xml"] textureByName:@"button_pause"]];
_buttonResume = [SPButton buttonWithUpState:[[Assets textureAtlas:@"ui.xml"] textureByName:@"button_play"]];
_buttonPause.x = Sparrow.stage.width - _buttonPause.width - 4.0f;
_buttonPause.y = 4.0f;
_buttonResume.x = _buttonPause.x;
_buttonResume.y = _buttonPause.y;
_buttonResume.visible = NO;
[_buttonPause addEventListener:@selector(onButtonPause:) atObject:self forType:SP_EVENT_TYPE_TOUCH];
[_buttonResume addEventListener:@selector(onButtonResume:) atObject:self forType:SP_EVENT_TYPE_TOUCH];
[Sparrow.juggler addObject:shipTween];
[_background addEventListener:@selector(onBackgroundTouch:) atObject:self forType:SP_EVENT_TYPE_TOUCH];
[_pirateShip addEventListener:@selector(onShipTap:) atObject:self forType:SP_EVENT_TYPE_TOUCH];
[self addEventListener:@selector(onEnterFrame:) atObject:self forType:SP_EVENT_TYPE_ENTER_FRAME];
[self addChild:_background];
[self addChild:_enemyShip];
[self addChild:_pirateShip];
[self addChild:_buttonPause];
[self addChild:_buttonResume];
Now, when we ran the example, we saw the pause button in the top-right corner of the screen. When we tap the button, nothing happens except for the button scaling down a bit.
Implementing the logic to pause and resume the game
Now that we have displayed the buttons on the screen, let's allow the player to pause and resume the game. We are going to utilize our own juggler and, save if the game is paused into a variable and if the game is not paused, we advance our juggler as well as the child elements.
Time for action – allowing the player to pause and resume
To allow the player to pause and resume the game, we need to follow these steps:
1. Open the Ship.h file.
2. Add an instance variable called _juggler that is a pointer to SPJuggler, as shown in the following line of code:
SPJuggler *_juggler;
3. Declare a property called paused, which is of the type BOOL, as shown in the following line of code:
@property (nonatomic) BOOL paused;
4. Declare a method called advanceTime, as shown in the following line of code:
-(void) advanceTime:(double)seconds;
5. Switch to the Ship.m file.
6. Inside the initializer, set the paused property to NO using its instance variable, as shown in the following code:
7. _isShooting = NO;
8. _paused = NO;
9.
SPTextureAtlas *atlas = (type == ShipPirate) ? [Assets textureAtlas:@"ship_pirate_small_cannon.xml"] : [Assets textureAtlas:@"ship_small_cannon.xml"];
10. Initialize the _juggler instance variable inside the initializer with the following line of code:
_juggler = [SPJuggler juggler];
11. Update all references from Sparrow.juggler to _juggler.
12. Implement the advanceTime method with the following lines of code:
13.-(void) advanceTime:(double)seconds
14.{
15. if (!self.paused) {
16. [_juggler advanceTime:seconds];
17. }
}
18. Switch to the Battlefield.h file.
19. Add an instance variable for juggler here as well:
SPJuggler *_juggler;
20. Add an instance variable for the background using the following line of code:
SPImage *_background;
21. Add a property called paused which is a BOOL type. As we are going to add custom getters and setters for this property, we also need an instance variable called _paused as shown in the following code:
22.@interface Battlefield : Scene {
23. Ship *_pirateShip;
24. Ship *_enemyShip;
25.
26. SPImage *_background;
27.
28. SPButton *_buttonPause;
29. SPButton *_buttonResume;
30.
31. SPJuggler *_juggler;
32.
33. BOOL _paused;
34.}
35.
36.@property (nonatomic) BOOL paused;
37. Switch to the Battlefield.m file.
38. Inside the initializer, update the reference from the local background variable to the _background instance variable.
39. Inside the Battlefield initializer, initialize the _juggler instance. This has to be done before we add shipTween to juggler:
40.[_buttonPause addEventListener:@selector(onButtonPause:) atObject:self forType:SP_EVENT_TYPE_TOUCH];
41.[_buttonResume addEventListener:@selector(onButtonResume:) atObject:self forType:SP_EVENT_TYPE_TOUCH];
42.
43._juggler = [SPJuggler juggler];
44.
[Sparrow.juggler addObject:shipTween];
45. Update all references from Sparrow.juggler to _juggler.
46. Add a custom setter for the paused property with the following content:
47.-(void) setPaused:(BOOL)paused
48.{
49. _paused = paused;
50.
51. _buttonResume.visible = _paused;
52. _buttonPause.visible = !_paused;
53.
54. _background.touchable = !_paused;
55.
56. _pirateShip.paused = _paused;
57. _enemyShip.paused = _paused;
}
58. Add a custom getter for the paused property that returns the _paused instance variable:
59.-(BOOL) paused
60.{
61. return _paused;
}
62. Implement the onButtonPause and onButtonResume methods by setting the paused property to its correct values (YES in the onButtonPause method, NO in the onButtonResume method).
63. Update the parameter type in onEnterFrame from being a pointer to SPEvent to being a pointer to SPEnterFrameEvent.
64. Add the following lines of code to the onEnterFrame method:
65.double passedTime = event.passedTime;
66.
67.[_enemyShip advanceTime:passedTime];
68.[_pirateShip advanceTime:passedTime];
69.if (!self.paused) {
70. [_juggler advanceTime:passedTime];
}
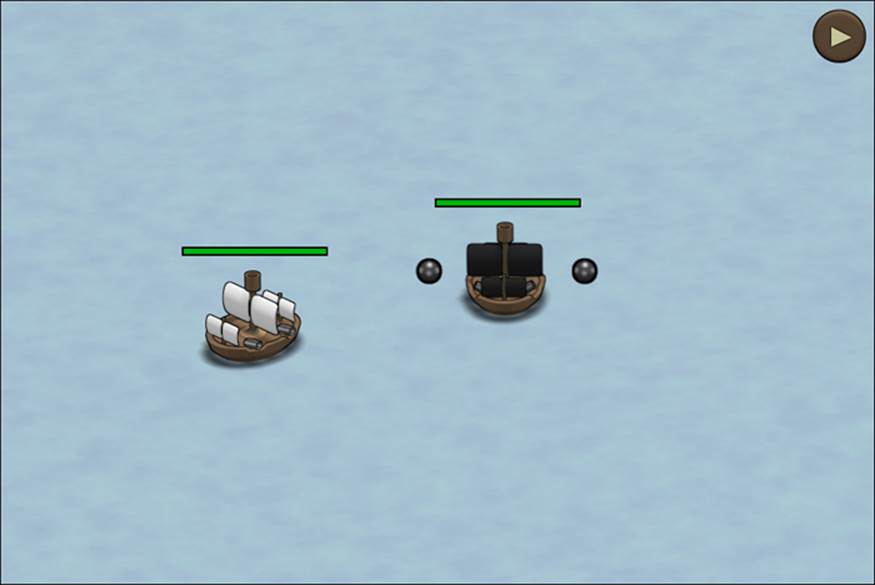
71. Run the example.
We can now tap the pause and resume buttons. In the following screenshot, you can see that when the game is paused, all animations stop until we press the resume button:
What just happened?
In the Ship.h file, we updated the interface by performing the following tasks:
· Added a new juggler instance variable, which is a pointer to SPJuggler (step 2)
· Added a paused property with the type BOOL (step 3)
· Declared a method called advanceTime (step 4)
Sparrow does not provide the pause and resume methods for its jugglers. We dealt with this by introducing our own jugglers and setting a flag if the game is paused, and we advanced all of our jugglers only if the game was not paused.
In step 5, we switched to the Ship.m file and we defined the paused property inside the initializer to NO, because by default, the ships should not be paused. This step is not necessary as Objective-C initializes this instance as NO; it's just a reminder to see which instance variables we have if we were to decide to change a value later on, and we know where to look.
In the next step, we initialized the _juggler instance variable. It does not matter where exactly we defined the juggler instance variable inside the initializer as we don't add any tweens to jugglers in the initializer method. Next, we searched and replaced all references from Sparrow.juggler to _juggler. The easiest way is to use command + F, select Replace from the drop-down list, put Sparrow.juggler in the first input box, _juggler in the second input, and select All to replace all the references.
In step 9, we implemented the advanceTime method, where we call the advanceTime method from _juggler and pass in double as the seconds parameter. This is only called if the paused property is set to NO.
Next, we switched to the Battlefield.h file. Here, we needed to perform the following steps:
· Add an instance variable for a juggler, similar to how we did for the Ship class (step 11).
· We now need an instance variable that references the background image instance (step 12).
· We need a paused property. As we are going to implement custom getters and setters, we also need an instance variable corresponding to that property (step 13).
Then, we switched to the Battlefield.m file. In the next step, we updated all references from the local background variable to the instance variable _background.
In step 16, we initialized our _juggler instance variable. Here, it does matter where we initialize this instance; it should be right before the line [Sparrow.juggler addObject:shipTween];.
Next, we updated the references to use _juggler instead of Sparrow.juggler inside the battlefield scene.
Then, we defined the setter for the paused property. Let's take a closer look at what exactly happened:
· We set the _paused instance variable to the value of the parameter.
· If _paused is set to YES, _buttonPause is not visible and _buttonResume is visible. If _paused is set to NO, it's the other way round.
· Each sprite has a touchable property. If this is set to NO, touch handlers won't fire. We set this to NO so the game can be paused.
· We paused all ships on the screen.
In step 19, we defined the getter for the paused property. It just returned the _paused instance variable.
We then implemented the onButtonPause and onButtonResume methods, where we set the paused property to YES and NO, respectively.
In step 21, we needed to update the parameter type in our onEnterFrame method. It needs to be a pointer to SPEnterFrame.
Then, we added some lines of code to the onEnterFrame method. Now that the event is a pointer to SPEnterFrame, we can actually get the time that has been passed by getting the passedTime property from the event parameter. We then called the advanceTime method from all the ships on the screen, and if the scene is paused, we call the advanceTime method from _juggler.
When we ran the example, we can now pause and resume the game at will.
Have a go hero
Here are some suggestions of what we could improve:
· As there isn't much happening in the onButtonPause and onButtonResume methods, we could either try to use blocks or merge both methods into one.
· We could extend the Scene class to use a juggler instance variable, so we don't need to redefine a custom juggler wherever we need it.
· Right now, we have custom user interface elements for each scene. However, if this were to change, we should think about abstracting the user interface logic into a separate class and maybe bind it to the Scene class.
Aborting the current game
So far, we don't have the ability to switch to the pirate cove scene. However, we should introduce the option to abort the current fight.
Time for action – conceding the game
To abort the current game, we need to follow these steps:
1. Open the Battlefield.m file.
2. Inside the initializer, we should add the abort button right after the resume button:
SPButton *buttonAbort = [SPButton buttonWithUpState:[[Assets textureAtlas:@"ui.xml"] textureByName:@"button_abort"]];
3. Position the abort button in the bottom-right corner:
4. buttonAbort.x = Sparrow.stage.width - buttonAbort.width - 4.0f;
buttonAbort.y = Sparrow.stage.height - buttonAbort.height - 4.0f;
5. Import the SceneDirector class, as shown in the following line of code:
#import "SceneDirector.h"
6. Add a listener to the abort button using a block, as shown in the following code:
7. [buttonAbort addEventListenerForType:SP_EVENT_TYPE_TRIGGERED block:^(SPEvent *event)
8. {
9. [((SceneDirector *) self.director) showScene:@"piratecove"];
}];
10. Add the button to the display tree, as shown in the following code:
[self addChild:buttonAbort];
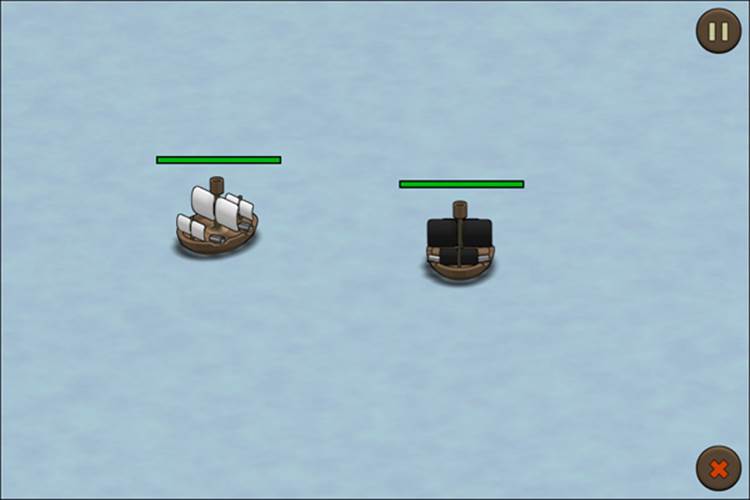
11. Run the example to see the result.
We now see the abort button as shown in the following screenshot:
What just happened?
In step 1, we opened the Battlefield.m file. For this example, we only need to take a look at the initializer method. We initialized the abort button similar to how we did for the pause and resume buttons before, the only difference is that we are using a different texture.
In the next step, we positioned the abort button at the bottom-right corner. Just like how we left a bit of space with the pause and resume buttons, we did the same here.
We then imported the SceneDirector.h file in the next step.
In step 5, we added an event listener to the abort button. Inside the event listener, we switched to the pirate cove scene. Although we do have a reference to the scene director using the director property, it is of the type id. So, we needed to recast it to a pointer to the SceneDirector class.
Then, we added the abort button to the display tree.
When we ran the example, we saw the abort button, and when we tapped it, we jumped to the pirate cove scene.
Adding dialogs to the screen
Now that we have added the abort button on the screen, we might run into a few problems, which are as follows:
· We might tap on the abort button by accident
· We don't have any way to get from the pirate cove scene back to the battlefield scene
So, to counteract this, at least on the surface, let's add a dialog which should be shown when we tap the abort button.
Time for action – creating a dialog class
To add dialogs, we need to follow these steps:
1. Add a new group inside the Classes folder called UI.
2. Inside the UI group, add a new Objective-C class called Dialog, which derives from SPSprite.
3. Implement the dialog initializer with the following lines of code:
4. -(id) init
5. {
6. if ((self = [super init])) {
7. SPImage *background = [SPImage imageWithTexture:[[Assets textureAtlas:@"ui.xml"] textureByName:@"dialog"]];
8.
9. SPButton *buttonYes = [SPButton buttonWithUpState:[[Assets textureAtlas:@"ui.xml"] textureByName:@"dialog_yes"] text:@"Yes"];
10.
11. SPButton *buttonNo = [SPButton buttonWithUpState:[[Assets textureAtlas:@"ui.xml"] textureByName:@"dialog_no"] text:@"No"];
12.
13. buttonYes.x = 24.0f;
14. buttonYes.y = background.height - buttonYes.height -40.0f;
15.
16. buttonNo.x = buttonYes.x + buttonYes.width - 20.0f;
17. buttonNo.y = buttonYes.y;
18.
19. [self addChild:background];
20. [self addChild:buttonYes];
21. [self addChild:buttonNo];
22. }
23.
24. return self;
}
25. Switch to the Battlefield.m file.
26. Import the Dialog.h file.
27. Right before the abort button event, initialize the dialog, as shown in the following code:
28.Dialog *dialog = [[Dialog alloc] init];
29.
30.dialog.x = (Sparrow.stage.width - dialog.width) / 2;
dialog.y = (Sparrow.stage.height - dialog.height) / 2;
31. The dialog should be hidden by default, as shown in the following line of code:
dialog.visible = NO;
32. Update the abort button event to show the dialog:
33.[buttonAbort addEventListenerForType: SP_EVENT_TYPE_TRIGGERED block:^(SPEvent *event)
34.{
35. dialog.visible = YES;
}];
36. Run the example to see the result.
When we tap the abort button, we now see a dialog popping up:
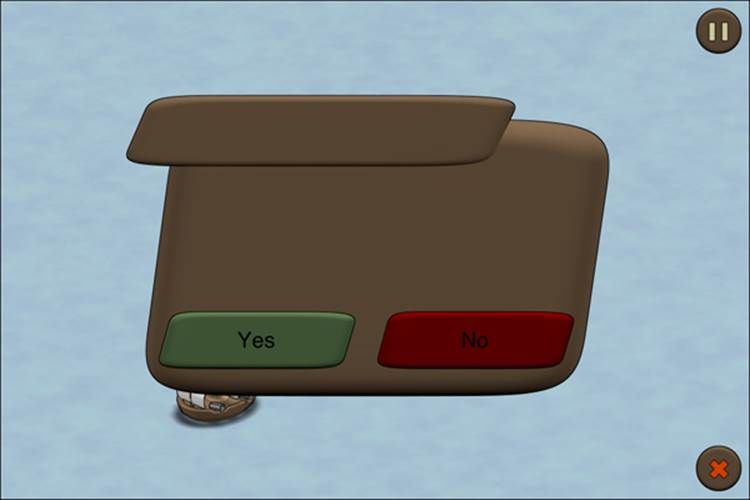
What just happened?
First, we structured the Dialog class. To keep it separate from the game logic code, we created it within a new group. The Dialog class itself should inherit from SPSprite.
In step 3, we defined the initializer for the Dialog class, where we performed the following actions:
· We added a background image for the dialog.
· We added the Yes and No buttons. We called the factory methods for SPButton, where we put some text on the buttons, which in our case is Yes and No, respectively.
· We positioned these elements at the bottom of the dialog.
Inside the Battlefield.m file, we imported the Dialog.h file to be able to use the Dialog class.
Inside the initializer of the battlefield scene, we needed to initialize the dialog, which we did right before the abort button event.
We set the dialog to be invisible by default and updated the abort button event to show the dialog.
When we ran the example, we saw the dialog when we tapped the abort button.
Have a go hero
Having the abort button on the bottom-right of the screen is not ideal from a usability point of view. If we accidently tapped the button, a dialog is now being shown instead of just aborting the current battle. Still, it doesn't seem to be ideal. The following are some suggestions on how to improve the situation:
· Placing the abort button (buttonAbort) next to the pause button. All user interface elements would be in the same area.
· Combine the pause button and the abort button into a game menu button. Clicking on the button will pause the game and will open a menu. An abort button can be found there.
Adding custom events to the dialogs
Now that a dialog is on the screen, we would like to attach listeners to the dialog buttons themselves. While we can go for simply attaching touch events, Sparrow provides a way to define custom events.
Time for action – adding our own buttons to our dialog
To add custom events for our dialogs, we just need to follow these steps:
1. Inside the Dialog.h file, we need to define the event names before the interface declaration:
2. #define EVENT_TYPE_YES_TRIGGERED @"yesTriggered"
#define EVENT_TYPE_NO_TRIGGERED @"noTriggered"
3. Switch to Dialog.m.
4. Register the following listeners to our buttons:
5. [buttonYes addEventListener:@selector(onButtonYes:) atObject:self forType:SP_EVENT_TYPE_TRIGGERED];
6.
[buttonNo addEventListener:@selector(onButtonNo:) atObject:self forType:SP_EVENT_TYPE_TRIGGERED];
7. Implement the onButtonYes and onButtonNo methods, as shown in the following code:
8. - (void)onButtonYes:(SPEvent *)event
9. {
10. SPEvent *localEvent = [SPEvent eventWithType:EVENT_TYPE_YES_TRIGGERED];
11. [self dispatchEvent:localEvent];
12.}
13.
14.- (void)onButtonNo:(SPEvent *)event
15.{
16. SPEvent *localEvent = [SPEvent eventWithType:EVENT_TYPE_NO_TRIGGERED];
17. [self dispatchEvent:localEvent];
}
18. Switch to Battlefield.m.
19. The local dialog variable inside the initializer needs to be refactored into an instance variable called _dialogAbort.
20. Move the #import "Dialog.h" statement from Battlefield.m to Battlefield.h.
21. Add event listeners for both dialog buttons in Battlefield.m, as shown in the following code:
22.[_dialogAbort addEventListener:@selector(onDialogAbortYes:) atObject:self forType:EVENT_TYPE_YES_TRIGGERED];
[_dialogAbort addEventListener:@selector(onDialogAbortNo:) atObject:self forType:EVENT_TYPE_NO_TRIGGERED];
23. Implement the corresponding methods, as shown in the following code:
24.-(void) onDialogAbortYes:(SPEvent *)event
25.{
26. [((SceneDirector *) self.director) showScene:@"piratecove"];
27.}
28.
29.-(void) onDialogAbortNo:(SPEvent *)event
30.{
31. self.paused = NO;
32. _dialogAbort.visible = NO;
}
33. Update the abort button event to also pause the game when the dialog is being shown:
34.[buttonAbort addEventListenerForType:SP_EVENT_TYPE_TOUCH block:^(SPEvent *event)
35.{
36. self.paused = YES;
37. _dialogAbort.visible = YES;
}];
38. Run the example to see the result. When we tap the abort button, we can now tap the buttons of the dialog:
What just happened?
In the first step, we defined the event names for our buttons. In the Dialog.m file, we needed to add listeners for our dialog. We used SP_EVENT_TYPE_TRIGGERED, so if any kind of event is triggered on either of the buttons, the selector will be called.
In step 4, we implemented the necessary methods. We created an event with our custom event type and dispatched this event afterwards.
In the next step, we refactored the local dialog variable in the battlefield initializer. It now needs to be an instance variable called _dialogAbort and it is still a pointer to Dialog. We updated all references and the initialization part of the instance variable. Consequently, we imported a statement to the header file.
We then called the addEventListener method on our dialog using our custom events.
In step 9, we implemented the methods that should be fired when the button is tapped. If we select Yes, we need to show the pirate cove scene, and if we select No, we need the dialog to disappear. We also resume the game in this case.
As we resume the game if we tap Yes, we also need to update the abort button event to actually pause the game once the dialog is being shown.
When we ran the example and tapped the abort button, our dialog pops up and the game pauses. If we tap No, the dialog closes and the game resumes. If we tap Yes, we shift to the pirate cove scene.
Drawing text on the screen
There are two ways to display text on the screen. We can either use one of the iOS fonts (so-called system fonts) or we could try to create a more customized font that fits our needs better.
Displaying our first text field
We already drew some text on the screen utilizing the capabilities of SPButton when we added the dialog buttons. However, we are now going to draw some text on the screen for the dialog message.
Time for action – adding a text field to the dialog
To draw text on the screen, we need to follow these steps:
1. As shown in the following line of code, add a property called content, which is a pointer to SPTextField, inside the Dialog.h file:
@property SPTextField *content;
2. In the Dialog initializer, create the following content instance and position it between the title box and the buttons:
3. _content = [SPTextField textFieldWithWidth:background.width - 48.0f height:background.height - 150.0f text:@"Dialog default text"];
4. _content.x = 24.0f;
_content.y = 50.0f;
5. Add the content property to the display tree, as shown in the following code:
6. [self addChild:background];
7. [self addChild:buttonYes];
8. [self addChild:buttonNo];
9. [self addChild:_content];
10. Switch to the Battlefield.m file.
11. Add a custom message for the abort dialog, as shown in the following code:
12._dialogAbort = [[Dialog alloc] init];
13.
14._dialogAbort.content.text = @"Would you like to abort the current fight?";
15.
16._dialogAbort.x = (Sparrow.stage.width - _dialogAbort.width) / 2;
_dialogAbort.y = (Sparrow.stage.height - _dialogAbort.height) / 2;
17. Run the example.
Now, we see the text message inside the dialog.
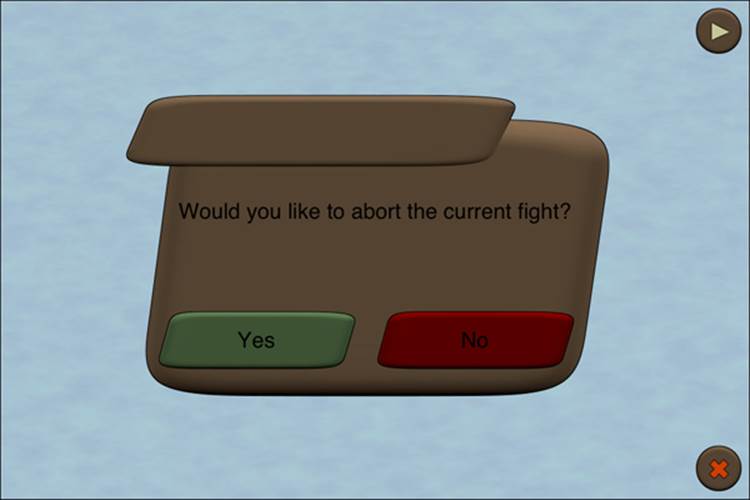
What just happened?
First of all, we needed a property for the message we are going to display. A SPTextField class works like this: we define a rectangle and some text, and the text will automatically be aligned inside the bounds of the rectangle. By default, the text is centered horizontally and vertically. If we want to change this, we need to change the hAlign and vAlign properties to our desired values. In addition to all of the properties it inherits from being a display object (such as color or scale), a text field also has the fontName property to use different fonts and the fontSize property for the size of the text.
In step 2, we created the _content instance, where the text field should be a bit smaller than the dialog itself. We gave the text field a default text and then updated its position to be more or less in the center of the dialog.
After we added the text field to the display tree in step 3, we updated the default message, a custom one, inside the Battlefield initializer.
When we ran the example, we saw our custom message in the dialog.
Explaining system fonts
System fonts are the fonts iOS has built-in, out of the box. The selection ranges from Arial and Helvetica to Verdana, including the light, bold, and italic variants. For a complete list of all available system fonts, visit http://iosfonts.com/.
Explaining bitmap fonts
A bitmap font is very similar to a texture atlas; every character is an image. All of these smaller images are put into a big one. Although system fonts can display Unicode characters with ease, if we need umlauts or similar characters, we would need to add them ourselves. As a result, this would directly increase the size of the image.
A sample bitmap font would look like the following screenshot:

A portion of the data might look something like the following portion of code:
<font>
<info face="Arial" size="72" bold="0" italic="0" charset="" unicode="" stretchH="100" smooth="1" aa="1" padding="2,2,2,2" spacing="0,0" outline="0"/>
<common lineHeight="83" base="65" scaleW="1024" scaleH="512" pages="1" packed="0"/>
<pages>
<page id="0" file="font.png"/>
</pages>
<chars count="80">
<char id="97" x="2" y="2" width="45" height="50" xoffset="-1" yoffset="18" xadvance="40" page="0" chnl="15"/>
<char id="98" x="2" y="54" width="44" height="64" xoffset="1" yoffset="5" xadvance="40" page="0" chnl="15"/>
<char id="99" x="2" y="120" width="43" height="50" xoffset="-1" yoffset="18" xadvance="36" page="0" chnl="15"/>
<char id="100" x="2" y="172" width="44" height="64" xoffset="-2" yoffset="5" xadvance="40" page="0" chnl="15"/>
<char id="101" x="47" y="120" width="46" height="50" xoffset="-1" yoffset="18" xadvance="40" page="0" chnl="15"/>
<char id="102" x="48" y="54" width="33" height="64" xoffset="-3" yoffset="4" xadvance="20" page="0" chnl="15"/>
<char id="103" x="83" y="2" width="44" height="65" xoffset="-2" yoffset="18" xadvance="40" page="0" chnl="15"/>
<char id="104" x="2" y="238" width="42" height="63" xoffset="1" yoffset="5" xadvance="40" page="0" chnl="15"/>
Similar to a texture atlas, the actual data is represented in XML.
There are multiple tools to create bitmap fonts, with each of them having their own advantages and disadvantages. Littera is a free online tool available at http://kvazars.com/littera/ (requires Adobe Flash Player); other popular commercial solutions are Glyph Designer by 71squared and bmGlyph by Stéphane Queraud.
Creating our very own bitmap font
For this example, we will use bmGlyph, as it allows us to create multiple scaled bitmap fonts similar to the mechanic TexturePacker provides. The bmGlyph solution is available on the Mac App Store at https://itunes.apple.com/us/app/bmglyph/id490499048?mt=12 for $9.99 or your regional equivalent.
If you don't want to use bmGlyph, the complete bitmap font is also included in the graphics package.
Time for action – using bmGlyph to create a bitmap font
To create our first bitmap font, we just need to follow these steps:
1. Open bmGlyph.
2. Select Arial Rounded MT Bold as the font.
3. Set Font size to 72 points.
4. Scroll down to the Color Tools section and check Shadow.
5. In the Shadow pane, set the x property to 2, the y property to -2, and the radius to 8.
6. In the Fill Mode section, select a brown-yellowish color and select the Glossy checkbox.
7. Hit the Publish button.
8. In the Default target, enter PirateFont as the File Name and font name (Force Font Name). In the Suffix input box, add @4x.
9. Click on the 50 button inside the Duplicate with scale box and add the suffix @2x.
10. Click on the 25 button.
11. Select Sparrow in the Format drop-down list.
12. Make sure that PirateFont is displayed in all of the targets as the File Name and in Force Font Name.
13. Hit Publish and then the Close button.
After these steps, we should see the following screen:
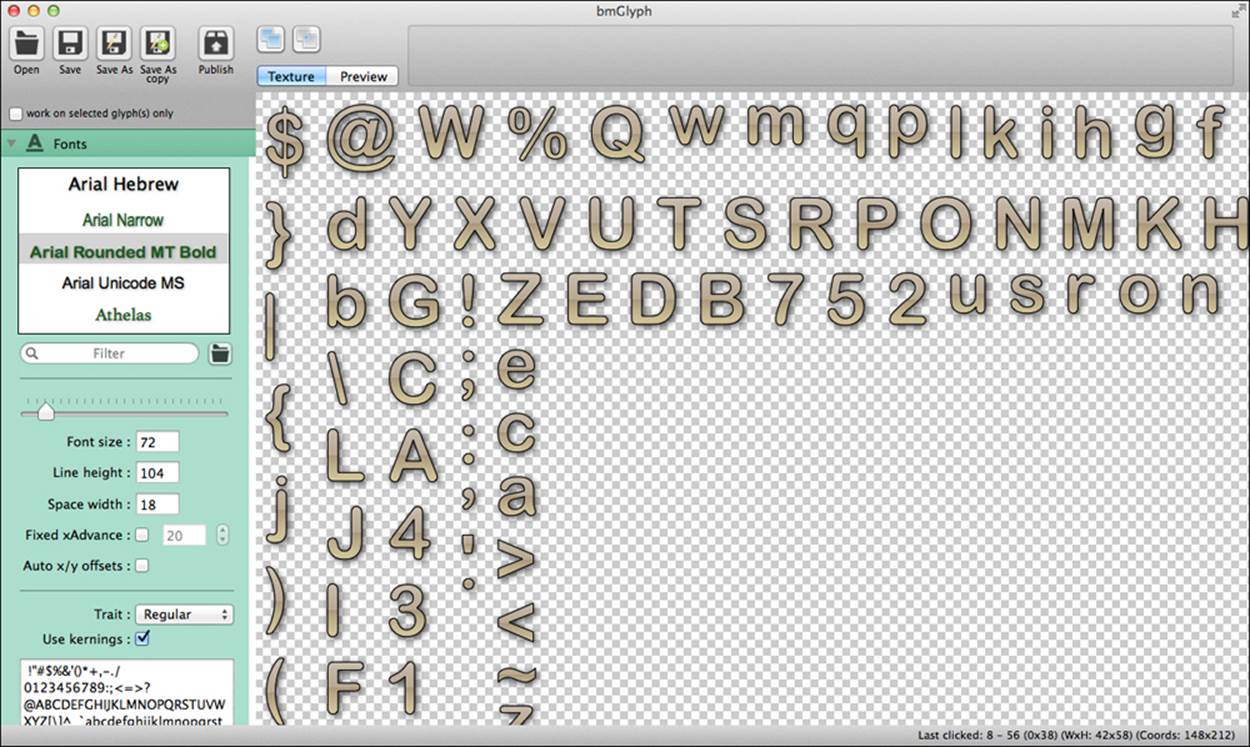
What just happened?
After we opened bmGlyph, we set the base font, size, color, and the shadow of the bitmap font. To export the bitmap font, we clicked on the Publish button, which we did in step 7. For each separate image, we need to define a new target with a scale. In our case, this is 100%, 50%, and 25% with the suffixes @4x and @2x, respectively. For the 25% target, we don't need a suffix.
To export a Sparrow-compatible bitmap font, we needed to select the Sparrow format. We needed to make sure that PirateFont is written in both File Name and Force Font Name. If we don't do the latter, the font won't become available as PirateFont, but will replace Arial Rounded MT Bold.
When we hit the Publish button, our font files became available in the location where we wanted to save them.
Displaying a text field with bitmap fonts
Now that we have displayed a system in our dialog, let's display text using our fresh bitmap font as the dialog's title.
Time for action – using our bitmap font for a text field
Follow these steps to display bitmap fonts in SPTextField:
1. We need to add another property called title inside the Dialog.h file, which is also a pointer to SPTextField:
@property SPTextField *title;
2. We register our bitmap font, as shown in the following code:
[SPTextField registerBitmapFontFromFile:@"PirateFont.fnt"];
3. We create and position the _title instance with the following lines of code:
4. _title = [SPTextField textFieldWithWidth:background.width * 0.6 height:30.0f text:@"Dialog"];
5. _title.fontName = @"PirateFont";
6. _title.color = SP_WHITE;
7.
8. _title.x = 24.0f;
_title.y = 26.0f;
9. We need to add the _title instance to the display tree, as shown in the following code:
10.[self addChild:background];
11.[self addChild:buttonYes];
12.[self addChild:buttonNo];
13.[self addChild:_content];
14.[self addChild:_title];
15. Inside the Battlefield.m file, we replace the default title with a custom one:
16._dialogAbort = [[Dialog alloc] init];
17.
18._dialogAbort.title.text = @"Abort this fight?";
19._dialogAbort.content.text = @"Would you like to abort the current fight?";
20.
21._dialogAbort.x = (Sparrow.stage.width - _dialogAbort.width) / 2;
_dialogAbort.y = (Sparrow.stage.height - _dialogAbort.height) / 2;
22. Run the example to see the result.
Our dialog now has a message and a title:
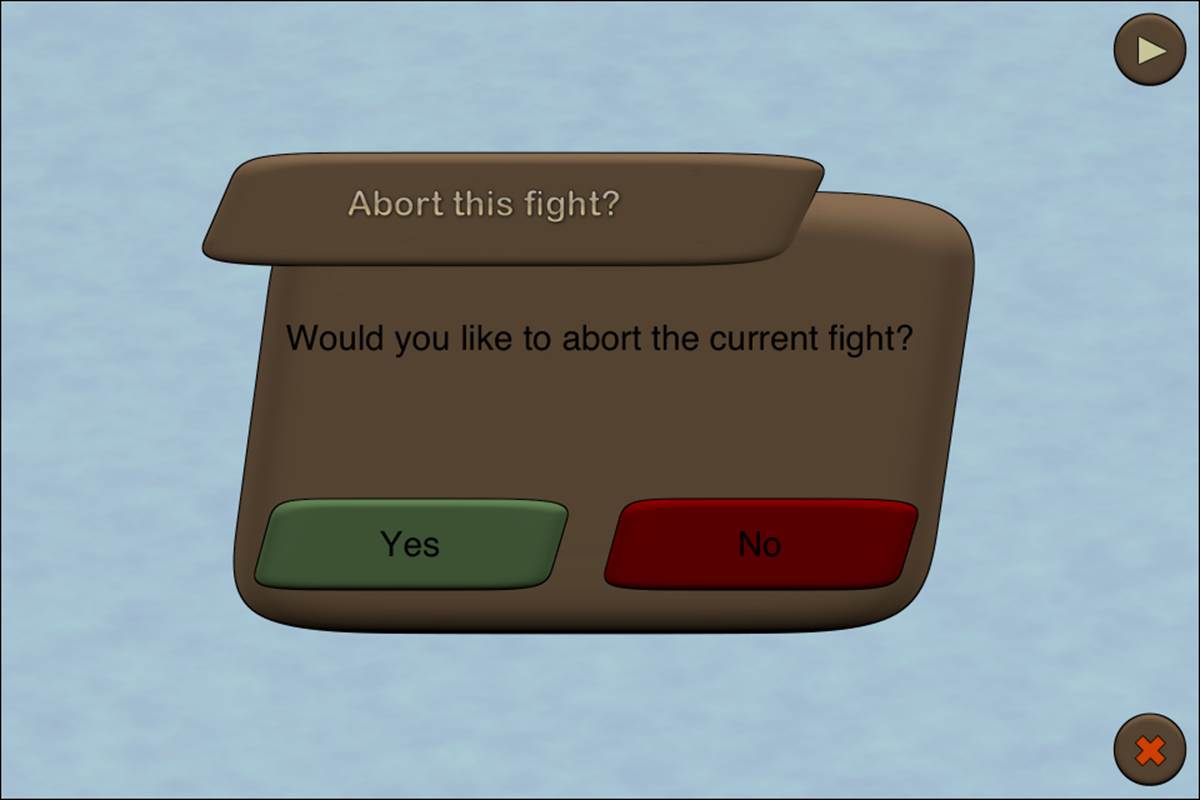
What just happened?
Displaying bitmap fonts is very similar to displaying system fonts on the screen. Before we can use any bitmap font, we need to register it first. When we want to display a text field with this font, we need to update the fontName property to reflect the name of the bitmap font.
Another thing to consider is that Sparrow displays all text in black by default. We need to change this in order to see the color effect of our bitmap font.
Note
Remember that the complete source code for this chapter can also be found on GitHub: https://github.com/freezedev/pirategame/tree/f742f6026e9ad129546d17e5d9e9728c27ff0733.
Pop quiz
Q1. In order for custom jugglers to show their tweens, which method needs to be called?
1. advanceTime
2. update
3. addJuggler
Q2. Are bitmap fonts similar to texture atlases?
1. Yes
2. No
Q3. What kind of fonts can be used with SPTextField?
1. System fonts
2. Bitmap fonts
3. Both
Summary
In this chapter, we learned about adding user interface elements to the screen.
Specifically, we covered health bars, buttons, and drawing text on the screen, and we got a deeper knowledge of jugglers and how to update elements through custom getters and setters.
Now that we have a basic user interface, let's add some artificial intelligence—which is the topic of the next chapter.