C# 6.0 and the .NET 4.6 Framework (2015)
PART VI
Introducing the .NET Base Class Libraries
CHAPTER 19
Multithreaded, Parallel, and Async Programming
Nobody enjoys working with an application that is sluggish during its execution. Moreover, nobody enjoys starting a task in an application (perhaps initiated by clicking a toolbar item) that prevents other parts of the program from being as responsive as possible. Before the release of .NET, building applications that had the ability to perform multiple tasks typically required authoring complex C++ code that used the Windows threading APIs. Thankfully, the .NET platform provides a number of ways for you to build software that can perform complex operations on unique paths of execution, with far fewer pain points.
This chapter begins by defining the overall nature of a “multithreaded application.” Next, you will revisit the .NET delegate type to investigate its intrinsic support for asynchronous method invocations. As you’ll see, this technique allows you to invoke a method on a secondary thread of execution without needing to manually create or configure the thread itself.
Next, you’ll be introduced to the original threading namespace that has shipped since .NET 1.0, specifically System.Threading. Here you’ll examine numerous types (Thread, ThreadStart, etc.) that allow you to explicitly create additional threads of execution and synchronize your shared resources, which helps ensure that multiple threads can share data in a nonvolatile manner.
The remaining parts of this chapter will examine three more recent techniques .NET developers can use to build multithreaded software, specifically the Task Parallel Library (TPL), Parallel LINQ (PLINQ), and the new intrinsic asynchronous keywords of C# (async and await). As you will see, these features can dramatically simplify how you can build responsive multithreaded software applications.
The Process/AppDomain/Context/Thread Relationship
In Chapter 17, a thread was defined as a path of execution within an executable application. While many .NET applications can live happy and productive single-threaded lives, an assembly’s primary thread (spawned by the CLR when Main() executes) may create secondary threads of execution at any time to perform additional units of work. By creating additional threads, you can build more responsive (but not necessarily faster executing on single-core machines) applications.
The System.Threading namespace was released with .NET 1.0 and offers one approach to build multithreaded applications. The Thread class is perhaps the core type, as it represents a given thread. If you want to programmatically obtain a reference to the thread currently executing a given member, simply call the static Thread.CurrentThread property, like so:
static void ExtractExecutingThread()
{
// Get the thread currently
// executing this method.
Thread currThread = Thread.CurrentThread;
}
Under the .NET platform, there is not a direct one-to-one correspondence between application domains and threads. In fact, a given AppDomain can have numerous threads executing within it at any given time. Furthermore, a particular thread is not confined to a single application domain during its lifetime. Threads are free to cross application domain boundaries as the Windows OS thread scheduler and the .NET CLR see fit.
Although active threads can be moved between AppDomain boundaries, a given thread can execute within only a single application domain at any point in time (in other words, it is impossible for a single thread to be doing work in more than one AppDomain at once). When you want to programmatically gain access to the AppDomain that is hosting the current thread, call the static Thread.GetDomain() method, like so:
static void ExtractAppDomainHostingThread()
{
// Obtain the AppDomain hosting the current thread.
AppDomain ad = Thread.GetDomain();
}
A single thread may also be moved into a particular context at any given time, and it may be relocated within a new context at the whim of the CLR. When you want to obtain the current context a thread happens to be executing in, use the static Thread.CurrentContext property (which returns a System.Runtime.Remoting.Contexts.Context object), like so:
static void ExtractCurrentThreadContext()
{
// Obtain the context under which the
// current thread is operating.
Context ctx = Thread.CurrentContext;
}
Again, the CLR is the entity that is in charge of moving threads into (and out of) application domains and contexts. As a .NET developer, you can usually remain blissfully unaware where a given thread ends up (or exactly when it is placed into its new boundary). Nevertheless, you should be aware of the various ways of obtaining the underlying primitives.
The Problem of Concurrency
One of the many “joys” (read: painful aspects) of multithreaded programming is that you have little control over how the underlying operating system or the CLR uses its threads. For example, if you craft a block of code that creates a new thread of execution, you cannot guarantee that the thread executes immediately. Rather, such code only instructs the OS/CLR to execute the thread as soon as possible (which is typically when the thread scheduler gets around to it).
Furthermore, given that threads can be moved between application and contextual boundaries as required by the CLR, you must be mindful of which aspects of your application are thread-volatile (e.g., subject to multithreaded access) and which operations are atomic (thread-volatile operations are the dangerous ones!).
To illustrate the problem, assume a thread is invoking a method of a specific object. Now assume that this thread is instructed by the thread scheduler to suspend its activity to allow another thread to access the same method of the same object.
If the original thread was not completely finished with its operation, the second incoming thread may be viewing an object in a partially modified state. At this point, the second thread is basically reading bogus data, which is sure to give way to extremely odd (and hard to find) bugs, which are even harder to replicate and debug.
Atomic operations, on the other hand, are always safe in a multithreaded environment. Sadly, there are few operations in the .NET base class libraries that are guaranteed to be atomic. Even the act of assigning a value to a member variable is not atomic! Unless the .NET Framework 4.6 SDK documentation specifically says an operation is atomic, you must assume it is thread-volatile and take precautions.
The Role of Thread Synchronization
At this point, it should be clear that multithreaded programs are in themselves quite volatile, as numerous threads can operate on the shared resources at (more or less) the same time. To protect an application’s resources from possible corruption, .NET developers must use any number of threading primitives (such as locks, monitors, and the [Synchronization] attribute or language keyword support) to control access among the executing threads.
Although the .NET platform cannot make the difficulties of building robust multithreaded applications completely disappear, the process has been simplified considerably. Using types defined within the System.Threading namespace, the Task Parallel Library (TPL), and the C#async and await language keywords, you are able to work with multiple threads with minimal fuss and bother.
Before diving into the System.Threading namespace, the TPL, and the C# async and await keywords, you will begin by examining how the .NET delegate type can be used to invoke a method in an asynchronous manner. While it is most certainly true that since .NET 4.6, the new C# async and await keywords offer a simpler alternative to asynchronous delegates, it is still important that you know how to interact with code using this approach (trust me; there is a ton of code in production that uses asynchronous delegates).
A Brief Review of the .NET Delegate
Recall that a .NET delegate is essentially a type-safe, object-oriented, function pointer. When you define a .NET delegate type, the C# compiler responds by building a sealed class that derives from System.MulticastDelegate (which in turn derives from System.Delegate). These base classes provide every delegate with the ability to maintain a list of method addresses, all of which may be invoked at a later time. Consider the following BinaryOp delegate, first defined in Chapter 10:
// A C# delegate type.
public delegate int BinaryOp(int x, int y);
Based on its definition, BinaryOp can point to any method taking two integers (by value) as arguments and returning an integer. Once compiled, the defining assembly now contains a full-blown class definition that is dynamically generated when you build your project, based on the delegate declaration. In the case of BinaryOp, this class looks more or less like the following (shown in pseudocode):
public sealed class BinaryOp : System.MulticastDelegate
{
public BinaryOp(object target, uint functionAddress);
public int Invoke(int x, int y);
public IAsyncResult BeginInvoke(int x, int y,
AsyncCallback cb, object state);
public int EndInvoke(IAsyncResult result);
}
Recall that the generated Invoke() method is used to invoke the methods maintained by a delegate object in a synchronous manner. Therefore, the calling thread (such as the primary thread of the application) is forced to wait until the delegate invocation completes. Also recall that in C# the Invoke() method does not need to be directly called in code but can be triggered indirectly, under the hood, when applying “normal” method invocation syntax.
Consider the following Console Application program (SyncDelegateReview), which invokes the static Add() method in a synchronous (aka blocking) manner (be sure to import the System.Threading namespace into your C# code file, as you will be calling the Thread.Sleep()method):
namespace SyncDelegateReview
{
public delegate int BinaryOp(int x, int y);
class Program
{
static void Main(string[] args)
{
Console.WriteLine("***** Synch Delegate Review *****");
// Print out the ID of the executing thread.
Console.WriteLine("Main() invoked on thread {0}.",
Thread.CurrentThread.ManagedThreadId);
// Invoke Add() in a synchronous manner.
BinaryOp b = new BinaryOp(Add);
// Could also write b.Invoke(10, 10);
int answer = b(10, 10);
// These lines will not execute until
// the Add() method has completed.
Console.WriteLine("Doing more work in Main()!");
Console.WriteLine("10 + 10 is {0}.", answer);
Console.ReadLine();
}
static int Add(int x, int y)
{
// Print out the ID of the executing thread.
Console.WriteLine("Add() invoked on thread {0}.",
Thread.CurrentThread.ManagedThreadId);
// Pause to simulate a lengthy operation.
Thread.Sleep(5000);
return x + y;
}
}
}
Within the Add() method, you are invoking the static Thread.Sleep() method to suspend the calling thread for approximately five seconds to simulate a lengthy task. Given that you are invoking the Add() method in a synchronous manner, the Main() method will not print out the result of the operation until the Add() method has completed.
Next, note that the Main() method is obtaining access to the current thread (via Thread.CurrentThread) and printing the ID of the thread via the ManagedThreadId property. This same logic is repeated in the static Add() method. As you might suspect, given that all the work in this application is performed exclusively by the primary thread, you find the same ID value displayed to the console.
***** Synch Delegate Review *****
Main() invoked on thread 1.
Add() invoked on thread 1.
Doing more work in Main()!
10 + 10 is 20.
Press any key to continue . . .
When you run this program, you should notice that a five-second delay takes place before you see the final Console.WriteLine() logic in Main() execute. Although many (if not most) methods may be called synchronously without ill effect, .NET delegates can be instructed to call their methods asynchronously if necessary.
![]() Source Code The SyncDelegateReview project is located in the Chapter 19 subdirectory.
Source Code The SyncDelegateReview project is located in the Chapter 19 subdirectory.
The Asynchronous Nature of Delegates
If you are new to the topic of multithreading, you might wonder what exactly an asynchronous method invocation is all about. As you are no doubt fully aware, some programming operations take time. Although the previous Add() was purely illustrative in nature, imagine that you built a single-threaded application that is invoking a method on a remote web service operation, calling a method performing a long-running database query, downloading a large document, or writing 500 lines of text to an external file. While performing these operations, the application could appear to hang for some amount of time. Until the task at hand has been processed, all other aspects of this program (such as menu activation, toolbar clicking, or console output) are suspended (which can aggravate users).
Therefore, the question is, how can you tell a delegate to invoke a method on a separate thread of execution to simulate numerous tasks performing “at the same time”? The good news is that every .NET delegate type is automatically equipped with this capability. The even better news is that you are not required to directly dive into the details of the System.Threading namespace to do so (although these entities can quite naturally work hand in hand).
The BeginInvoke() and EndInvoke() Methods
When the C# compiler processes the delegate keyword, the dynamically generated class defines two methods named BeginInvoke() and EndInvoke() . Given the definition of the BinaryOp delegate, these methods are prototyped as follows:
public sealed class BinaryOp : System.MulticastDelegate
{
...
// Used to invoke a method asynchronously.
public IAsyncResult BeginInvoke(int x, int y,
AsyncCallback cb, object state);
// Used to fetch the return value
// of the invoked method.
public int EndInvoke(IAsyncResult result);
}
The first set of parameters passed into BeginInvoke() will be based on the format of the C# delegate (two integers, in the case of BinaryOp). The final two arguments will always be System.AsyncCallback and System.Object. You’ll examine the role of these parameters shortly; for the time being, though, I’ll supply null for each. Also note that the return value of EndInvoke() is an integer, based on the return type of BinaryOp, while the single parameter of this method is always of type IAsyncResult.
The System.IAsyncResult Interface
The BeginInvoke() method always returns an object implementing the IAsyncResult interface, while EndInvoke() requires an IAsyncResult-compatible type as its sole parameter. The IAsyncResult- compatible object returned from BeginInvoke() is basically a coupling mechanism that allows the calling thread to obtain the result of the asynchronous method invocation at a later time via EndInvoke(). The IAsyncResult interface (defined in the System namespace) is defined as follows:
public interface IAsyncResult
{
object AsyncState { get; }
WaitHandle AsyncWaitHandle { get; }
bool CompletedSynchronously { get; }
bool IsCompleted { get; }
}
In the simplest case, you are able to avoid directly invoking these members. All you have to do is cache the IAsyncResult-compatible object returned by BeginInvoke() and pass it to EndInvoke() when you are ready to obtain the result of the method invocation. As you will see, you are able to invoke the members of an IAsyncResult-compatible object when you want to become “more involved” with the process of fetching the method’s return value.
![]() Note If you asynchronously invoke a method that provides a void return value, you can simply “fire and forget.” In such cases, you will never need to cache the IAsyncResult-compatible object or call EndInvoke() in the first place (as there is no return value to retrieve).
Note If you asynchronously invoke a method that provides a void return value, you can simply “fire and forget.” In such cases, you will never need to cache the IAsyncResult-compatible object or call EndInvoke() in the first place (as there is no return value to retrieve).
Invoking a Method Asynchronously
To instruct the BinaryOp delegate to invoke Add() asynchronously, you will modify the logic in the previous project (feel free to add code to the existing project; however, in your lab downloads, you will find a new Console Application project named AsyncDelegate). Update the previousMain() method as follows:
static void Main(string[] args)
{
Console.WriteLine("***** Async Delegate Invocation *****");
// Print out the ID of the executing thread.
Console.WriteLine("Main() invoked on thread {0}.",
Thread.CurrentThread.ManagedThreadId);
// Invoke Add() on a secondary thread.
BinaryOp b = new BinaryOp(Add);
IAsyncResult iftAR = b.BeginInvoke(10, 10, null, null);
// Do other work on primary thread...
Console.WriteLine("Doing more work in Main()!");
// Obtain the result of the Add()
// method when ready.
int answer = b.EndInvoke(iftAR);
Console.WriteLine("10 + 10 is {0}.", answer);
Console.ReadLine();
}
If you run this application, you will find that two unique thread IDs are displayed, given that there are in fact multiple threads working within the current AppDomain:
***** Async Delegate Invocation *****
Main() invoked on thread 1.
Doing more work in Main()!
Add() invoked on thread 3.
10 + 10 is 20.
In addition to the unique ID values, you will also notice upon running the application that the Doing more work in Main()! message displays immediately, while the secondary thread is occupied attending to its business.
Synchronizing the Calling Thread
If you think carefully about the current implementation of Main(), you might realize that the timespan between calling BeginInvoke() and EndInvoke() is clearly less than five seconds. Therefore, once Doing more work in Main()! prints to the console, the calling thread is now blocked and waiting for the secondary thread to complete before being able to obtain the result of the Add() method. Therefore, you are effectively making yet another synchronous call.
static void Main(string[] args)
{
...
BinaryOp b = new BinaryOp(Add);
// Once the next statement is processed,
// the calling thread is now blocked until
// BeginInvoke() completes.
IAsyncResult iftAR = b.BeginInvoke(10, 10, null, null);
// This call takes far less than five seconds!
Console.WriteLine("Doing more work in Main()!");
// Now we are waiting again for other thread to complete!
int answer = b.EndInvoke(iftAR);
...
}
Obviously, asynchronous delegates would lose their appeal if the calling thread had the potential of being blocked under various circumstances. To allow the calling thread to discover whether the asynchronously invoked method has completed its work, the IAsyncResult interface provides the IsCompleted property. Using this member, the calling thread is able to determine whether the asynchronous call has indeed completed before calling EndInvoke().
If the method has not completed, IsCompleted returns false, and the calling thread is free to carry on its work. If IsCompleted returns true, the calling thread is able to obtain the result in the “least blocking manner” possible. Ponder the following update to the Main()method:
static void Main(string[] args)
{
...
BinaryOp b = new BinaryOp(Add);
IAsyncResult iftAR = b.BeginInvoke(10, 10, null, null);
// This message will keep printing until
// the Add() method is finished.
while(!iftAR.IsCompleted)
{
Console.WriteLine("Doing more work in Main()!");
Thread.Sleep(1000);
}
// Now we know the Add() method is complete.
int answer = b.EndInvoke(iftAR);
...
}
Here, you enter a loop that will continue processing the Console.WriteLine() statement until the secondary thread has completed. After this has occurred, you can obtain the result of the Add() method, knowing full well the method has indeed completed. The call toThread.Sleep(1000) is not necessary for this particular application to function correctly; however, by forcing the primary thread to wait for approximately one second during each iteration, it prevents the same message from printing hundreds of times. Here is the output (your output might differ slightly, based on the speed of your machine and when threads come to life):
***** Async Delegate Invocation *****
Main() invoked on thread 1.
Doing more work in Main()!
Add() invoked on thread 3.
Doing more work in Main()!
Doing more work in Main()!
Doing more work in Main()!
Doing more work in Main()!
Doing more work in Main()!
10 + 10 is 20.
In addition to the IsCompleted property, the IAsyncResult interface provides the AsyncWaitHandle property for more flexible waiting logic. This property returns an instance of the WaitHandle type, which exposes a method named WaitOne(). The benefit ofWaitHandle.WaitOne() is that you can specify the maximum wait time. If the specified amount of time is exceeded, WaitOne() returns false. Ponder the following updated while loop, which no longer uses a call to Thread.Sleep():
while (!iftAR.AsyncWaitHandle.WaitOne(1000, true))
{
Console.WriteLine("Doing more work in Main()!");
}
While these properties of IAsyncResult do provide a way to synchronize the calling thread, they are not the most efficient approach. In many ways, the IsCompleted property is much like a really annoying manager (or classmate) who is constantly asking, “Are you done yet?” Thankfully, delegates provide a number of additional (and more elegant) techniques to obtain the result of a method that has been called asynchronously.
![]() Source Code The AsyncDelegate project is located in the Chapter 19 subdirectory.
Source Code The AsyncDelegate project is located in the Chapter 19 subdirectory.
The Role of the AsyncCallback Delegate
Rather than polling a delegate to determine whether an asynchronously invoked method has completed, it would be more efficient to have the secondary thread inform the calling thread when the task is finished. When you want to enable this behavior, you will need to supply an instance of the System.AsyncCallback delegate as a parameter to BeginInvoke(), which up until this point has been null. However, when you do supply an AsyncCallback object, the delegate will call the specified method automatically when the asynchronous call has completed.
![]() Note The callback method will be called on the secondary thread, not the primary thread. This has important implications when using threads within a graphical user interface (WPF or Windows Forms) as controls have thread-affinity, meaning they can be manipulated only by the thread that created them. You’ll see some examples of working the threads from a GUI later in this chapter, during the examination of the Task Parallel Library (TPL) and the C# async and await keywords.
Note The callback method will be called on the secondary thread, not the primary thread. This has important implications when using threads within a graphical user interface (WPF or Windows Forms) as controls have thread-affinity, meaning they can be manipulated only by the thread that created them. You’ll see some examples of working the threads from a GUI later in this chapter, during the examination of the Task Parallel Library (TPL) and the C# async and await keywords.
Like any delegate, AsyncCallback can invoke methods that match only a specific pattern, which in this case is a method taking IAsyncResult as the sole parameter and returning nothing.
// Targets of AsyncCallback must match the following pattern.
void MyAsyncCallbackMethod(IAsyncResult itfAR)
Assume you have another Console Application project (AsyncCallbackDelegate) making use of the BinaryOp delegate. This time, however, you will not poll the delegate to determine whether the Add() method has completed. Rather, you will define a static method namedAddComplete() to receive the notification that the asynchronous invocation is finished. Also, this example uses a class-level static bool field, which will be used to keep the primary thread in Main() running a task until the secondary thread is finished.
![]() Note The use of this Boolean variable in this example is, strictly speaking, not thread safe, as there are two different threads that have access to its value. This will be permissible for the current example; however, as a very good rule of thumb, you must ensure data that can be shared among multiple threads is locked down. You’ll see how to do so later in this chapter.
Note The use of this Boolean variable in this example is, strictly speaking, not thread safe, as there are two different threads that have access to its value. This will be permissible for the current example; however, as a very good rule of thumb, you must ensure data that can be shared among multiple threads is locked down. You’ll see how to do so later in this chapter.
namespace AsyncCallbackDelegate
{
public delegate int BinaryOp(int x, int y);
class Program
{
private static bool isDone = false;
static void Main(string[] args)
{
Console.WriteLine("***** AsyncCallbackDelegate Example *****");
Console.WriteLine("Main() invoked on thread {0}.",
Thread.CurrentThread.ManagedThreadId);
BinaryOp b = new BinaryOp(Add);
IAsyncResult iftAR = b.BeginInvoke(10, 10,
new AsyncCallback(AddComplete), null);
// Assume other work is performed here...
while (!isDone)
{
Thread.Sleep(1000);
Console.WriteLine("Working....");
}
Console.ReadLine();
}
static int Add(int x, int y)
{
Console.WriteLine("Add() invoked on thread {0}.",
Thread.CurrentThread.ManagedThreadId);
Thread.Sleep(5000);
return x + y;
}
static void AddComplete(IAsyncResult itfAR)
{
Console.WriteLine("AddComplete() invoked on thread {0}.",
Thread.CurrentThread.ManagedThreadId);
Console.WriteLine("Your addition is complete");
isDone = true;
}
}
}
Again, the static AddComplete() method will be invoked by the AsyncCallback delegate when the Add() method has completed. If you run this program, you can confirm that the secondary thread is the thread invoking the AddComplete() callback.
***** AsyncCallbackDelegate Example *****
Main() invoked on thread 1.
Add() invoked on thread 3.
Working....
Working....
Working....
Working....
Working....
AddComplete() invoked on thread 3.
Your addition is complete
Like other examples in this chapter, your output might be slightly different. In fact, you might see one final “Working...” printout occur after the addition is complete. This is just a by-product of the forced one-second delay in Main().
The Role of the AsyncResult Class
Currently, the AddComplete() method is not printing the actual result of the operation (adding two numbers). The reason is that the target of the AsyncCallback delegate (AddComplete(), in this example) does not have access to the original BinaryOp delegate created in the scope of Main() and, therefore, you can’t call EndInvoke() from within AddComplete()!
While you could simply declare the BinaryOp variable as a static member variable in the class to allow both methods to access the same object, a more elegant solution is to use the incoming IAsyncResult parameter.
The incoming IAsyncResult parameter passed into the target of the AsyncCallback delegate is actually an instance of the AsyncResult class (note the lack of an I prefix) defined in the System.Runtime.Remoting.Messaging namespace. The AsyncDelegateproperty returns a reference to the original asynchronous delegate that was created elsewhere.
Therefore, if you want to obtain a reference to the BinaryOp delegate object allocated within Main(), simply cast the System.Object returned by the AsyncDelegate property into type BinaryOp. At this point, you can trigger EndInvoke() as expected.
// Don’t forget to import
// System.Runtime.Remoting.Messaging!
static void AddComplete(IAsyncResult itfAR)
{
Console.WriteLine("AddComplete() invoked on thread {0}.",
Thread.CurrentThread.ManagedThreadId);
Console.WriteLine("Your addition is complete");
// Now get the result.
AsyncResult ar = (AsyncResult)itfAR;
BinaryOp b = (BinaryOp)ar.AsyncDelegate;
Console.WriteLine("10 + 10 is {0}.", b.EndInvoke(itfAR));
isDone = true;
}
Passing and Receiving Custom State Data
The final aspect of asynchronous delegates you need to address is the final argument to the BeginInvoke() method (which has been null up to this point). This parameter allows you to pass additional state information to the callback method from the primary thread. Because this argument is prototyped as a System.Object, you can pass in any type of data whatsoever, as long as the callback method knows what to expect. Assume for the sake of demonstration that the primary thread wants to pass in a custom text message to the AddComplete() method, like so:
static void Main(string[] args)
{
...
IAsyncResult iftAR = b.BeginInvoke(10, 10,
new AsyncCallback(AddComplete),
"Main() thanks you for adding these numbers.");
...
}
To obtain this data within the scope of AddComplete(), use the AsyncState property of the incoming IAsyncResult parameter. Notice that an explicit cast will be required; therefore, the primary and secondary threads must agree on the underlying type returned fromAsyncState.
static void AddComplete(IAsyncResult itfAR)
{
...
// Retrieve the informational object and cast it to string.
string msg = (string)itfAR.AsyncState;
Console.WriteLine(msg);
isDone = true;
}
Here is the output of the final iteration:
***** AsyncCallbackDelegate Example *****
Main() invoked on thread 1.
Add() invoked on thread 3.
Working....
Working....
Working....
Working....
Working....
AddComplete() invoked on thread 3.
Your addition is complete
10 + 10 is 20.
Main() thanks you for adding these numbers.
Now that you understand how a .NET delegate can be used to automatically spin off a secondary thread of execution to handle an asynchronous method invocation, you can turn your attention to directly interacting with threads using the System.Threading namespace. Recall that this namespace was the original .NET threading API that shipped since version 1.0.
![]() Source Code The AsyncCallbackDelegate project is located in the Chapter 19 subdirectory.
Source Code The AsyncCallbackDelegate project is located in the Chapter 19 subdirectory.
The System.Threading Namespace
Under the .NET platform, the System.Threading namespace provides a number of types that enable the direct construction of multithreaded applications. In addition to providing types that allow you to interact with a particular CLR thread, this namespace defines types that allow access to the CLR- maintained thread pool, a simple (non-GUI-based) Timer class, and numerous types used to provide synchronized access to shared resources. Table 19-1 lists some of the important members of this namespace. (Be sure to consult the .NET Framework 4.6 SDK documentation for full details.)
Table 19-1. Core Types of the System.Threading Namespace
|
Type |
Meaning in Life |
|
Interlocked |
This type provides atomic operations for variables that are shared by multiple threads. |
|
Monitor |
This type provides the synchronization of threading objects using locks and wait/signals. The C# lock keyword uses a Monitor object under the hood. |
|
Mutex |
This synchronization primitive can be used for synchronization between application domain boundaries. |
|
ParameterizedThreadStart |
This delegate allows a thread to call methods that take any number of arguments. |
|
Semaphore |
This type allows you to limit the number of threads that can access a resource, or a particular type of resource, concurrently. |
|
Thread |
This type represents a thread that executes within the CLR. Using this type, you are able to spawn additional threads in the originating AppDomain. |
|
ThreadPool |
This type allows you to interact with the CLR-maintained thread pool within a given process. |
|
ThreadPriority |
This enum represents a thread’s priority level (Highest, Normal, etc.). |
|
ThreadStart |
This delegate is used to specify the method to call for a given thread. Unlike the ParameterizedThreadStart delegate, targets of ThreadStart must always have the same prototype. |
|
ThreadState |
This enum specifies the valid states a thread may take (Running, Aborted, etc.). |
|
Timer |
This type provides a mechanism for executing a method at specified intervals. |
|
TimerCallback |
This delegate type is used in conjunction with Timer types. |
The System.Threading.Thread Class
The most primitive of all types in the System.Threading namespace is Thread. This class represents an object-oriented wrapper around a given path of execution within a particular AppDomain. This type also defines a number of methods (both static and instance level) that allow you to create new threads within the current AppDomain, as well as to suspend, stop, and destroy a particular thread. Consider the list of core static members in Table 19-2.
Table 19-2. Key Static Members of the Thread Type
|
Static Member |
Meaning in Life |
|
CurrentContext |
This read-only property returns the context in which the thread is currently running. |
|
CurrentThread |
This read-only property returns a reference to the currently running thread. |
|
GetDomain() GetDomainID() |
These methods return a reference to the current AppDomain or the ID of the domain in which the current thread is running. |
|
Sleep() |
This method suspends the current thread for a specified time. |
The Thread class also supports several instance-level members, some of which are shown in Table 19-3.
Table 19-3. Select Instance-Level Members of the Thread Type
|
Instance-Level Member |
Meaning in Life |
|
IsAlive |
Returns a Boolean that indicates whether this thread has been started (and has not yet terminated or aborted). |
|
IsBackground |
Gets or sets a value indicating whether this thread is a “background thread” (more details in just a moment). |
|
Name |
Allows you to establish a friendly text name of the thread. |
|
Priority |
Gets or sets the priority of a thread, which may be assigned a value from the ThreadPriority enumeration. |
|
ThreadState |
Gets the state of this thread, which may be assigned a value from the ThreadState enumeration. |
|
Abort() |
Instructs the CLR to terminate the thread as soon as possible. |
|
Interrupt() |
Interrupts (e.g., wakes) the current thread from a suitable wait period. |
|
Join() |
Blocks the calling thread until the specified thread (the one on which Join() is called) exits. |
|
Resume() |
Resumes a thread that has been previously suspended. |
|
Start() |
Instructs the CLR to execute the thread ASAP. |
|
Suspend() |
Suspends the thread. If the thread is already suspended, a call to Suspend() has no effect. |
![]() Note Aborting or suspending an active thread is generally considered a bad idea. When you do so, there is a chance (however small) that a thread could “leak” its workload when disturbed or terminated.
Note Aborting or suspending an active thread is generally considered a bad idea. When you do so, there is a chance (however small) that a thread could “leak” its workload when disturbed or terminated.
Obtaining Statistics About the Current Thread of Execution
Recall that the entry point of an executable assembly (i.e., the Main() method) runs on the primary thread of execution. To illustrate the basic use of the Thread type, assume you have a new Console Application project named ThreadStats. As you know, the staticThread.CurrentThread property retrieves a Thread object that represents the currently executing thread. Once you have obtained the current thread, you are able to print out various statistics, like so:
// Be sure to import the System.Threading namespace.
static void Main(string[] args)
{
Console.WriteLine("***** Primary Thread stats *****\n");
// Obtain and name the current thread.
Thread primaryThread = Thread.CurrentThread;
primaryThread.Name = "ThePrimaryThread";
// Show details of hosting AppDomain/Context.
Console.WriteLine("Name of current AppDomain: {0}",
Thread.GetDomain().FriendlyName);
Console.WriteLine("ID of current Context: {0}",
Thread.CurrentContext.ContextID);
// Print out some stats about this thread.
Console.WriteLine("Thread Name: {0}",
primaryThread.Name);
Console.WriteLine("Has thread started?: {0}",
primaryThread.IsAlive);
Console.WriteLine("Priority Level: {0}",
primaryThread.Priority);
Console.WriteLine("Thread State: {0}",
primaryThread.ThreadState);
Console.ReadLine();
}
Here is the current output:
***** Primary Thread stats *****
Name of current AppDomain: ThreadStats.exe
ID of current Context: 0
Thread Name: ThePrimaryThread
Has thread started?: True
Priority Level: Normal
Thread State: Running
The Name Property
While this code is more or less self-explanatory, do notice that the Thread class supports a property called Name. If you do not set this value, Name will return an empty string. However, once you assign a friendly string moniker to a given Thread object, you can greatly simplify your debugging endeavors. If you are using Visual Studio, you may access the Threads window during a debugging session (select Debug ![]() Windows
Windows ![]() Threads). As you can see from Figure 19-1, you can quickly identify the thread you want to diagnose.
Threads). As you can see from Figure 19-1, you can quickly identify the thread you want to diagnose.
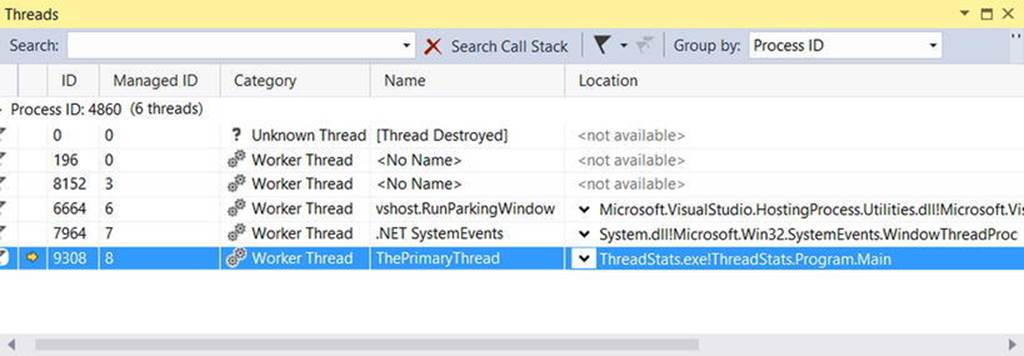
Figure 19-1. Debugging a thread with Visual Studio
The Priority Property
Next, notice that the Thread type defines a property named Priority. By default, all threads have a priority level of Normal. However, you can change this at any point in the thread’s lifetime using the ThreadPriority property and the relatedSystem.Threading.ThreadPriority enumeration, like so:
public enum ThreadPriority
{
Lowest,
BelowNormal,
Normal, // Default value.
AboveNormal,
Highest
}
If you were to assign a thread’s priority level to a value other than the default (ThreadPriority.Normal), understand that you would have no direct control over when the thread scheduler switches between threads. In reality, a thread’s priority level offers a hint to the CLR regarding the importance of the thread’s activity. Thus, a thread with the value ThreadPriority.Highest is not necessarily guaranteed to be given the highest precedence.
Again, if the thread scheduler is preoccupied with a given task (e.g., synchronizing an object, switching threads, or moving threads), the priority level will most likely be altered accordingly. However, all things being equal, the CLR will read these values and instruct the thread scheduler how to best allocate time slices. Threads with an identical thread priority should each receive the same amount of time to perform their work.
In most cases, you will seldom (if ever) need to directly alter a thread’s priority level. In theory, it is possible to jack up the priority level on a set of threads, thereby preventing lower-priority threads from executing at their required levels (so use caution).
![]() Source Code The ThreadStats project is in the Chapter 19 subdirectory.
Source Code The ThreadStats project is in the Chapter 19 subdirectory.
Manually Creating Secondary Threads
When you want to programmatically create additional threads to carry on some unit of work, follow this predictable process when using the types of the System.Threading namespace:
1. Create a method to be the entry point for the new thread.
2. Create a new ParameterizedThreadStart (or ThreadStart) delegate, passing the address of the method defined in step 1 to the constructor.
3. Create a Thread object, passing the ParameterizedThreadStart/ThreadStart delegate as a constructor argument.
4. Establish any initial thread characteristics (name, priority, etc.).
5. Call the Thread.Start() method. This starts the thread at the method referenced by the delegate created in step 2 as soon as possible.
As stated in step 2, you may use two distinct delegate types to “point to” the method that the secondary thread will execute. The ThreadStart delegate can point to any method that takes no arguments and returns nothing. This delegate can be helpful when the method is designed to simply run in the background without further interaction.
The obvious limitation of ThreadStart is that you are unable to pass in parameters for processing. However, the ParameterizedThreadStart delegate type allows a single parameter of type System.Object. Given that anything can be represented as a System.Object, you can pass in any number of parameters via a custom class or structure. Do note, however, that the ParameterizedThreadStart delegate can only point to methods that return void.
Working with the ThreadStart Delegate
To illustrate the process of building a multithreaded application (as well as to demonstrate the usefulness of doing so), assume you have a Console Application project (SimpleMultiThreadApp) that allows the end user to choose whether the application will perform its duties using the single primary thread or split its workload using two separate threads of execution.
Assuming you have imported the System.Threading namespace, your first step is to define a method to perform the work of the (possible) secondary thread. To keep focused on the mechanics of building multithreaded programs, this method will simply print out a sequence of numbers to the console window, pausing for approximately two seconds with each pass. Here is the full definition of the Printer class:
public class Printer
{
public void PrintNumbers()
{
// Display Thread info.
Console.WriteLine("-> {0} is executing PrintNumbers()",
Thread.CurrentThread.Name);
// Print out numbers.
Console.Write("Your numbers: ");
for(int i = 0; i < 10; i++)
{
Console.Write("{0}, ", i);
Thread.Sleep(2000);
}
Console.WriteLine();
}
}
Now, within Main(), you will first prompt the user to determine whether one or two threads will be used to perform the application’s work. If the user requests a single thread, you will simply invoke the PrintNumbers() method within the primary thread. However, if the user specifies two threads, you will create a ThreadStart delegate that points to PrintNumbers(), pass this delegate object into the constructor of a new Thread object, and call Start() to inform the CLR this thread is ready for processing.
To begin, set a reference to the System.Windows.Forms.dll assembly (and import the System.Windows.Forms namespace) and display a message within Main() using MessageBox.Show() (you’ll see the point of doing so after you run the program). Here is the complete implementation of Main():
static void Main(string[] args)
{
Console.WriteLine("***** The Amazing Thread App *****\n");
Console.Write("Do you want [1] or [2] threads? ");
string threadCount = Console.ReadLine();
// Name the current thread.
Thread primaryThread = Thread.CurrentThread;
primaryThread.Name = "Primary";
// Display Thread info.
Console.WriteLine("-> {0} is executing Main()",
Thread.CurrentThread.Name);
// Make worker class.
Printer p = new Printer();
switch(threadCount)
{
case "2":
// Now make the thread.
Thread backgroundThread =
new Thread(new ThreadStart(p.PrintNumbers));
backgroundThread.Name = "Secondary";
backgroundThread.Start();
break;
case "1":
p.PrintNumbers();
break;
default:
Console.WriteLine("I don’t know what you want...you get 1 thread.");
goto case "1";
}
// Do some additional work.
MessageBox.Show("I’m busy!", "Work on main thread...");
Console.ReadLine();
}
Now, if you run this program with a single thread, you will find that the final message box will not display the message until the entire sequence of numbers has printed to the console. As you are explicitly pausing for approximately two seconds after each number is printed, this will result in a less-than-stellar end-user experience. However, if you select two threads, the message box displays instantly, given that a unique Thread object is responsible for printing the numbers to the console.
![]() Source Code The SimpleMultiThreadApp project is included in the Chapter 19 subdirectory.
Source Code The SimpleMultiThreadApp project is included in the Chapter 19 subdirectory.
Working with the ParameterizedThreadStart Delegate
Recall that the ThreadStart delegate can point only to methods that return void and take no arguments. While this might fit the bill in some cases, if you want to pass data to the method executing on the secondary thread, you will need to use the ParameterizedThreadStartdelegate type. To illustrate, let’s re-create the logic of the AsyncCallbackDelegate project created earlier in this chapter, this time using the ParameterizedThreadStart delegate type.
To begin, create a new Console Application project named AddWithThreads and import the System.Threading namespace. Now, given that ParameterizedThreadStart can point to any method taking a System.Object parameter, you will create a custom type containing the numbers to be added, like so:
class AddParams
{
public int a, b;
public AddParams(int numb1, int numb2)
{
a = numb1;
b = numb2;
}
}
Next, create a static method in the Program class that will take an AddParams parameter and print the sum of the two numbers involved, as follows:
static void Add(object data)
{
if (data is AddParams)
{
Console.WriteLine("ID of thread in Add(): {0}",
Thread.CurrentThread.ManagedThreadId);
AddParams ap = (AddParams)data;
Console.WriteLine("{0} + {1} is {2}",
ap.a, ap.b, ap.a + ap.b);
}
}
The code within Main() is straightforward. Simply use ParameterizedThreadStart rather than ThreadStart, like so:
static void Main(string[] args)
{
Console.WriteLine("***** Adding with Thread objects *****");
Console.WriteLine("ID of thread in Main(): {0}",
Thread.CurrentThread.ManagedThreadId);
// Make an AddParams object to pass to the secondary thread.
AddParams ap = new AddParams(10, 10);
Thread t = new Thread(new ParameterizedThreadStart(Add));
t.Start(ap);
// Force a wait to let other thread finish.
Thread.Sleep(5);
Console.ReadLine();
}
The AutoResetEvent Class
In these first few examples, you have used a few crude ways to inform the primary thread to wait until the secondary thread has completed. During your examination of asynchronous delegates, you used a simple bool variable as a toggle; however, this is not a recommended solution, as both threads can access the same point of data, and this can lead to data corruption. A safer but still undesirable alternative is to call Thread.Sleep() for a fixed amount of time. The problem here is that you don’t want to wait longer than necessary.
One simple, and thread-safe, way to force a thread to wait until another is completed is to use the AutoResetEvent class. In the thread that needs to wait (such as a Main() method), create an instance of this class and pass in false to the constructor to signify you have not yet been notified. Then, at the point at which you are willing to wait, call the WaitOne() method. Here is the update to the Program class, which will do this very thing using a static-level AutoResetEvent member variable:
class Program
{
private static AutoResetEvent waitHandle = new AutoResetEvent(false);
static void Main(string[] args)
{
Console.WriteLine("***** Adding with Thread objects *****");
Console.WriteLine("ID of thread in Main(): {0}",
Thread.CurrentThread.ManagedThreadId);
AddParams ap = new AddParams(10, 10);
Thread t = new Thread(new ParameterizedThreadStart(Add));
t.Start(ap);
// Wait here until you are notified!
waitHandle.WaitOne();
Console.WriteLine("Other thread is done!");
Console.ReadLine();
}
...
}
When the other thread is completed with its workload, it will call the Set() method on the same instance of the AutoResetEvent type.
static void Add(object data)
{
if (data is AddParams)
{
Console.WriteLine("ID of thread in Add(): {0}",
Thread.CurrentThread.ManagedThreadId);
AddParams ap = (AddParams)data;
Console.WriteLine("{0} + {1} is {2}",
ap.a, ap.b, ap.a + ap.b);
// Tell other thread we are done.
waitHandle.Set();
}
}
![]() Source Code The AddWithThreads project is included in the Chapter 19 subdirectory.
Source Code The AddWithThreads project is included in the Chapter 19 subdirectory.
Foreground Threads and Background Threads
Now that you have seen how to programmatically create new threads of execution using the System.Threading namespace, let’s formalize the distinction between foreground threads and background threads.
· Foreground threads have the ability to prevent the current application from terminating. The CLR will not shut down an application (which is to say, unload the hosting AppDomain) until all foreground threads have ended.
· Background threads (sometimes called daemon threads) are viewed by the CLR as expendable paths of execution that can be ignored at any point in time (even if they are currently laboring over some unit of work). Thus, if all foreground threads have terminated, any and all background threads are automatically killed when the application domain unloads.
It is important to note that foreground and background threads are not synonymous with primary and worker threads. By default, every thread you create via the Thread.Start() method is automatically a foreground thread. Again, this means that the AppDomain will not unload until all threads of execution have completed their units of work. In most cases, this is exactly the behavior you require.
For the sake of argument, however, assume that you want to invoke Printer.PrintNumbers() on a secondary thread that should behave as a background thread. Again, this means that the method pointed to by the Thread type (via the ThreadStart orParameterizedThreadStart delegate) should be able to halt safely as soon as all foreground threads are done with their work. Configuring such a thread is as simple as setting the IsBackground property to true, like so:
static void Main(string[] args)
{
Console.WriteLine("***** Background Threads *****\n");
Printer p = new Printer();
Thread bgroundThread =
new Thread(new ThreadStart(p.PrintNumbers));
// This is now a background thread.
bgroundThread.IsBackground = true;
bgroundThread.Start();
}
Notice that this Main() method is not making a call to Console.ReadLine() to force the console to remain visible until you press the Enter key. Thus, when you run the application, it will shut down immediately because the Thread object has been configured as a background thread. Given that the Main() method triggers the creation of the primary foreground thread, as soon as the logic in Main() completes, the AppDomain unloads before the secondary thread is able to complete its work.
However, if you comment out the line that sets the IsBackground property, you will find that each number prints to the console, as all foreground threads must finish their work before the AppDomain is unloaded from the hosting process.
For the most part, configuring a thread to run as a background type can be helpful when the worker thread in question is performing a noncritical task that is no longer needed when the main task of the program is finished. For example, you could build an application that pings an e-mail server every few minutes for new e-mails, updates current weather conditions, or performs some other noncritical task.
The Issue of Concurrency
When you build multithreaded applications, your program needs to ensure that any piece of shared data is protected against the possibility of numerous threads changing its value. Given that all threads in an AppDomain have concurrent access to the shared data of the application, imagine what might happen if multiple threads were accessing the same point of data. As the thread scheduler will force threads to suspend their work at random, what if thread A is kicked out of the way before it has fully completed its work? Thread B is now reading unstable data.
To illustrate the problem of concurrency, let’s build another Console Application project named MultiThreadedPrinting. This application will once again use the Printer class created previously, but this time the PrintNumbers() method will force the current thread to pause for a randomly generated amount of time.
public class Printer
{
public void PrintNumbers()
{
...
for (int i = 0; i < 10; i++)
{
// Put thread to sleep for a random amount of time.
Random r = new Random();
Thread.Sleep(1000 * r.Next(5));
Console.Write("{0}, ", i);
}
Console.WriteLine();
}
}
The Main() method is responsible for creating an array of ten (uniquely named) Thread objects, each of which is making calls on the same instance of the Printer object as follows:
class Program
{
static void Main(string[] args)
{
Console.WriteLine("*****Synchronizing Threads *****\n");
Printer p = new Printer();
// Make 10 threads that are all pointing to the same
// method on the same object.
Thread[] threads = new Thread[10];
for (int i = 0; i < 10; i++)
{
threads[i] =
new Thread(new ThreadStart(p.PrintNumbers));
threads[i].Name = string.Format("Worker thread #{0}", i);
}
// Now start each one.
foreach (Thread t in threads)
t.Start();
Console.ReadLine();
}
}
Before looking at some test runs, let’s recap the problem. The primary thread within this AppDomain begins life by spawning ten secondary worker threads. Each worker thread is told to make calls on the PrintNumbers() method on the same Printer instance. Given that you have taken no precautions to lock down this object’s shared resources (the console), there is a good chance that the current thread will be kicked out of the way before the PrintNumbers() method is able to print the complete results. Because you don’t know exactly when (or if) this might happen, you are bound to get unpredictable results. For example, you might find the output shown here:
*****Synchronizing Threads *****
-> Worker thread #1 is executing PrintNumbers()
Your numbers: -> Worker thread #0 is executing PrintNumbers()
-> Worker thread #2 is executing PrintNumbers()
Your numbers: -> Worker thread #3 is executing PrintNumbers()
Your numbers: -> Worker thread #4 is executing PrintNumbers()
Your numbers: -> Worker thread #6 is executing PrintNumbers()
Your numbers: -> Worker thread #7 is executing PrintNumbers()
Your numbers: -> Worker thread #8 is executing PrintNumbers()
Your numbers: -> Worker thread #9 is executing PrintNumbers()
Your numbers: Your numbers: -> Worker thread #5 is executing PrintNumbers()
Your numbers: 0, 0, 0, 0, 1, 0, 0, 1, 1, 1, 2, 2, 2, 3, 3, 3, 2, 1, 0, 0, 4, 3,
4, 1, 2, 4, 5, 5, 5, 6, 6, 6, 2, 7, 7, 7, 3, 4, 0, 8, 4, 5, 1, 5, 8, 8, 9,
2, 6, 1, 0, 9, 1,
6, 2, 7, 9,
2, 1, 7, 8, 3, 2, 3, 3, 9,
8, 4, 4, 5, 9,
4, 3, 5, 5, 6, 3, 6, 7, 4, 7, 6, 8, 7, 4, 8, 5, 5, 6, 6, 8, 7, 7, 9,
8, 9,
8, 9,
9,
9,
Now run the application a few more times. Here is another possibility (your results will certainly differ):
*****Synchronizing Threads *****
-> Worker thread #0 is executing PrintNumbers()
-> Worker thread #1 is executing PrintNumbers()
-> Worker thread #2 is executing PrintNumbers()
Your numbers: -> Worker thread #4 is executing PrintNumbers()
Your numbers: -> Worker thread #5 is executing PrintNumbers()
Your numbers: Your numbers: -> Worker thread #6 is executing PrintNumbers()
Your numbers: -> Worker thread #7 is executing PrintNumbers()
Your numbers: Your numbers: -> Worker thread #8 is executing PrintNumbers()
Your numbers: -> Worker thread #9 is executing PrintNumbers()
Your numbers: -> Worker thread #3 is executing PrintNumbers()
Your numbers: 0, 0, 0, 0, 0, 0, 0, 0, 0, 0, 1, 1, 1, 1, 1, 1, 1, 1, 1, 1, 2, 2,
2, 2, 2, 2, 2, 2, 2, 2, 3, 3, 3, 3, 3, 3, 3, 3, 3, 3, 4, 4, 4, 4, 4, 4, 4, 4, 4,
4, 5, 5, 5, 5, 5, 5, 5, 5, 5, 5, 6, 6, 6, 6, 6, 6, 6, 6, 6, 6, 7, 7, 7, 7, 7, 7
, 7, 7, 7, 7, 8, 8, 8, 8, 8, 8, 8, 8, 8, 8, 9,
9,
9,
9,
9,
9,
9,
9,
9,
9,
![]() Note If you are unable to generate unpredictable outputs, increase the number of threads from 10 to 100 (for example) or introduce another call to Thread.Sleep() within your program. Eventually, you will encounter the concurrency issue.
Note If you are unable to generate unpredictable outputs, increase the number of threads from 10 to 100 (for example) or introduce another call to Thread.Sleep() within your program. Eventually, you will encounter the concurrency issue.
There are clearly some problems here. As each thread is telling the Printer to print the numerical data, the thread scheduler is happily swapping threads in the background. The result is inconsistent output. What you need is a way to programmatically enforce synchronized access to the shared resources. As you would guess, the System.Threading namespace provides a number of synchronization-centric types. The C# programming language also provides a particular keyword for the very task of synchronizing shared data in multithreaded applications.
Synchronization Using the C# lock Keyword
The first technique you can use to synchronize access to shared resources is the C# lock keyword. This keyword allows you to define a scope of statements that must be synchronized between threads. By doing so, incoming threads cannot interrupt the current thread, thus preventing it from finishing its work. The lock keyword requires you to specify a token (an object reference) that must be acquired by a thread to enter within the lock scope. When you are attempting to lock down a private instance-level method, you can simply pass in a reference to the current type, as follows:
private void SomePrivateMethod()
{
// Use the current object as the thread token.
lock(this)
{
// All code within this scope is thread safe.
}
}
However, if you are locking down a region of code within a public member, it is safer (and a best practice) to declare a private object member variable to serve as the lock token, like so:
public class Printer
{
// Lock token.
private object threadLock = new object();
public void PrintNumbers()
{
// Use the lock token.
lock (threadLock)
{
...
}
}
}
In any case, if you examine the PrintNumbers() method, you can see that the shared resource the threads are competing to gain access to is the console window. Therefore, if you scope all interactions with the Console type within a lock scope, as follows:
public void PrintNumbers()
{
// Use the private object lock token.
lock (threadLock)
{
// Display Thread info.
Console.WriteLine("-> {0} is executing PrintNumbers()",
Thread.CurrentThread.Name);
// Print out numbers.
Console.Write("Your numbers: ");
for (int i = 0; i < 10; i++)
{
Random r = new Random();
Thread.Sleep(1000 * r.Next(5));
Console.Write("{0}, ", i);
}
Console.WriteLine();
}
}
you have effectively designed a method that will allow the current thread to complete its task. Once a thread enters into a lock scope, the lock token (in this case, a reference to the current object) is inaccessible by other threads until the lock is released after the lock scope has exited. Thus, if thread A has obtained the lock token, other threads are unable to enter any scope that uses the same lock token until thread A relinquishes the lock token.
![]() Note If you are attempting to lock down code in a static method, simply declare a private static object member variable to serve as the lock token.
Note If you are attempting to lock down code in a static method, simply declare a private static object member variable to serve as the lock token.
If you now run the application, you can see that each thread has ample opportunity to finish its business.
*****Synchronizing Threads *****
-> Worker thread #0 is executing PrintNumbers()
Your numbers: 0, 1, 2, 3, 4, 5, 6, 7, 8, 9,
-> Worker thread #1 is executing PrintNumbers()
Your numbers: 0, 1, 2, 3, 4, 5, 6, 7, 8, 9,
-> Worker thread #3 is executing PrintNumbers()
Your numbers: 0, 1, 2, 3, 4, 5, 6, 7, 8, 9,
-> Worker thread #2 is executing PrintNumbers()
Your numbers: 0, 1, 2, 3, 4, 5, 6, 7, 8, 9,
-> Worker thread #4 is executing PrintNumbers()
Your numbers: 0, 1, 2, 3, 4, 5, 6, 7, 8, 9,
-> Worker thread #5 is executing PrintNumbers()
Your numbers: 0, 1, 2, 3, 4, 5, 6, 7, 8, 9,
-> Worker thread #7 is executing PrintNumbers()
Your numbers: 0, 1, 2, 3, 4, 5, 6, 7, 8, 9,
-> Worker thread #6 is executing PrintNumbers()
Your numbers: 0, 1, 2, 3, 4, 5, 6, 7, 8, 9,
-> Worker thread #8 is executing PrintNumbers()
Your numbers: 0, 1, 2, 3, 4, 5, 6, 7, 8, 9,
-> Worker thread #9 is executing PrintNumbers()
Your numbers: 0, 1, 2, 3, 4, 5, 6, 7, 8, 9,
![]() Source Code The MultiThreadedPrinting project is included in the Chapter 19 subdirectory.
Source Code The MultiThreadedPrinting project is included in the Chapter 19 subdirectory.
Synchronization Using the System.Threading.Monitor Type
The C# lock statement is really just a shorthand notation for working with the System.Threading.Monitor class. Once processed by the C# compiler, a lock scope actually resolves to the following (which you can verify using ildasm.exe):
public void PrintNumbers()
{
Monitor.Enter(threadLock);
try
{
// Display Thread info.
Console.WriteLine("-> {0} is executing PrintNumbers()",
Thread.CurrentThread.Name);
// Print out numbers.
Console.Write("Your numbers: ");
for (int i = 0; i < 10; i++)
{
Random r = new Random();
Thread.Sleep(1000 * r.Next(5));
Console.Write("{0}, ", i);
}
Console.WriteLine();
}
finally
{
Monitor.Exit(threadLock);
}
}
First, notice that the Monitor.Enter() method is the ultimate recipient of the thread token you specified as the argument to the lock keyword. Next, all code within a lock scope is wrapped within a try block. The corresponding finally clause ensures that the thread token is released (via the Monitor.Exit() method), regardless of any possible runtime exception. If you were to modify the MultiThreadPrinting program to make direct use of the Monitor type (as just shown), you would find the output is identical.
Now, given that the lock keyword seems to require less code than making explicit use of the System.Threading.Monitor type, you might wonder about the benefits of using the Monitor type directly. The short answer is control. If you use the Monitor type, you are able to instruct the active thread to wait for some duration of time (via the static Monitor.Wait() method), inform waiting threads when the current thread is completed (via the static Monitor.Pulse() and Monitor.PulseAll() methods), and so on.
As you would expect, in a great number of cases, the C# lock keyword will fit the bill. However, if you are interested in checking out additional members of the Monitor class, consult the .NET Framework 4.6 SDK documentation.
Synchronization Using the System.Threading.Interlocked Type
Although it always is hard to believe until you look at the underlying CIL code, assignments and simple arithmetic operations are not atomic. For this reason, the System.Threading namespace provides a type that allows you to operate on a single point of data atomically with less overhead than with the Monitor type. The Interlocked class defines the following key static members shown in Table 19-4.
Table 19-4. Select Static Members of the System.Threading.Interlocked Type
|
Member |
Meaning in Life |
|
CompareExchange() |
Safely tests two values for equality and, if equal, exchanges one of the values with a third |
|
Decrement() |
Safely decrements a value by 1 |
|
Exchange() |
Safely swaps two values |
|
Increment() |
Safely increments a value by 1 |
Although it might not seem like it from the onset, the process of atomically altering a single value is quite common in a multithreaded environment. Assume you have a method named AddOne() that increments an integer member variable named intVal. Rather than writing synchronization code such as the following:
public void AddOne()
{
lock(myLockToken)
{
intVal++;
}
}
you can simplify your code via the static Interlocked.Increment() method. Simply pass in the variable to increment by reference. Do note that the Increment() method not only adjusts the value of the incoming parameter but also returns the new value.
public void AddOne()
{
int newVal = Interlocked.Increment(ref intVal);
}
In addition to Increment() and Decrement(), the Interlocked type allows you to atomically assign numerical and object data. For example, if you want to assign the value of a member variable to the value 83, you can avoid the need to use an explicit lock statement (or explicit Monitor logic) and use the Interlocked.Exchange() method, like so:
public void SafeAssignment()
{
Interlocked.Exchange(ref myInt, 83);
}
Finally, if you want to test two values for equality and change the point of comparison in a thread- safe manner, you are able to leverage the Interlocked.CompareExchange() method as follows:
public void CompareAndExchange()
{
// If the value of i is currently 83, change i to 99.
Interlocked.CompareExchange(ref i, 99, 83);
}
Synchronization Using the [Synchronization] Attribute
The final synchronization primitive examined here is the [Synchronization] attribute, which is a member of the System.Runtime.Remoting.Contexts namespace. In essence, this class-level attribute effectively locks down all instance member code of the object for thread safety. When the CLR allocates objects attributed with [Synchronization], it will place the object within a synchronized context. As you might recall from Chapter 17, objects that should not be removed from a contextual boundary should derive from ContextBoundObject. Therefore, if you want to make the Printer class type thread safe (without explicitly writing thread-safe code within the class members), you could update the definition as follows:
using System.Runtime.Remoting.Contexts;
...
// All methods of Printer are now thread safe!
[Synchronization]
public class Printer : ContextBoundObject
{
public void PrintNumbers()
{
...
}
}
In some ways, this approach can be seen as the lazy way to write thread-safe code, given that you are not required to dive into the details about which aspects of the type are truly manipulating thread- sensitive data. The major downfall of this approach, however, is that even if a given method is not making use of thread-sensitive data, the CLR will still lock invocations to the method. Obviously, this could degrade the overall functionality of the type, so use this technique with care.
Programming with Timer Callbacks
Many applications have the need to call a specific method during regular intervals of time. For example, you might have an application that needs to display the current time on a status bar via a given helper function. As another example, you might want to have your application call a helper function every so often to perform noncritical background tasks such as checking for new e-mail messages. For situations such as these, you can use the System.Threading.Timer type in conjunction with a related delegate named TimerCallback.
To illustrate, assume you have a Console Application project (TimerApp) that will print the current time every second until the user presses a key to terminate the application. The first obvious step is to write the method that will be called by the Timer type (be sure to importSystem.Threading into your code file).
class Program
{
static void PrintTime(object state)
{
Console.WriteLine("Time is: {0}",
DateTime.Now.ToLongTimeString());
}
static void Main(string[] args)
{
}
}
Notice the PrintTime() method has a single parameter of type System.Object and returns void. This is not optional, given that the TimerCallback delegate can only call methods that match this signature. The value passed into the target of your TimerCallback delegate can be any type of object (in the case of the e-mail example, this parameter might represent the name of the Microsoft Exchange server to interact with during the process). Also note that given that this parameter is indeed a System.Object, you are able to pass in multiple arguments using a System.Array or custom class/structure.
The next step is to configure an instance of the TimerCallback delegate and pass it into the Timer object. In addition to configuring a TimerCallback delegate, the Timer constructor allows you to specify the optional parameter information to pass into the delegate target (defined as a System.Object), the interval to poll the method, and the amount of time to wait (in milliseconds) before making the first call. Here’s an example:
static void Main(string[] args)
{
Console.WriteLine("***** Working with Timer type *****\n");
// Create the delegate for the Timer type.
TimerCallback timeCB = new TimerCallback(PrintTime);
// Establish timer settings.
Timer t = new Timer(
timeCB, // The TimerCallback delegate object.
null, // Any info to pass into the called method (null for no info).
0, // Amount of time to wait before starting (in milliseconds).
1000); // Interval of time between calls (in milliseconds).
Console.WriteLine("Hit key to terminate...");
Console.ReadLine();
}
In this case, the PrintTime() method will be called roughly every second and will pass in no additional information to said method. Here is the output:
***** Working with Timer type *****
Hit key to terminate...
Time is: 6:51:48 PM
Time is: 6:51:49 PM
Time is: 6:51:50 PM
Time is: 6:51:51 PM
Time is: 6:51:52 PM
Press any key to continue . . .
If you did want to send in some information for use by the delegate target, simply substitute the null value of the second constructor parameter with the appropriate information, like so:
// Establish timer settings.
Timer t = new Timer(timeCB, "Hello From Main", 0, 1000);
You can then obtain the incoming data as follows:
static void PrintTime(object state)
{
Console.WriteLine("Time is: {0}, Param is: {1}",
DateTime.Now.ToLongTimeString(), state.ToString());
}
![]() Source Code The TimerApp project is included in the Chapter 19 subdirectory.
Source Code The TimerApp project is included in the Chapter 19 subdirectory.
Understanding the CLR ThreadPool
The next thread-centric topic you will examine in this chapter is the role of the CLR thread pool. When you invoke a method asynchronously using delegate types (via the BeginInvoke() method), the CLR does not literally create a new thread. For purposes of efficiency, a delegate’sBeginInvoke() method leverages a pool of worker threads that is maintained by the runtime. To allow you to interact with this pool of waiting threads, the System.Threading namespace provides the ThreadPool class type.
If you want to queue a method call for processing by a worker thread in the pool, you can use the ThreadPool.QueueUserWorkItem() method. This method has been overloaded to allow you to specify an optional System.Object for custom state data in addition to an instance of the WaitCallback delegate.
public static class ThreadPool
{
...
public static bool QueueUserWorkItem(WaitCallback callBack);
public static bool QueueUserWorkItem(WaitCallback callBack,
object state);
}
The WaitCallback delegate can point to any method that takes a System.Object as its sole parameter (which represents the optional state data) and returns nothing. Do note that if you do not provide a System.Object when calling QueueUserWorkItem(), the CLR automatically passes a null value. To illustrate queuing methods for use by the CLR thread pool, ponder the following program, which uses the Printer type once again. In this case, however, you are not manually creating an array of Thread objects; rather, you are assigning members of the pool to the PrintNumbers() method.
class Program
{
static void Main(string[] args)
{
Console.WriteLine("***** Fun with the CLR Thread Pool *****\n");
Console.WriteLine("Main thread started. ThreadID = {0}",
Thread.CurrentThread.ManagedThreadId);
Printer p = new Printer();
WaitCallback workItem = new WaitCallback(PrintTheNumbers);
// Queue the method ten times.
for (int i = 0; i < 10; i++)
{
ThreadPool.QueueUserWorkItem(workItem, p);
}
Console.WriteLine("All tasks queued");
Console.ReadLine();
}
static void PrintTheNumbers(object state)
{
Printer task = (Printer)state;
task.PrintNumbers();
}
}
At this point, you might be wondering if it would be advantageous to use the CLR- maintained thread pool rather than explicitly creating Thread objects. Consider these benefits of leveraging the thread pool:
· The thread pool manages threads efficiently by minimizing the number of threads that must be created, started, and stopped.
· By using the thread pool, you can focus on your business problem rather than the application’s threading infrastructure.
However, using manual thread management is preferred in some cases. Here’s an example:
· If you require foreground threads or must set the thread priority. Pooled threads are always background threads with default priority (ThreadPriority.Normal).
· If you require a thread with a fixed identity in order to abort it, suspend it, or discover it by name.
![]() Source Code The ThreadPoolApp project is included in the Chapter 19 subdirectory.
Source Code The ThreadPoolApp project is included in the Chapter 19 subdirectory.
That wraps up your investigation of the System.Threading namespace. To be sure, understanding the topics presented thus far in the chapter (especially during your examination of concurrency issues) will be extremely valuable when creating a multithreaded application. Given this foundation, you will now turn your attention to a number of new thread-centric topics that are available only with .NET 4.0 and higher. To begin, you will examine the role of an alternative threading model, termed the TPL.
Parallel Programming Using the Task Parallel Library
At this point in the chapter, you have examined two programming techniques (using asynchronous delegates and via the members of System.Threading) that allow you to build multithreaded software. Recall that both of these approaches will work under any version of the .NET platform.
Beginning with the release of .NET 4.0, Microsoft introduced a new approach to multithreaded application development using a parallel programming library termed the Task Parallel Library (TPL). Using the types of System.Threading.Tasks, you can build fine-grained, scalable parallel code without having to work directly with threads or the thread pool.
This is not to say, however, that you will not use the types of System.Threading when you use the TPL. In reality, these two threading toolkits can work together quite naturally. This is especially true in that the System.Threading namespace still provides a majority of the synchronization primitives you examined previously (Monitor, Interlocked, and so forth). This being said, you will quite likely find that you will favor working with the TPL rather than the original System.Threading namespace, given that the same set of tasks can be performed in a more straightforward manner.
![]() Note On a related note, be aware that the C# async and await keywords use various members of the System.Threading.Tasks namespace.
Note On a related note, be aware that the C# async and await keywords use various members of the System.Threading.Tasks namespace.
The System.Threading.Tasks Namespace
Collectively speaking, the types of System.Threading.Tasks are referred to as the Task Parallel Library. The TPL will automatically distribute your application’s workload across available CPUs dynamically, using the CLR thread pool. The TPL handles the partitioning of the work, thread scheduling, state management, and other low-level details. The end result is that you can maximize the performance of your .NET applications, while being shielded from many of complexities of directly working with threads (see Figure 19-2).
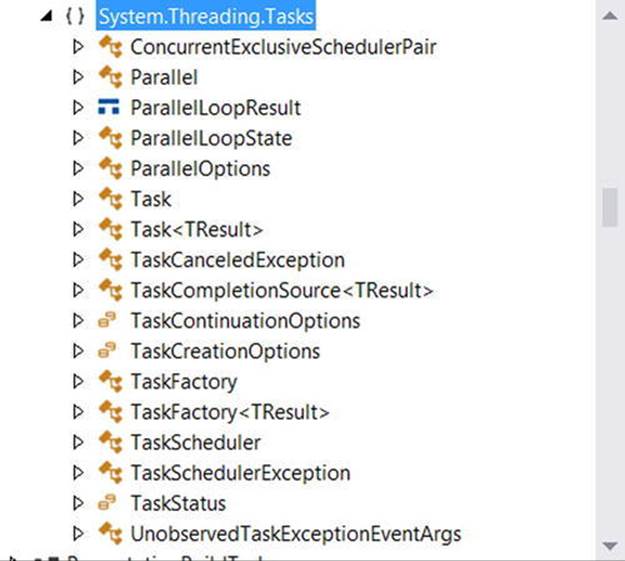
Figure 19-2. Members of the System.Threading.Tasks namespace
The Role of the Parallel Class
A key class of the TPL is System.Threading.Tasks.Parallel. This class supports a number of methods that allow you to iterate over a collection of data (specifically, an object implementing IEnumerable<T>) in a parallel fashion. If you were to look up the Parallel class in the .NET Framework 4.6 SDK documentation, you would see that this class supports two primary static methods, Parallel.For() and Parallel.ForEach(), each of which defines numerous overloaded versions.
These methods allow you to author a body of code statements that will be processed in a parallel manner. In concept, these statements are the same sort of logic you would write in a normal looping construct (via the for or foreach C# keywords). The benefit is that the Parallelclass will pluck threads from the thread pool (and manage concurrency) on your behalf.
Both of these methods require you to specify an IEnumerable- or IEnumerable<T>-compatible container that holds the data you need to process in a parallel manner. The container could be a simple array, a nongeneric collection (such as ArrayList), a generic collection (such asList<T>), or the results of a LINQ query.
In addition, you will need to use the System.Func<T> and System.Action<T> delegates to specify the target method that will be called to process the data. You’ve already encountered the Func<T> delegate in Chapter 12, during your investigation of LINQ to Objects. Recall thatFunc<T> represents a method that can have a given return value and a varied number of arguments. The Action<T> delegate is similar to Func<T>, in that it allows you to point to a method taking some number of parameters. However, Action<T> specifies a method that can only return void.
While you could call the Parallel.For() and Parallel.ForEach() methods and pass a strongly typed Func<T> or Action<T> delegate object, you can simplify your programming by using a fitting C# anonymous method or lambda expression.
Data Parallelism with the Parallel Class
The first way to use the TPL is to perform data parallelism. Simply put, this term refers to the task of iterating over an array or collection in a parallel manner using the Parallel.For() or Parallel.ForEach() method. Assume you need to perform some labor-intensive file I/O operations. Specifically, you need to load a large number of *.jpg files into memory, flip them upside down, and save the modified image data to a new location.
The .NET Framework 4.6 SDK documentation provides a console-based example of this very situation; however, you will see how to perform the same overall task using a graphical user interface so you can examine the use of “anonymous delegates” to allow secondary threads to update the primary user interface thread (aka the UI thread).
![]() Note When you are building a multithreaded graphical user interface (GUI) application, secondary threads can never directly access user interface controls. The reason is that controls (buttons, text boxes, labels, progress bars, etc.) have thread affinity with the thread that created them. In the following example, I’ll illustrate one way to allow secondary threads to access UI items in a thread-safe manner. You’ll see a more simplified approach when you examine the C# async and await keywords.
Note When you are building a multithreaded graphical user interface (GUI) application, secondary threads can never directly access user interface controls. The reason is that controls (buttons, text boxes, labels, progress bars, etc.) have thread affinity with the thread that created them. In the following example, I’ll illustrate one way to allow secondary threads to access UI items in a thread-safe manner. You’ll see a more simplified approach when you examine the C# async and await keywords.
To illustrate, create a Windows Forms application named DataParallelismWithForEach, and use the Solution Explorer to rename Form1.cs to MainForm.cs. After you do so, import the following namespaces in your primary code file:
// Be sure you have these namespaces!
using System.Threading.Tasks;
using System.Threading;
using System.IO;
The GUI of the application consists of a multiline TextBox and a single Button (named btnProcessImages). The purpose of the text area is to allow you to enter data while the work is being performed in the background, thus illustrating the nonblocking nature of the parallel task. The Click event of this Button will eventually use the TPL, but for now, author the following blocking code.
![]() Note You should update the string passed into the following Directory.GetFiles() method call to point to a path on your computer that has some image files (such as a personal folder of family pictures). I’ve included some sample images (that ship with the Windows operating system) in the Solution directory for your convenience.
Note You should update the string passed into the following Directory.GetFiles() method call to point to a path on your computer that has some image files (such as a personal folder of family pictures). I’ve included some sample images (that ship with the Windows operating system) in the Solution directory for your convenience.
public partial class MainForm : Form
{
public MainForm()
{
InitializeComponent();
}
private void btnProcessImages_Click(object sender, EventArgs e)
{
ProcessFiles();
}
private void ProcessFiles()
{
// Load up all *.jpg files, and make a new folder for the modified data.
string[] files = Directory.GetFiles
(@"C:\TestPictures", "*.jpg",
SearchOption.AllDirectories);
string newDir = @"C:\ModifiedPictures";
Directory.CreateDirectory(newDir);
// Process the image data in a blocking manner.
foreach (string currentFile in files)
{
string filename = Path.GetFileName(currentFile);
using (Bitmap bitmap = new Bitmap(currentFile))
{
bitmap.RotateFlip(RotateFlipType.Rotate180FlipNone);
bitmap.Save(Path.Combine(newDir, filename));
// Print out the ID of the thread processing the current image.
this.Text = string.Format("Processing {0} on thread {1}", filename,
Thread.CurrentThread.ManagedThreadId);
}
}
}
}
Notice that the ProcessFiles() method will rotate each *.jpg file under the specified directory, which currently contains 37 files (again, be sure to update the path sent into Directory.GetFiles() as necessary). Currently, all the work is happening on the primary thread of the executable. Therefore, if the button is clicked, the program will appear to hang. Furthermore, the caption of the window will also report that the same primary thread is processing the file, as we have only a single thread of execution.
To process the files on as many CPUs as possible, you can rewrite the current foreach loop to use Parallel.ForEach(). Recall that this method has been overloaded numerous times; however, in the simplest form, you must specify the IEnumerable<T>-compatible object that contains the items to process (that would be the files string array) and an Action<T> delegate that points to the method that will perform the work.
Here is the relevant update, using the C# lambda operator in place of a literal Action<T> delegate object. Notice that you are currently commenting out the line of code that displayed the ID of the thread executing the current image file. See the next section to find out the reason why.
// Process the image data in a parallel manner!
Parallel.ForEach(files, currentFile =>
{
string filename = Path.GetFileName(currentFile);
using (Bitmap bitmap = new Bitmap(currentFile))
{
bitmap.RotateFlip(RotateFlipType.Rotate180FlipNone);
bitmap.Save(Path.Combine(newDir, filename));
// This code statement is now a problem! See next section.
// this.Text = string.Format("Processing {0} on thread {1}", filename,
// Thread.CurrentThread.ManagedThreadId);
}
}
);
Accessing UI Elements on Secondary Threads
You’ll notice that I’ve commented out the previous line of code that updated the caption of the main window with the ID of the currently executing thread. As noted previously, GUI controls have “thread affinity” with the thread that created it. If secondary threads attempt to access a control they did not directly create, you are bound to run into runtime errors when debugging your software. On the flip side, if you were to run the application (via Ctrl+F5), you might not ever find any problems whatsoever with the original code.
![]() Note Let me reiterate the previous point: when you debug (F5) a multithreaded application, Visual Studio is often able to catch errors that arise when a secondary thread is “touching” a control created on the primary thread. However, oftentimes when you run (Ctrl+F5) the application, the application could appear to run correctly (or it might error straightaway). Until you take precautions (examined next), your application has the potential of raising a runtime error under such circumstances.
Note Let me reiterate the previous point: when you debug (F5) a multithreaded application, Visual Studio is often able to catch errors that arise when a secondary thread is “touching” a control created on the primary thread. However, oftentimes when you run (Ctrl+F5) the application, the application could appear to run correctly (or it might error straightaway). Until you take precautions (examined next), your application has the potential of raising a runtime error under such circumstances.
One approach that you can use to allow these secondary threads to access the controls in a thread-safe manner is yet another delegate centric technique, specifically an anonymous delegate. The Control parent class of the Windows Forms API defines a method named Invoke(), which takes a System.Delegate as input. You can call this method when you are in a coding context involving secondary threads to provide a thread-safe manner to update the UI of the given control. Now, while you could write all of the required delegate code directly, most developers use anonymous delegates as a simple alternative. Here is the relevant update to content with the previously commented-out code statement:
using (Bitmap bitmap = new Bitmap(currentFile))
{
bitmap.RotateFlip(RotateFlipType.Rotate180FlipNone);
bitmap.Save(Path.Combine(newDir, filename));
// Eek! This will not work anymore!
//this.Text = string.Format("Processing {0} on thread {1}", filename,
// Thread.CurrentThread.ManagedThreadId);
// Invoke on the Form object, to allow secondary threads to access controls
// in a thread-safe manner.
this.Invoke((Action)delegate
{
this.Text = string.Format("Processing {0} on thread {1}", filename,
Thread.CurrentThread.ManagedThreadId);
}
);
}
![]() Note The this.Invoke() method is unique to the Windows Forms API. When you are building a WPF application, you would write this.Dispatcher.Invoke() for the same purpose.
Note The this.Invoke() method is unique to the Windows Forms API. When you are building a WPF application, you would write this.Dispatcher.Invoke() for the same purpose.
Now, if you run program, the TPL will indeed distribute the workload to multiple threads from the thread pool, using as many CPUs as possible. However, you will not see the window’s caption display the name of each unique thread, and you won’t see anything if you type in the text box until all the images have been processed! The reason is that the primary UI thread is still blocked, waiting for all the other threads to finish up their business.
The Task Class
The Task class allows you to easily invoke a method on a secondary thread and can be used as a simple alternative to working with asynchronous delegates. Update the Click handler of your Button control as so:
private void btnProcessImages_Click(object sender, EventArgs e)
{
// Start a new "task" to process the files.
Task.Factory.StartNew(() =>
{
ProcessFiles();
});
}
The Factory property of Task returns a TaskFactory object. When you call its StartNew() method, you pass in an Action<T> delegate (here, hidden away with a fitting lambda expression) that points to the method to invoke in an asynchronous manner. With this small update, you will now find that the window’s title will show which thread from the thread pool is processing a given file, and better yet, the text area is able to receive input, as the UI thread is no longer blocked.
Handling Cancellation Request
One improvement you can make to the current example is to provide a way for the user to stop the processing of the image data, via a second (aptly named) Cancel button. Thankfully, the Parallel.For() and Parallel.ForEach() methods both support cancellation through the use of cancellation tokens. When you invoke methods on Parallel, you can pass in a ParallelOptions object, which in turn contains a CancellationTokenSource object.
First, define the following new private member variable in your Form-derived class of type CancellationTokenSource named cancelToken:
public partial class MainForm : Form
{
// New Form-level variable.
private CancellationTokenSource cancelToken =
new CancellationTokenSource();
...
}
Now, assuming you have added a new Button (named btnCancel) on your designer, handle the Click event and implement the handler as so:
private void btnCancel_Click(object sender, EventArgs e)
{
// This will be used to tell all the worker threads to stop!
cancelToken.Cancel();
}
Now, the real modifications need to occur within the ProcessFiles() method. Consider the final implementation:
private void ProcessFiles()
{
// Use ParallelOptions instance to store the CancellationToken.
ParallelOptions parOpts = new ParallelOptions();
parOpts.CancellationToken = cancelToken.Token;
parOpts.MaxDegreeOfParallelism = System.Environment.ProcessorCount;
// Load up all *.jpg files, and make a new folder for the modified data.
string[] files = Directory.GetFiles
(@"C:\Users\Public\Pictures\Sample Pictures", "*.jpg",
SearchOption.AllDirectories);
string newDir = @"C:\ModifiedPictures";
Directory.CreateDirectory(newDir);
try
{
// Process the image data in a parallel manner!
Parallel.ForEach(files, parOpts, currentFile =>
{
parOpts.CancellationToken.ThrowIfCancellationRequested();
string filename = Path.GetFileName(currentFile);
using (Bitmap bitmap = new Bitmap(currentFile))
{
bitmap.RotateFlip(RotateFlipType.Rotate180FlipNone);
bitmap.Save(Path.Combine(newDir, filename));
this.Invoke((Action)delegate
{
this.Text = string.Format("Processing {0} on thread {1}", filename,
Thread.CurrentThread.ManagedThreadId);
}
);
}
}
);
this.Invoke((Action)delegate
{
this.Text = "Done!";
});
}
catch (OperationCanceledException ex)
{
this.Invoke((Action)delegate
{
this.Text = ex.Message;
});
}
}
Notice that you begin the method by configuring a ParallelOptions object, setting the CancellationToken property to use the CancellationTokenSource token. Also note that when you call the Parallel.ForEach() method, you pass in the ParallelOptionsobject as the second parameter.
Within the scope of the looping logic, you make a call to ThrowIfCancellationRequested() on the token, which will ensure if the user clicks the Cancel button, all threads will stop, and you will be notified via a runtime exception. When you catch theOperationCanceledException error, you will set the text of the main window to the error message.
![]() Source Code The DataParallelismWithForEach project is included in the Chapter 19 subdirectory.
Source Code The DataParallelismWithForEach project is included in the Chapter 19 subdirectory.
Task Parallelism Using the Parallel Class
In addition to data parallelism, the TPL can also be used to easily fire off any number of asynchronous tasks using the Parallel.Invoke() method. This approach is a bit more straightforward than using delegates or members from System.Threading; however, if you require more control over the way tasks are executed, you could forgo use of Parallel.Invoke() and use the Task class directly, as you did in the previous example.
To illustrate task parallelism, create a new Windows Forms application called MyEBookReader and be sure the System.Threading.Tasks and System.Net namespaces are imported. This example is a modification of a useful example in the .NET Framework 4.6 SDK documentation. Here, you will fetch a publically available e-book from Project Gutenberg (www.gutenberg.org) and then perform a set of lengthy tasks in parallel.
The GUI consists of a multiline TextBox control (named txtBook) and two Button controls (btnDownload and btnGetStats). Once you have designed the UI, handle the Click event for each Button, and in the form’s code file, declare a class-level string variable namedtheEBook. Implement the Click hander for the btnDownload as so:
private void btnDownload_Click(object sender, EventArgs e)
{
WebClient wc = new WebClient();
wc.DownloadStringCompleted += (s, eArgs) =>
{
theEBook = eArgs.Result;
txtBook.Text = theEBook;
};
// The Project Gutenberg EBook of A Tale of Two Cities, by Charles Dickens
wc.DownloadStringAsync(new Uri("http://www.gutenberg.org/files/98/98-8.txt"));
}
The WebClient class is a member of System.Net. This class provides a number of methods for sending data to and receiving data from a resource identified by a URI. As it turns out, many of these methods have an asynchronous version, such as DownloadStringAsync(). This method will spin up a new thread from the CLR thread pool automatically. When the WebClient is done obtaining the data, it will fire the DownloadStringCompleted event, which you are handling here using a C# lambda expression. If you were to call the synchronous version of this method (DownloadString()), the form would appear unresponsive for quite some time.
The Click event hander for the btnGetStats Button control is implemented to extract the individual words contained in theEBook variable and then pass the string array to a few helper functions for processing as follows:
private void btnGetStats_Click(object sender, EventArgs e)
{
// Get the words from the e-book.
string[] words = theEBook.Split(new char[]
{ ’ ’, ’\u000A’, ’,’, ’.’, ’;’, ’:’, ’-’, ’?’, ’/’ },
StringSplitOptions.RemoveEmptyEntries);
// Now, find the ten most common words.
string[] tenMostCommon = FindTenMostCommon(words);
// Get the longest word.
string longestWord = FindLongestWord(words);
// Now that all tasks are complete, build a string to show all
// stats in a message box.
StringBuilder bookStats = new StringBuilder("Ten Most Common Words are:\n");
foreach (string s in tenMostCommon)
{
bookStats.AppendLine(s);
}
bookStats.AppendFormat("Longest word is: {0}", longestWord);
bookStats.AppendLine();
MessageBox.Show(bookStats.ToString(), "Book info");
}
The FindTenMostCommon() method uses a LINQ query to obtain a list of string objects that occur most often in the string array, while FindLongestWord() locates, well, the longest word.
private string[] FindTenMostCommon(string[] words)
{
var frequencyOrder = from word in words
where word.Length > 6
group word by word into g
orderby g.Count() descending
select g.Key;
string[] commonWords = (frequencyOrder.Take(10)).ToArray();
return commonWords;
}
private string FindLongestWord(string[] words)
{
return (from w in words orderby w.Length descending select w).FirstOrDefault();
}
If you were to run this project, the amount of time to perform all tasks could take a goodly amount of time, based on the CPU count of your machine and overall processor speed. Eventually, you should see the output shown in Figure 19-3.
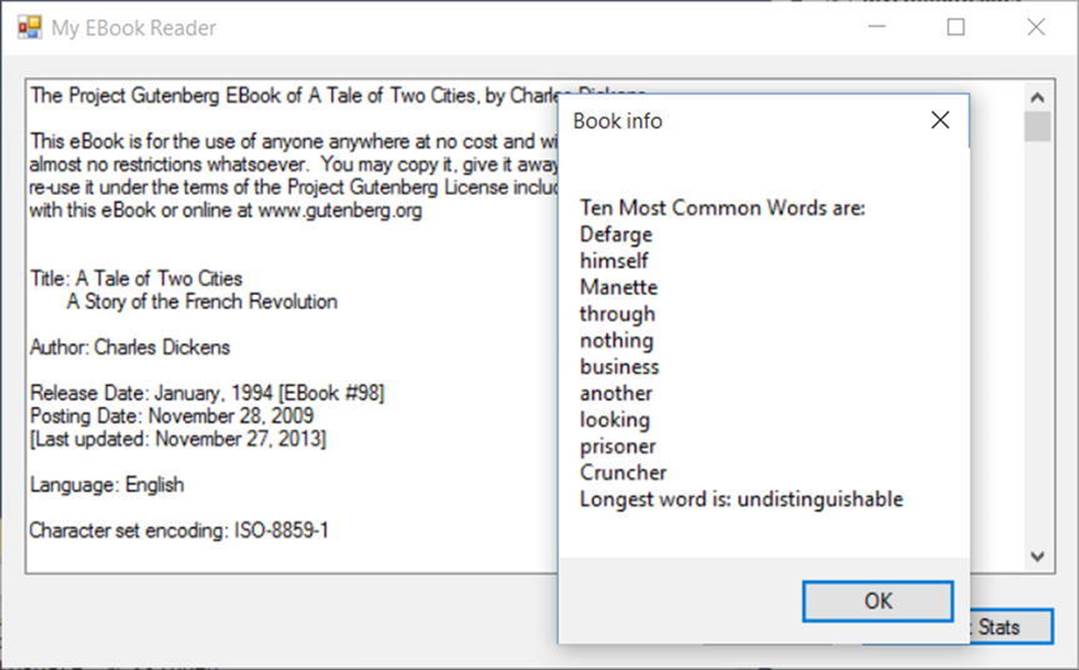
Figure 19-3. Stats about the downloaded e-book
You can help ensure that your application uses all available CPUs on the host machine by invoking the FindTenMostCommon() and FindLongestWord() methods in parallel. To do so, modify your btnGetStats_Click() method as so:
private void btnGetStats_Click(object sender, EventArgs e)
{
// Get the words from the e-book.
string[] words = theEBook.Split(
new char[] { ’ ’, ’\u000A’, ’,’, ’.’, ’;’, ’:’, ’-’, ’?’, ’/’ },
StringSplitOptions.RemoveEmptyEntries);
string[] tenMostCommon = null;
string longestWord = string.Empty;
Parallel.Invoke(
() =>
{
// Now, find the ten most common words.
tenMostCommon = FindTenMostCommon(words);
},
() =>
{
// Get the longest word.
longestWord = FindLongestWord(words);
});
// Now that all tasks are complete, build a string to show all
// stats in a message box.
...
}
The Parallel.Invoke() method expects a parameter array of Action<> delegates, which you have supplied indirectly using lambda expressions. Again, while the output is identical, the benefit is that the TPL will now use all possible processors on the machine to invoke each method in parallel if possible.
![]() Source Code The MyEBookReader project is included in the Chapter 19 subdirectory.
Source Code The MyEBookReader project is included in the Chapter 19 subdirectory.
Parallel LINQ Queries (PLINQ)
To wrap up your look at the TPL, be aware that there is another way you can incorporate parallel tasks into your .NET applications. If you choose, you can use a set of extension methods, which allow you to construct a LINQ query that will perform its workload in parallel (if possible). Fittingly, LINQ queries that are designed to run in parallel are termed PLINQ queries.
Like parallel code authored using the Parallel class, PLINQ has the option of ignoring your request to process the collection in parallel if need be. The PLINQ framework has been optimized in numerous ways, which includes determining whether a query would, in fact, perform faster in a synchronous manner.
At runtime, PLINQ analyzes the overall structure of the query, and if the query is likely to benefit from parallelization, it will run concurrently. However, if parallelizing a query would hurt performance, PLINQ just runs the query sequentially. If PLINQ has a choice between a potentially expensive parallel algorithm or an inexpensive sequential algorithm, it chooses the sequential algorithm by default.
The necessary extension methods are found within the ParallelEnumerable class of the System.Linq namespace. Table 19-5 documents some useful PLINQ extensions.
Table 19-5. Select Members of the ParallelEnumerable Class
|
Member |
Meaning in Life |
|
AsParallel() |
Specifies that the rest of the query should be parallelized, if possible. |
|
WithCancellation() |
Specifies that PLINQ should periodically monitor the state of the provided cancellation token and cancel execution if it is requested. |
|
WithDegreeOfParallelism() |
Specifies the maximum number of processors that PLINQ should use to parallelize the query. |
|
ForAll() |
Enables results to be processed in parallel without first merging back to the consumer thread, as would be the case when enumerating a LINQ result using the foreach keyword. |
To see PLINQ in action, create a final Windows Forms application named PLINQDataProcessingWithCancellation and import the System.Threading namespace. This simple form will need only two Button controls named btnExecute and btnCancel. Then the Execute button is clicked, and you will fire off a new Task, which executes a LINQ query that investigates a large array of integers, looking for only the items where x % 3 == 0 is true. Here is a nonparallel version of the query:
public partial class MainForm : Form
{
...
private void btnExecute_Click(object sender, EventArgs e)
{
// Start a new "task" to process the ints.
Task.Factory.StartNew(() =>
{
ProcessIntData();
});
}
private void ProcessIntData()
{
// Get a very large array of integers.
int[] source = Enumerable.Range(1, 10000000).ToArray();
// Find the numbers where num % 3 == 0 is true, returned
// in descending order.
int[] modThreeIsZero = (from num in source where num % 3 == 0
orderby num descending select num).ToArray();
MessageBox.Show(string.Format("Found {0} numbers that match query!",
modThreeIsZero.Count()));
}
}
Opting in to a PLINQ Query
If you want to inform the TPL to execute this query in parallel (if possible), you will want to use the AsParallel() extension method as so:
int[] modThreeIsZero = (from num in source.AsParallel() where num % 3 == 0
orderby num descending select num).ToArray();
Notice how the overall format of the LINQ query is identical to what you saw in previous chapters. However, by including a call to AsParallel(), the TPL will attempt to pass the workload off to an available CPU.
Cancelling a PLINQ Query
It is also possible to use a CancellationTokenSource object to inform a PLINQ query to stop processing under the correct conditions (typically because of user intervention). Declare a form-level CancellationTokenSource object named cancelToken and implement theClick handler of the btnCancel to call the Cancel() method on this object. Here is the relevant code update:
public partial class MainForm : Form
{
private CancellationTokenSource cancelToken = new CancellationTokenSource();
private void btnCancel_Click(object sender, EventArgs e)
{
cancelToken.Cancel();
}
...
}
Now, inform the PLINQ query that it should be on the lookout for an incoming cancellation request by chaining on the WithCancellation() extension method and passing in the token. In addition, you will want to wrap this PLINQ query in a proper try/catch scope and deal with the possible exception. Here is the final version of the ProcessIntData() method:
private void ProcessIntData()
{
// Get a very large array of integers.
int[] source = Enumerable.Range(1, 10000000).ToArray();
// Find the numbers where num % 3 == 0 is true, returned
// in descending order.
int[] modThreeIsZero = null;
try
{
modThreeIsZero = (from num in
source.AsParallel().WithCancellation(cancelToken.Token)
where num % 3 == 0 orderby num descending
select num).ToArray();
MessageBox.Show(string.Format("Found {0} numbers that match query!",
modThreeIsZero.Count()));
}
catch (OperationCanceledException ex)
{
this.Invoke((Action)delegate
{
this.Text = ex.Message;
});
}
}
![]() Source Code The PLINQDataProcessingWithCancellation project is in the Chapter 19 subdirectory.
Source Code The PLINQDataProcessingWithCancellation project is in the Chapter 19 subdirectory.
Asynchronous Calls with the async Keyword
I have covered a lot of terse material in this (rather lengthy) chapter. To be sure, building, debugging, and understanding complex multithreaded applications is a challenge in any framework. While the TPL, PLINQ, and the delegate type can simplify matters to some extent (especially when compared to other platforms and languages), developers are still required to be fairly savvy with the ins and outs of various advanced techniques.
Since the release of .NET 4.5, the C# programming language (and for that matter, the VB programming language) has been updated with two new keywords that further simplify the process of authoring asynchronous code. In contrast to all the examples in this chapter, when you use the new async and await keywords, the compiler will generate a good deal of threading code on your behalf, using numerous members of the System.Threading and System.Threading.Tasks namespaces.
A First Look at the C# async and await Keywords
The async keyword of C# is used to qualify that a method, lambda expression, or anonymous method should be called in an asynchronous manner automatically. Yes, it’s true. Simply by marking a method with the async modifier, the CLR will create a new thread of execution to handle the task at hand. Furthermore, when you are calling an async method, the await keyword will automatically pause the current thread from any further activity until the task is complete, leaving the calling thread free to continue on its merry way.
To illustrate, create a new Windows Forms application named FunWithCSharpAsync and import the System.Threading namespace into the initial form’s primary code file (I renamed my initial form to be MainForm). After you have done so, place a single Button control (namedbtnCallMethod) and a single TextBox control (named txtInput) on the designer surface, and configure any basic UI properties (colors, fonts, text) you want. Now, handle the Click event of the Button control, and within the event handler, call a private helper method namedDoWork(), which forces the calling thread to wait for ten seconds. Here is the story thus far:
public partial class MainForm : Form
{
public MainForm()
{
InitializeComponent();
}
private void btnCallMethod_Click(object sender, EventArgs e)
{
this.Text = DoWork();
}
private string DoWork()
{
Thread.Sleep(10000);
return "Done with work!";
}
}
Now, given your work in this chapter, you know that if you were to run the program and click this button, you would need to wait 10 seconds before the text box control could receive keyword input. Furthermore, you will not see the title of the main window update with the message"Done with work!" for ten seconds as well.
If you were to use any of the previous techniques shown in this chapter to make your program more responsive, you would have a good deal of work ahead of you. However, since .NET 4.5, you can author the following C# code base:
public partial class MainForm : Form
{
public MainForm()
{
InitializeComponent();
}
private async void btnCallMethod_Click(object sender, EventArgs e)
{
this.Text = await DoWork();
}
// See below for code walkthrough...
private Task<string> DoWork()
{
return Task.Run(() =>
{
Thread.Sleep(10000);
return "Done with work!";
});
}
}
First, notice that the button’s Click event hander has been marked with the async keyword. This marks the method as a member to be called in a nonblocking manner. Also notice that the implementation of the event handler uses the await keyword before naming the method that will be called. This is important: if you decorate a method with the async keyword but do not have at least one internal await-centric method call, you have essentially built a blocking, synchronous method call (in fact, you will be given a compiler warning to this effect).
Now, notice that you are required to use the Task class from the System.Threading.Tasks namespace to refactor our DoWork() method to work as expected. Basically, rather than returning a specific return value straightaway (a string object in the current example), you return a Task<T> object, where the generic type parameter T is the underlying, actual return value (with me so far?).
The implementation of DoWork() now directly returns a Task<T> object, which is the return value of Task.Run(). The Run() method takes a Func<> or Action<> delegate, and as you know by this point in the text, you can simplify your life by using a lambda expression. Basically, your new version of DoWork() is essentially saying the following:
When you call me, I will run a new task. This task will cause the calling thread to sleep for 10 seconds, and when it is done, it gives me a string return value. I’ll put this string in a new Task<string> object and return it to the caller.
Having translated this new implementation of DoWork() into more natural (poetic) language, you gain some insight into the real role of the await token. This keyword will always modify a method that returns a Task object. When the flow of logic reaches the await token, the calling thread is suspended until the call completes. If you were to run this version of the application, you would find that you could click the button and happily type within the text area immediately. Ten seconds later, your window’s title would update with the completed message notification.
Naming Conventions for Async Methods
Now, let’s say that the new version of DoWork() is exactly as currently shown; however, the button’s Click event hander has been implemented as so:
private async void btnCallMethod_Click(object sender, EventArgs e)
{
// Oops! No await keyword here!
this.Text = DoWork();
}
Notice you did indeed mark the method with the async keyword, but you neglected to use the await keyword as a decorator before the DoWork() method call. At this point, you will have compiler errors, as the return value of DoWork() is a Task object, which you are attempting to assign directly to the Text property (which takes a string data type). Remember, the await token is in charge of extracting out the internal return value contained in the Task object. Since you have not used this token, you have a type mismatch.
![]() Note An “awaitable” method is simply a method that returns a Task<T>.
Note An “awaitable” method is simply a method that returns a Task<T>.
Given that methods that return Task objects can now be called in a nonblocking manner via the async and await tokens, Microsoft recommends (as a best practice) that any method returning a Task be marked with an Async suffix. In this way, developers who know the naming convention receive a visual reminder that the await keyword is required, if they intend to invoke the method within an asynchronous context.
![]() Note Event handlers for GUI controls (such as your button Click handler) that use the async /await keywords do not follow this naming convention (by convention—pardon the redundancy!).
Note Event handlers for GUI controls (such as your button Click handler) that use the async /await keywords do not follow this naming convention (by convention—pardon the redundancy!).
Furthermore, the DoWork() method could also be decorated with the async and await tokens (although this is not strictly required for the current example). Given these points, here is the final update to the current example, which conforms to the recommending naming conventions:
public partial class MainForm : Form
{
public MainForm()
{
InitializeComponent();
}
private async void btnCallMethod_Click(object sender, EventArgs e)
{
this.Text = await DoWorkAsync();
}
private async Task<string> DoWorkAsync()
{
return await Task.Run(() =>
{
Thread.Sleep(10000);
return "Done with work!";
});
}
}
Async Methods Returning Void
Currently, your DoWork() method is returning a Task, which contains “real data” for the caller that will be obtained transparently via the await keyword. However, what if you want to build an asynchronous method that returns void? In this case, you use the nongeneric Task class and omit any return statement, like so:
private async Task MethodReturningVoidAsync()
{
await Task.Run(() => { /* Do some work here... */
Thread.Sleep(4000);
});
}
The caller of this method, such as a second button Click event handler, would then use the await and async keywords as so:
private async void btnVoidMethodCall_Click(object sender, EventArgs e)
{
await MethodReturningVoidAsync();
MessageBox.Show("Done!");
}
Async Methods with Multiple Awaits
It is completely permissible for a single async method to have multiple await contexts within its implementation. Assume your application now has a third button Click event handler that has been marked with the async keyword. In the previous parts of this example, the Click handlers purposely called some external method that runs the underlying Task; however, you could inline this logic via a set of lambda expressions as so:
private async void btnMutliAwaits_Click(object sender, EventArgs e)
{
await Task.Run(() => { Thread.Sleep(2000); });
MessageBox.Show("Done with first task!");
await Task.Run(() => { Thread.Sleep(2000); });
MessageBox.Show("Done with second task!");
await Task.Run(() => { Thread.Sleep(2000); });
MessageBox.Show("Done with third task!");
}
Again, here each task is not doing much more than suspending the current thread for a spell; however, any unit of work could be represented by these tasks (calling a web service, reading a database, or what have you). In any case, let’s summarize the key points of this example, as follows:
· Methods (as well as lambda expressions or anonymous methods) can be marked with the async keyword to enable the method to do work in a nonblocking manner.
· Methods (as well as lambda expressions or anonymous methods) marked with the async keyword will run in a blocking manner until the await keyword is encountered.
· A single async method can have multiple await contexts.
· When the await expression is encountered, the calling thread is suspended until the awaited task is complete. In the meantime, control is returned to the caller of the method.
· The await keyword will hide the returned Task object from view, appearing to directly return the underlying return value. Methods with no return value simply return void.
· As a naming convention, methods that are to be called asynchronously should be marked with the Async suffix.
![]() Source Code The FunWithCSharpAsync project is in the Chapter 19 subdirectory.
Source Code The FunWithCSharpAsync project is in the Chapter 19 subdirectory.
Retrofitting the AddWithThreads Example Using Asycn/Await
Much earlier in this chapter, you built an example named AddWithThreads using the original threading API of the .NET platform, System.Threading. Now, let’s retrofit this example to use the C# async and await keywords to showcase just how much cleaner the application logic can become. First, let me remind you of the basics of how the AddWithThreads project worked initially.
· You created a custom class named AddParams, which represented the data to be summed.
· You used the Thread class and ParameterizedThreadStart delegate to point to an Add() method receiving an AddParams object.
· You used the AutoResetEvent class to ensure the calling thread waited for the secondary thread to complete.
All in all, it was a good deal of effort to simply compute the addition of two numbers on a secondary thread of execution! Here is the same project, now refactored using the techniques under examination (I did not reprint the AddParams class here, but recall it simply had two fields, aand b, to represent the data to sum):
class Program
{
static void Main(string[] args)
{
AddAsync();
Console.ReadLine();
}
private static async Task AddAsync()
{
Console.WriteLine("***** Adding with Thread objects *****");
Console.WriteLine("ID of thread in Main(): {0}",
Thread.CurrentThread.ManagedThreadId);
AddParams ap = new AddParams(10, 10);
await Sum(ap);
Console.WriteLine("Other thread is done!");
}
static async Task Sum(object data)
{
await Task.Run(() =>
{
if (data is AddParams)
{
Console.WriteLine("ID of thread in Add(): {0}",
Thread.CurrentThread.ManagedThreadId);
AddParams ap = (AddParams)data;
Console.WriteLine("{0} + {1} is {2}",
ap.a, ap.b, ap.a + ap.b);
}
});
}
}
The first thing I’d like to point out is that the code that was initially in Main() has been moved into a new method named AddAsync(). The reason was not only to conform to the expected naming convention, but this brings up an important point.
![]() Note The Main() method of an executable cannot be marked with the async keyword.
Note The Main() method of an executable cannot be marked with the async keyword.
Note that AddAsync() is marked with the async token and has defined an await context. As well, the Sum() method is spinning off a new Task to perform the unit of work. In any case, lo and behold, when you run the program, you find that 10 plus 10 is still indeed 20. Note, however, that you do have two unique thread IDs.
***** Adding with Thread objects *****
ID of thread in Main(): 1
ID of thread in Add(): 3
10 + 10 is 20
Other thread is done!
![]() Source Code The AddWithThreadsAsync project is in the Chapter 19 subdirectory.
Source Code The AddWithThreadsAsync project is in the Chapter 19 subdirectory.
So, as you can see, the async and await keywords can simplify the process of invoking methods on a secondary thread of execution. While you have worked through only a few examples of what can be done with this aspect of the C# language, you are in a good position for further exploration.
Summary
This chapter began by examining how .NET delegate types can be configured to execute a method in an asynchronous manner. As you have seen, the BeginInvoke() and EndInvoke() methods allow you to indirectly manipulate a secondary thread with minimum fuss and bother. During this discussion, you were also introduced to the IAsyncResult interface and AsyncResult class type. As you learned, these types provide various ways to synchronize the calling thread and obtain possible method return values.
The next part of this chapter examined the role of the System.Threading namespace. As you learned, when an application creates additional threads of execution, the result is that the program in question is able to carry out numerous tasks at (what appears to be) the same time. You also examined several manners in which you can protect thread-sensitive blocks of code to ensure that shared resources do not become unusable units of bogus data.
This chapter then examined some new models for working with multithreaded development introduced with .NET 4.0, specifically the Task Parallel Library and PLINQ. I wrapped things up by covering the role of the async and await keywords. As you have seen, these keywords are using many types of the TPL framework in the background; however, the compiler does a majority of the work to create the complex threading and synchronization code on your behalf.
All materials on the site are licensed Creative Commons Attribution-Sharealike 3.0 Unported CC BY-SA 3.0 & GNU Free Documentation License (GFDL)
If you are the copyright holder of any material contained on our site and intend to remove it, please contact our site administrator for approval.
© 2016-2026 All site design rights belong to S.Y.A.