Magento Search Engine Optimization (2014)
Chapter 6. Analyzing and Tracking Your Visitors
In Chapter 1, Preparing and Configuring Your Magento Website, we looked at how to set up Google Analytics (GA) within Magento—particularly how to enable e-commerce tracking.
In this chapter, we will not only be looking at how to interpret the data that we receive, but more importantly how to use it to better optimize our Magento website and continuously improve our conversions.
In this chapter, we will do the following:
· Look at the differences between the many sections specific to e-commerce tracking within GA
· Understand how Multi-Channel Funnels (MCF) can help determine the origin of our online sales
· Understand how to track custom events and compare them in relation to e-commerce conversions
· Look at how Universal Analytics will help more accurately describe our e-commerce conversions
· Briefly look at some of the most common A/B testing (content experiment) tools
An overview of e-commerce analytics reports
Once e-commerce tracking has been enabled on our GA profile (as shown in Chapter 1, Preparing and Configuring Your Magento Website), we will find many new options available to us across the various sections within GA.
Across most of the pages inside Google Analytics, we can click on the E-commerce button within the Explorer menu (as shown in the following screenshot) to change the table of data that is presented with data relevant to sales:
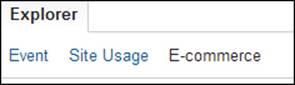
By selecting this button on our GA pages, we will be presented with e-commerce-specific data for our chosen section. For example, by navigating to Behavior | Site Content | Landing Pages and clicking on the E-commerce tab, we will be presented with:
· Revenue: Total revenue accrued through customers landing on this page
· Transactions: Total number of transactions from this landing page
· Average Order Value: How much on average a customer spends after landing on this page
· E-commerce Conversion Rate: Percentage rate of visits to sales
· Per Visit Value: An average value-per-visit of this landing page
All of this data can be used to better optimize our individual pages and tweak them for improved conversion rates. The same can be said for the e-commerce data provided through the Explorer button across many of the GA sections.
One particularly important section that becomes available for us after enabling e-commerce tracking is Conversions | E-commerce and everything beneath it, which is shown in the following screenshot:
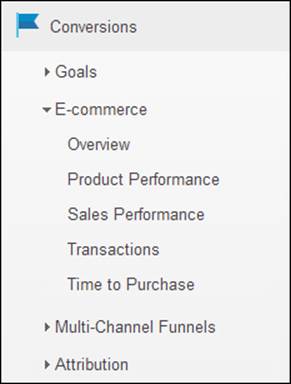
This whole section is dedicated to providing us with e-commerce reports from our Magento store. The following is a brief summary of each of these pages and what we should take from them in order to better analyze our conversion rates:
· Overview: This page provides us with a timeline graph of our primary metrics (conversion rate, average order value, quantity purchased, number of transactions, revenue, and so on) so that we can see our sales performance over a specified time period.
· Product Performance: This page is useful in evaluating how often each product is ordered and the revenue each individual product is generating.
· Sales Performance: This page will, by default, show us the most profitable dates within a given time frame. This is useful to quickly determine whether a specific marketing campaign had a major impact on sales compared to the other dates.
· Transactions: This section provides us with the information for each order. Each row contains information such as the specific products purchased (by clicking on Transactions), revenue made, tax applied, delivery charges charged, and also the quantity ordered.
· Time to Purchase: This page shows either the average days taken from the time a customer first enters our shop to the time they checkout, or (depending on the distribution setting) the number of visits it had taken the customer to eventually purchase.
Adding secondary dimensions and advanced filters
Google Analytics provides us with quick and easy methods for extending the default dataset on these pages and are vital in transforming what are essentially sales reports into sales analytics.
Choosing a secondary dimension allows us to add a column to our default dataset so that we can analyze an entirely different metric alongside our primary dimension.
For instance, this might be useful if we wanted to find out whether our customers were purchasing our products after landing on our home page or whether they were actually landing on our specific product page.
To do this, we would perform the following steps:
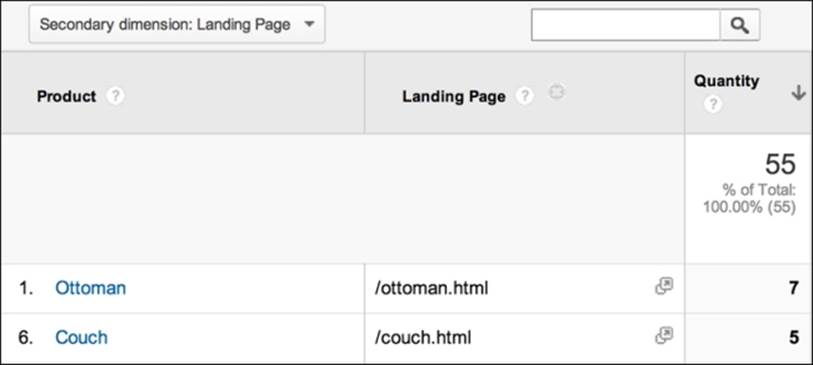
1. Navigate to Conversions | E-commerce | Product Performance and select Landing Page from our Secondary dimension drop-down list.
2. We can then see our new column appear next to our product name as shown in the following screenshot:
We could then narrow down these results further by using advanced filters, for instance, if we wished to narrow our product performance dataset down to a particular brand (where the brand is shown within the product name). To do this, we would perform the following steps:
1. Click on advanced, which is located near the search bar to the right-hand side of our Secondary dimension setting.
2. Select Include from the first drop-down list, Product from the second, and Containing from the third. We would then enter our brand name into the text box provided.
3. Once we click on Apply, our results will be filtered to include only those results where the product name contains our brand.
Advanced segments
As well as secondary dimensions and advanced filters, we should also look at utilizing advanced segments. Google Analytics comes with built-in options for isolating subsets of our traffic.
For example, if we wished to always show data from mobile traffic, we would add Mobile Traffic to our advanced segments and then click on Apply as shown in the following screenshot:
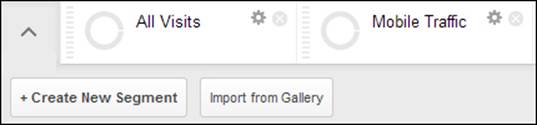
This will provide us with another row of results specific to Mobile Traffic underneath All Visits within our dataset.
Tip
Custom segments stay active no matter where we navigate through GA, so make sure to return to all traffic in order to view our standard datasets.
For a great tutorial on what we can do with advanced segments, please see (kissmetrics.com) goo.gl/fJzIlM.
Understanding Multi-Channel Funnels
When a customer purchased a product from our Magento website, we used to only be able to see his/her last interaction; that is, the last traffic source that brought the user to our store. With Multi-Channel Funnels, we can now analyze data that has been stored against a customer on the leadup to his/her purchase. Essentially, we are analyzing his/her conversion path.
The standard channel groups that are analyzed are organic search, referrals from other websites, and direct visits.
Tip
If we integrate AdWords tracking, we may also see paid search results as a channel along with more advanced AdWords secondary dimensions.
The two main areas within Multi-Channel Funnels for us to have a look at are assisted conversions and top conversion paths.
Assisted conversions
Navigating to Conversions | Multi-Channel Funnels | Assisted Conversions, we can see which of our Channel Groupings assisted in converting our visitor into a customer. We can also change our dataset so that we can see which of our keywords have assisted our conversions by performing the following actions:
1. Select Keyword as our Secondary dimension tab.
2. Use the advanced filter to only "Include MCF Channel Grouping Containing Organic".
This would be a good technique to find out whether our optimized keywords are making us a return on our SEO campaign.
Top conversion paths
This report shows the number and value of conversions for each unique conversion path. In order to understand this section more clearly, we should add Keyword (Or Source/Medium) Path as a secondary dimension. We will then start to see patterns emerge that may help us to understand which channels interact with each other.
For instance, customers who found our website via an organic search might (at a later date) simply enter our website URL into their browser. We can also use advanced filters to filter our MCF Channel Grouping Path column to those only containing Social Network. We can then, for example, make a more informed decision on whether or not our Pinterest.com campaign was worth the investment, as shown in the following screenshot:

Note
For some other quick tips and techniques for Multi-Channel Funnels and using filters, please see (seocandy.co.uk) goo.gl/8xGHlY.
Adding events to track phone number clicks
Event tracking is an extremely useful tool and allows us to track customer interaction with any part of a page. It uses simple JavaScript events, such as onclick, to push data to GA so that we can analyze factors that may not be picked up as standard.
A common usage of click-based event tracking would be to analyze how many customers click on our company phone number—possibly in order to get help when browsing our website. Using our e-commerce tracking data, we could then see how many of these events resulted in sales, perhaps giving an indication as to the level of support provided by our telephone operators.
In order to do this, we would simply add the following code to our phone number within the Magento template files (typically within the header.phtml file):
<a href="tel:555123123" onclick="_gaq.push(['_trackEvent','Click-to-Call','Head Area','555-123-123']);">555-123-123</a>
In this example, we will track the click event on our phone number and set the following:
· Click-to-Call as our category
· Head Area as our action
· 555-123-123 as our label
To see the results in GA, we would perform the following steps:
1. Navigate to Behavior | Events | Overview and then click on our Click-to-Call event category.
Tip
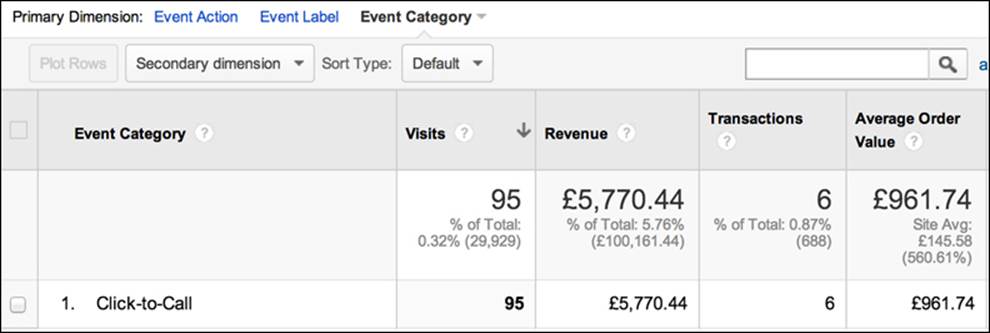
Within primary dimensions, we can also swap between the Event Action and Event Label options to see a breakdown of our different phone numbers and areas if we are running multiple event-tracking codes.
2. In order to see our e-commerce conversion rates from customers clicking on our phone number, we can click on our E-commerce button within the Explorer menu to change our table data as shown in the following screenshot:
We could then use custom segments to further analyze our data; for example, we could display how many of these events were fired from mobile users (as clicking on a phone number is most commonly associated with tablet/mobile devices).
Note
For a fantastic in-depth guide on event tracking, please see this post by Anna Lewis (koozai.com) goo.gl/yg0UKu.
Universal Analytics changes the way in which events are triggered using the following code instead:
<a href="tel:555123123" onclick="ga('send', 'event', 'Click-to-Call','Head Area','555-123-123');">555-123-123</a>
Universal Analytics
The most notable aspect of Universal Analytics in relation to tracking visitors on our Magento store is multiplatform tracking.
For example, the user could perhaps browse our website on his/her mobile phone via a referral link on his/her way to work. When he/she returns home having already learned about our website, he/she could then enter a branded search on Google and purchase our products via his/her laptop.
With standard GA, this would provide us with two visits—one successful conversion through a branded organic search and the other a non-successful referral visit. However, the real-world scenario would be that the "credit" of the sale should be given to the referral visit.
Universal Analytics hopes to resolve this problem by improving its measurement of users accessing the same website across multiple devices.
Note
Currently (as of Magento CE 1.8), Universal Analytics compatibility is not provided as default within the administration panel; however, there are extensions available that will be covered in Chapter 8, Purpose-built Magento Extensions for SEO/CRO.
Implementing and analyzing content experiments
Running content experiments (also known as A/B testing or split testing) is such a far-reaching subject that it could easily be a book in its own right.
As we're trying to cover all the main aspects of Magento SEO, I can only touch upon a couple of useful content-optimization tools that are available and that may help us to increase conversions through adapting the content to better serve our customers.
Google Content Experiments (announced in 2012: goo.gl/yuPcta) allows you to run small snippets of JavaScript on your pages to enable you to track different variations of a page through Google Analytics. Using goals within GA, you can then track the version of the page that is producing the best conversion rate.
An alternative conversion rate optimization (CRO) tool that is becoming increasingly popular is Optimizely (www.optimizely.com). Optimizely also uses small snippets of JavaScript, but instead of supplying different pages to different visitors, Optimizely allows you to affect elements on the same page and serve different variations to different visitors. Because of the same URL, it is unfortunately rather difficult to discern any analytical data through GA; therefore, Optimizely supply their own analytics package in order to measure performance data and provide you with the ability to define your own goals.
Both of these tools allow you to adapt the content of your webpage and track the performance of each variation in order to better optimize the user experience. The benefit of Google Content Experiments is that it's integrated into Google Analytics, and as such, we can easily compare our variations to the revenue we have accumulated.
Note
For a great tutorial on setting up content experiments, please visit (online-behavior.com) goo.gl/51nWWj.
Summary
In this chapter, we have looked at how e-commerce tracking enables a whole host of new features within the Google Analytics panels. We've also seen ways to use secondary dimensions and advanced filters to provide us with more comprehensive reports.
With the implementation of custom event tracking, we've also seen how we can capture the identity of anyone who clicks on the phone number of our website and then goes on to become a paying customer.
We've also looked at how Multi-Channel Funnels provide insights into ways in which different conversion paths interact with one another and how we can better analyze cross-channel marketing campaigns.
A/B testing is a large subject, and we have briefly touched upon the two most popular tools available.
In the next chapter, we will be looking at how we can block search engine access to some of our pages as well as at ways to implement a few tweaks to our .htaccess file in order to serve consistent URLs to users.