Mastering the Nikon D610 (2014)
Camera Body Reference
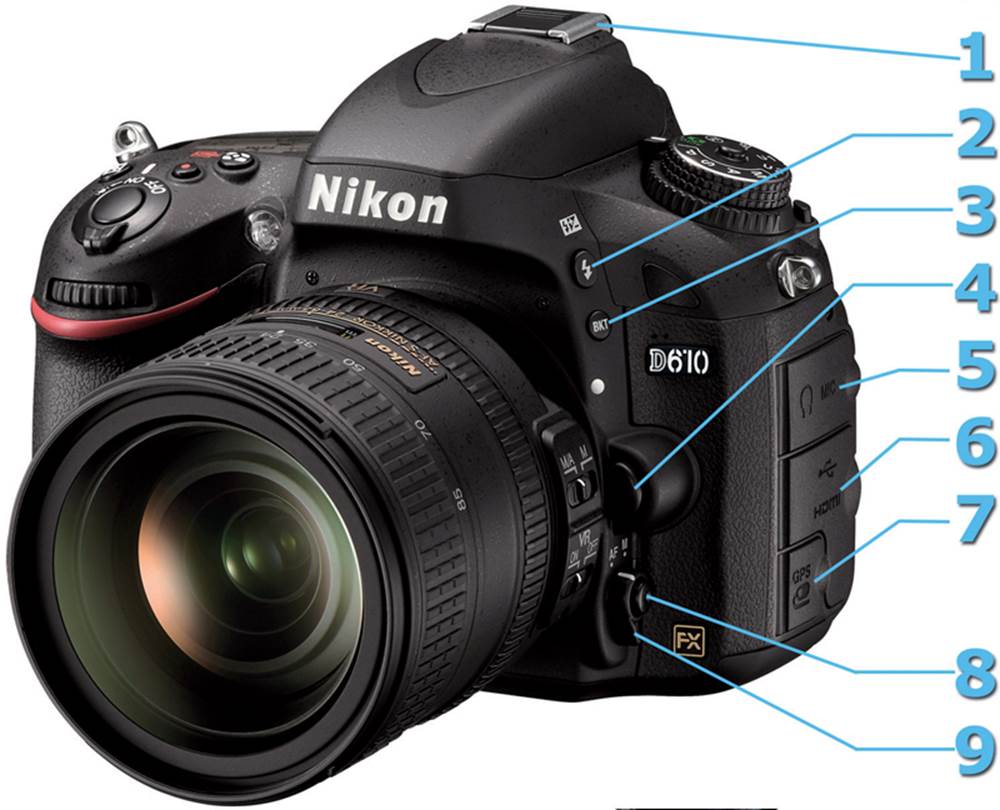
Front of Camera on Right Side (facing camera)
1. Accessory shoe (hot shoe)
2. Flash mode/compensation button (also raises flash #10)
3. Bracketing button (BKT)
4. Lens release button
5. Audio connector cover
6. HDMI/USB connector cover
7. Accessory terminal connector cover (GPS, etc.)
8. AF-mode button
9. Focus-mode selector
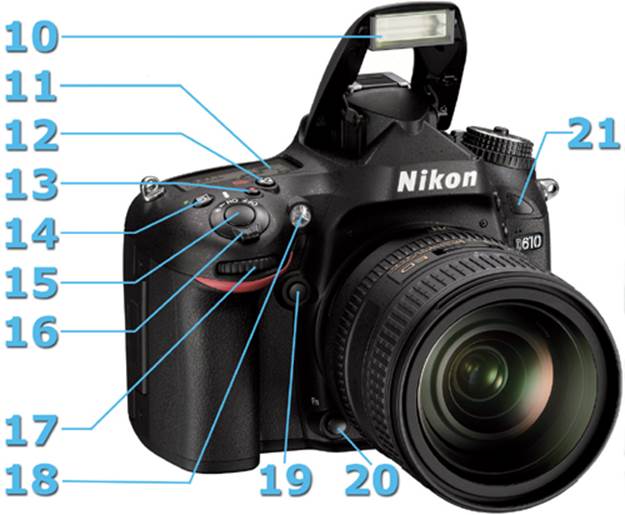
Front of Camera on Left Side (facing camera)
10. Built-in flash (Speedlight)
11. Control panel
12. Metering/Formatting button
13. Movie-record button
14. Exposure compensation/Reset button
15. Shutter-release button
16. Power switch
17. Sub-command dial
18. AF-assist illuminator
19. Depth-of-field preview button
20. Fn (function) button
21. Infrared receiver (front)
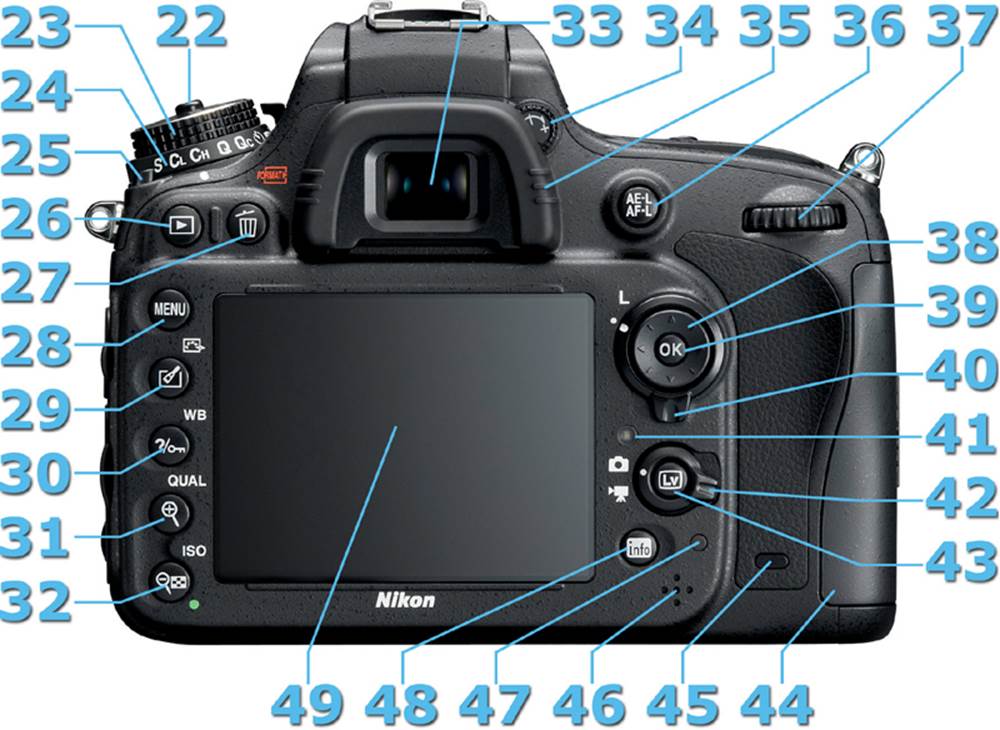
Back of Camera
22. Mode dial lock release
23. Mode dial
24. Release mode dial
25. Release mode dial lock release
26. Playback button
27. Delete/format button
28. MENU button
29. Retouch/Picture Control button
30. Help/Protect button (WB)
31. Playback zoom in button (QUAL)
32. Playback zoom out/thumbnails button (ISO)
33. Viewfinder eyepiece
34. Diopter adjustment control
35. Rubber eyecup
36. AE-L/AF-L button (AE/AF lock)
37. Main command dial
38. Multi selector
39. OK button
40. Focus selector lock
41. Ambient brightness sensor (for Monitor)
42. Live view selector
43. Lv button (Live view)
44. Memory card slot cover
45. Infrared receiver (rear)
46. Speaker
47. Memory card access lamp
48. Info button
49. Monitor
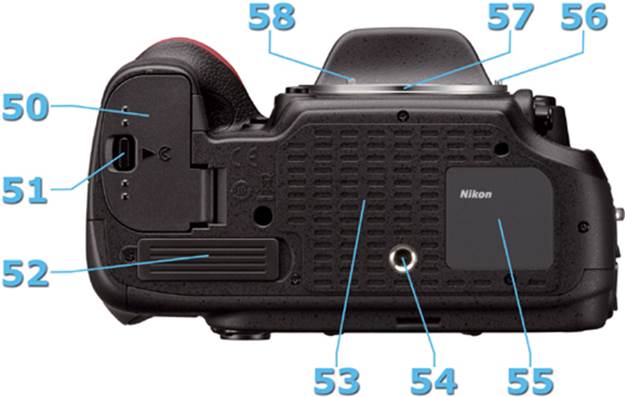
Bottom of Camera and Lens Mount (F-Mount)
50. Battery-chamber cover
51. Battery-chamber cover latch
52. MB-D14 contact cover
53. Rubber base plate
54. Tripod socket
55. Label for ID, battery voltage, and serial number
56. Lens lock pin (moved by Lens release button #4)
57. Lens mount (F-mount)
58. AF coupling (screwdriver)
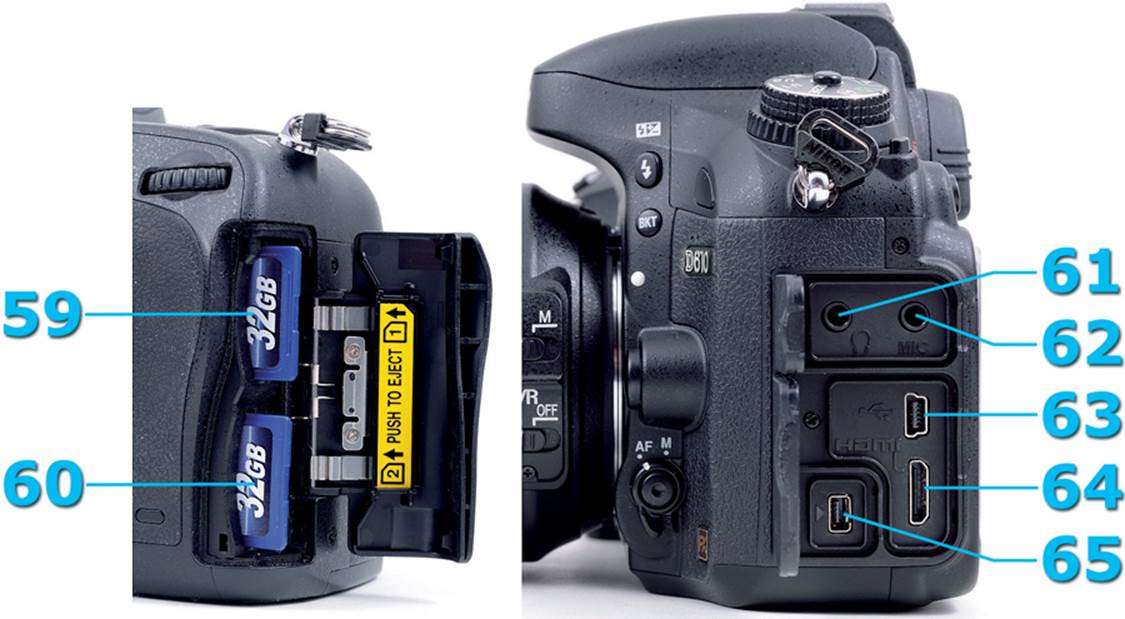
Under the Camera’s Side Covers
59. Card Slot 1 (under #44)
60. Card Slot 2 (under #44)
61. Headphone connector (under #5)
62. External microphone connector (under #5)
63. USB connector (under #6)
64. HDMI mini-pin connector, type C (under #6)
65. Accessory terminal for GPS and other accessories (under #7)
Colors and Wording Legend
Throughout this book, you’ll notice that in the numbered, step-by-step instructions there are colored terms as well as terms that are displayed in italic font.
1. Blue is used to refer to the camera’s physical features.
2. Green is for functions and settings displayed on the camera’s LCD screens.
3. Italic is for textual prompts seen on the camera’s LCD screens.
4. Italic or bold italic is also used on select occasions for special emphasis.
Here is a sample paragraph with the colors and italic font in use:
Press the MENU button to reach the Setup Menu, and then scroll to the Format memory card option by pressing the down arrow on the Multi selector. You will see the following message: All images on Memory card will be deleted. OK? Select Yes and then press the OK button. Please make sure you’ve transferred all your images first!