Canon EOS 70D: The Guide to Understanding and Using Your Camera (2014)
Chapter 17. The My Menu Menu
Chapter 17: The My Menu Menu

The My Menu Menu

Figure 17-1. The My Menu tab
My Menu Settings
My Menu is designed to give you access to the six menu items you reference most often. Most menu items are available to be registered to My Menu. Once you have registered these frequently used menu items, you need only access My Menu, then the specific menu option listed, and you have the same access (and the same interface) as if you had navigated the full menu structure.
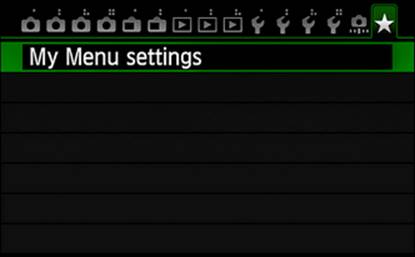
Figure 17-2. The My Menu opening screen
Register to My Menu
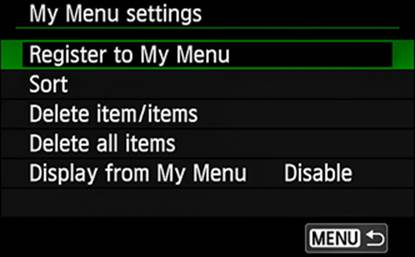
Figure 17-3. Selecting a My Menu Settings option
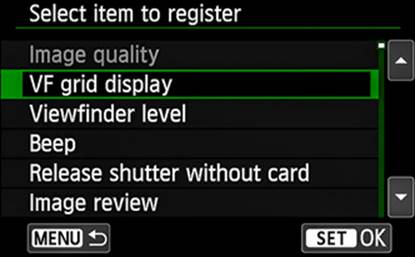
Figure 17-4. Choosing items to register
When you select the My Menu tab (the white star icon on a green background, shown in Figure 17-1), the opening screen (shown in Figure 17-2) is displayed. By default, only the My Menu Settings option is available, and it is pre-selected. Touch that line or press SET to open the My Menu Settings screen, shown in Figure 17-3. When you select the Register To My Menu option, the camera displays the first of about 110 menu options (see Figure 17-4). You can touch and hold the up- or down-arrow icons on the right edge of the screen, or use the Quick Control Dial or the Multi-controller to scroll through this list, placing the green-bordered rectangle on the menu option you want to register to My Menu. Touch the line, touch the SET icon or Press SET, then select OK, and touch or press SET. Be patient; it takes about a second and a half for the registration to complete. Once a menu option is registered to My Menu, it will be listed in gray (notice the Image Quality item in Figure 17-4). When you are done registering menu options (up to a total of six), touch the MENU icon or press the MENU button to return to the top-level menu for My Menu.
Sort
In today’s world, most people think of sorting as arranging in a progressive order: A–Z, Z–A, 1–100, 100–1, etc. For this function, however, the word arrange is more appropriate. In this implementation, when you choose Sort from the menu shown in Figure 17-3, the Sort My Menu screen opens, showing a list of all the registered menu options. Touch a line, or use the Quick Control Dial or the Multi-controller, to select a menu option you wish to place higher or lower on the list. Using the touch feature, you can now use the white up- and down-arrows at the bottom-left of the screen to position this item where you wish. If you used a dial to select that item, press SET to confirm that selection, then use the Quick Control Dial or the Multi-controller to move the selected item up or down (notice the up/down arrows to the right of the selected item in Figure 17-5). Again, press SET to fix the item at that position on the list.
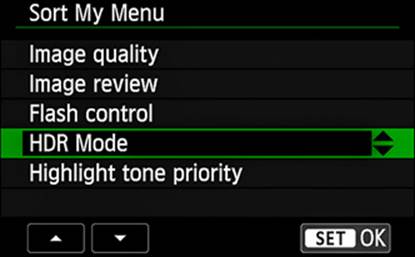
Figure 17-5. Sorting the registered My Menu items
Delete Item/Items

Figure 17-6. Selecting the Delete Item/Items option
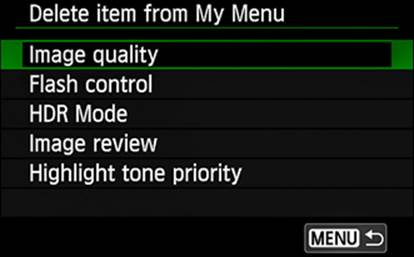
Figure 17-7. Choosing the registered My Menu item to delete
After working with My Menu for a bit, you will determine which menu options will serve you best in My Menu. If the list of registered My Menu options is at six, then something must be removed to make room for something new. Select the Delete Item/Items option as shown in Figure 17-6. If you use the touch feature to select an item for deletion, you will immediately get the Delete Item From My Menu confirmation screen; touch the OK icon. However, if you use the Quick Control Dial or the Multi-controller to select the menu option to be deleted, you will need to press the SET button to proceed to the confirmation screen, then select OK and press SET. You now have an empty slot for adding a different menu option.
Figure 17-7 shows the Image Quality item selected for deletion.
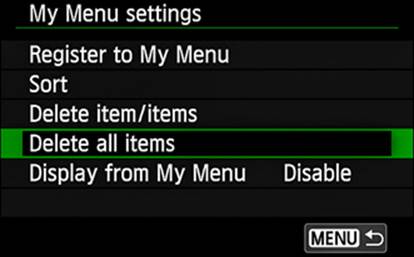
Figure 17-8. Selecting the Delete All Items option
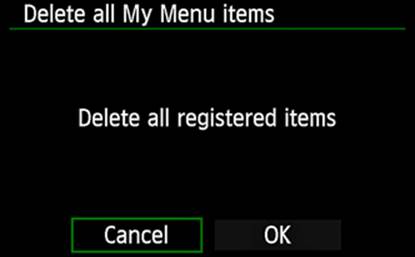
Figure 17-9. The Delete All Registered Items confirmation screen
If you decide it’s quicker to just erase all currently registered menu options and start over, select the Delete All Items option; if you used a dial to make your selection, you must press SET. Touch OK on the confirmation screen, or select OK and press the SET button. Now you have a clean slate and can build My Menu from the ground up.
Display From My Menu
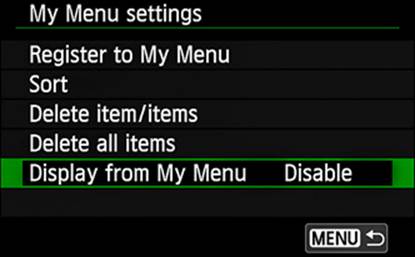
Figure 17-10. Selecting the Display From My Menu option
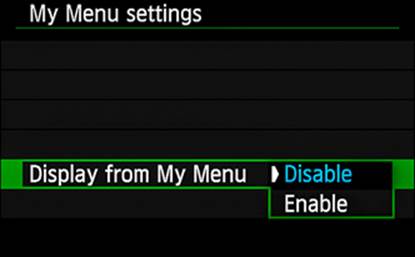
Figure 17-11. Choosing a Display From My Menu value
If you are using My Menu frequently, you may decide to set the Display From My Menu option to Enable. That way, when you press the MENU button, the menu structure will open to My Menu, regardless of which menu you were last working with. With this option set to Disable, the camera’s menu structure will open to the last menu opened, when you press the MENU button.
Re-entering the My Menu Settings Menu
Once you have created your own My Menu, you may want to add, delete, or change some item entries. When you open the My Menu tab, you will notice a My Menu Settings line at the bottom of the list of items. Selecting this line will open the My Menu Settings screen, allowing you to perform whatever maintenance your My Menu requires.
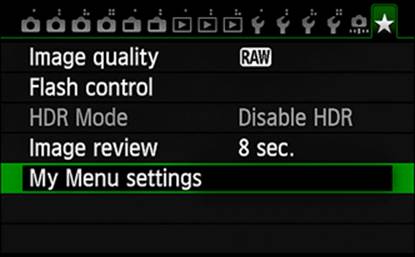
Figure 17-12. Re-entering the My Menu Settings screen
All materials on the site are licensed Creative Commons Attribution-Sharealike 3.0 Unported CC BY-SA 3.0 & GNU Free Documentation License (GFDL)
If you are the copyright holder of any material contained on our site and intend to remove it, please contact our site administrator for approval.
© 2016-2026 All site design rights belong to S.Y.A.