Android Application Development: A Beginner's Tutorial (2015)
Chapter 16. Preferences
Android comes with a SharedPreferences interface that can be used to manage application settings as key/value pairs. SharedPreferences also takes care of the writing of data to a file. In addition, Android provides the Preference API with user interface (UI) classes that are linked to the default SharedPreferences instance so that you can easily create a UI for modifying application settings.
This chapter discusses SharedPreferences and the Preference API in detail.
SharedPreferences
The android.content.SharedPreferences interface provides methods for storing and reading application settings. You can obtain the default instance of SharedPreferences by calling the getDefaultSharedPreferences static method of PreferenceManager, passing a Context.
PreferenceManager.getDefaultSharedPreferences(context);
To read a value from the SharedPreferences, use one of the following methods.
public int getInt(java.lang.String key, int default)
public boolean getBoolean(java.lang.String key, boolean default)
public float getFloat(java.lang.String key, float default)
public long getLong(java.lang.String key, long default)
public int getString(java.lang.String key, java.lang.String default)
public java.util.Set<java.lang.String> getStringSet(
java.lang.String key, java.util.Set<java.lang.String> default)
The getXXX methods return the value associated with the specified key if the pair exists. Otherwise, it returns the specified default value.
To first check if a SharedPreferences contains a key/value pair, use the contains method, which returns true if the specified key exists.
public boolean contains(java.lang.String key)
On top of that, you can use the getAll method to get all key-value pairs as a Map.
public java.util.Map<java.lang.String, ?> getAll()
Values stored in a SharedPreferences are persisted automatically and will survive user sessions. The values will be deleted when the application is uninstalled.
The Preference API
To store a key-value pair in a SharedPreferences, you normally use the Android Preference API to create a user interface that the user can use to edit settings. The android.preference.Preference class is the main class for this. Some of its subclasses are
§ CheckBoxPreference
§ EditTextPreference
§ ListPreference
§ DialogPreference
An instance of a Preference subclass corresponds to a setting.
You could create a Preference at runtime, but the best way to create one is by using an XML file to lay out your preferences and then use a PreferenceFragment to load the XML file. The XML file must have a PreferenceScreen root element and is commonly named preferences.xmland should be saved to an xml directory under res.
Note
Prior to Android 3.0, the PreferenceActivity was often used to load a preference xml file. This class is now deprecated and should not be used. Use PreferenceFragment, instead.
You will learn how to use Preference in the following example.
Using Preferences
The PreferenceDemo1 application shows you how you can use SharedPreferences and the Preference API. It has two activities. The first activity shows the values of three application settings by reading them when the activity is resumed. The second activity contains a PreferenceFragmentthat allows the user to change each of the settings.
Figures 16.1 and 16.2 show the main activity and the second activity, respectively.
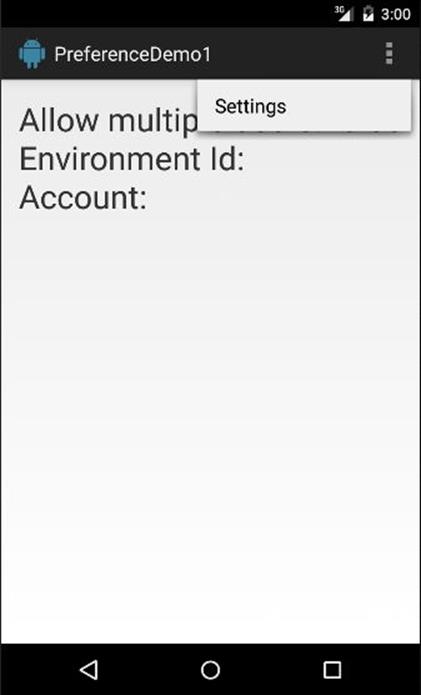
Figure 16.1: The main activity of PreferenceDemo1
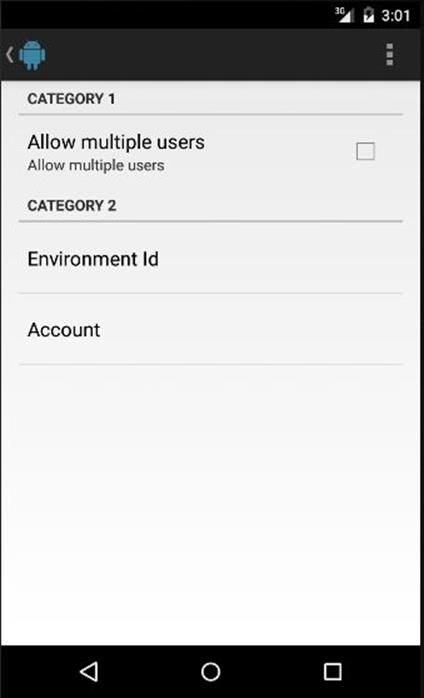
Figure 16.2: The SettingsActivity activity
The AndroidManifest.xml file for the application, which describes the two activities, is shown in Listing 16.1.
Listing 16.1: The AndroidManifest.xml file
<?xml version="1.0" encoding="utf-8"?>
<manifest xmlns:android="http://schemas.android.com/apk/res/android"
package="com.example.preferencedemo1"
android:versionCode="1"
android:versionName="1.0" >
<uses-sdk
android:minSdkVersion="19"
android:targetSdkVersion="19" />
<application
android:allowBackup="true"
android:icon="@drawable/ic_launcher"
android:label="@string/app_name"
android:theme="@style/AppTheme" >
<activity
android:name="com.example.preferencedemo1.MainActivity"
android:label="@string/app_name">
<intent-filter>
<action android:name="android.intent.action.MAIN"/>
<category
android:name="android.intent.category.LAUNCHER" />
</intent-filter>
</activity>
<activity
android:name="com.example.preferencedemo1.SettingsActivity"
android:parentActivityName=".MainActivity"
android:label="">
</activity>
</application>
</manifest>
The first activity has a very simple layout that features a sole TextView as is presented by the activity_main.xml file in Listing 16.2.
Listing 16.2: The layout file for the first activity (activity_main.xml)
<RelativeLayout
xmlns:android="http://schemas.android.com/apk/res/android"
android:layout_width="match_parent"
android:layout_height="match_parent"
android:paddingBottom="@dimen/activity_vertical_margin"
android:paddingLeft="@dimen/activity_horizontal_margin"
android:paddingRight="@dimen/activity_horizontal_margin"
android:paddingTop="@dimen/activity_vertical_margin">
<TextView
android:id="@+id/info"
android:layout_width="wrap_content"
android:layout_height="wrap_content"
android:textSize="30sp"/>
</RelativeLayout>
The MainActivity class, shown in Listing 16.3, is the activity class for the first activity. It reads three settings from the default SharedPreferences in its onResume method and displays the values in the TextView.
Listing 16.3: The MainActivity class
package com.example.preferencedemo1;
import android.app.Activity;
import android.content.Intent;
import android.content.SharedPreferences;
import android.os.Bundle;
import android.preference.PreferenceManager;
import android.view.Menu;
import android.view.MenuItem;
import android.widget.TextView;
public class MainActivity extends Activity {
@Override
protected void onCreate(Bundle savedInstanceState) {
super.onCreate(savedInstanceState);
setContentView(R.layout.activity_main);
}
@Override
public void onResume() {
super.onResume();
SharedPreferences sharedPref = PreferenceManager.
getDefaultSharedPreferences(this);
boolean allowMultipleUsers = sharedPref.getBoolean(
SettingsActivity.ALLOW_MULTIPLE_USERS, false);
String envId = sharedPref.getString(
SettingsActivity.ENVIRONMENT_ID, "");
String account = sharedPref.getString(
SettingsActivity.ACCOUNT, "");
TextView textView = (TextView) findViewById(R.id.info);
textView.setText("Allow multiple users: " +
allowMultipleUsers + "\nEnvironment Id: " + envId
+ "\nAccount: " + account);
}
@Override
public boolean onCreateOptionsMenu(Menu menu) {
getMenuInflater().inflate(R.menu.menu_main, menu);
return true;
}
@Override
public boolean onOptionsItemSelected(MenuItem item) {
switch (item.getItemId()) {
case R.id.action_settings:
startActivity(new Intent(this,
SettingsActivity.class));
return true;
default:
return super.onOptionsItemSelected(item);
}
}
}
In addition, the MainActivity class overrides the onCreateOptionsMenu and onOptionsItemSelected methods so that a Settings action appears on the action bar and clicking it will start the second activity, SettingsActivity.
SettingsActivity, presented in Listing 16.4, contains a default layout that is replaced by an instance of SettingsFragment when the activity is created. Pay attention to the onCreate method of the class. If the last lines of code in the method looks foreign to you, please first read Chapter 13, “Fragments.”
Listing 16.4: The SettingsActivity class
package com.example.preferencedemo1;
import android.app.Activity;
import android.os.Bundle;
import android.view.Menu;
public class SettingsActivity extends Activity {
public static final String ALLOW_MULTIPLE_USERS =
"allowMultipleUsers";
public static final String ENVIRONMENT_ID = "envId";
public static final String ACCOUNT = "account";
@Override
protected void onCreate(Bundle savedInstanceState) {
super.onCreate(savedInstanceState);
getActionBar().setDisplayHomeAsUpEnabled(true);
getFragmentManager()
.beginTransaction()
.replace(android.R.id.content,
new SettingsFragment()).commit();
}
@Override
public boolean onCreateOptionsMenu(Menu menu) {
getMenuInflater().inflate(R.menu.menu_settings, menu);
return true;
}
}
Note that the SettingsActivity class declares three public static finals that define setting keys. The fields are used internally as well as from other classes.
The SettingsFragment class is a subclass of PreferenceFragment. It is a simple class that simply calls addPreferencesFromResource to load the XML document containing the layout for three Preference subclasses. The SettingsFragment class is shown in Listing 16.5 and the XML file in Listing 16.6.
Listing 16.5: The SettingsFragment class
package com.example.preferencedemo1;
import android.os.Bundle;
import android.preference.PreferenceFragment;
public class SettingsFragment extends PreferenceFragment {
@Override
public void onCreate(Bundle savedInstanceState) {
super.onCreate(savedInstanceState);
// Load the preferences from an XML resource
addPreferencesFromResource(R.xml.preferences);
}
}
Listing 16.6: The res/xml/preferences.xml file
<PreferenceScreen
xmlns:android="http://schemas.android.com/apk/res/android">
<PreferenceCategory android:title="Category 1">
<CheckBoxPreference
android:key="allowMultipleUsers"
android:title="Allow multiple users"
android:summary="Allow multiple users" />
</PreferenceCategory>
<PreferenceCategory android:title="Category 2">
<EditTextPreference
android:key="envId"
android:title="Environment Id"
android:dialogTitle="Environment Id"/>
<EditTextPreference
android:key="account"
android:title="Account"/>
</PreferenceCategory>
</PreferenceScreen>
The preferences.xml file groups the Preference subclasses into two categories. In the first category is a CheckBoxPreference linked to the allowMultipleUsers key. In the second category are two EditTextPreferences linked to envId and account.
Summary
An easy way to manage application settings is by using the Preference API and the default SharedPreferences. In this chapter you learned how to use both.