Android Application Development: A Beginner's Tutorial (2015)
Chapter 4. Layouts
Layouts are important because they directly affect the look and feel of your application. Technically, a layout is a view that arranges child views added to it. Android comes with a number of built-in layouts, ranging from LinearLayout, which is the easiest to use, to RelativeLayout, which is the most powerful.
This chapter discusses the various layouts in Android.
Overview
An important Android component, a layout defines the visual structure of your UI components. A layout is a subclass of android.view.ViewGroup, which in turn derives from android.view.View. A ViewGroup is a special view that can contain other views. A layout can be declared in a layout file or added programmatically at runtime.
The following are some of the layouts in Android.
§ LinearLayout. A layout that aligns its children in the same direction, either horizontally or vertically.
§ RelativeLayout. A layout that arranges each of its children based on the positions of one or more of its siblings.
§ FrameLayout. A layout that arranges each of its children based on top of one another.
§ TableLayout. A layout that organizes its children into rows and columns.
§ GridLayout. A layout that arranges its children in a grid.
In a majority of cases, a view in a layout must have the layout_width and layout_height attributes so that the layout knows how to size the view. Both layout_width and layout_height attributes may be assigned the value match_parent (to match the parent’s width/height), wrap_content(to match the width/height of its content) or a measurement unit.
The AbsoluteLayout, which offers exact locations for its child views, is deprecated and should not be used. Use RelativeLayout instead.
LinearLayout
A LinearLayout is a layout that arranges its children either horizontally or vertically, depending on the value of its orientation property. The LinearLayout is the easiest layout to use.
The layout in Listing 4.1 is an example of LinearLayout with horizontal orientation. It contains three children, an ImageButton, a TextView and a Button.
Listing 4.1: A horizontal LinearLayout
<LinearLayout
xmlns:android="http://schemas.android.com/apk/res/android"
xmlns:tools="http://schemas.android.com/tools"
android:orientation="horizontal"
android:layout_width="match_parent"
android:layout_height="match_parent">
<ImageButton
android:src="@android:drawable/btn_star_big_on"
android:layout_width="wrap_content"
android:layout_height="wrap_content"/>
<TextView
android:layout_width="wrap_content"
android:layout_height="wrap_content"
android:text="@string/hello_world" />
<Button android:text="Button1"
android:layout_width="wrap_content"
android:layout_height="wrap_content"/>
</LinearLayout>
Figure 4.1 shows the views in the LinearLayout in Listing 4.1.
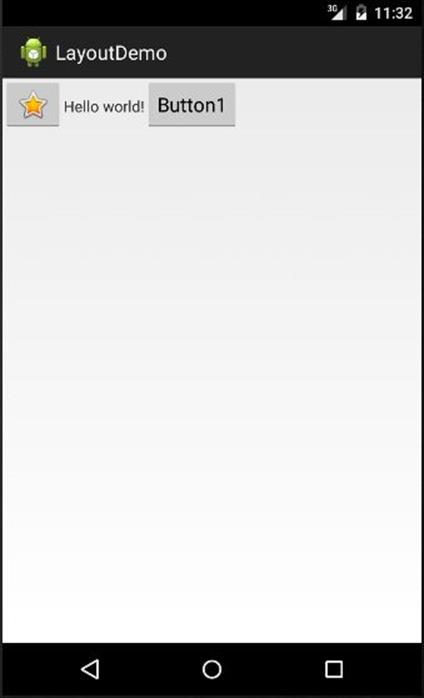
Figure 4.1: Horizontal LinearLayout example
The layout in Listing 4.2 is a vertical LinearLayout with three child views, an ImageButton, a TextView and a Button.
Listing 4.2: Vertical linear layout
<LinearLayout
xmlns:android="http://schemas.android.com/apk/res/android"
xmlns:tools="http://schemas.android.com/tools"
android:orientation="vertical"
android:layout_width="match_parent"
android:layout_height="match_parent">
<ImageButton
android:src="@android:drawable/btn_star_big_on"
android:layout_gravity="center"
android:layout_width="wrap_content"
android:layout_height="wrap_content"/>
<TextView
android:layout_gravity="center"
android:layout_width="wrap_content"
android:layout_height="wrap_content"
android:layout_marginLeft="15dp"
android:text="@string/hello_world"/>
<Button android:text="Button1"
android:layout_gravity="center"
android:layout_width="wrap_content"
android:layout_height="wrap_content"/>
</LinearLayout>
Figure 4.2 shows the vertical LinearLayout.
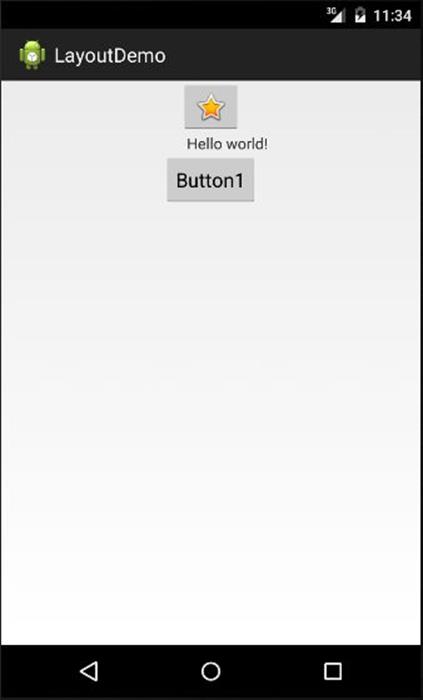
Figure 4.2: Vertical linear layout example
Note that each view in a layout can have a layout_gravity attribute to determine its position within its axis. For example, setting the layout_gravity attribute to center will center it.
A LinearLayout can also have a gravity attribute that affects its gravity. For example, the layout in Listing 4.3 is a vertical LinearLayout whose gravity attribute is set to bottom.
Listing 4.3: Vertical linear layout with bottom gravity
<LinearLayout
xmlns:android="http://schemas.android.com/apk/res/android"
xmlns:tools="http://schemas.android.com/tools"
android:orientation="vertical"
android:layout_width="match_parent"
android:layout_height="match_parent"
android:gravity="bottom">
<ImageButton
android:src="@android:drawable/btn_star_big_on"
android:layout_gravity="center"
android:layout_width="wrap_content"
android:layout_height="wrap_content"/>
<TextView
android:layout_gravity="center"
android:layout_width="wrap_content"
android:layout_height="wrap_content"
android:layout_marginLeft="15dp"
android:text="@string/hello_world"/>
<Button android:text="Button1"
android:layout_gravity="center"
android:layout_width="wrap_content"
android:layout_height="wrap_content"/>
</LinearLayout>
Figure 4.3 shows the vertical LinearLayout in Listing 4.3.
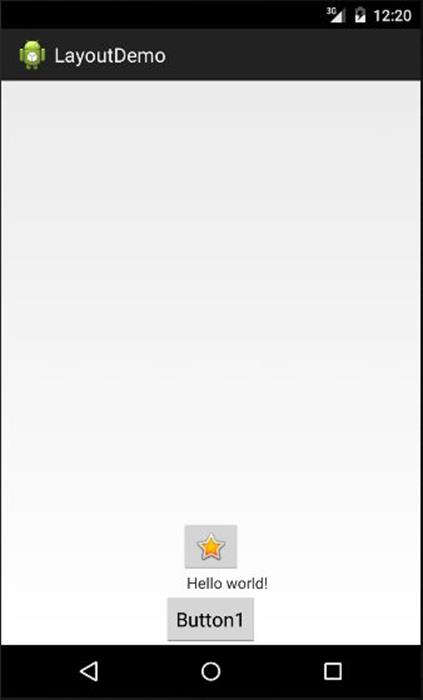
Figure 4.3: Vertical linear layout with gravity
RelativeLayout
The RelativeLayout is the most powerful layout available. All children in a RelativeLayout can be positioned relative to each other or to their parent. For example, you can tell a view to be positioned to the left or right of another view. Or, you can specify that a view is aligned to the bottom or top edge of its parent.
Positioning a child in a RelativeLayout is achieved using the attributes summarized in Table 4.1.
|
Attribute |
Description |
|
layout_above |
Places the bottom edge of this view above the specified view ID. |
|
layout_alignBaseline |
Places the baseline of this view on the baseline of the specified view ID. |
|
layout_alignBottom |
Aligns the bottom of this view with the specified view. |
|
layout_alignEnd |
Aligns the end edge of this view with the end edge of the specified view. |
|
layout_alignLeft |
Aligns the left edge of this view with the left edge of the specified view. |
|
layout_alignParentBottom |
A value of true aligns the bottom of this view with the bottom edge of its parent. |
|
layout_alignParentEnd |
A value of true aligns the end edge of this view with the end edge of its parent. |
|
layout_alignParentLeft |
A value of true aligns the left edge of this view with the left edge of its parent. |
|
layout_alignParentRight |
A value of true aligns the right edge of this view with the right edge of its parent. |
|
layout_alignParentStart |
A value of true aligns the start edge of this view with the start edge of its parent. |
|
layout_alignParentTop |
A value of true aligns the top edge of this view with the top edge of its parent. |
|
layout_alignRight |
Aligns the right edge of this view with the right edge of the given view. |
|
layout_alignStart |
Aligns the start edge of this view with the start edge of the given view. |
|
layout_alignTop |
Aligns the top edge of this view with the top edge of the given view. |
|
layout_alignWithParentIfMissing |
A value of true sets the parent as the anchor when the anchor cannot be found for layout_toLeftOf, layout_toRightOf, etc. |
|
layout_below |
Places the top edge of this view below the given view. |
|
layout_centerHorizontal |
A value of true centers this view horizontally within its parent. |
|
layout_centerInParent |
A value of true centers this view horizontally and vertically within its parent. |
|
layout_centerVertical |
A value of true center this view vertically within its parent. |
|
layout_toEndOf |
Places the start edge of this view to the end of the given view. |
|
layout_toLeftOf |
Places the right edge of this view to the left of the given view. |
|
layout_toRightOf |
Places the left edge of this view to the right of the given view. |
|
layout_toStartOf |
Places the end edge of this view to the start of the given view. |
Table 4.1: Attributes for children of a RelativeLayout
As an example, the layout in Listing 4.4 specifies the positions of three views and a RelativeLayout.
Listing 4.4: Relative layout
<RelativeLayout
xmlns:android="http://schemas.android.com/apk/res/android"
xmlns:tools="http://schemas.android.com/tools"
android:layout_width="match_parent"
android:layout_height="match_parent"
android:paddingLeft="2dp"
android:paddingRight="2dp">
<Button
android:id="@+id/cancelButton"
android:layout_width="wrap_content"
android:layout_height="wrap_content"
android:text="Cancel" />
<Button
android:id="@+id/saveButton"
android:layout_width="wrap_content"
android:layout_height="wrap_content"
android:layout_toRightOf="@id/cancelButton"
android:text="Save" />
<ImageView
android:layout_width="150dp"
android:layout_height="150dp"
android:layout_marginTop="230dp"
android:padding="4dp"
android:layout_below="@id/cancelButton"
android:layout_centerHorizontal="true"
android:src="@android:drawable/ic_btn_speak_now" />
<LinearLayout
android:id="@+id/filter_button_container"
android:layout_width="match_parent"
android:layout_height="wrap_content"
android:layout_alignParentBottom="true"
android:gravity="center|bottom"
android:background="@android:color/white"
android:orientation="horizontal" >
<Button
android:id="@+id/filterButton"
android:layout_width="wrap_content"
android:layout_height="fill_parent"
android:text="Filter" />
<Button
android:id="@+id/shareButton"
android:layout_width="wrap_content"
android:layout_height="fill_parent"
android:text="Share" />
<Button
android:id="@+id/deleteButton"
android:layout_width="wrap_content"
android:layout_height="fill_parent"
android:text="Delete" />
</LinearLayout>
</RelativeLayout>
Adding An Identifier
The first button in Listing 4.4 includes the following id attribute so that it can be referenced from the code.
android:id="@+id/cancelButton"
The plus sign (+) after @ indicates that the identifier (in this case, cancelButton) is being added with this declaration and is not declared in a resource file.
Figure 4.4 shows the RelativeLayout in Listing 4.4.
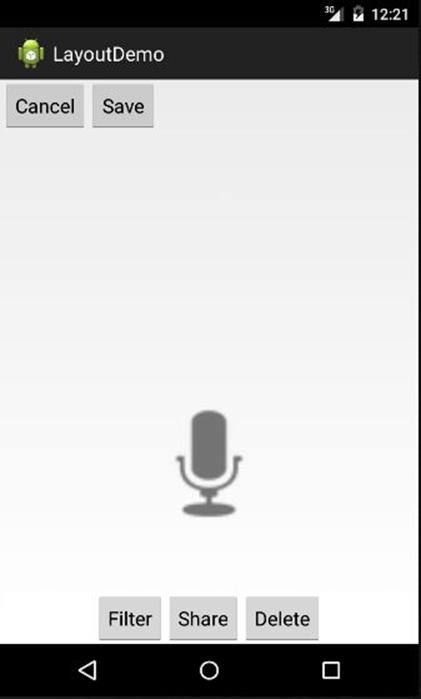
Figure 4.4: RelativeLayout
FrameLayout
A FrameLayout positions its children on top of each other. By adjusting the margin and padding of a view, it is possible to lay out the view below another view, as shown by the layout in Listing 4.5.
Listing 4.5: Using a FrameLayout
<FrameLayout
xmlns:android="http://schemas.android.com/apk/res/android"
xmlns:tools="http://schemas.android.com/tools"
android:orientation="horizontal"
android:layout_width="match_parent"
android:layout_height="match_parent">
<Button android:text="Button1"
android:layout_width="wrap_content"
android:layout_height="wrap_content"
android:layout_marginTop="100dp"
android:layout_marginLeft="100dp" />
<ImageButton
android:src="@android:drawable/btn_star_big_on"
android:alpha="0.35"
android:layout_width="wrap_content"
android:layout_height="wrap_content"
android:layout_marginTop="90dp"
android:layout_marginLeft="90dp" />
</FrameLayout>
The layout in Listing 4.5 uses a FrameLayout with a Button and an ImageButton. The ImageButton is placed above the Button, as shown in Figure 4.5.
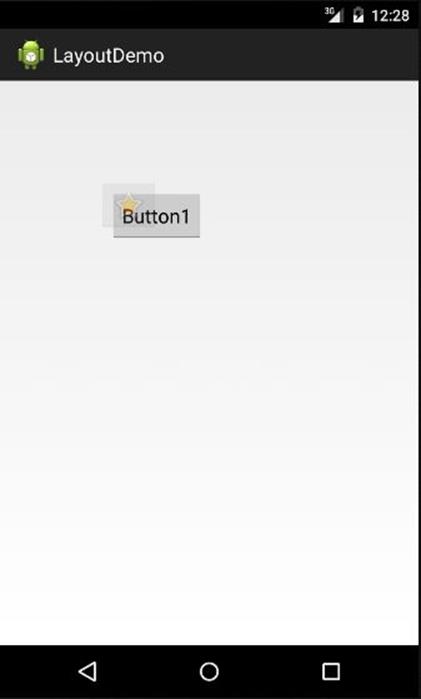
Figure 4.5: Using FrameLayout
TableLayout
A TableLayout is used to arrange child views in rows and columns. The TableLayout class is a subclass of LinearLayout. To add a row in a TableLayout, use a TableRow element. A view directly added to a TableLayout (without a TableRow) will also occupy a row that spans all columns.
The layout in Listing 4.6 shows a TableLayout with four rows, two of which are created using TableRow elements.
Listing 4.6: Using the TableLayout
<TableLayout
xmlns:android="http://schemas.android.com/apk/res/android"
android:layout_width="wrap_content"
android:layout_height="wrap_content"
android:layout_gravity="center" >
<TableRow
android:id="@+id/tableRow1"
android:layout_width="500dp"
android:layout_height="wrap_content"
android:padding="5dip" >
<ImageView android:src="@drawable/ic_launcher" />
<ImageView android:src="@android:drawable/btn_star_big_on" />
<ImageView android:src="@drawable/ic_launcher" />
</TableRow>
<TableRow
android:id="@+id/tableRow2"
android:layout_width="wrap_content"
android:layout_height="wrap_content" >
<ImageView android:src="@android:drawable/btn_star_big_off" />
<TextClock />
<ImageView android:src="@android:drawable/btn_star_big_on" />
</TableRow>
<EditText android:hint="Your name" />
<Button
android:layout_height="wrap_content"
android:text="Go" />
</TableLayout>
Figure 4.6 shows how the TableLayout in Listing 4.6 is rendered.
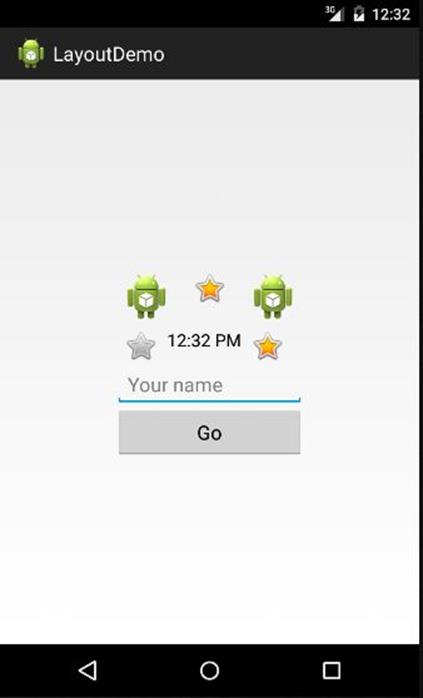
Figure 4.6: Using TableLayout
Grid Layout
A GridLayout is similar to a TableLayout, but the number of columns must be specified using a columnCount attribute. Listing 4.7 shows an example of GridLayout.
Listing 4.7: GridLayout example
<GridLayout
xmlns:android="http://schemas.android.com/apk/res/android"
android:layout_width="wrap_content"
android:layout_height="wrap_content"
android:layout_gravity="center"
android:columnCount="3">
<!-- 1st row, spanning 3 columns -->
<TextView
android:layout_width="wrap_content"
android:layout_height="wrap_content"
android:text="Enter your name"
android:layout_columnSpan="3"
android:textSize="26sp"
/>
<!-- 2nd row -->
<TextView android:text="First Name"/>
<EditText
android:id="@+id/firstName"
android:layout_width="200dp"
android:layout_columnSpan="2"/>
<!-- 3rd row -->
<TextView android:text="Last Name"/>
<EditText
android:id="@+id/lastName"
android:layout_width="200dp"
android:layout_columnSpan="2"/>
<!-- 4th row, spanning 3 columns -->
<Button
android:layout_width="wrap_content"
android:layout_height="wrap_content"
android:layout_column="2"
android:layout_gravity="right"
android:text="Submit"/>
</GridLayout>
Figure 4.7 visualizes the GridLayout in Listing 4.7.

Figure 4.7: Using GridLayout
Creating A Layout Programmatically
The most common way to create a layout is by using an XML file, as you have seen in the examples in this chapter. However, it is also possible to create a layout programmatically, by instantiating the layout class and passing it to the addContentView method in an activity class. For instance, the following code is part of the onCreate method of an activity that programmatically creates a LinearLayout, sets a couple properties, and passes it to addContentView.
LinearLayout root = new LinearLayout(this);
LinearLayout.LayoutParams matchParent = new
LinearLayout.LayoutParams(
LinearLayout.LayoutParams.MATCH_PARENT,
LinearLayout.LayoutParams.MATCH_PARENT);
root.setOrientation(LinearLayout.VERTICAL);
root.setGravity(Gravity.CENTER_VERTICAL); addContentView(root, matchParent);
Summary
A layout is responsible for arranging its child views. It directly affect the look and feel of an application. In this chapter you learned some of the layouts available in Android, LinearLayout, RelativeLayout, FrameLayout, TableLayout, and GridLayout.
All materials on the site are licensed Creative Commons Attribution-Sharealike 3.0 Unported CC BY-SA 3.0 & GNU Free Documentation License (GFDL)
If you are the copyright holder of any material contained on our site and intend to remove it, please contact our site administrator for approval.
© 2016-2026 All site design rights belong to S.Y.A.