Android Programming: Pushing the Limits (2014)
Part III. Pushing the Limits
Chapter 20. Distributing Applications on Google Play Store
Publishing Android applications has become very easy thanks to all the improvements made to the Google
Play Store. Google provides a number of useful tools, guides, and checklists that will help you in the process
of getting your application out to your users. In order to gain access to the Google Play Console, you must
first register for a publisher account and set up a Google Wallet Merchant Account if you want to sell apps
or support in-app purchases. You do this through the Google Play Developer Console, which you can find at
https://play.google.com/apps/publish (see Figure 20-1).
Figure 20-1 The Google Play Developer Console after a successful sign-up
Google Play supports additional features such as an advanced In-app Billing service that lets you sell digital
content from within your application and provides the means by which users can sign up for a subscription for a
service within your application. Both of these features are managed by the In-app Billing APIs that I cover in this
chapter.
If you don’t want to charge for your application or for digital in-app content but still want to have some revenue
from your application, you can integrate ads. You do so by using the Google AdMob Ads SDK, which lets you
place ad banners in your application as standard Android View objects.
In some situations, you may want to verify that your paid application is licensed to run on the most current
device. To support this, Google provides the Google Play Licensing Service, which lets you perform automatic
verifications on the purchase state of an application. You’ll find a guide for integrating this service in this
chapter.
Android limits APK files distributed through Google Play to 50MB. Some games and apps require resources that
exceed this limit, which is why Google Play supports the use of APK extension files. I provide a guide for using
this service in the section, "APK Expansion Files," later in this chapter.
In-app Billing
Although selling your application is the most obvious way of monetizing your application, sometimes it’s more
efficient to provide your application for free and rely on users purchasing additional content from within your
application. This is handled by an In-app Billing service that lets users buy digital content or subscriptions for a
specific application.
To get started with in-app purchases, you need a valid Google Wallet Merchant Account, which you find in the
Google Play Developer Console. Once you get this set up, you need to enable billing for your application and
upload it to the Google Play Store. (Note that you don’t need to publish the app to enable in-app billing.)
Start by adding the following permission to your manifest, which allows your application to perform in-app
purchases:
<uses-permission android:name=”com.android.vending.BILLING” />
Next, you must copy the file IInAppBillingService.aidl from the play_billing directory in the
Android SDK extras and place it in the package com.android.vending.billing under the aidl sources
directory of your application. I also recommend that you copy the util package from the sample application
TrivialDrive found in the play_billing directory. These classes will make it much easier to implement the
In-app Billing API in your own application.
You also need to define the product IDs (also known as SKUs) for your different in-app products. Each product
that the user can purchase must have a unique SKU, and you define them in the Google Play Developer Console
as follows:
public static final String APPLE_SKU = “apple”;
public static final String BANANA_SKU = “banana”;
public static final String ORANGE_SKU = “orange”;
public static final String AVOCADO_SKU = “avocado”;
public static final String LIME_SKU = “lime”;
public static final String[] FRUIT_SKUS = new String[] {APPLE_SKU,
BANANA_SKU,
ORANGE_SKU,
AVOCADO_SKU,
LIME_SKU};
private Inventory mInventory;
private Set<String> mOwnedFruits = new HashSet<String>();
When your application starts, you create the IabHelper class that you copied from the TrivialDrive samples
application, as shown in the following code:
@Override
protected void onCreate(Bundle savedInstanceState) {
super.onCreate(savedInstanceState);
setContentView(R.layout.activity_main);
mHelper = new IabHelper(this, BASE_64_PUBLIC_KEY);
mHelper.startSetup(new IabHelper.OnIabSetupFinishedListener() {
@Override
public void onIabSetupFinished(IabResult result) {
if(!result.isSuccess()) {
// TODO Error handling of In-App Billing integration!
}
}
});
}
Load the current Inventory for all the products, as shown next. This class is also part of the utility
package that you copied from the samples. This query also allows you to check whether the current user has
purchased a specific SKU.
private void loadFruitInventory() {
mHelper.queryInventoryAsync(true,
new IabHelper.QueryInventoryFinishedListener() {
@Override
public void onQueryInventoryFinished(IabResult result,
Inventory inventory) {
if(result.isSuccess()) {
mInventory = inventory;
mOwnedFruits.clear();
for (String fruitSku : FRUIT_SKUS) {
if(inventory.hasPurchase(fruitSku)) {
mOwnedFruits.add(fruitSku);
}
}
}
}
});
}
In-app purchases are asynchronous because they will start an Activity in the Google Play Store application.
The following is the code for launching the purchase flow for buying a fruit. Note that you also have to
implement onActivityResult() and call handleActivityResult() on the helper class.
@Override
protected void onActivityResult(int requestCode, int resultCode, Intent
data) {
if(!mHelper.handleActivityResult(PURCHASE_FRUIT, resultCode, data)) {
super.onActivityResult(requestCode, resultCode, data);
}
}
private void purchaseFruit(String sku) {
// User doesn’t own this fruit yet
if (!mOwnedFruits.contains(sku)) {
mHelper.launchPurchaseFlow(this, sku, PURCHASE_FRUIT,
new IabHelper.OnIabPurchaseFinishedListener() {
@Override
public void onIabPurchaseFinished(IabResult result,
Purchase info) {
if (result.isSuccess()) {
mOwnedFruits.add(info.getSku());
} else {
// TODO Error handling!
}
}
}, mBase64UserId);
}
}
Consuming Products
Once a product is purchased, it can be “consumed.” Using consumable objects is useful in games—for example,
virtual coins or, in this case, virtual fruit. The following example shows how to “consume” such a virtual fruit that
the user has purchased:
private void consumeFruit(String sku) {
mHelper.consumeAsync(mInventory.getPurchase(sku),
new IabHelper.OnConsumeFinishedListener() {
@Override
public void onConsumeFinished(Purchase purchase, IabResult result)
{
if(result.isSuccess()) {
Log.d(TAG, “Purchase successful!”);
mOwnedFruits.remove(purchase.getSku());
}
}
});
}
In-app Subscriptions
It’s also possible to implement subscriptions as part of the In-app Billing API. Doing so allows users to confirm a
recurring charge to their Google Play account. The recurrence is either monthly or yearly (this might change in
the future), and the API also supports a first-time free trial for your subscriptions.
Starting the subscription purchase flow works the same way that it does with normal in-app purchases, as
shown in the following example:
private void subcribeToUnlimitedFruit() {
if (mHelper.subscriptionsSupported()) {
mHelper.launchSubscriptionPurchaseFlow(this,
UNLIMITED_FRUIT_SUBSCRIPTION,
SUBSCRIBE_UNLIMITED_FRUIT,
new IabHelper.OnIabPurchaseFinishedListener() {
@Override
public void onIabPurchaseFinished(IabResult result,
Purchase info) {
if (result.isSuccess() &&
UNLIMITED_FRUIT_SUBSCRIPTION.
equals(info.getSku())) {
mUnlimitedFruits = true;
} else {
// TODO Error handling...
}
}
});
}
}
How you decide to utilize the In-app Billing API in your application depends on what your application or games
do. The preceding example uses fruit, and you treat the fruit as consumables that will be removed from the
user’s purchased items once the fruit is consumed. If you provide an In-app Billing service for removing ads or
upgrading to a Pro version of your applications, then you should not treat the purchases as consumables.
In-app subscriptions aren’t supported in all countries, which is why you should always check whether they’re
available before presenting them to the user. Also, remember that subscriptions involve your commitment to
continue to deliver content or services for users who sign up.
Ads in Android Applications
Although selling your application or integrating in-app purchases are ways of monetizing your work, doing so
may not always be a viable choice. For example, if you wish to provide the application for free to increase the
number of users, you can instead integrate ads that will give you a way to monetize your application while still
providing it free-of-charge to your users. Google supports in-app ads through its AdMob services. To use this
service, you need to sign up with AdMob at http://www.google.com/ads/admob.
Ironically, by combining ads with an in-app purchase that allows users to get rid of the ads, you can create
an additional method for monetizing on your application. In this section, I show how you can integrate ads
through the AdMob service provided by Google and also how you can provide the option for removing those
ads through an in-app purchase.
To start, you need to download the AdMob SDK for Android, which you can find at https://developers.
google.com/mobile-ads-sdk. Unzip the archive and copy the file GoogleAdMobAdsSdk-6.4.1.jar
to the libs directory of your project. Next, add the following dependency in your Gradle build script:
compile files(‘libs/GoogleAdMobAdsSdk-6.4.1.jar’)
You now have the AdMob SDK for Android integrated into your project.
Next, you add the permissions as well as the AdActivity to your manifest, as shown here:
<uses-permission android:name=”android.permission.INTERNET” />
<uses-permission android:name=”android.permission.ACCESS_NETWORK_STATE” />
<application
android:allowBackup=”true”
android:icon=”@drawable/ic_launcher”
android:label=”@string/app_name”
android:theme=”@style/AppTheme”>
<activity android:name=”com.google.ads.AdActivity”
android:configChanges=”keyboard|keyboardHidden|
orientation|screenLayout|
uiMode|screenSize|
smallestScreenSize”/>
The simplest way to integrate ads in your application is by using the class com.google.ads.AdView. You
can use this class either in your XML layouts or programmatically in Java.
Here is a simple example of using the AdView in your XML layout:
<LinearLayout xmlns:android=”http://schemas.android.com/apk/res/android”
xmlns:ads=”http://schemas.android.com/apk/lib/com.google.
ads”
xmlns:tools=”http://schemas.android.com/tools”
android:layout_width=”match_parent”
android:layout_height=”match_parent”
tools:context=”.AdDemo”>
<com.google.ads.AdView
android:id=”@+id/adView”
android:layout_width=”wrap_content”
android:layout_height=”wrap_content”
ads:adUnitId=”AD_UNIT_ID”
ads:adSize=”SMART_BANNER”
ads:testDevices=”DEVICE_ID_FOR_TESTING”
ads:loadAdOnCreate=”true”/>
</LinearLayout>
The first ads attribute, adUnitId, is your AdMob publisher ID. The adSize attribute decides how large your
ad will be. A SMART_BANNER will adapt itself to the screen size. You can find the full list of supported banner
sizes for AdMob SDK at https://developers.google.com/mobile-ads-sdk/docs/admob/
intermediate#android-sizes. You need to set the testDevices attribute to the device ID for your development device. (An example of retrieving the device ID is in the section “Application Licensing” later in
this chapter.) Doing so enables you to debug and test the AdMob integration, which otherwise wouldn’t be
possible.
In the earlier example with the XML layout, the ads are loaded automatically when the View is loaded. This
may not always be what you want, so when you need more fine-grained control over when ads are loaded, you
can use the approach shown in the following method. You can also use this method to refresh the ad manually,
which will load a new banner.
private void loadAds() {
AdView adView = (AdView) findViewById(R.id.adView);
adView.loadAd(new AdRequest());
}
Targeting Ads
You can target the ads by giving the AdRequest a number of parameters, which you may want to do if you can
define the context and user preferences. The following code shows how to define gender, location, birthday and
a set of keywords to the AdRequest:
private void targetAdd(boolean isMale,
Location location,
Date birthday,
Set<String> keywords) {
AdRequest adRequest = new AdRequest();
adRequest.setGender(isMale ?
AdRequest.Gender.MALE : AdRequest.Gender.FEMALE);
adRequest.setLocation(location);
adRequest.setBirthday(birthday);
adRequest.setKeywords(keywords);
AdView adView = (AdView) findViewById(R.id.adView);
adView.loadAd(adRequest);
}
Another important aspect of targeting ads is determining whether the ads need to comply with the Children’s
Online Privacy Protection Act (COPPA). You can use this in your application to ensure that all ads displayed are
“child safe” according to COPPA.
You can add the following code to indicate that your ads should be displayed according to COPPA. If you want
to indicate that the ads should not be treated according to COPPA, change the value from 1 to 0.
AdMobAdapterExtras adMobAdapterExtras = new AdMobAdapterExtras();
adMobAdapterExtras.addExtra(“tag_for_child_directed_treatment”, 1);
adRequest.setNetworkExtras(adMobAdapterExtras);
Ad Colors
You can also change the overall color scheme of the ads, which is especially useful when you want to adapt the
look and feel of the ads to the color scheme of your application.
The following example shows how to set a color scheme for the ads:
AdMobAdapterExtras adColor = new AdMobAdapterExtras();
adColor.addExtra(“color_bg”, “AAAAFF”);
adColor.addExtra(“color_bg_top”, “FFFFFF”);
adColor.addExtra(“color_border”, “FFFFFF”);
adColor.addExtra(“color_link”, “000080”);
adColor.addExtra(“color_text”, “808080”);
adColor.addExtra(“color_url”, “008000”);
adRequest.setNetworkExtras(adColor);
Use this with care, as a bad color combination can annoy the user and make them abandon your application.
Interstitial Ads
If you think banner ads aren’t suitable for your application, you can instead use interstitial ads. These ads allow
you to display a full-screen ad in your application that the user can either interact with or dismiss when it times
out. Although more intrusive than banner ads, interstitial ads won’t affect your own Views in the same way
banners do.
The following code illustrates how to load an interstitial ad and display it once it’s ready. All you need to do is
implement the logic in onDismissScreen() where you move to the next screen in your app or game.
private void loadInterstitialAd() {
mInterstitialAd = new InterstitialAd(this,
MY_INTERSTITIAL_AD_UNIT_ID);
mInterstitialAd.setAdListener(new AdListener() {
@Override
public void onReceiveAd(Ad ad) {
mInterstitialAd.show();
}
@Override
public void onFailedToReceiveAd(Ad ad,
AdRequest.ErrorCode errorCode) {
}
@Override
public void onPresentScreen(Ad ad) { }
@Override
public void onDismissScreen(Ad ad) {
// TODO User dismissed the ad, show next screen...
}
@Override
public void onLeaveApplication(Ad ad) { }
});
mInterstitialAd.loadAd(new AdRequest());
}
Application Licensing
When you sell your application on the Google Play Store, you have a clear way of monetizing on your
application. However, because it’s possible to extract an APK file from a device, there is a risk that your
application will be distributed through channels you haven’t approved. The many alternative app stores for
Android make it virtually impossible for developers to check all of them.
Once you set up the project and library correctly, you need to add the correct permission to your manifest, as
shown next. This allows your application to perform licensing checks.
<uses-permission android:name=”com.android.vending.CHECK_LICENSE” />
Performing a license check is easy:
private void checkLicense() {
String deviceId = Settings.Secure.
getString(getContentResolver(),
Settings.Secure.ANDROID_ID);
LicenseChecker licenseChecker =
new LicenseChecker(this,
new ServerManagedPolicy(this,
new AESObfuscator(SALT,
getPackageName(),
deviceId)),
BASE_64_PUBLIC_KEY);
licenseChecker.checkAccess(mLicenseCheckerCallback);
}
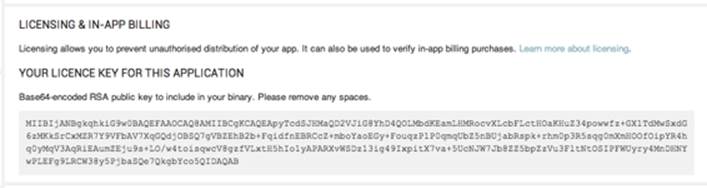
The SALT parameter must be a byte array of 20 random bytes. BASE_64_PUBLIC_KEY must be the full
licensing key found in your Google Play Developer Console for your application, as shown in Figure 20-2.
Figure 20-2 The Base64 encoded public RSA key for the licensing service shown in the Google Play Developer Console
In the callback for the licensing check shown here, you simply display a Toast if the user isn’t licensed to use
this application:
class MyLicenseCheckerCallback implements LicenseCheckerCallback {
@Override
public void allow(int reason) {
Log.d(TAG, “License check passed!”);
}
@Override
public void dontAllow(int reason) {
Log.e(TAG, “License check failed - notify user!”);
Toast.makeText(MainActivity.this,
R.string.licensing_failed_message,
Toast.LENGTH_LONG).show();
// TODO Open Google Play Store for this application and quit
}
@Override
public void applicationError(int errorCode) {
Log.e(TAG, “Application error: “ + errorCode);
finish();
}
}
For each application that uses the licensing service, you have a number of different choices. You can notify the
user about a missing license, open Google Play Store for your application, and finish the Activity. Another
option is to perform a graceful degradation of the enabled features.
APK Expansion Files
When your game (or application) comes with a huge amount of content, the 50MB limit of APK files may not
be sufficient. In that case, you can use the APK Expansion Files feature to distribute up to 4GB of additional
data. This data will be stored on the shared storage where it will be available to all applications, so if the data is
sensitive, you need to encrypt it yourself (refer to Chapter 12 for more on this topic). The exact location of the
expansion files is <shared-storage>/Android/obb/<package-name>, where <shared-storage>
is the same path as returned by Environment.getExternalStorageDirectory().
You can have two expansion files, each with a maximum file size of 2GB, and they can contain any kind of data.
The first file is named main, and the second file, which is optional, is named patch. The name of the file uses
the following scheme:
[main|patch].<expansion-version>.<package-name>.obb
The first component of the name determines which file (main or patch) it is. The second part must match the
attribute android:versionCode in the manifest of your application. The final part is the package name of
your application.
Creating Expansion Files
The expansion files can be of any format, but I recommend using the ZIP file format because the Expansion
Library provides some helper classes to read files from such an archive. If your expansion file will contain media
files that you’ll be loading with MediaPlayer or SoundPool, package them without additional compression; that
way, you can simply load them with the standard APIs using their offset in the ZIP file.
The following command shows how you can create a ZIP file with your additional content:
$ zip –n .mp4;.ogg <expansion-file> <media files>
The –n parameter tells the zip command not to compress files with those extensions. <expansion-file>
is the filename of your expansion file, and <media files> is a list of all the files you want to include.
Downloading Expansion Files
In most situations, the expansion files are downloaded automatically by the Google Play client and placed in
external storage. However, in some situations, the files must be downloaded by your application. This is usually
the case when the user has swapped the SD card used for the external storage or deletes the contents of the
external storage manually.
In this situation, you need to perform a request using the Application Licensing service (as shown in the earlier
section “Application Licensing”) that will respond with the URLs for the expansion files. As a result, you must
include the License Verification Library, even if your application is free and otherwise wouldn’t require the
Application Licensing service. Also, because it needs to perform some network operations, your application
must declare the android.permission.INTERNET permission.
To simplify the manual download process, a Download Library is included in the Google Play APK Expansion
Library package that makes integration of the service easier.
Start by extending the class DownloaderService, as shown here, and add the public key form the licensing
service (see previous section):
public class MyDownloaderService extends DownloaderService {
public static final String BASE64_PUBLIC_KEY = “<Base64
LicensingKey>”;
public static final byte[] SALT = new byte[32];
@Override
public void onCreate() {
super.onCreate();
new Random().nextBytes(SALT);
}
@Override
public String getPublicKey() {
return BASE64_PUBLIC_KEY;
}
@Override
public byte[] getSALT() {
return SALT;
}
@Override
public String getAlarmReceiverClassName() {
return DownloadAlarmReceiver.class.getName();
}
}
The following is an example of the broadcast receiver that is used for starting the DownloaderService in
case it is terminated unexpectedly:
public class DownloadAlarmReceiver extends BroadcastReceiver {
private static final String TAG = “DownloadAlarmReceiver”;
public void onReceive(Context context, Intent intent) {
try {
DownloaderClientMarshaller.
startDownloadServiceIfRequired(context,
intent,
MyDownloaderService.
class);
} catch (PackageManager.NameNotFoundException e) {
Log.e(TAG, “Cannot find MyDownloaderService.”, e);
}
}
}
Finally, add a method in your main Activity that checks whether the correct expansion files have been
downloaded. The following is an example of such a method that you can build upon. You should probably
extend this method with additional checks of the content, just to be sure the file isn’t modified.
private void performDownloadIfNeeded() {
String fileName = Helpers.
getExpansionAPKFileName(this, true, EXPANSION_FILE_VERSION);
if (!Helpers.doesFileExist(this, fileName,
EXPANSION_FILE_SIZE, true)) {
Intent notifierIntent =
new Intent(this, MainActivity.class);
notifierIntent.
setFlags(Intent.FLAG_ACTIVITY_NEW_TASK |
Intent.FLAG_ACTIVITY_CLEAR_TOP);
PendingIntent pendingIntent =
PendingIntent.getActivity(this, 0,
notifierIntent,
PendingIntent.FLAG_UPDATE_CURRENT);
try {
DownloaderClientMarshaller.
startDownloadServiceIfRequired(this,
pendingIntent,
MyDownloaderService.class);
} catch (PackageManager.NameNotFoundException e) {
Log.e(TAG, “Cannot find downloader service.”, e);
}
}
}
This method shows how you can add expansion files to your application on Google Play, how to verify that
you have them available, and how to initiate download them when needed. Use the expansion files as the first
solution for dealing with content that doesn’t fit within the maximum size allowed for APK files.
Summary
In this final chapter, I covered some of the features related to the Google Play Store. The features available
for developers presented in this chapter can help you monetize your application as well as deliver additional
content that doesn’t fit within the 50MB size limit for APK files. You can generate income for your application
three ways: You can sell it, add in-app purchases, or integrate ads.
Carefully consider which strategy to use when you decide to monetize your application. Although simply selling
your application may seem like the simplest solution, you’ll probably gain a larger user base by providing the
application for free and offering users the opportunity to buy virtual goods instead. Ads are easy to include but
will consume screen space in your application or game. They might also be considered too intrusive by some
users. Consider all aspects before deciding on which solution works best for each application because changing
your strategy at a later point may be difficult.
Further Resources Websites
Distributing apps on the Google Play Store: http://developer.android.com/distribute/index.html
The Google Play Developer Console: https://play.google.com/apps/publish
Resources for Google Play distribution: http://developer.android.com/google/play/dist.html
The Google Mobile Ads SDK downloads and documentation: https://developers.google.com/mobile-ads-sdk
Google AdMob service: www.google.com/ads/admob