Android Development Patterns: Best Practices for Professional Developers (2016)
Chapter 1. Development Tools
The toolset of choice for Android development has changed over the last few years. Once, the Eclipse IDE was the integrated development environment (IDE) of choice, but we now stand at the changing of the guard where the now fully support Android Studio is the current weapon of choice for developers. In this chapter, you learn about Android Studio, how to get the standalone SDK tools, various Android emulators, and version-control systems that are used with Android development.
Android Studio
Many Android developers have used or have had some experience with the Android Development Tools (ADT) bundle. This package, provided by the Android team, consisted of the Android SDK and the Eclipse IDE, which was used to help developers create rich Android applications on software that many Java developers were already using.
On May 15th, 2013, at the Google I/O developer conference, Android Studio was announced. This new toolset is composed of several additions aimed at making Android development easier, faster, and better than the ADT bundle that it replaced. Initially, it was released as a beta project but is now the officially supported platform from Google for Android development.
Android Studio is based on the JetBrains IntelliJ IDEA platform. This IDE has many new-and-improved features that the Android team feels better suits the development of Android applications. Features such as auto-save on every keystroke, the ability to separate the build process from the application, and smart auto-complete and import help developers create their applications faster and make them less reliant on complicated workspace setups and less worried about potential data loss.
Android Studio also comes as an installation instead of a packed file. This allows closer ties to the operating system on which it is installed, making it easier for developers to install without having to manually unpack and manage the SDK and IDE on their file system.
The new Gradle build system allows for a much easier build process that gives control back to developers and makes project collaboration much easier. On the surface, it appeared that any Android project could be exported or checked into a code repository without any problems. However, when another developer checked out the project, there were occasions when different versions of the support library, SDK tools, or even the project build target would include different .jar files, making the project fail to compile and bringing development to a complete halt.
With the new Gradle-based build system, compiled .jar files are created and included as needed from the installed SDK. This greatly speeds up team collaboration because projects can now be passed through a code repository without worrying about specific versions of the compiled support .jar files or similar .jar files being sent separately to the developer to allow the project to be built.
Installing Android Studio
Android Studio is available for Windows, Linux, and OS X. You can download the current version of Android Studio from http://developer.android.com/sdk/. The website attempts to detect your currently installed operating system and give you a downloadable installation file. If you are using a different computer than the one on which you plan on running your install, you can download different versions of the Android Studio installation file under the Other Download Options section of the site.
Once you have selected to download Android Studio, you are moved to a new page asking you to read the terms and conditions of the download. After reading the terms thoroughly and checking the Agree box, you are then allowed to download the installation file. When the download is complete, you can run or execute the file to begin installation.
Note
If you are on a metered or cellular connection, you should find a broadband connection before attempting your download because the installation file may be over 200MB. Even if you manage to download the executable when Android Studio is installed, it will check for and install updates as well as portions of the Android SDK, which can add more than 2GB of data.
Unlike in previous installations where an application was uncompressed to your file system, Figure 1.1 shows the execution of the Android Studio installation file when executed on OS X.
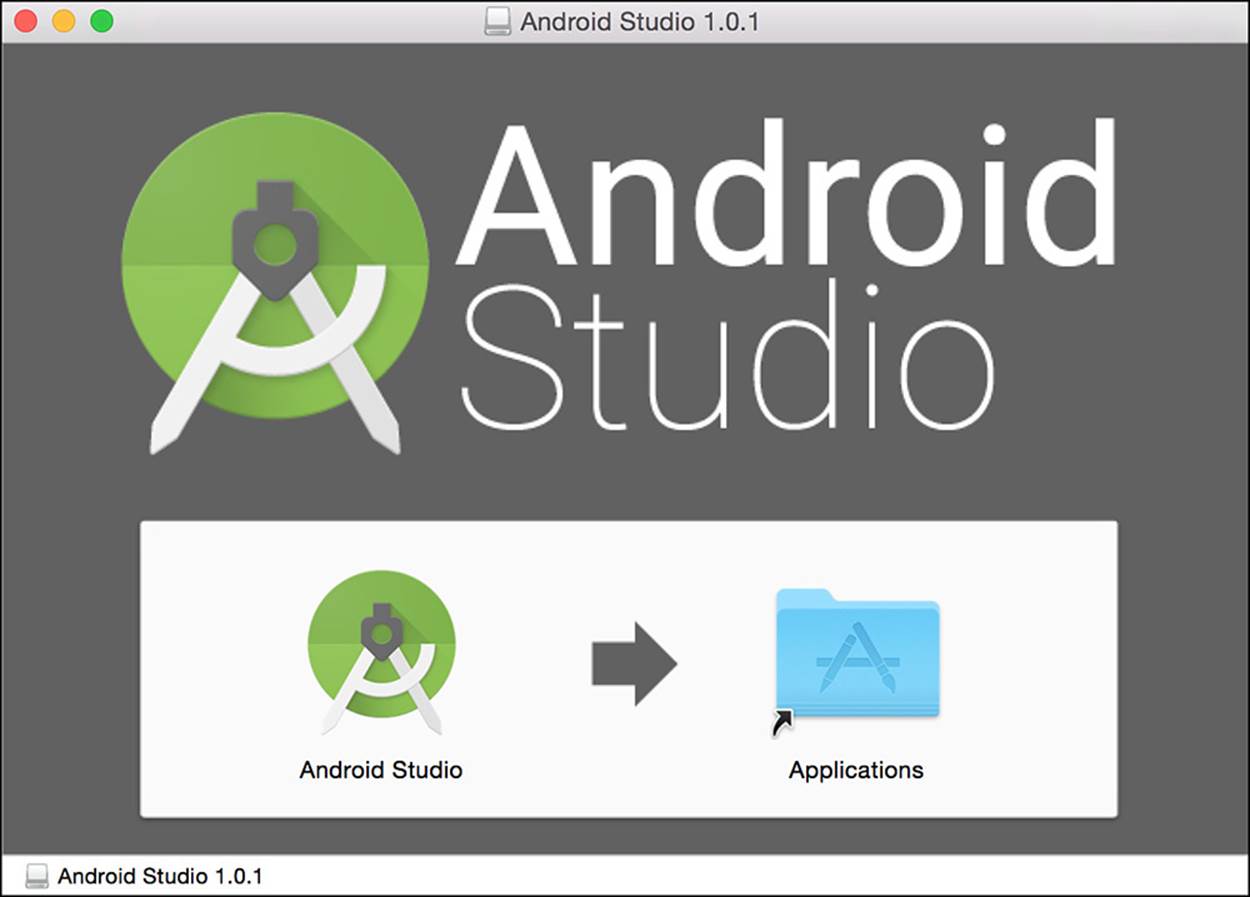
Figure 1.1 Android Studio is now installed like a standard application in OS X. You just drag the application to your Applications folder.
During either the installation process (Windows) or when you open Android Studio for the first time (OS X), you will be walked through the SDK wizard. Because Android requires Java, you will be asked for the path to the Java 7 or higher Java Development Kit (JDK). Currently Java 7 is the preferred version of Java used with Android development, so you should download the latest version 7 release possible. Note that you must have the JDK installed and not the Java Runtime Environment (JRE). The JDK does contain the JRE, but it also contains extra components that are used by Android Studio for compiling Java code and resources. The currently installed JDK will attempt to be located automatically by the installation process, but if it is not found you may download the JDK by visitinghttp://www.oracle.com/technetwork/java/javase/downloads/.
Once you install the proper JDK, you can continue through the setup process. Most developers should be fine with the default installation options; however, if you want to know exactly where and what is being installed on your system, you may opt for the Custom installation. The Custom installation path allows you to choose to install the Android SDK, the Intel HAXM emulation enhancement, and an optimized Android Virtual Device (AVD). You are also given the option to change the installation path of the Android SDK on your system. The standard installation installs the SDK, the Intel HAXM, and the AVD.
The wizard asks you to accept more terms and conditions and then begins downloading the necessary components to give you a fully functional workbench that you will use to get your Android application started.
Note
If you have been using the ADT Bundle as your main development IDE, you should migrate your current project as soon as possible by following the migration guides available at http://developer.android.com/sdk/. You can still use the ADT bundle if you want, but it is no longer under official support, and if you run into problems you will be on your own.
For the official migration instruction visit http://developer.android.com/sdk/installing/migrate.html.
When the wizard finishes the download, you are shown the Welcome screen of Android Studio. You should now be able to start using Android Studio.
Using Android Studio
Unlike with the ADT Bundle, when Android Studio is launched, you are not taken to a workbench; instead, you are shown a Welcome screen. Figure 1.2 shows the Welcome screen.
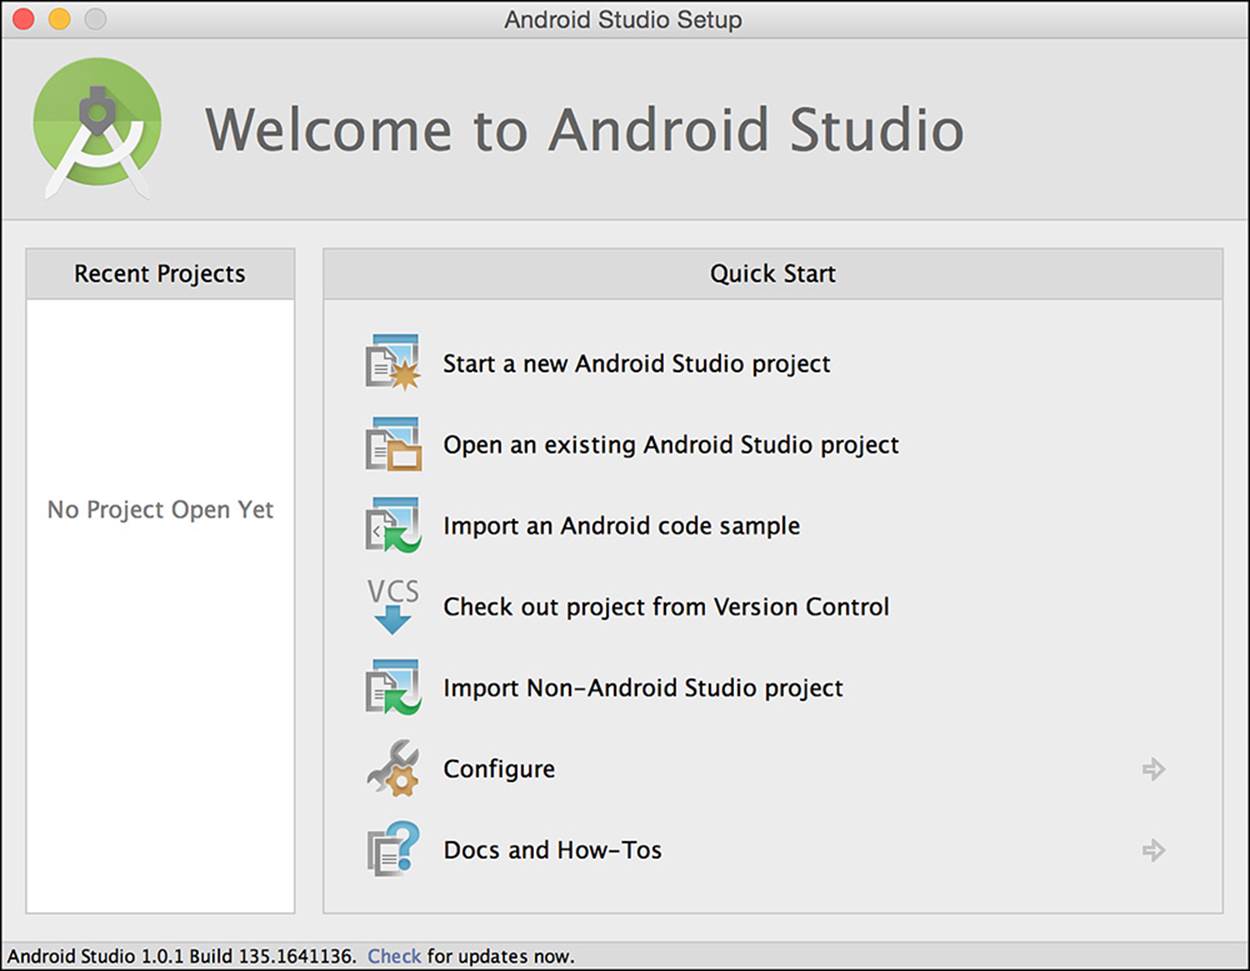
Figure 1.2 The Welcome screen of Android Studio v1.0.1. Even newer versions such as 1.4 have remained the same.
As you begin to develop a project, the Recent Projects list populates and you can choose a project to begin working on it. To begin a new project, you can use the Start a New Android Studio Project button in the Quick Start section.
Occasionally, you may find that some projects are not listed in the Recent Projects list. When this happens you should use the Open an Existing Android Studio Project button to locate the project and open it.
If you are new to Android development or if you want to see some examples on specific portions of Android development, you can click Import an Android Code Sample. This starts a download that will grab a list of sample projects that you can open to look at to help with understanding how different pieces of the Android system interact and are used for application building.
If you have a project that was created using ADT, you can attempt to import it by choosing Import Non-Android Studio Project and choosing the project folder. Android Studio will then attempt to convert the project into an Android Studio project. If your migration runs into issues, you may need to export the project from ADT or generate a build.gradle file before attempting to import.
If you need to update your SDK tools, you can do so through the SDK Manager. This is accessible by clicking the Configure button and choosing SDK Manager on the pane that slides in. If you are already working inside a project, you can open this by clicking Tools, Android, SDK in the menu. This launches a new window that checks for updates for the Android SDK. If any are found, you are prompted to update and install them. Figure 1.3 shows the Android SDK Manager window with some packages ready to be installed.
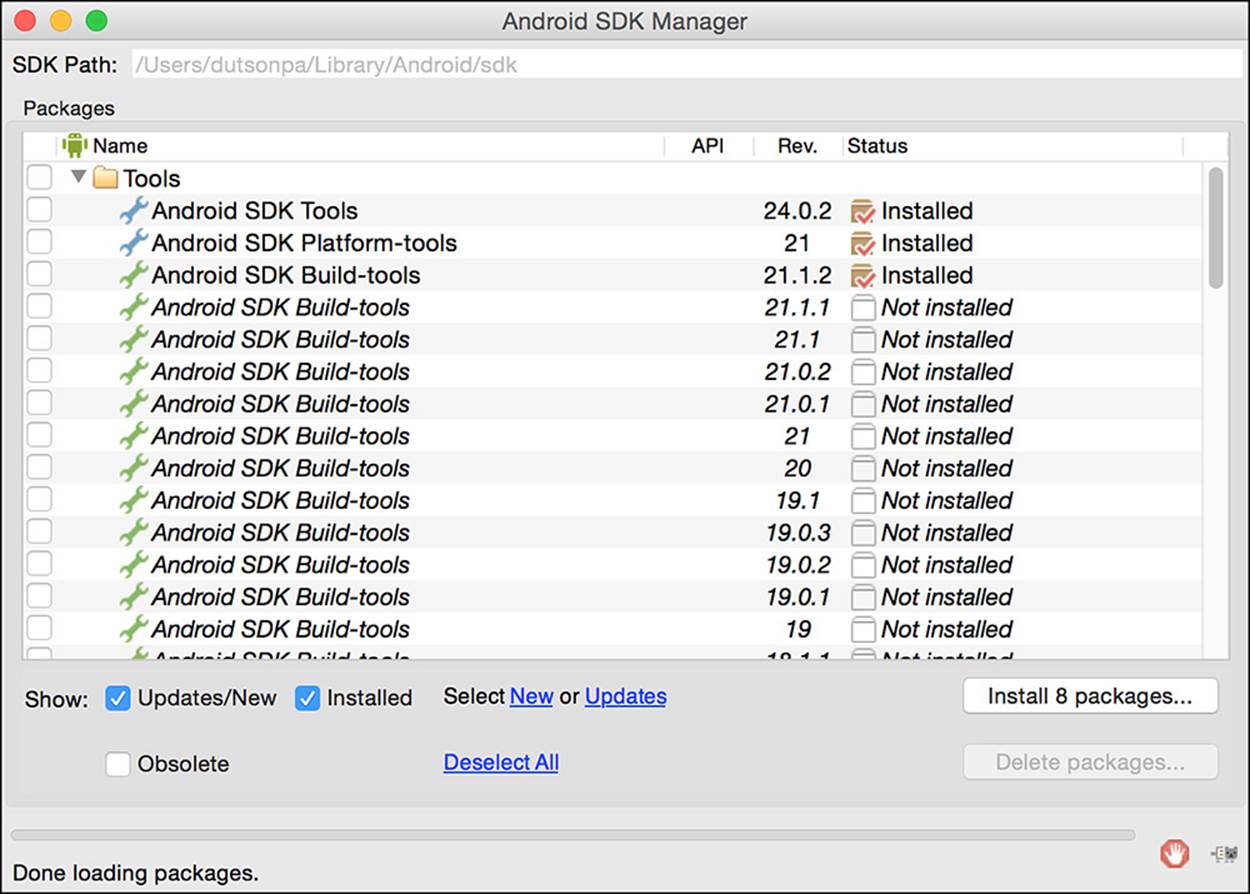
Figure 1.3 The Android SDK Manager is used to install and update components of the Android SDK.
Many extra components and packages can be installed by using the Android SDK Manager. If you find that you cannot create or open some projects, it may be due to missing packages. This is a good place to start when trying to troubleshoot problems with compiling, importing, or opening projects.
Starting a New Project
Clicking the Start a New Android Studio Project button starts the new project wizard. The first page lets you configure the initial settings of your project. The name of your application is set here as well as your package name. In order to help you create packages properly, Android Studio has you enter a company domain. This helps ensure that applications do not overlap and cause potential conflicts due to having the same package name. If you have a specific location that you want to save your project, you can also change the default location.
Clicking the Next button allows you to choose what your application will target. Note that you are not limited to creating an app that will only work on a watch, TV, or mobile device. If you want your application to work on multiple devices, you should check the box next to the platform you wish to support. When you check a platform, you will then be able to choose which API level you require to run your application. Android Studio updates to grab the current Android fragmentation lists to give you a percentage of how many devices your application will be compatible with. This useful metric may help you decide how you will build your application and give you an idea of how many Android users will be able to run your application.
Clicking Next moves you to the Activity-selection screen. If you plan on building your own UI, you will probably want to select the Blank Activity option. If you already know that you will need a different type of Activity, you can select it here to have it added for you.
Clicking Next moves you to a screen allowing you to choose options for the Activity you chose on the previous page. Options here allow you to change the Activity name, the layout name, as well as the title and other potential options, such as menu resource names, fragment names, object kinds, and more. Once you have filled out everything to your satisfaction, click Finish to be taken to the main IDE screen.
Note
If you see errors about your project being unable to build, Gradle having missing components, or another similar message, you should see an option to “retry the operation.” If you retry and the process fails again, you should check your JDK build path. Some systems will default to the first version of Java that is found on your system. If you are working with Lollipop, you must have Java JDK 7 or higher; pointing the IDE to the newer JDK location should fix your build problems.
When the project opens you will be shown your activity .xml file. Figure 1.4 shows the Design view of activity_main.xml, which is the main layout file that was created as a new project using the Blank Activity option.
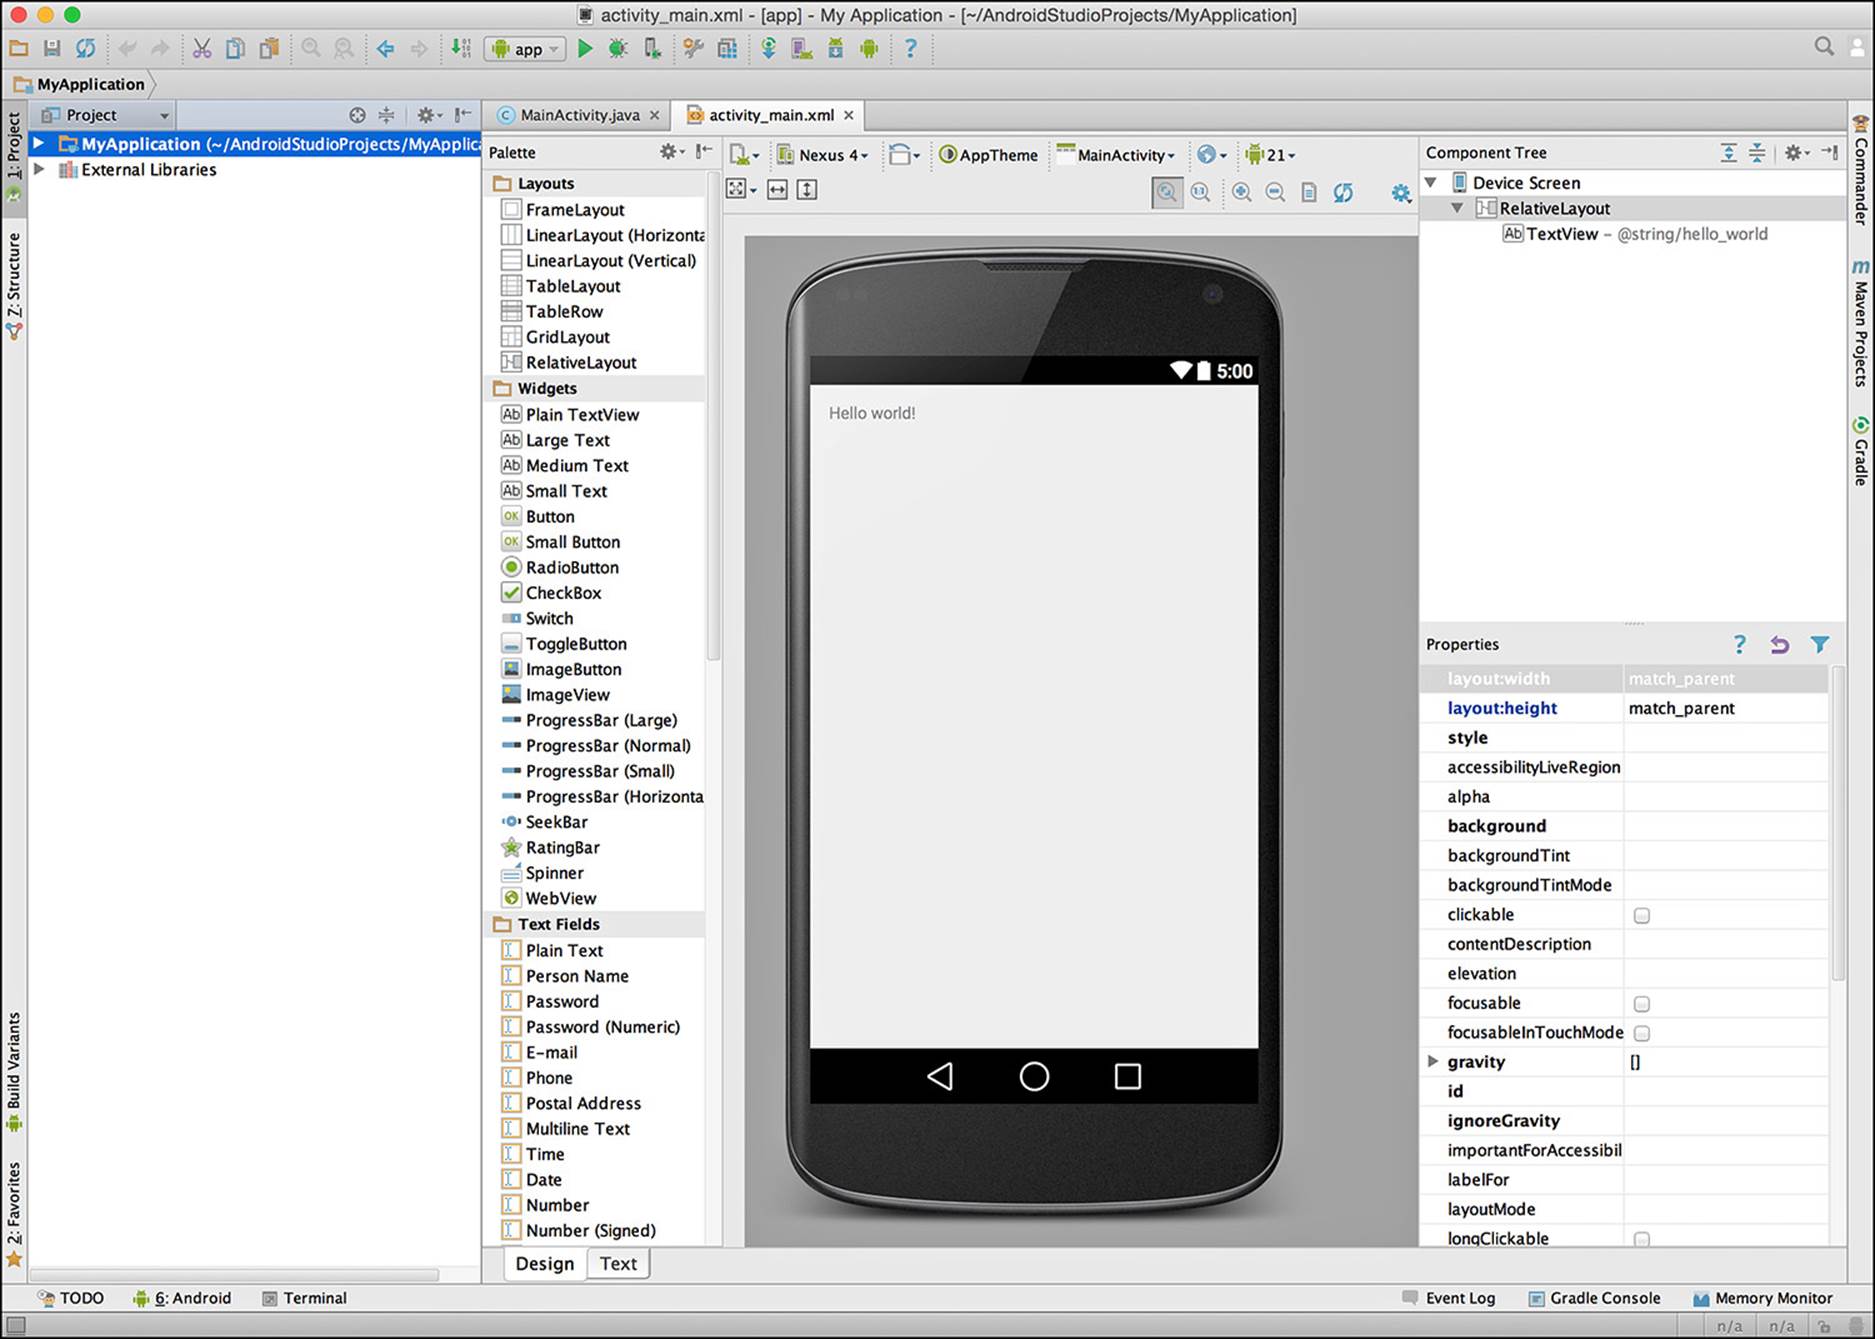
Figure 1.4 The activity_main.xml file is open in the Design view.
The Design view is used for drag-and-drop development. A list of layouts, widgets, and various components can be dragged on to the Android device, and the view will be updated to show what will happen when they are added. Even if you decide not to use the drag-and-drop interface and instead code in all of your components, they will be rendered in this view so that you can see how your project will look.
The right side of the Design view gives you a component tree of the components that have been added to the activity as well as a Properties section. The Properties section can be used to adjust components by tweaking various settings. Note that some properties can be changed to use hard-coded values rather than the ones created in a resources file such as strings.xml. This may not seem to be an issue at first, but it can snowball into a massive update effort when you decide to take your application global and need to localize all the text used in your application.
The middle section will initially be set to show you a default device based on what your application is targeted for. If you are developing a phone or tablet application, then a phone will displayed. This can be changed by using the option buttons above the device. A drop-down will list the current “skin” and will allow you to change to another device. This is extremely useful to see how different devices will handle the layout of your components. You can also change and modify the AppTheme as well as which Activity you want to view and the API level.
Note
The Design view is a preview of what your application will probably look like when run on an Android device. However, it may not always be 100% accurate, especially on every Android device. Whenever possible, test on as many actual devices as you can, as well as on software emulators.
After you are done playing with the visual aspects of your Activity, click the Text tab at the bottom of the window. This changes the view to let you view the actual nodes and elements that make up your Activity XML file. As a reminder, you do not have to use the Design mode; if you are comfortable, you can code the entire Activity directly into the XML. A Preview pane is available to show you what is happening when you add and remove code to and from the Activity XML. Figure 1.5 shows a button that has been added to the Text view and is rendered in the Preview pane.
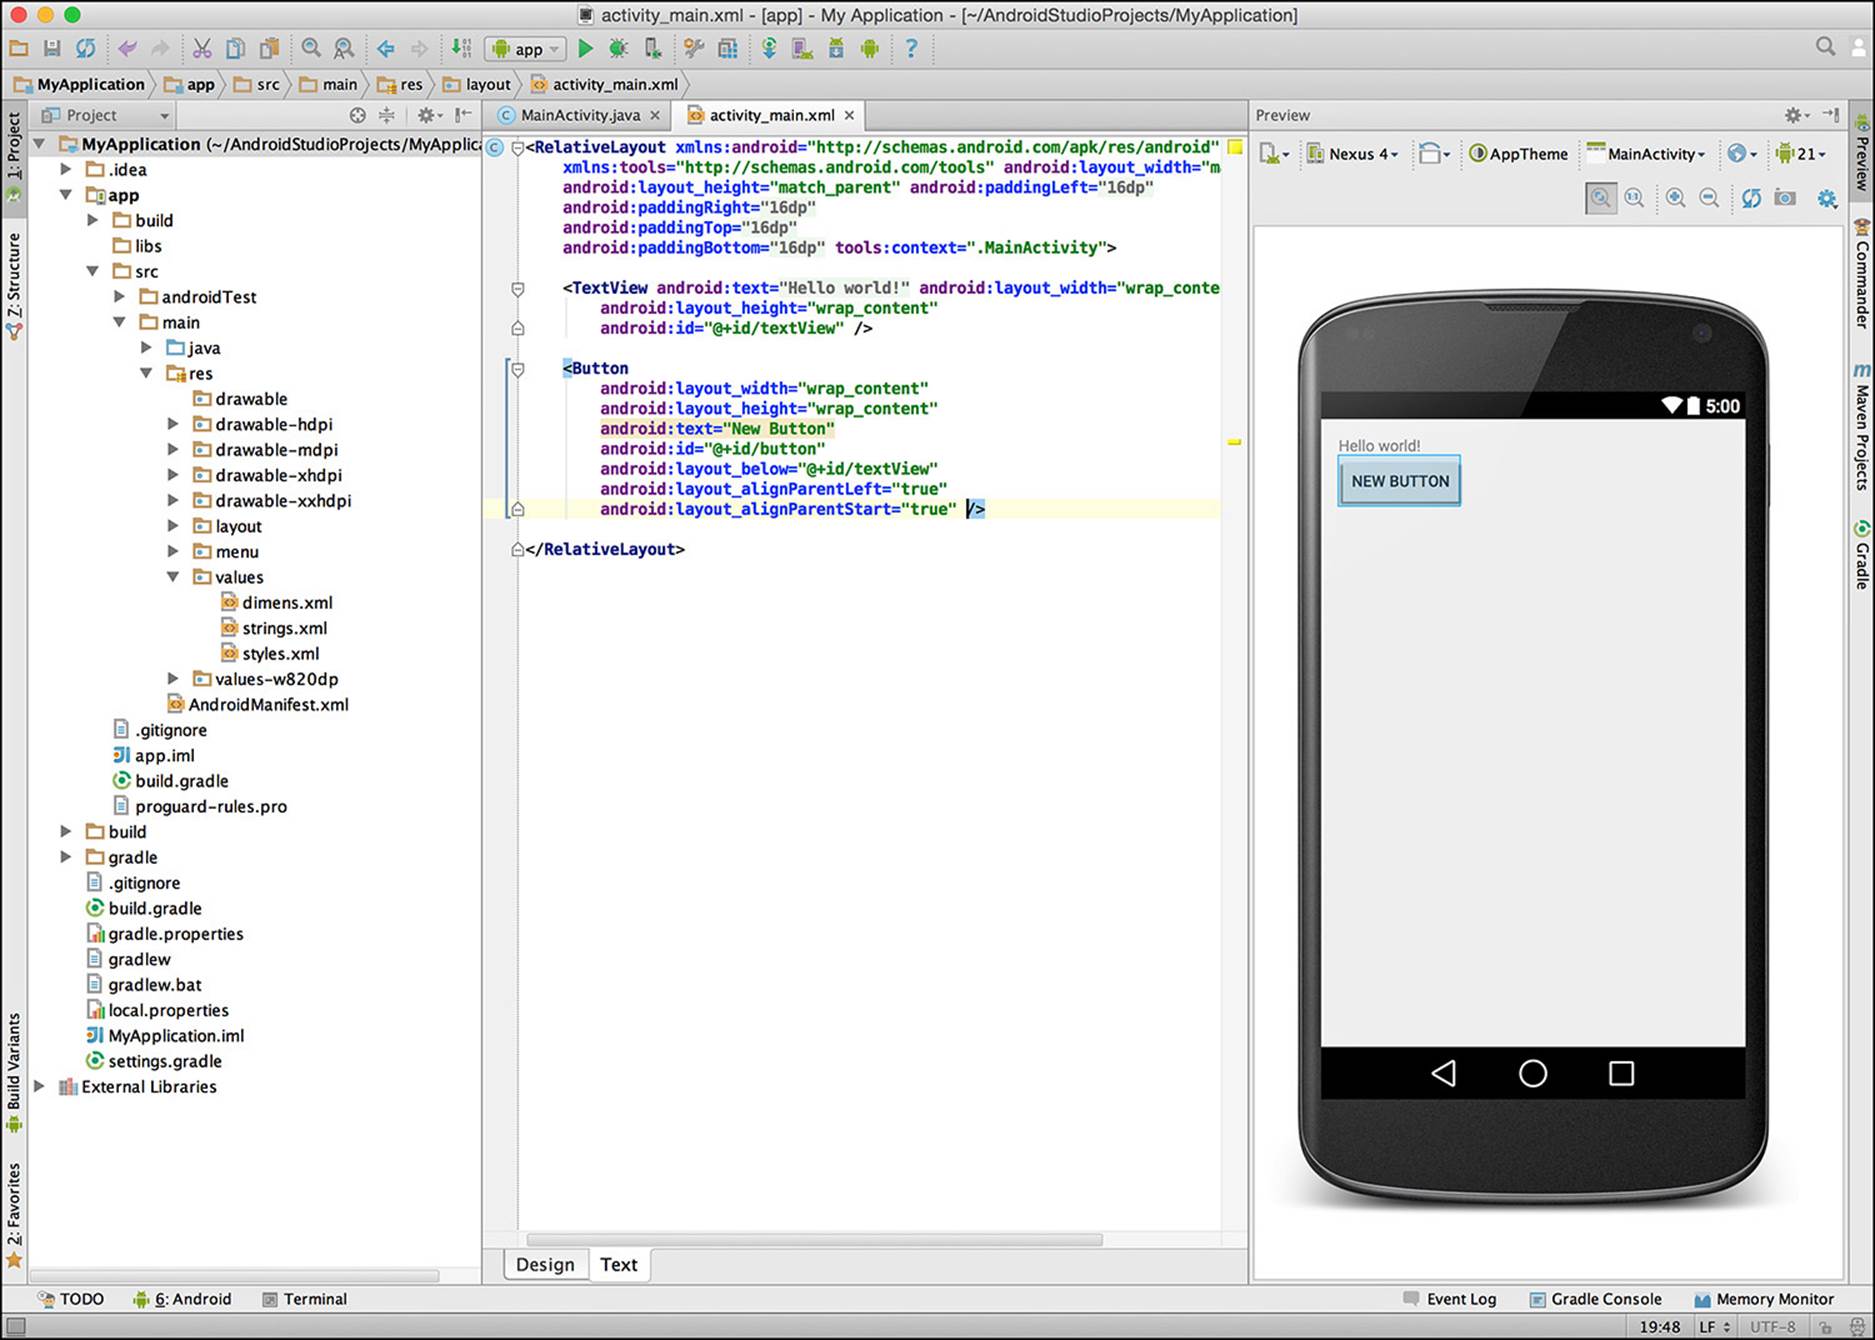
Figure 1.5 A button has been added and is displayed in the Preview pane.
Android Studio extends the IntelliJ platform, giving you the features you may already be used to as well as several new options, including the following:
![]() Auto-save functionality
Auto-save functionality
![]() Customizable panel and pane arrangement
Customizable panel and pane arrangement
![]() Code linting
Code linting
![]() Syntax highlighting
Syntax highlighting
![]() Automatic imports for classes
Automatic imports for classes
![]() ADB integration
ADB integration
![]() LogCat integration
LogCat integration
![]() Maven and Gradle build options
Maven and Gradle build options
![]() File Commander
File Commander
![]() Event Log
Event Log
![]() Memory Monitor
Memory Monitor
![]() GitHub integration
GitHub integration
![]() Bookmarks and breakpoints
Bookmarks and breakpoints
You can learn more about the features of the IDE by reading the documentation for IntelliJ IDEA at https://www.jetbrains.com/idea/documentation/.
This is done by going to the application menu and clicking File, Close Project. This immediately closes the project you are working on as well as the IDE and displays the Welcome to Android Studio window.
If you decide that you do not need Android Studio or are only interested in some of the tools bundled in the Android SDK, you may be interested in downloading and using the standalone SDK tools.
Standalone SDK Tools
You are not required to use Android Studio to develop Android applications. Other IDEs are available, and some IDEs offer an Android plugin that will handle compiling and publishing an application, provided it has access to the Android SDK.
If you find that you only need the Android SDK, you can download it as a compressed file from the download page at http://developer.android.com/sdk/. The download will be labeled as SDK Tools Only or as Other Download Option on the page.
If you are using Windows for development, you should still download the executable installation file instead of a compressed .zip file. The installation will give you easier access to the Android SDK Manager and other tools that you will need to use to keep your installation up to date. Be sure to take note of where you install the tools on your system so that you can add them to your system path, or reference them when using the command-line tools.
The standalone Android SDK Tools does not contain a complete tools install. It contains only a few folders, a readme file, and a Tools directory that you will use to download the pieces of the Android SDK that you want to work with.
To get started developing, you must download a version of Android as well as the Platform-tools. You can complete this by navigating into the Tools directory that’s executing the Android program.
Note
The entire Android SDK is several gigabytes in file size. To cut back on how much a developer needs to download in order to get started developing, the downloads have been separated into sections. These sections will help you reduce how much bandwidth you need to get started, but an Internet connection will be needed during development as patches, samples, and updates are posted to the download repository.
When you execute the android command, the Android SDK Manager will be launched. If you get an error message or nothing appears, you need to make sure you have Java installed. Linux users may need to install Java through a package manager (such as apt-get). Figure 1.6shows the Android SDK Manager window launched on OS X via the android command.
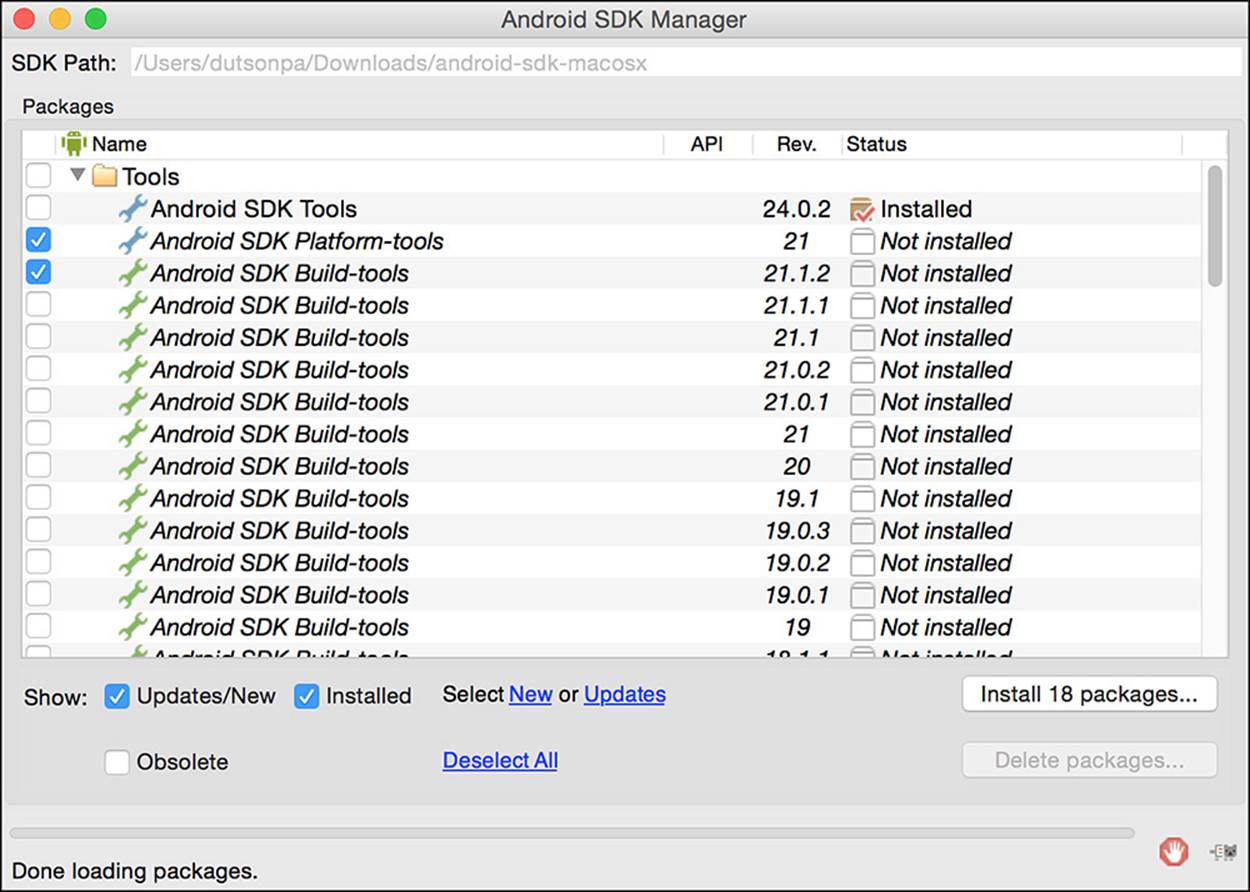
Figure 1.6 The Android SDK Manager is used to update the SDK as well as offer new packages.
After you download all the components and packages that you selected, you are ready to start using the Android SDK. Note that using the standalone SDK is best suited to advanced developers who are already familiar with building projects or ones who need specific tools such asadb and dmtracedump.
Android Device Emulation
It would be practically impossible for any developer to have every device that Android runs on in their office to use for live device testing. This is where an Android emulator can come into play.
Emulators allow developers to get a rough idea and feel for how an application is going to behave on a specific version of Android. As a developer, it gives you the opportunity to tune, tweak, and alter device settings such as system memory, screen size, screen dpi, and even some sensor information. Using an emulator is no excuse for skipping live device testing, but it certainly can be a boost to developers who would otherwise be unable to test their applications on device models that they do not actually have.
Android Virtual Device
The Android Virtual Device (AVD) is the emulator available through the Android SDK. AVDs are managed through the AVD Manager, which can be launched directly from Android Studio by finding the icon for AVD Manager. Alternatively, you can launch it from the command line by navigating to the “tools” directory of your Android SDK and executing android avd.
Note that when you use the android avd command, the manager launched will be different from the AVD Manager launched from Android Studio. To launch the AVD Manager from Android Studio, you can either click the AVD Manager button or select Tools, Android, AVD Manager.
By launching the AVD Manager from Android Studio, you can see what virtual devices are currently available for use. If you have not created a virtual device yet or if a default virtual device is not available, you need to click the Create Virtual Device button to launch the configuration wizard. The wizard will allow you to create a virtual phone, tablet, Wear device, or TV. After selecting the type of device you would like to emulate, you can then choose to create a new hardware profile, import a hardware profile, clone a device, or continue the setup.
Cloning a device creates a copy of the basic settings and allows you to change the device skin. If you choose a device that already exists and click the Next button, you are given the option of choosing the version of Android as well as the chip architecture that the emulator will run on. Clicking the Next button shows you a page that allows you to name the AVD, shows you a summary of the device settings, lets you adjust the scale of the device, and gives you the choice of either using your GPU to help with processing or creating a snapshot of the device that will be used for a faster boot time. You can only use one of these settings at a time, so you need to decide whether having a fast boot or having potentially better performance while using the emulator is more important to you. You can always edit the AVD later to use the other option if you find that one option is not working out for you.
Note
Scaling the device can be useful for developers who are working on laptops or smaller screen devices that may not be able to accurately demonstrate the raw pixel resolution of modern Android devices. If you select “Auto” for scale, your emulator will adjust itself as best as it can to fit your screen.
When you finish modifying your AVD, you can click the Finish button to complete the wizard and wait while the AVD is created and stored. To start an AVD, click the Play button, and the emulator window will appear with a skinned AVD. Figure 1.7 shows an AVD of a Nexus 6 running.
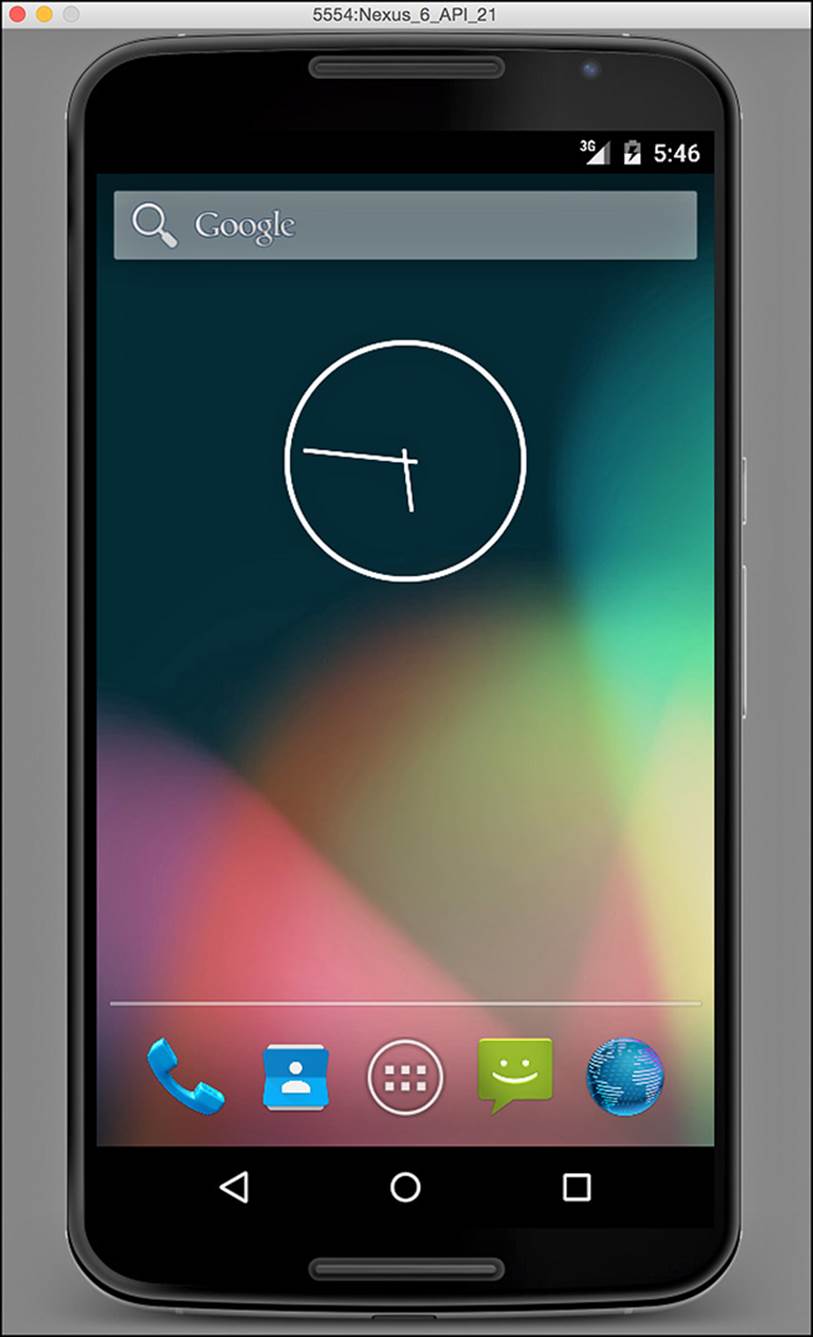
Figure 1.7 The AVD has scaled the displayed resolution to fit my screen and has been skinned to match a Nexus 6.
GenyMotion
GenyMotion is another Android emulator that uses Oracle VM VirtualBox as a platform for launching and controlling Android images. When using GenyMotion, the first thing you might notice is how fast the emulator is. By leveraging a different VM process than AVD, you are given an emulator that achieves a near real-time response.
To get started with GenyMotion, you should first download Oracle VM VirtualBox by visiting https://www.virtualbox.org/wiki/Downloads and downloading the binary package for your system. After downloading and installing the package, you can then get the GenyMotion installation file from https://www.genymotion.com/.
GenyMotion is available for developers under various license agreements. If you are just going to try GenyMotion, you can use the Free license, which grants you access to a limited emulator that lets you launch an application but will not grant you priority support and will not give you the right to use the emulator for commercial projects.
The Business license will give you many more options, such as multi-touch, screen-casting, Java API access, and priority support. This is not a fixed cost, but is sold as a subscription.
There is also an Indie license that is available for developers who want to use all of the features of GenyMotion but do not have a company or business to reimburse the cost and who only have one or two developers.
When trying GenyMotion, you should start with the Free license to get a taste and then move to either an Indie or Business license, as your situation allows. You should also know that GenyMotion has plugins for both IntelliJ and Eclipse, allowing you to use it inside of Android Studio as your emulator of choice.
After you have installed Oracle VM VirtualBox and GenyMotion, you can launch the GenyMotion application. When it launches for the first time, you will be asked if you would like to download an emulator. If you want to download one of the pre-built and tuned emulators, you should click the Yes button. You will then be prompted for a login. GenyMotion does require that you register with them in order to download emulators. Note that registration is easy and is required when managing your license.
After entering in your user information, you will be able to choose what emulator you would like to download. To help you quickly get the one you want, you can use the sorting options for API level and device type. Continuing through the emulator-creation wizard will start a download of the device you have picked. When the image download has completed, you can launch your emulator by selecting it and clicking the Start button.
GenyMotion is definitely worth checking out, especially if you need to have a fast emulator that will run as fast as a physical device.
Xamarin Android Player
Xamarin is typically thought of as the framework used for cross-platform or as the go-to solution for writing Android applications with C#. Xamarin has also released an emulator that can pair with any IDE or development solution that uses adb.
The Xamarin Android Player is not as full featured as other emulation options; however, it is under active development, with features being added as development continues. It currently runs in a similar fashion to GenyMotion, which means that it requires Oracle VM VirtualBox installed for use. Unlike with GenyMotion, if Oracle VM VirtualBox is not already installed on your system, it will be downloaded and the installation started for you. For information about the installation process and using the program, you should visit the Xamarin Android Player documentation page at http://developer.xamarin.com/guides/android/getting_started/installation/android-player/.
Because Android Player is a solution from Xamarin, you must have an active Xamarin. Android trial or subscription in order to use it. Windows (both 32- and 64-bit) and OS X (10.7+) are both supported. You can learn more about the Xamarin Android Player by visitinghttps://xamarin.com/android-player.
Version-Control Systems
The need for using a code repository should seem pretty straightforward, but for some developers it may take a hard-drive failure or an accident for them to realize why having a code storage solution is a must when developing.
Many types of code repositories are available, including CVS, SVN, Git, Mercurial, and others. The following is breakdown of a few code repository solutions that are available for use with your Android development.
Subversion
Subversion (https://subversion.apache.org/) is still a fairly common version-control system that is compatible with several different clients. It was created in 2000 by CollabNet and is managed by the Apache Foundation today. There are plugins for Eclipse, IntelliJ, and even plugins that incorporate into the system shell. Subversion is commonly referred to as SVN and creates “shadow” copies of every file that enters revision control. These files are used for comparison and recovery; however, they take the same space as the actual file. This means that on your system you will need twice as much space for your project when using SVN.
There are several options for using SVN; some solutions are available through cloud storage whereas others are available as an enterprise or in-house solution. Although SVN is generally installed on a Linux server, there are some distributions, such as VisualSVN, that allow for your SVN server to run in a Windows environment.
Subversion offers the following features:
![]() Ignore file list managed with an .svnignore file
Ignore file list managed with an .svnignore file
![]() Branches
Branches
![]() Versioning
Versioning
![]() Merge tracking
Merge tracking
![]() Tagging
Tagging
![]() Command-line and client access
Command-line and client access
Git
Git (http://git-scm.com/) takes a different approach to version-control systems. Instead of being reliant on having a centralized code repository, it distributes itself to each user. It was initially created in 2005 by Linus Torvalds for Linux kernel development. In the time since, it has become one of the most popular code repository systems.
Although there is still a centralized location, each user creates a local “clone” of the remote repository and works against the local version. This means that changes are committed locally and when ready are “pushed” to the remote resource. The benefit is that users are able to workabstractly and then send “pull requests” to the remote system when a fix or change is ready to be added to the main repository.
Git is available for free through the GNU General Public License version 2; however, you can find online hosts that will offer personal storage with public projects or private hosting for a fee.
Git offers the following features:
![]() Distributed repositories through cloning
Distributed repositories through cloning
![]() Command-line and client access
Command-line and client access
![]() Forking projects
Forking projects
![]() Ignore file list through .git configuration
Ignore file list through .git configuration
![]() Context switching
Context switching
![]() Branching
Branching
Mercurial
Another option for your version-control system is Mercurial (http://mercurial.selenic.com/). Mercurial runs quite similarly to Git in that each developer is given a local copy of the repository to work with, only sending changes up to the remote location when branches or merges are final.
Mercurial is written in Python and has a client available for Windows, Linux, and OS X. Being written in Python also makes the system extensible through plugins, which can be found on the Mercurial wiki site or by writing your own.
Mercurial offers the following features:
![]() Distributed repositories
Distributed repositories
![]() Branching
Branching
![]() Merging
Merging
![]() Workflows
Workflows
Summary
This chapter introduced you to the tools you need to start developing Android applications. You learned about Android Studio, the supported platform from the Android team that is based on IntelliJ IDEA Community Edition. You learned about installing the standalone SDK tools for use with your own IDE or build tools. You also learned that version-control systems can be leveraged to help you keep your code in a safe state for recovery and sharing.
All materials on the site are licensed Creative Commons Attribution-Sharealike 3.0 Unported CC BY-SA 3.0 & GNU Free Documentation License (GFDL)
If you are the copyright holder of any material contained on our site and intend to remove it, please contact our site administrator for approval.
© 2016-2026 All site design rights belong to S.Y.A.