Android Wearable Programming (2015)
Chapter 4. Sending and Syncing Data
This chapter will provide you with the background and understanding of how you can effectively build applications that communicate between the Android handheld device and the Android wearable, send messages and compressed blob image data over Bluetooth to the Android wearable device, and then present this information within the wearable watch face area.
Android Wear comes with a number of APIs that will help to make communicating between the handheld and the wearable a breeze. We will be learning the differences between using MessageAPI, which is sometimes referred to as a "fire and forget" type of message, and DataLayerAPI that supports syncing of data between a handheld and a wearable, and NodeAPI that handles events related to each of the local and connected device nodes.
We will learn how to use DataLayerAPI to send an image from our handheld device to the wearable device, and then use MessageAPI, which will enable us to send and receive messages between the handheld and the wearable using the DataAPI event methods.
This chapter includes the following topics:
· Creating an Android wearable app to send and receive information
· Setting up the UI for our handheld app
· Setting up the UI for our Android wearable
· Establishing communication between the handheld and the wearable
· Sending and receiving messages between the handheld and the wearable device
· Sending and receiving images sent from the handheld to the wearable device
Creating a wearable send and receive application
In this section, we will take a look at how to create an Android wearable application that will send an image and a message, and display this on our wearable device. In the next sections, we will take a look at the steps required to send data to the Android wearable using DataAPI, NodeAPI, and MessageAPIs.
Firstly, create a new project in Android Studio by following these simple steps:
1. Launch Android Studio, and then click on the File | New Project menu option.
2. Next, enter SendReceiveData for the Application name field.
3. Then, provide the name for the Company Domain field.
4. Now, choose Project location and select where you would like to save your application code:
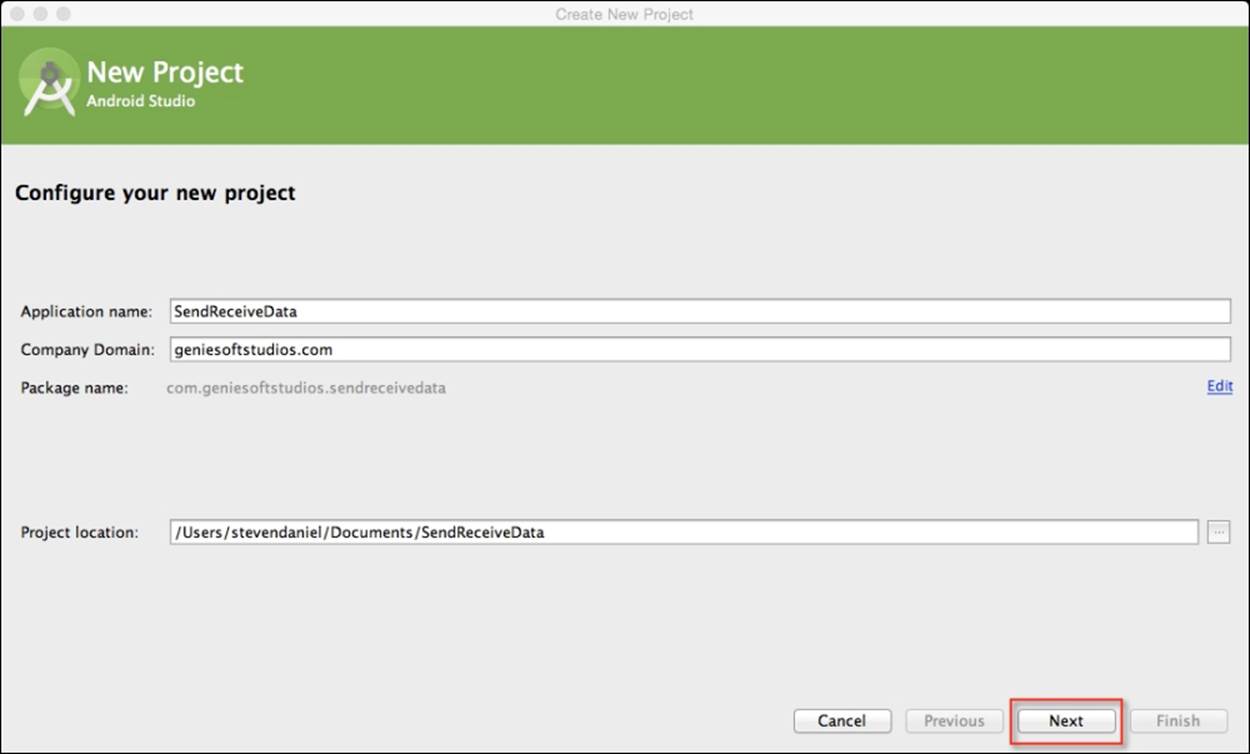
5. Click on the Next button to proceed to the next step.
Next, we will need to specify the form factors for our phone/tablet and Android Wear devices using which our application will run. On this screen, we will need to choose the minimum SDK version for our phone/tablet and Android Wear.
6. Click on the Phone and Tablet option and choose API 19: Android 4.4 (KitKat) for Minimum SDK.
7. Click on the Wear option and choose API 21: Android 5.0 (Lollipop) for Minimum SDK:
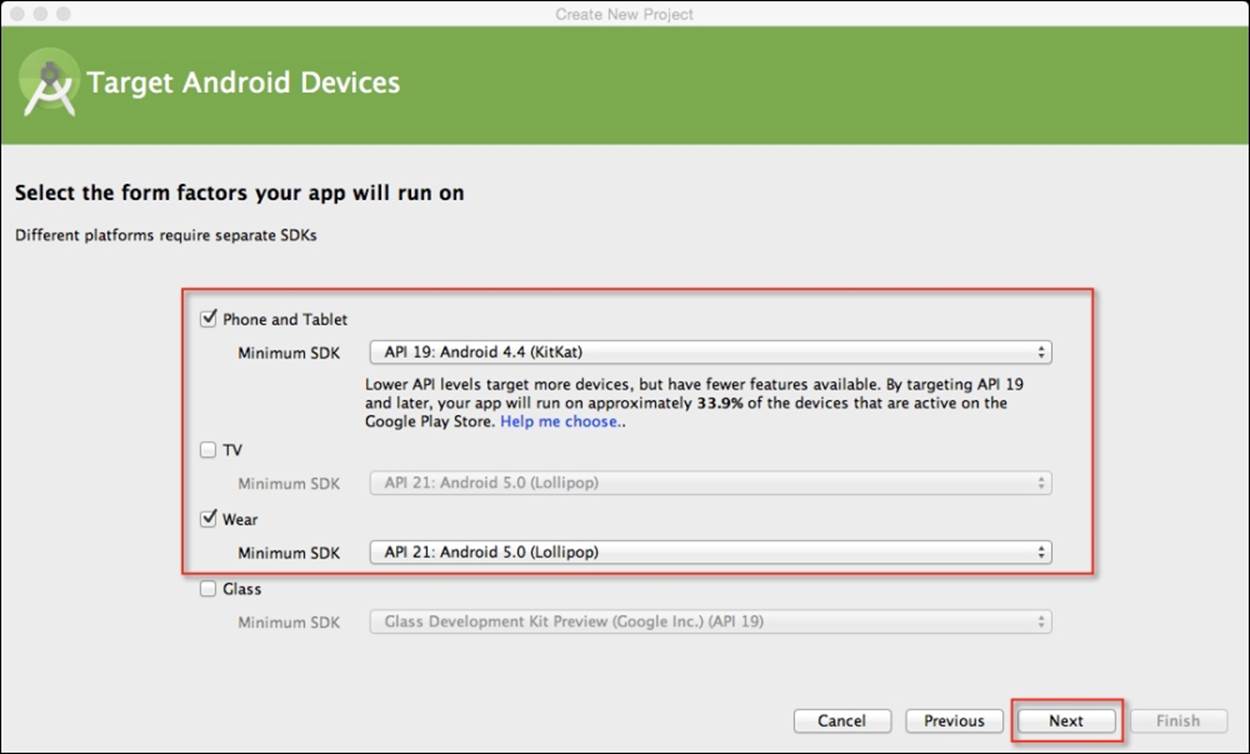
8. Click on the Next button to proceed to the next step.
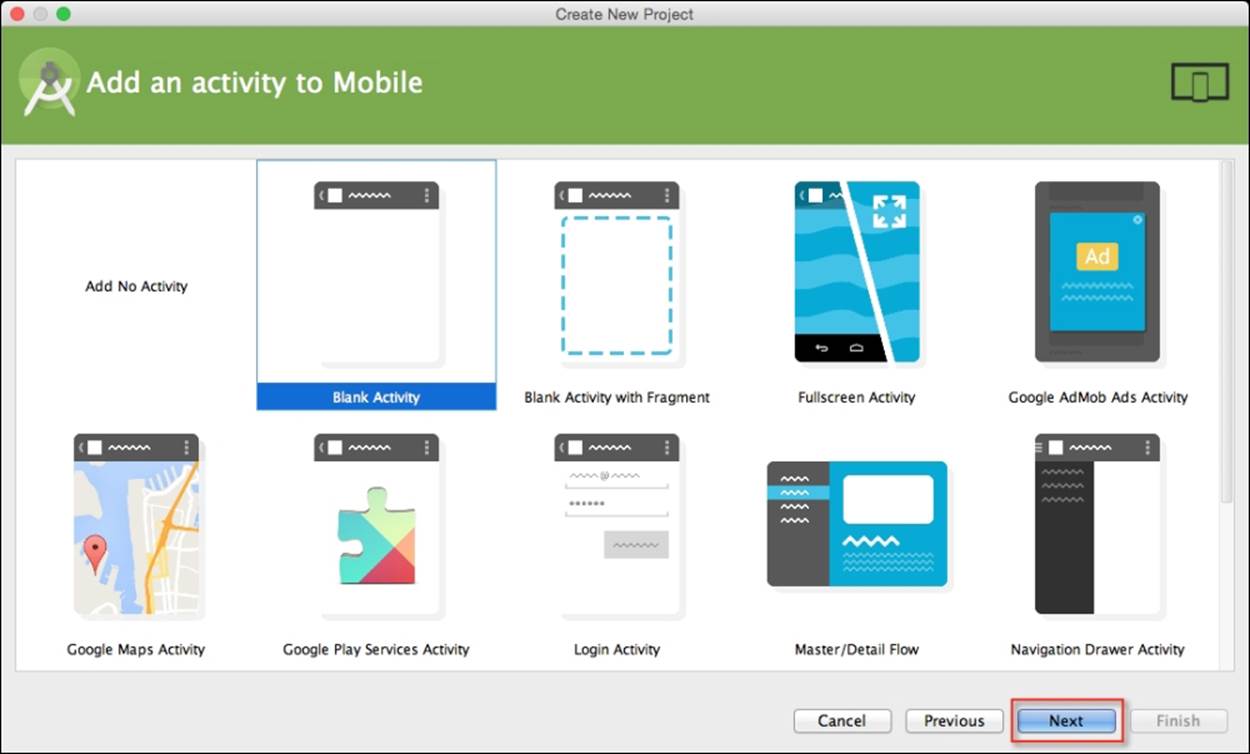
In our next step, we will need to add Blank Activity to our application project for the mobile section of our app.
9. From the Add an activity to Mobile screen, choose the Add Blank Activity option from the list of activities shown and click on the Next button to proceed to the next step:
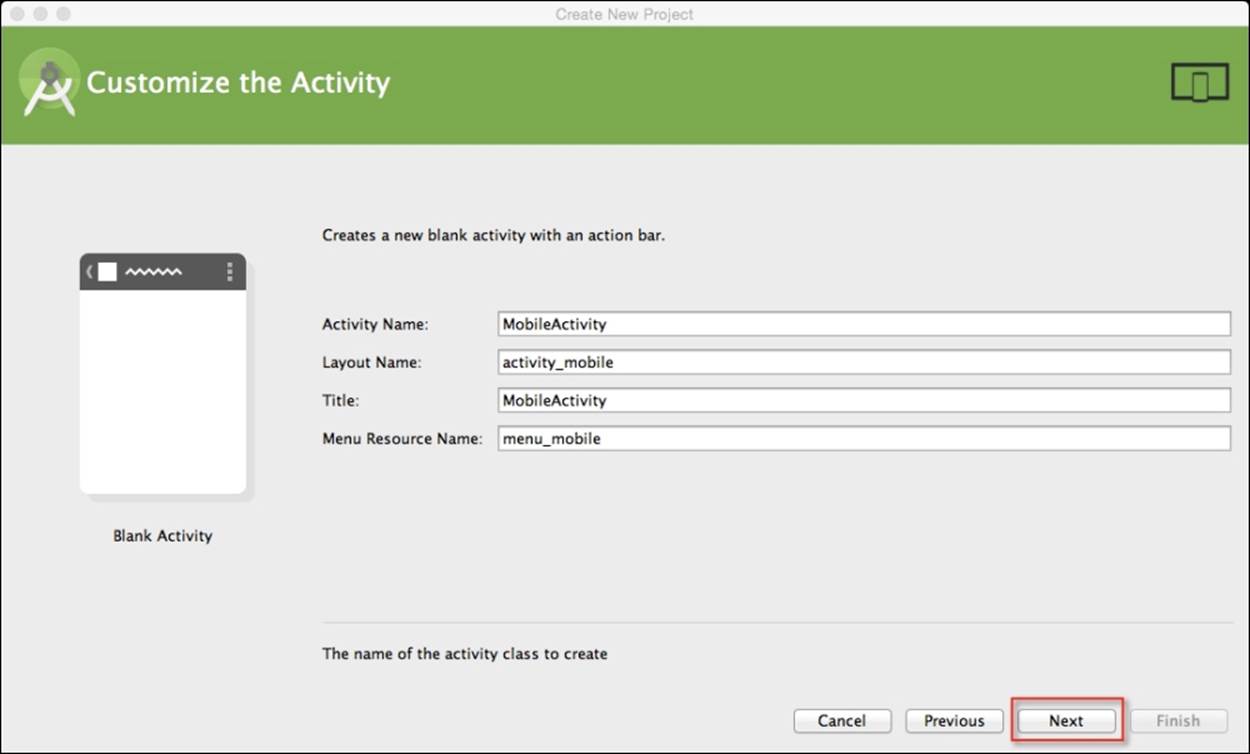
Next, we need to customize the properties for Blank Activity so that it can be used by our application. Here we will need to specify the name of our activity, layout information, title, and menu resource file.
10. From the Customize the Activity screen, enter MobileActivity for Activity Name shown and click on the Next button to proceed to the next step in the wizard:
In the next step, we will need to add Blank Activity to our application project for the Android wearable section of our app.
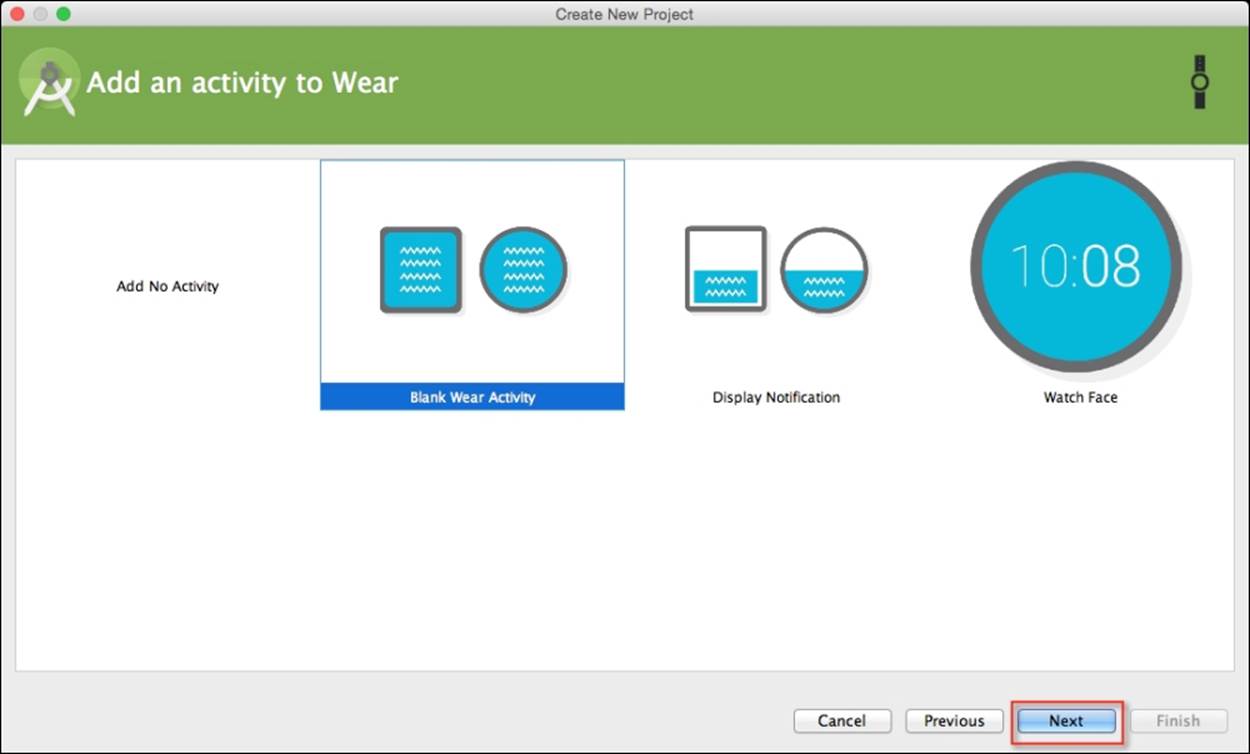
11. From the Add an activity to Wear screen, choose the Blank Wear Activity option from the list of activities shown and click on the Next button to proceed to the next step:
Next, we need to customize the properties for Blank Wear Activity so that our Android wearable can use it. Here we will need to specify the name of our activity and the layout information.
12. From the Customize the Activity screen, enter WearActivity for Activity Name shown and click on the Next button to proceed to the next step in the wizard:

13. Finally, click on the Finish button and the wizard will generate your project and after a few moments, the Android Studio window will appear with your project displayed.
Creating a UI for the mobile activity
In this section, we need to build the UI for the Android handheld activity section of our application. This will enable us to communicate and send messages and images between the Android wearable and the Android handheld device.
To create the user interface for the mobile activity, follow these simple steps:
1. From the Project Navigator window, choose the mobile section and open the activity_mobile.xml file that is located in the res | layout folder, and add the following highlighted code:
2. <RelativeLayout xmlns:android="http://schemas.android.com/apk/res/android"
3. xmlns:tools="http://schemas.android.com/tools" android:layout_width="match_parent"
4. android:layout_height="match_parent" android:paddingLeft="@dimen/activity_horizontal_margin"
5. android:paddingRight="@dimen/activity_horizontal_margin"
6. android:paddingTop="@dimen/activity_vertical_margin"
7. android:paddingBottom="@dimen/activity_vertical_margin" tools:context=".MobileActivity">
8.
9. <EditText
10. android:layout_width="wrap_content"
11. android:layout_height="wrap_content"
12. android:inputType="textMultiLine"
13. android:minEms="10"
14. android:id="@+id/send_message_input"
15. android:layout_marginTop="87dp"
16. android:layout_alignParentTop="true"
17. android:layout_centerHorizontal="true" />
18. <Button
19. android:layout_width="wrap_content"
20. android:layout_height="wrap_content"
21. android:text="@string/send_message_button"
22. android:id="@+id/send_message_button"
23. android:layout_below="@+id/send_message_input"
24. android:layout_centerHorizontal="true" />
25. <Button
26. android:layout_width="wrap_content"
27. android:layout_height="wrap_content"
28. android:text="@string/send_image_button"
29. android:id="@+id/send_image_button"
30. android:layout_below="@+id/send_message_button"
31. android:layout_centerHorizontal="true" />
</RelativeLayout>
32. Again from the Project Navigator window, choose the mobile section, open the strings.xml file that is located in the res | values folder, and add the highlighted code as follows:
33.<resources>
34. <string name="app_name">SendReceiveData</string>
35. <string name="action_settings">Settings</string>
36. <string name="send_image_button">Send an image to
37. Android Wear</string>
38. <string name="send_message_button">Send the
39. Message to Android Wear</string>
40. <string name="send_message_text">Enter a message
41. to send</string>
</resources>
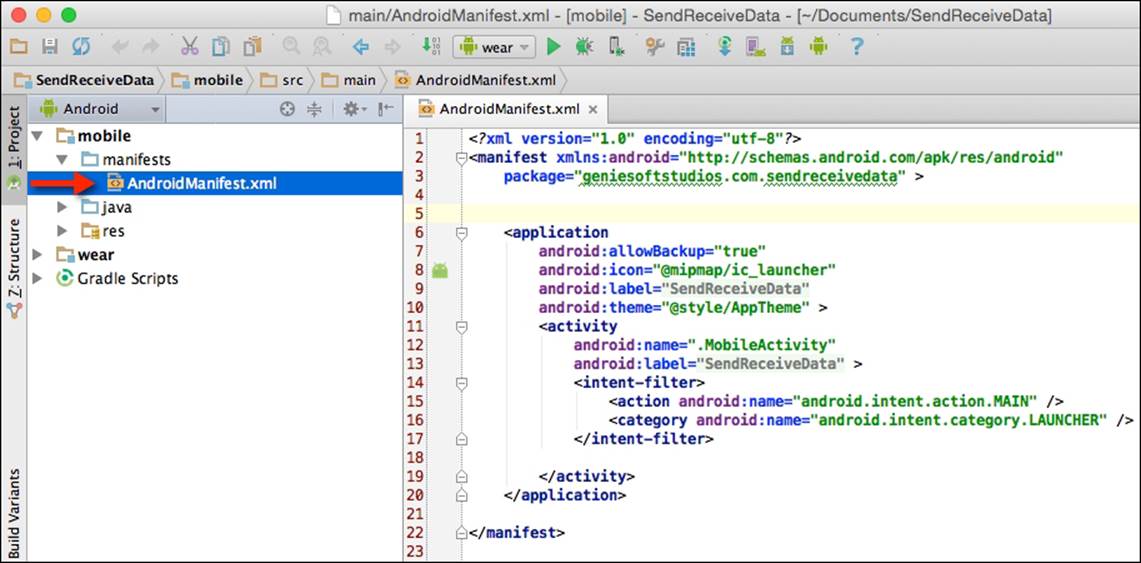
42. In the same Project Navigator window, choose the mobile section, select the manifests folder, and then select the AndroidManifest.xml file as shown in the following screenshot:
43. Next, under the manifest section of the mobile handheld app, we need to include permissions to allow our app to run within the handheld device. Enter the following permission:
<uses-permission android:name="android.permission.INTERNET"></uses-permission>
44. Now, modify the <application> section of the handheld app and enter the code sections highlighted in the following snippet:
45.<application
46. android:allowBackup="true"
47. android:icon="@mipmap/ic_launcher"
48. android:label="@string/app_name"
49. android:theme="@style/AppTheme" >
50. <activity
51. android:name=".MobileActivity"
52. android:label="@string/app_name" >
53. <intent-filter>
54. <action
55. android:name="android.intent.action.MAIN" />
56. <category
57. android:name="android.intent.category.LAUNCHER" />
58. </intent-filter>
59. <meta-data
60. android:name="com.google.android.gms.version"
61. android:value="@integer/google_play_services_version"/>
62. </activity>
</application>
In our next section, we will need to create the user interface for the wearable portion of our application. This will be used to display messages and images sent from the handheld device to the wearable watch area.
Creating a UI for the wear activity
In this section, we need to build the user interface for the Android wearable activity section of our application. This will enable us to receive messages and images sent from the Android handheld device and have this information presented within the Android wearable watch area.
Perform the following steps:
1. From the Project Navigator window, open the rect_activity_wear.xml file that is located in the res | layout folder, and add the following code:
2. <?xml version="1.0" encoding="utf-8"?>
3. <RelativeLayout
4. xmlns:android="http://schemas.android.com/apk/res/android"
5. xmlns:tools="http://schemas.android.com/tools"
6. android:layout_width="match_parent"
7. android:layout_height="match_parent"
8. android:orientation="vertical"
9. tools:context=".WearActivity"
10. tools:deviceIds="wear_square">
11.
12. <TextView
13. android:layout_width="92dp"
14. android:layout_height="31dp"
15. android:minEms="10"
16. android:id="@+id/received_message_input"
17. android:layout_marginTop="20dp"
18. android:layout_alignParentTop="true"
19. android:layout_centerHorizontal="true"
20. android:layout_gravity="center_horizontal" />
21.
22. <ImageView
23. android:layout_width="111dp"
24. android:layout_height="95dp"
25. android:id="@+id/received_image_input"
26. android:layout_below="@+id/received_message_input"
27. android:adjustViewBounds="false"
28. android:layout_marginLeft="10dp"
29. android:layout_marginTop="20dp"
30. android:layout_marginRight="10dp"
31. android:layout_marginBottom="100dp"
32. android:layout_gravity="center_horizontal" />
</RelativeLayout>
33. Next, open the round_activity_wear.xml file that is located in the res | values folder within Project Navigator and add the code sections as follows:
34.<?xml version="1.0" encoding="utf-8"?>
35.<RelativeLayout xmlns:android="http://schemas.android.com/apk/res/android"
36.xmlns:tools="http://schemas.android.com/tools" android:layout_width="match_parent"
37.android:layout_height="match_parent" tools:context=".WearActivity" tools:deviceIds="wear_round">
38.
39. <TextView
40. android:layout_width="wrap_content"
41. android:layout_height="wrap_content"
42. android:minEms="10"
43. android:id="@+id/received_message_input"
44. android:layout_marginTop="87dp"
45. android:layout_alignParentTop="true"
46. android:layout_centerHorizontal="true" />
47. <ImageView
48. android:layout_width="match_parent"
49. android:layout_height="match_parent"
50. android:id="@+id/received_image_input"
51. android:layout_below="@+id/received_message_input"/>
52.
</RelativeLayout>
53. Now from the Project Navigator window, choose the wear section, select the manifests folder, and then select the AndroidManifest.xml file as shown in the following screenshot:
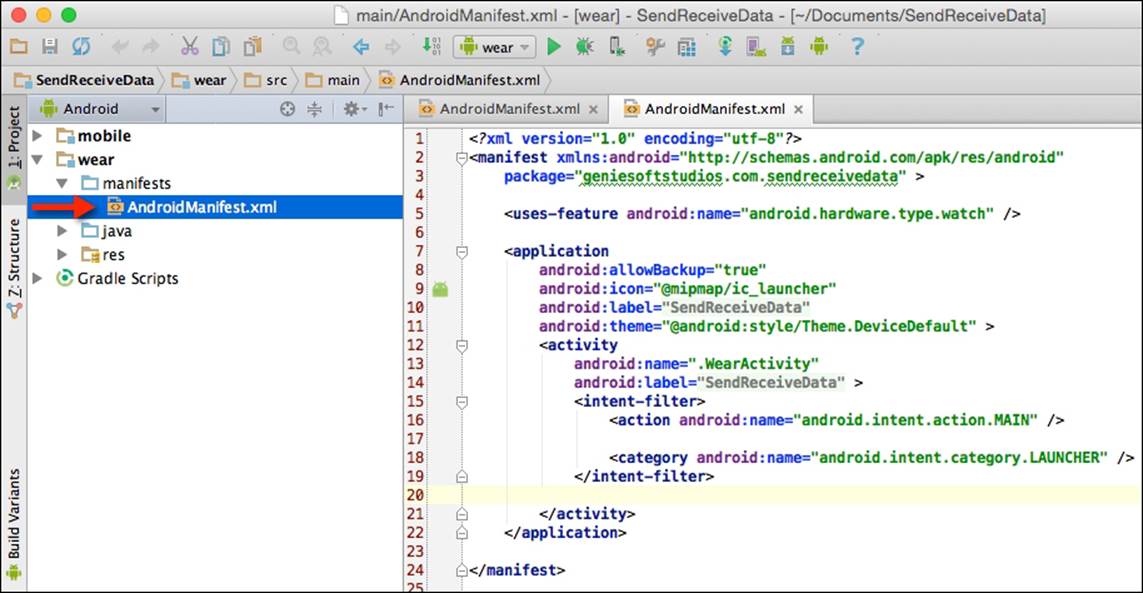
54. Then, modify the <application> section of the wearable app, and enter the following highlighted code sections:
55.<application
56. android:allowBackup="true"
57. android:icon="@mipmap/ic_launcher"
58. android:label="@string/app_name"
59. android:theme="@android:style/Theme.DeviceDefault" >
60. <activity
61. android:name=".WearActivity"
62. android:label="@string/app_name" >
63. <intent-filter>
64. <action
65. android:name="android.intent.action.MAIN" />
66. <category
67. android:name="android.intent.category.LAUNCHER" />
68. </intent-filter>
69. <!-- Allow communication with Google Play
70. Services -->
71. <meta-data
72. android:name="com.google.android.gms.version"
73. android:value="@integer/
74. google_play_services_version"/>
75. </activity>
</application>
76. Now, from the Project Navigator window open the MobileActivity.java file as shown in the following screenshot:
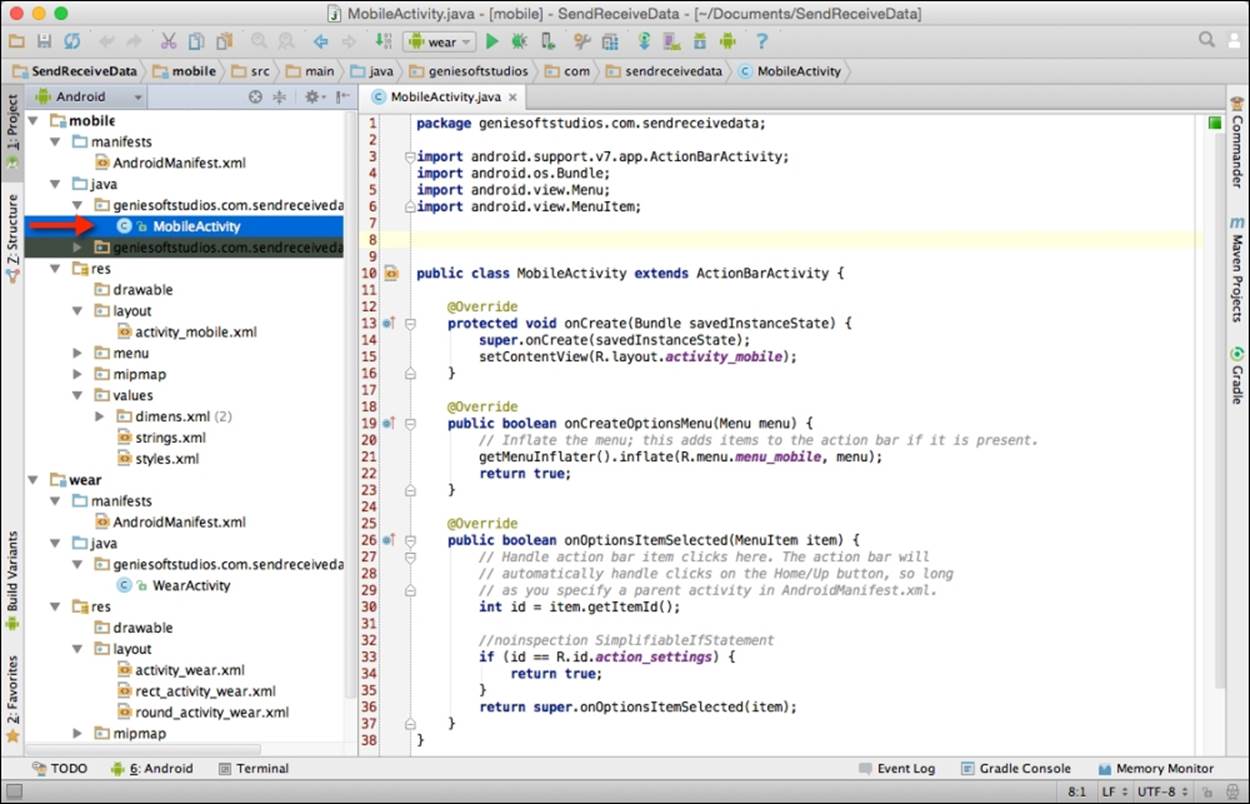
77. Then, add the following import statements to the MobileActivity.java file with the highlighted entries:
78.import android.support.v7.app.ActionBarActivity;
79.import android.os.Bundle;
80.import android.view.Menu;
81.import android.view.MenuItem;
82.import android.util.Log;
83.import android.view.View;
84.import java.io.ByteArrayOutputStream;
85.import java.net.URL;
86.import java.util.Random;
87.import com.google.android.gms.common.ConnectionResult;
88.import com.google.android.gms.common.api.GoogleApiClient;
89.import com.google.android.gms.wearable.Node;
90.import com.google.android.gms.wearable.NodeApi;
91.import com.google.android.gms.wearable.PutDataMapRequest;
92.import com.google.android.gms.wearable.Wearable;
93.import com.google.android.gms.common.api.GoogleApiClient.ConnectionCallbacks;
94.import com.google.android.gms.common.api.GoogleApiClient.OnConnectionFailedListener;
95.import com.google.android.gms.wearable.Asset;
96.import com.google.android.gms.wearable.DataMap;
97.import android.graphics.Bitmap;
98.import android.graphics.BitmapFactory;
99.import android.widget.Button;
100. import android.widget.EditText;
In the preceding code snippet, we started by adding the import statements that will be responsible for handling communication and will enable us to send messages and image data between our Android handheld device and the Android wearable. In the next section, we will be taking a look at how we can establish connections between our handheld and mobile device, as well as hook up buttons and text field controls to their associated method events.
Establishing connections for the mobile activity
Until now, we have created our project and the user interface for the mobile in our application. Also, we have set up our permissions so that our application can communicate with the Internet and Google Play Services.
In order for our app to communicate between the handheld and the Android wearable, we will need to establish a connection:
1. From the Project Navigator window, expand the mobile section, select, and expand the java section.
2. Next, double-click to open MobileActivity.java, and add the following code snippet:
3. public class MobileActivity extends ActionBarActivity {
4.
5. private GoogleApiClient mGoogleApiClient;
6. private static final String LOG_TAG = "MobileActivity";
7.
8. // establishes a connection between the mobile and wearable
9. private void initGoogleApiClient() {
10. if (mGoogleApiClient != null &&
11. mGoogleApiClient.isConnected()) {
12. Log.d(LOG_TAG, "Connected");
13. }
14. else
15. {
16. // Creates a new GoogleApiClient object with all
17. // connection callbacks
18. mGoogleApiClient = new GoogleApiClient.Builder(this)
19. .addConnectionCallbacks(new ConnectionCallbacks() {
20. @Override
21. public void onConnected(Bundle connectionHint) {
22. Log.d(LOG_TAG, "onConnected: " + connectionHint);
23. }
24. @Override
25. public void onConnectionSuspended(int
26. cause) {
27. Log.d(LOG_TAG, "onConnectionSuspended: "+ cause);
28. }
29. })
30. .addOnConnectionFailedListener(newOnConnectionFailedListener() {
31. @Override
32. public void onConnectionFailed(ConnectionResultresult) {
33. Log.d(LOG_TAG, "onConnectionFailed: " + result);
34. }
35. })
36. .addApi(Wearable.API)
37. .build();
38.
39. // Make the connection
40. mGoogleApiClient.connect();
41. }
}
42. Now, we need to create the activity callback methods that will be responsible for starting, stopping, resuming, and terminating the app, as shown in the following code snippet:
43. @Override
44. protected void onStart() {
45. super.onStart();
46. initGoogleApiClient();
47. }
48.
49. @Override
50. protected void onStop() {
51. super.onStop();
52. mGoogleApiClient.disconnect();
53. }
54.
55. @Override
56. protected void onResume() {
57. super.onResume();
58. initGoogleApiClient();
59. }
60.
61. @Override
62. protected void onDestroy() {
63. super.onDestroy();
64. mGoogleApiClient.disconnect();
}
In the preceding code snippet, we started by declaring our GoogleApiClient object variable that will be responsible for establishing and handling the connection between the Android handheld and the Android wearable device.
Next, we created our initGoogleApiClient() method that implements the GoogleApiClient.ConnectionCallbacks interface to handle all of the connection callbacks returned by GoogleApiClient. When GoogleApiClient has successfully established a connection with the wearable device, the callback method calls the onConnected method. If any errors have been detected, these will be caught by the onConnectionFailed callback method.
Then, we declare our onStart(), onStop(), onResume(), and onDestroy() activity class methods. The onStart() method will be called whenever the activity becomes visible and is displayed to the user, and the onResume() method is called after the onStart() method when the activity is displayed in the foreground. The onStop() method is called when the activity is no longer visible to the user, which happens when another activity has been resumed, or the current one is being destroyed. The onDestroy() method will be called once the activity has been removed from the activity chain, and is responsible for destroying any memory that has been previously allocated to variables from the memory.
Sending messages to the Android wearable
In this section, we will be taking a look at the steps involved in sending a message to your Android wearable device. This process is quite simple, and our next step is to write the code that will communicate between our Android wearable and the handheld device:
1. From the Project Navigator window, open the MobileActivity.java file.
2. Next, modify the onCreate(Bundle savedInstanceState) method and enter the code highlighted as follows:
3. @Override
4. protected void onCreate(Bundle savedInstanceState) {
5. super.onCreate(savedInstanceState);
6. setContentView(R.layout.activity_mobile);
7.
8. // Get a pointer to our buttons and textField
9. final Button mSendMessageButton = (Button)
10. findViewById(R.id.send_message_button);
11. final EditText mSendMessageInput = (EditText)
12. findViewById(R.id.send_message_input);
13.
14. // Set up our hint message for our Text Field
15. mSendMessageInput.setHint(R.string.send_message_text);
16. Next, we need to set up an onClickListener method in sendMessageButton as shown in the following code snippet:
17.// Set up our send message button onClick method handler
18.mSendMessageButton.setOnClickListener(new
19.View.OnClickListener() {
20. @Override
21. public void onClick(View v) {
22. // Create a new thread to send the entered message
23. Thread thread = new Thread(new Runnable()
24. {
25. @Override
26. public void run()
27. {
28. try {
29. String messageText =mSendMessageInput.getText().toString();
30. NodeApi.GetConnectedNodesResult nodes =Wearable.NodeApi.
31. getConnectedNodes(mGoogleApiClient).await();
32. for (Node node : nodes.getNodes()) {
33. result = Wearable.MessageApi.
34. sendMessage(mGoogleApiClient,
35. node.getId(), "/message",
36. messageText.getBytes() ).await();
37. }
38. runOnUiThread(new Runnable() {
39. @Override
40. public void run() {
41. mSendMessageInput.getText().clear();
42. }
43. });
44. }
45. catch (Exception e) {
46. Log.e(LOG_TAG,
47. e.getMessage());
48. }
49. }
50. });
51. // Starts our Thread
52. thread.start();
53. Log.d(LOG_TAG, "Message has been sent");
54. }
});
In the preceding code snippet, we started by declaring two objects, mSendMessageButton and mSendMessageInput. These objects contain the reference to our button and the EditTextField will hold the text entered by the user. We proceed to set some properties for each of these fields. Next, we proceed to set up a setOnClickListener object that will handle and respond to the events when the user has tapped on the Send the Message to Android Wear button.
In our next step, we create a new thread object that inherits from the Thread class that includes a run method that will be used to execute the active class and then declare a messageText string variable. This extracts the text entered by the user, and then we useNodeApi.getConnectedNodes() to get a list of all nodes that are currently connected to the device. In most cases, the getConnectedNodes() method will return back a single node, but to make this future proof we iterate over all the connected nodes to handle cases where the user may be signed in to multiple devices.
Once we have the list, we send a message to each of the nodes using Wearable.MessageApi.sendMessage that makes reference to GoogleApiClient, the current node ID, the path used to determine the type of message being sent, and finally the message payload, which is defined as a byte array. We use the await property to block our wearable UI until the task completes.
Once the message has been sent, we clear our mSendMessageInput EditText field to allow the user to continue to enter additional text. Any errors encountered will be caught in the catch (Exception e) block. Then we call the start method of our thread and display a message to our Log window to denote that the message has been sent successfully.
Receiving messages using MessageAPI
In our previous section, we looked at how we can use MessageAPI to send messages to the Android wearable. In this section, we will take a look at how we can retrieve this message and display it on our Android wearable device:
1. From the Project Navigator window, open the WearActivity.java file:
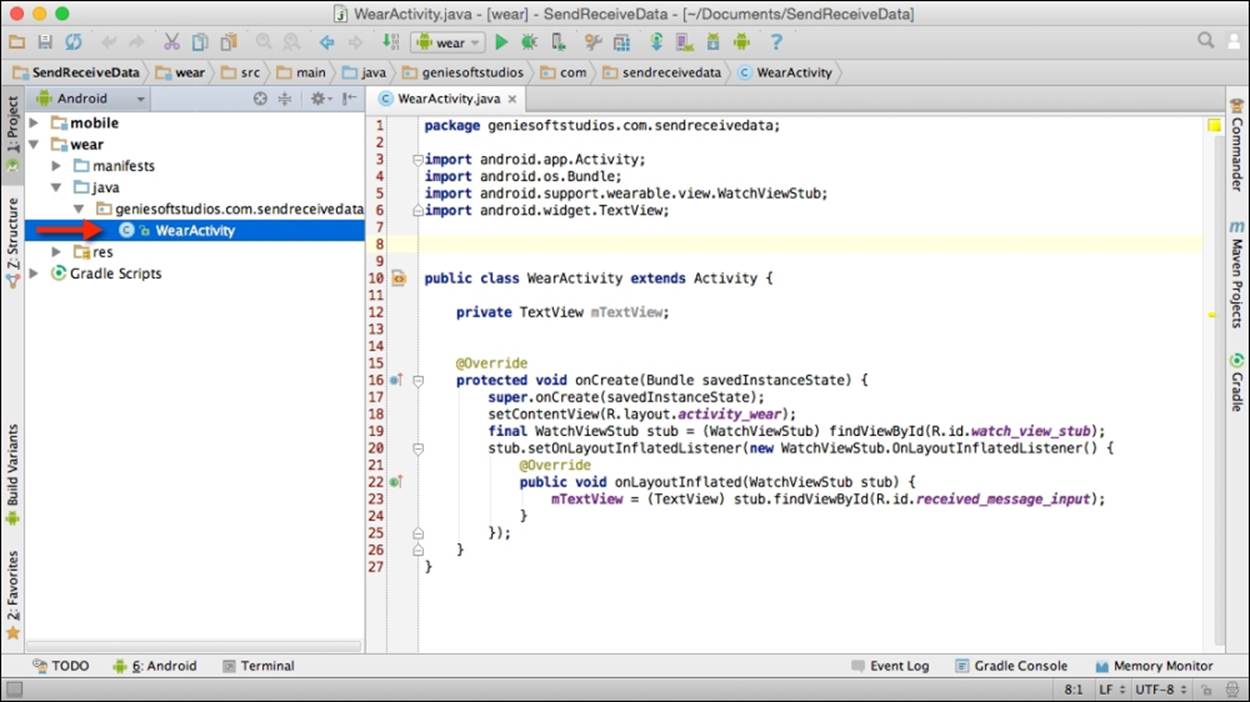
2. Next, add the following highlighted import statements in the WearActivity.java file:
3. import android.app.Activity;
4. import android.os.Bundle;
5. import android.support.wearable.view.WatchViewStub;
6. import android.widget.TextView;
7. import android.graphics.Bitmap;
8. import android.graphics.BitmapFactory;
9. import android.os.Handler;
10.import android.widget.ImageView;
11.import android.util.Log;
12.import com.google.android.gms.common.ConnectionResult;
13.import com.google.android.gms.common.api.GoogleApiClient;
14.import com.google.android.gms.wearable.Asset;
15.import com.google.android.gms.wearable.DataApi;
16.import com.google.android.gms.wearable.DataEvent;
17.import com.google.android.gms.wearable.DataEventBuffer;
18.import com.google.android.gms.wearable.DataMapItem;
19.import com.google.android.gms.wearable.MessageApi;
20.import com.google.android.gms.wearable.MessageEvent;
21.import com.google.android.gms.wearable.Wearable;
import java.io.InputStream;
22. Now, modify the WearActivity class as shown in the following code:
23.public class WearActivity extends Activity {
24.
25. private TextView mTextView;
26. private GoogleApiClient mGoogleApiClient;
27. private static final String LOG_TAG = "WearActivity";
28.
29. @Override
30. protected void onCreate(Bundle savedInstanceState) {
31. super.onCreate(savedInstanceState);
32. setContentView(R.layout.activity_wear);
33. final WatchViewStub stub = (WatchViewStub)
34. findViewById(R.id.watch_view_stub);
35. stub.setOnLayoutInflatedListener(new
36. WatchViewStub.OnLayoutInflatedListener() {
37. @Override
38. public void onLayoutInflated(WatchViewStub
39. stub) {
40. mTextView = (TextView)
41. stub.findViewById(R.id.received_message_input);
42. }
43. });
44.
45. // Establish our connection
46. initGoogleApiClient();
}
47. Here, we need to create a new initGoogleApiClient method and add the code that will be called when the watch is instantiated. This will initialize the watch area, as follows:
48.// establishes a connection between the mobile and wearable
49.private void initGoogleApiClient()
50.{
51. mGoogleApiClient = new GoogleApiClient.Builder(this)
52. .addConnectionCallbacks(new
53. GoogleApiClient.ConnectionCallbacks() {
54. @Override
55. public void onConnected(Bundle connectionHint) {
56. Log.d(LOG_TAG, "onConnected: " +
57. connectionHint);
58. Wearable.MessageApi.addListener(
59. mGoogleApiClient, messageListener);
60. }
61. @Override
62. public void onConnectionSuspended(int cause) {
63. Log.d(LOG_TAG, "onConnectionSuspended:
64. " + cause);
65. }
66. })
67. .addOnConnectionFailedListener(new
68. GoogleApiClient.OnConnectionFailedListener() {
69. @Override
70. public void onConnectionFailed(ConnectionResult
71. result) {
72. Log.d(LOG_TAG, "onConnectionFailed: "
73. + result);
74. }
75. })
76. .addApi(Wearable.API)
77. .build();
78.
79. mGoogleApiClient.connect();
}
80. Next, we need to create an onMessageReceived new method and add the following code that will be called when the wearable device receives the message from the handheld device:
81.MessageApi.MessageListener messageListener = new MessageApi.MessageListener() {
82. @Override
83. public void onMessageReceived(final MessageEvent
84. messageEvent) {
85. runOnUiThread(new Runnable() {
86. @Override
87. public void run() {
88. if (messageEvent.getPath().
89. equalsIgnoreCase("/message")) {
90. Log.i(LOG_TAG, new
91. String(messageEvent.getData()));
92. mTextView.setText(new
93. String(messageEvent.getData()));
94. }
95. }
96. });
97. }
};
98. Now, we need to create the onStop method that will handle clean up and destruction of our GoogleApiClient connections:
99.@Override
100. protected void onStop() {
101. super.onStop();
102. mGoogleApiClient.disconnect();
}
103. Next, we need to create the onDestroy method that will handle clean up and destruction of our GoogleApiClient connections.
104. @Override
105. protected void onDestroy() {
106. super.onDestroy();
107. mGoogleApiClient.disconnect();
}
108. In this step, we need to install the app on both Android handheld device and Android wearable device so that messages can be communicated between them. Choose the mobile configuration from the drop-down menu as shown in the following screenshot:
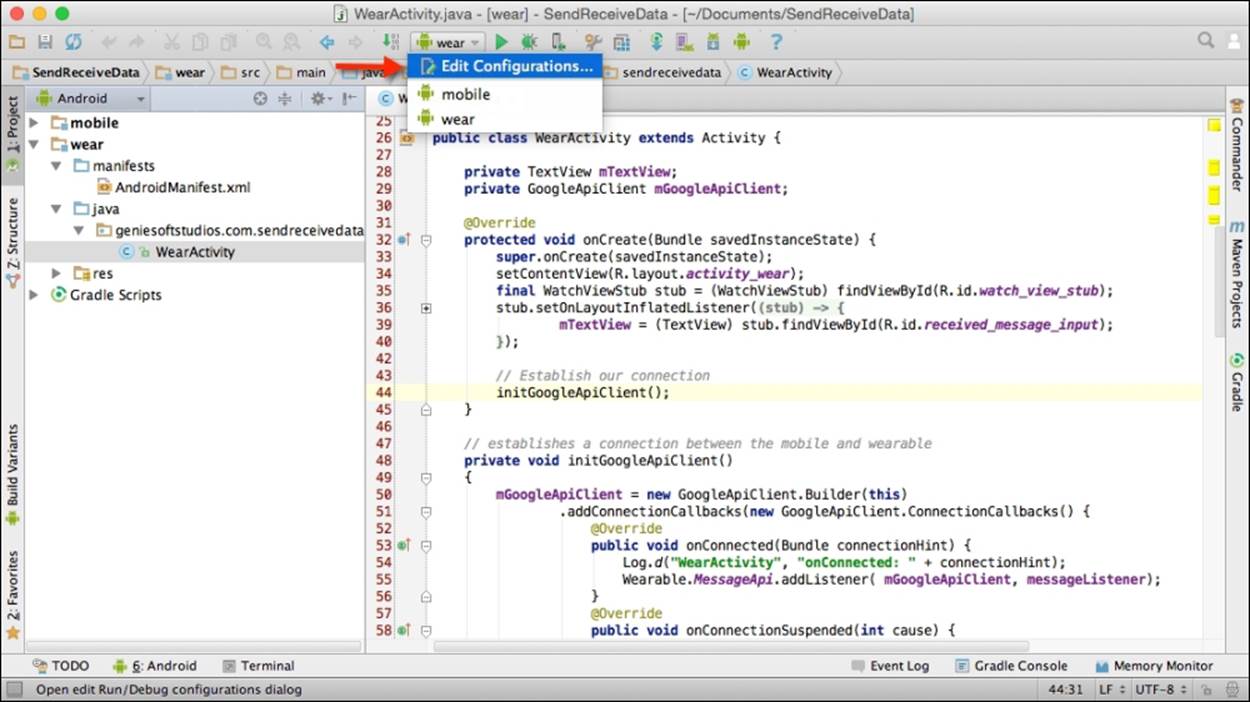
109. Then, install the app on our Android wearable device by following the same steps that we did for our Android handheld device, but choose the wear configuration from the drop-down menu as shown in the preceding screenshot.
In the preceding code snippet, we start by getting a reference to our mTextView object that will be used to display the message received from the Android handheld device. Next, we make a call to our initGoogleApiClient method that is responsible for establishing connection between our Android handheld and wearable device. Once the GoogleApiClient object has established a successful connection, the onConnected method is called where we set up a listener service on our MessageApi that will capture any messages our wearable class receives, and these will be handled by the onMessageReceived method.
In our next step, we create a new messageListener object that inherits from the MessageApi.MessageListener class that includes a onMessageReceived method. This method will be responsible for receiving messages sent from the Android handheld device and accepts amessageEvent variable that contains the message data object.
The runOnUiThread method is called only when a message data object has been received. Then we use getPath to get the path on which the message is being delivered and compare this to the path that we declared within our mobile activity class.
Next, we use the getData method to get the data passed by the message and then display this message on our Log window to denote that the message has been received successfully. This is done before assigning the contents of the message to our mTextViewobject, so that this can be displayed within the watch area. Next, we create the onStop() method that will be called when the activity is no longer visible to the user, or the GoogleApiClient variable has been destroyed by the onDestroy method.
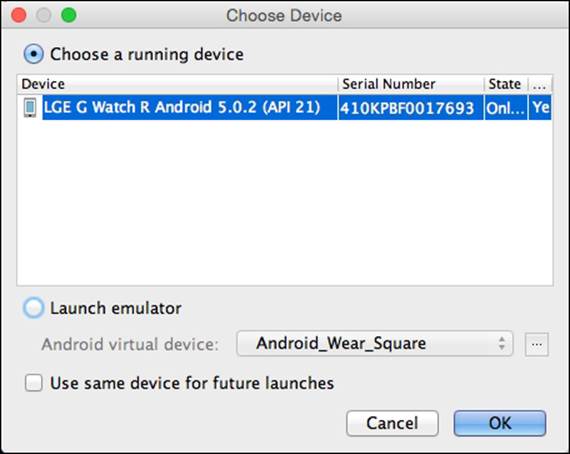
Finally, we can begin to compile, build, and run our application. Simply press CMD + F9 and choose your AVD or Android wearable device from the list of available devices as shown in the following screenshot:
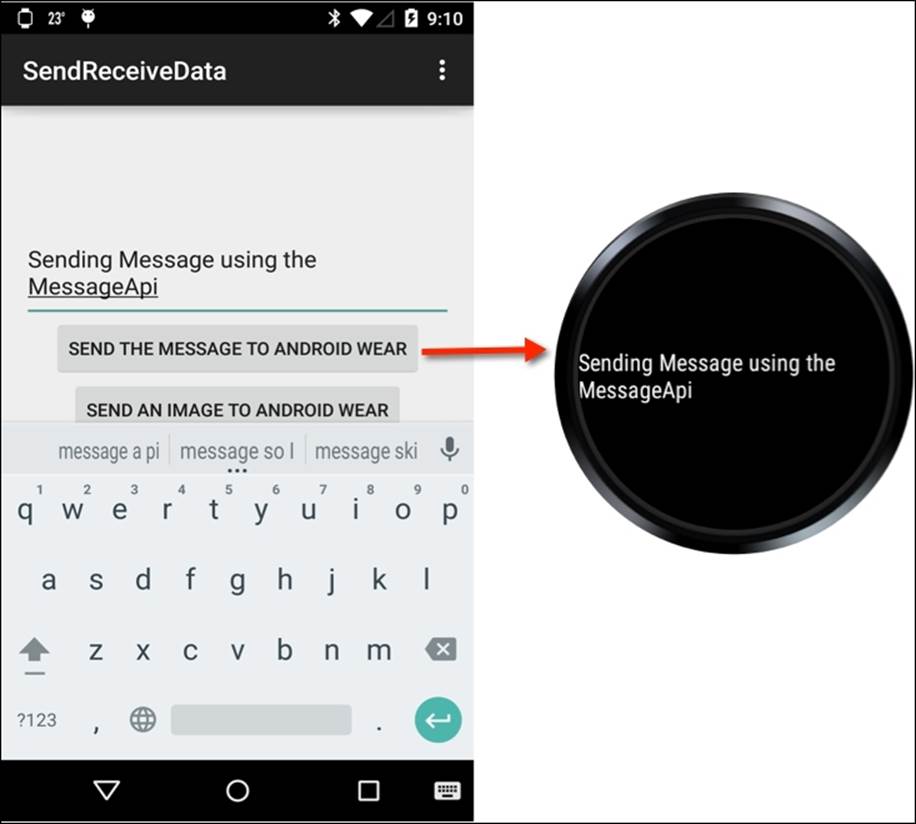
Once the wearable app has been installed on the Android handheld and Android wearable devices, you should see your entered message appear within the watch area, as follows:
As you can see, using MessageApi to send messages is quite simple. In our next section, we will take a look at how we can use DataApi to send an image from the handheld device to the Android wearable.
Transferring image data to the Android wearable
In our previous section, we looked at how we can send messages from our Android handheld device and display this information within our wearable watch area. In this section, we will take a look at the steps involved in downloading an image from the Internet, compressing the file contents in memory before sending this to the Android wearable, and displaying this within the watch area:
1. From the Project Navigator window, open the MobileActivity.java file.
2. Next, modify the onCreate(Bundle savedInstanceState) method and enter the following highlighted code sections:
3. @Override
4. protected void onCreate(Bundle savedInstanceState) {
5. super.onCreate(savedInstanceState);
6. setContentView(R.layout.activity_mobile);
7.
8. // Get a pointer to our buttons and textField
9. final Button mSendMessageButton = (Button)
10. findViewById(R.id.send_message_button);
11. final Button mSendImageButton = (Button)
12. findViewById(R.id.send_image_button);
13. final EditText mSendMessageInput = (EditText)
14. findViewById(R.id.send_message_input);
15.
16. // Set up our hint message for our Text Field
mSendMessageInput.setHint(R.string.send_message_text);
17. Now, we need to set up an onClickListener method in our sendImageButton as shown in the following code snippet:
18.// Set up our send image button onClick method handler
19.mSendImageButton.setOnClickListener(newView.OnClickListener() {
20. @Override
21. public void onClick(View v) {
22. // Create a new thread to send the downloaded image
23. Thread thread = new Thread(new Runnable(){
24. @Override
25. public void run()
26. {
27. // Declare our image variable to hold the URL
28. String imageName ="http://www.androidcentral.com/sites/" + "androidcentral.com/files/styles/w550h500/public/" +
29. "wallpapers/batdroid-blj.jpg";
30. try {
31. PutDataMapRequest request =
32. PutDataMapRequest.create("/image");
33. DataMap map = request.getDataMap();
34. URL url = new URL(imageName);
35. Bitmap bmp =BitmapFactory.decodeStream(url.openConnection().
36. getInputStream());
37. final ByteArrayOutputStream byteStream = new
38. ByteArrayOutputStream();
39. bmp.compress(Bitmap.CompressFormat.PNG, 100,
40. byteStream);
41.
42. // Creates an image asset from the chosen image
43. Asset asset =
44. Asset.createFromBytes(byteStream.toByteArray());
45. Random randomGenerator = new Random();
46. int randomInt = randomGenerator.nextInt(1000);
47. map.putInt("Integer", randomInt);
48. map.putAsset("androidImage", asset);
49. Wearable.DataApi.putDataItem(mGoogleApiClient,
50. request.asPutDataRequest());
51. }
52. catch (Exception e) {
53. Log.e(LOG_TAG, e.getMessage());
54. }
55. });
56. // Starts our Thread
57. thread.start();
58. Log.d(LOG_TAG, "Image has been sent");
59.}
60.});
}
In the preceding code snippet, we started by declaring our mSendImageButton object variable that will be responsible for downloading the image from the Internet and sending this to the Android wearable device. Next, we proceed to set up a setOnClickListener object that will handle and respond to the events when the user has tapped on the Send an Image to Android Wear button. In our next step, we create a new thread object that inherits from the Thread class that includes a run method that will be used to execute the active class. Then we declare an imageName string variable that will be used to hold the path for our image that will be downloaded.
Next, we create an object variable request that references the PutDataMapRequest object that will be used to hold our image data. Then we call the getDataMap method to our request object to get the data map, so that we can proceed to assign values to this object that will be stored in the map object variable. In our next step, we declare a url object that uses the URL class that converts the imageName string into a URL object. Then we use BitmapFactory.decodeStream to connect to the Internet, return the object data, and assign the contents to our bmp object variable, then declare our byteStream object that creates ByteArrayOutputStream with a default size of 32 bytes.
Note
If byteStream sends more than 32 bytes, the underlying byte array will automatically expand.
In our next step, we write a compressed version of the bitmap to the specified bitmap stream, compress for maximum quality, and then pass our byteStream output stream to write the compressed data.
Note
The path string is a unique identifier for the data item that allows you to access it from either side of the connection. The path must begin with a forward slash.
Next, we need to create an asset image asset object variable from the compressed image data and convert the byteStream data into a byte array. Assets are objects that are used to send binary blobs of data, such as images. When you send blob data to the Android wearable, the system will automatically take care of the transfer for you, and conserve bandwidth by caching large assets to avoid retransmission.
Note
The term blob is essentially a collection of binary data that is stored as a single entity and can be images, audio, or other multimedia objects.
Then we instantiate our Random class that constructs a random number generator with an initial state that is unlikely to be duplicated by a subsequent instantiation, and then assign this to our randomGenerator variable.
After this, declare a randomInt variable and generate a random number from one to one thousand. Then we create an Integer data item, and assign the random value to this. This is to ensure that we can send the image multiple times to the Android wearable device. Next, we proceed to do the same for our androidImage data item, and assign the created image asset data. Finally, we call the DataApi.putDataItem method, which adds the image data to the Android wearable network and sends the data to the Android wearable.
Receiving image data using DataApi
In the previous section, we looked at how we can use the DataApi.putDataItem method to send a binary image data to the Android wearable. In this section, we will be taking a look at how we can retrieve the image and display it within our Android wearable watch area:
1. From the Project Navigator window, open the WearActivity.java file.
2. Next, modify the WearActivity class and add the following code snippet:
3. public class WearActivity extends Activity {
4. private TextView mTextView;
5. private ImageView imageView;
6. private GoogleApiClient mGoogleApiClient;
7. private Bitmap imageBitmap;
8. private final Handler imageHandler = new
9. Handler();
10.
11. @Override
12. protected void onCreate(Bundle savedInstanceState) {
13. super.onCreate(savedInstanceState);
14. setContentView(R.layout.activity_wear);
15. final WatchViewStub stub = (WatchViewStub)
16. findViewById(R.id.watch_view_stub);
17. stub.setOnLayoutInflatedListener(new
18. WatchViewStub.OnLayoutInflatedListener() {
19. @Override
20. public void onLayoutInflated(WatchViewStub
21. stub) {
22. mTextView = (TextView)
23. stub.findViewById(R.id.received_message_input);
24. imageView = (ImageView)
25. stub.findViewById(R.id.received_image_input);
26. }
27. });
28.
29. // Establish our connection
30. initGoogleApiClient();
}
31. Then, we modify the initGoogleApiClient method and add the following highlighted code:
32.// establishes a connection between the mobile and wearable
33.private void initGoogleApiClient()
34.{
35. mGoogleApiClient = new GoogleApiClient.Builder(this)
36. .addConnectionCallbacks(new
37. GoogleApiClient.ConnectionCallbacks() {
38. @Override
39. public void onConnected(Bundle connectionHint) {
40. Log.d(LOG_TAG, "onConnected: " +
41. connectionHint);
42. Wearable.DataApi.addListener(
43. mGoogleApiClient, onDataChangedListener);
44. Wearable.MessageApi.addListener(
45. mGoogleApiClient, messageListener);
46. }
47. @Override
48. public void onConnectionSuspended(int cause) {
49. Log.d(LOG_TAG, "onConnectionSuspended:
50. " + cause);
51. }
52. })
53. .addOnConnectionFailedListener(new
54. GoogleApiClient.OnConnectionFailedListener() {
55. @Override
56. public void onConnectionFailed(ConnectionResult
57. result) {
58. Log.d(LOG_TAG, "onConnectionFailed: "
59. + result);
60. }
61. })
62. .addApi(Wearable.API)
63. .build();
64.
65. mGoogleApiClient.connect();
}
66. Next, we create a onDataChanged(DataEventBuffer dataEvents) listener method and add the following code that will be called when the wearable device receives the image from the handheld device:
67.public DataApi.DataListener onDataChangedListener = new DataApi.DataListener() {
68. @Override
69. public void onDataChanged(DataEventBuffer dataEvents){
70. for (DataEvent event : dataEvents) {
71. if (event.getType() ==
72. DataEvent.TYPE_CHANGED &&
73. event.getDataItem().getUri().getPath()
74. .equals("/image")) {
75. DataMapItem dataMapItem =
76. DataMapItem.fromDataItem(
77. event.getDataItem());
78. Asset imageAsset =
79. dataMapItem.getDataMap().
80. getAsset("androidImage");
81.
82. imageBitmap =
83. loadBitmapFromAsset(imageAsset);
84. // Process our received image bitmap
85. imageHandler.post(new Runnable() {
86. @Override
87. public void run() {
88. if (imageView != null) {
89. Log.d(LOG_TAG, "Image
90. received");
91. imageView.setImageBitmap(imageBitmap);
92. }
93. }
94. });
95. }
96. }
97. }
};
98. Now, we need to create a new loadBitmapFromAsset (Asset asset) method and add the code that will load and decode the bitmap asset information, as shown in the following code snippet:
99.public Bitmap loadBitmapFromAsset(Asset asset) {
100. if (asset == null) {
101. throw new IllegalArgumentException("Asset cannot be empty");
102. }
103. // Convert asset into a file descriptor and block
104. // until it's ready
105. InputStream assetInputStream =Wearable.DataApi.getFdForAsset(mGoogleApiClient, asset).await().getInputStream();
106.
107. if (assetInputStream == null) {
108. Log.w("WearActivity", "Requested an unknown
109. Asset.");
110. return null;
111. }
112. // Decode the stream into a bitmap
113. return BitmapFactory.decodeStream(assetInputStream);
}
In the preceding code snippets, we start creating additional variables for imageView, imageBitmap, and imageHandler. The imageView will be used to output the contents of our image and display this to the Android wearable device. The imageBitmap will be responsible for holding the downloaded and decoded image, once it has been received by imageHandler. Next, we get a reference to our imageView object that will be used to display the image received from the Android handheld device. Then, we make a call to ourinitGoogleApiClient method that is responsible for establishing the connection between our Android handheld and wearable devices. Once the GoogleApiClient object has established a successful connection, the onConnected method is called where we set up a listener service on DataApi that will capture any images our wearable class receives, and these will be handled by the onDataChangedListener() method.
In our next step, we create a new onDataChangedListener() object that inherits from the DataApi.DataListener class that includes a onDataChanged method that will be responsible for receiving any images that are sent from the Android handheld device and accepts adataEvents variable that contains the contents of our image data object. Next, we use the DataEvent class to get a list of all data objects that are currently being sent to the Android wearable device.
Then we use the getType property to get the type of event, and perform a comparison to check if there has been a change since the last time. We use the getPath property of the getDataItem property of the DataEvent event object to check that we are processing the correct image path value.
Next, we use the DataMapItem class to extract the contents of our image object from the event object, since we have obtained the correct data item path. Then we use the Asset class and use the getAsset method to get the image object data, which we pass to ourloadBitmapFromAsset method to decode the contents of the image into a bitmap object and return the contents back to the calling method. We use the await property on our getFdForAsset method to block our wearable UI until the task completes. The imageHandlermethod is called only when an image object has been received, and then it uses the setImageBitmap method of our imageView object so that this can be displayed within the watch area, before finally destroying the connection to our GoogleApiClient within the onDestroymethod.
Finally, we can compile, build, and run our application. Simply press CMD + F9 and choose your AVD or Android handheld device from the list of Android emulators. Once the mobile app has been launched, you should see the user interface displayed, as shown in the following screenshot:
Note
You must ensure that you install the app on both your Android handheld device and the Android wearable device to ensure that everything works as expected.
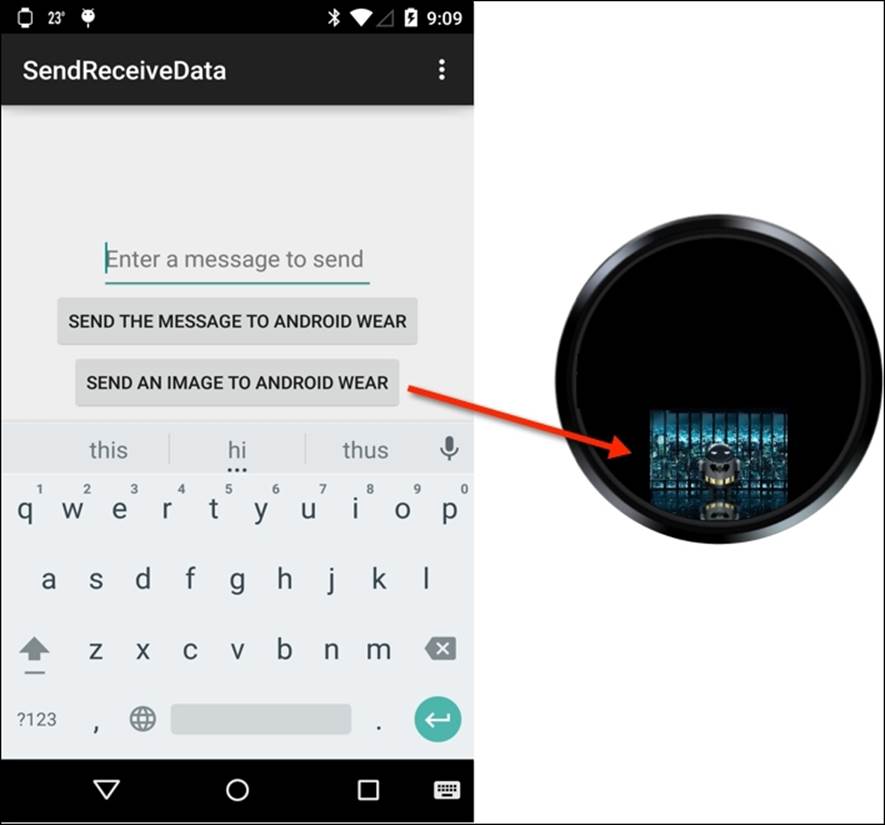
The preceding screenshot shows the workflow between the Android handheld device and the Android wearable device when an image has been sent after the user taps the Send an image to Android Wear button.
Summary
In this chapter, we learned about three new APIs, DataAPI, NodeAPI, and MessageAPIs, and how we can use them and their associated methods to transmit information between the handheld mobile and the wearable.
Note
If, for whatever reason, the connected wearable node gets disconnected from the paired handheld device, the DataApi class is smart enough to try sending again automatically once the connection is reestablished.
We learned about GoogleApiClient that is responsible for establishing and handling the connection between the Android handheld and the wearable device. Then we moved on to learn about the NodeApi class, and how we can use this to obtain a list of all nodes that are currently connected to the wearable device. Next, we learned about MessageApi and how we can use the sendMessage() method to send a message to the Android wearable.
Then we got acquainted with the DataApi class, and how we can use the DataListener() method to check for any image data being sent from the Android handheld to the wearable.
In the next chapter, we will learn how we can build effective and interactive content for the Android TV platform. We will get acquainted with the Android Leanback support library to see how we can design and customize our own user interfaces.