Android Wearables (2015)
Part III. Projects
Chapter 10. Smartwatch as Input
WHAT’S IN THIS CHAPTER?
· ➤ Using Wear as a game controller
· ➤ Using sensors on Android Wear
· ➤ Gesture detection with accelerometers
· ➤ Sending data between devices
WROX.COM CODE DOWNLOADS FOR THIS CHAPTER
The code downloads for this chapter are found at www.wrox.com/go/androidwearables on the Download Code tab. The code is in the Chapter 10 download and the files are individually named according to the listing numbers noted throughout the chapter.
ANDROID WEAR AS A GAME CONTROLLER
Chapter 9 reviewed how to use sensors on Android Wear when building a basic Activity Tracker application. The Activity Tracker was only running on Android Wear and was not connected to your phone in any way. This is poor design because Google requires you to at least have a host app when publishing on Google Play.
In this chapter we’ll remedy this problem by building a simple dice game—without any dice!—running on both devices. We will use Android Wear to create the virtual die that will be thrown on the mobile device. We will read its accelerometer sensor and translate its movements to the number of distinct shake gestures performed.
The value of shake gestures will then be translated into a random value on a selected die and displayed on your game board.
A Note on Sensors
Android devices have a multitude of sensors available. Even the small Android Wear device has as many as 15 or even more, as shown in Table 10.1. Some of them are compound or composite sensors. This means that we often have more than one choice for how to solve a sensor-based problem. This chapter presents just one solution to the virtual dice problem.
Table 10.1 Sensors Available on the LG G Watch
|
NAME |
TYPE |
DESCRIPTION |
|
STMicro 3-axis Tilt Sensor |
Software |
|
|
MPL Gyroscope |
Hardware |
|
|
MPL Raw Gyroscope |
Hardware |
|
|
MPL Accelerometer |
Hardware |
An accelerometer sensor that includes the gravity force. |
|
MPL Magnetic Field |
Hardware |
|
|
MPL Raw Magnetic Field |
Hardware |
|
|
MPL Orientation |
Software |
An older-style sensor that has been deprecated and is on its way out of the Android system. You should use the Rotation Vector instead. |
|
MPL Rotation Vector |
Software |
Gives a rotational unit vector based on the East-North-Up coordinates. |
|
MPL Game Rotation Vector |
Software |
Similar to the Rotation Vector, except that it uses different underlying hardware. This also means that the sensors report different values. |
|
MPL Linear Acceleration |
Software |
An accelerometer that has the gravity already excluded. |
|
MPL Gravity |
Software |
Reports the gravity vector in the device’s coordinate system. Should be identical to the raw accelerometer values when the device is resting. |
|
MPL Signification Motion |
Software |
A composite sensor that allows the device to fall asleep while the sensor is still working, which is very different from other sensors. This sensor is often used to listen for when the user starts to walk, run, bike, or something else. |
|
MPL Step Detector |
Hardware/software |
Fires a single event for every detected step the user takes while the sensor is active. Chapter 9 covered this sensor. |
|
MPL Step Counter |
Hardware/software |
Keeps track of the total number of steps the user has taken since the device was started. It resets the number of steps when the device is turned off or rebooted. |
|
MPL Geomagnetic Rotation Vector |
Software |
Also called a magnetometer and is very similar to the rotation vector sensor. However, where the rotation vector uses a gyroscope, this uses the magnetometer. It reports the same set of values as the rotation vector. |
Detecting Gestures
To understand basic gesture detection with accelerometers, first we need to review the data the accelerometer produces. Looking at graphs helps us understand what the motion looks like to the computer and how values are translated over time. Figure 10.1 shows a graph of a simple shake gesture with a Wear device attached to your wrist.
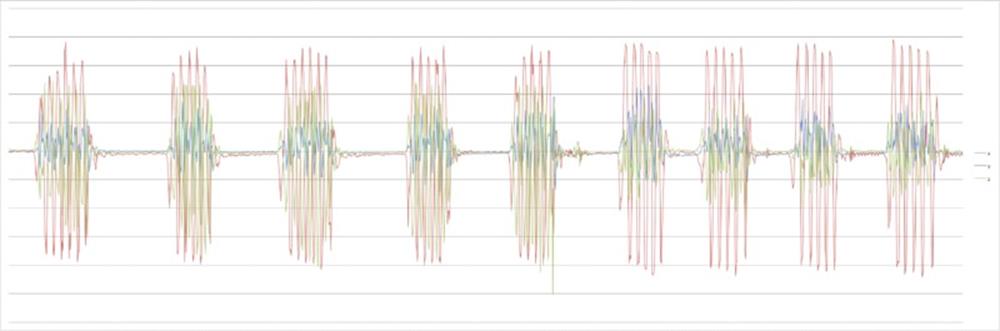
FIGURE 10.1 The shake gesture as the computer sees it
Notice how the single shake motion in one direction has two almost-equal forces—acceleration and deceleration. The objective is to detect these pairs of motions to create a single shake movement.
Creating more-complex gestures may even require “training” your device to recognize the gesture. But this topic is beyond the scope of this chapter, so we’ll leave it to you to explore on your own.
BUILDING THE DICE GAME
In this chapter we’ll build a project using the accelerometer sensor (TYPE_ACCELEROMETER) to detect shake gestures. We define a shake gesture as a rapid set of motions that change direction. You can think of the smartwatch as a simple, safe, miniature version of the Wiimote. There’s no chance you’ll injure your spouse while playing tennis with the Wear device if you attach it to your wrist properly.
Creating the Project
Begin by creating the project for our game. Enter DiceGame as the Application name, and let the Company Domain be wrox.wiley.com. Select both the Phone and Tablet and the Wear platforms for this app; we’ll use the smartwatch as the virtual die and the phone as the game board. Create both the activities. Call the Phone activity MyPhoneActivity and the Wear activity MyWearActivity. Click Finish to create the project.
Designing a User Interface
A game is a complex structure. Even a seemingly simple game such as Yahtzee requires a lot of logic to handle all the possible outcomes. We won’t be doing any of that. We’ll focus solely on the game’s interactions—the dice throw. If you want to build a full game with all the bells and whistles, we recommend that you visit any of the excellent game-building tutorial websites. You’ll find plenty of material to dig through!
Android Wear GUI
Our interface is simple. On the Wear side we’ll use a CircledImageView as a progress indicator for the dice throw, showing that a dice throw is in progress and also showing when we’ll force the die to be thrown.
When the die has been thrown, we’ll let the user know that a successful throw has been made. Listing 10-1 shows our rectangular layout for Wear. Notice that we’ve added the XML namespace so that we can easily set the required attributes.
LISTING 10-1: The Wear layout, rect format
<?xml version="1.0" encoding="utf-8"?>
<LinearLayout
xmlns:android="http://schemas.android.com/apk/res/android"
xmlns:tools="http://schemas.android.com/tools"
xmlns:wear="http://schemas.android.com/apk/res-auto"
android:layout_width="match_parent"
android:layout_height="match_parent"
android:background="@color/white"
android:orientation="vertical"
tools:context=".MyWearActivity"
tools:deviceIds="wear_square">
<android.support.wearable.view.CircledImageView
android:id="@+id/progress"
android:layout_width="match_parent"
android:layout_height="match_parent"
wear:circle_border_color="#33CCFF"
wear:circle_border_width="15dp"
wear:circle_color="@color/white"
wear:circle_radius="80dp"
/>
</LinearLayout>
We’ll use a CountDownTimer to both animate the progress indicator on the CircledImageView and provide a fail-safe exit for the dice throw. A player shouldn’t be allowed to shake the dice for an eternity! Listing 10-2 highlights the timer.
LISTING 10-2: Adding the progress animation
package com.wiley.wrox.dicegame;
import android.app.Activity;
import android.os.Bundle;
import android.os.CountDownTimer;
import android.support.wearable.view.CircledImageView;
import android.support.wearable.view.WatchViewStub;
public class MyWearActivity extends Activity {
private static final int MAX_SHAKE_TIME = 1000;
private static final int COUNTDOWN_INTERVAL = 100;
private CircledImageView mCircledImageView;
private CountDownTimer mCountDownTimer;
@Override
protected void onCreate(Bundle savedInstanceState) {
super.onCreate(savedInstanceState);
setContentView(R.layout.activity_my_wear);
final WatchViewStub stub = (WatchViewStub) findViewById(R.id.watch_view_stub);
stub.setOnLayoutInflatedListener(new WatchViewStub.OnLayoutInflatedListener() {
@Override
public void onLayoutInflated(WatchViewStub stub) {
mCircledImageView = (CircledImageView) stub.findViewById(R.id.progress);
startTimer(); // Test the timer
}
});
}
private void startTimer() {
if (mCountDownTimer != null)
mCountDownTimer.cancel();
mCountDownTimer = new CountDownTimer(MAX_SHAKE_TIME, COUNTDOWN_INTERVAL) {
@Override
public void onTick(long millisLeft) {
float progress = (float) millisLeft/MAX_SHAKE_TIME;
mCircledImageView.setProgress(progress);
}
@Override
public void onFinish() {
mCircledImageView.setProgress(1.0f);
}
};
mCountDownTimer.start();
}
}
That concludes the Wear UI. Let’s move on to the mobile’s UI, which is even simpler.
Mobile GUI
On the mobile side of things is an even more basic interface—a TextView displaying the resulting throw. That’s it! See Listing 10-3 for details.
LISTING 10-3: The mobile layout
<RelativeLayout
xmlns:android="http://schemas.android.com/apk/res/android"
xmlns:tools="http://schemas.android.com/tools"
android:layout_width="match_parent"
android:layout_height="match_parent"
android:paddingBottom="@dimen/activity_vertical_margin"
android:paddingLeft="@dimen/activity_horizontal_margin"
android:paddingRight="@dimen/activity_horizontal_margin"
android:paddingTop="@dimen/activity_vertical_margin"
tools:context=".MyPhoneActivity">
<TextView
android:layout_width="wrap_content"
android:layout_height="wrap_content"
android:layout_alignParentTop="true"
android:layout_centerHorizontal="true"
android:layout_marginTop="10dp"
android:text="@string/app_name"
android:textSize="40sp"/>
<TextView
android:id="@+id/result"
android:layout_width="wrap_content"
android:layout_height="wrap_content"
android:layout_centerInParent="true"
android:text="0"
android:textSize="80sp"/>
</RelativeLayout>
Before moving on to the application logic, be sure to hook up the UI widgets in the activity, as shown in Listing 10-4.
LISTING 10-4: Connecting the Mobile UI
package com.wiley.wrox.dicegame;
import android.app.Activity;
import android.os.Bundle;
import android.widget.TextView;
public class MyPhoneActivity extends Activity {
TextView mResult;
@Override
protected void onCreate(Bundle savedInstanceState) {
super.onCreate(savedInstanceState);
setContentView(R.layout.activity_my_phone);
mResult = (TextView) findViewById(R.id.result);
}
private void setDiceValue(int value) {
mResult.setText(Integer.toString(value));
}
}
Accessing Sensors
To build this project you’ll use a library called Seismic, which is made by a company called Square. The beauty of this library is that it’s so simple to use in comparison to building your own shake-detection algorithm.
To include this library, add the dependency in Listing 10-5 to your Wear gradle file and then sync it.
LISTING 10-5: Add the Seismic dependency to your gradle file
dependencies {
compile fileTree(dir: 'libs', include: ['*.jar'])
compile 'com.google.android.support:wearable:+'
compile 'com.google.android.gms:play-services-wearable:+'
compile 'com.squareup:seismic:1.0.0'
}
Working with Seismic is as easy as creating an instance of ShakeListener found in the Seismic library and then passing your SensorManager to your ShakeListener. The hearShake method will be called every time a shake is registered. In Seismic, a shake is registered when more than 75% of the samples taken in the past 0.5 seconds are accelerating. This is shown in Listing 10-6.
LISTING 10-6: Fetching the sensor and attaching ShakeListener to it
package com.wiley.wrox.dicegame;
import android.app.Activity;
import android.hardware.SensorManager;
import com.squareup.seismic.ShakeDetector;
import android.os.Bundle;
import android.os.CountDownTimer;
import android.support.wearable.view.CircledImageView;
import android.support.wearable.view.WatchViewStub;
public class MyWearActivity extends Activity implements ShakeDetector
.Listener {
private static final int MAX_SHAKE_TIME = 1000;
private static final int COUNTDOWN_INTERVAL = 100;
private CircledImageView mCircledImageView;
private CountDownTimer mCountDownTimer;
private SensorManager mSensorManager;
private ShakeDetector mShakeDetector;
@Override
protected void onCreate(Bundle savedInstanceState) {
super.onCreate(savedInstanceState);
setContentView(R.layout.activity_my);
mSensorManager = (SensorManager) getSystemService(SENSOR_SERVICE);
mShakeDetector = new ShakeDetector(this);
final WatchViewStub stub = (WatchViewStub) findViewById(R.id.watch_view_stub);
stub.setOnLayoutInflatedListener(new WatchViewStub.OnLayoutInflatedListener() {
@Override
public void onLayoutInflated(WatchViewStub stub) {
mCircledImageView = (CircledImageView) stub.findViewById(R.id.progress);
}
});
}
@Override
protected void onResume() {
super.onResume();
mShakeDetector.start(mSensorManager);
}
@Override
protected void onPause() {
super.onPause();
mShakeDetector.stop();
}
private void startTimer() {
if (mCountDownTimer != null)
mCountDownTimer.cancel();
mCountDownTimer = new CountDownTimer(MAX_SHAKE_TIME, COUNTDOWN_INTERVAL) {
@Override
public void onTick(long millisLeft) {
float progress = (float) millisLeft / MAX_SHAKE_TIME;
mCircledImageView.setProgress(progress);
}
@Override
public void onFinish() {
mCircledImageView.setProgress(0.0f);
// TODO: Generate die value
}
};
mCountDownTimer.start();
}
@Override
public void hearShake() {
startTimer();
}
}
At this point we have a working shake detector on our wrist. Before we can send anything to our game board—the mobile phone—we need to read the die value from our virtual dice.
Generating the Die Value
In this example we’ll keep the die value generation simple. A basic random function multiplied with the maximum value of our standard six-sided die will suffice. Listing 10-7 shows how we generate basic random die values.
LISTING 10-7: Generating a random die value
package com.wiley.wrox.dicegame;
import android.app.Activity;
import android.hardware.SensorManager;
import com.squareup.seismic.ShakeDetector;
import android.os.Bundle;
import android.os.CountDownTimer;
import android.support.wearable.view.CircledImageView;
import android.support.wearable.view.WatchViewStub;
import java.util.Random;
public class MyWearActivity extends Activity implements ShakeDetector.Listener {
...
private Random mRandom = new Random();
private void startTimer() {
if (mCountDownTimer != null)
mCountDownTimer.cancel();
mCountDownTimer = new CountDownTimer(MAX_SHAKE_TIME, COUNTDOWN_INTERVAL) {
@Override
public void onTick(long millisLeft) {
float progress = (float) millisLeft / MAX_SHAKE_TIME;
mCircledImageView.setProgress(progress);
}
@Override
public void onFinish() {
mCircledImageView.setProgress(0.0f);
int value = generateDieValue(6);
}
};
mCountDownTimer.start();
}
@Override
public void hearShake() {
startTimer();
}
private int generateDieValue(int sides) {
return mRandom.nextInt(sides) + 1;
}
}
Connecting to Mobile
It’s time to turn our focus to the game board. When the board is set up and ready to receive values, we need to set up the connection between it and our game control—the Wear device.
Just like we did in Chapter 7, we’ll use Google Services to establish a simple data connection between our mobile and Wear devices. The connection will allow us to send simple data between the two devices.
The Mobile Connection
Open MyPhoneActivity.java and add GoogleApiClient, as shown in Listing 10-8.
LISTING 10-8: Adding GoogleApiClient to the mobile activity
package com.wiley.wrox.dicegame;
import android.app.Activity;
import android.os.Bundle;
import android.widget.TextView;
import com.google.android.gms.common.ConnectionResult;
import com.google.android.gms.common.api.GoogleApiClient;
import com.google.android.gms.wearable.MessageApi;
import com.google.android.gms.wearable.MessageEvent;
import com.google.android.gms.wearable.Wearable;
import java.nio.ByteBuffer;
public class MyPhoneActivity extends Activity {
TextView result;
GoogleApiClient mGoogleApiClient;
@Override
protected void onCreate(Bundle savedInstanceState) {
super.onCreate(savedInstanceState);
setContentView(R.layout.activity_my_phone);
result = (TextView) findViewById(R.id.result);
mGoogleApiClient = new GoogleApiClient.Builder(this)
.addApi(Wearable.API)
.addConnectionCallbacks(mConnectionCallbacks)
.build();
mGoogleApiClient.connect();
}
private void setDiceValue(int value) {
result.setText(Integer.toString(value));
}
GoogleApiClient.ConnectionCallbacks mConnectionCallbacks = new
GoogleApiClient.ConnectionCallbacks() {
@Override
public void onConnected(Bundle bundle) {
Wearable.MessageApi.addListener(mGoogleApiClient, mMessageListener);
}
@Override
public void onConnectionSuspended(int i) {
}
};
MessageApi.MessageListener mMessageListener = new MessageApi.MessageListener() {
@Override
public void onMessageReceived(MessageEvent messageEvent) {
if( messageEvent.getPath().equals("/dicegame")) {
ByteBuffer byteBuffer = ByteBuffer.wrap(messageEvent.getData());
final int value = byteBuffer.getInt();
runOnUiThread(new Runnable() {
@Override
public void run() {
setDiceValue(value);
}
});
}
}
};
}
INTEGERS AND BYTE ARRAYS
In Java, the standard integer has 32 bits. Because a byte consists of 8 bits, the integer actually has 4 bytes. This means that you need to translate the integer into a byte array before sending it over any data connection, which usually accepts only bytes or byte arrays.
The Wear Connection
The final part of this connection is the Wear device. Listing 10-9 shows how to create the connection on the Wear end and also how to send integers over the Google Services connection by converting them to byte arrays and then sending them as data.
LISTING 10-9: Creating GoogleApiClient on Wear
package com.wiley.wrox.dicegame;
import android.app.Activity;
import android.hardware.SensorManager;
import android.os.Bundle;
import android.os.CountDownTimer;
import android.support.wearable.view.CircledImageView;
import android.support.wearable.view.WatchViewStub;
import com.google.android.gms.common.api.GoogleApiClient;
import com.google.android.gms.wearable.Node;
import com.google.android.gms.wearable.NodeApi;
import com.google.android.gms.wearable.Wearable;
import java.nio.ByteBuffer;
import java.util.List;
import java.util.Random;
public class MyWearActivity extends Activity implements ShakeDetector.Listener {
private static final int MAX_SHAKE_TIME = 1000;
private static final int COUNTDOWN_INTERVAL = 100;
private CircledImageView mCircledImageView;
private CountDownTimer mCountDownTimer;
private SensorManager mSensorManager;
private ShakeDetector mShakeDetector;
private Random mRandom = new Random();
private GoogleApiClient mGoogleApiClient;
private Node mNode;
@Override
protected void onCreate(Bundle savedInstanceState) {
super.onCreate(savedInstanceState);
setContentView(R.layout.activity_my);
mSensorManager = (SensorManager) getSystemService(SENSOR_SERVICE);
final WatchViewStub stub = (WatchViewStub) findViewById(R.id.watch_view_stub);
stub.setOnLayoutInflatedListener(new WatchViewStub.OnLayoutInflatedListener() {
@Override
public void onLayoutInflated(WatchViewStub stub) {
mCircledImageView = (CircledImageView) stub.findViewById(R.id.progress);
}
});
mGoogleApiClient = new GoogleApiClient.Builder(this)
.addApi(Wearable.API)
.addConnectionCallbacks(mConnectionCallbacks)
.build();
mGoogleApiClient.connect();
}
@Override
protected void onResume() {
super.onResume();
mShakeDetector.start(mSensorManager);
}
@Override
protected void onPause() {
super.onPause();
mShakeDetector.stop();
}
private void startTimer() {
if (mCountDownTimer != null)
mCountDownTimer.cancel();
mCountDownTimer = new CountDownTimer(MAX_SHAKE_TIME, COUNTDOWN_INTERVAL) {
@Override
public void onTick(long millisLeft) {
float progress = (float) millisLeft / MAX_SHAKE_TIME;
mCircledImageView.setProgress(progress);
}
@Override
public void onFinish() {
mCircledImageView.setProgress(0.0f);
int value = generateDieValue(6);
sendToPhone(value);
}
};
mCountDownTimer.start();
}
@Override
public void hearShake() {
startTimer();
}
private int generateDieValue(int sides) {
return mRandom.nextInt(sides) + 1;
}
GoogleApiClient.ConnectionCallbacks mConnectionCallbacks = new GoogleApiClient
.ConnectionCallbacks() {
@Override
public void onConnected(Bundle bundle) {
new Thread(new Runnable() {
@Override
public void run() {
NodeApi.GetConnectedNodesResult result = Wearable.NodeApi
.getConnectedNodes(mGoogleApiClient).await();
List<Node> nodes = result.getNodes();
if (nodes.size() > 0) {
mNode = nodes.get(0);
}
}
}).start();
}
@Override
public void onConnectionSuspended(int i) {
}
};
private void sendToPhone(final int value) {
new Thread(new Runnable() {
@Override
public void run() {
if( mNode != null ){
byte[] bytes = ByteBuffer.allocate(4).putInt(value).array();
Wearable.MessageApi.sendMessage(mGoogleApiClient, mNode.getId(),
"/dicegame", bytes).await();
}
}
}).start();
}
}
This is just one way of sending an integer. You can also send strings and then parse those to integers on the other end of the pipe. I prefer working with bytes rather than strings. Open MyWearActivity.java and add the code shown in Listing 10-10.
LISTING 10-10: Keeping the screen on
package com.wiley.wrox.dicegame;
import android.app.Activity;
import android.hardware.SensorManager;
import android.os.Bundle;
import android.os.CountDownTimer;
import android.support.wearable.view.CircledImageView;
import android.support.wearable.view.WatchViewStub;
import android.view.Window;
import android.view.WindowManager;
import com.google.android.gms.common.ConnectionResult;
import com.google.android.gms.common.api.GoogleApiClient;
import com.google.android.gms.wearable.Node;
import com.google.android.gms.wearable.NodeApi;
import com.google.android.gms.wearable.Wearable;
import com.squareup.seismic.ShakeDetector;
import java.nio.ByteBuffer;
import java.util.List;
import java.util.Random;
public class MyWearActivity extends Activity implements ShakeDetector.Listener {
private static final int MAX_SHAKE_TIME = 1000;
private static final int COUNTDOWN_INTERVAL = 100;
private CircledImageView mCircledImageView;
private CountDownTimer mCountDownTimer;
private SensorManager mSensorManager;
private ShakeDetector mShakeDetector;
private Random mRandom = new Random();
private GoogleApiClient mGoogleApiClient;
private Node mNode;
@Override
protected void onCreate(Bundle savedInstanceState) {
super.onCreate(savedInstanceState);
setContentView(R.layout.activity_my);
getWindow().addFlags(WindowManager.LayoutParams.FLAG_KEEP_SCREEN_ON);
...
}
...
}
You may have noticed that on Wear—the sender—we also created a node. The node is the recipient when values are sent. Because we’re only sending values from Wear to mobile, and not the other way around, only the Wear needs to have a node.
Keeping the Screen On
The final tweak we’ll make is keeping the screen online even if Google doesn’t suggest it. With games, you may be inactive while it’s your friends’ turn to roll their virtual dice. Listing 10-10 shows how to lock the screen.
THE DICE GAME
The finished game includes one six-sided virtual die and a game board. Figure 10.2 shows the user interface of the Wear app as a shake is in progress.
FIGURE 10.2 The finished Wear app
Figure 10.3 shows the game board. It contains only a title and a number—the value of the die.
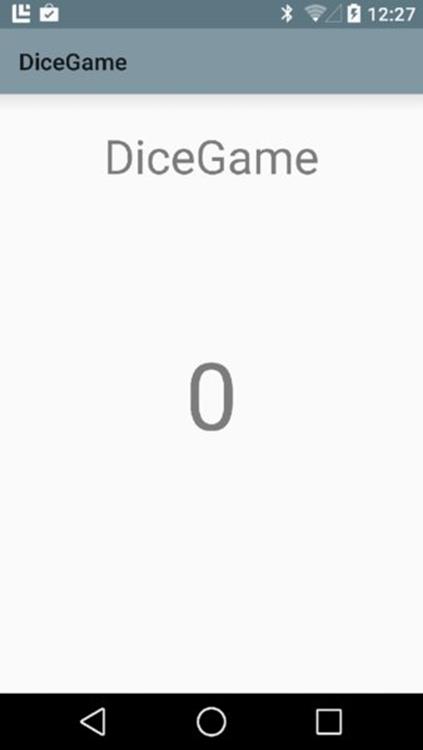
FIGURE 10.3 The finished mobile app
IMPROVEMENTS
The finished application you’ve built in this chapter is a simple dice-rolling mechanism. It has no other game mechanics built in, so it’s up to you to take it to the next level. Here are some things you can do to improve the game:
· ➤ Create more intriguing game rules and logic.
· ➤ Use the number of shakes made as a seed when generating the die value. Doing so can give you another level of control over the game and have players use tactics when shaking their die.
· ➤ Use more than one sensor for more interesting shake gesture patterns. This could include hidden gestures that are difficult to reproduce but generate higher values.
· ➤ Improve the user interface by making it more interesting to look at.
· ➤ Most dice can’t get a value of 0, so unless you’re making a representation of a very specific die you should make sure to limit the possible values of the die.
SUMMARY
In this chapter you began your journey into the exciting world of gestural interactions. You also had another go at the Google Services APIs for sending data between your mobile and your Wear device.
In the last chapter of this book you’ll dive into another exciting realm within wearable programming—smart glasses. You’ll get examples of how they work, what features they often have, and how to create your own apps that run on them.
RECOMMENDED READING
1. Sensors Overview, http://developer.android.com/guide/topics/sensors/sensors_overview.html.
2. Motion Sensor overview, http://developer.android.com/guide/topics/sensors/sensors_motion.html.