Arduino Sketches: Tools and Techniques for Programming Wizardry (2015)
Part I. Introduction to Arduino
Chapter 2. Programming for the Arduino
The Arduino is an embedded system, that is to say it has the minimum amount of hardware to get the job done. That does not mean that it is by any means a weak system; there is no point in having a PCI bus if it will never be used—it will only take up space, energy, and increase the overall cost of the device. Arduinos are lightweight—and inexpensive—and make excellent embedded systems. Just like all embedded systems, programming is done on a host computer, not the Arduino itself.
Programming an embedded system, and indeed programming any sort of system, is the art of writing text that can be understood by a human, and translating it into a binary file that can be understood by a processor. For this, some tools are required. The data written by humans is called source code, and because most source code is in text format, sometimes a simple text editor is enough. Most people go with an Integrated Development Environment (IDE), an augmented text editor with add-ons designed for developers. These add-ons can range from text auto-completion to debugging and often include tools to handle different types of source files, which contain source code. Some projects might use only one file, but large projects can sometimes have hundreds of files, if not thousands. After the source code is written, a compiler must be used, which reads in the source code and creates one or more binary files. These binary files are later uploaded onto the Arduino and run by the microcontroller.
Arduino developed all the tools required to get straight to work. With a different embedded system, you may have to make a choice of an IDE, install a compiler, and sometimes even a flasher, and spend precious hours setting up the system. With Arduino, this isn't the case; everything is delivered in a simple package and contains everything needed, from writing your programs to flashing the final binary file.
An Arduino program is known as a sketch. There are several definitions of the word sketch such as a brief literary composition or a brief musical composition. Whatever your preference, an Arduino sketch is like a work of art; you, the artist, gather and assemble elements to create your masterpiece. Google X engineer Jeremy Blum, author of the book Exploring Arduino (Wiley, 2013), said,
I believe that creative engineering is indistinguishable from fine artwork.
The Arduino will be your canvas; you are on your way to making something amazing using sketches and electronics. Your only limitation will be your imagination.
Installing Your Environment
The first thing that you need to do is to install the Arduino IDE. The Arduino IDE is a fully integrated piece of software written in Java. Java can run on multiple platforms, and the IDE is available for Windows, Mac OS X, and Linux. You can get the Arduino IDE free of charge at the Arduino website:
http://arduino.cc/en/main/software
On this page, you will most likely have several options. The latest stable version will always be listed first. Next, any beta versions available will be listed. Beta versions are test versions that might not be up to the quality of a finished version but that add functionality; it will be up to you to decide if you want to use it. Beta versions sometimes support more hardware, and if you use the latest Arduino boards, you might not have a choice.
Also listed on the site are nightly builds and builds for specific hardware. Nightly builds are installers that are generated every night that contain the latest updates but may in some rare cases also have bugs. Specific builds are builds created for a single board in mind. At the time of writing, there is an IDE available for the Intel Galileo, an Arduino compatible board designed and manufactured by Intel that does not use the same compiler.
Downloading the Software
Time to get to work! You have to download the software, so find the latest version and download it. Figure 2.1 shows what the Arduino site looks like on my development computer.
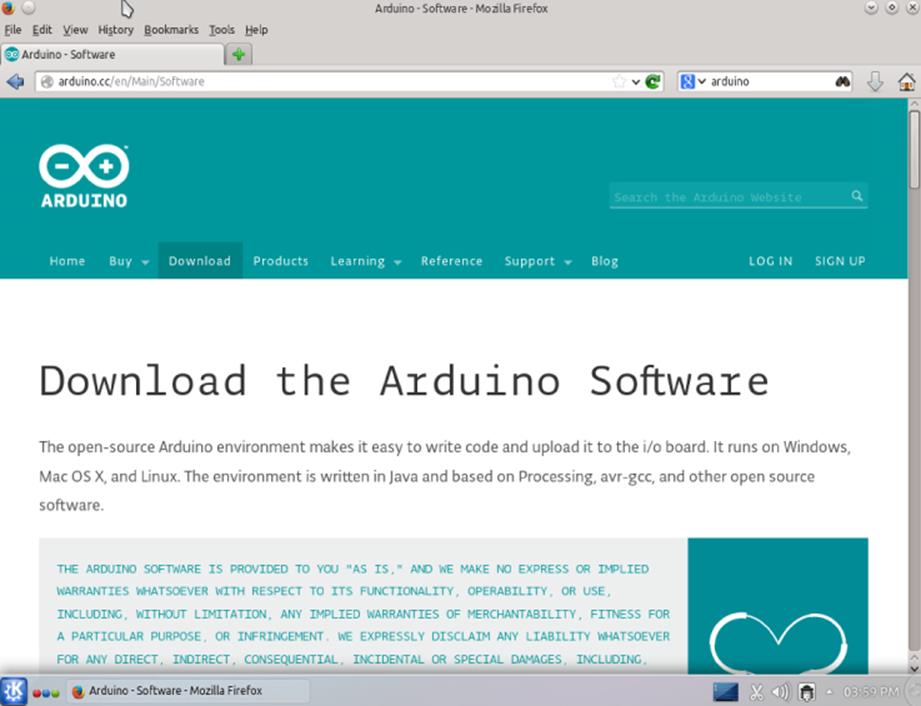
Figure 2.1 The Arduino download page
Windows users have a choice between an installer and an archive. For the installer, simply download the installer, double-click it, and follow the instructions. For more information on installing, please see the Arduino website on installing:http://arduino.cc/en/Guide/HomePage.
Mac OS X and Linux users have to download an archive. Simply unpack the archive using your normal tool, and double-click the Arduino icon inside the newly created folder. Everything required is inside this folder.
If you have an operating system that is not listed, or if you are curious about the source code, a source code bundle is also available. You could compile the source code yourself.
Some Linux distributions might bundle the Arduino IDE directly; others might require external repositories. Refer to your distribution's forums or look at Arduino's Playground website, a community edited wiki, at: http://playground.arduino.cc.
Running the Software
Once you have downloaded and installed the software, open the application. If everything went well, you should have a window that looks like the one in Figure 2.2.
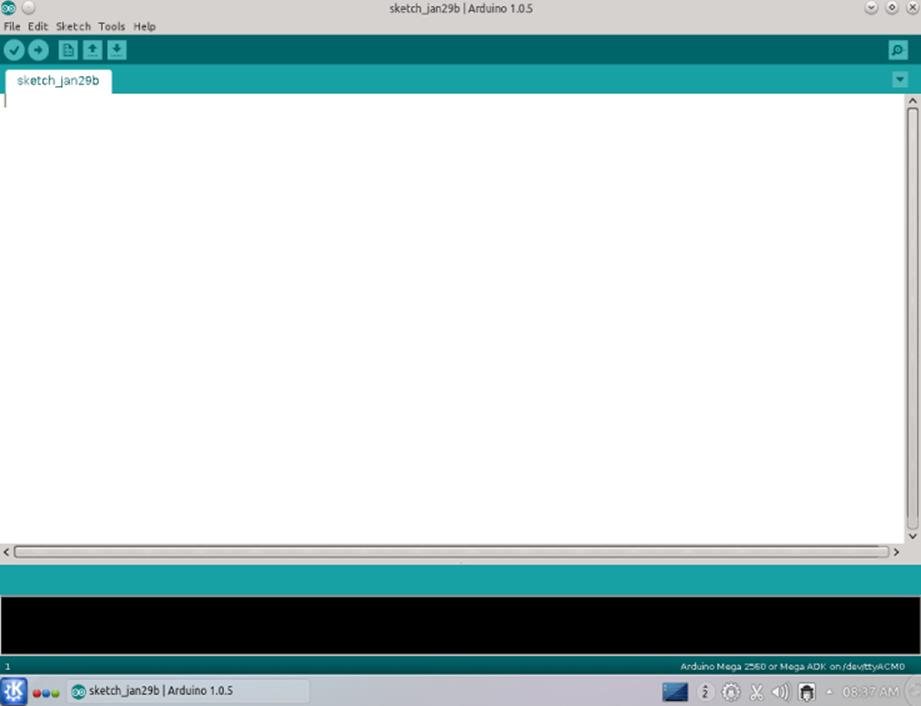
Figure 2.2 Empty sketch
This is the Arduino IDE, where you will design your sketches. The main window is the sketch editor, which is where you write your code. At the bottom is the status window; you receive information on compilation, uploads, or code errors. In the bottom right of the screen is the device information panel, which shows the device that you are using, as well as the serial port it is connected to.
The sketch editor isn't just a simple text editor; the editor colors and formats text depending on what you write. Comments are greyed out, data types are written in color, and so on. This provides a nice, easy way to read and write source code.
Using Your Own IDE
The Arduino IDE is a capable environment, but some people may want to use their own IDE, either for preference or simply because they are used to another environment. The Arduino community has worked hard on porting the tools to other programs, and you can find a complete list on the Arduino Playground. Eclipse, CodeBlocks, Kdevelop, and the command line are just a few of the environments proposed. Although this book concentrates on the Arduino IDE, check out other IDEs. For more information seehttp://playground.arduino.cc/Main/DevelopmentTools.
Your First Program
It's time to dive in! By default, Arduinos come with a default sketch called Blink. This sketch will blink the on-board LED connected to pin 13, available on most Arduinos. Just plug a USB cable into your computer and your Arduino, and after a few seconds you will see the LED blink, telling you that everything went well. Arduinos are all about getting things done, and what better way to show you just how easy they are than to run your first program. Your first sketch will look like Listing 2.1:
Listing 2.1: Your first sketch
/*
Blink
Turns on an LED on for one second, then off for one second, repeat
This example code is in the public domain.
*/
// Pin 13 has an LED connected on most Arduino boards.
// give it a name:
int led = 13;
// the setup routine runs once when you press reset:
void setup() {
// initialize the digital pin as an output.
pinMode(led, OUTPUT);
}
// the loop routine runs over and over again forever:
void loop() {
digitalWrite(led, HIGH); // turn the LED on (HIGH is the level)
delay(200); // wait for 0.2 seconds
digitalWrite(led, LOW); // turn the LED off by making the LOW
delay(200); // wait for 0.2 seconds
}
If this source code doesn't make much sense to you, don't worry; everything will be explained a little later. Seasoned C developers might have a few questions, which will also be answered later.
The previous sketch is an entire program. You can either type it in or use the Arduino IDE directly; this code listing is actually an example from the Arduino IDE. To open it, go to File ![]() Examples
Examples ![]() 01.Basics
01.Basics ![]() Blink, and a new window will open with the code. This sketch has comments, text zones where the user can write about what he is intending to do, indicated by // at the beginning of the line. Have a quick read through, and try to see what the program is doing.
Blink, and a new window will open with the code. This sketch has comments, text zones where the user can write about what he is intending to do, indicated by // at the beginning of the line. Have a quick read through, and try to see what the program is doing.
When you are ready, it is time to upload your first program! Uploading means installing the binary code onto the Arduino board. Make sure your Arduino board is connected to your development computer via USB. For this example, use an Arduino Uno or Arduino Mega. This code can run on all the Arduinos, so feel free to use whichever you have. To upload the program, a few simple steps must first be completed. The IDE needs to know what type of board is connected. First, go into the menu; Tools ![]() Board, and select your board. As you can see, there are a lot of different boards to choose from. Select the entry that corresponds to your board; in this example, I have an Arduino Mega 2560, as illustrated in Figure 2.3.
Board, and select your board. As you can see, there are a lot of different boards to choose from. Select the entry that corresponds to your board; in this example, I have an Arduino Mega 2560, as illustrated in Figure 2.3.
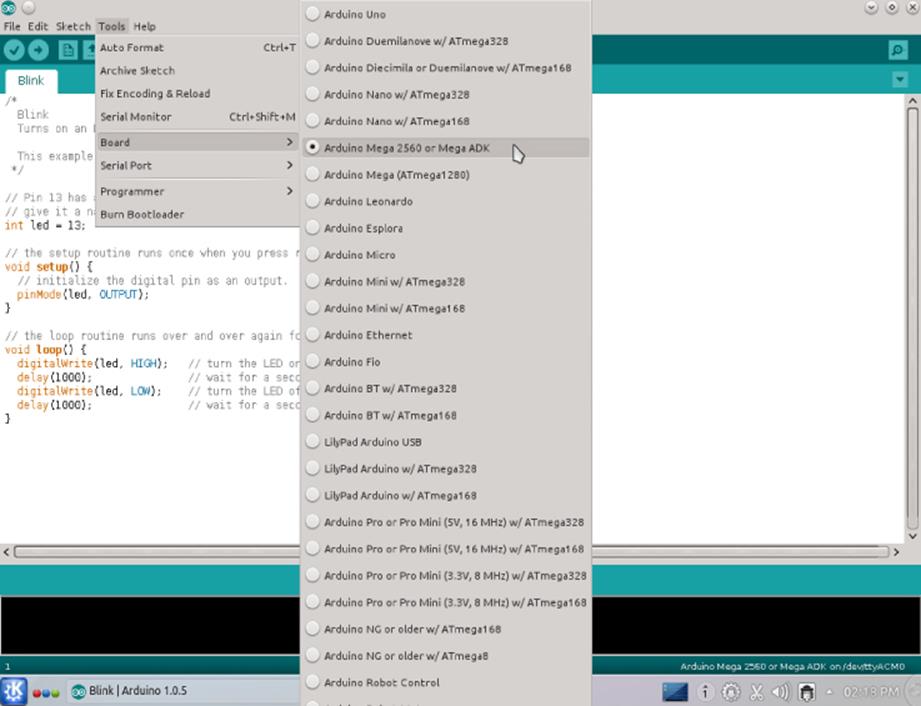
Figure 2.3 Arduino IDE with the Arduino Mega 2560 selected
Next, the IDE needs to know how the board is connected to your computer. Using the Tools ![]() Serial Port menu, you can select the proper connection. On a Windows machine, the board will appear as a COM port. On a Mac, the Arduino connection will start with “/dev/tty.usbmodem.” My development machine is a Linux system, and in this case the Arduino is connected to /dev/ttyACM0. On some systems, there might be several serial ports listed. Figure 2.4 illustrates me selecting my port.
Serial Port menu, you can select the proper connection. On a Windows machine, the board will appear as a COM port. On a Mac, the Arduino connection will start with “/dev/tty.usbmodem.” My development machine is a Linux system, and in this case the Arduino is connected to /dev/ttyACM0. On some systems, there might be several serial ports listed. Figure 2.4 illustrates me selecting my port.
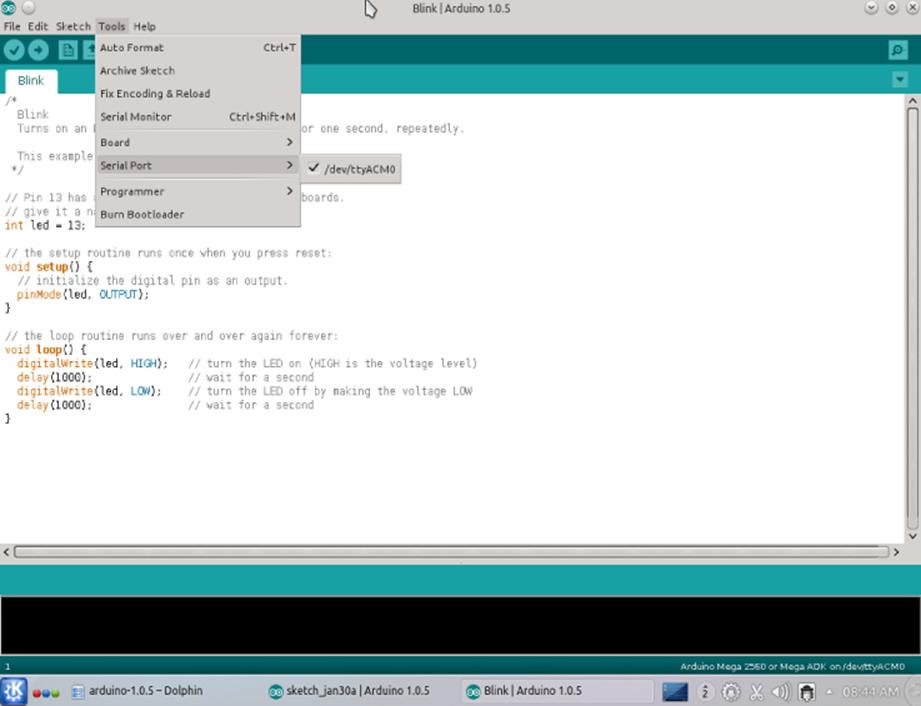
Figure 2.4 Arduino IDE with the Arduino Mega 2560 serial port selected
That's it—as far as configuration goes. You have to do this only once; the Arduino IDE remembers your preferences and keeps them for the next time. You will need to change your settings if you change boards or plug the board into a different USB port.
Next, you may optionally verify the source code. The verification stage actually compiles the source code; the compiler will warn you if anything goes wrong. If there is a problem, the IDE shows a message at the bottom of the screen, indicating a line number and the cause of the problem. For this example, the compiler shouldn't complain, and it will compile your application. To compile, you must click the Verify button (the check mark) in the top left of the IDE or go into the menu Sketch ![]() Verify/Compile. There is also a keyboard shortcut: Ctrl+R.
Verify/Compile. There is also a keyboard shortcut: Ctrl+R.
There is now one final step: you must upload the program onto your Arduino. Simply click the Upload button next to the Verify button, or go to the menu item File ![]() Upload. Again, a keyboard shortcut is available: Ctrl+U, as shown in Figure 2.5. The upload process also re-verifies the source code before uploading.
Upload. Again, a keyboard shortcut is available: Ctrl+U, as shown in Figure 2.5. The upload process also re-verifies the source code before uploading.
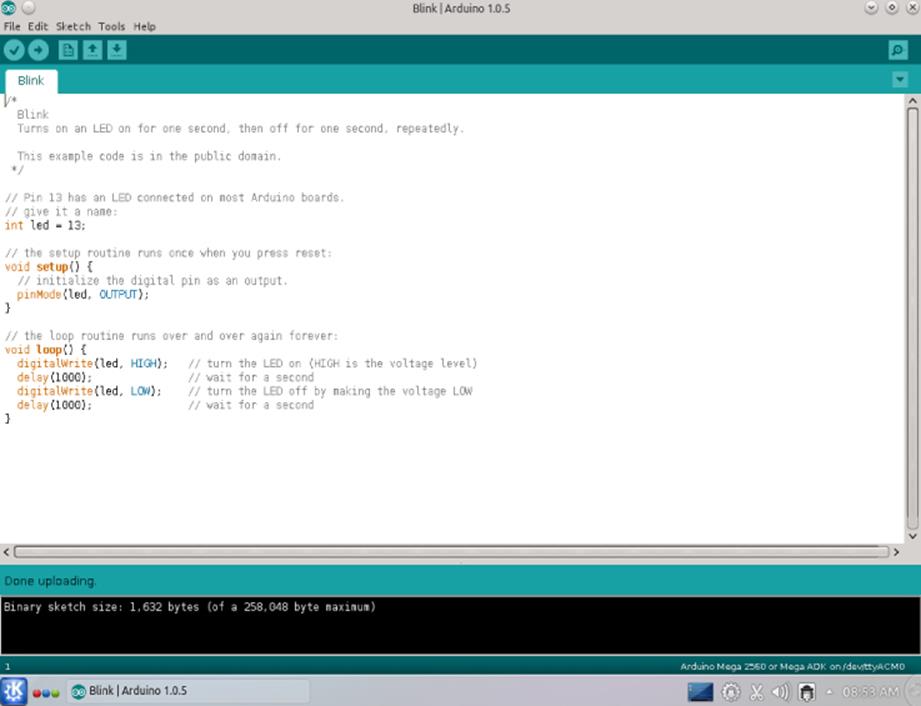
Figure 2.5 Successful upload
The Arduino IDE now attempts to contact the Arduino board and transfer the program into the microcontroller's flash memory. A message at the bottom should soon display the text “Done Uploading”. Now look at your Arduino board. Next to the USB connector, a small LED should be blinking; the same one used to verify that your Arduino was working in the beginning of the chapter. This time, it should be blinking two to three times per second. Congratulations! You have now successfully uploaded your first Arduino program!
The program has now been written into flash memory, but what does that mean? Like a program on a computer, it has been “installed” into the nonvolatile memory and will be executed every time you turn on the Arduino, so try that right now. Unplug your Arduino from the USB port, wait a few seconds, and then plug it back in. The Arduino will be powered again from the USB port, and after a few seconds, the LED will start to flash. Your program is running.
Although it may appear that the Arduino has simply run your program, it hasn't done only that. Arduinos contain something called a bootloader, a small program that is run every time the device starts. This is only one of the strong points of the Arduino system; the bootloader is always available to allow the programmer to reflash a program. Even if you accidentally flash a program that continuously crashes, you will always be able to reflash your Arduino, provided the bootloader is present.
WARNING
If you need more program space, you can delete the bootloader and place your own application at the start of the processor's instruction sequence. Doing this has the advantage of freeing the space used by the bootloader and using it for your own application. The bootloader is a small program, about 2 kilobytes in size. If you delete the bootloader, you can still reflash your Arduino, but more specialized equipment will be required.
Understanding Your First Sketch
Now that your sketch works and you have seen the results, it is time to have a closer look at the source code. This is presented step by step. The first part gives some interesting information:
/*
Blink
Turns on an LED on for one second, then off for one second repeatedly
This example code is in the public domain.
*/
Everything placed between the text /* and */ is considered to be a comment, a portion of source code that is ignored by the compiler. Everything within these markers will be ignored, so it is the best place to write natural language text about what the program does, or is doing. It is common to start a source code file with a comment, explaining what the application does. Just by looking at these few lines, you already have an idea about what the program will do.
// Pin 13 has an LED connected on most Arduino boards.
// give it a name:
int led = 13;
This, again, explains what will happen using comments. Just like the /* and */ markers, when the compiler encounters the marker //, it will ignore everything else after that marker but only for that line. On the first line, the compiler encounters a comment marker and ignores the text. It then attempts to read in the second line but again encounters a comment and ignores that, too. On the third line, there is no comment; this is a real line of code.
It starts with the keyword int, short for integer. This is a variable declaration; it tells the compiler to reserve space for a variable, a named container that can change its contents. Because the variable was declared as an integer, it can hold only whole numbers between -32,768 and 32,767. This variable is named led. The compiler will assign the value 13 to the variable. Finally, the line is finished with a semicolon. In C, a semicolon marks the end of an instruction.
Now for the next part:
// the setup routine runs once when you press reset:
void setup() {
// initialize the digital pin as an output.
pinMode(led, OUTPUT);
}
The first line is a comment. It explains what the next portion of the code will do.
The next line is interesting. The keyword void means an empty data type. The second word, setup, declares the name of a function. Because of the parentheses and curly brackets, you know that this is not a variable but a function. Functions are portions of code that can be called inside a program; instead of writing the same code dozens of times, it is possible to write it only once and have the program call this function as required. It is also a way of separating code for special needs.
Inside the parentheses, you would list any parameters for the function: these are variables that can be passed to the function. Because there is nothing inside the parentheses of setup(), there are no parameters. The function therefore does not need any data to run. Because the function was declared as void, it will not return any data either. When this function is called, it will do its job and then return without any data. But what exactly does it do?
Everything included in the curly brackets is part of the function—in this case, a single line of code. When the setup function is called, it executes one instruction, pinMode(). This instruction is not preceded with a data type, meaning that it is not a variable declaration, and it is not a function declaration. Because it has parentheses, it is a function, and unlike setup it requires two parameters: led and OUTPUT. All the standard functions will be listed in Chapter 4, but just to give you an idea, pinMode() is a function that tells the microcontroller how a particular pin will be used. Before using a pin, the microcontroller needs to know how it will be used; in this case, it will be sent as an output. The microcontroller can therefore set the output of a pin as HIGH or LOW and will not attempt to read the status of the pin. The pin in question, identified as led, was defined earlier in the code; it is pin number 13.
Now for the final section of code.
// the loop routine runs over and over again forever:
void loop() {
digitalWrite(led, HIGH); // turn the LED on (HIGH voltage level)
delay(200); // wait for a second
digitalWrite(led, LOW); // turn the LED off, LOWvoltage
delay(200); // wait for a second
}
Again, the code starts with a comment, giving you an idea of what this portion of code will do. This is a function declaration for a function called loop(). It does not require any parameters to run.
Inside of loop, you'll see the function digitalWrite(). As you might have guessed from the name of the function, it performs a write action on a pin in digital format. It sets the pin status to a logical 1 (HIGH) or a logical 0 (LOW). The first time the function is called in this sketch, it sets the pin to a logical 1.
The code then calls the delay() function with an argument of 1000. The delay function tells the microcontroller to wait for a specified number of milliseconds before proceeding to the next instruction. In this case, it tells the microcontroller to wait for 1 second before proceeding. So, the program turns on a pin and then waits for 1 second. The rest of the code is similar; a digitalWrite is performed, this time setting the pin to a logical 0 (LOW), and then waits for another second.
For those of you used to developing applications in C, you might have noticed that the Arduino code does not have a main() function. In C, the main() function is used as an entry point; that is to say, it is the function that is called when the program starts. This is true for systems programming, where an operating system takes care of initializing everything required by the program, but this is not the case on embedded systems.
The Arduino requires that two functions be present; setup() and loop(). These two functions must be present, even if they are empty, but they rarely will be.
The setup() function is called when a sketch starts and is used to initialize variables, pin modes, and other components for your sketch. It is good practice to keep initialization code away from the work code, making things clearer. It also has the advantage of making your program more robust. Although it is perfectly possible to set up a pin as required just before performing an action, it is best to have everything completely set up before starting your program. Looking into the setup() function can tell you immediately if you have correctly set up a pin, instead of looking through long lines of code in the work section. In this example, setup() contained a command to change the status of a pin, setting it to output.
The loop() function does exactly what its name implies; it loops continuously, as long as power is applied to the Arduino. In the example, loop() set the output of a pin HIGH, waited for 1 second, set the output of the same pin to LOW, and then waited for another second. After this was done, the function ran again. This is also the reason why configuration should not be done inside the loop() function; the same code will be run over and over again. If you had put any configuration here, variables could have been overwritten, and setting pin configurations might have slowed down the application.
These two functions are required for any sketch, though you are free to add your own functions as required.
Programming Basics
As said previously, programming is the art of writing something that is readable by humans and that can be converted to be understood by computers. The problem is that computers, despite what people try to tell you, aren't intelligent at all. They need to be told exactly what to do, and require exact instructions. Source code has to be laid out in a precise way.
Variables and Data Types
In your sketches, most of the time you will want to store data and perform some type of calculation. Counting the number of times a button is pushed, storing the voltage on an analog pin, or performing a complex mathematical calculation with vectors: require data to be calculated and stored. This data is saved in a variable, a memory location that can be changed as required. By declaring a variable, you are asking the compiler to allocate a specific amount of memory, depending on the data type.
There are different types of data, and you must first tell the compiler exactly what sort of data you want to store. If you define a variable as capable of holding integers, you cannot use the same variable to store floating-point data, or even a string of text. The different data types are listed in Table 2.1.
Table 2.1 Different Data Types
|
Data Type |
Contents |
|
void |
No data type |
|
boolean |
True or false |
|
char |
One character, stored as an ASCII number (‘A’, ‘B’, ‘C’…) |
|
unsigned char |
Decimal numbers, from 0 to 255 |
|
byte |
Decimal numbers, from 0 to 255 |
|
int |
Decimal numbers, from –32,768 to 32,767 |
|
unsigned int |
Decimal numbers, from 0 to 65,535 |
|
word |
Decimal numbers, from 0 to 65,535 |
|
long |
Decimal numbers, from –2,147,483,648 to 2,147,483,647 |
|
unsigned long |
Decimal numbers, from 0 to 4,294,967,295 |
|
short |
Decimal numbers, –32,768 to 32,767 |
|
float |
Floating point numbers, from –3.4028235 x 1038 3.4028235 x 1038 |
|
double |
Floating point numbers |
|
string |
An array of char |
|
String |
Advanced arrays of char |
|
array |
A collection of variables |
Also noteworthy, the Arduino Due is a relatively new device that uses a 32-bit microcontroller instead of the 8-bit AVR found in other Arduino boards. Therefore, some of the data types are different to other Arduinos. Integers are coded to 32-bits, meaning they can handle much larger numbers. Also, the data type double is coded to 8 bytes on the Arduino Due and 4 bytes on other Arduinos. Therefore, a double has more precision on an Arduino Due.
When declaring a variable, it is important to first specify the data type and then the variable name. Optionally, you may assign a value by using the equal sign. Finally, finish with a semicolon. The following are legal declarations:
long data;
char usertext;
int pin_number = 42;
You are free to use just about any variable name, but don't use names that are too vague. In the previous example, usertext hints that the variable contains some text that comes from an external source. The variable pin_number suggests that this is the pin ID for input or output operations, but data? The definition is too vast; does it contain text? Numbers? Later in your sketch, you might start wondering what this variable contains, and you might even confuse it with another variable with unpredictable results.
Data types work on variables but also on functions. This is described later in the “Functions” section.
Control Structures
The power of microprocessors and microcontrollers is their ability to process data. They follow instructions, and can also execute conditional instruction depending on data. Does the variable contain a number greater or equal than 42? If so, execute this portion of code. Otherwise, execute another portion. These instructions come in the form of conditional statements like if, for, and while.
if Statement
The if statement is the simplest of branching statements and is used to detect if an expression is equal to a result. It is used as follows:
if (expression)
{
statement;
}
Multiple instructions can be used inside an if statement, by placing multiple instructions inside curly brackets:
if (expression)
{
statement;
another_statement;
}
It is also possible to execute two sets of instructions using an if .. else statement. You can think of it as doing one thing if the result is equal to something, else performs another action.
if (expression)
{
do_this;
}
else
{
do_that;
}
It is also possible to mix several ifs using else:
if (expression)
{
do_this;
}
else if (expression)
{
do_that;
}
The expression is used to check the veracity of a statement. For example, you can check to see if a variable is equal to a certain value, less than a value, greater than a value, and so on. It is also possible to detect other value types; for example, if a boolean value is trueor false.
int myval = 42;
if (myval == 42){
run_this; // myval equals 42; this function will be executed
}else{
run_that; //This one will not
}
if (myval < 50){
run_another_function; //This will be run, since 42 is less than 50
}
Note that in this example, the myval variable is set to the value 42 with a single equals sign (=), but the value is evaluated with a double equals (==). In C, a single equal sign always sets the value of a variable (or at least tries to). Two equal signs makes an evaluation. Watch out when writing if structures; a single equal sign will force a value into a variable, and the results might not be quite what you expect!
switch Case
The if statement is easy to use and works well in situations in which you need to check a variable against one value, possibly two. What would happen if you need to check against multiple variables? What about a robot that needs to detect how close an obstacle is? In this case, you might use an if statement; if the obstacle is less than 3 inches away, then stop the motors. Some situations are not as simple. Imagine a keypad connected to an Arduino with some stickers on the keypad detailing instructions for the user. If the user presses button one, then the Arduino will turn on the lights. If the user presses button two, then the blinds open. If the user presses button three, some music turns on, and so on. With if statements, this would rapidly get out of hand and would be difficult to read:
if (button == 1){
turn_on_lights();
}
if (button == 2){
if (blinds_up == false){
raise_blinds();
blinds_up = true;
}
}
if (button == 3)
…
A more elegant way of writing this is through the switch/case statement. Just like the if statement, switch/case controls the flow of the program by allowing different sections to be executed depending on a condition. A switch statement checks the value of a variable, and executes different case statements depending on the value.
switch(button)
{
case 1:
turn_on_lights();
break;
case 2:
if (blinds_up == false)
{
raise_blinds();
blinds_up = true;
}
break;
case 3:
…
Notice the break instruction; it is typically used at the end of each case and tells the compiler to stop running instructions. Without the break statement, the Arduino would continue to execute the case instructions, even when another case should be used. This can actually be used to your advantage. Imagine that in this application, pushing buttons 4, 6, and 8 actually do the same thing. You can write the following:
switch(button)
{
case 4:
case 6:
case 8:
//code to be run
break;
}
while Loop
The while loop is the most basic loop in C; it will loop over the same code while a condition is satisfied. As long as the condition is true, while continues to execute the same code, checking the condition at the end of the loop.
while (button == false)
{
button = check_status(pin4);
}
In this example, the function check_status runs until it returns true. When that happens, the variable button becomes true, and the while loop will be broken. It might be within a few milliseconds, or the system might wait indefinitely.
for Loop
In cases in which you need a portion of code to loop an exact number of times, the for loop is used. It is similar to while, only it is written differently. The for loop keeps track of the number of times it has run.
for (expression1; expression2; expression3)
{
instructions;
instructions;
}
This might look complicated, but don't worry; it is simple. It requires three expressions:
· expression1 is the initializer; it will initialize a variable.
· expression2 is the conditional expression; as long as this condition is true, the loop keeps on executing.
· expression3 is the modifier; when a loop is completed, this action is performed.
For example:
for (int i = 0; i < 10; i++)
{
myfunc(i);
}
In this example, a variable is defined with the name i. The variable is set to zero, and each time the function myfunc is run, i is increased by one. Finally, when i reaches 10, the loop stops before running myfunc. This saves you from writing out all the commands one by one like this:
myfunc(0);
myfunc(1);
…
myfunc(8);
myfunc(9);
NOTE
The name i is often used for a temporary variable in for() loops. It is shorthand for “index.”
Functions
A function is a portion of code that can be called, with parameters if required, and returns data if required. If you write a long list of repeating statements in code, or if you have created code that needs to be called several times, it may be useful to create a function.
The main program is running and then calls a function, called addTwo(), with two parameters: 12 and 30. The function is run and data is returned. The program then returns to where it was.
A function requires a data type, even if it does not return any data. If no data is to be returned, then the data type void must be used. The contents of the function are contained within curly brackets. In the addTwo() function shown above, it returned an int datatype, indicated when it was first declared.
Libraries
The Arduino programming environment comes with a standard library, a library of functions that are included in every sketch. However, the Arduino is also an embedded system, so the standard library contains the strict minimum. By default, it can handle basic mathematical operations, and set pins to digital or analog input and output, but it cannot write data to an SD card, connect to WiFi, or use a TFT screen. These devices that are not standard on Arduino boards. Of course, an Arduino can use these devices when they are available, but to use these devices, a library for the specific device must be imported into a sketch. Otherwise, there is no point in having the extra functionality that could potentially take up space on a device where space is critical.
Adding a library to your sketch adds more functionality and allows you, the programmer, to use new functions. For example, by importing the EEPROM library, you can access the internal EEPROM by using two new functions: read() and write(). The standard library will be presented in Chapter 4, and different libraries are presented throughout the book.
CROSS-REFERENCE
Chapter 6 explains EEPROM technology and the EEPROM library.
Summary
This chapter showed you how to create your first Arduino sketch and walked you through it step by step. Arduino has developed all the tools required for you to get started programming, and they are delivered in a simple package that contains everything you need, from writing your programs to flashing the final binary file.
An Arduino program is known as a sketch, which is like a work of art. You, the artist, gather and assemble elements to create your masterpiece, and the Arduino is your canvas.
In Chapter 3, you will see some of the most common electronic components, and how to choose their values. Each will be presented, and I will explain how to use them in your sketches.
All materials on the site are licensed Creative Commons Attribution-Sharealike 3.0 Unported CC BY-SA 3.0 & GNU Free Documentation License (GFDL)
If you are the copyright holder of any material contained on our site and intend to remove it, please contact our site administrator for approval.
© 2016-2026 All site design rights belong to S.Y.A.