Practical Electronics: Components and Techniques (2015)
Chapter 3. Tools
There is much more to tools for electronics than just screwdrivers and pliers. While most of the common tools can be found at a local hardware or home improvement store, many are unique to the electronics industry. These specialized tools have evolved over many years, in some cases starting out as modified versions of common hardware store types, and in other cases designed from the outset to fulfill a specific need.
For the most part, you shouldn’t need to spend a lot of money on odd-ball tools if you stick to the common hardware described in Chapter 2 and avoid things like surface-mounted components with ultra-fine pitch leads. If you need to use an integrated circuit (IC) with something like 144 leads with hair-width spaces between the leads, then you should probably consider paying someone to mount it for you using screened solder paste and a reflow soldering system. For just a single project, it might not be worth the expense of acquiring a decent bench microscope and a fancy surface-mount soldering station and then learning to use it.
This chapter is a survey of some of the common tools you should consider owning for working with modern electronics. It is not intended to be a definitive or comprehensive guide. There are hand tools, power tools, and bench-mounted tools for tightening, cutting, drilling, and trimming. Other tools are used for soldering, inspecting, and finishing. I would suggest obtaining a selection of catalogs from companies such as Digikey and Mouser and perusing the tool sections. If you have a good electronics supply outlet nearby, it might be useful to browse its display racks to get an idea of what’s available and examine the tools in person.
Some of the tools described in this chapter can severely injure you if used incorrectly or carelessly. Always wear safety glasses when working with power tools, and always read and follow the manufacturer’s safety precautions provided with the tool.
Screwdrivers
For every screw type there is a screwdriver. For most tasks, a basic selection of screwdrivers, such as the ones shown in Figure 3-1, is all you’ll need.
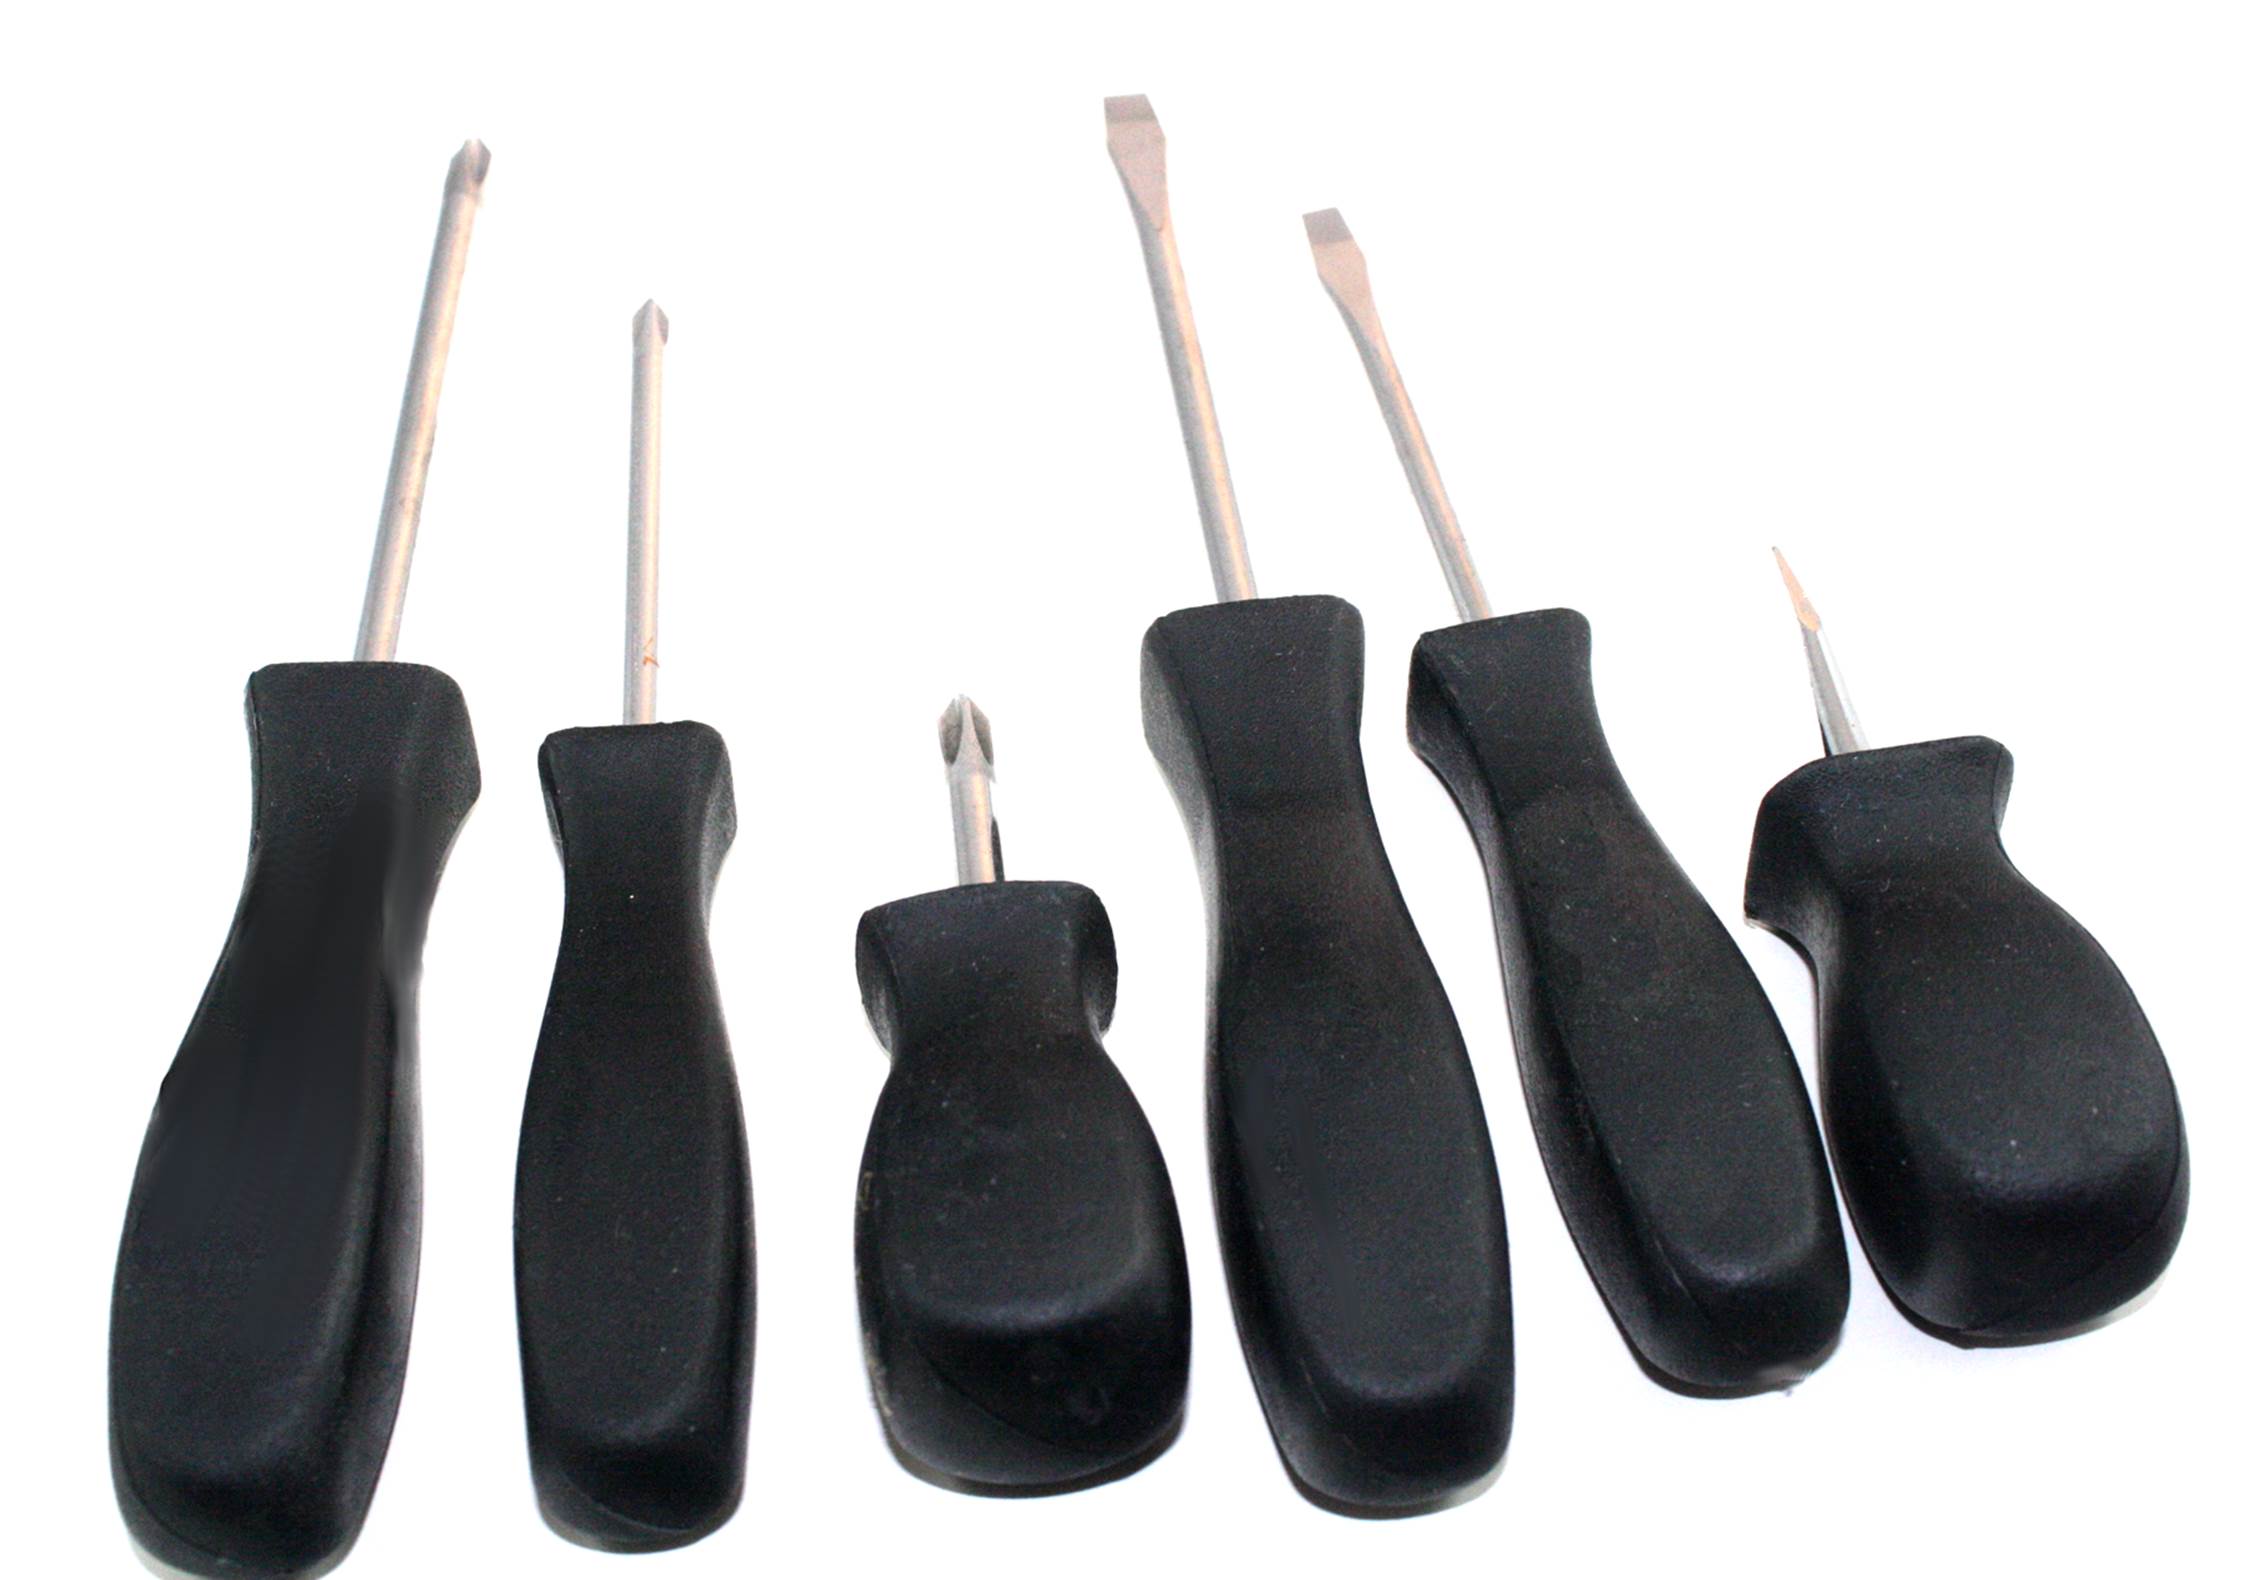
Figure 3-1. Screwdrivers
However, if you plan on disassembling consumer electronics or a toy, then you might also need some rather odd screwdriver types. A set of miniature and specialty screwdrivers, such as the one shown in Figure 3-2, is essential for these types of situations. You can find sets like this on eBay. Just bear in mind that these imported tools are generally not made from the highest-quality metal (that’s why they are so inexpensive), and they can be easily ruined if used incorrectly.

Figure 3-2. Miniature screwdrivers
Combination driver sets are available that use a common handle and a selection of driver bits. Figure 3-3 shows a set with slotted, Phillips, hex, Y, and other styles.
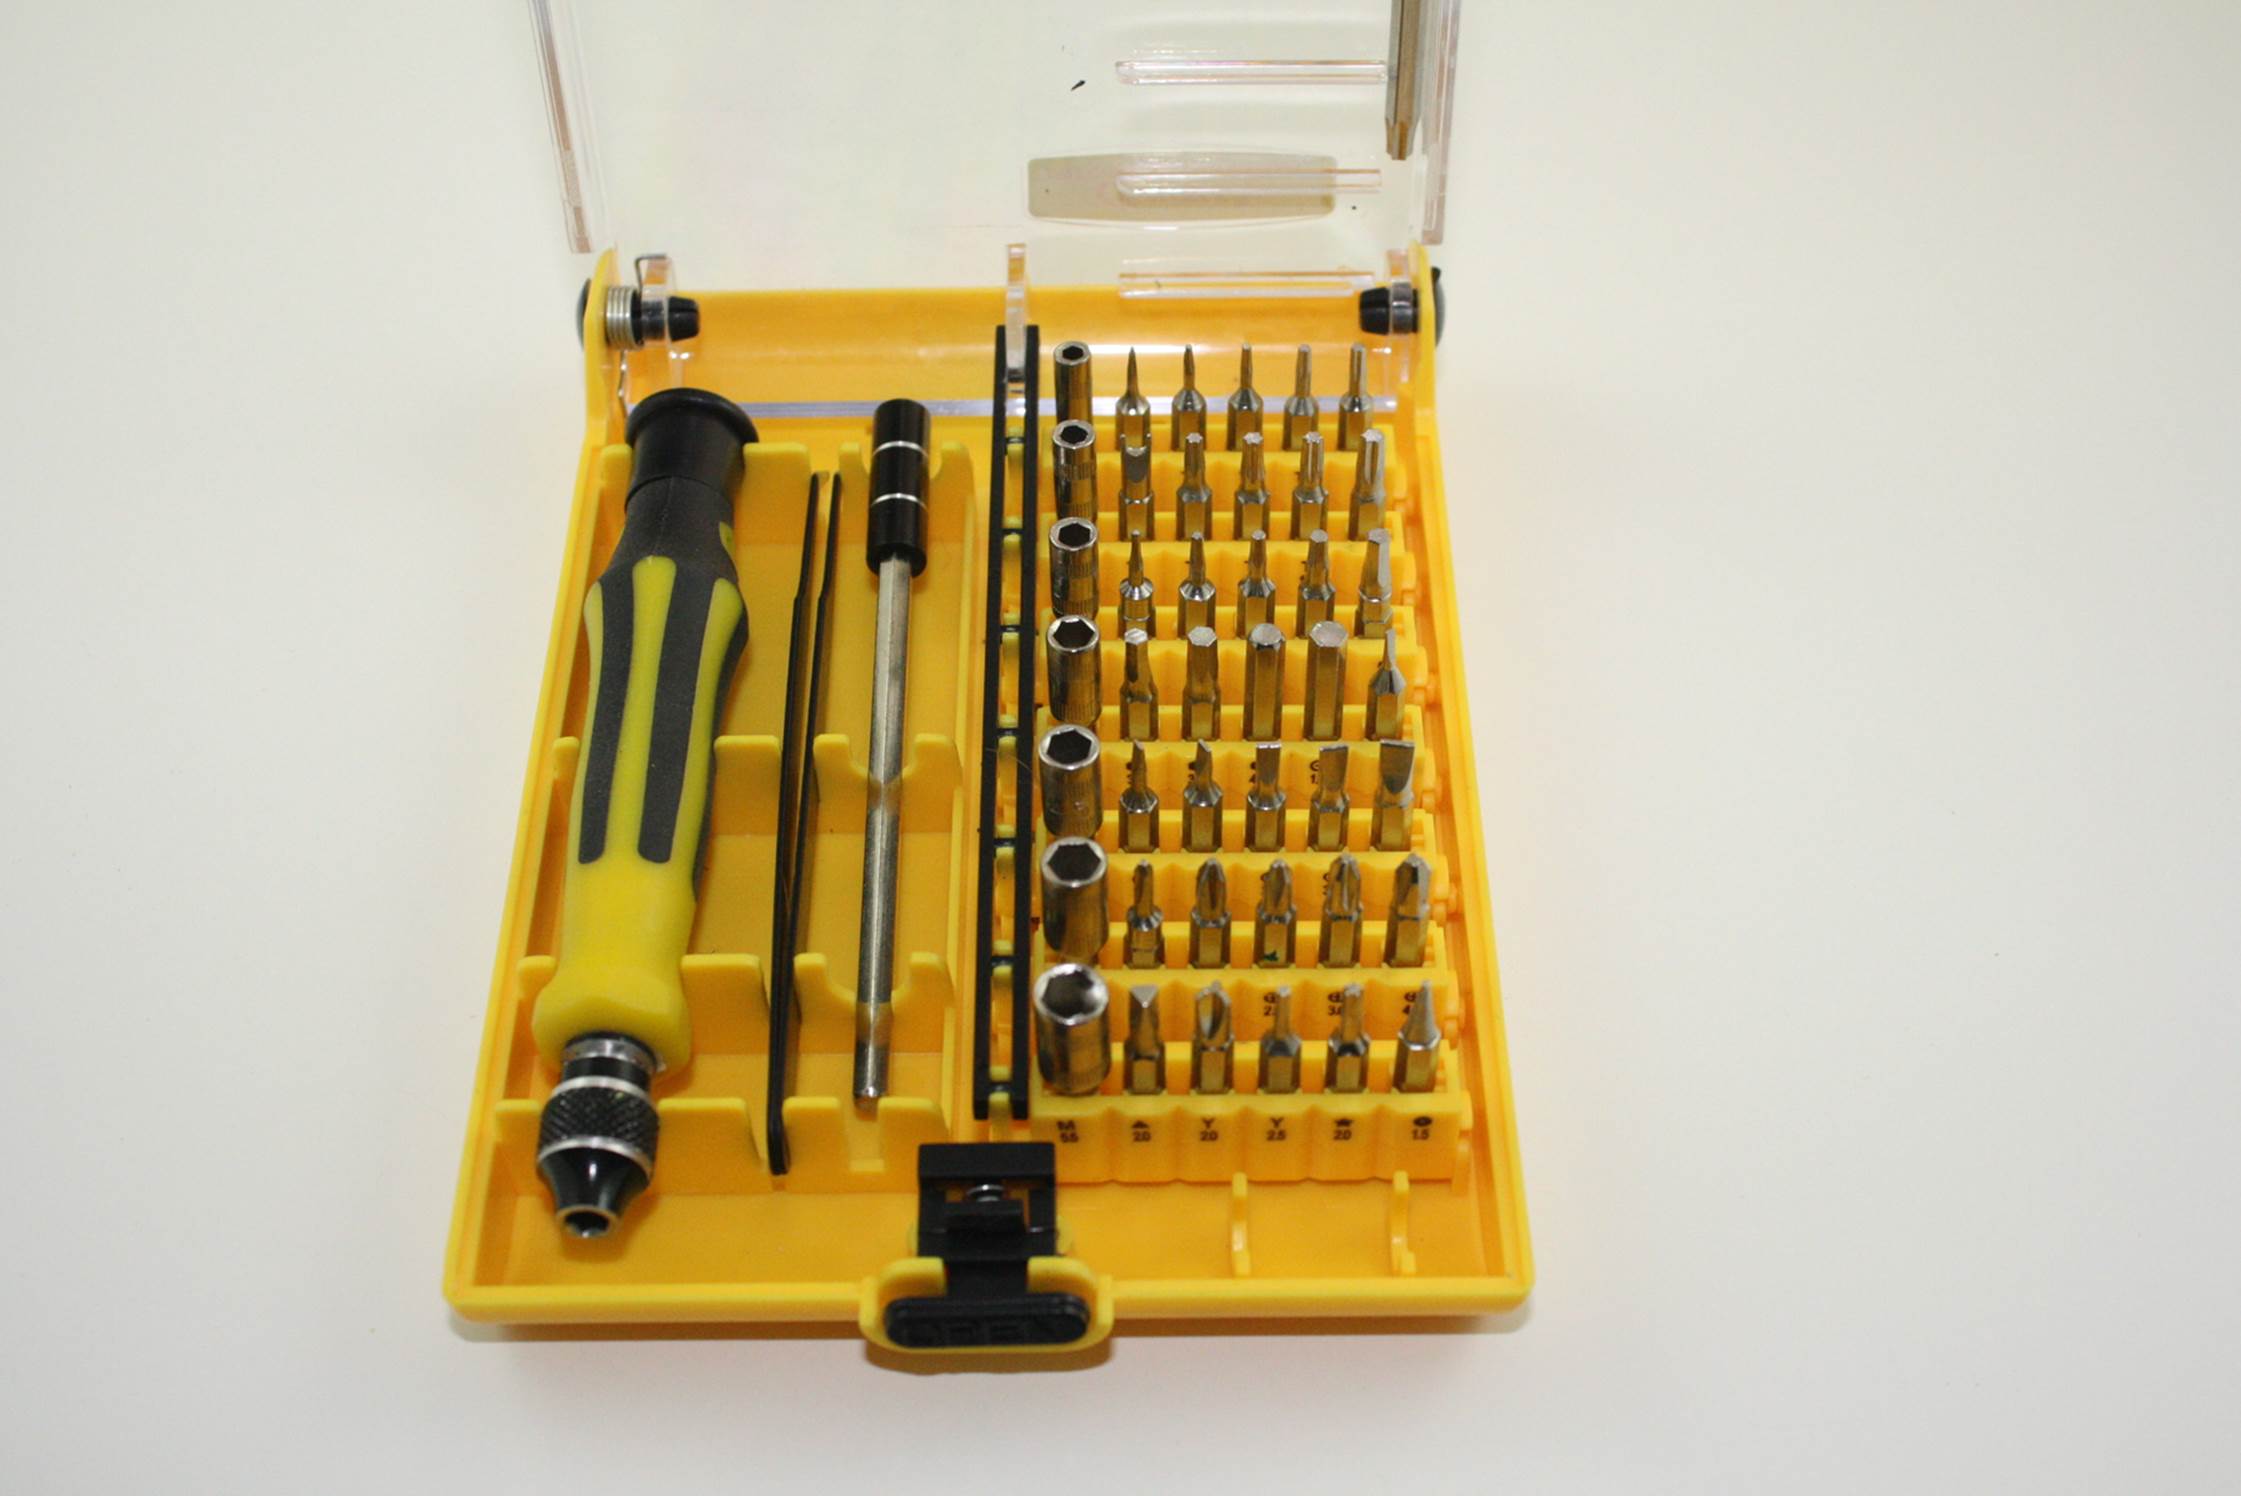
Figure 3-3. Combination driver set
Although inexpensive combination sets might seem like the answer to all your driver needs, you should bear in mind that you get what you pay for. The tool bits in these sets aren’t always made from the best metal and tend to be brittle. The handles can also become loose or even break if stressed too much. That being said, sometimes the only place to find that oddball driver you really need is in one of these imported combination kits.
Pliers
The pliers available from a hardware store or other locations are acceptable for many tasks, but they are not always ideal for working with electronics. Figure 3-4 shows a selection of typical tools you might find at an auto parts or home improvement store.
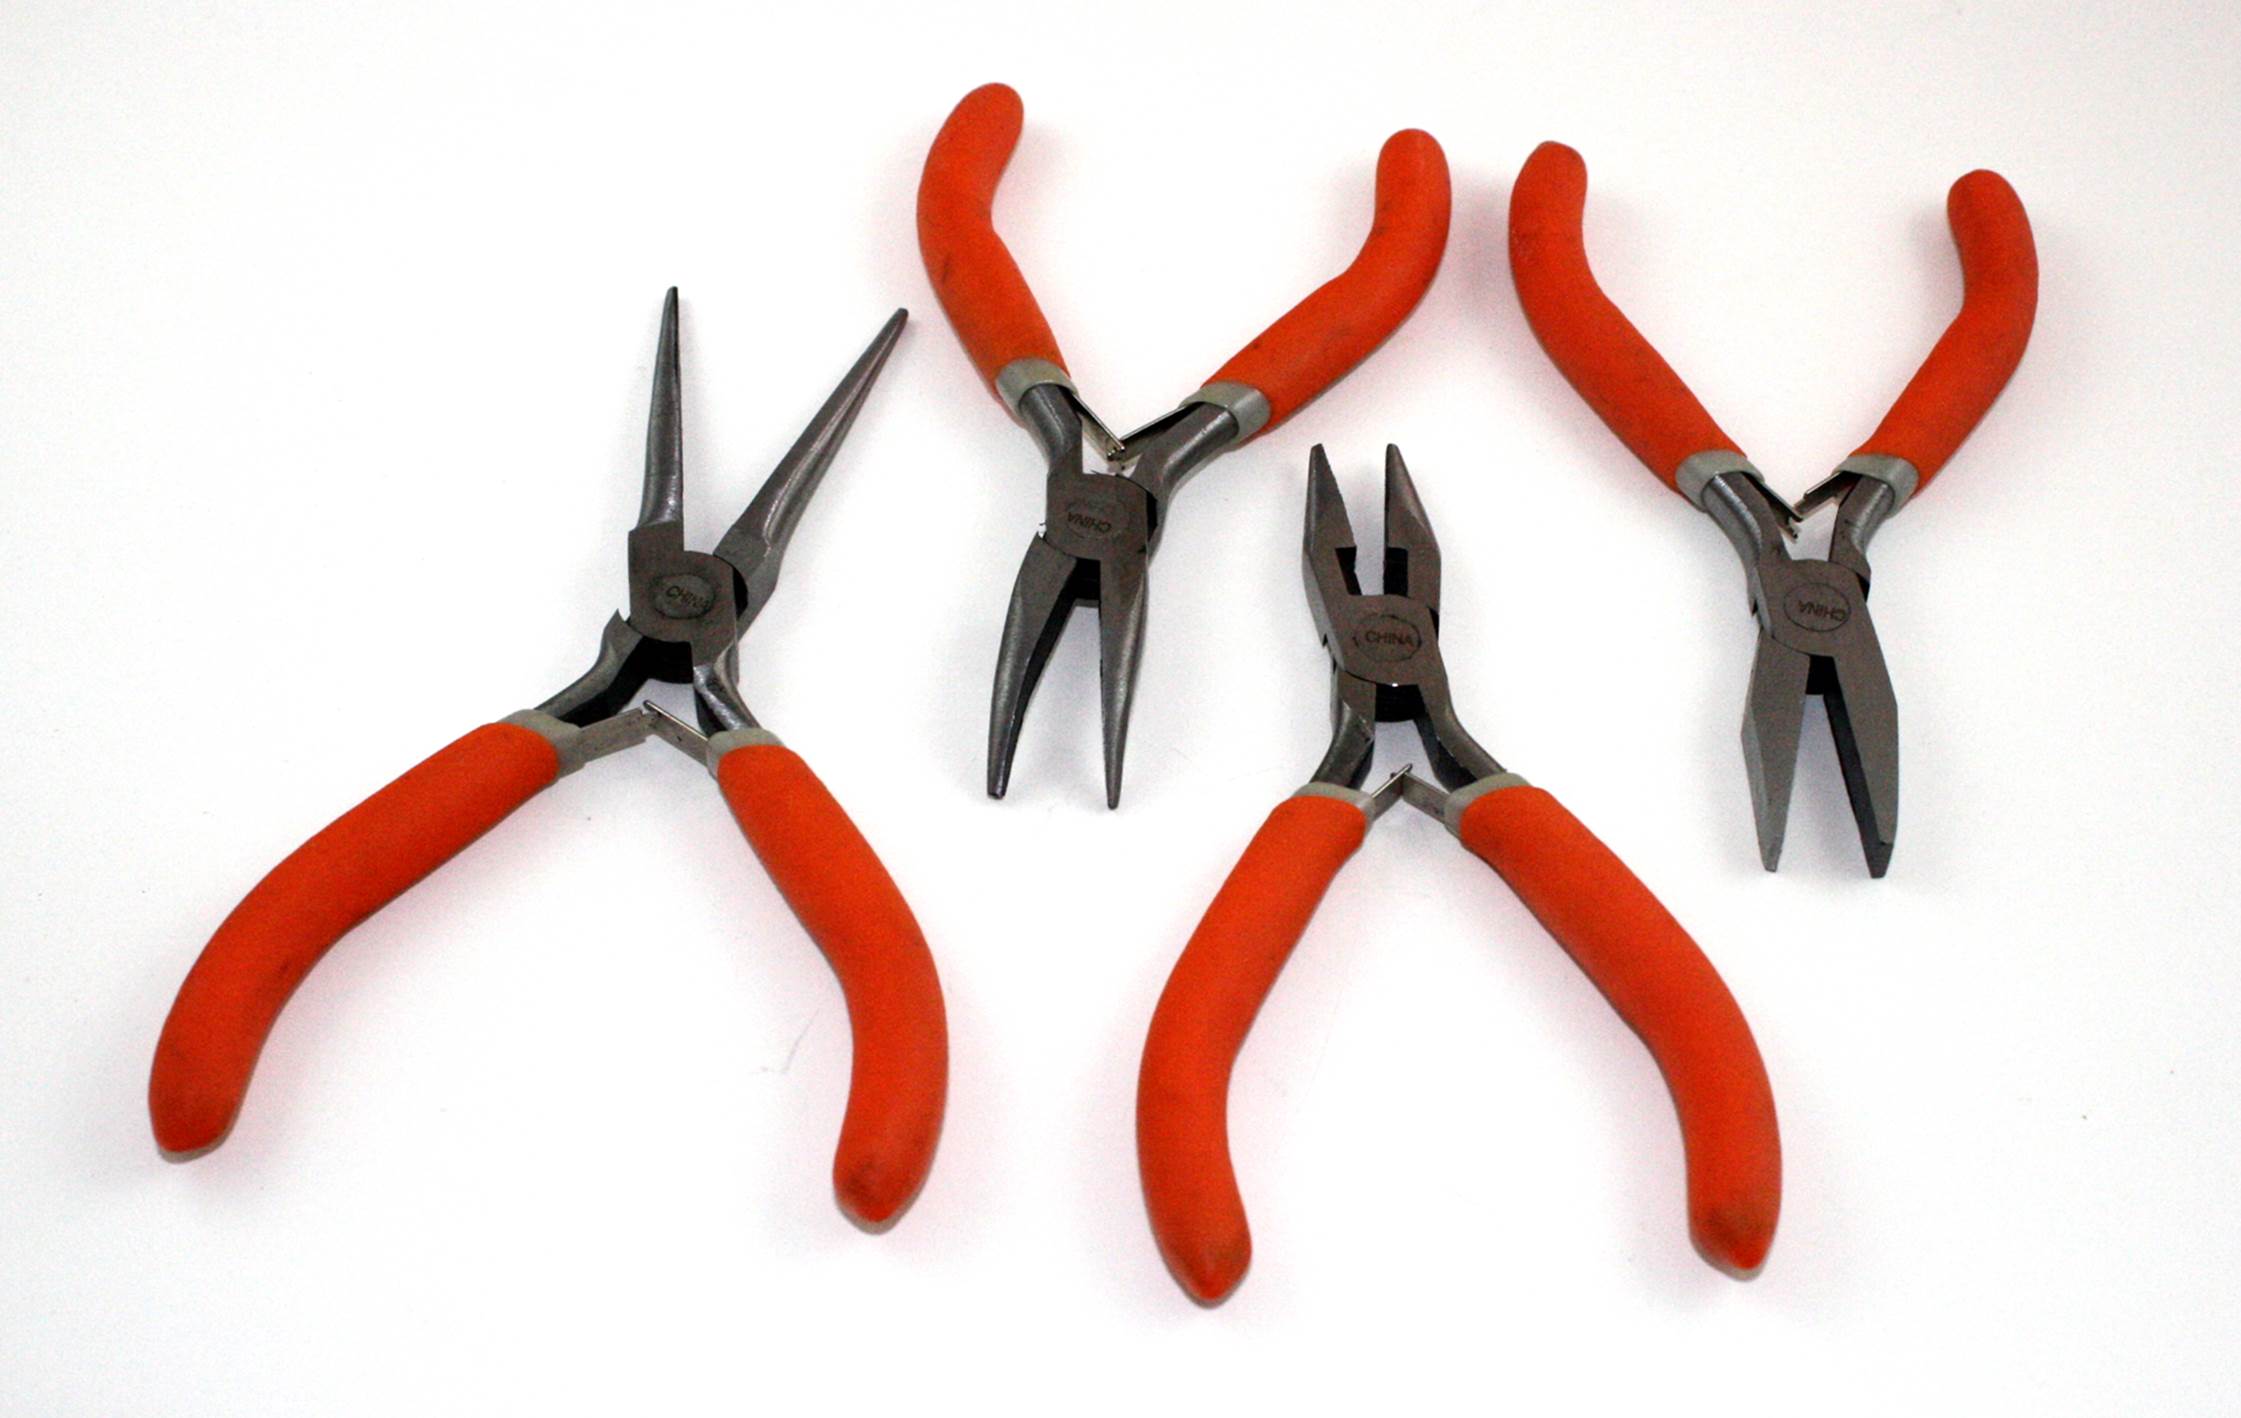
Figure 3-4. Selection of various common pliers
The large jaws of the common pliers are good for gripping stubborn bolts or holding a stiff spring while maneuvering it into position. But those same large jaws cannot really deal with things like resistor leads. For that type of task, you need a different tool.
Specialty pliers are available with narrow tips, and even with a 90-degree bend. Needle-nose pliers, shown in Figure 3-5, are a common tool in any electronics toolbox. But, as with any tool, they are intended for a specific set of applications, which are discussed in Chapter 4.
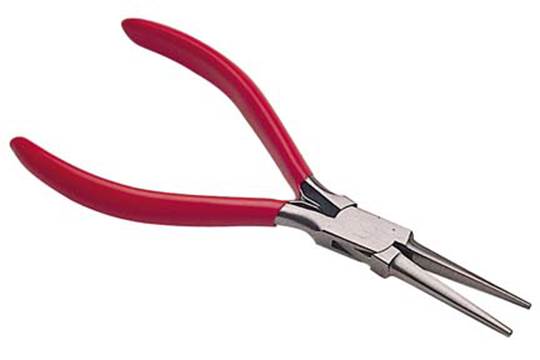
Figure 3-5. Needle-nose pliers
So-called lineman’s pliers are a familiar tool for anyone who deals with household or industrial electrical wiring. They were originally developed for use by electrical linemen, hence the name. These tools are rugged and versatile and can be used to bend large-gauge wire, cut screws and small bolts, and pull cable through narrow channels or conduit, and some types have cut-outs to crimp lug-type connectors. They are sometimes used to hammer a screw or concrete anchor into a starting position, earning them the nickname of electrician’s hammer. Figure 3-6 shows a typical example. You can find them at hardware and home improvement stores, online suppliers, and most electrical supply outlets.
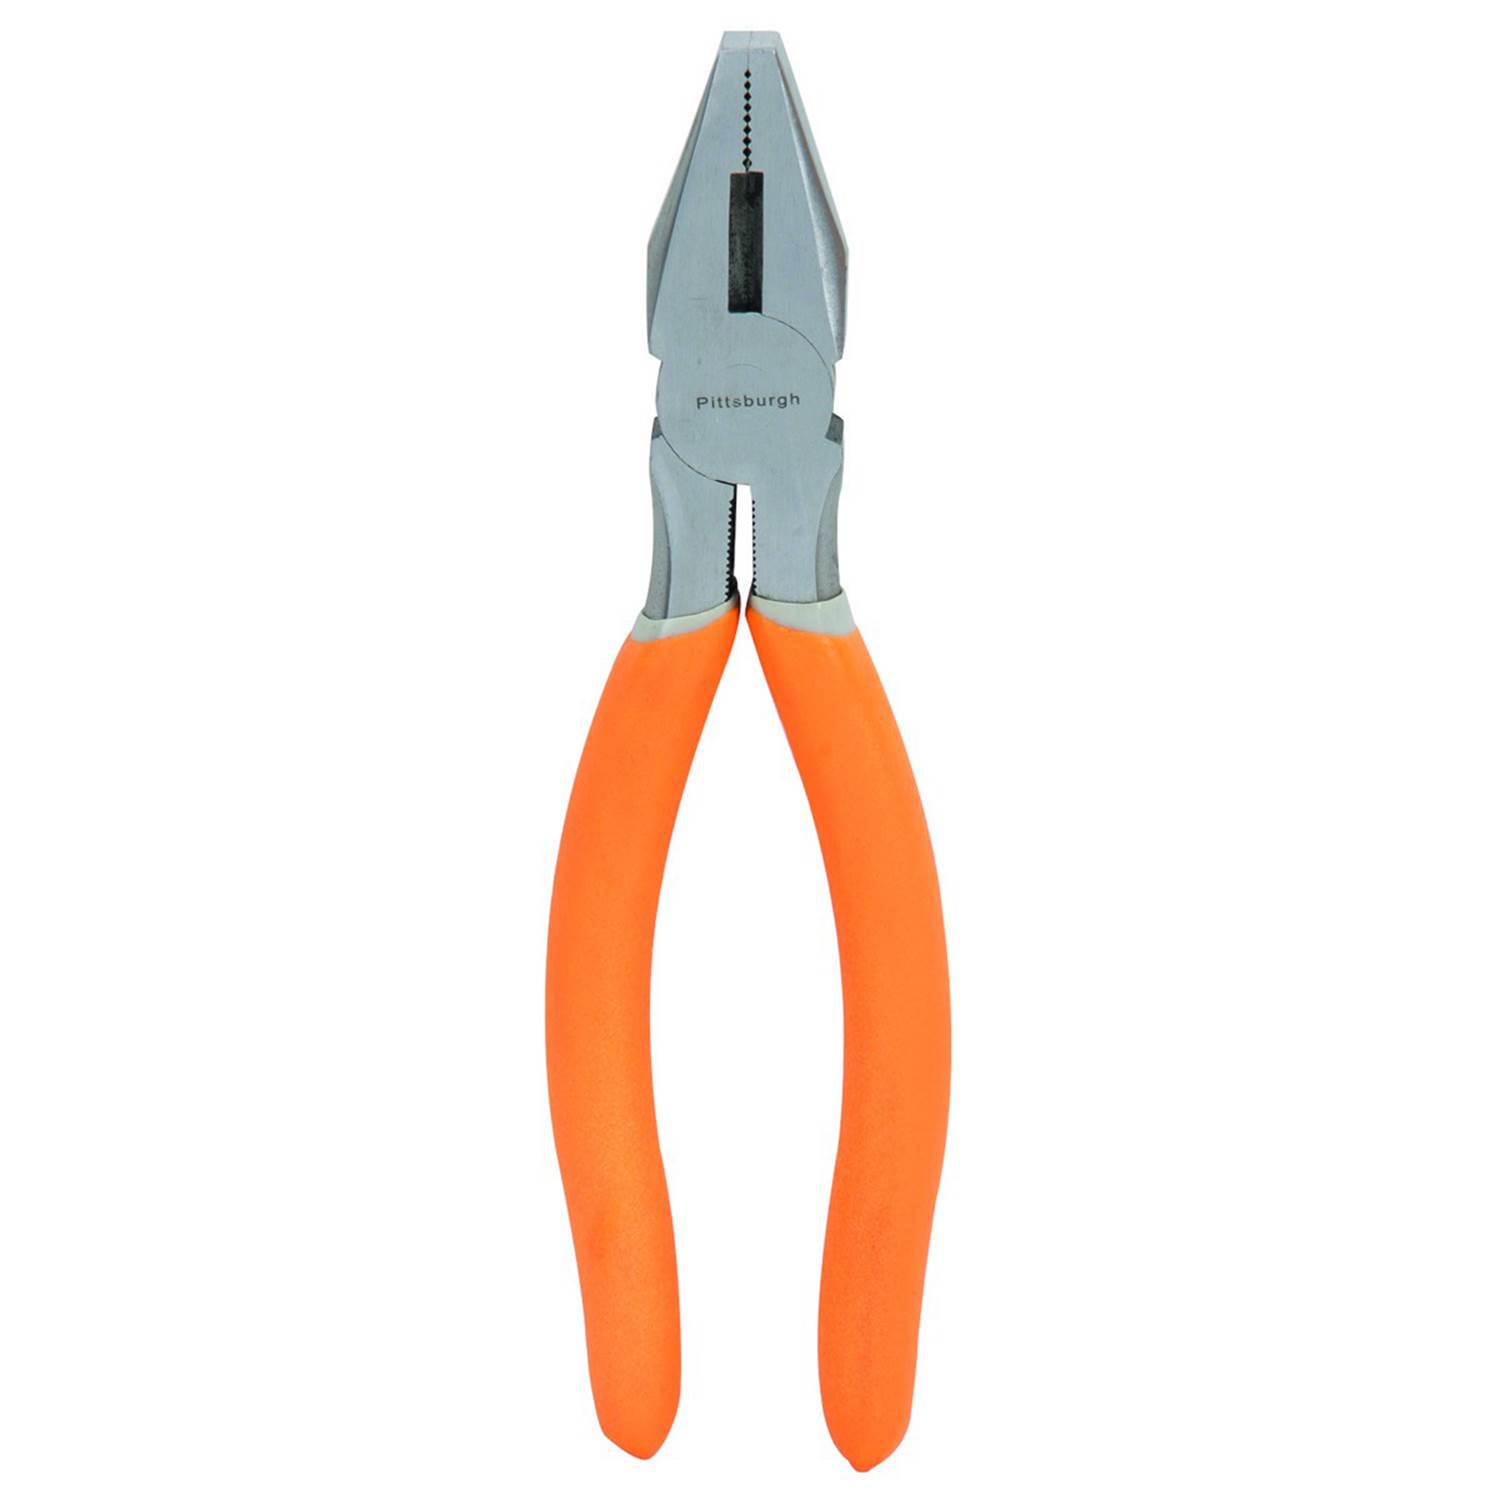
Figure 3-6. Lineman’s pliers
Wire Cutters
As with pliers, the typical wire cutters from the hardware store are suitable for cutting wires for home wiring and automotive work, but they are not designed for electronics. Specialty cutters are available with blades designed to cut flush against a surface to trim component leads on a printed circuit board (PCB) as close as possible, and some types have built-in retainers to prevent cut leads and wires from flying off. Figure 3-7 shows the so-called flush cutter type, which is most commonly used in electronics.
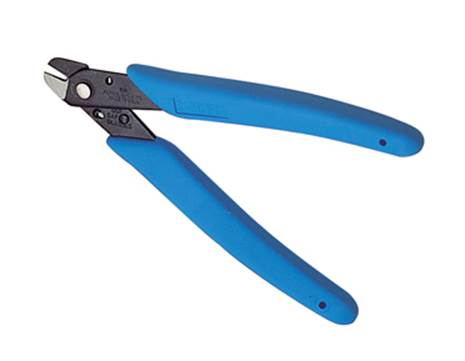
Figure 3-7. Flush wire cutters
The diagonal cutters shown in Figure 3-8, along with a pair of end cutters (also known as nippers), are common types of wire-cutting tools. As mentioned earlier, these are not designed specifically for electronics work, but they can, and should, be used for tasks that are too demanding for the flush cutters.

Figure 3-8. Diagonal wire cutters and end cutters (nippers)
Diagonal cutters come in a range of sizes, from small ones like the tool shown in Figure 3-8 to large cutting tools used by electricians and in industry. The end cutters are useful for nipping off wires close to a surface and can be used to (carefully!) remove small brads or finishing nails, provided that you are careful not to apply excessive force and put a notch in the blades.
There is one important thing to keep in mind when you are using wire cutters intended for electronics work: do not cut hard items that can create a nick or notch in the blades. In other words, use a pair of lineman’s pliers or heavy cutters for things like clothes hanger wire or spring steel, diagonal cutters for large-gauge insulated wire, and flush cutters for the leads of components and thin wire only. Once your flush cutters have been nicked, that portion of the blade is useless (except perhaps for stripping small-gauge wires, but there are better tools for that).
Wire Strippers
Trying to strip the insulation from wire using something like a pair of flush or diagonal cutters is risky, at best. Unless you are very, very good, there is a distinct possibility that the wire will be nicked, and when that happens, the nicked spot can cause the wire to break. Some types of pliers include built-in wire strippers, but they don’t always work that well, and they are fixed for one size of wire. A better option is a tool made specifically to strip wires, like the one shown in Figure 3-9.

Figure 3-9. Simple manual wire strippers
You can adjust the wire strippers shown in Figure 3-9 using the set screw seen on the lower handle. If set correctly, they will do a good job of removing most types of insulation without damaging the underlying wire. Manual wire strippers like these can be adjusted to any wire size from 10 down to 24 AWG (American wire gauge), but they can be hard to use on larger wire gauges.
There are, of course, fancier wire strippers available, such as the automatic strippers shown in Figure 3-10.
Automatic wire strippers cut and remove up to 1 inch of insulation in one step, repeatedly removing the same amount of insulation each time. The tool shown in Figure 3-10 handles 8- to 22-gauge wire, and a replacement blade set is available for 16- to 26-gauge wire.
As you might expect, there are also electric versions of automatic wire strippers. These are expensive heavy-duty tools intended for production line work, and they aren’t something normally found in a typical small shop.
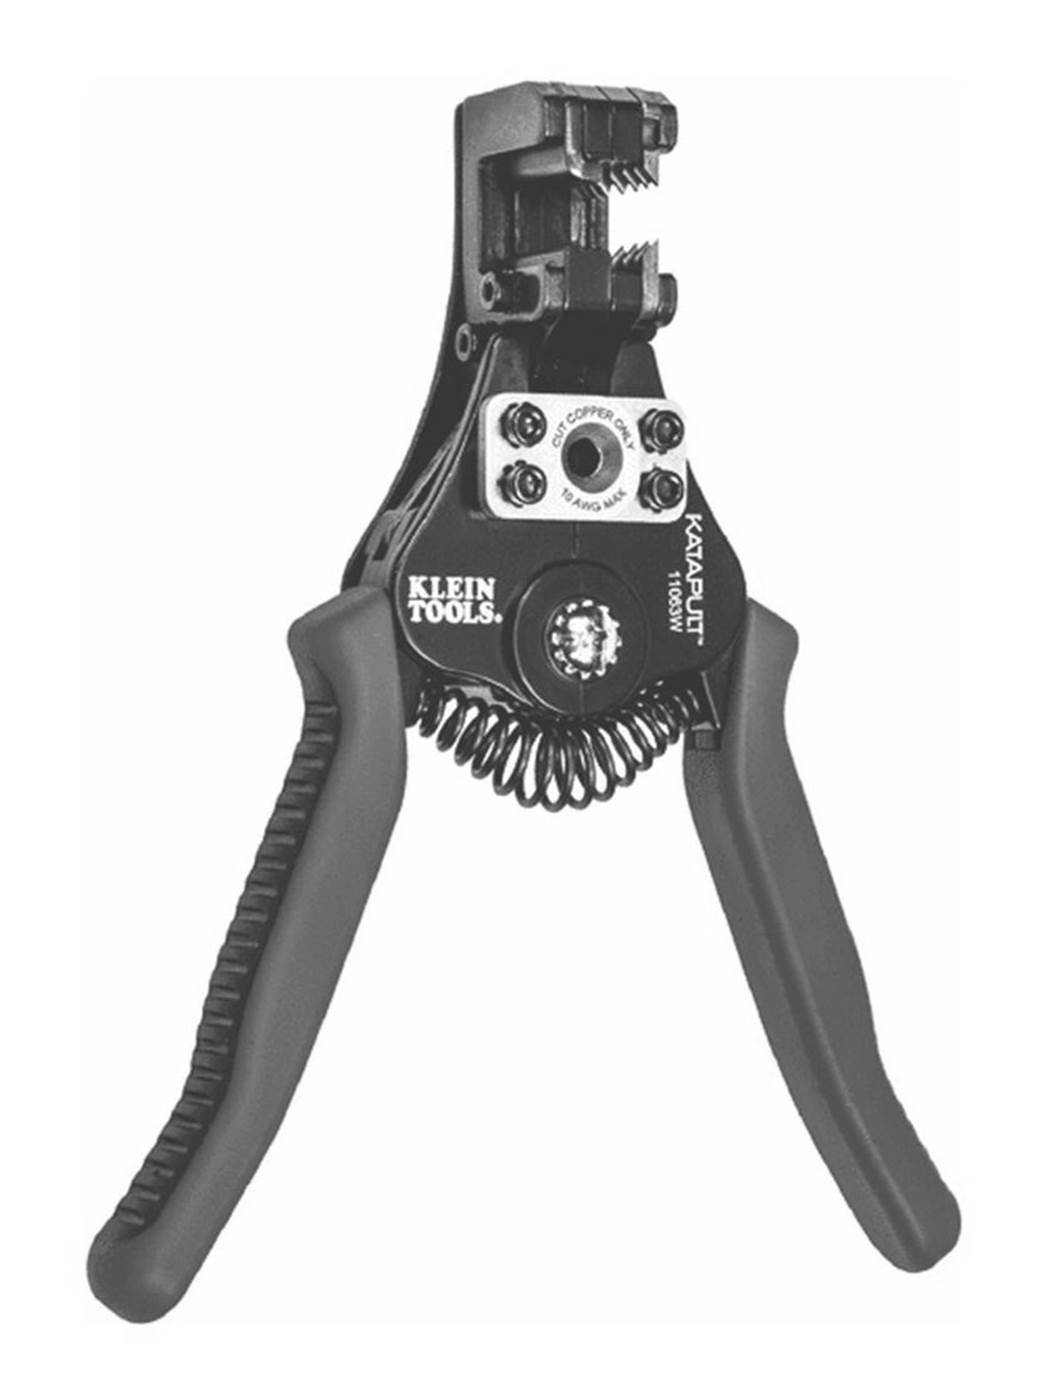
Figure 3-10. Automatic wire strippers
There is also a style of tool that incorporates lug crimper, machine-screw cutter, wire cutter, and wire stripper capabilities into the same tool. These are common in hardware stores, but I don’t recommend them as wire strippers. When this type of tool is used to strip wire, it has a tendency to pull on the insulation rather than cut it cleanly, and sometimes the tool just doesn’t have the right stripper hole for the wire. With the two types of stripping tools shown here, you can either set the tool for exactly the right size or you can rely on the blade set and grabber jaws to do a clean job without requiring you to wrestle with the wire.
Crimping Tools
If you are working with connectors that utilize crimped terminals, then a crimping tool is essential. There really is no other way to make a good connection with these types of connectors. Rectangular connectors that use insertable socket terminals are readily available, and they come in a variety of styles and sizes. Crimping tools range from simple things that look like pliers to aerospace-grade ratcheted devices with interchangeable crimping parts, called dies, for different contact sizes. Figure 3-11 shows a relatively inexpensive tool for working with crimp contacts like those used in rectangular connectors. The tools range in price from around $30 to well over $500.
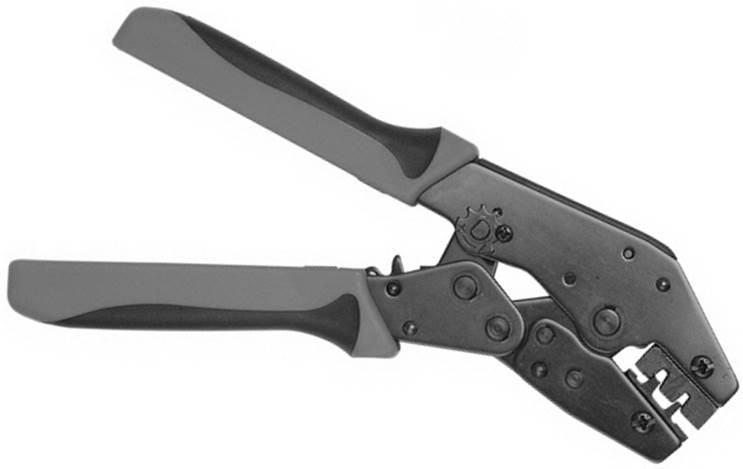
Figure 3-11. A crimping tool for small contacts
Do not try to use a crimping tool from an auto supply or hardware store for miniature electronic connectors. It won’t work. Those tools, like the one shown in Figure 3-12, are made to be used with connectors such as the spade lugs and barrel splices found in automotive wiring, and for those types of applications they are fine. They just won’t work with the extremely small terminal parts used in miniature connectors.
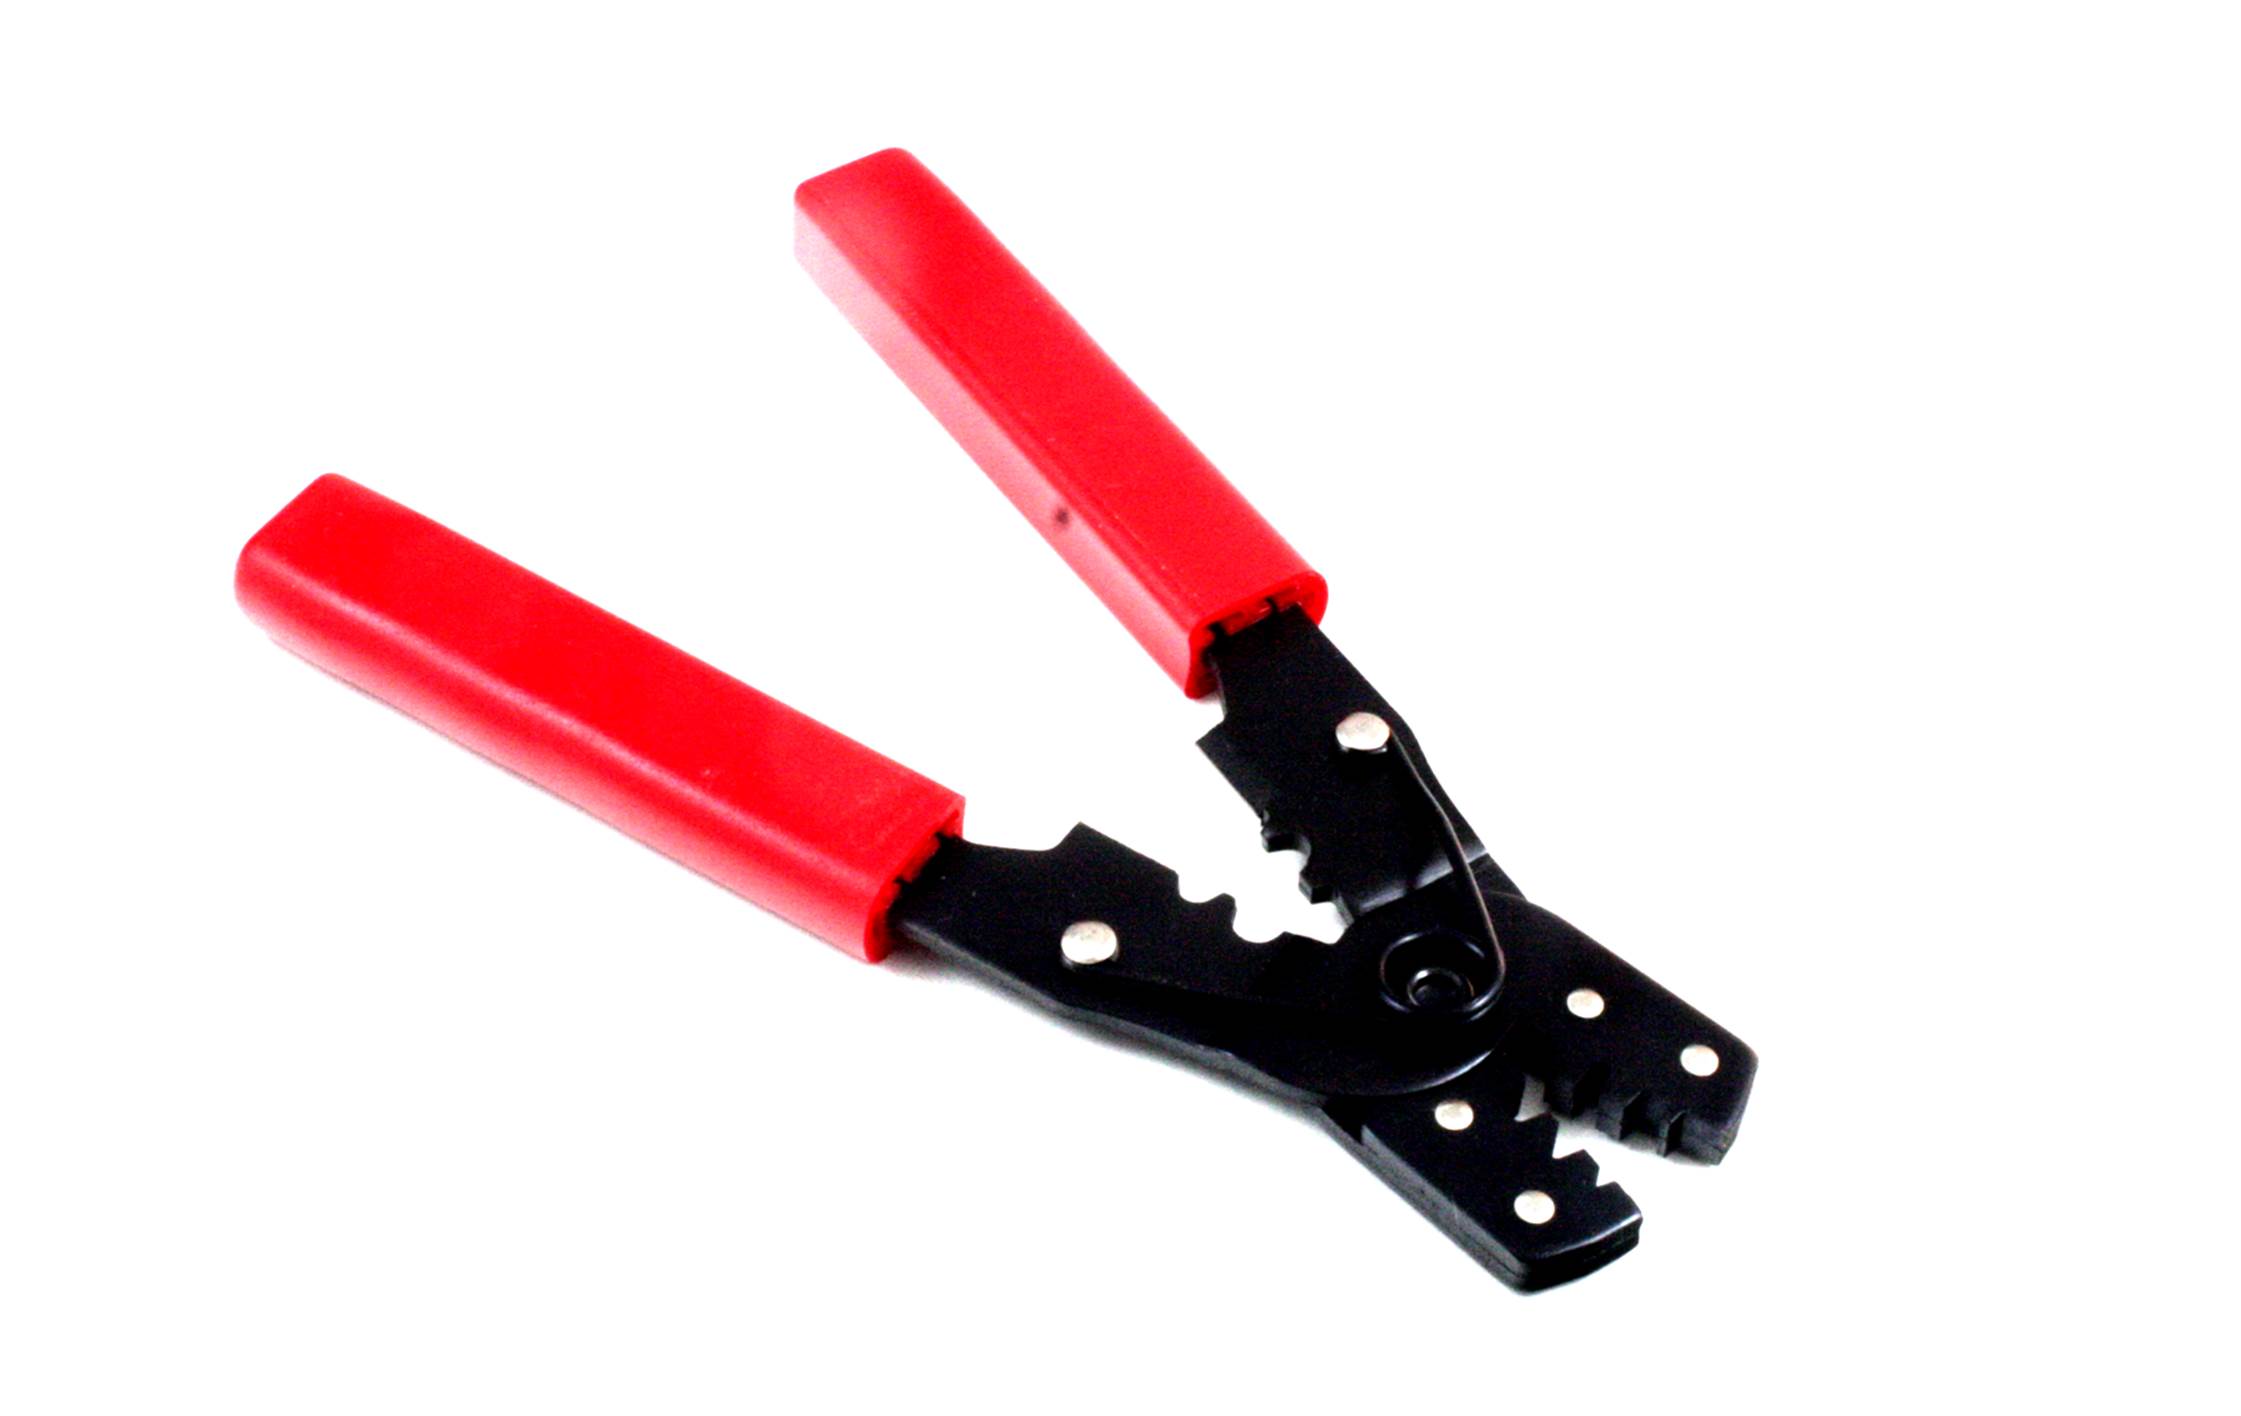
Figure 3-12. Spade lug crimping tool
Note that the crimping tool in Figure 3-12 has other things going on besides the crimping points. A tool like this can cut and strip wires, as well as trim machine screws. It can come in handy in an electronics shop on occasion, but it might not see a lot of heavy use.
Try to use the correct tool made for specific contacts or terminals. You may end up with a collection of crimp tools (that’s typical), but when you need a tool, only the right tool will do the job correctly.
Lastly, if you plan to work with things like the “F” connectors used with cable TV wiring or make your own Ethernet cables, then you’ll need crimp tools for those applications. You can find tools for video and telephone connectors at a well-stocked home improvement store, and there are multiple sources of RJ45 Ethernet-cable-making kits available online.
Socket and Hex Drivers
You can find a basic socket set at any auto parts, hardware, or home improvement store. These sets typically have socket sizes ranging from 1/4 inch to 3/4 inch, with some going smaller and some larger. It depends on how much you are willing to spend. Sockets come in metric sizes as well.Figure 3-13 shows a typical kit in a plastic carrying case. But, like many other common tools, these sets are not intended for the electronics industry. Rather, they are designed for automotive and other heavy-duty applications. Still, it is a good idea to have a decent socket set around.
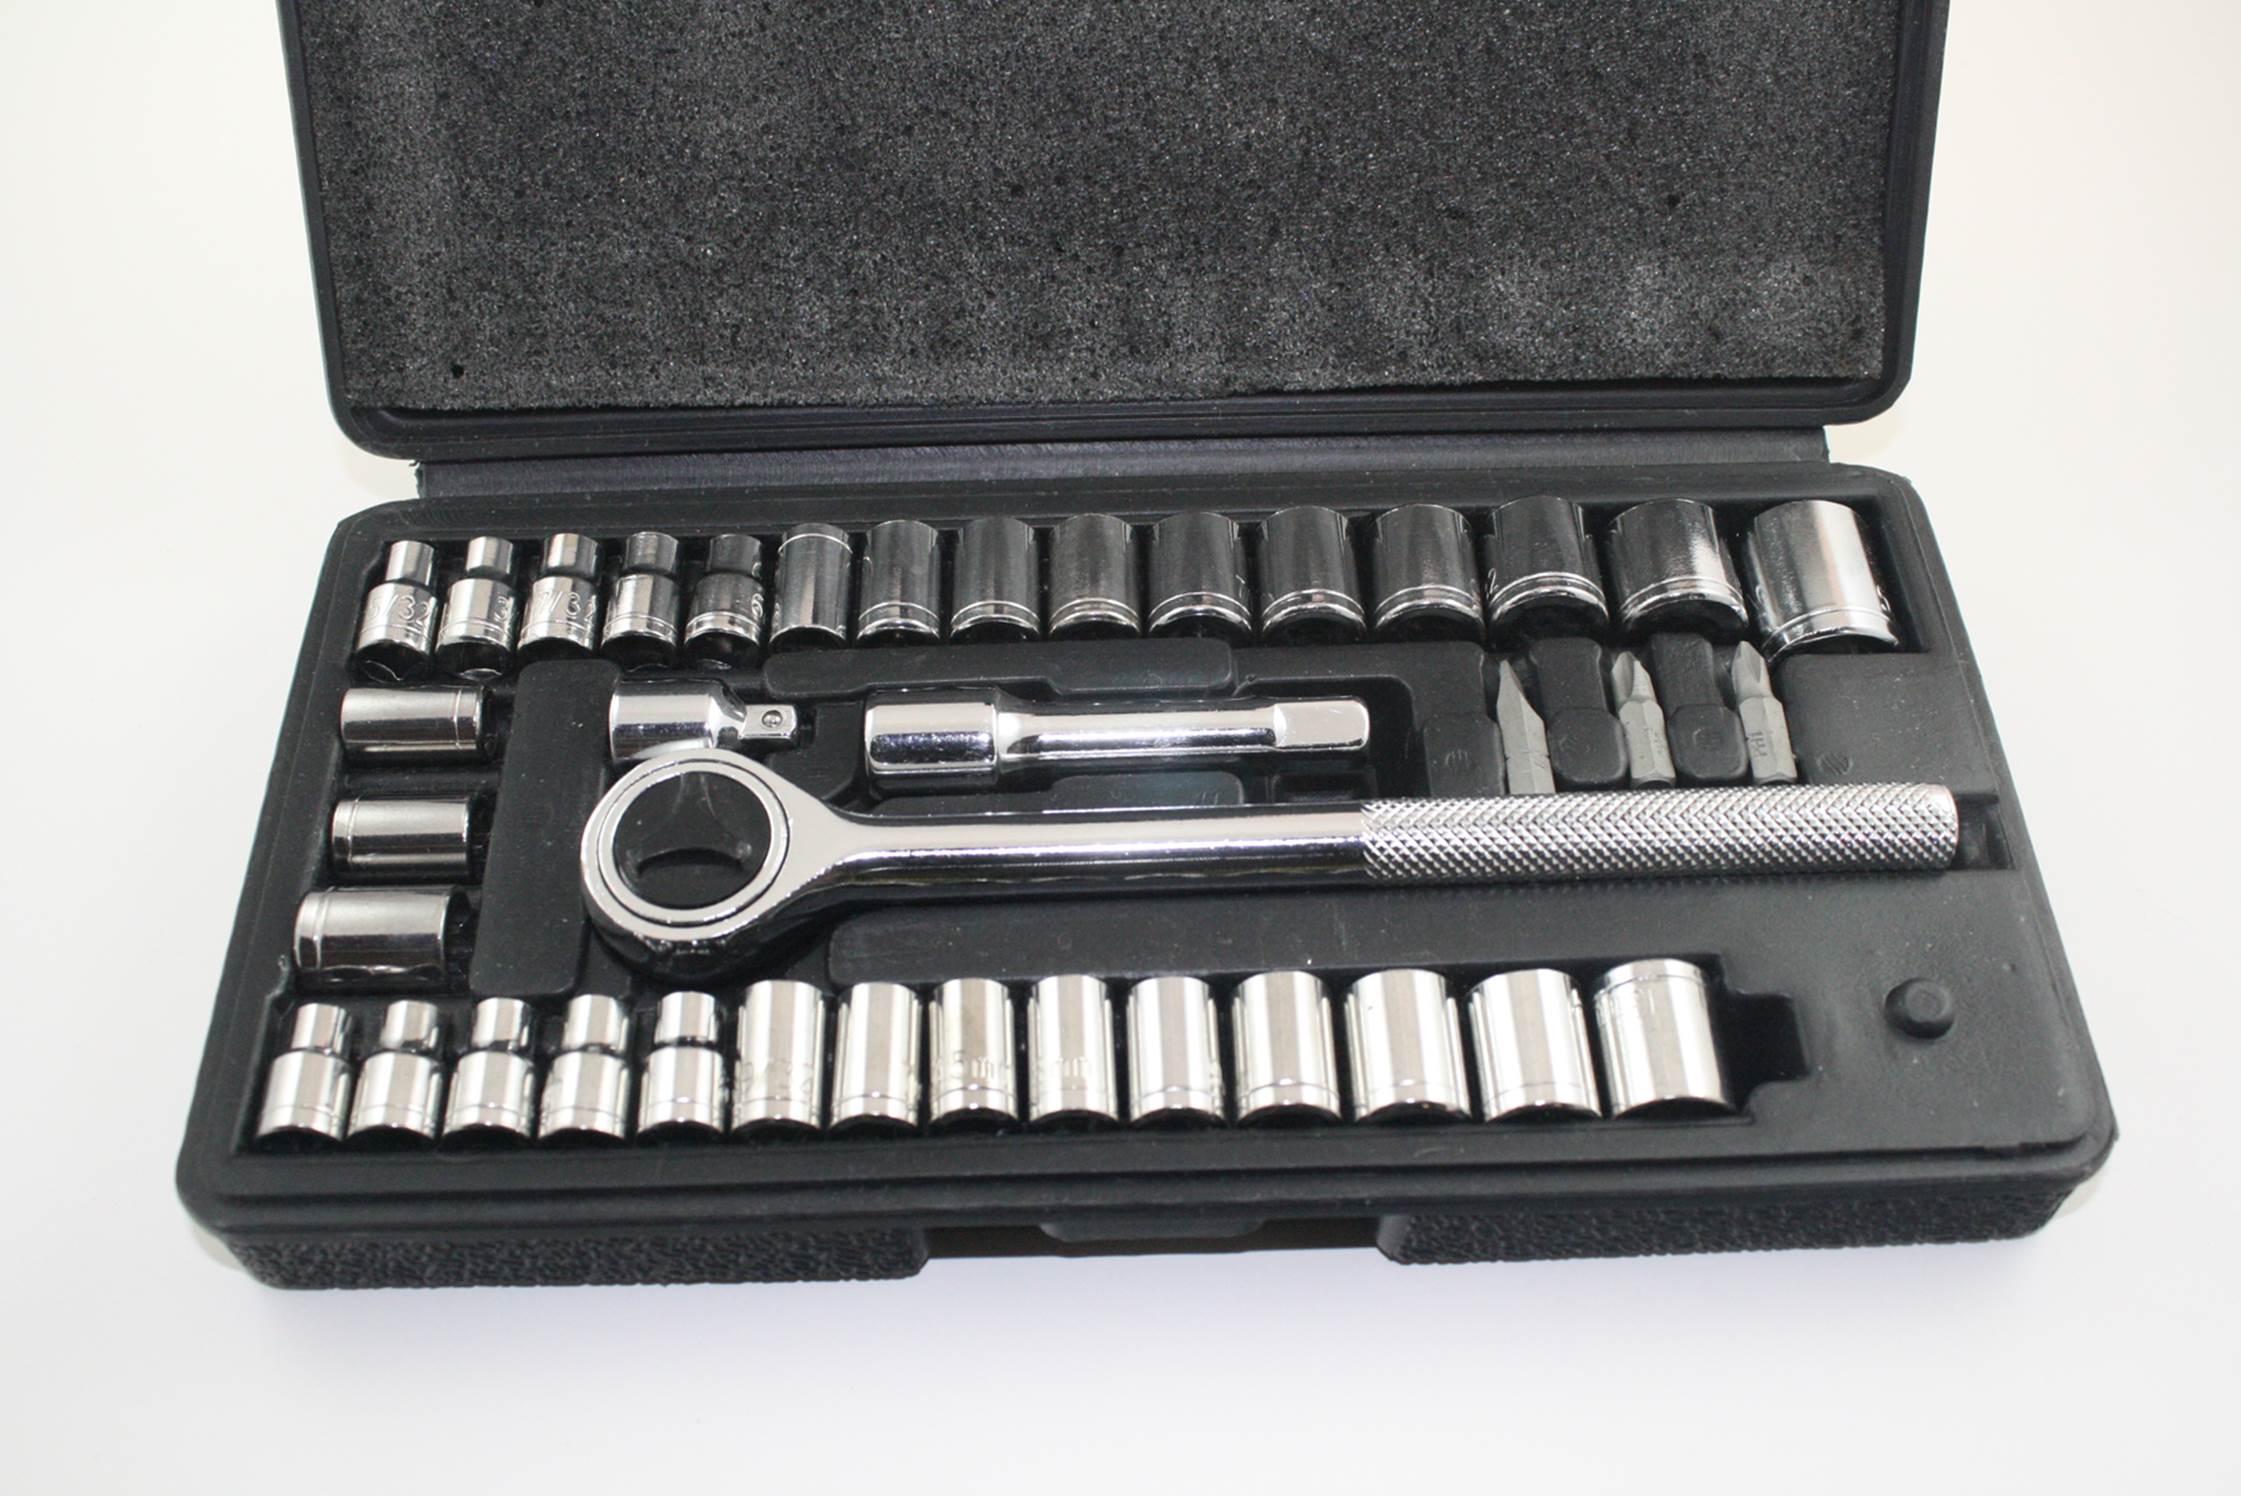
Figure 3-13. Typical ratchet and socket set
Socket drivers made specifically for electronics work usually don’t come with the ratchet. Rather, the kit is a set of tools that plug into a common handle, or each tool has an integrated handle, like the set shown in Figure 3-14.
Also note that the combination tool kit shown in Figure 3-3 comes with seven metric sockets, and still other kits are available with long (i.e., deep) sockets that can fit over a protruding screw or bolt shaft.
For hex-socket-head screws and bolts, you need a hex wrench or hex key, also called an Allen wrench. These come in both ANSI/ASME (i.e, English) and a typical small set in a holder is shown in Figure 3-15.
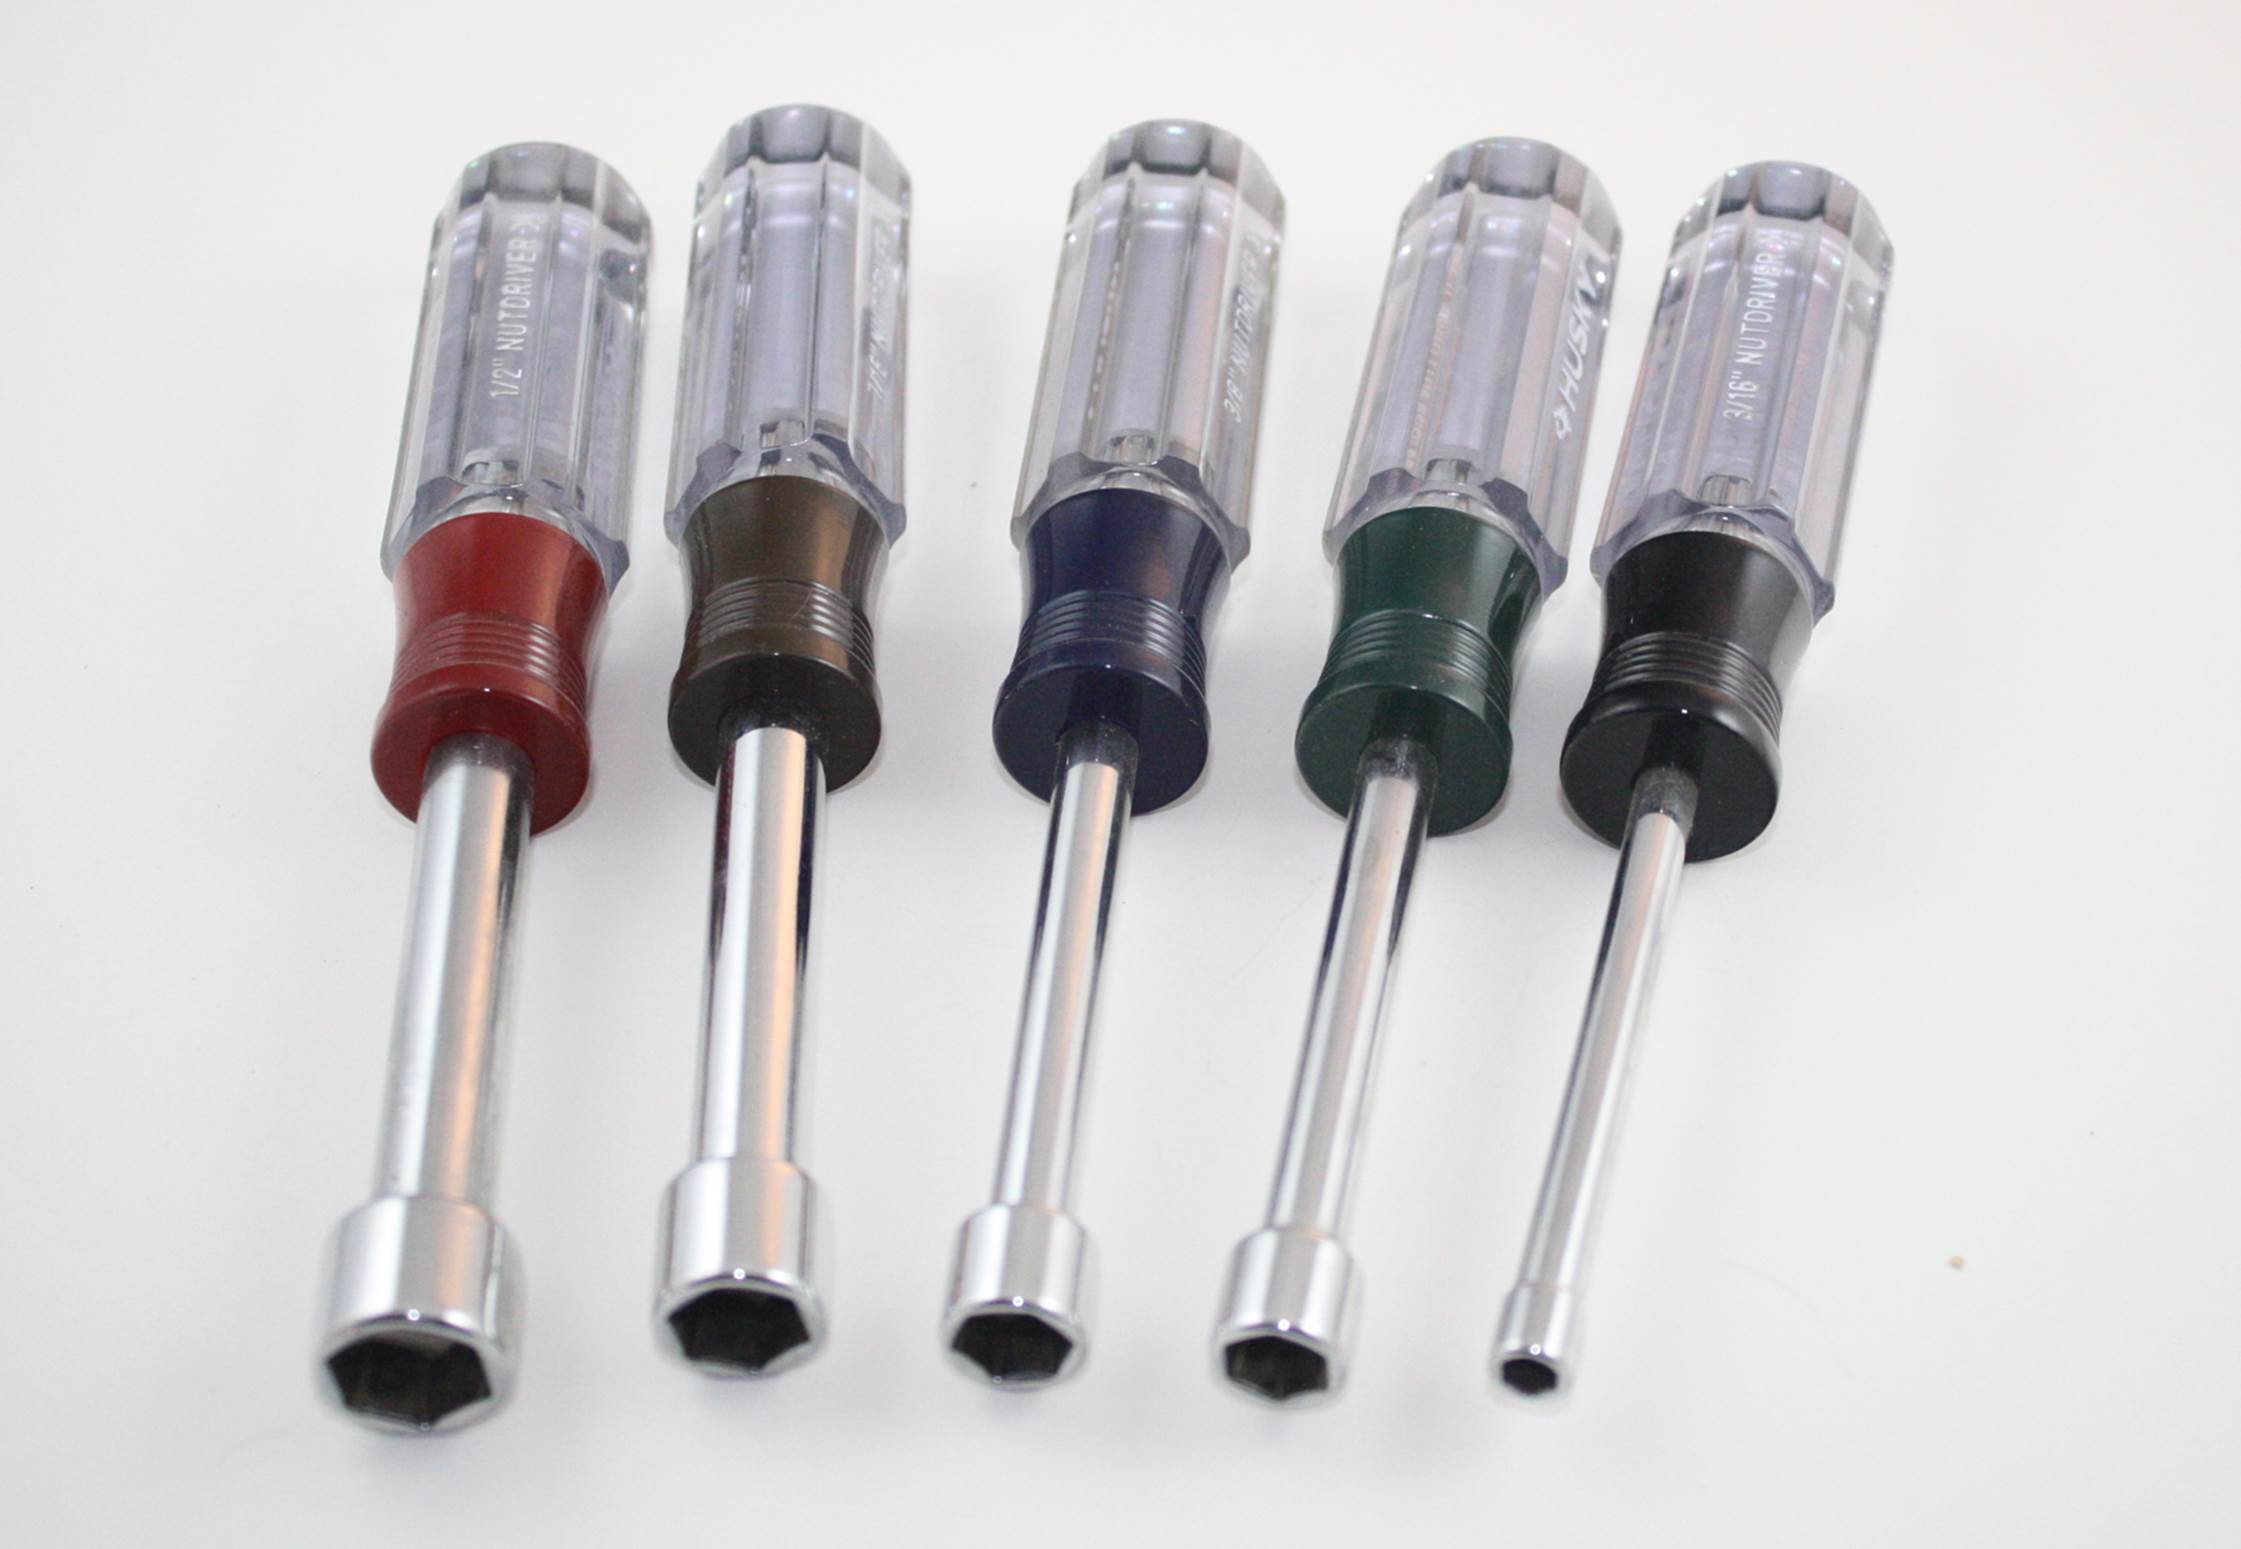
Figure 3-14. Socket tool set
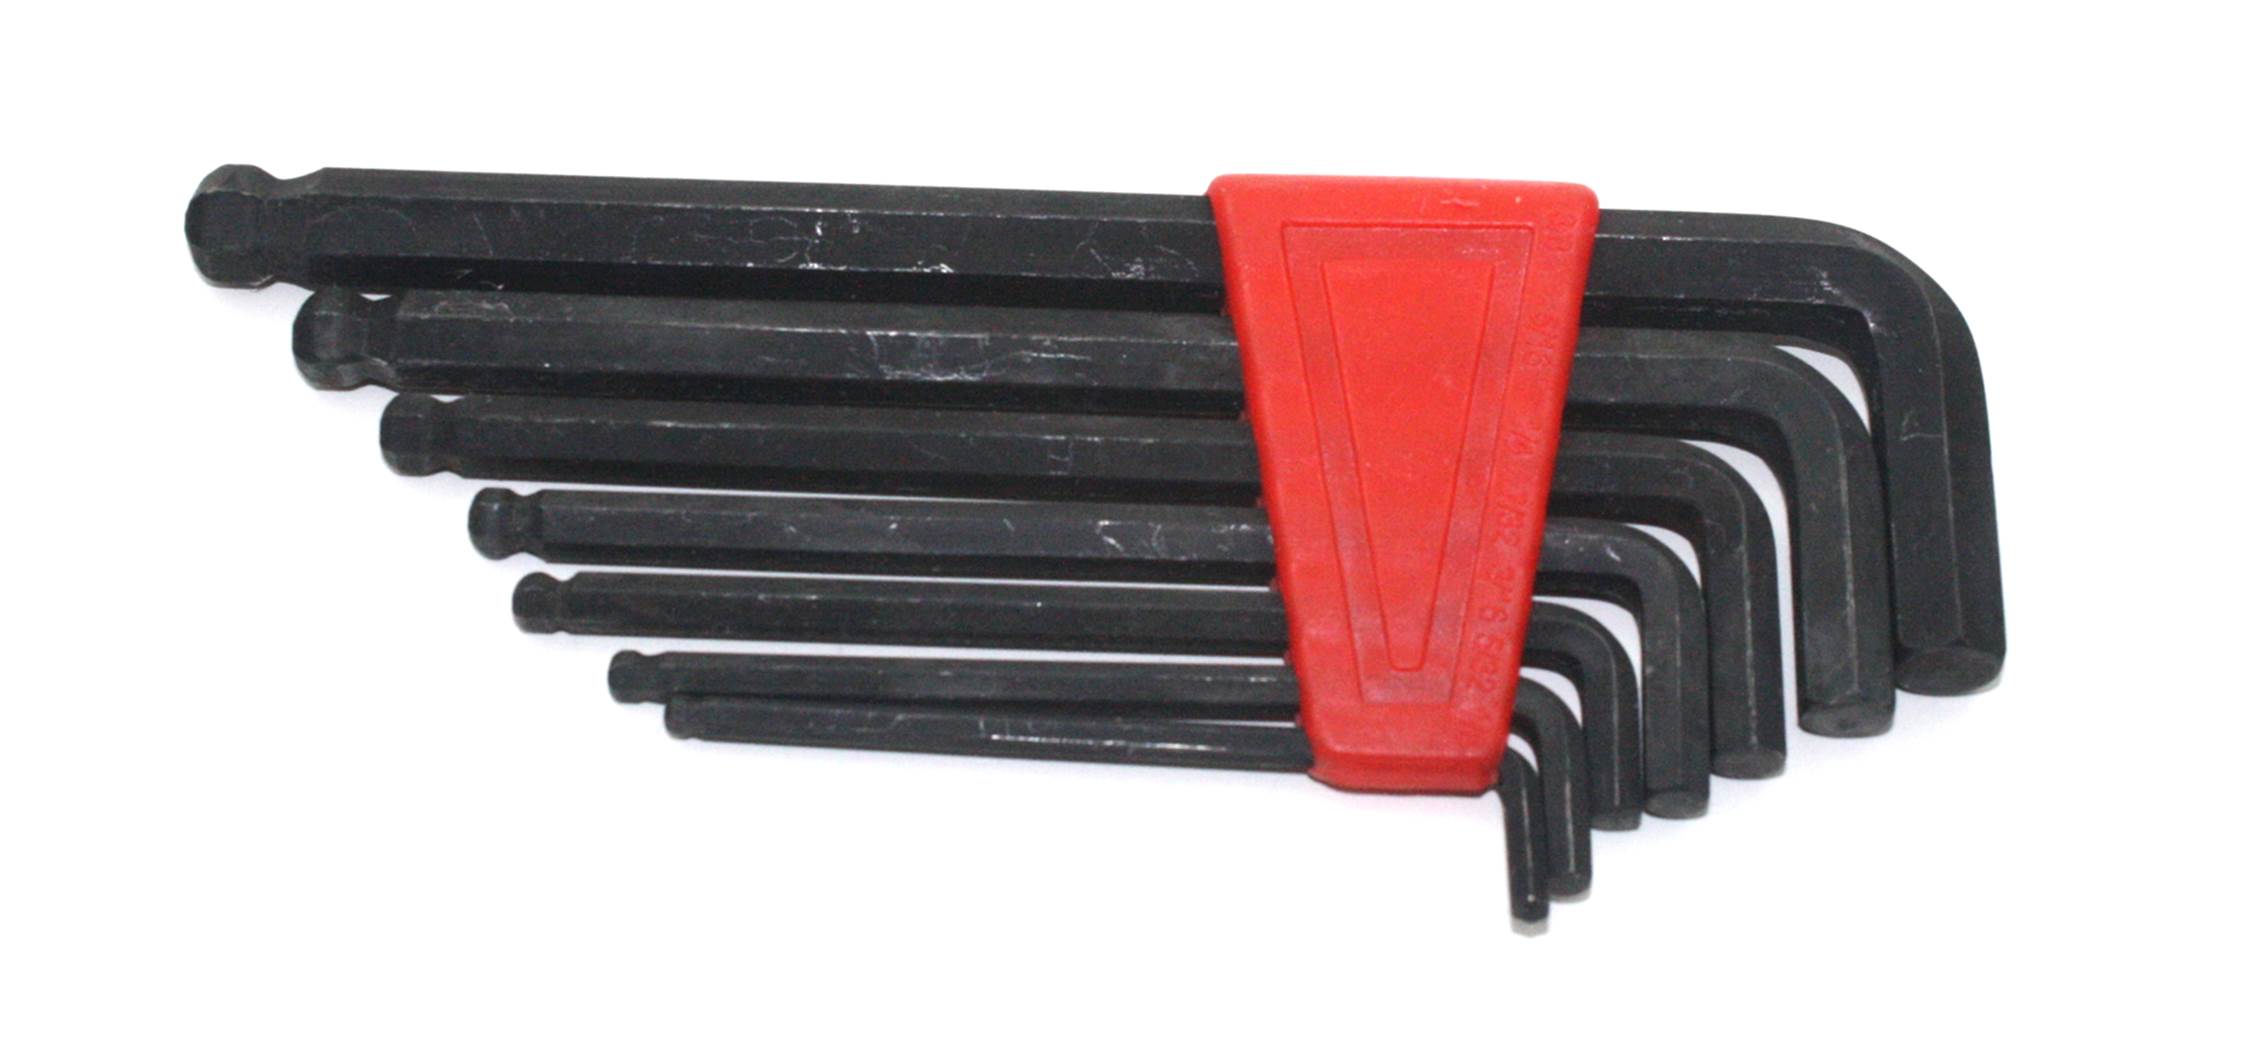
Figure 3-15. A standard set of hex wrenches (hex keys)
These hex wrenches have ball-type ends, and thus are sometimes referred to as ball drivers. This is a handy feature that allows the wrench to apply torque to a fastener without having to be directly aligned with the axis of the bolt or screw. As you can also see, this particular set already has some milage on it, but that’s all right. Tools don’t have to be pretty to work well.
I would not recommend the so-called T-handle tools, such as the example shown in Figure 3-16, for electronics work, mainly due to the expense, but that’s largely a personal choice. This type of tool is popular in the optical sciences, where it is used to make fine adjustments to lens mounts and mirrors, and it is sometimes found in aerospace fabrication environments. These tools are less frequently seen in electronics labs or shops, however.
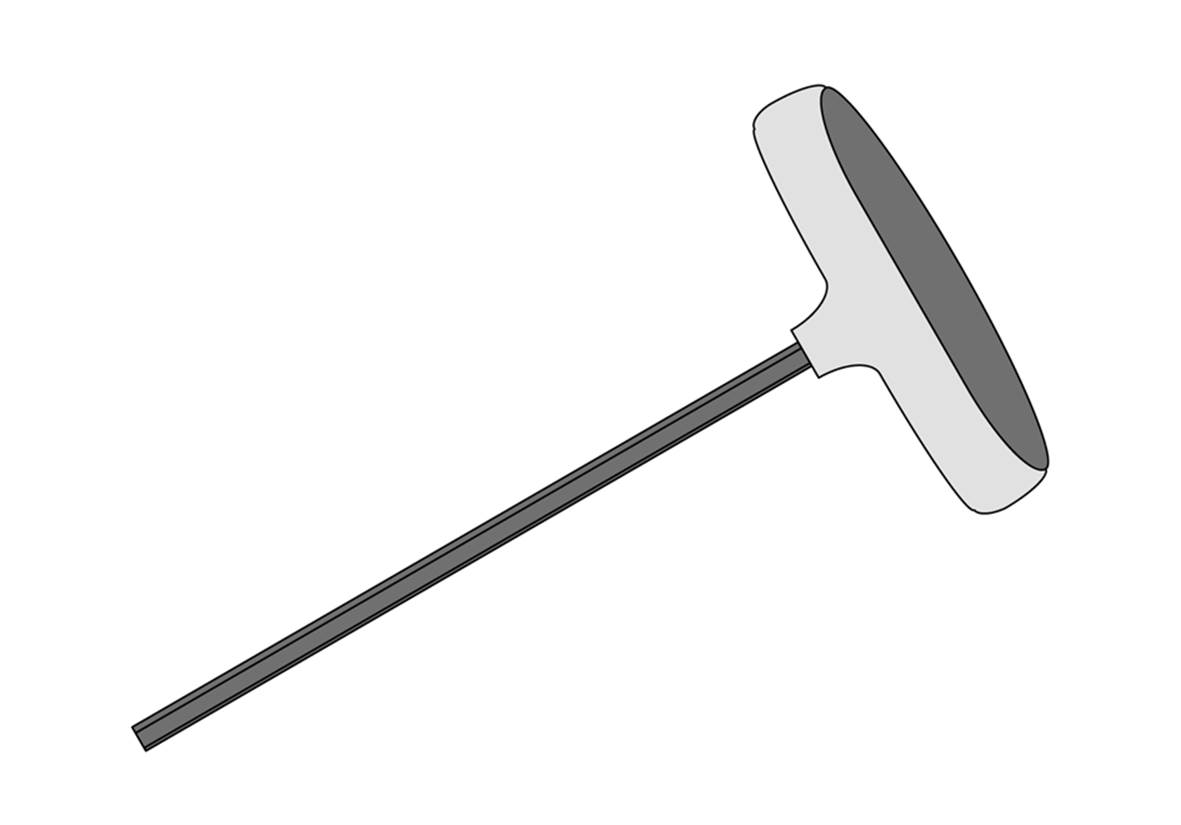
Figure 3-16. An example of a T-handle hex wrench
I would recommend getting sockets and hex wrenches in both ANSI/ASME and metric sizes, especially if you plan to hack an existing consumer or industrial device of some type. Most consumer electronics these days are assembled using metric fasteners, but a lot of industrial equipment made in the US is still ANSI/ASME.
Clamps
Clamps are designed to exert pressure to hold something, whether that is a single piece of wire, an electronic component, or two pieces of metal. Clamps may be locked or screwed into position, and they retain the pressure on whatever they’re gripping until released. Technically, even a common alligator clip is a type of clamp, and it can be found in that role as part of so-called “third-hand” gadgets like the one shown in Figure 3-17.
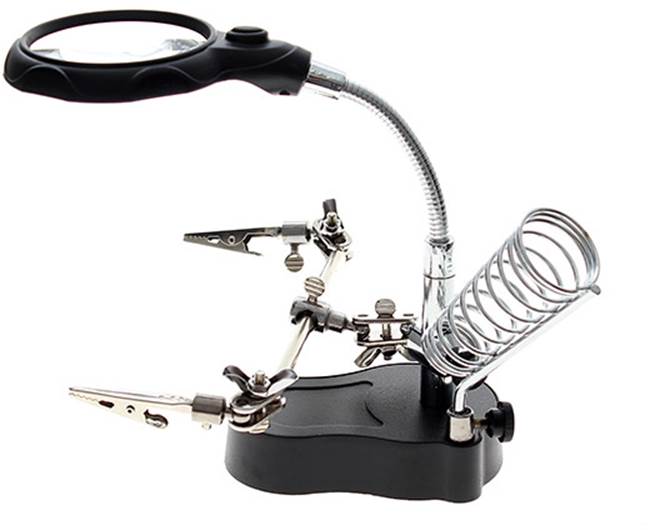
Figure 3-17. A “third-hand” fixture for holding work with small clamps
Some types of clamps look like thin jaws with scissor-like handles. Also known as hemostats, these are just repurposed medical tools. Figure 3-18 shows some of the various types that are available for purchase from multiple sources. In the past, tools like this were used as heatsinks for soldering things like transistors into a point-to-point circuit. With the widespread adoption of printed circuit boards and temperature-controlled soldering irons, it became possible to solder parts onto the PCB without worrying too much about thermal damage (assuming, of course, that the person wielding the soldering iron has a good technique and doesn’t loiter too long on the connection).
A hemostat is useful when you need to hold some parts in place for soldering, such as two pieces of wire or component leads. They are also useful for holding things while an adhesive sets or for just keeping something out of the way.
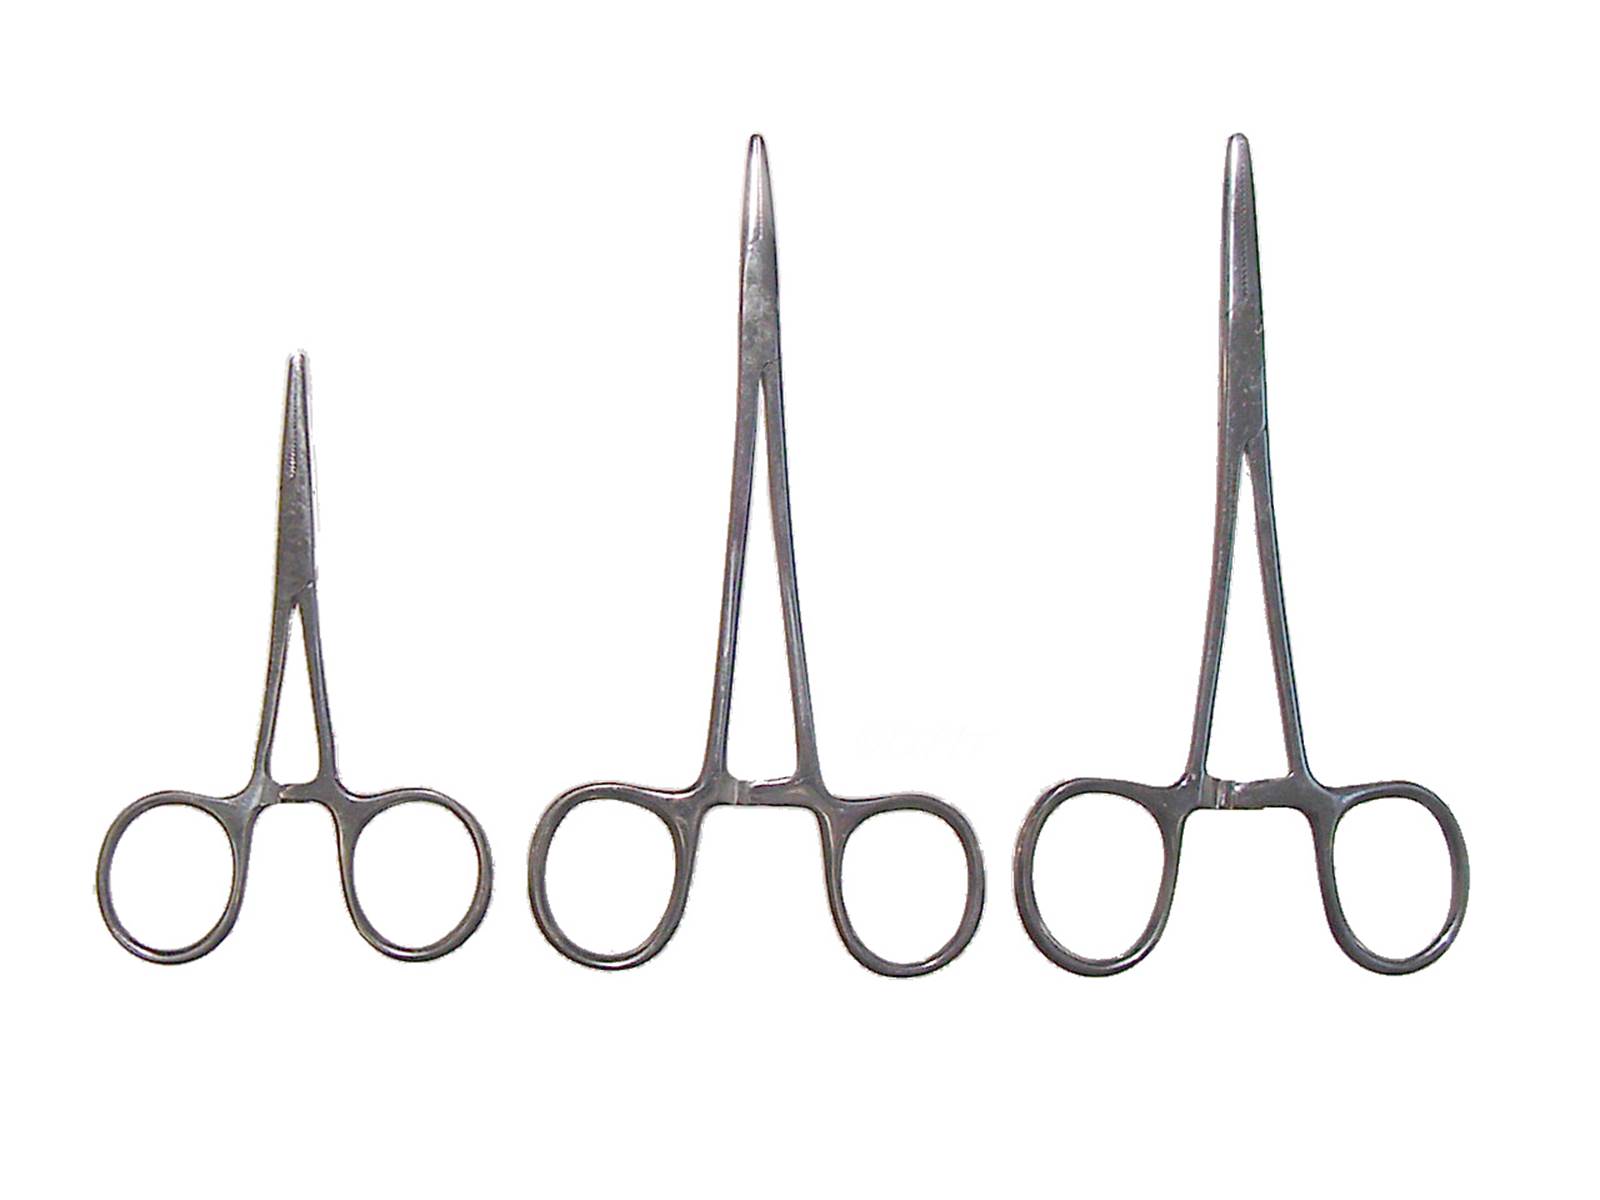
Figure 3-18. Hemostats (clamps)
For larger jobs, there are various types of clamps available, from miniature C-clamps to plastic spring-loaded devices that look like clothes pins on steroids. Many of the clamps employed for woodworking can also be used for electronics work, so long as you keep in mind that things can get hot, and plastic clamps intended for wood might not fare well if the work pieces they are holding get too warm.
For dealing with metal, the ever-popular C-clamp is often a good first choice. Figure 3-19 shows some of the types available. I recommend keeping several of the smaller ones in your toolbox. You may or may not ever need the larger sizes, but having a couple around is not a bad idea.
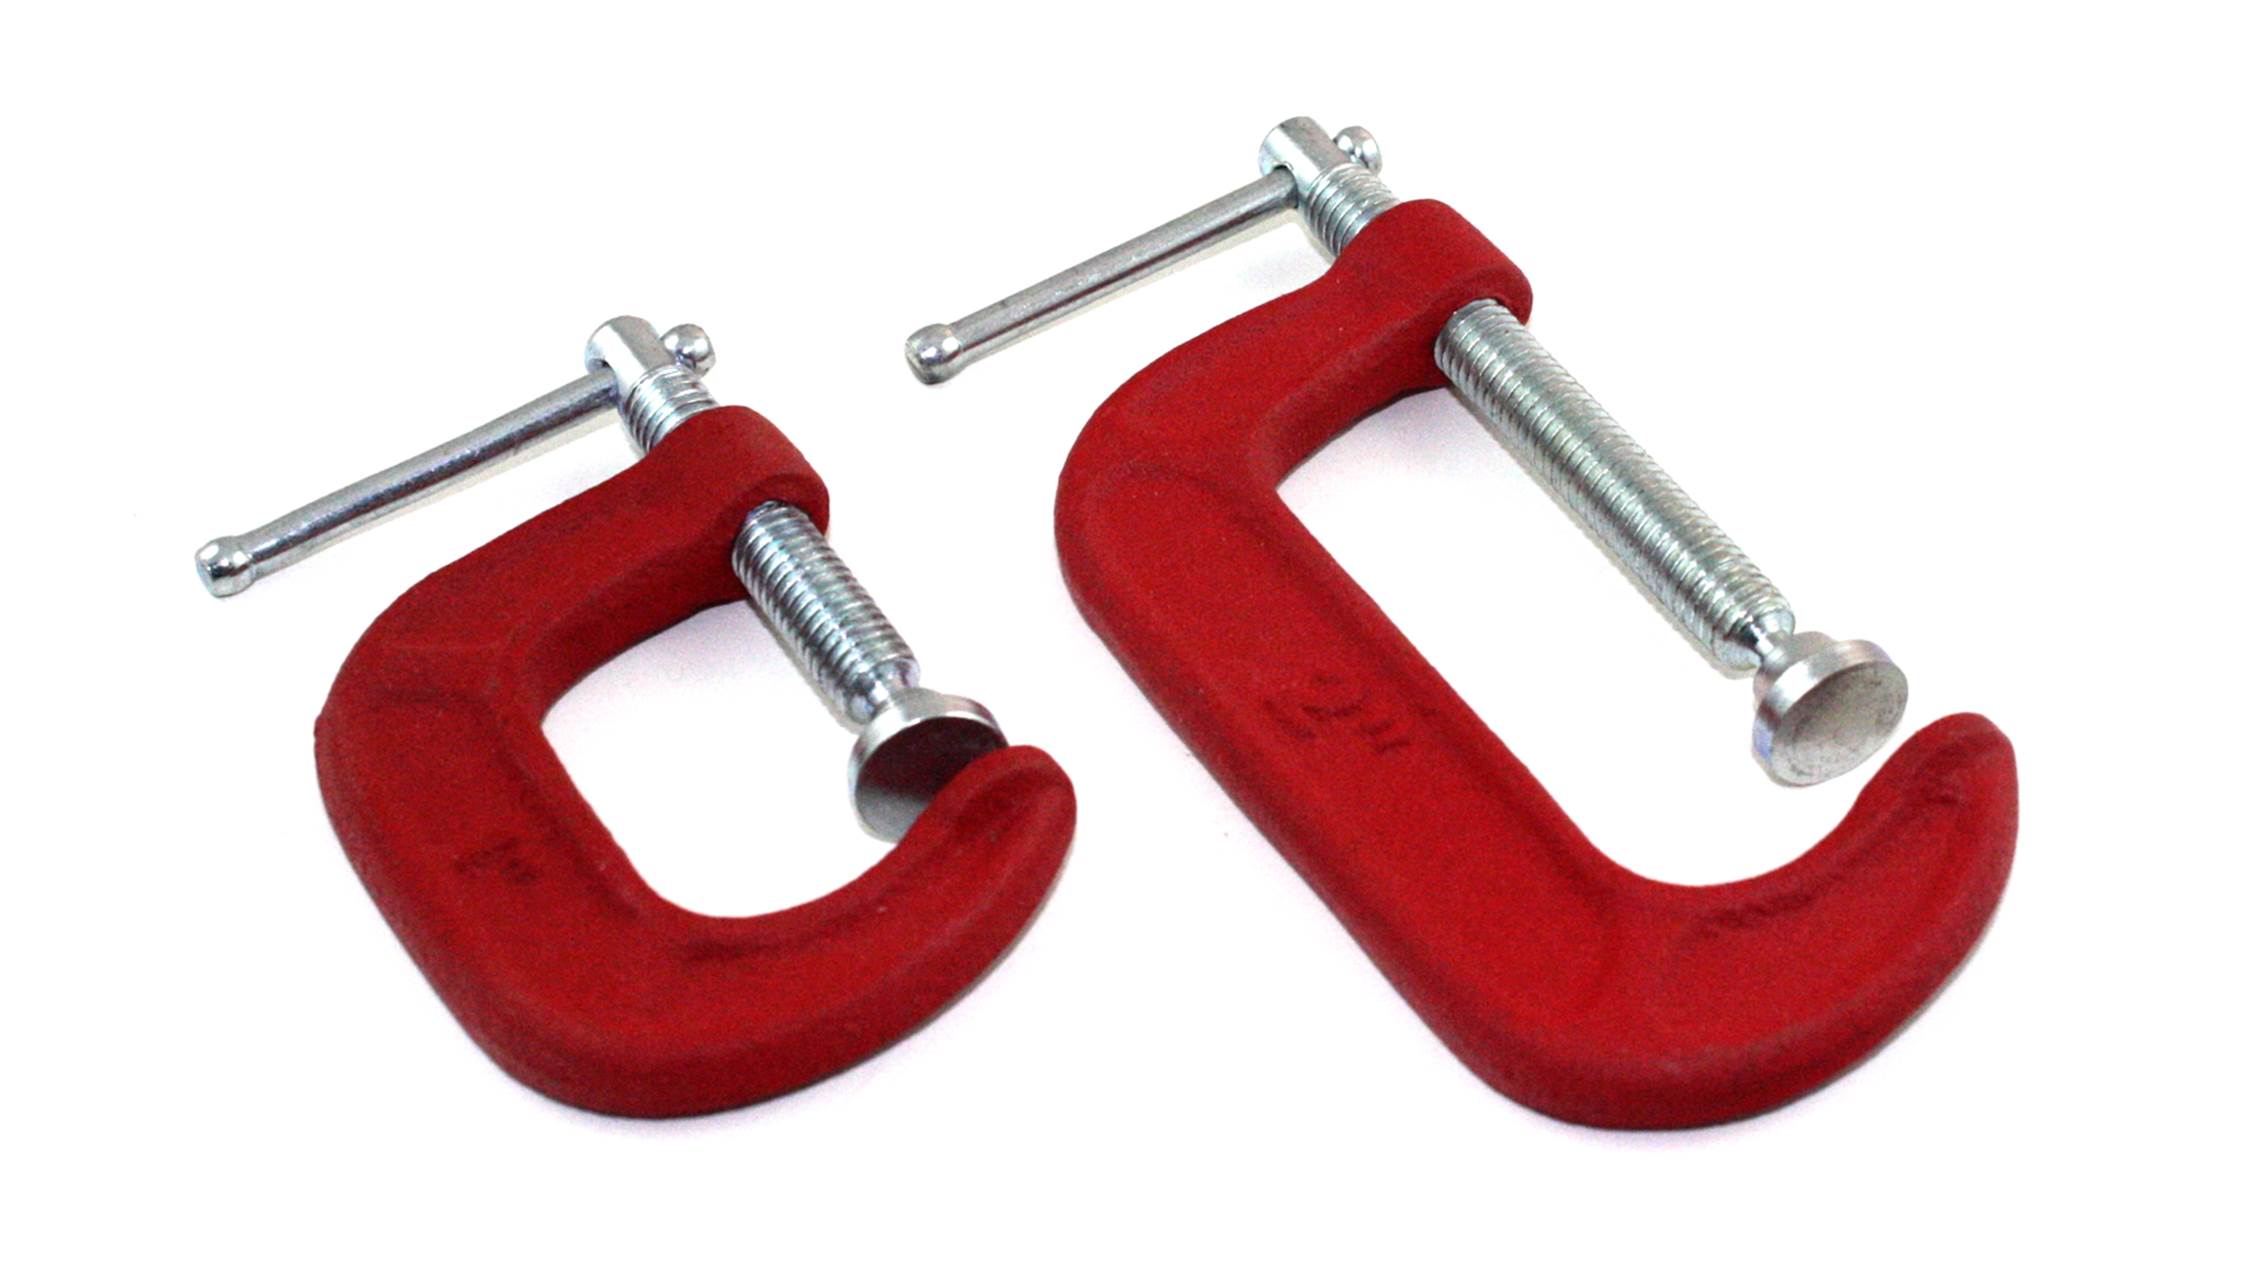
Figure 3-19. C-clamps
Vises
A small vise is an essential tool in any shop. Figure 3-20 shows one type of bench vise commonly used in electronics work. Unlike its larger cast and forged cousins, this vise is lightweight, the head can rotate and swivel into various positions, and the jaws are padded with plastic strips to prevent damage to delicate items. This one happens to be made by PanaVise, and it consists of a model 300 base and a model 301 vise head.
The small vise shown in Figure 3-20 can also be incorporated into a compact workstation, as shown in Figure 3-21. In addition to the vise itself, it includes a soldering iron holder, circuit board holder, and a heavy base. This is a PanaVise model 315 circuit board holder with a model 300 base, all of which is attached to a larger base that has holders for a soldering iron and a spool of solder. It also also recessed tray spaces in the base to hold soldering-iron-tip cleaning sponges.
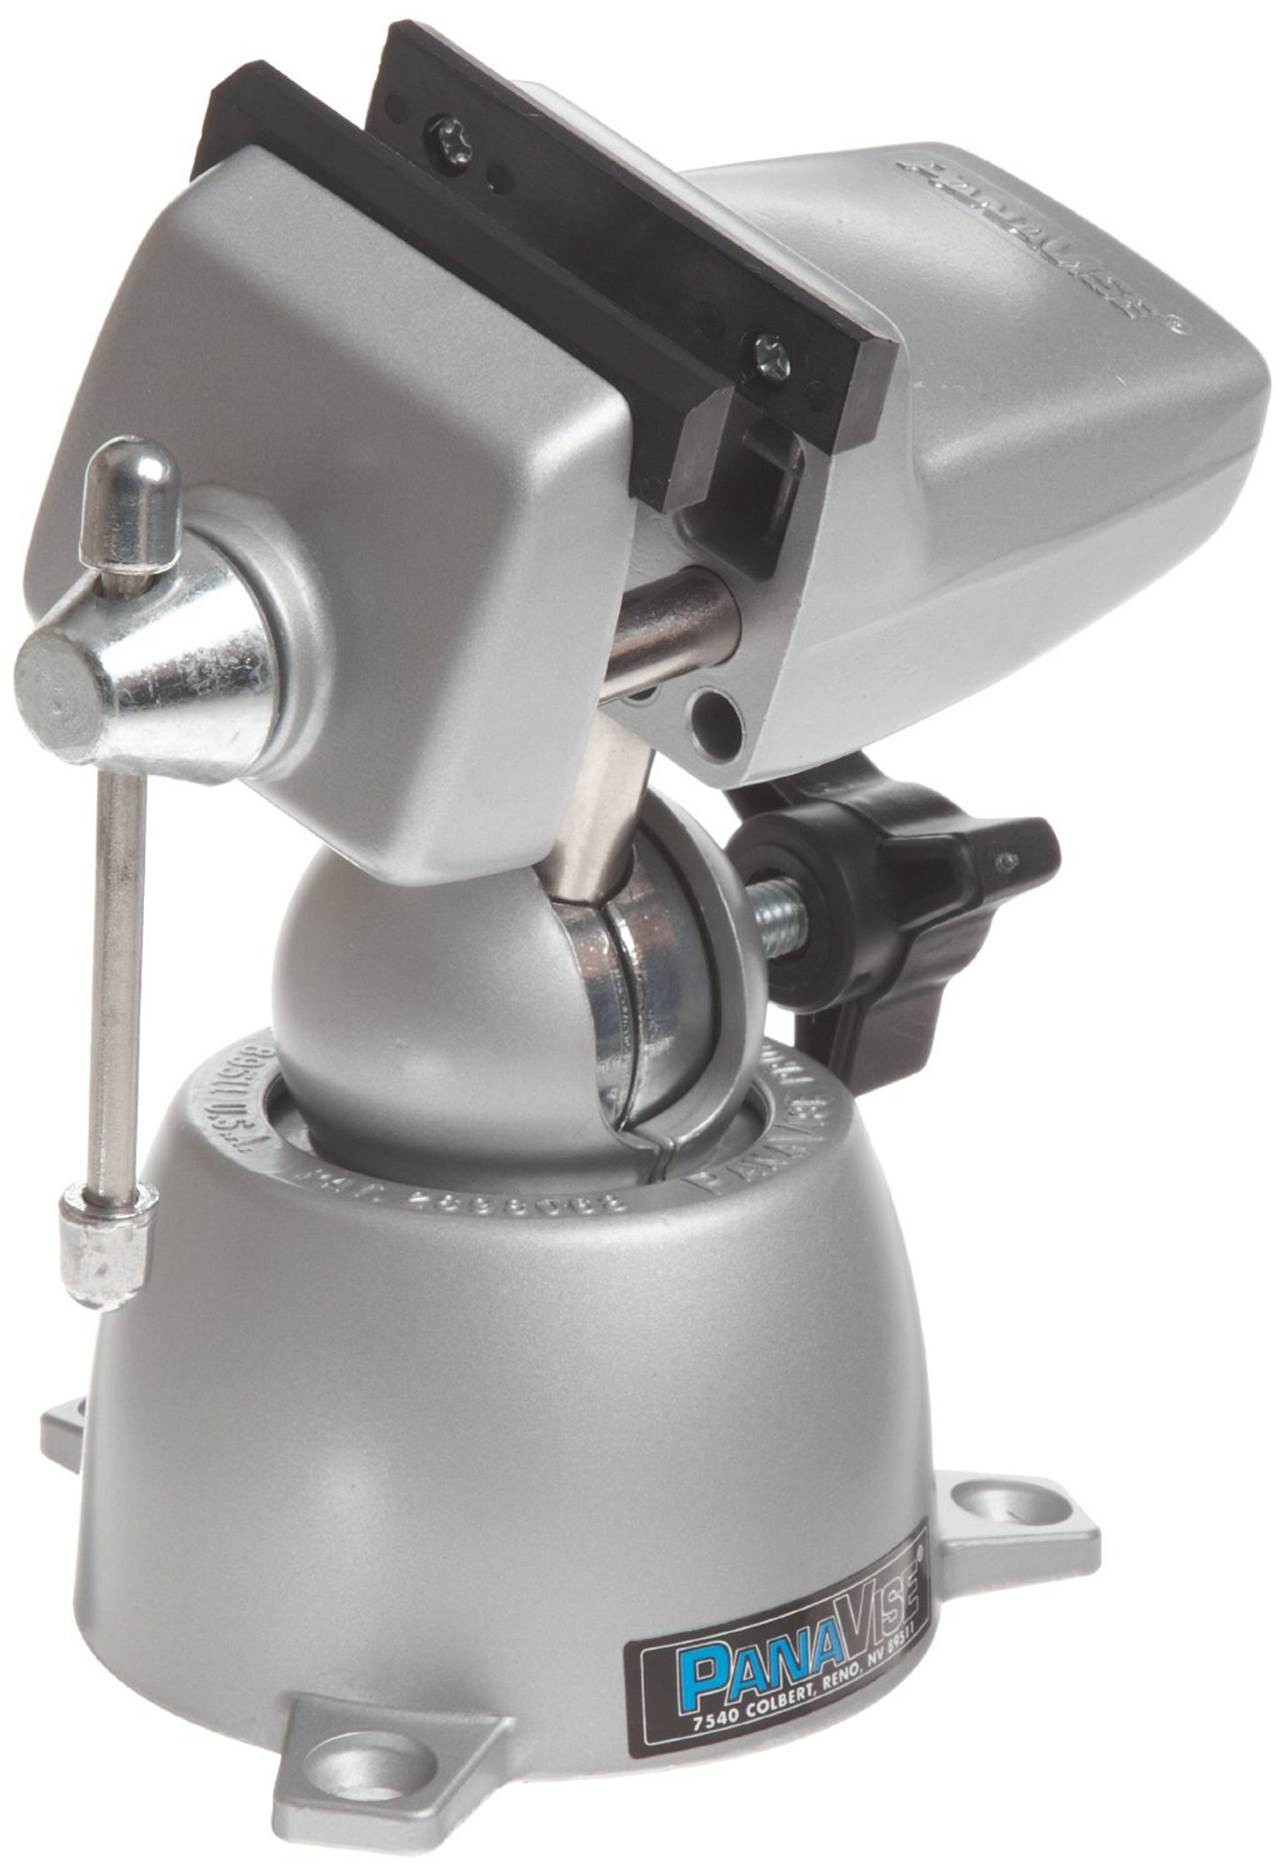
Figure 3-20. A small bench vise for electronics work
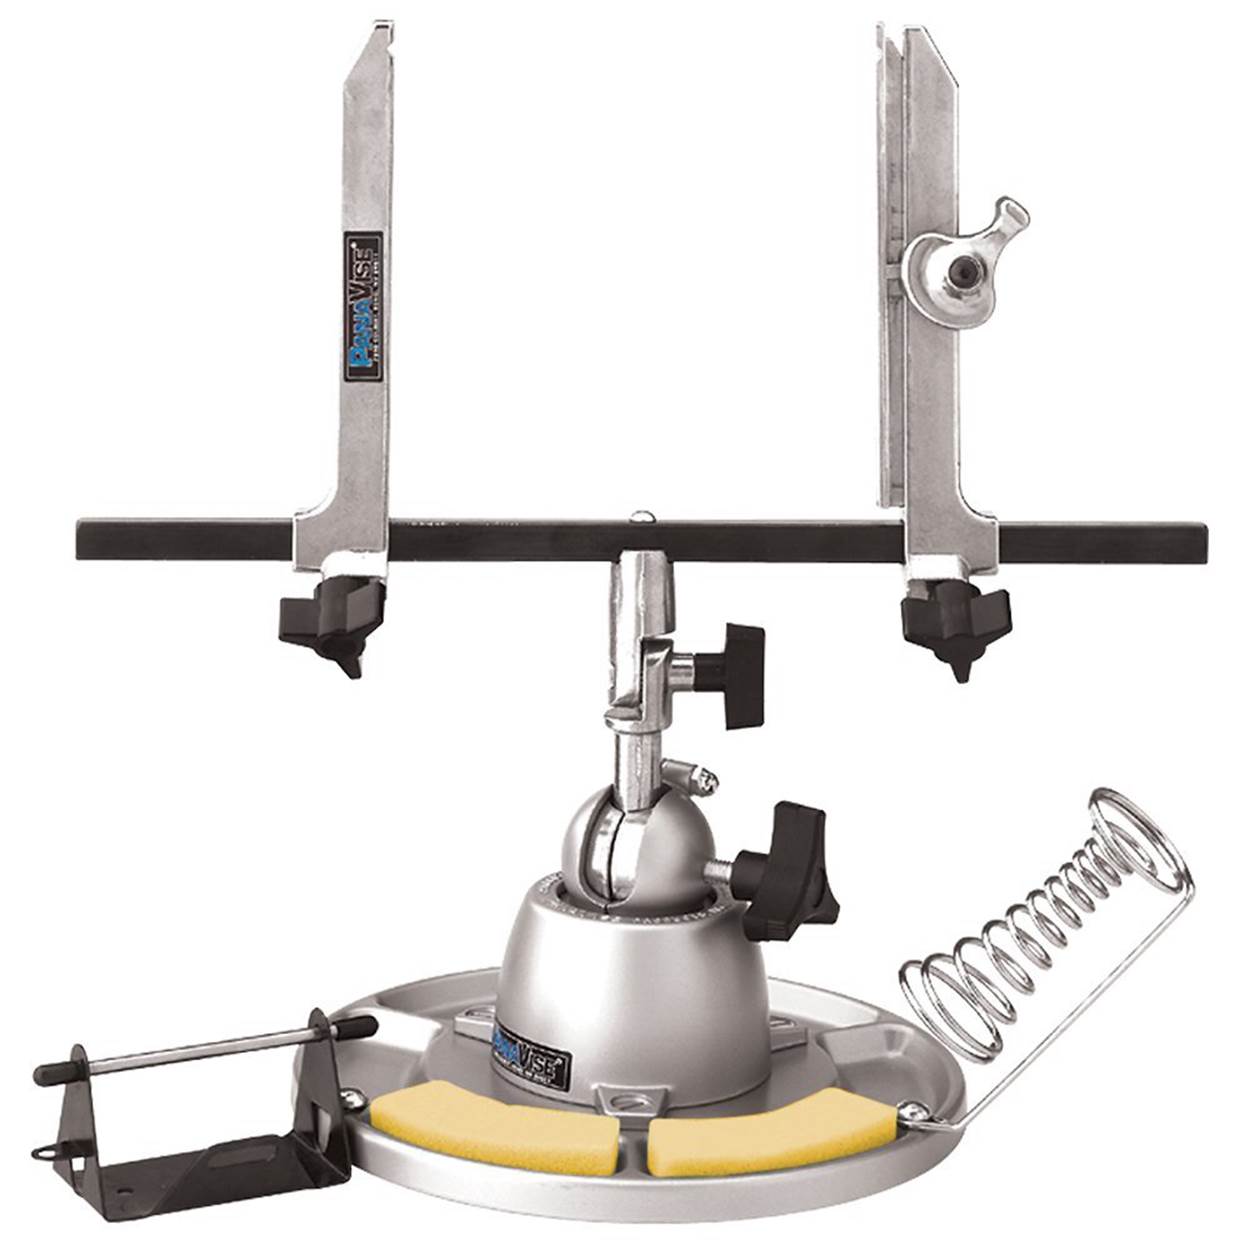
Figure 3-21. A compact workstation based on a small electronics vise
The vise shown in Figure 3-20 isn’t suitable for bending metal or hammering out a stuck steel alignment pin. For that you need something like the one shown in Figure 3-22. A big downside to a tool like this is that it really needs to have a permanent location—a very solid permanent location. So unless you think you might need to do some light metalwork, you can probably forgo the heavy-duty vise.
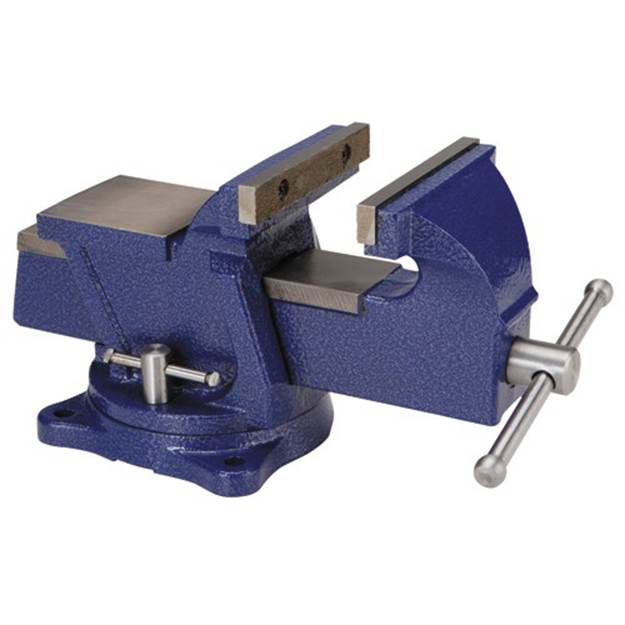
Figure 3-22. A large bench vise
A somewhat smaller version of Figure 3-22 is shown in Figure 3-23. This model is designed to clamp to the edge of a table or workbench, and it’s suitable for many lightweight tasks.
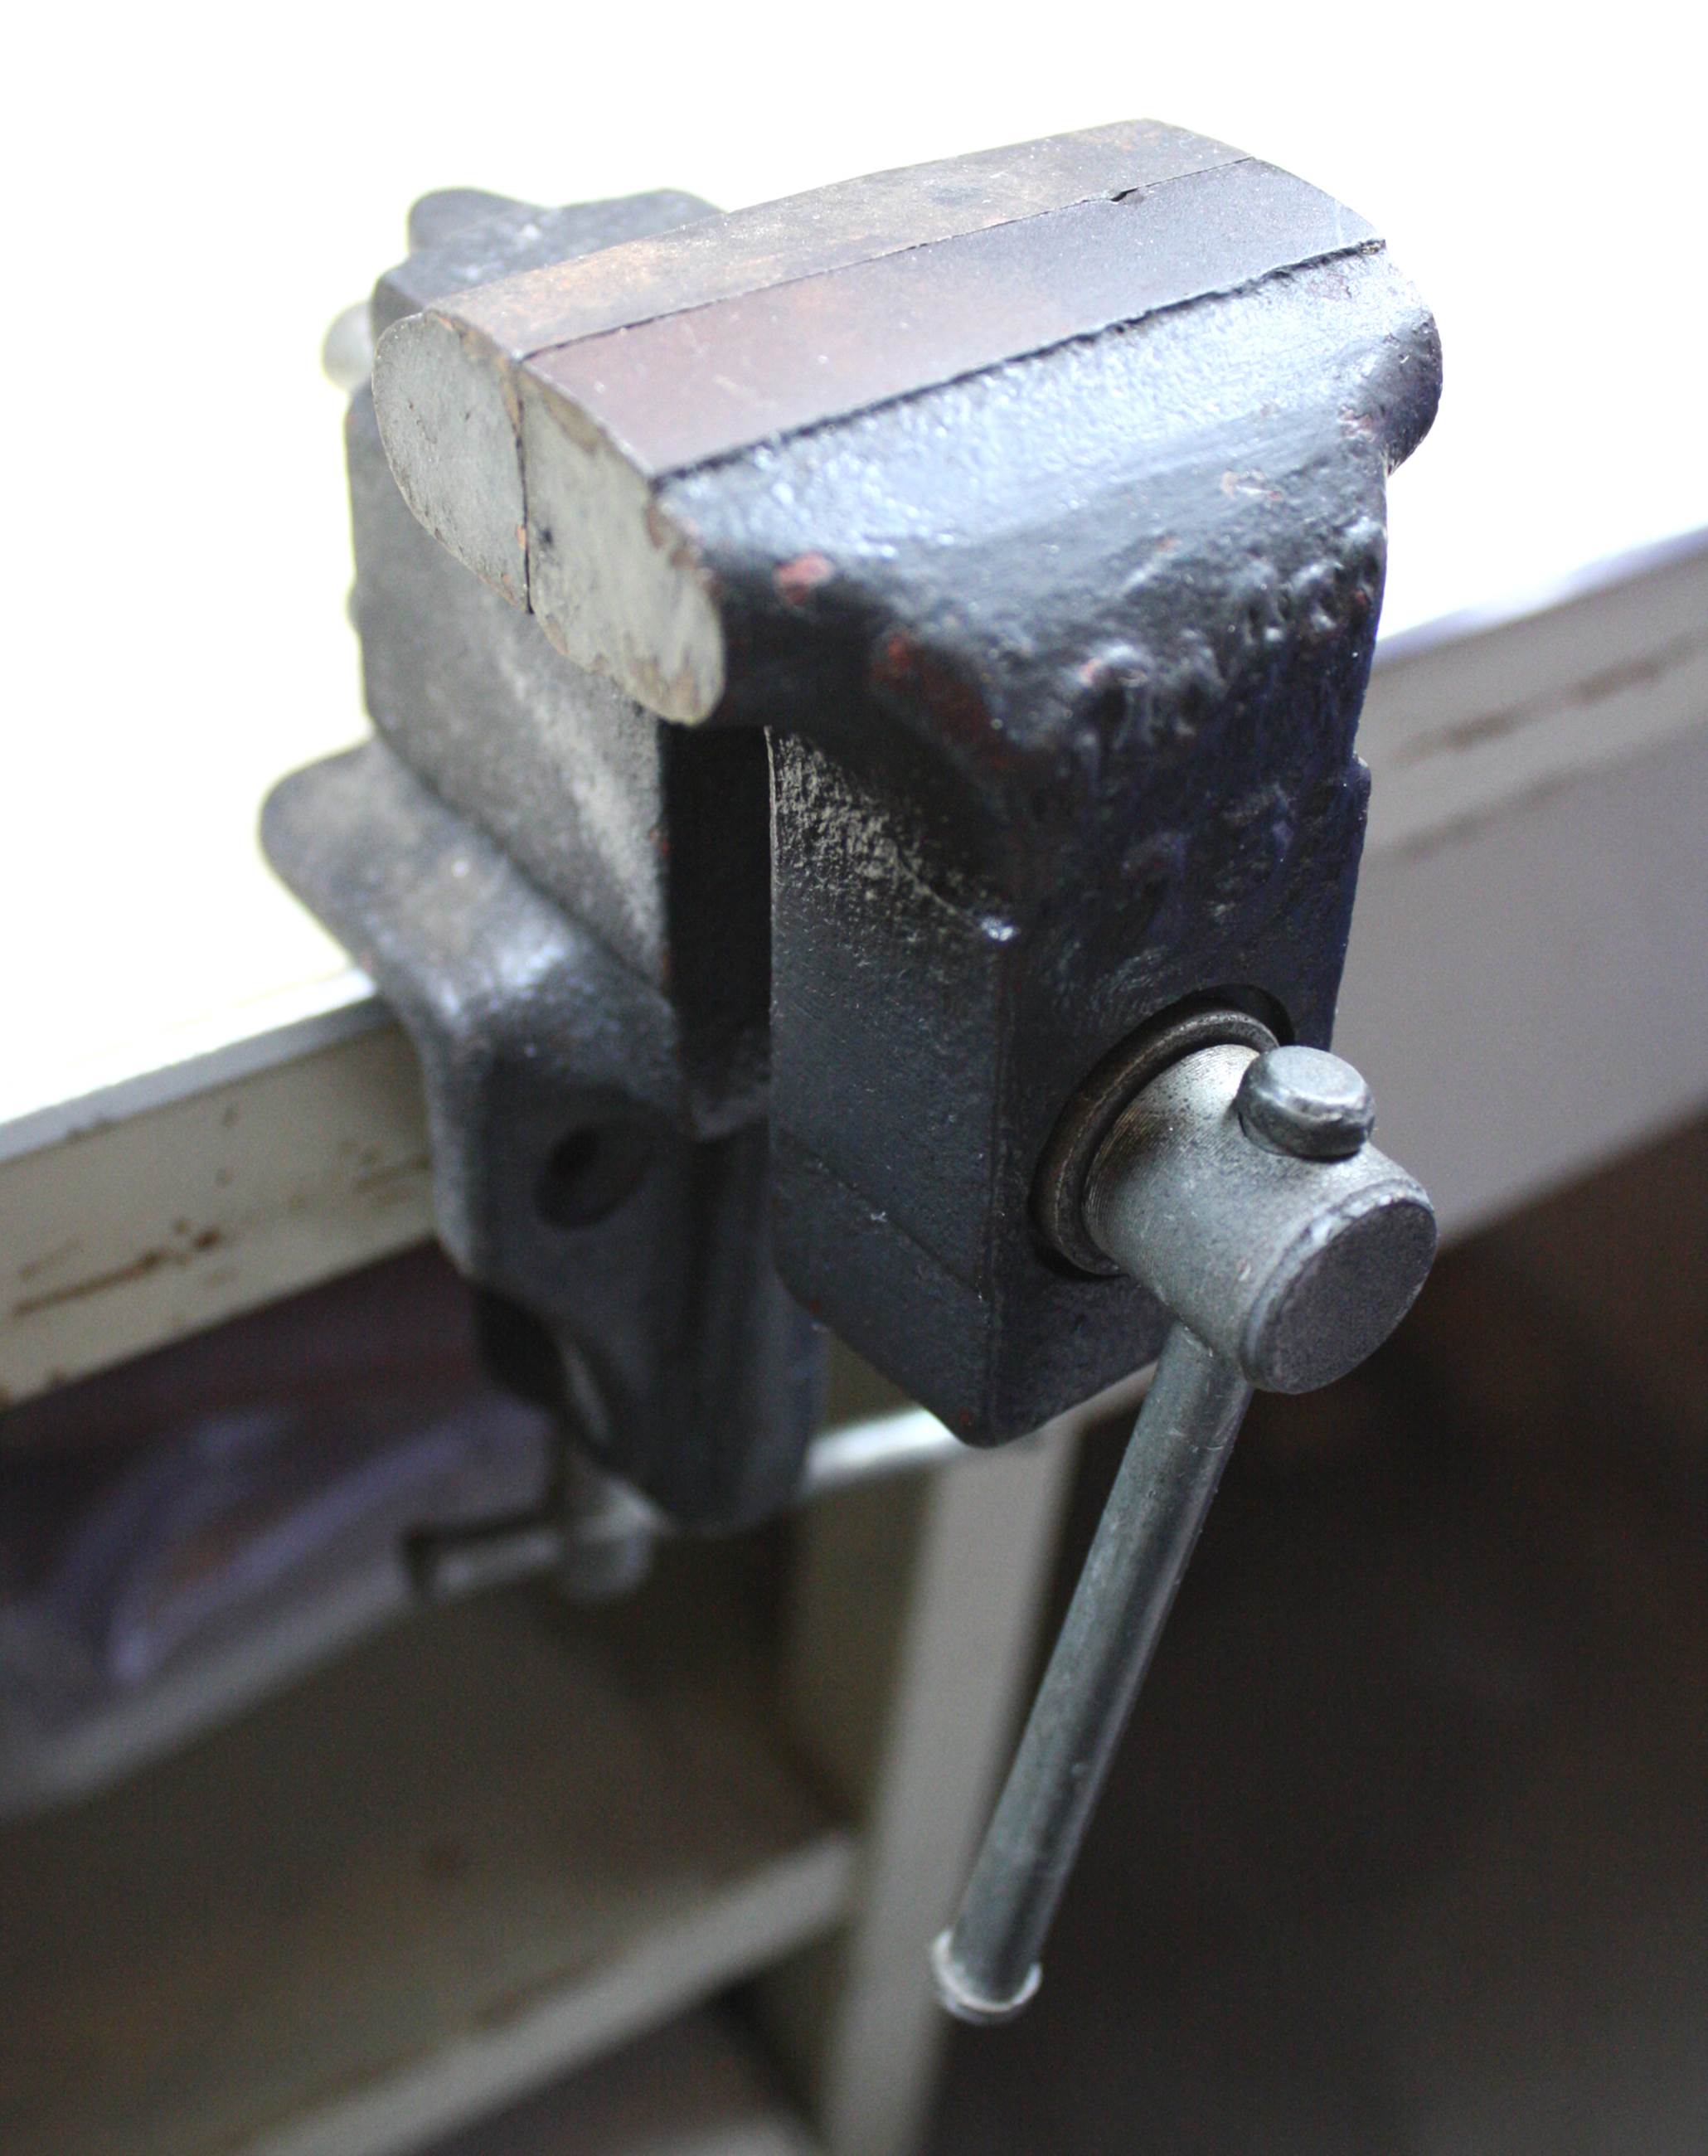
Figure 3-23. A clamp-on bench vise
Rotary Tools
A good rotary tool is one of the most versatile tools you can own. There are many types available, ranging from the very cheap and somewhat flimsy to substantial tools suitable for production-line use. Some models come with a selection of speeds, and some have continuously variable speed control.
A rotary tool is extremely useful for cutting small square holes in a plastic box, trimming a slightly oversized printed circuit board to fit into an enclosure, drilling holes in a PCB, and performing other tasks that require a small tool with a lot of attachment options. Figure 3-24 shows a typical unit with variable speed.
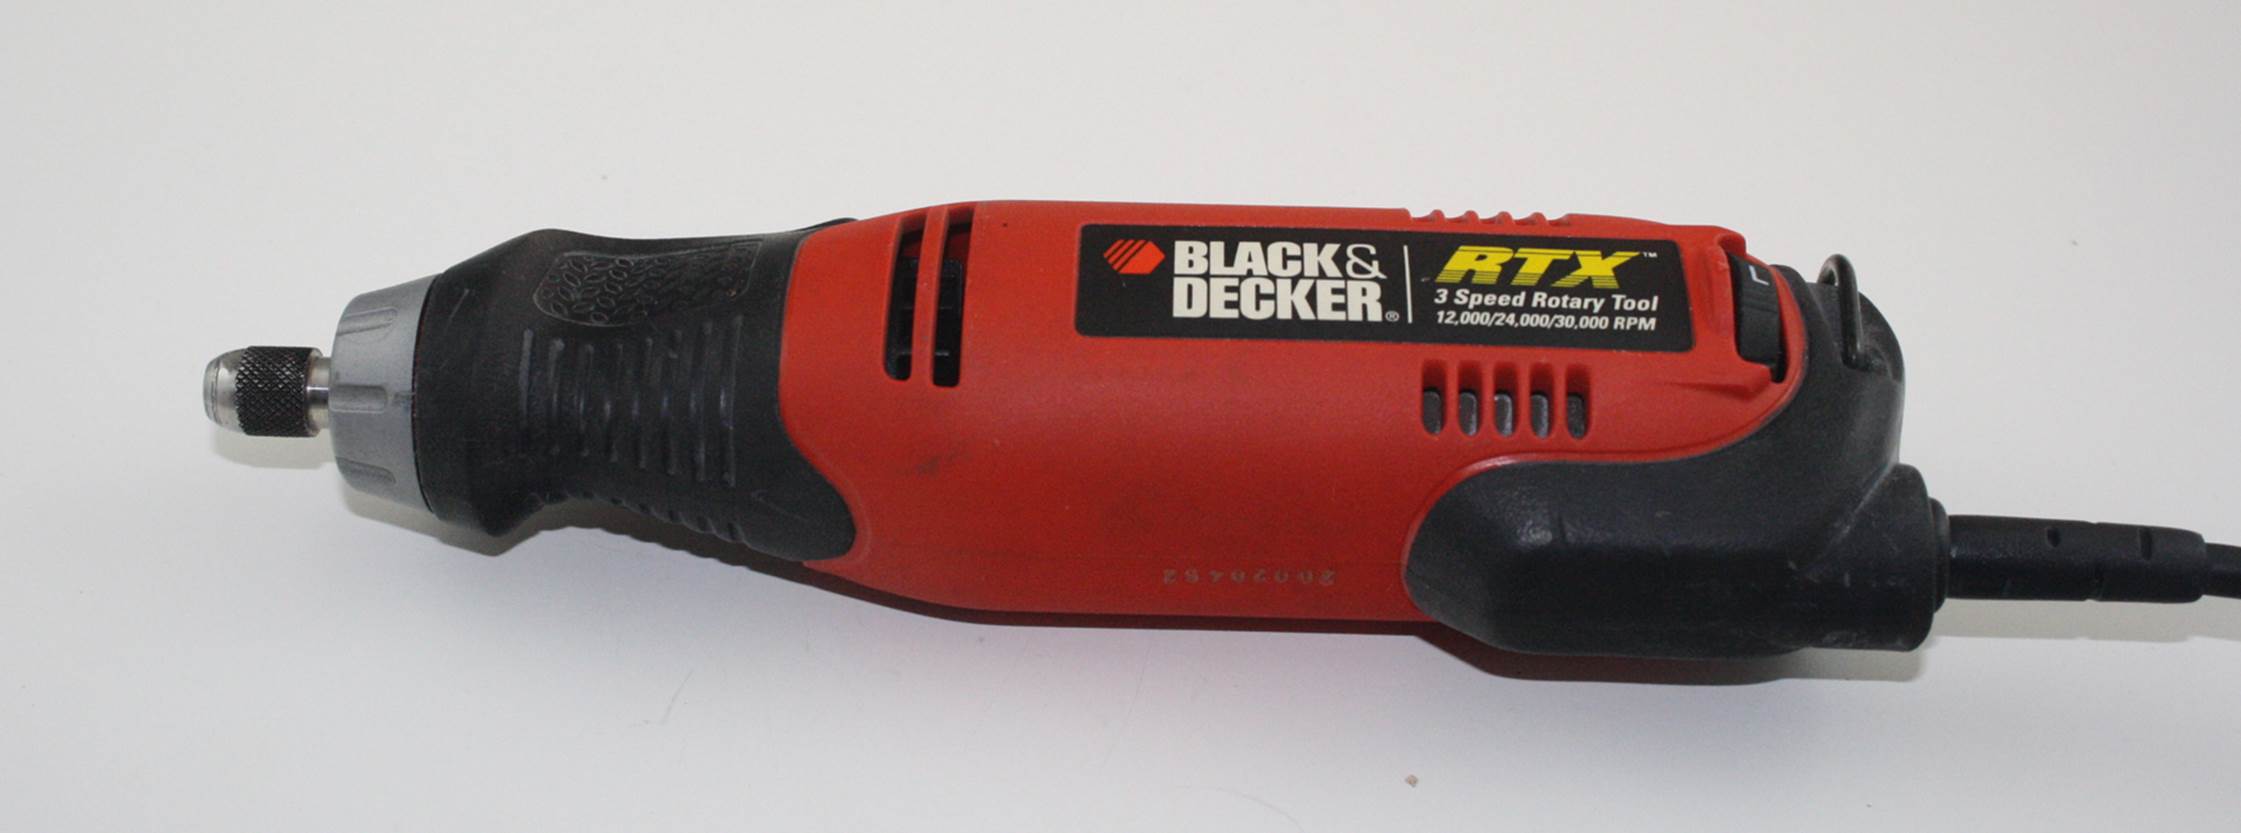
Figure 3-24. Rotary tool
You can also purchase a selection of various attachments for rotary tools in the form of kits from most hardware stores and home improvement centers, as shown in Figure 3-25. Of all of these, the most useful attachments are probably the miniature cut-off disks, sanding drums, and cutting tips. I purchase the cut-off disks in bulk packs, as I tend to go through them rather quickly. If you are building highly detailed model ships or custom jewelry, the other attachments might also be useful, but they aren’t really essential for electronics work.

Figure 3-25. Rotary tool attachments (accessory kit)
One thing to keep in mind when considering a rotary tool is that the various attachments all use the same shaft size, typically 1/8 inch, and the chuck (the part that grips the shaft) is designed for only that size. In other words, you can’t grab a 9/64 drill bit and expect it to work. It won’t, not without an adapter or a different chuck. While a drill comes with a chuck that can be adjusted to accommodate bits of different diameters, a rotary tool usually doesn’t.
A rotary tool is not really a drill. With the right bit, it can be used as a drill for soft materials and printed circuit boards, but it does not have the torque of a real drill. It is easy to burn out a rotary tool by using it for something it wasn’t intended for, so if you need to drill holes, you really should reach for a drill.
Grinders
A small bench grinder is a handy thing to have. Grinders in general are useful tools to have, and they can save you a lot of time when you need to shape the tip of a screwdriver, take the corner off a bracket so it will fit, or clean up the edge of a piece of aluminum or clear acrylic. You can pick up one like the unit shown in Figure 3-26 from Harbor Freight for around $40, and some models come with a detachable flex-cable rotary tool, like the one shown.
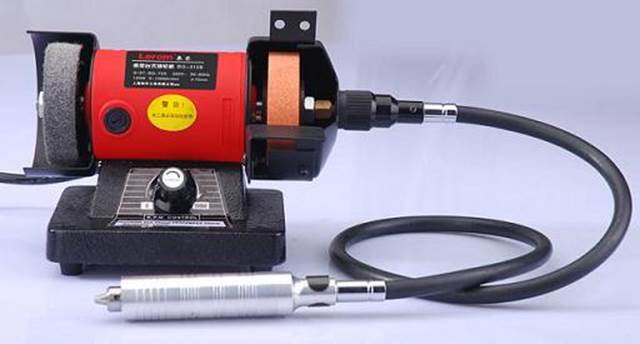
Figure 3-26. Small bench grinder with rotary tool attachment
Unless you plan to sharpen lawnmower blades or undertake some other heavy-duty activity, you probably don’t need a heavy-duty grinder. These devices have high-power motors, often come with built-in work lamps, and are available in both bench and floor-mount versions.
A tool that I’ve found to be extremely useful is a right-angle grinder, like the one shown in Figure 3-27. You might not always need it, but when the need does arise, there is really nothing else that can do the job as quickly and efficiently as this tool. You can use it to cut small-diameter metal extrusions and tubing. You can also use it to remove the end of a machine screw or bolt that is protruding too far past a nut, or to remove the head of a blind rivet or ruined screw without resorting to drilling. It can also be used to slice up an aluminum chassis if you want to use part of it for something else, and, if you use it carefully, you can even cut square or rectangular access panels in a metal box.
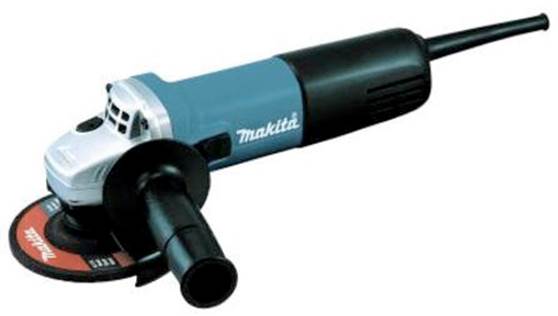
Figure 3-27. Hand-held right-angle grinder
The downside to the right-angle grinder is that it is a loud—very loud—and powerful tool. It is also rather dangerous, and it can inflict serious injuries very quickly if you let it get away from you. Always use the side grip handle, wear heavy gloves, use eye protection, and never try to operate the tool single-handed. These tools aren’t well suited to doing fine, detailed work (use a rotary tool for that), but they can slice through metal tubes, pipes, or extrusions with ease.
Drills
Electric hand drills are useful for a lot of things, but drilling a precise hole typically isn’t one of those things. A small drill press is essential for drilling holes for screws, switches, LED indicators, or connectors. While you might be able to do a passable job with a common electric hand drill, the chances of slipping, creating an off-axis hole, or accidentally making the hole too large because of tool vibrations are great. If you want a clean, precise hole, use a drill press.
That being said, a hand-held electric drill is an essential tool for the shop. When you just need to make a quick hole, drill out a rivet, or use it with a driver bit to drive in a screw, an electric hand-drill is handy to have around. I recommend a battery-powered type like the one shown inFigure 3-28.
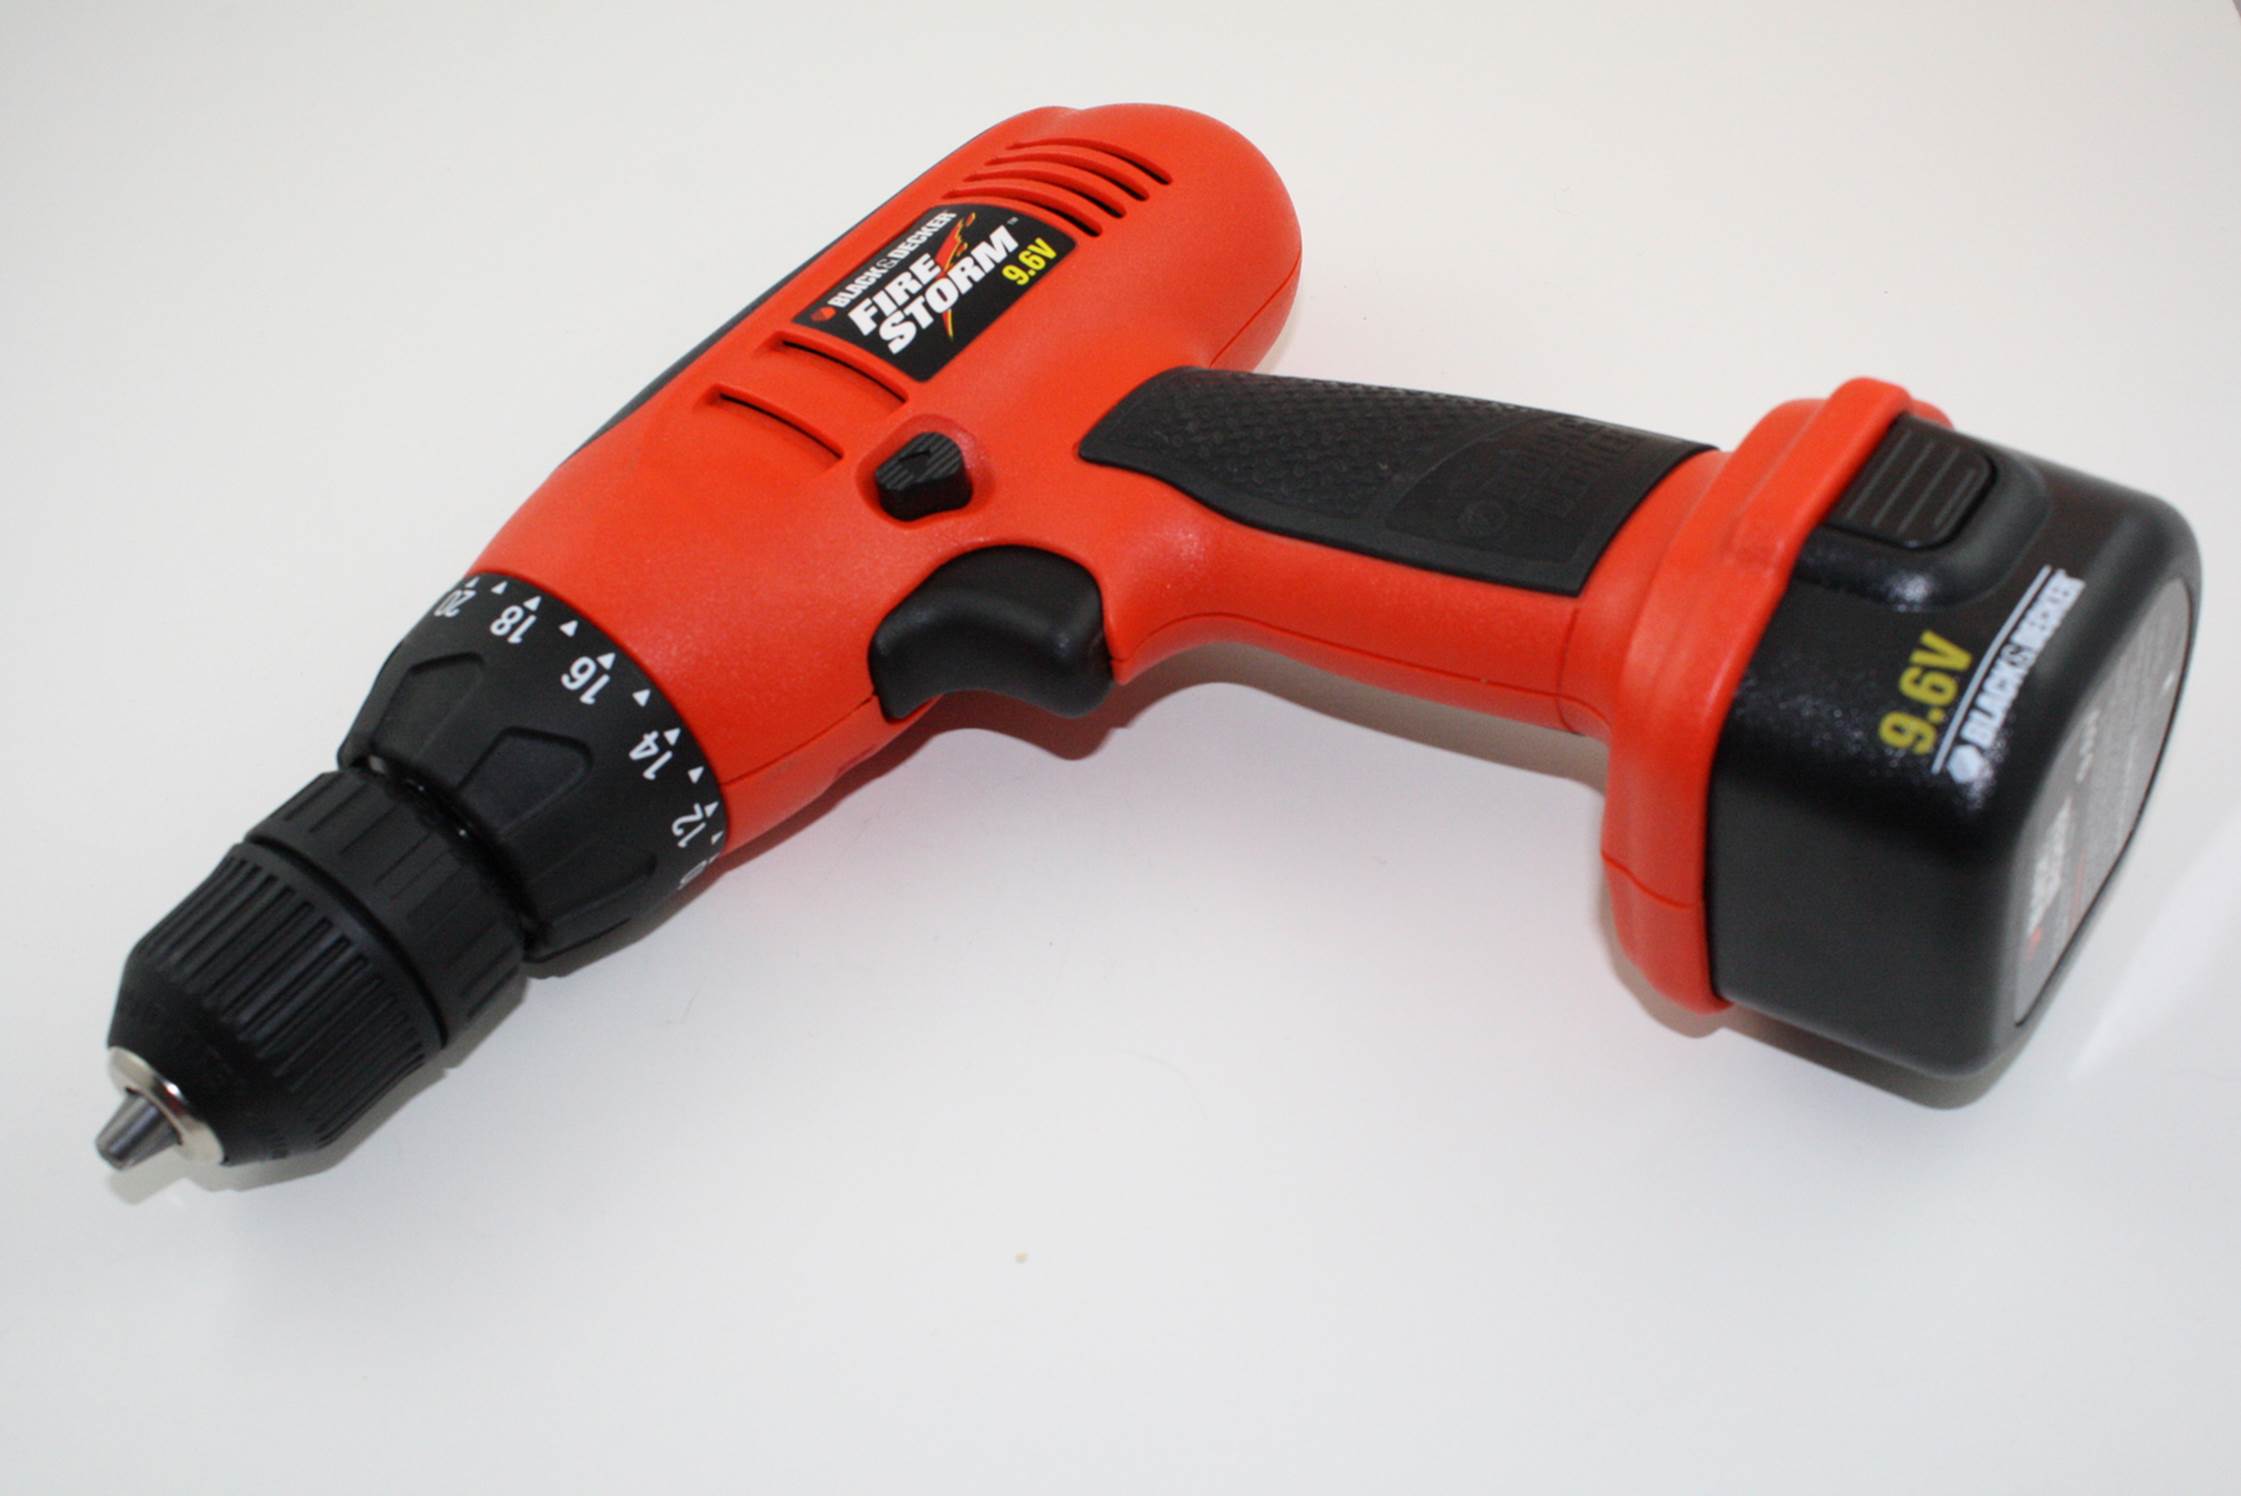
Figure 3-28. Cordless hand drill
For doing precision drilling, a drill press is essential. You can get a decent bench-top drill press like the one shown in Figure 3-29 for around $70 (this one came from Harbor Freight), and there are also rigs that allow a standard hand-held electric drill to be clamped into a drill-press-type fixture. These are all right for light jobs, but they do require care when you’re mounting the drill. If you need to remove and replace the drill often to handle different tasks, then a dedicated drill press would probably be a better alternative; it’s less tedious to deal with and it saves wear and tear on the hand-held drill.
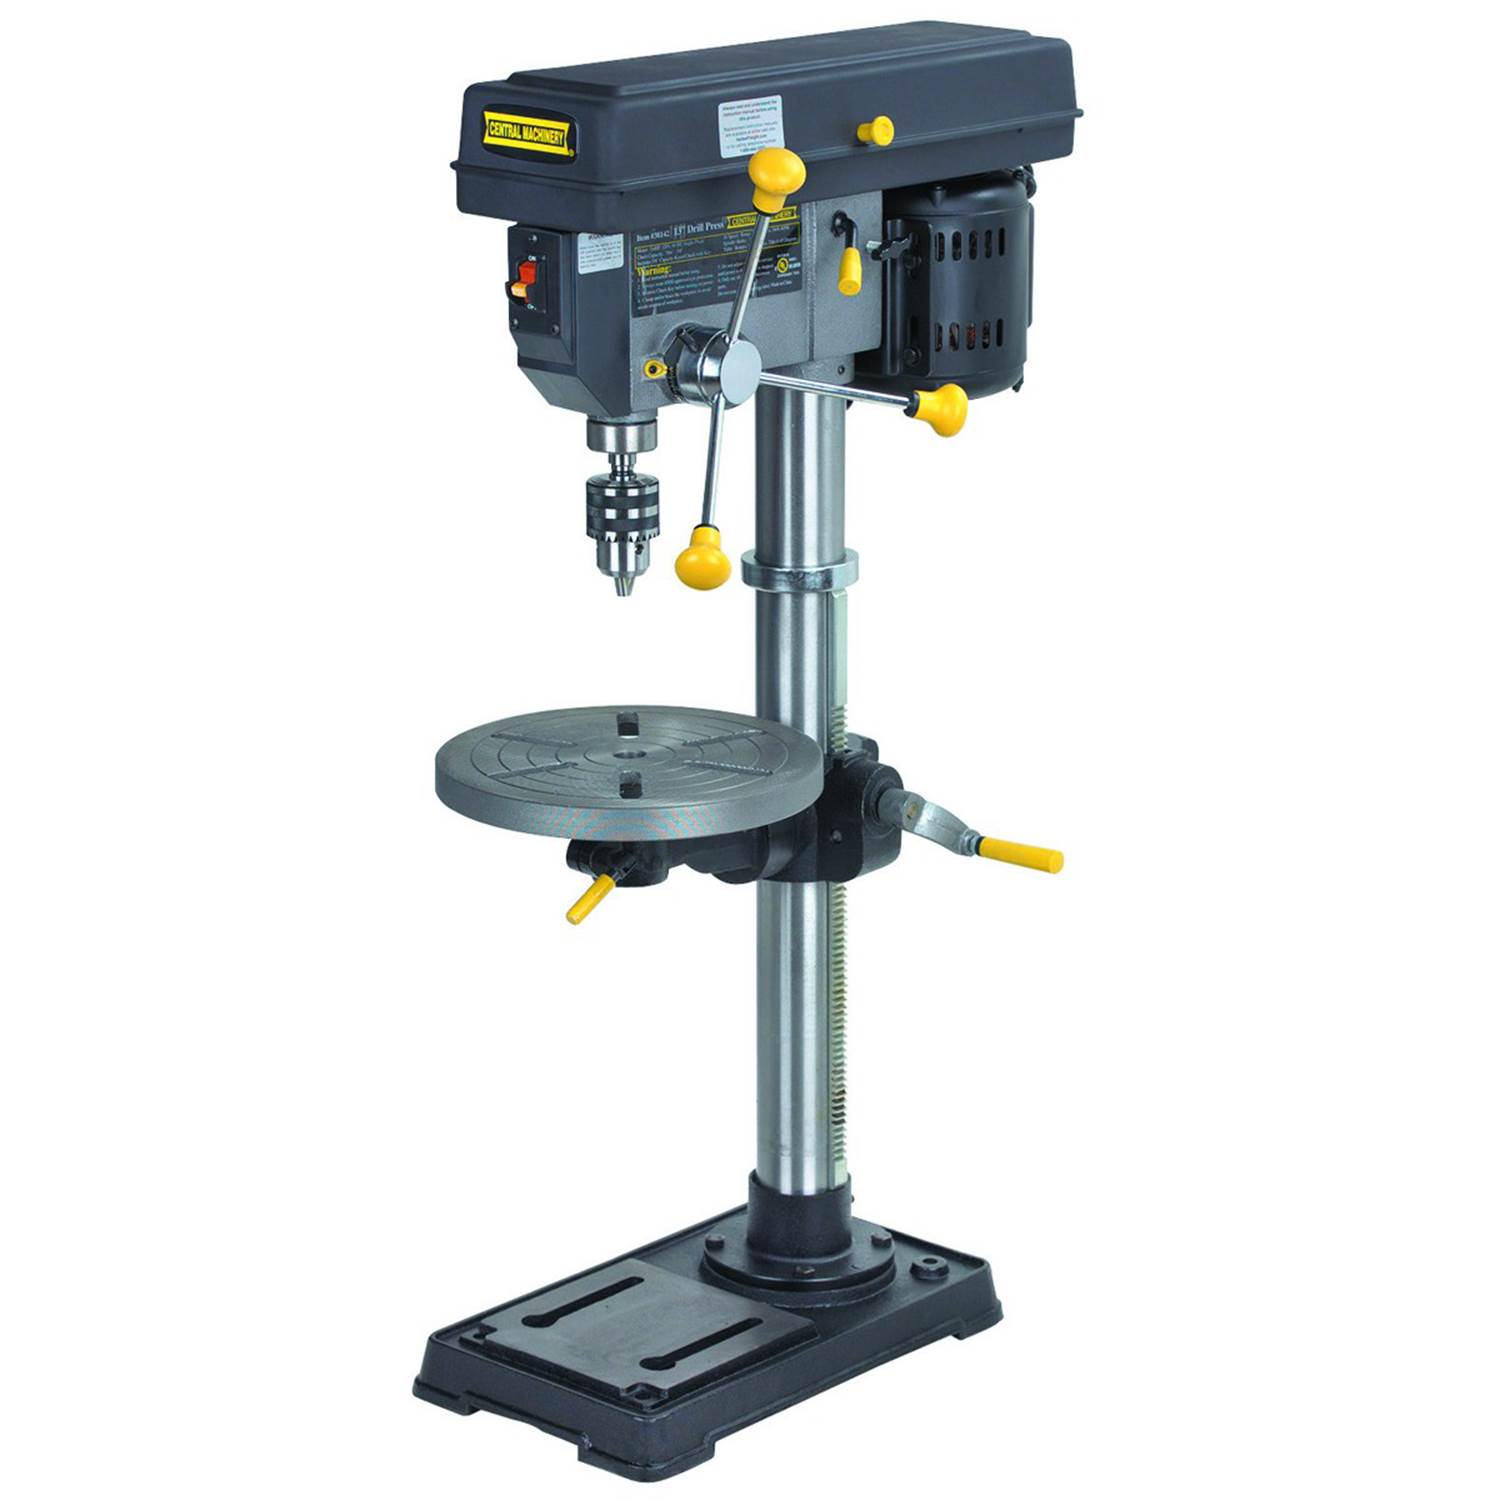
Figure 3-29. Small bench-top drill press
Drill Bits
The drill, be it hand-held or some type of drill press, is only a mechanism for spinning a tool. The working tool in a drill is the drill bit. Sets of drill bits in various sizes are widely available, in a variety of cases and holders. These range from small kits, like the one shown in Figure 3-30, to large sets found in machine shops and industrial settings.
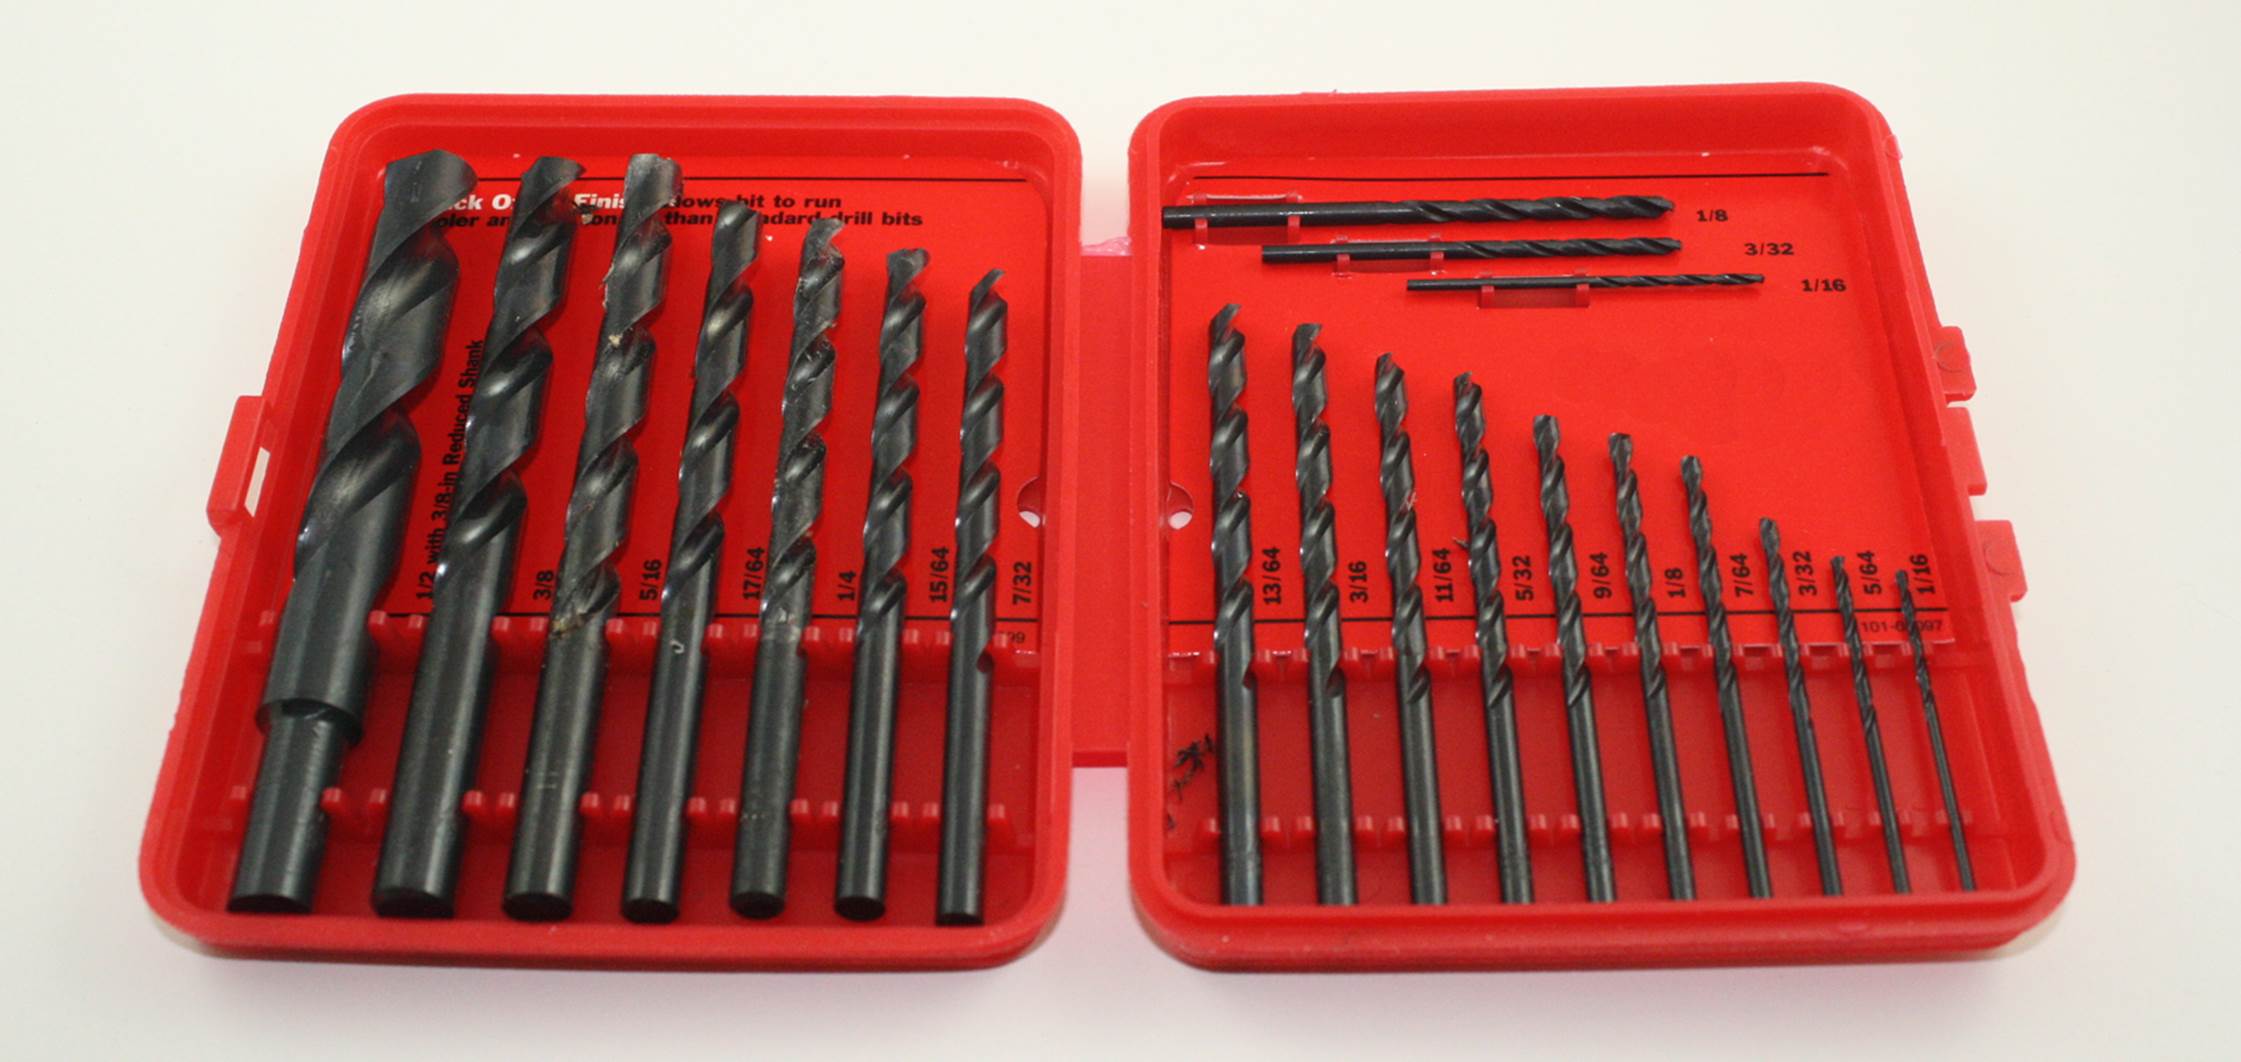
Figure 3-30. Small drill bit set
Not all drills are created equal, and most of the low-cost drill bit sets contain bits that will not stand up to extended or heavy use. The metal used to make the drills simply isn’t that great, and a couple of attempts to make a hole in something like steel will quickly dull the tip. There are ways to drill a hole with lubricants that can help to reduce the wear and tear, but they won’t stop it. Chapter 4 discusses recommended ways to use drills.
Some drill bits are intended for special-purpose applications, such as drilling the holes in a printed circuit board. Figure 3-31 shows a selection of these types of drill bits. Notice the color-coded plastic collars on the bit shanks. There are standard twist drill bits available with 1/8-inch shanks that can be used with a rotary tool, and you can typically find them wherever rotary tools are sold.
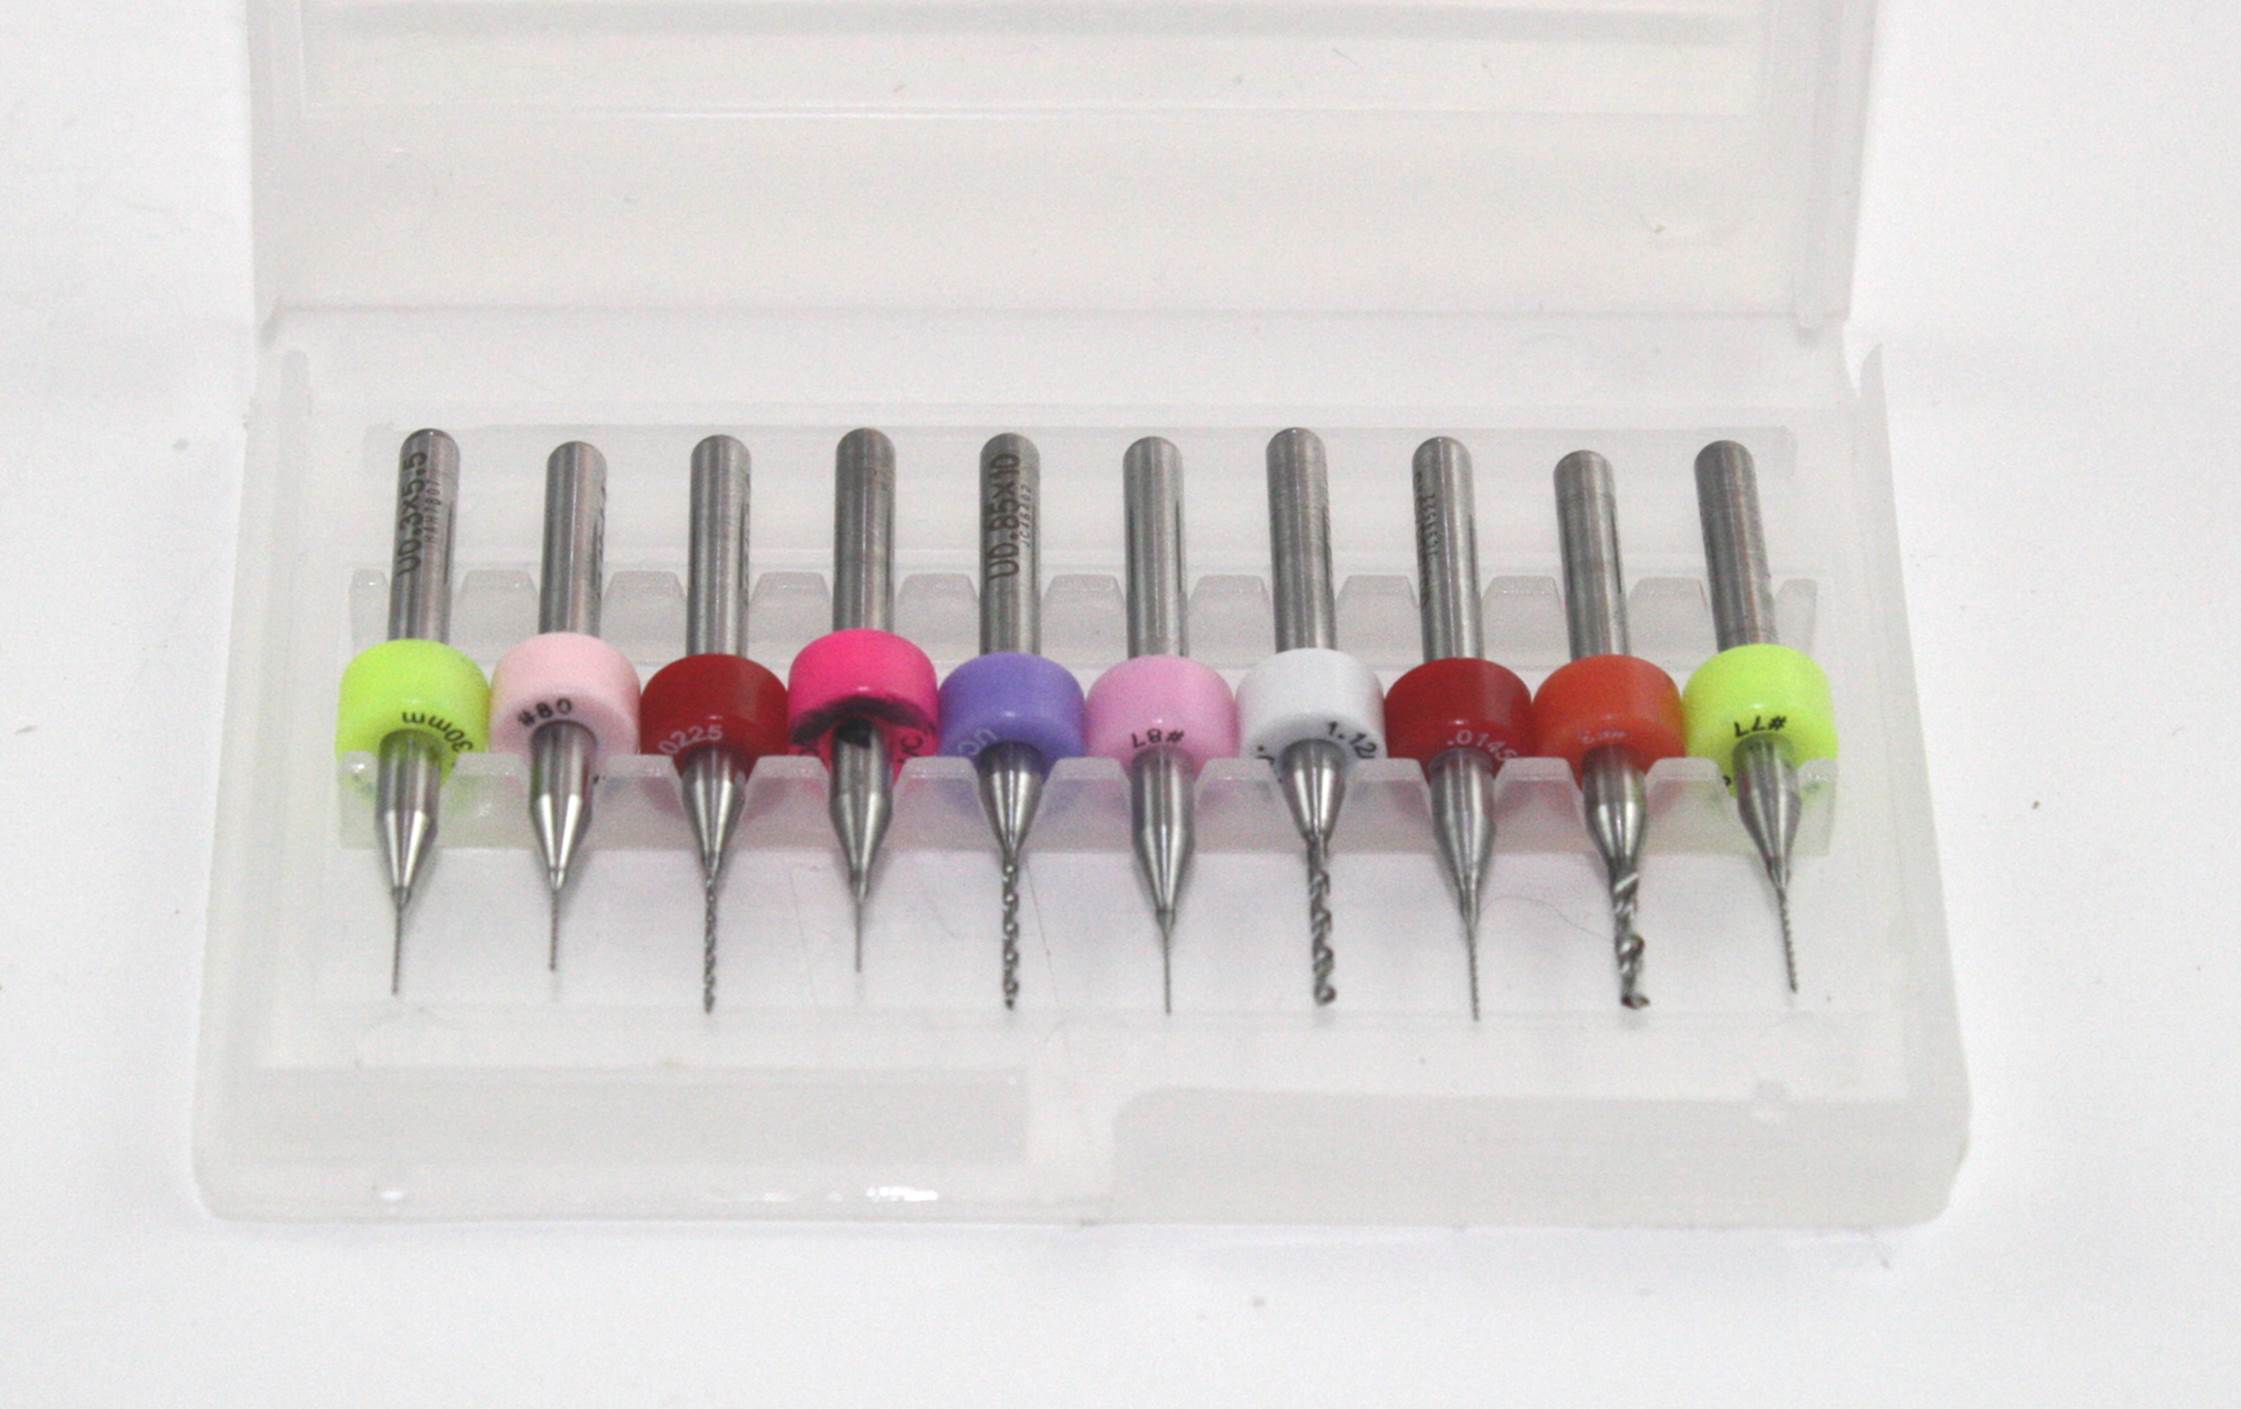
Figure 3-31. Selection of PCB drill bits
You can also find PCB drill bits listed as surplus items, mainly because the materials used to make PCBs tend to be hard on drill bits and they quickly get too dull to meet manufacturing standards. But, as always, caveat emptor. You may end up with a collection of dull or broken drills that are essentially useless. Better to spend a bit more and get one of the imported sets of new bits. They might not be top quality, but with careful use, they will do the job.
Note that small drills bits like those shown in Figure 3-31 are useful for soft materials like plastic or wood, and of course they will make a hole in a PCB if they are sharp. In general, these types of drill bits will not work well with hard metals, but they can be used with soft metals like lead, silver, and gold.
Taps and Dies
Sometimes you really need a threaded hole, or maybe you want to make a special-purpose threaded shaft. Tapping is the process of cutting threads into an appropriately sized hole with a tool called a tap. A die is a tool for cutting threads into a blank rod to create a threaded shaft, and it is also sometimes used to repair damaged screw or bolt threads. Figure 3-32 shows an inexpensive tap and die kit.
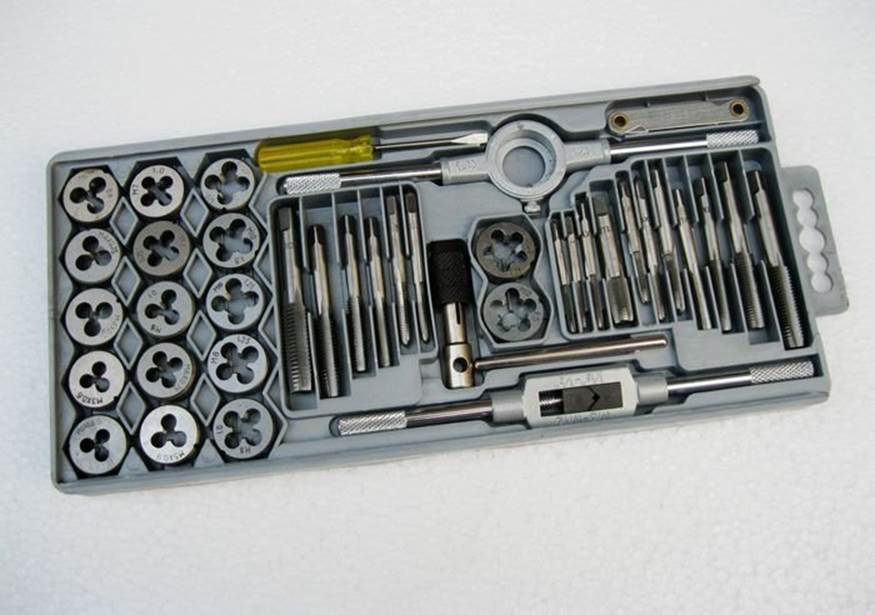
Figure 3-32. Tap and die kit
A tap and die kit is handy to have around, but it must be used with care to avoid damage to the tools. It’s easy to break off a small tap in a hole that was drilled to the wrong size. Chapter 4 discusses some ways to use both taps and dies to get successful results.
Small Hand Saws
A small saw is useful for cutting things like tubing and sections of sheet materials. Specialty saws, such as a jeweler’s saw, are extremely useful for creating odd-shaped holes in things.
Figure 3-33 shows a type of miniature hacksaw that is readily available at hardware and home improvement stores.
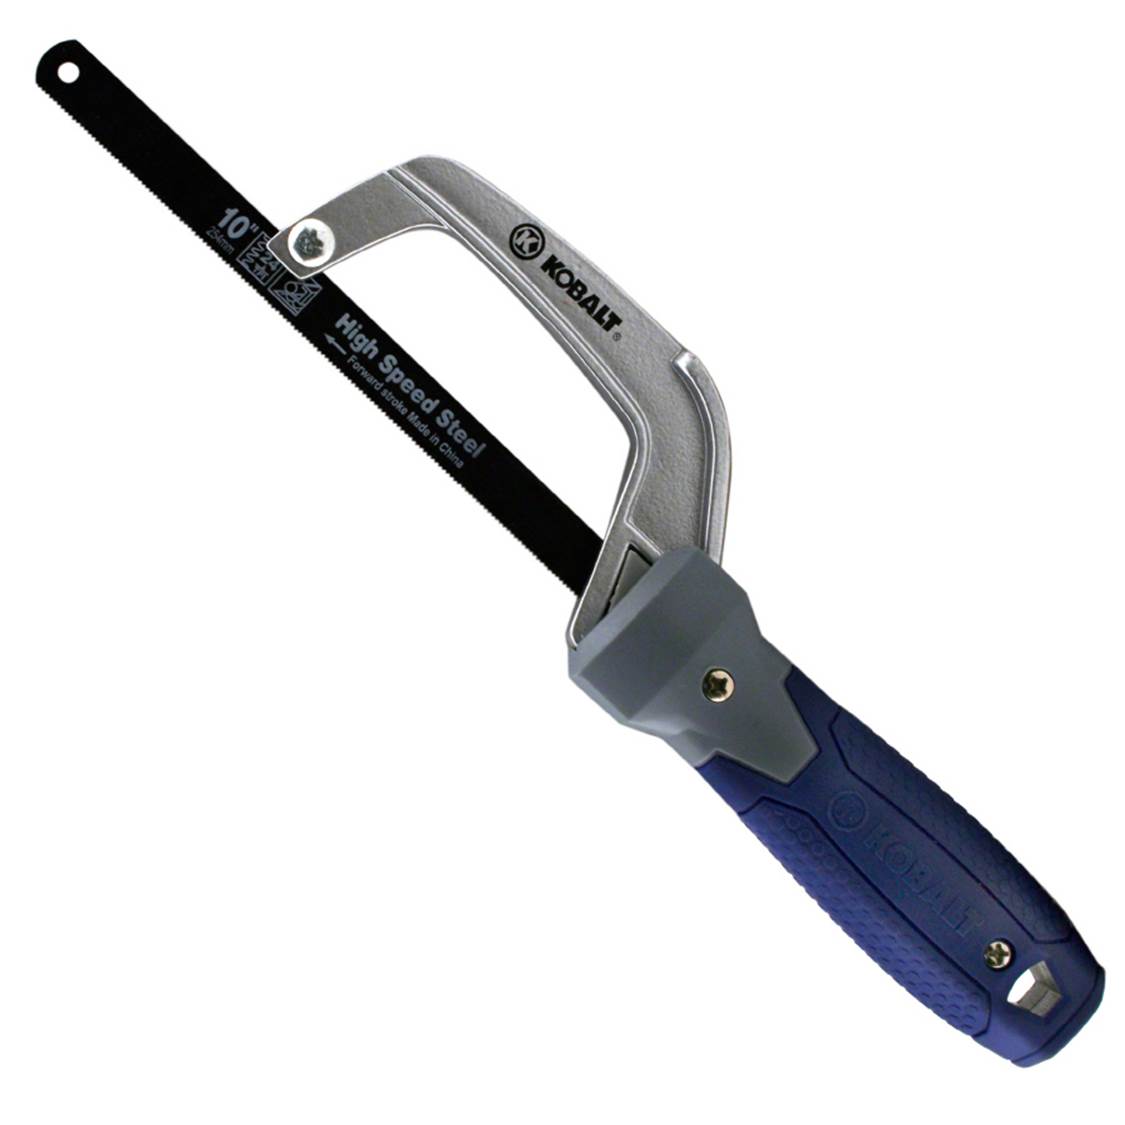
Figure 3-33. Miniature hacksaw
These tools will accept a standard hacksaw blade, and they are useful for getting into tight places. They do not have the same degree of stability that you will get with a regular hacksaw, however, because the blade isn’t tensioned at both ends.
For doing detail work or creating small holes with odd shapes, something like the jeweler’s saw shown in Figure 3-34 is the way to go.
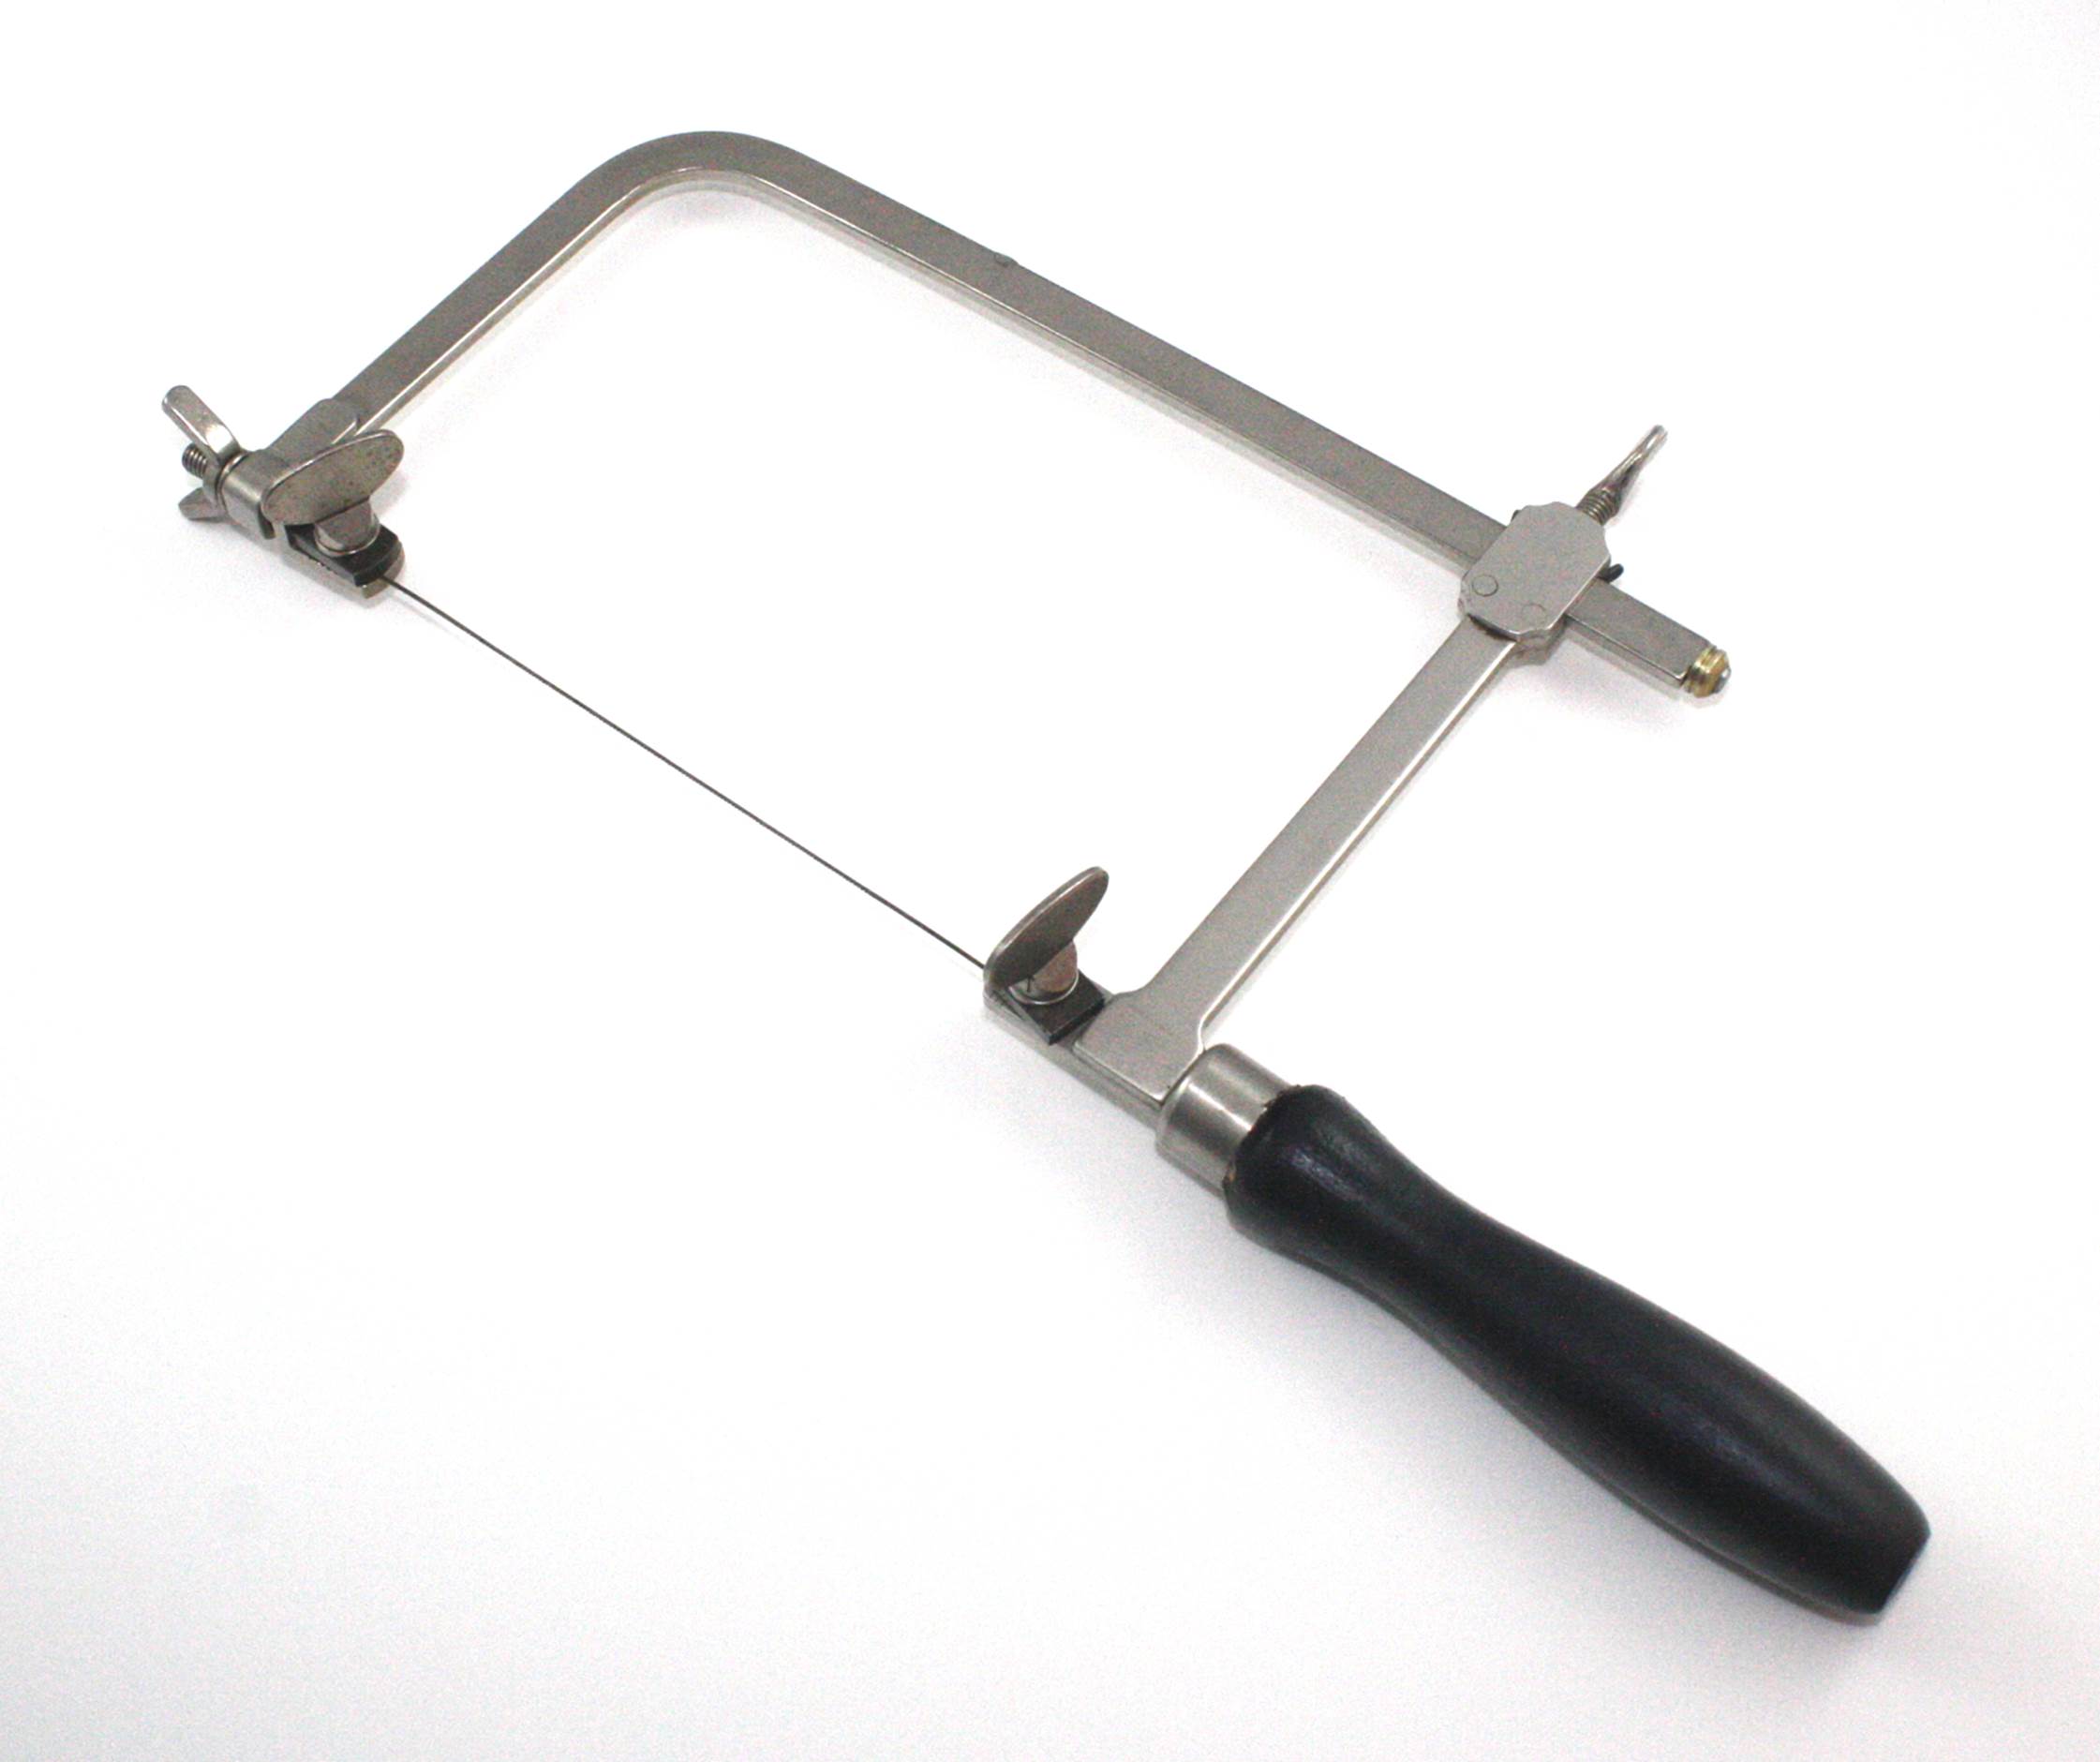
Figure 3-34. A typical jeweler’s saw
A jeweler’s saw uses a very narrow blade. This allows it to make sharp turns without binding, but it also means that it easy to snap the blade if you apply too much force while cutting. Figure 3-35 shows a pack of blades for a jeweler’s saw.
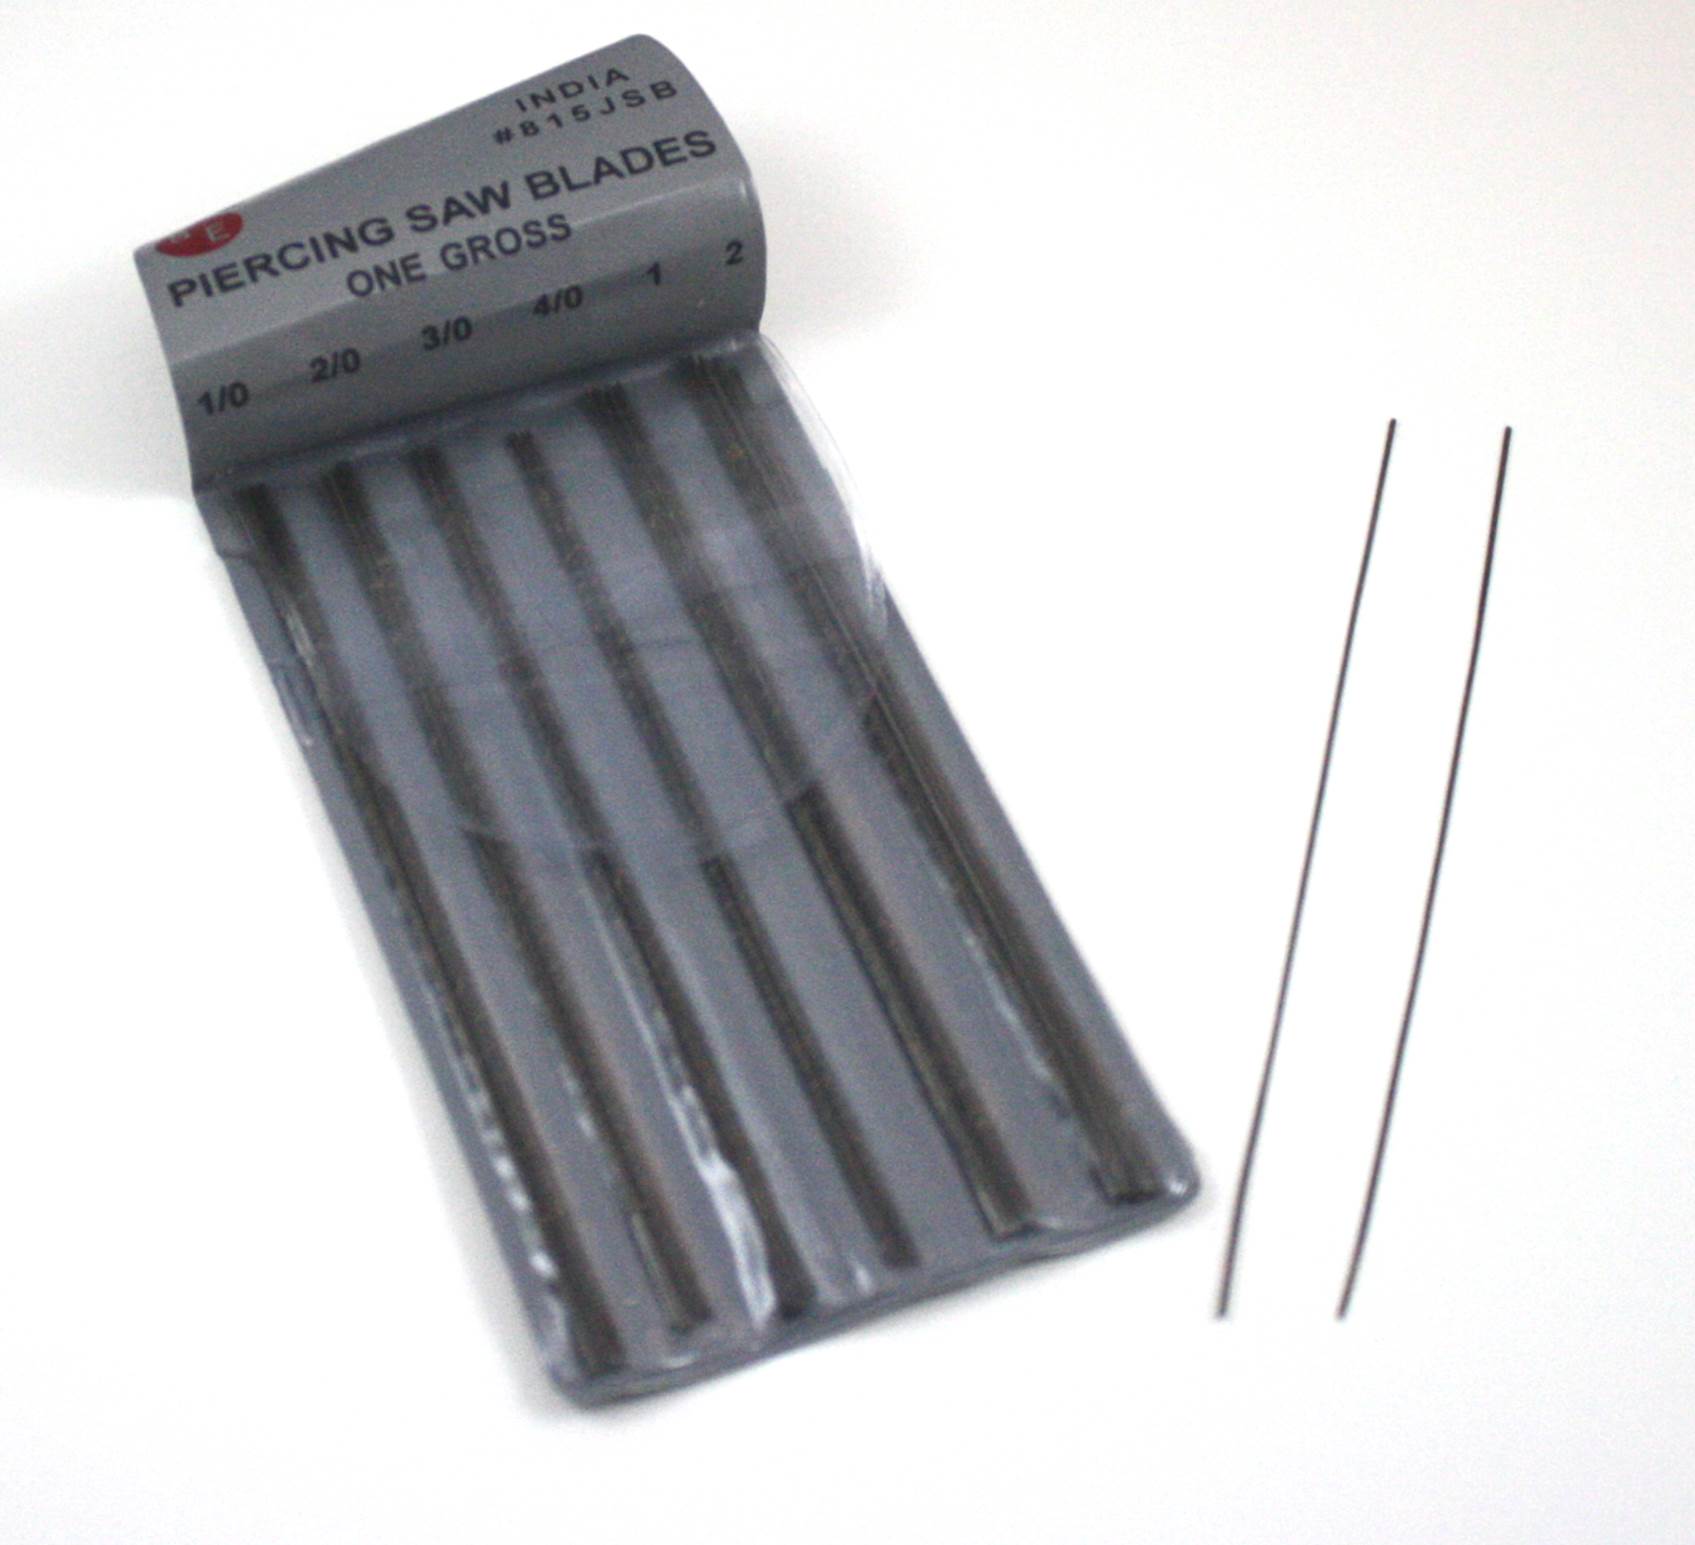
Figure 3-35. Pack of blades for a jeweler’s saw
Miniature Power Saws
Since electronics often involves working with things that are small, there usually isn’t a need for something like a full-up table saw or cut-off saw. However, you will find that there is often a need to cut plastic or metal tubing, aluminum extrusions, or small plastic or soft aluminum panels. For jobs like these, miniature tools are available, like the little table saw shown in Figure 3-36.
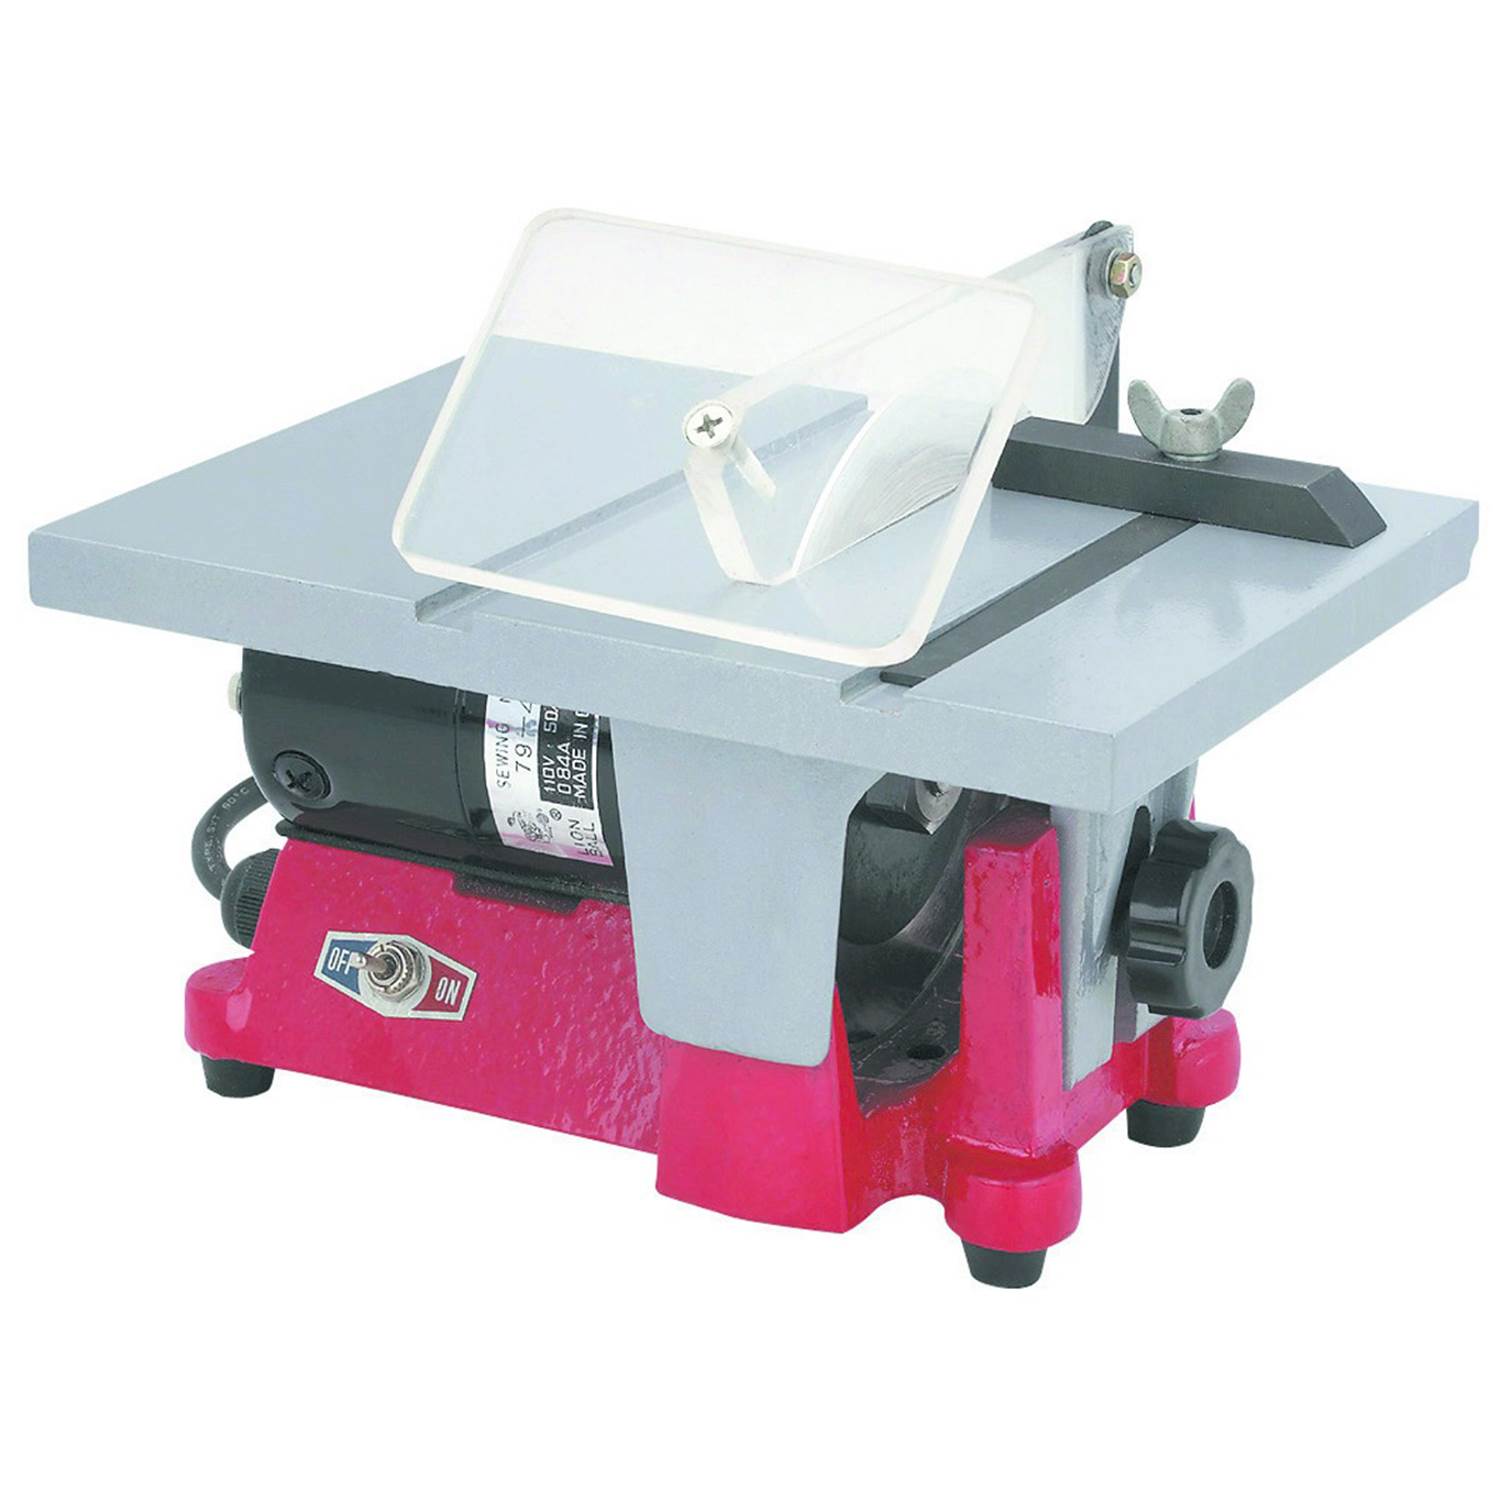
Figure 3-36. Miniature table saw
This handy device uses a standard 4-inch blade, and although it’s somewhat clumsy to adjust, it does have a height adjustment. The blade is fixed in the vertical position, so it won’t do angle cuts. You can find it for about $40 or so at places like Harbor Freight. Note that the table area is small, so it isn’t suitable for anything larger than about 12 inches in size. You could, with a little effort, build table extensions for it to handle larger items, but then you would be treading into the territory of full-size table saws.
For cutting tubing, extrusions, rods, or other long, thin items, a cut-off saw with a grinder blade is a handy tool. Also known as a chop saw, a cut-off saw will produce a nice, clean cut, without the roughness and jagged edges that can result when a hacksaw is used. It’s a lot quicker, as well.Figure 3-37 shows one of the various types of miniature cut-off saws that are available. They range in price from around $40 to over $300, depending on the brand, quality, blade size, and number of additional features. Note that some of these types of tools will work only with a grinder wheel, not an actual saw blade.
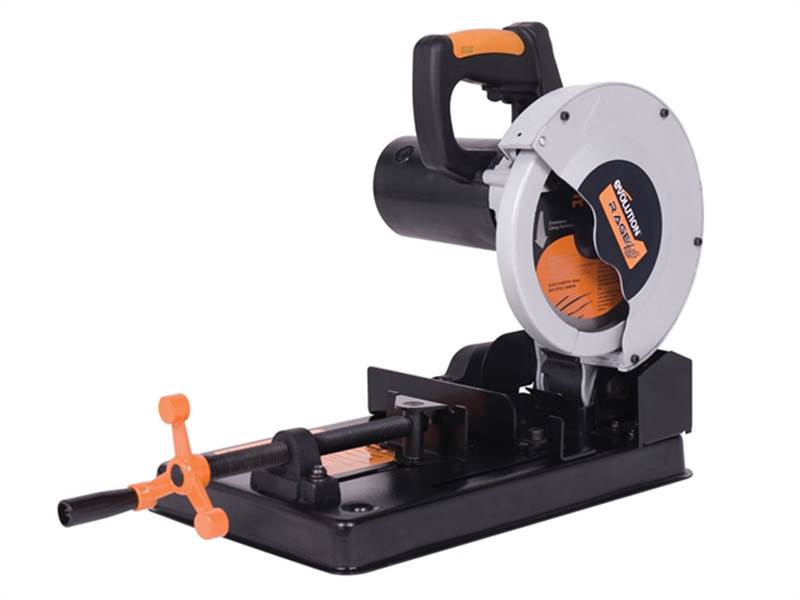
Figure 3-37. Miniature cut-off/chop saw
The primary advantage of small saws like these is their convenience and ability to deal with small work pieces. Just keep in mind that, like any powered tool, these are not toys. Although they are miniature versions of the full-size tools found in metal and woodworking shops, they can still cut you badly. Losing a finger with careless use is a distinct possibility, just as with their larger cousins.
Specialty Metalworking Tools
If you will be working with metal, there are some tools that you really should consider having in your toolbox. Metal can be a frustrating material to deal with, and having the right tool for the job can make the difference between annoyance and satisfaction.
When you are drilling or cutting a hole in sheet metal, the result often has sharp edges or little bits of leftover material called burrs. This is particularly true when you’re working with the soft, untempered aluminum used for sheet-metal chassis parts. Steel pieces don’t suffer quite as much from this, but drilling a 1/2-inch hole in a piece of 18-gauge steel can sometimes result in a somewhat ragged hole. This most often happens when you attempt to make a hole without going through a series of step-up holes first (see Chapter 4 for drilling techniques), which is a common mistake of the impatient.
A deburring tool, as shown in Figure 3-38, is essentially a swivel blade set in a handle. It is used in a circular motion to trim the inside of a hole or cut-out, removing burrs and helping to smooth out the cut. These tools are inexpensive and readily available from a variety of sources.
Creating a starting point is a good idea when working with metal. Even when you’re using a drill press, a location point can help get the drill started to make a clean hole. The automatic punch, shown in Figure 3-39, is designed to take the place of a hand-held punch and ball-peen hammer. To use it, you simply push down until the internal spring-loaded mechanism releases, which causes the tip to create a small indentation in the material.
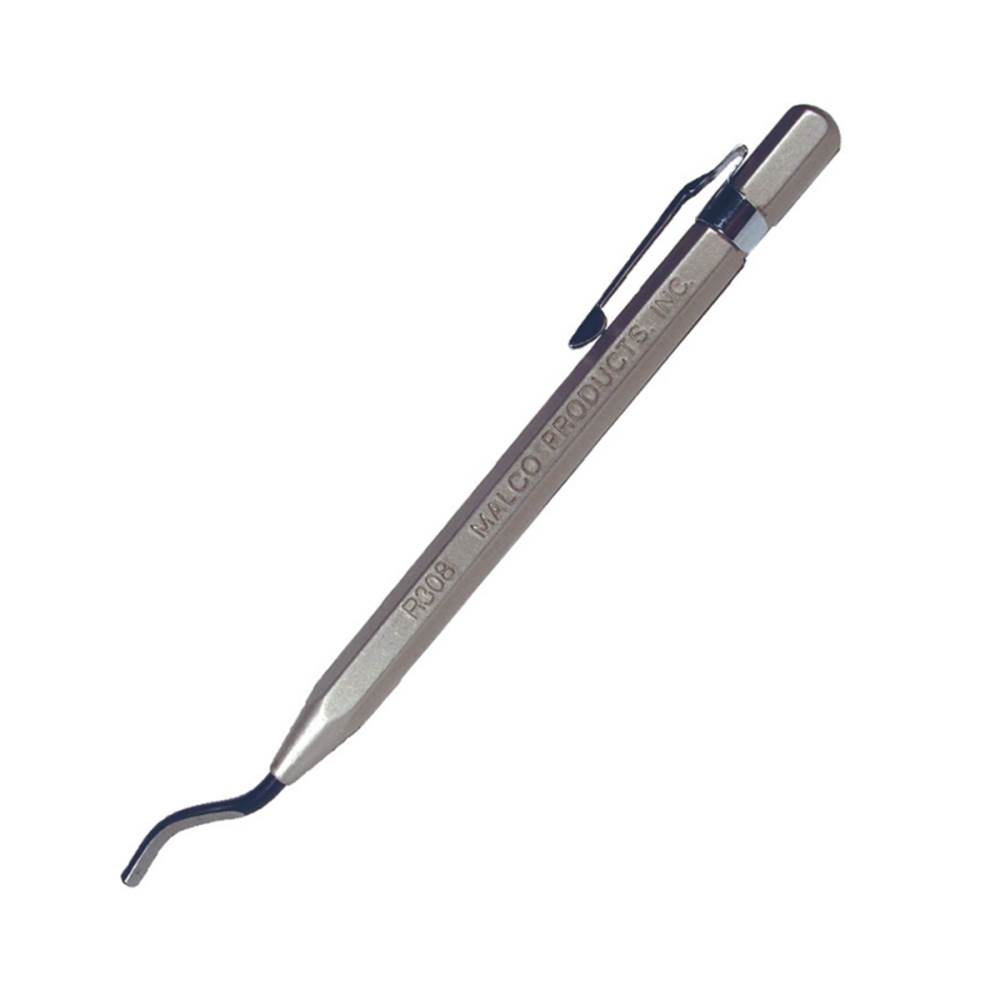
Figure 3-38. Deburring tool
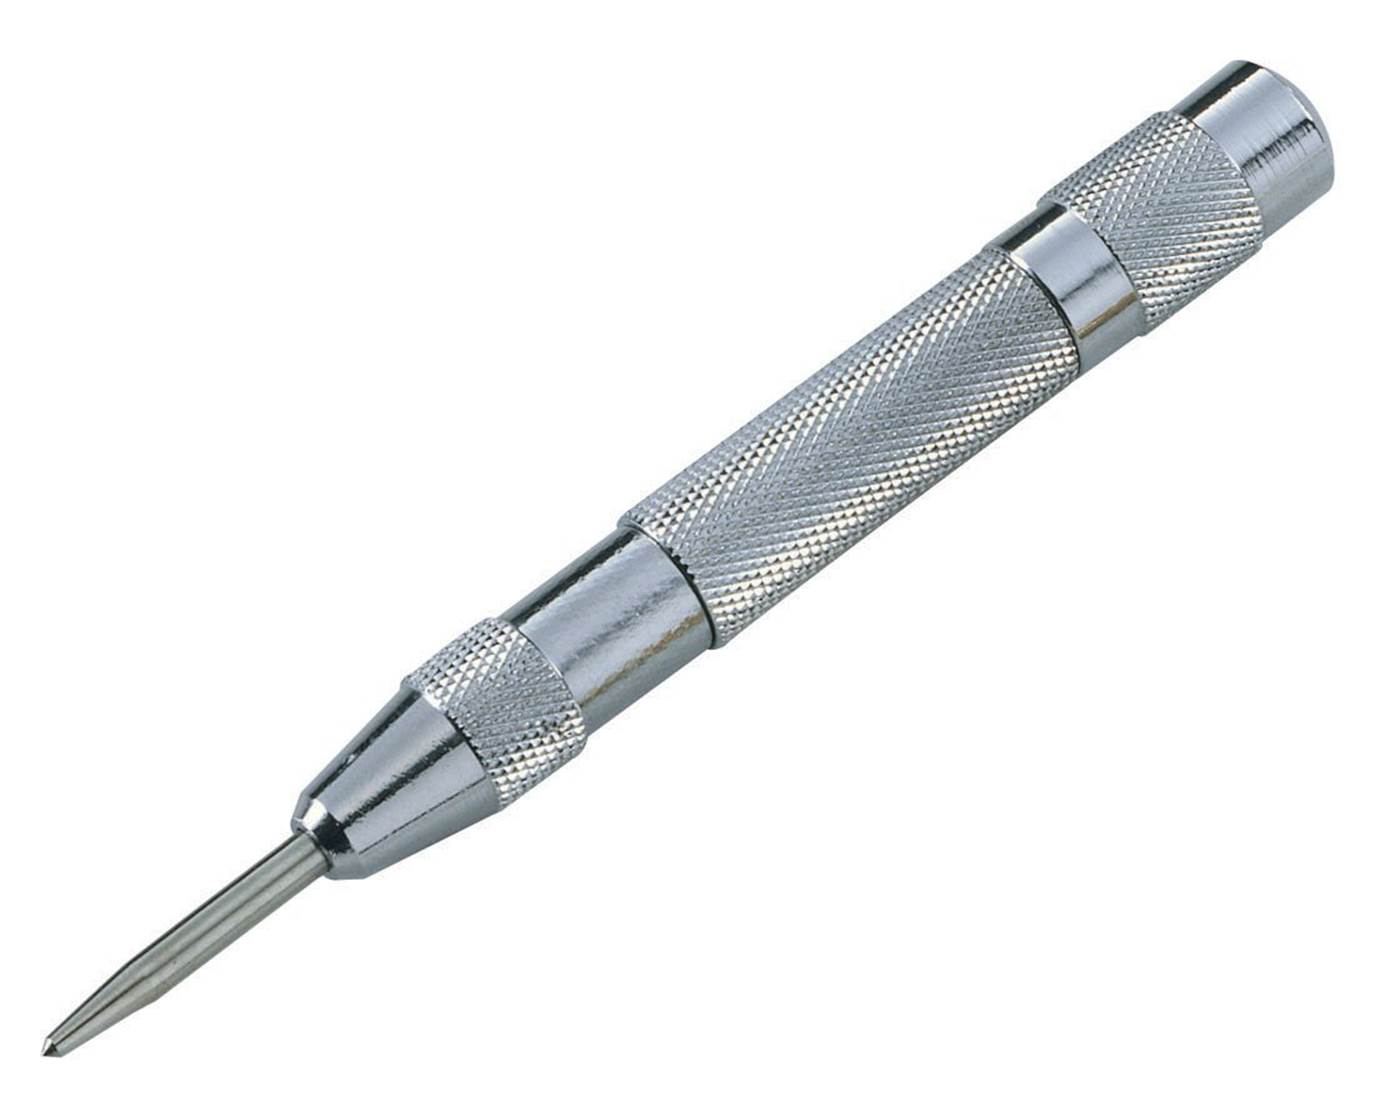
Figure 3-39. Automatic punch
The concept of step-up drilling was mentioned earlier and is discussed in Chapter 4, but there is a tool that makes the process easier (which should not be surprising, since there seems to be a tool for every conceivable use). This is called a step drill, and a typical step drill set is shown inFigure 3-40.
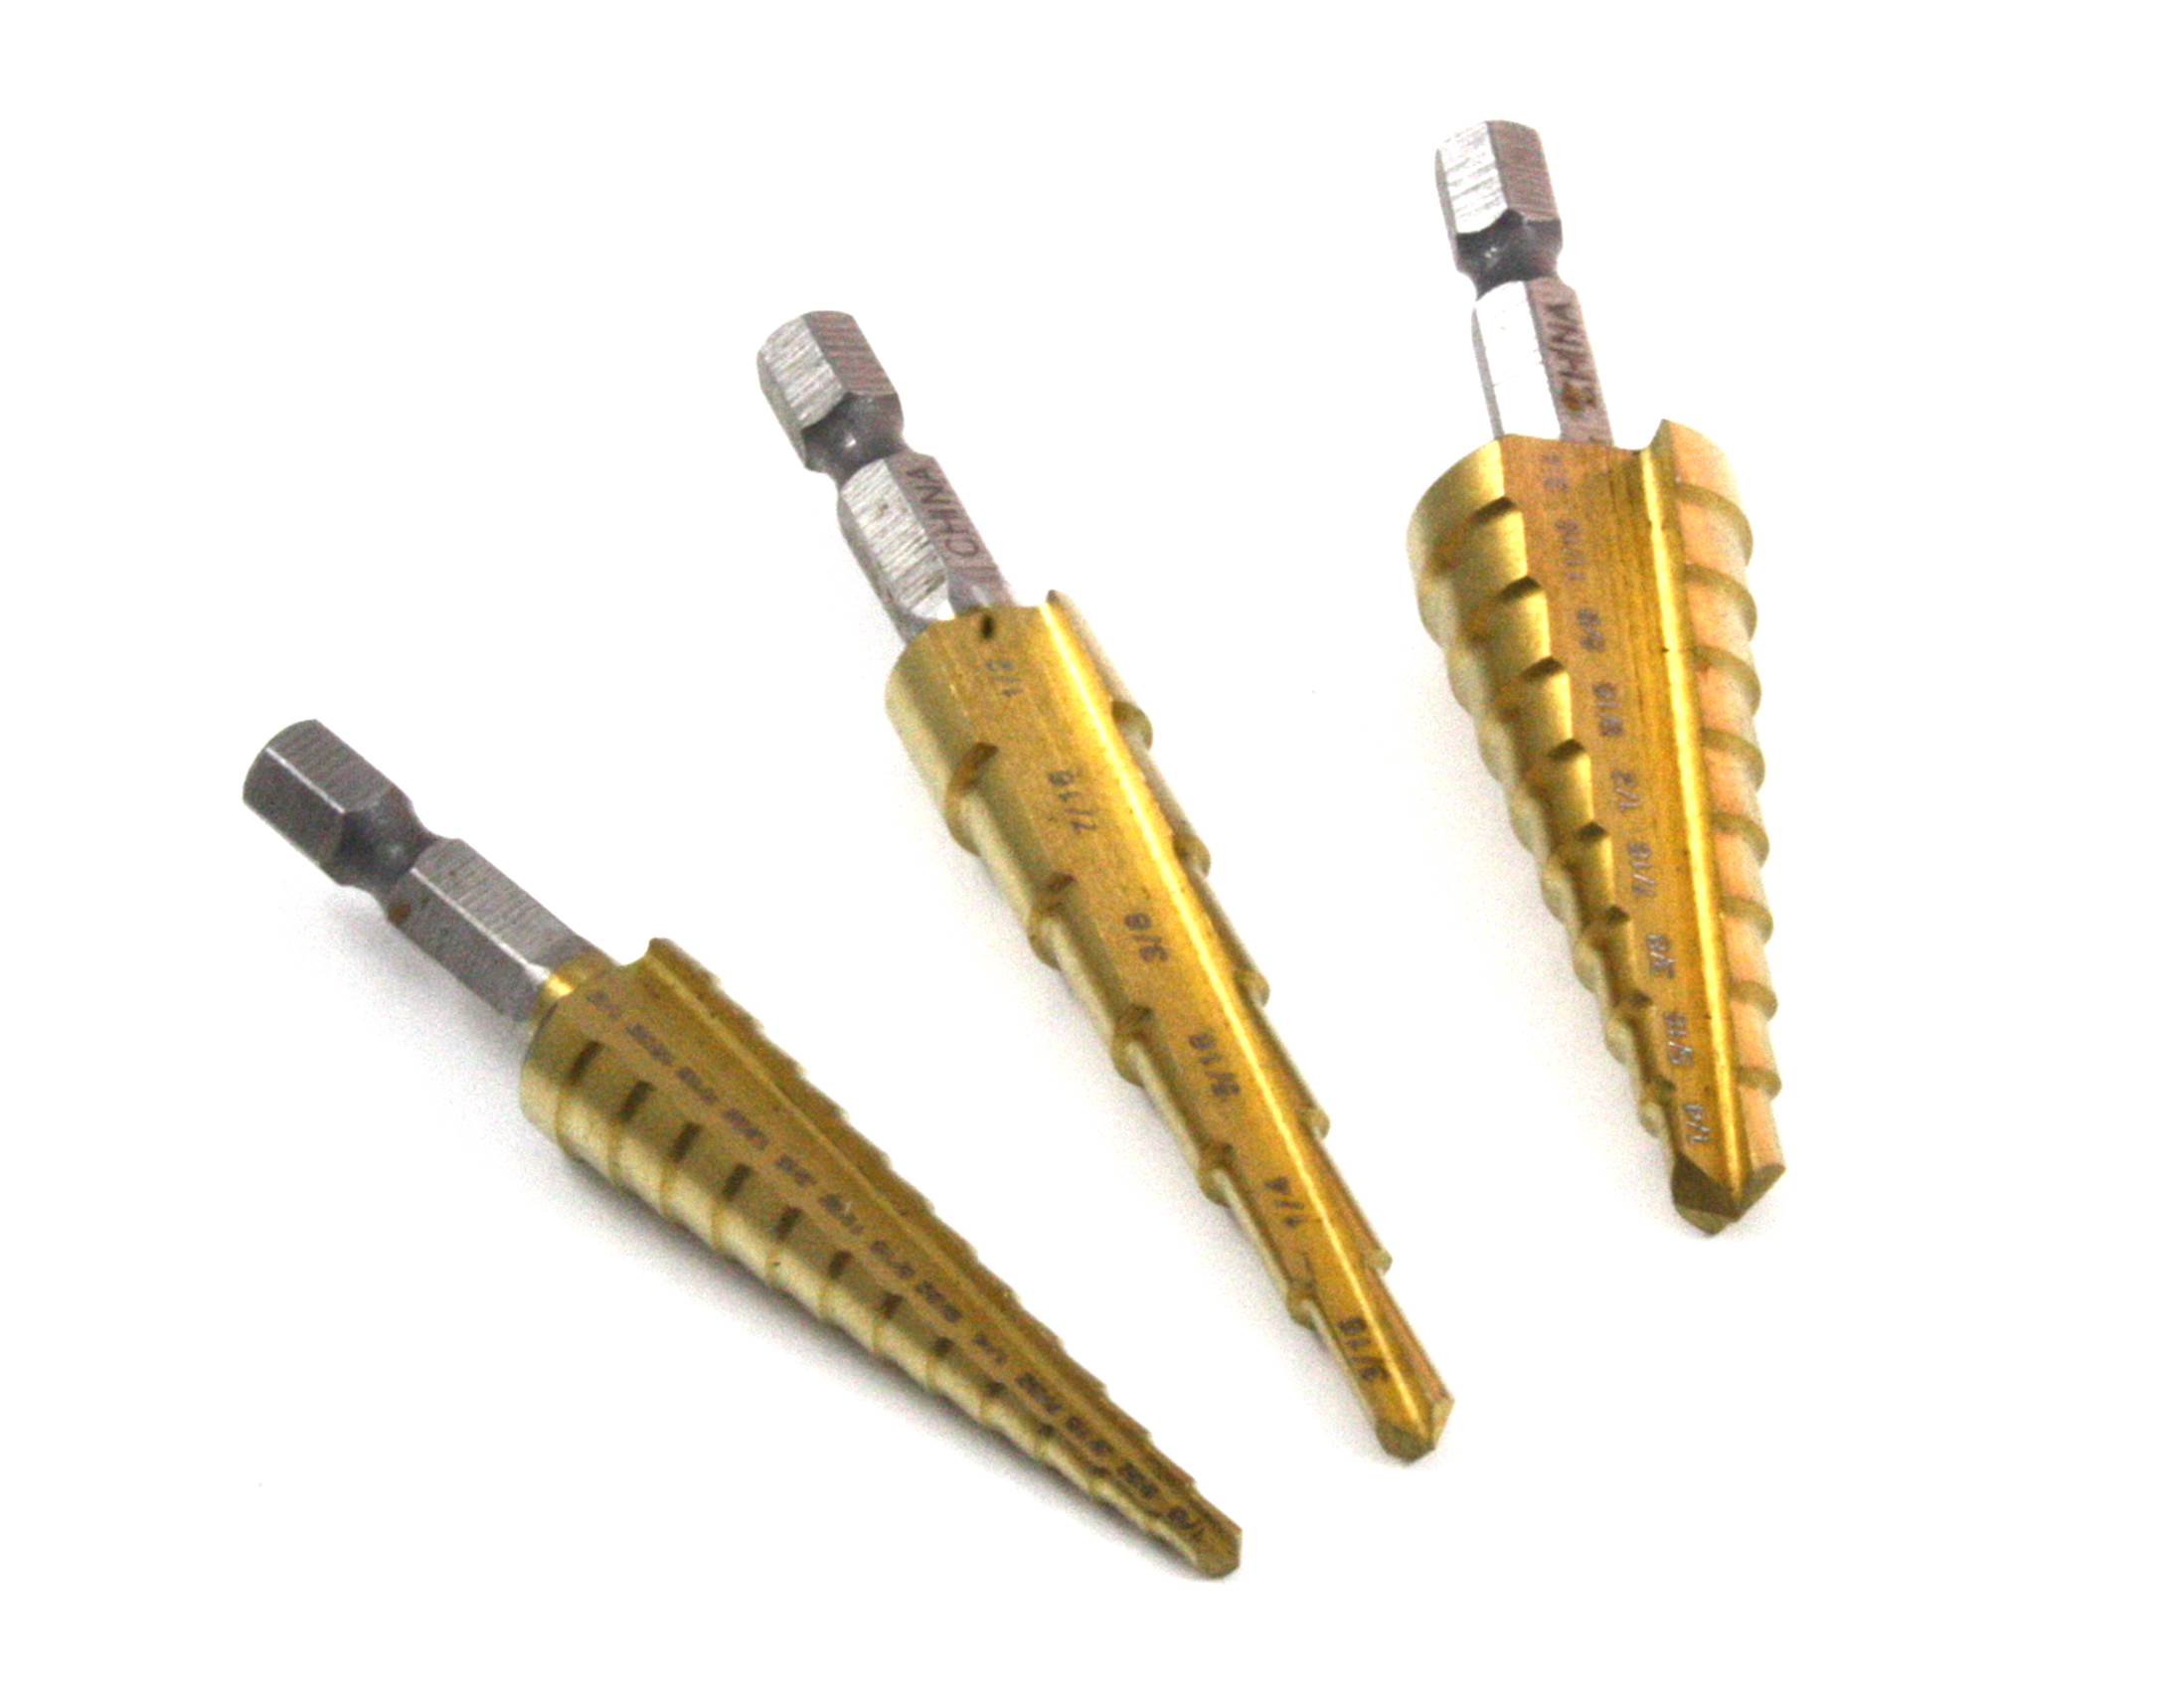
Figure 3-40. Step drill set
A step drill is best suited for soft materials, such as plastic, soft aluminum, or mild steel as found in electrical boxes. Step drills are often used by electricians to make conduit holes in electrical enclosures. They can be used with hard materials if the tool is suitably hardened and rated for that kind of application, but many of the low-cost step bits won’t take much abuse like that before they become useless.
Brave and bold electricians notwithstanding, I would suggest that a step drill be used with a drill press if possible, since it can potentially bind in the hole and twist the drill out of your hands. An electric drill can spin around and hit your hand before you can move it out of the way, and you could end up with a broken bone or two. At the very least, you can get a nice bruise if a drill gets away from you.
A good set of step drills tends to be rather pricey, running upward of around $100 for a set of three, but single drills can be had for a low as $10 each. When buying a step drill, get the best one you can afford.
Tweezers
A good pair of tweezers is invaluable for working with small parts that needle-nose pliers won’t hold safely or reliably. Tweezers for electronics work come in a range of styles, as shown in Figure 3-41.
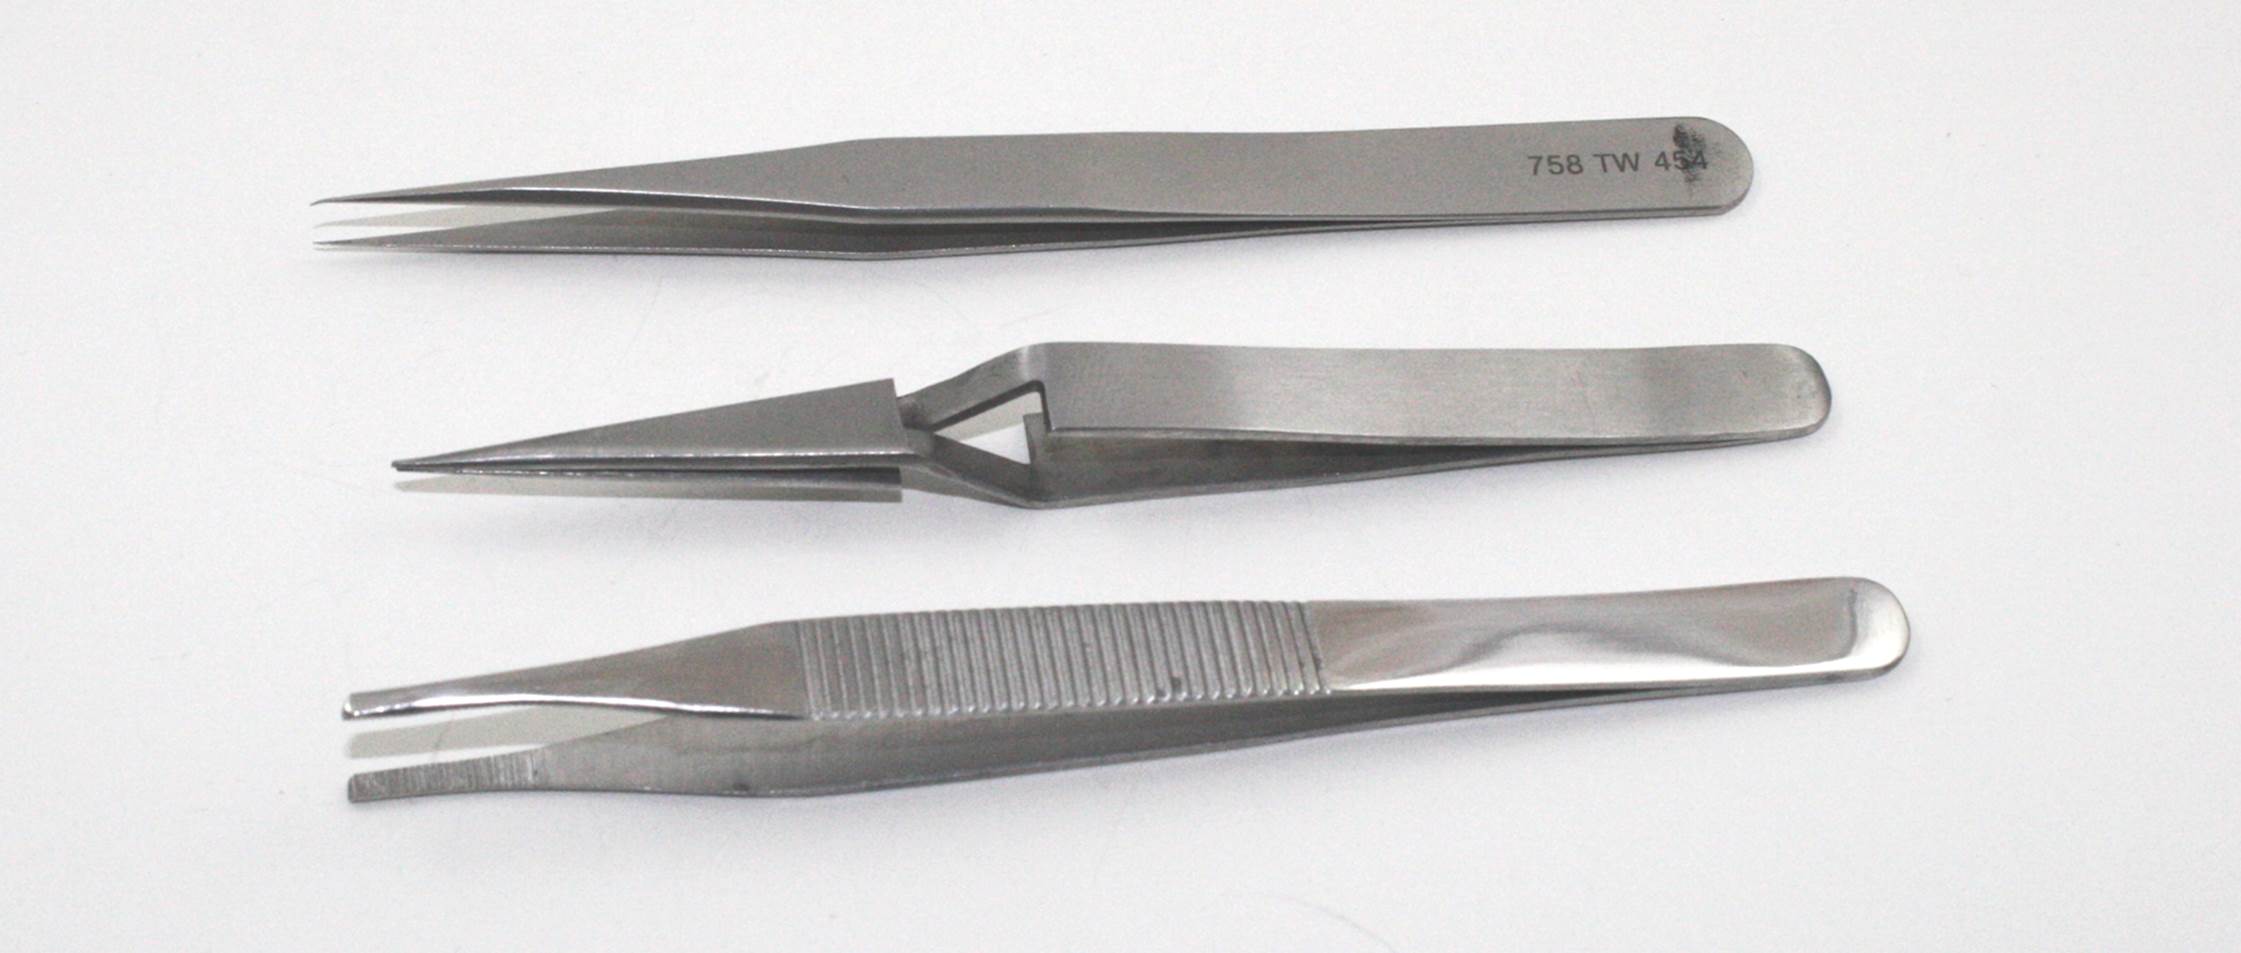
Figure 3-41. An assortment of tweezers
In addition to tweezers that operate like the ones found in a home medicine cabinet, there are also self-closing types, where you have to force the tips apart rather than force them together. It’s not a bad idea to have at least one of both types in your tool kit.
Soldering Tools
A decent soldering iron or a soldering station is absolutely essential for working with electronics. Avoid the cheap soldering irons, as they won’t hold up to heavy use and they don’t hold their tip temperature reliably. Please don’t even consider a soldering gun for electronics work (even though old Heathkit manuals show them being used to assemble vacuum tube equipment). A soldering gun is typically used for connecting heavy gauge wires and copper tubing, not for working with components on a PCB. In fact, if you happen to own a soldering gun, I would suggest hiding it so you won’t ever be tempted to grab it in a hurry. Better yet, throw it away, donate it, or convert it into a low-cost spot welder. Figure 3-42 shows a low-cost temperature-controlled soldering iron.
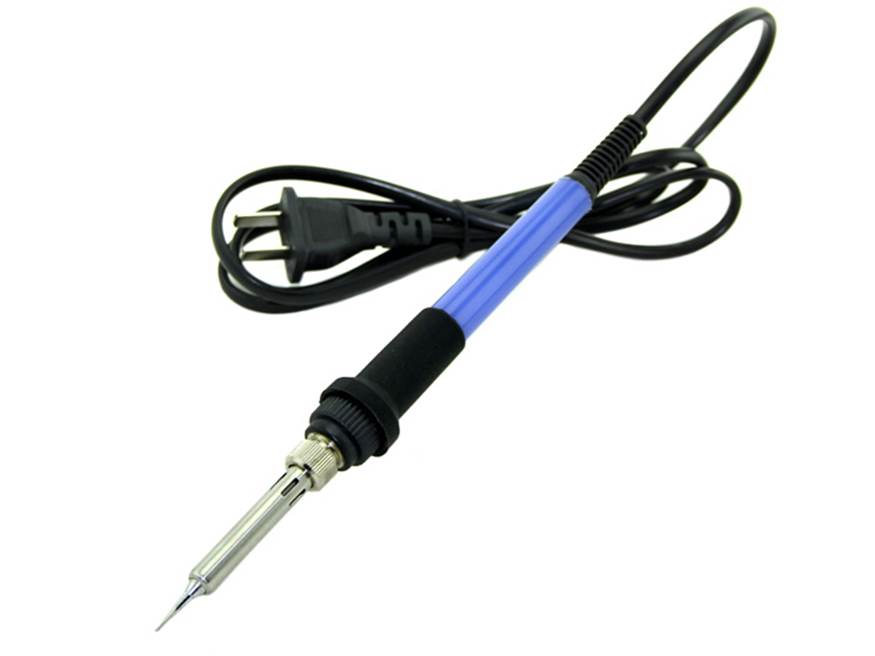
Figure 3-42. Soldering iron
Companies such as Weller make excellent industrial-grade soldering stations with continuous temperature control and grounded tips to reduce possible damage from static discharge. A variety of tip sizes and styles is available, ranging from something like a slot screwdriver to very fine points for surface-mount technology (SMT) work. Figure 3-43 shows a low-cost soldering station sold by Velleman, which includes the tool holder and a control unit to regulate the tip temperature.
Working with surface-mount parts requires soldering tools that are capable of working with small parts and closely spaced leads. Soldering stations for surface-mount work can be rather pricey, particularly for the stations that also include a hot-air attachment. The good news is that a soldering station like the one shown in Figure 3-43 will handle a lot of SMT tasks if used with a fine tip and the appropriate temperature. Chapter 4 discusses soldering temperature in more detail.
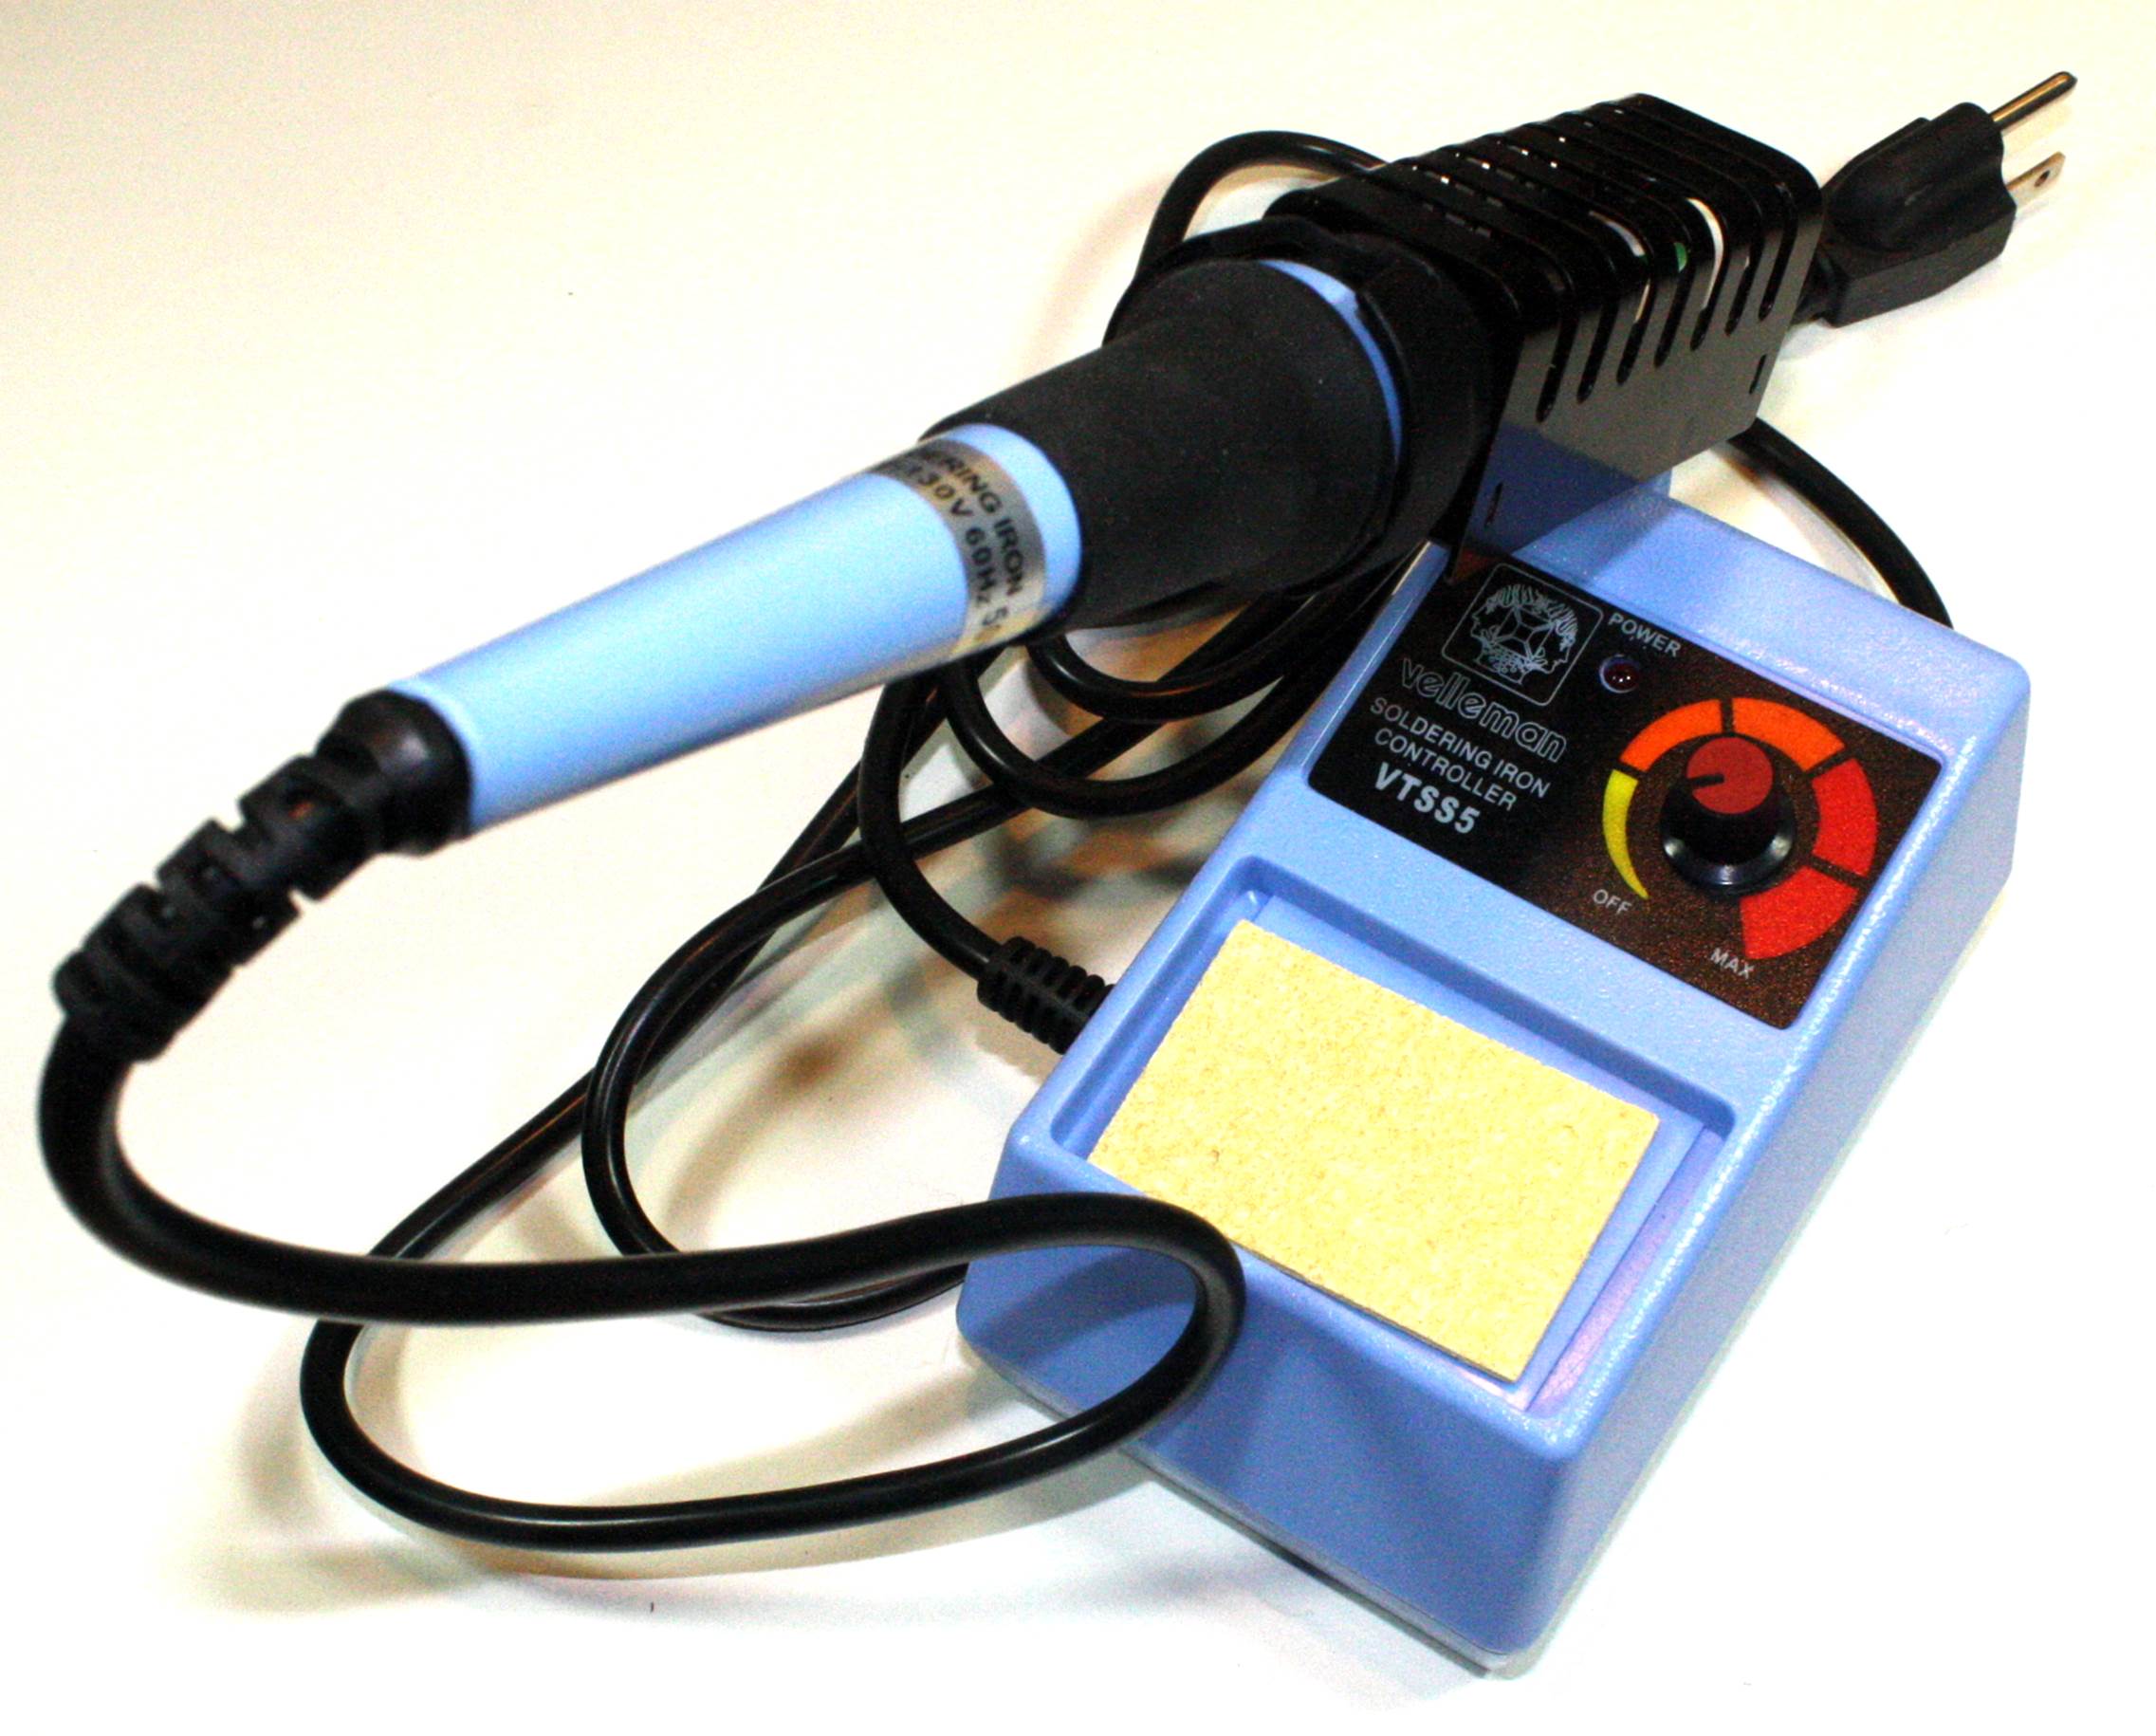
Figure 3-43. Soldering station

Figure 3-44. Surface-mount soldering station
Figure 3-44 shows a soldering station specifically designed for working with surface-mount parts (this one is X-TRONIC model number XTR-4040-XTS and is available through Amazon.com). In addition to the soldering iron with a fine-point tip, it also has a hot-air blower with a selection of nozzles. The hot air is used to desolder or rework a surface-mount part. The kit comes with the magnifying light shown. In Chapter 4, we’ll look at how to work with surface-mount parts in more detail.
Magnifiers and Microscopes
If you plan on working with surface-mounted components, and you value your eyesight, you should consider purchasing some type of magnifier or low-power microscope. A true stereo microscope is best, but of course it is also more expensive than a simple single-objective type. Figure 3-45 shows a low-cost stereo microscope.
The types of cheap microscopes sold as toys for children are useless for electronics work, as are more high-end laboratory microscopes used in medical and biology work. The image quality of toy microscopes is usually rather bad, and both types typically have too high a level of magnification to be usable. An industrial microscope for electronics work is designed to provide a decent level of magnification (between 5X and 10X is typical, and some are adjustable) while still maintaining a relatively wide field of view. You won’t be able to look at microbes in pond water with one of these, but you will be able to clearly see the leads on a TQFP144 surface-mount IC package.
The stereo microscope in Figure 3-45 was acquired for about $100 as a surplus (new overstock) item. You can find similar bargains on eBay or by checking out some of the optical surplus companies found online.
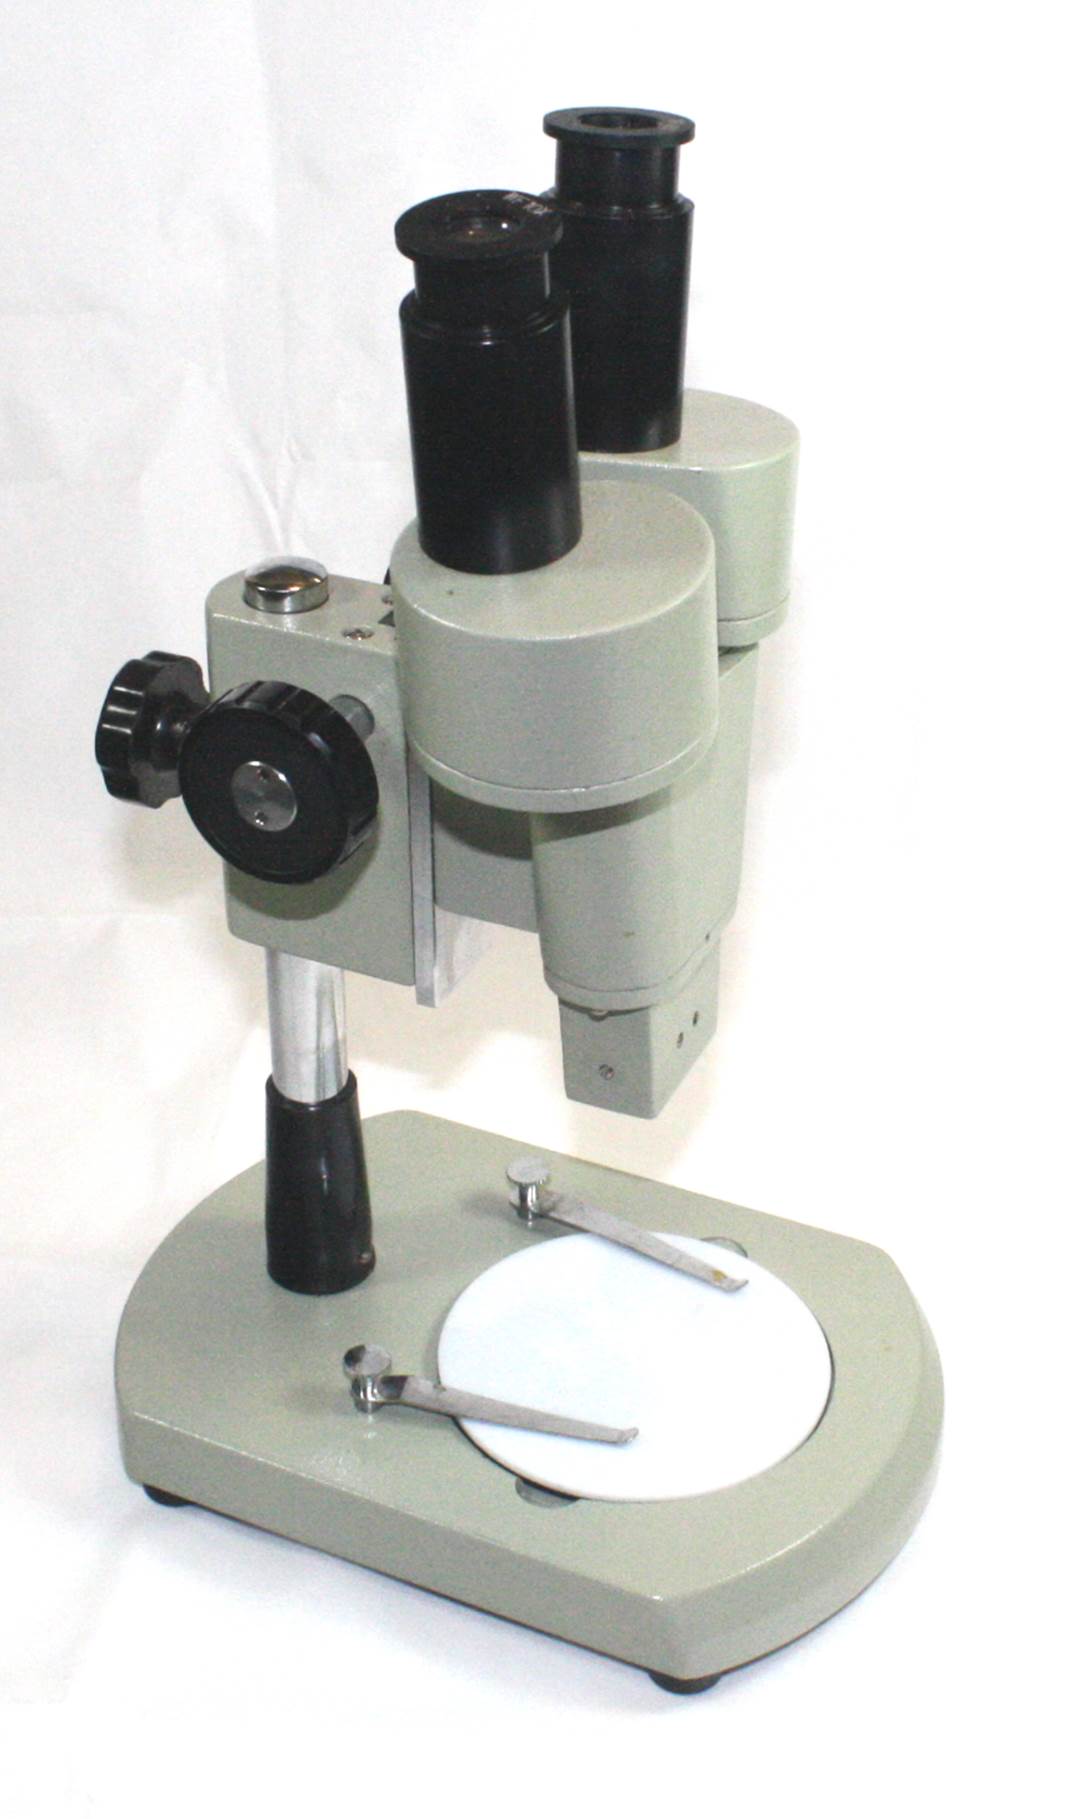
Figure 3-45. Low-power bench microscope
Another alternative—a handy item mentioned in “Clamps”—combines a magnifying glass with a pair of clips, as shown in Figure 3-46. It doesn’t provide the same level of magnification as a microscope, but for many applications it’s just fine.
Lastly, there are bench lamps with built-in magnifying lenses, like the one shown in Figure 3-47. Some are large enough to allow you to look through the lens with both eyes at once, so you can get a sense of depth.
Figure 3-46. Bench work holder with magnifier
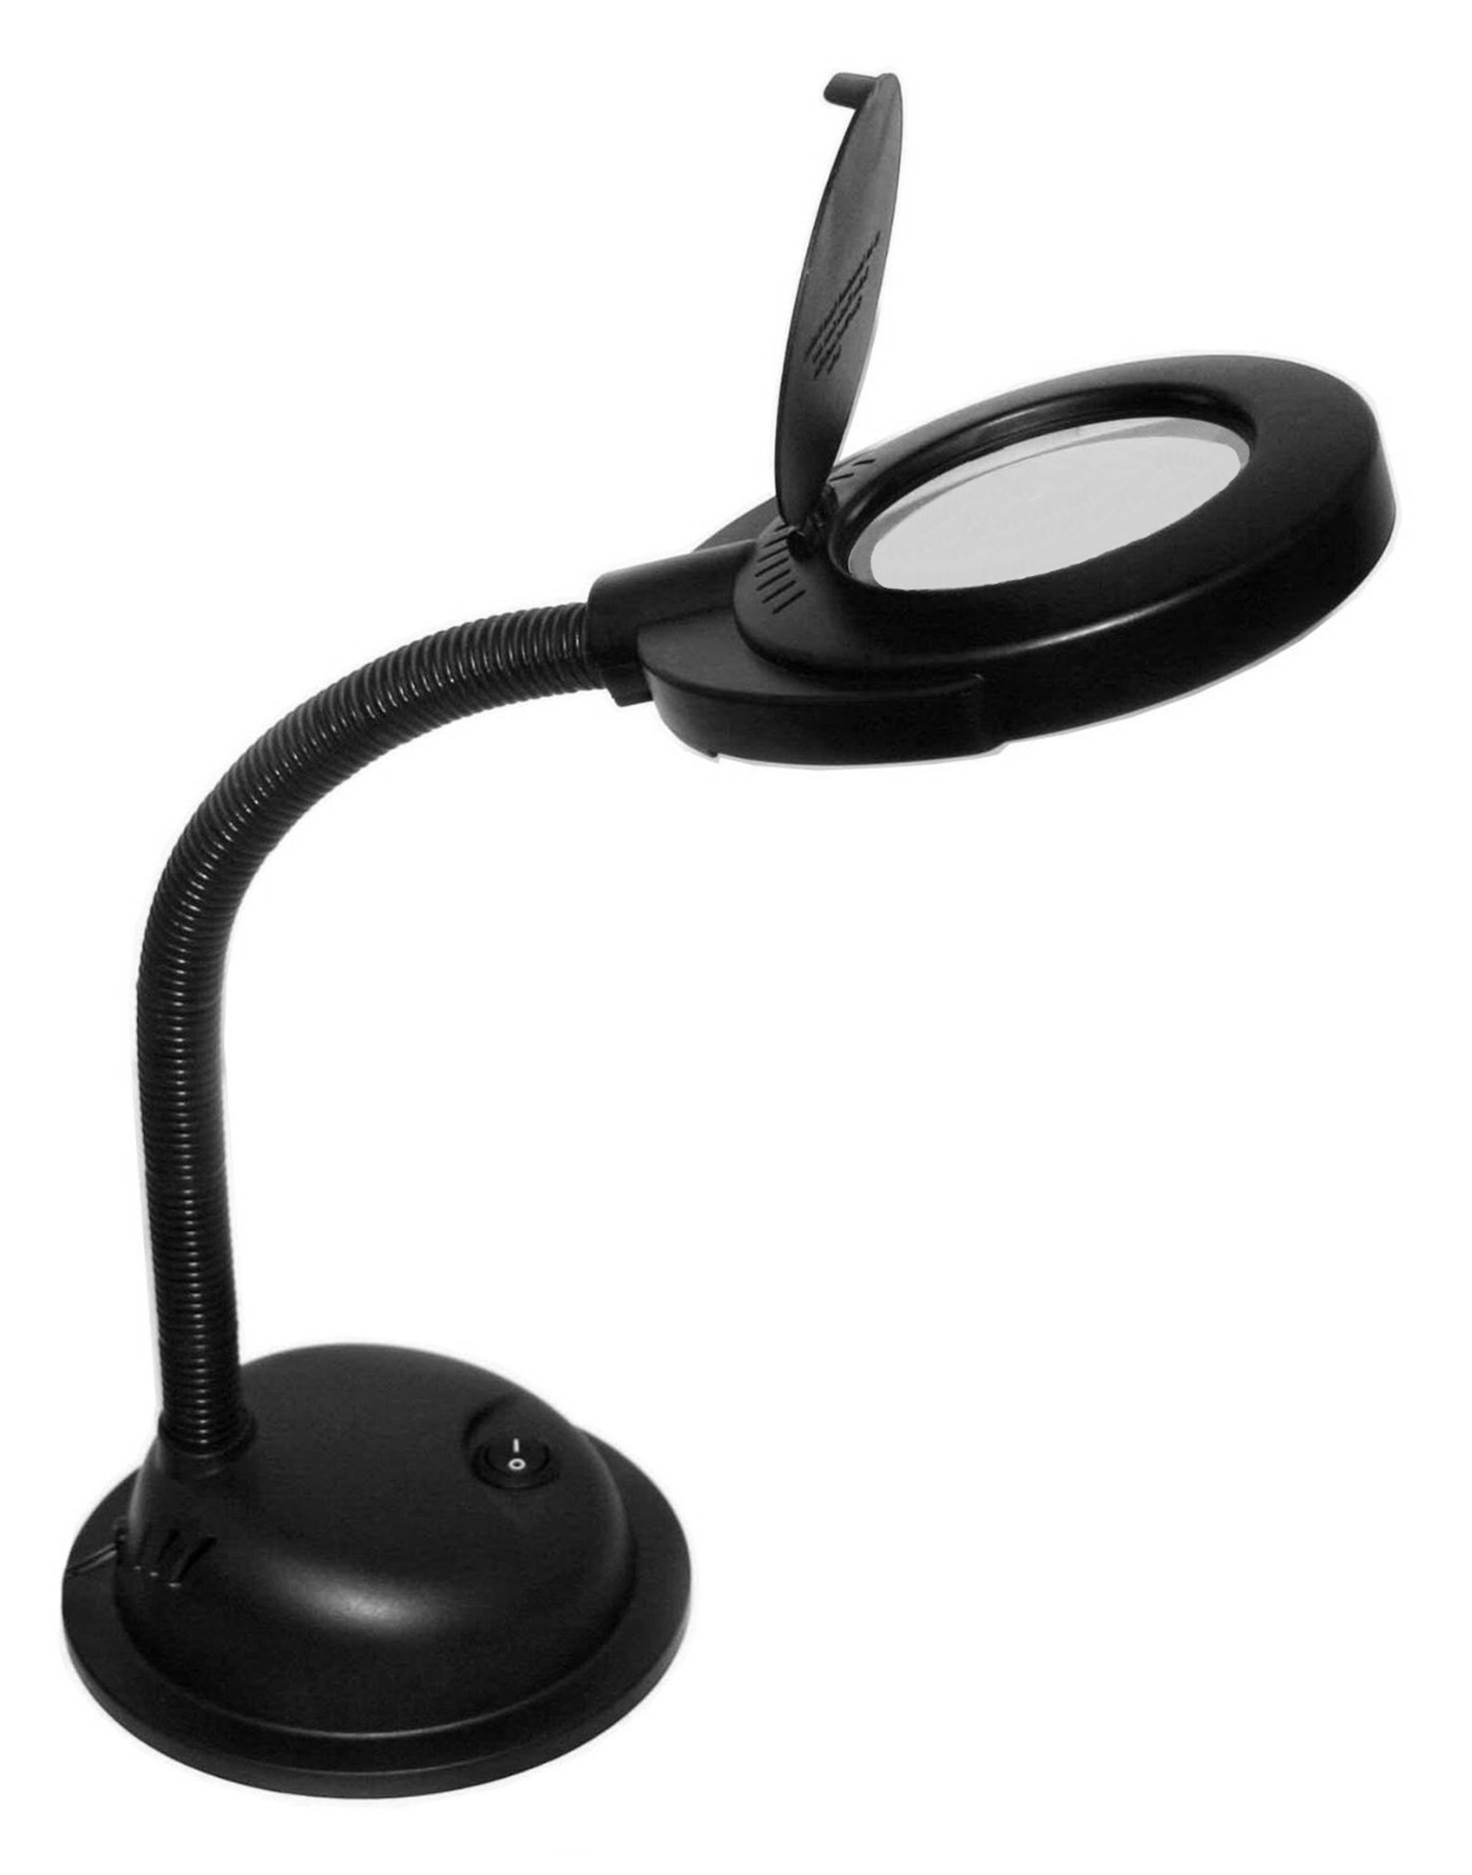
Figure 3-47. Magnifying bench lamp
As a last resort, there are the jeweler’s loupe and pocket magnifiers, like the one shown in Figure 3-48. The pocket magnifier, with its multiple lenses, is popular with geologists and rock hounds. It’s also useful for electronics work, but it does require a hand to hold it and it needs to be fairly close to whatever you want to look at.
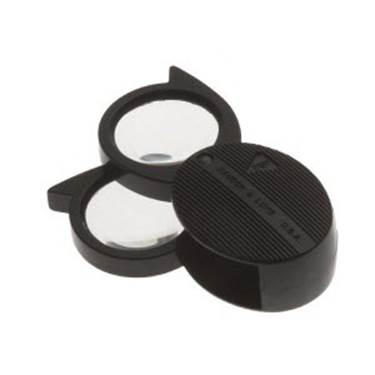
Figure 3-48. Pocket magnifier
Workspaces
Having a lot of tools on hand is great, but only if you also have a place to store them and use them. If you have tight quarters, a surplus combination cabinet and shelf unit like the one shown in Figure 3-49 might be just the thing. This particular item looks like it came out of a dormitory, or maybe an efficiency apartment, and it was purchased for about $40.
This setup has a board with rubber feet under it holding a small vise and an articulated work holder (with magnifying glass). Above that is a shelf with various supplies, and the whole front table folds up when it’s not needed.

Figure 3-49. Combination cabinet and shelf unit with fold-down table opened
Things like the drill press, the miniature table saw, the cut-off saw, and the soldering station really need to live on a workbench of some sort. You can purchase relatively inexpensive workbenches from places like Sears or Harbor Freight, or you could spend some serious money and get an industrial-grade, metal-frame workbench for several hundred dollars.
Another alternative is to repurpose old metal office and dormitory furniture. If you have a local college or university that holds periodic auctions, it is possible to find some good bargains. Some manufacturers also hold auctions occasionally, and these are a good place to pick up used industrial-grade fixtures (if you don’t mind scuffs, dings, acid burns, and other minor defects).
A good toolbox is also essential. Figure 3-50 shows a small, but overstuffed, toolbox. Larger roll-around toolboxes, like the ones used by auto mechanics, are nice if you have the space for them. A good one that will hold up to years of use is not cheap, however. You can get a roll-around cheap, but you’ll more than likely end up with just a cheap roll-around that won’t last very long.
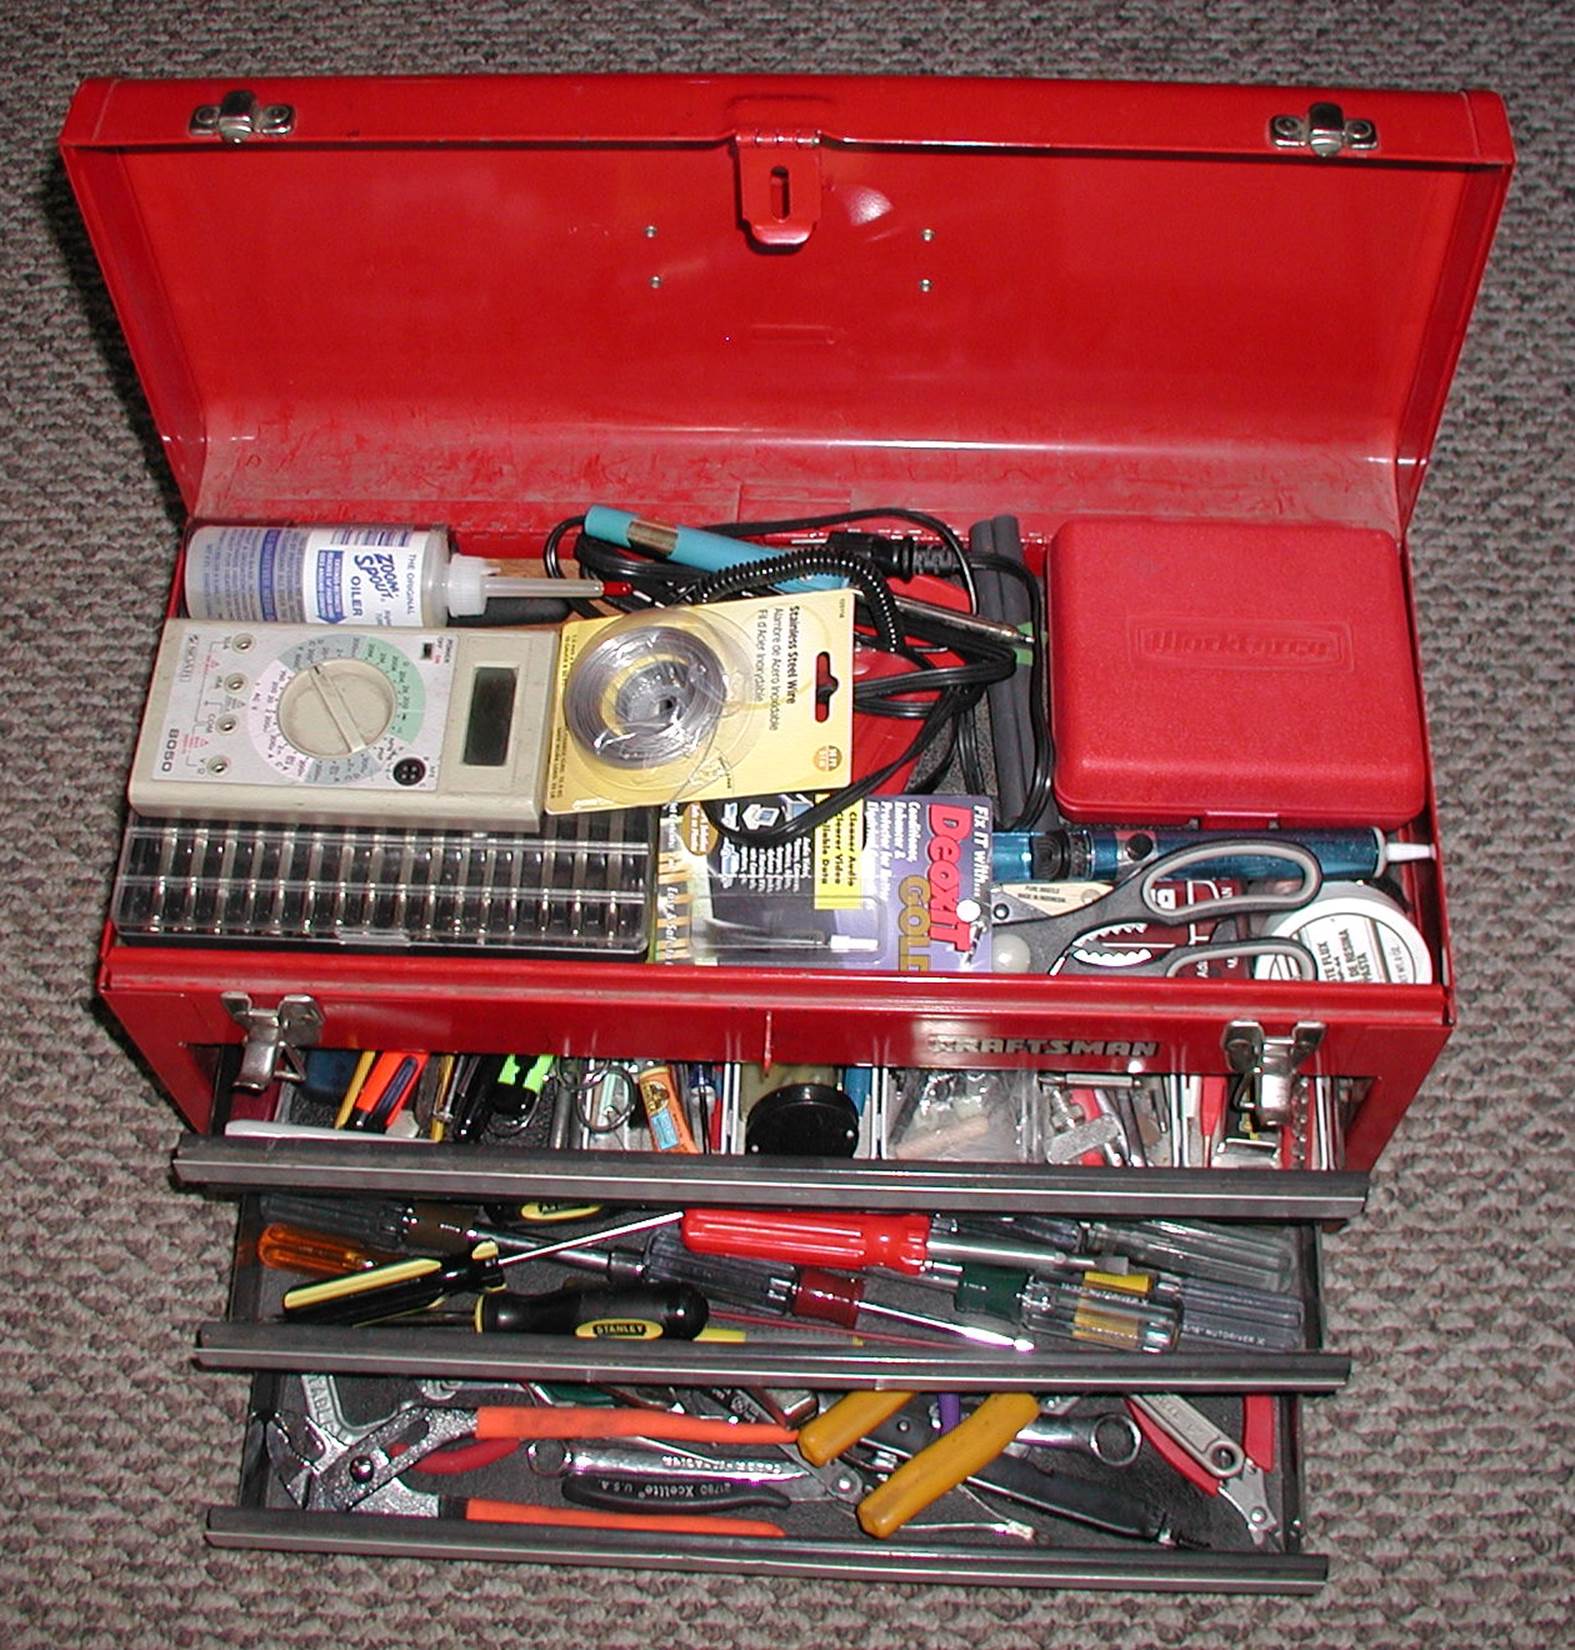
Figure 3-50. Overstuffed toolbox
Lastly, you can build overhead shelving for a table or desk for very little money. If you use standard shelf wood from a home improvement store, all you’ll need to do is cut the shelf planks to the correct lengths and assemble each shelf with some brackets, some screws, and a suitable amount of wood glue, and you’ll have a handy place to store books, parts, and tools while leaving the table or desk surface open. Paint is optional, but it does look nicer.
Summary
From what has been covered here, you should be able to gather up a minimum set of tools for your projects. As a suggested minimum, you will need screwdrivers, pliers of various types, flush and diagonal cutters, wire strippers, lineman’s pliers, hex wrenches, sockets, soldering tools, a drill (and drill bits, of course), and a good set of files. A good pocket knife is also an incredibly handy thing to have.
In addition to checking electronics distributors, home improvement centers, hardware stores, electronics suppliers, and online sources, you might also want to look around your area to see if there are any surplus or second-hand tool shops. You can find a wide variety of things at low prices, although sometimes they do need to be cleaned up or at least readjusted before they are once again usable. If, for example, a shop has a bench-top band saw for $30 that really only needs to have the blade guides adjusted, then that’s something that might be worth buying. You can also find buckets full of used screwdrivers, pliers, and wrenches at second-hand tool shops.
If you were to purchase everything covered in this chapter, you could end up spending less than $1,000, depending on where you purchased it and what level of quality you could tolerate. With some careful shopping, you might even be able to get some of tools used and get the total down to under $500.
A good set of tools can make all the difference between success and failure, but knowing how to use them and gaining experience is the other key ingredient. In Chapter 4, we will look at some of the techniques used with various tools.
All materials on the site are licensed Creative Commons Attribution-Sharealike 3.0 Unported CC BY-SA 3.0 & GNU Free Documentation License (GFDL)
If you are the copyright holder of any material contained on our site and intend to remove it, please contact our site administrator for approval.
© 2016-2026 All site design rights belong to S.Y.A.