Start & Run a Computer Repair Service (Start & Run Business Series) (2012)
8
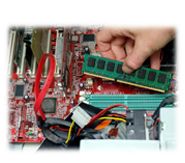
Diagnosing a Computer
When a customer presents you with a computer, it is tempting to just get right down to business. Many people start by finding out about the problem, opening up the computer, and trying to solve the problem. However, this approach could put your business at risk, cost you a sale, or just cause more confusion than it solves.
Whenever you do any work on a computer, you should always start by using a standard diagnostic process. Even if your customer is not going to leave the computer with you, you should always track the work on the customer’s check-in form. While this may sound time-consuming, it will actually save you a great deal of time and effort (and sometimes money). The check-in form can serve many different purposes:
• The customer receives a copy of the form and this serves as his or her check-in receipt as well as gives him or her your contact information.
• Collects customer information so that you can contact him or her when the work is done or if you have additional questions.
• Your policies are clearly outlined to the customer.
• The customer’s problem is documented.
• The customer’s approval is documented.
• The work you complete is documented.
• The customer signs the form at the end of the work to show he or she has accepted the work that was performed.
At our store we also use the blank back of forms like these for detailed notes about the computer. Everything from the problems we encountered during the diagnostic to our interaction with our customers is recorded on the back of the form. During the check-in process, the form is taped to the computer. After work is completed, the form is saved and filed in case any future problems arise.
1. Designing Your Check-in Form
The forms we use were actually developed over the years to meet the needs of our technicians. They have changed over time, and yours will too. Every time we reorder our forms from the printer, we ask our technicians if they need any changes to the form first — many times they do have suggestions that improve the form.
Create your own forma and as you work with it, feel free to customize it as needed to meet the needs of your business. Because the check-in form contains so much critical information, it will become the most important form in your business so make sure you take the time to ensure that the form meets your needs. The following outlines what should go into the check-in form.
Check-in summary (across the top): One thing that we like to put on our forms is a blank line where we boldly write the customer name and check-in date. This lets us track our check-ins.
Store information (across the top): Across the top we list our store information, including logo, address, and phone number. Even though the customer has left his or her computer with us, we found that he or she still may not know where we are located or how to contact us. We add this information to the top of the form so that the customer has this information after the check-in is completed.
This is also a good place to locate a welcome message to your customers. We also add instructions for the form at the top although we walk each customer through the form personally.
Customer information (top left): This section contains the information that you need to have about the customers (e.g., name, address, and phone number). If they forget to fill in a phone number, you will be unable to contact them when the work is complete. We had one customer who did this and came in furious about a month later. While it was her fault for skipping this information on the form and not calling for an update, it didn’t stop her from yelling at us!
We also ask for the customer to indicate if this is a business or consumer machine. This is an important talking point for you. If it is a business computer, you may need to get other information. For instance, is the problem happening on or off their network? Is this critical to have fixed before a particular date (e.g., a payroll computer)? Does the customer want a data backup before any work is completed (we usually charge for this service)?
Lastly, what is the password on the machine? There is nothing worse than having to wait to get the password or, if you can’t get a hold of the customer, having to break the password. Either way, it wastes your time, so get this information up front.
Computer check-in information (top right): When you collect a customer’s computer, sometimes the person has other things with the machine. For example, a laptop may also have a case, an external CD drive, etc. Do not let the customer check in these items! As a technician, you don’t need the case, or anything in the case. All this will do is clutter your work area and give you things to lose. The things that get checked in should be listed on the form.
Company policy information (middle): This is where you show your critical company policies. Make sure to list any disclaimers or other notifications you want to make sure each customer is aware of. Also, include a line where the customer can sign and date the policy. This will protect you in case of any problems in the future.
Make sure to keep the check-in forms as long as possible. When the customers sign the policy information, they are agreeing to the risks associated with computer repair. Therefore, keep these forms even after the repair is done. If there is any problem, this form will show that the customers knew the risks and accepted the risks. Their signature can save you hundreds if not thousands of dollars in lawsuits. They wouldn’t have brought in the computer if there wasn’t something wrong with it, but they tend to forget that when something bad happens. As an example, a virus removal will stress a hard drive far beyond what it commonly experiences. With the new power-saving drives, the number of hours they actually spin has been drastically reduced. When we do a virus removal the drive works at 100 percent capacity for 12 hours or more. They can fail so before we start, we tell that to customers to ensure they’ve backed up their data.
After a few years when you are ready to get rid of the forms, don’t just throw them out, scan them in! There are some great scanners on the market (e.g., NeatReceipts) that can scan your forms and turn them into searchable PDF documents. While the search feature may not always work on handwritten text, storing the forms electronically will let you have the reports for tax purposes or legal reasons without taking too much space in your home or business.
High-level tech notes (bottom left): This is where we put the high-level tech notes (remember we also keep more detailed notes on the back of the page). Make this area fit your business and contain information that is important to you.
Sign-offs (bottom right): At the end of the repair, you want to make sure that both you and the customer have tested the system. Use this area to track both of those functions.
In general, there are a few things that we realized we didn’t need on the form. For instance, the form is not numbered. This is because we (unlike a Laundromat) use the form itself as the “ticket,” not the number. Since the customer has filled out so much unique information, there is no need for a unique number. (Plus the cost of numbered forms is higher; don’t get it if it doesn’t add value).
Another thing we don’t have is custom highlighting or color logos. The cost of adding additional colors to the form can almost double the printing costs. Try to keep your form in black and white. If your business is doing well, you could go through thousands of these forms each year, and every penny counts!
2. How to Complete a Diagnostic and Make a Sale
It may seem obvious, but it is important to use the check-in form the right way. If you skip any of the following steps, or if you fail to complete them in their entirety, you will find that additional problems will happen. Using the form helps you correctly diagnose your problem, build a customer relationship, and, most importantly, make a sale!
2.1 Step 1: Ask the customer to complete the form
First and foremost have your customer complete your check-in form. This should include providing information about who the customer is. Specifically make sure to understand who uses the system. Is this a business system with a critical function or is it a computer used by a three-year-old? Knowing who the user is and what the machine is used for not only helps you make your diagnosis, but if there is a critical function that the computer has, you will know if you need to offer expedited service for an additional fee. Normally, expedited service would be completed ASAP, working nights and weekends to get the job done.
2.2 Step 2: Read the customer your policies
Policies are there for the customers to read, but give them a brief verbal overview of what your policies are and why you have them. This might take a minute or two, but it is worth it. After all, many people sign documents without ever reading them. Sure, they are supposed to read the document, but reading it to them makes sure they have the chance to ask any questions and makes sure you can emphasize any concerns.
2.3 Step 3: Have the customer sign the disclaimer
Every computer repair has risks. Even if the only risk is that your place of business is wiped away by a storm, things can happen. Getting the customers to sign off on the disclaimer makes them aware of and accepting of the risks involved. This also gives you the chance to discuss the risks of any type of work. For instance, if the hard drive is starting to fail, this would be a good time to explain that hard drives can fail at any time — even while you are trying to do a data transfer. Setting these expectations up front reduces the problems you will have later on if there are any issues.
2.4 Step 4: Have the customer explain the problem
Even though the customers wrote the issues on the form, take the time to listen to what is wrong. Ask questions, and show that you are interested in their situation. At this point, you are showing the customers that you care about their individual situation and that you understand what they are saying. This is not just important to help speed along your diagnosis, but it will also help build your relationship with the customer.
By the way, some customers will lie. If they dropped their Notebook, it might not come out until much later. If they poured a soda into their computer, they will only admit it when you point to the pools of dried soda. If their computer is riddled with porn and pop-ups, they blame their neighbor. While it’s useful to get information from the customers, you might have to treat them as “hostile witnesses”!
2.5 Step 5: Reproduce the problem
Once you understand the problem, it is important to reproduce it yourself. In some cases, your customers will be adamant that they know what is wrong and they don’t want you to “waste” time checking it. To handle these customers, let them know that you need to see the error yourself to see what else is happening while the error occurs. Take notes as you work because you will want them later.
Always start your inspection of the computer by turning it on. This step may seem silly, especially if the customer says the computer won’t even turn on, but you will be surprised at your results. In some cases, the computer the person claims isn’t working will actually turn on (what the customer meant was that the computer won’t boot). In other cases, people will claim computers work when they don’t even turn on! Either way, it is best to check this point yourself.
2.6 Step 6: Identify the cause of the problem but do not fix it
Once you think you know the cause of the problem, stop: Do not fix the problem! Even if the problem is a small setting that you need to change, never fix the problem before speaking with the customer and getting approval to make the repair! This is a common mistake new techs make. Because the problem is a quick fix, they fix the problem first and then try to charge the customer later. However, this can create conflict.
We have had customers come in with all sorts of odd problems. Occasionally, the problem is something simple such as a small setting that needs to be changed. Unfortunately, if you change this setting first and then tell the customer he or she will be charged the minimum (i.e., a half hour of labor), the person will generally be upset and feel cheated. The problem is that when you fix it without mentioning the charge, the customer assumes it is free and he or she is disappointed and upset that there is a cost. However, if the person comes in with the problem and you tell him or her that you think you can fix it but he or she will be charged for a half hour of labor, the customer now has a choice. In general, most people choose the repair and they are thrilled that it didn’t cost more.
Don’t assume that the only problem the computer has is the problem the customer reported. We have seen customers check in computers for one problem and then we found a few other problems that weren’t mentioned. Always give the computer a thorough once-over when you are checking it in. If you find any other problems, bring these to the attention of the customer right away so that he or she understands the problems were there before the repair was completed. Remember, if you replace the customer’s power supply and three weeks later the person’s hard drive dies, he or she will blame you for not knowing it was going to fail. Check everything you can as long as you have time and space.
2.7 Step 7: Obtain customer approval to complete the work
To obtain customer approval, you want the customer to understand three basic things:
1. What is wrong and how much it will cost to fix? Once you know the problem, tell the customer in general terms (not with such specificity that he or she could do it at home, just the high-level problem statement) what you think the issue is, how you think it can be resolved, and how much it will cost to resolve the problem. Then, ask for customer’s approval to fix the problem. If the person doesn’t approve, you simply put the machine back together and let him or her walk out with just the diagnostic completed.
2. What can go wrong? If the customer approves the repair, you can get started. Make sure he or she understands the risks of the particular service. Let the customer know what could go wrong. Were the power supply and motherboard damaged? Make sure he or she knows that other parts could be broken as well. Is the computer blue-screening? Talk to the person about all the things that could cause that problem. By giving the customer information before the problem occurs you will prepare him or her for what could go wrong, making the conversation much easier when or if a problem happens.
3. Approximately when will it be completed? Let the customer know when you will be starting work on his or her system and about when you think work will be completed. If the customer brought in the computer on a Friday and you are closed until Monday, then let the person know that. This way, he or she isn’t waiting all weekend expecting your call.
Promised dates are always missed. I don’t know why this is, but it often seems like any time a date is “promised,” the delivery date is missed — every time. Therefore, never promise an exact date. You can give an estimated completion and you can promise to call by a particular time with an update, but avoid promising any repair by any particular date.
2.8 Step 8: Complete the work and check the computer
Although this is a short step, it can be the most difficult step. Once you think you have fixed the problem, make sure to check all the other computer functions to make sure that nothing else was broken in the process. We have a checklist that each tech is required to complete before the system is deemed finished. You’d be surprised how many times a DVD cable is knocked off by accident when we’re working inside a case, or we had to disconnect the USB ports and didn’t plug them back in. When the customer gets home after carrying the heavy computer all the way back, he or she doesn’t want to have to bring it back. We’re trying to create happy customers, remember?
2.9 Step 9: Have the customer verify that the work is complete
Before the customer leaves your shop or before you leave the client site, make sure that the customer verifies that the computer is working. This step may take a couple of minutes, but it builds strong customer relationships and makes any problems found in the next few days easier to understand. For instance, one customer picked up a computer and verified it worked. When he got home and plugged it in, it didn’t even turn on. Had he not verified it at our store, he would have been convinced we gave him an unfixed computer. However, when he called, he started by apologizing for “breaking it” before he got it home and mentioned that he had to drive on a long unpaved road to get to his house. He brought back the machine, we fixed it again (for free as a courtesy — the hard drive cable had just “bounced out”), and he was happy. Had he not verified the machine was working before he left, it would have been a very different phone conversation.
Note: You have a customer that says he or she wants to save money on service. The person offers to pay you half the rate, but in exchange, he or she will do part of the service himself or herself. Never, ever take this deal. Each time we have tried working with customers like these they are more trouble and time than having a customer who gets the full service. For example, one customer offered to install his own drivers, and do his own updates on a wipe and reload only to go home and complain that “nothing worked” when he got there! It is not worth your time to negotiate partial service.
2.10 Step 10: Collect your payment
Once the work is complete, collect any payment you are due before the computer leaves your shop or before you leave the client site.
All materials on the site are licensed Creative Commons Attribution-Sharealike 3.0 Unported CC BY-SA 3.0 & GNU Free Documentation License (GFDL)
If you are the copyright holder of any material contained on our site and intend to remove it, please contact our site administrator for approval.
© 2016-2026 All site design rights belong to S.Y.A.