HTML5, 20 Lessons to Successful Web Development (2015)
PART I Basic HTML
LESSON 2 The Layout of an HTML Document

To view the accompanying video for this lesson, please visit mhprofessional.com/nixonhtml5/.
Don’t worry too much if Lesson 1 has left you scratching your head. If any of it is unclear right now, you will soon understand it as I take you section by section through a typical HTML document, and show you how it is laid out. If you’ve never used HTML before, I think you’ll be pleasantly surprised because it’s actually very straightforward.
In this lesson, I explain the different parts of an HTML document such as the <!DOCTYPE>, headers, scripts, CSS, meta tags, and the body. You will gain an understanding of how a document is put together and the things it may contain.

The examples from this and all the lessons in this book are freely downloadable at 20lessons.com.
The <!DOCTYPE> Declaration
All well-formatted HTML pages begin with a line that tells the browser information about the type of content to expect. This line consists of the <!DOCTYPE> declaration, along with some arguments if the version of HTML used is less than 5. There are a number of different arguments available for this declaration, which are listed at doctype.org and fully explained at wikipedia.org/wiki/Doctype. For example, a typical HTML 4 document will begin with the following line, which declares the document to be an HTML 4.01 transitional document:

The tag can be spread over more than one line if it would wrap around in your HTML editor, as shown in the example. In HTML5 documents, the declaration has been simplified so that you only need to use the following line:
<!DOCTYPE html>
You are unlikely to need or very often see the former declaration because all the latest versions (and some older ones too) of all major browsers will render pages either in standards mode if they do not support HTML5, or using HTML5 styling if they do. Either way, you can probably ignore older-style <!DOCTYPE> declarations except when working with legacy pages that have not been updated.
Internet Explorer Tweak for Local Documents
Because Microsoft’s Internet Explorer places local documents in a trusted security zone, when you open a web page containing any active content such as JavaScript, you have to click a couple of different things to confirm that you wish to grant the web page access to your computer.
Obviously this is quite annoying when you are simply testing a document prior to uploading it to the Internet or using it in an app. Fortunately, there’s a simple solution, which is to tell IE that the document was saved from the Internet (even though it wasn’t), so that it then automatically assigns the correct security restrictions without being prompted. Therefore, you can add the following IE-only tag after the <!DOCTYPE> line if you will be accessing local documents using IE:
<!-- saved from url=(0014)about:internet -->
Don’t worry about leaving it in your documents because it is within comment tags (see the “Inserting Comments” section in Lesson 3), and so all browsers other than IE will ignore this line. You can even leave it in place when you upload documents to the Web, because that is the same restricted zone that the command is setting anyway. But, of course, if you won’t be using any active content in your web pages (such as JavaScript), or using the Internet Explorer browser, it can be omitted.
The <html> Tag
This tag notifies the web browser that a section of HTML follows. The end of the section should be noted with a matching </html> tag to indicate closure. Any content outside of these tags will be treated simply as text by most browsers unless it is within other tags or comments (explained inLesson 3).
Many browsers are forgiving and do their best to display a page well, even with missing or misplaced <html> or other tags. But it’s best to get things in the right order to ensure that all browsers display your content properly.
Within a pair of <html> tags, there are generally two other tags used to contain the header and body text of the document. These are <head> and <body>.
The <head> Tag
The <head> tag indicates that the HTML within it and its closing </head> tag contains further information about the document such as its title, metadata, style sheets, and JavaScript. At its simplest the head section of an HTML document may look like this:

Creating a Document Title
As you saw in the previous example, setting the title of your document is as easy as enclosing it within a pair of <title> and </title> tags. The title will appear at the top of the browser in the title bar and will be used by search engines such as Google for indexing your website. Therefore, make sure the title is clear, precise, succinct, and contains relevant keywords to the page’s contents. Therefore, if your website is about right-handed widgets (for example), a better title might be something like this:

Using phrases such as “Welcome to…” was great in the 1990s when the Internet was new and there were few websites. But in the modern age when a user might browse dozens of sites in a single session, these phrases are superfluous “noise” that most people ignore. In my view it’s far better to get down to the point immediately, before the user surfs off to a competitor’s site.
Including Style Sheets
Cascading Style Sheets (CSS) are not really covered in this course, but you need to know about them. If you don’t already know, they are sets of rules used to describe the layout and presentation of an HTML document, which are kept separately from the content. This is done to free the content from its layout and presentation so that different designs can easily be swapped in according to need. For example, a web page can be restyled with basic CSS to make it more suitable for printing, and some CSS rules can be used to help page readers read out a web page to visually impaired people.
More than that, you can change the entire look and feel of a website by altering a few simple CSS rules; something that is very time-consuming to accomplish if the styling is embedded within the web page’s contents.
There are different ways of incorporating CSS rules in a document, including embedding them within the text, or as a set of rules within the <head> section of an HTML document using <style> and </style> tags, like the following (which tells the browser to display all Level 1 headings—explained later—in red):
Or, by saving all the CSS rules in a separate document, you can simply include a single line in the <head> of a document to include them. The latter is the preferred method of most developers, and you perform it using the <link> tag, like this:
<link rel=′stylesheet′ href=′styles.css′ type=′text/css′>
Since this book only uses a little CSS in passing, it will not be discussed in further detail, but you may be interested in reading my book CSS & CSS3: 20 Lessons to Successful Web Development, for a comprehensive introduction.
Incorporating JavaScript
This course is also not about JavaScript, although some elements of HTML5 require the use of JavaScript. Generally JavaScript is included within a web page by either including a section within <script> and </script> tags, or by adding an src attribute to the <script> tag to load in an external file.
For example, the following HTML specifies a script that is embedded within <script> tags (the result of running this code is shown in Figure 2-1):

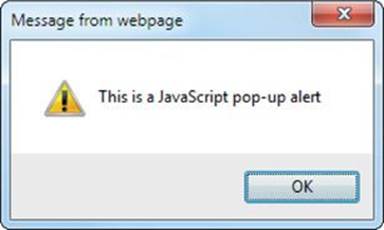
FIGURE 2-1 A JavaScript alert window
Like all JavaScript, the preceding example can be placed almost anywhere within an HTML document, but you will most often find scripts in the <head> section of web pages, so that they load in and execute before the body of a document. If scripts are longer than a few lines, they will often be saved as external files that are then loaded in as follows:
<script src=′ProgramCode.js′></script>
The file ProgramCode.js is then loaded in from the current folder and its contents are executed as if all its commands were contained within the <script> tags. However, the JavaScript examples in this course are short and for ease of comprehension are always inserted alongside the HTML elements upon which they act.
JavaScript <script> tags allow you to specify the type of script as being JavaScript (for example: <script type=′text/javascript′>), but all major browsers allow you to omit this and I generally do so to save on typing. However, if you find yourself with a strict program editor or your programming styles at your company require it, then you’ll need to use the full string, as you should when writing HTML4 documents, for which the type attribute is required.
You may also see instances of <script language=′javascript′> if you view the source of some websites, but this was deprecated in HTML4 and is now obsolete in HTML5, and should not be used.
Passing Metadata
It is possible to provide additional information to an HTML document that the browser can use (if it understands it). Such data is sent using the <meta> tag. For example, you can tell a browser to exchange the current page for another one after a set length of time, like this:
<meta http-equiv=′refresh′content=′10;url=http://othersite.com′>
This meta command uses the http-equiv attribute with the value of refresh to tell the browser that a refresh is being requested. The content attribute has the value 10; url=http://othersite.com, which states that after 10 seconds the web page at http://othersite.com should replace the current one. Note that this is an empty tag (known as a void element) that contains no content and does not make use of a </meta> tag to close it.
Other uses of the <meta> tag include setting the width of the document for portable browsing hardware such as phones and tablets. This is done using the viewport value, and a common width you see used is 960 pixels. However, such documents are not restricted to only devices of at least that width because all this setting does is say how many pixels of width your document uses. Devices of differing resolutions will then render at that width but then zoom in or out, or rescale as necessary to enable your pages to display at their best.
So, for example, to specify a document width of 960 pixels, you might use the following tag:
<meta name=′viewport′ content=′width=960′>
With both these tags applied, a head section of HTML might look like this:

However, as a beginner, on the whole you will probably mostly use only the <title> tag in the <head> section until you become more proficient at HTML, with the possible exception of two other versions of the <meta> tag for declaring keywords and a description for a web page, like this:

These used to be very important for search engine ranking, and while less so these days due to smarter web crawlers, they are used by some search engines and indexers, and may be worth including on your web pages.

The <meta> tag is an unusual use of HTML (particularly for newcomers) but you need to be aware of it even if you don’t use it, as it often crops up containing a variety of different metadata.
The <body> Tag
You place the contents of an HTML document inside a pair of <body> and </body> tags. Web browsers then know to display everything they find in there, and the HTML you need can be as simple as this:

As you will learn in Lesson 3, there are dozens of tags you can use within the body of a document, but by default you can simply place some text and it will be displayed in your browser’s default text font and size.
Summary
When all the parts I have described so far are brought together, including only the document’s title in the <head> (without JavaScript or metadata, and so on), a basic HTML document might look something like this:
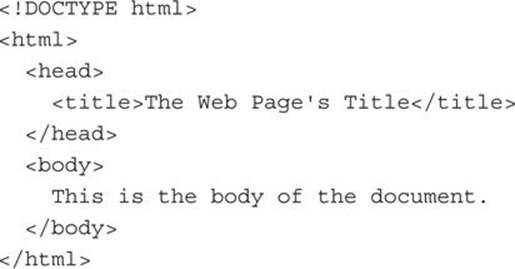
As you can see, it’s quite simple really and nothing to be frightened of. Each section, such as <head> or <body>, is closed with a matching </head> or </body> tag, and the enclosing <html> tag is closed right at the document end with a </html> tag.
In the following lesson I’ll delve more deeply into the <body> tag and show you how to use the various tags it supports.
Self-Test Questions
Test how much you have learned in this lesson with these questions. If you don’t know an answer, go back and reread the relevant section until your knowledge is complete. You can find the answers in the appendix.
1. What declaration should appear right at the start of every HTML5 document?
2. Which tag is used to specify that it contains HTML contents?
3. What is the purpose of the <head> tag?
4. How do you title a document?
5. Where in an HTML document should the <title> tag appear?
6. How do you denote the body of an HTML document?
7. Where is the place to put CSS (Cascading Style Sheet) rules?
8. How else can you include a style sheet in an HTML document?
9. How do you embed JavaScript into an HTML document?
10. How can you run an external JavaScript file from an HTML document?