Beginning HTML5 & CSS3 For Dummies® (2013)
Part II
Getting the Structure and Text Right
5
Text and Lists
In This Chapter
![]() Working with basic blocks of text
Working with basic blocks of text
![]() Manipulating text blocks
Manipulating text blocks
![]() Creating bulleted, numbered, and definition lists
Creating bulleted, numbered, and definition lists
HTML documents include text, images, multimedia files, links, and other bits of content that you mold into a web page by using markup elements and attributes. You use blocks of text to create such things as headings, paragraphs, and lists. The first step in creating a solid HTML document is laying a firm foundation to establish the document’s structure.
Formatting Text
Here’s an ultratechnical definition of a block of text: some chunk of content that fills one or more lines inside an HTML element.
In fact, any HTML page is a collection of blocks of text:
![]() Every bit of content on your page must be part of some block element.
Every bit of content on your page must be part of some block element.
![]() Block elements usually end with a line break when rendered in a web browser.
Block elements usually end with a line break when rendered in a web browser.
![]() Every block element sits inside the <body> element on your page. In fact, <body> is the ultimate block!
Every block element sits inside the <body> element on your page. In fact, <body> is the ultimate block!
Inline elements versus text blocks
The difference between inline elements and a block of text is important. HTML elements in this chapter describe blocks of text. An inline element is a word or string of words inside a block element (for example, text-emphasis elements, such as <em> or <strong>). Inline elements must be nested within a block element; otherwise, your HTML document isn't syntactically correct.
Inline elements, such as linking and formatting elements, are designed to link from (or change the appearance of) a few words or lines of content found inside those blocks.
HTML recognizes several kinds of text blocks that you can use in your document, including (but not limited to) the items shown in Table 5-1.
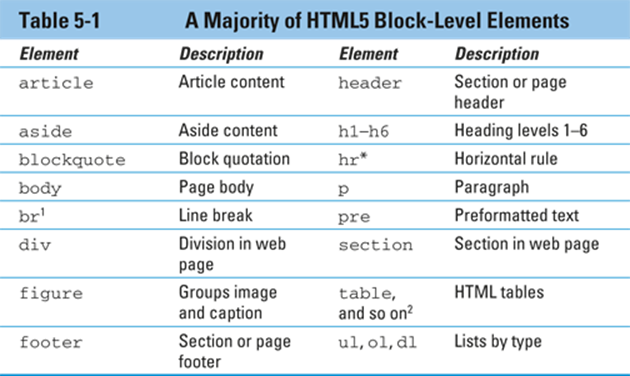
1 Denotes an empty element (single tag only, no pair).
2 All table elements fall into this cell, but we don’t have room for them here. See Chapter 6 for details.
For more about HTML block elements, see “HTML5 Block Level Elements: Complete List” at
www.tutorialchip.com/tutorials/html5-block-level-elements-complete-list
Paragraphs
Paragraphs appear more often than any other text block in web pages.
 HTML browsers don't recognize hard returns that you enter when you create your page inside an editor. You must use a <p> tag to tell the browser to package all text up to the next closing </p> tag as a paragraph.
Formatting
To create a paragraph, follow these steps:
1. Add <p> in the body of the document.
2. Type the content of the paragraph.
3. Add </p> to close that paragraph.
Here’s what it looks like:
<!DOCTYPE html>
<html>
<head>
<meta charset="UTF-8">
<title>All About Blocks</title>
</head>
<body>
<p>This is a paragraph. It's a very simple structure that you will use
time and again in your web pages.</p>
<p>This is another paragraph. What could be simpler to create?</p>
</body>
</html>
This HTML page includes two paragraphs, each marked with a separate <p> element. Most web browsers add a line break and a full line of white space after every paragraph on your page, as shown in Figure 5-1.
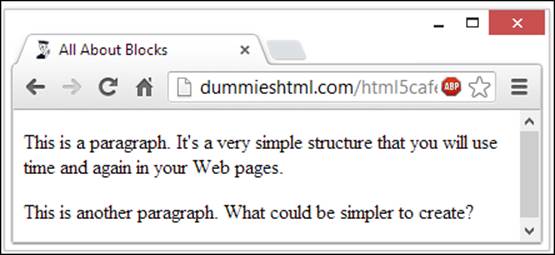
Figure 5-1: Web browsers delineate paragraphs with line breaks.
 Sloppy HTML coders don't use the closing </p> tag when they create paragraphs. Although some browsers permit this dubious practice without yelling, omitting the closing tag isn't good practice because it
![]() Isn’t correct syntax.
Isn’t correct syntax.
![]() Causes problems with style sheets.
Causes problems with style sheets.
![]() Can cause a page to appear inconsistently from one browser to another.
Can cause a page to appear inconsistently from one browser to another.
You can control paragraph formatting (color, style, size, and alignment) with Cascading Style Sheets (CSS), covered in Chapters 11 through 19.
Headings
Headings break a document into sections. This book uses headings and subheadings to divide each chapter into sections, and you can do the same with your web page. Headings
![]() Create an organizational structure.
Create an organizational structure.
![]() Break up the text flow on the page.
Break up the text flow on the page.
![]() Provide visual cues as to how pieces of content are grouped.
Provide visual cues as to how pieces of content are grouped.
HTML includes six elements for different heading levels in documents:
![]() <h1> is the most prominent heading (Heading 1)
<h1> is the most prominent heading (Heading 1)
![]() <h6> is the least prominent heading (Heading 6)
<h6> is the least prominent heading (Heading 6)
 Follow numerical order from lowest to highest as you use HTML heading levels. That is, don’t use a second-level heading until you use a first-level heading, don’t use a third-level heading until you use a second, and so on. If this doesn’t make sense to you, think about how the six heading styles work in Microsoft Word and you’ll have it. Should you want to change how headings look, Chapters 11 and 12 show you how to use style sheets for that purpose.
Formatting
To create a heading, follow these steps:
1. Add <hn> in the body of your document.
2. Type the content for the heading.
3. Add </hn>.
When used in this context, n means the number of the heading level you want to create. For example, to create a first-level heading, you would substitute the number 1 for n and would add <h1> to your page, for a second-level heading, add <h2>, and so forth.
Browser displays
Every browser has a different way of displaying heading levels, as you see in the next two sections.
Graphical browsers
Most graphical browsers use a distinctive size and typeface for headings:
![]() First-level headings (<h1>) are the largest (usually two or three font sizes larger than the default text size for paragraphs).
First-level headings (<h1>) are the largest (usually two or three font sizes larger than the default text size for paragraphs).
![]() All headings use boldface type by default, and paragraph text uses plain (nonbold) type by default.
All headings use boldface type by default, and paragraph text uses plain (nonbold) type by default.
![]() Sixth-level headings (<h6>) are the smallest and may be two or three font sizes smaller than the default paragraph text.
Sixth-level headings (<h6>) are the smallest and may be two or three font sizes smaller than the default paragraph text.
The following snippet of HTML markup shows all six headings at work:
<!DOCTYPE html>
<html>
<head>
<meta charset="UTF-8">
<title>All About Blocks: Headings 1-6</title>
</head>
<body>
<h1>First-level heading</h1>
<h2>Second-level heading</h2>
<h3>Third-level heading</h3>
<h4>Fourth-level heading</h4>
<h5>Fifth-level heading</h5>
<h6>Sixth-level heading</h6>
</body>
</html>
Figure 5-2 shows the headings in the HTML page as rendered in a browser.
Use CSS to control how headings look, including color, size, spacing, and alignment.
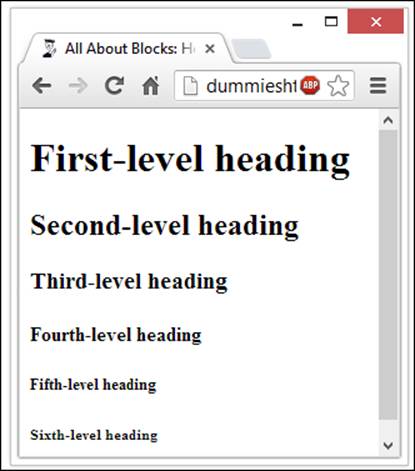
Figure 5-2: Web browsers display headings from level one to level six.
 By default, most browsers use Times Roman fonts for headings. The font size decreases as the heading level increases. (Default sizes for first- through sixth-level headings are, respectively, 24, 18, 14, 12, 10, and 8 point font.) You can override any of this formatting by using CSS.
Text browsers
Text-only browsers use heading conventions that are different from those of graphical browsers because text-only browsers use a single character size and font to display all content. Some good text-only browsers to consider include Lynx, ELinks, Cygwin, and MIRA.
Controlling Text Blocks
Blocks of text build the foundation of your page. You can break those blocks into smaller pieces to better guide readers through your content.
Block quotes
A block quote is a quotation, or an excerpt from a copyrighted source, that you set apart on a page. Use the <blockquote> element to enclose quotations:
<!DOCTYPE html>
<html>
<head>
<meta charset="UTF-8">
<title>Famous Quotations</title>
</head>
<body>
<h1>An Inspiring Quote</h1>
<p>When I need a little inspiration to remind me of why I spend my days
in the classroom, I just remember what Lee Iococca said:</p>
<blockquote>
In a completely rational society, the best of us would be teachers
and the rest of us would have to settle for something else.
</blockquote>
</body>
</html>
Most web browsers display block quote content with a slight left indent, as shown in Figure 5-3.
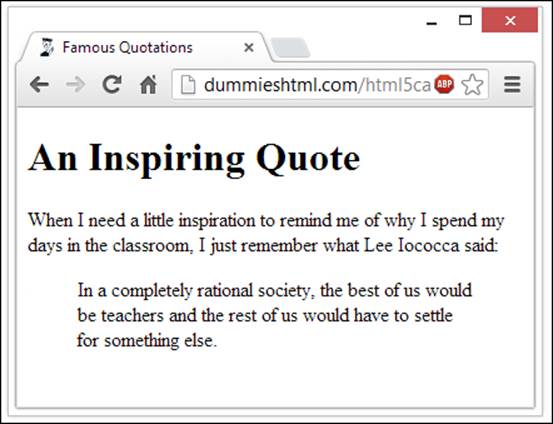
Figure 5-3: Web browsers typically indent a block quote to separate it from paragraphs.
Preformatted text
Ordinarily, HTML ignores white space inside documents. That’s why a browser won’t display any of a block element’s
![]() Hard returns.
Hard returns.
![]() Line breaks.
Line breaks.
![]() Large white spaces.
Large white spaces.
The following markup includes various hard returns, line breaks, and lots of spaces. Figure 5-4 shows that the web browser ignores all of this.
<p>This is a paragraph
with a lot of white space
thrown in for fun (and as a test of course).</p>
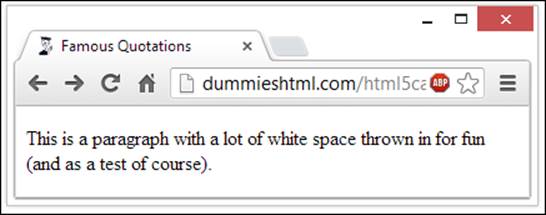
Figure 5-4: Web browsers routinely ignore white space.
The preformatted text element (<pre>) instructs browsers to keep all white space intact while it displays your content. (See the following sample.) Use the <pre> element in place of the <p> element to make the browser apply all your white space, as shown in Figure 5-5.
<!DOCTYPE html>
<html>
<head>
<meta charset="UTF-8">
<title>White Space</title>
</head>
<body>
<pre>This is a paragraph
with a lot of white space
thrown in for fun (and as a test of course).
</pre>
</body>
</html>
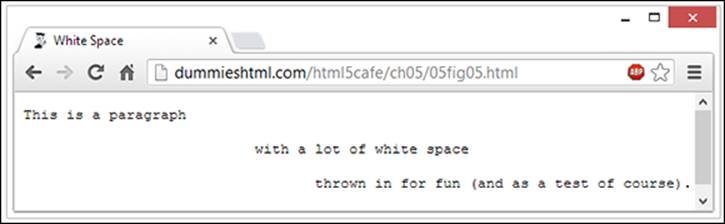
Figure 5-5: Use preformatted text to force browsers to recognize white space.
You may want the browser to display white spaces in an HTML page where proper spacing is important, such as for
![]() Code samples
Code samples
![]() Columnar data, numbers, or other format-sensitive text
Columnar data, numbers, or other format-sensitive text
![]() Text tables
Text tables
You could nest <pre> elements inside <blockquote> elements to carefully control how lines of quoted text appear on the page. Or better yet, forget about these tags and use CSS to position text blocks inside <div> elements.
Horizontal rules
Using a horizontal rule element (hr) lets you include solid straight lines called rules on your page.
The browser creates the rule based on the hr element, so users don't wait for a graphic to download. A horizontal rule is a good option to
![]() Break a page into logical sections.
Break a page into logical sections.
![]() Separate headers and footers from the rest of the page.
Separate headers and footers from the rest of the page.
Formatting
When you include an <hr> element on your page, as in the following HTML, the browser replaces it with a line, as shown in Figure 5-6.
<!DOCTYPE html>
<html>
<head>
<meta charset="UTF-8">
<title>Horizontal Rules</title>
</head>
<body>
<p>This is a paragraph followed by a horizontal rule.</p>
<hr>
<p>This is a paragraph preceded by a horizontal rule.</p>
</body>
</html>
A horizontal rule always sits on a line by itself; you can't add the <hr> element in the middle of a paragraph (or other block element) and expect the rule to appear in the middle of the block.
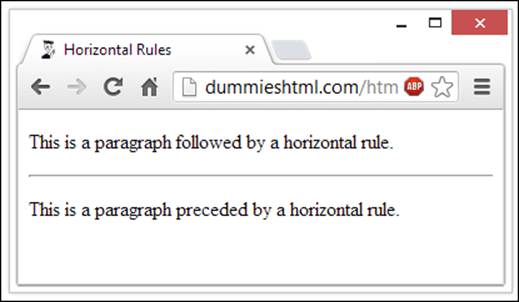
Figure 5-6: Use the <hr> element to add horizontal lines to your page.
The following bit of HTML creates a horizontal rule that takes up 45 percent of the page width, is 4 pixels (px) high, is aligned to the center, and has shading turned off:
<p>This is a paragraph followed by a horizontal rule.</p>
<hr width="45%" size="4" class="center" noshade="noshade">
<p>This is a paragraph preceded by a horizontal rule.</p>
Figure 5-7 shows how adding attributes in the preceding example alters how a rule appears. (Note: These attributes are deprecated, and best replaced with CSS equivalents as described in Chapters 11 through 19. Deprecated attributes are covered online, and the preceding HTML is not valid.)
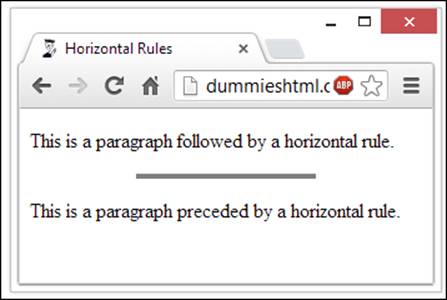
Figure 5-7: Don’t use deprecated <hr> attributes; use CSS instead.
Organizing Information
Lists are powerful tools to group similar elements, and lists give visitors to your site an easy way to zoom in on groups of information. Just about anything fits in a list, from sets of instructions to collections of links.
Lists use a combination of elements — at least two components:
![]() A markup element that says, “Hey browser! The following items go in a list.”
A markup element that says, “Hey browser! The following items go in a list.”
![]() Markup elements that say, “Hey browser! This is an item in the list.”
Markup elements that say, “Hey browser! This is an item in the list.”
HTML supports three types of lists:
![]() Numbered lists
Numbered lists
![]() Bulleted lists
Bulleted lists
![]() Definition lists
Definition lists
Numbered lists
A numbered list consists of at least two items, each prefaced by a number. Use a numbered list when the order or priority of items is important.
You use two kinds of elements for a numbered list:
![]() The ordered list element (<ol>) specifies a numbered list.
The ordered list element (<ol>) specifies a numbered list.
![]() List item elements (<li>) mark each item in the list.
List item elements (<li>) mark each item in the list.
Formatting
A numbered list with three items requires elements and content in the following order:
1. <ol>
2. <li>
3. Content for the first list item
4. </li>
5. <li>
6. Content for the second list item
7. </li>
8. <li>
9. Content for the third list item
10. </li>
11. </ol>
The following markup defines a three-item numbered list:
<!DOCTYPE html>
<html>
<head>
<meta charset="UTF-8">
<title>Numbered Lists</title>
</head>
<body>
<h1>Things to do today</h1>
<ol>
<li>Feed cat</li>
<li>Wash car</li>
<li>Grocery shopping</li>
</ol>
</body>
</html>
Figure 5-8 shows how a browser renders this markup. You don’t have to specify a number for each item in a list; the browser identifies list items from the markup and adds numbers, including a period after each one by default.
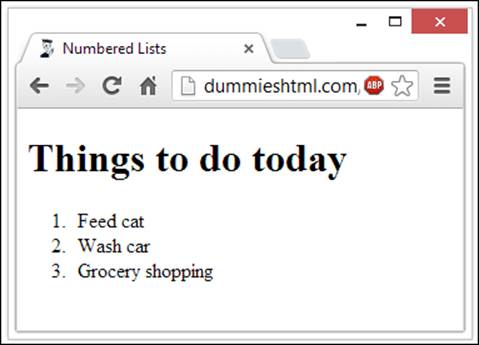
Figure 5-8: Use <ol> and <li> tags to create a numbered list.
If you swap the first two items in the list, they’re still numbered in order when the page appears, as shown in Figure 5-9.
<ol>
<li>Wash car</li>
<li>Feed cat</li>
<li>Grocery shopping</li>
</ol>
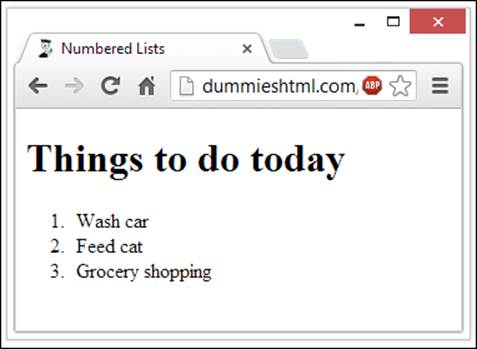
Figure 5-9: Web browsers set numbers for your list by their order of appearance.
Bulleted lists
A bulleted list contains one or more items each prefaced by a bullet (often a big dot; this book uses check marks as bullets). Use this kind of list if the items’ order isn’t necessary for understanding the information it presents.
Formatting
A bulleted list requires the following:
![]() The unordered list element (<ul>) specifies a bulleted list.
The unordered list element (<ul>) specifies a bulleted list.
![]() A list item element (<li>) marks each item in the list.
A list item element (<li>) marks each item in the list.
![]() The closing tag for the unordered list element (</ul>) indicates that the list has come to its end.
The closing tag for the unordered list element (</ul>) indicates that the list has come to its end.
An unordered list (another name for bulleted list) with three items requires elements and content in the following order:
1. <ul>
2. <li>
3. Content for the first list item
4. </li>
5. <li>
6. Content for the second list item
7. </li>
8. <li>
9. Content for the third list item
10. </li>
11. </ul>
The following markup formats a three-item list as a bulleted list:
<!DOCTYPE html>
<html>
<head>
<meta charset="UTF-8">
<title>Bulleted Lists</title>
</head>
<body>
<h1>Things to do today</h1>
<ul>
<li>Feed cat</li>
<li>Wash car</li>
<li>Grocery shopping</li>
</ul>
</body>
</html>
Figure 5-10 shows how a browser renders this with bullets.
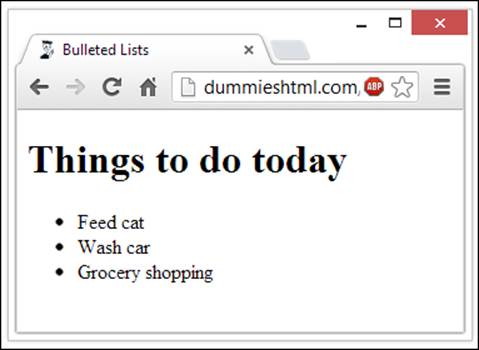
Figure 5-10: An unordered list uses bullets instead of numbers to mark items.
Use CSS to exert more control over the formatting of your lists, including the ability to use your own graphics as bullet symbols.
Definition lists
Definition lists group terms and definitions into a single list and require three elements to complete the list:
![]() <dl>: Holds the list definitions (dl = definition list)
<dl>: Holds the list definitions (dl = definition list)
![]() <dt>: Defines a term in the list (dt = definition term)
<dt>: Defines a term in the list (dt = definition term)
![]() <dd>: Defines a definition for a term (dd = definition list definition)
<dd>: Defines a definition for a term (dd = definition list definition)
You can have as many terms (defined by <dt>) in a list (<dl>) as you need. Each term can have one or more definitions (defined by <dd>).
Creating a definition list with two items requires tags and content in the following order:
1. <dl>
2. <dt>
3. First term name
4. </dt>
5. <dd>
6. Content for the definition of the first item
7. </dd>
8. <dt>
9. Second term name
10. </dt>
11. <dd>
12. Content for the definition of the second item
13. </dd>
14. </dl>
The following definition list includes three terms, one of which has two definitions:
<!DOCTYPE html>
<html>
<head>
<meta charset="UTF-8" />
<title>Definition Lists</title>
</head>
<body>
<h1>Markup Language Definitions</h1>
<dl>
<dt>SGML</dt>
<dd>The Standard Generalized Markup Language</dd>
<dt>HTML</dt>
<dd>The Hypertext Markup Language</dd>
<dd>The markup language you use to create web pages.</dd>
<dt>XML</dt>
<dd>The Extensible Markup Language</dd>
</dl>
</body>
</html>
Figure 5-11 shows how a browser displays this HTML.
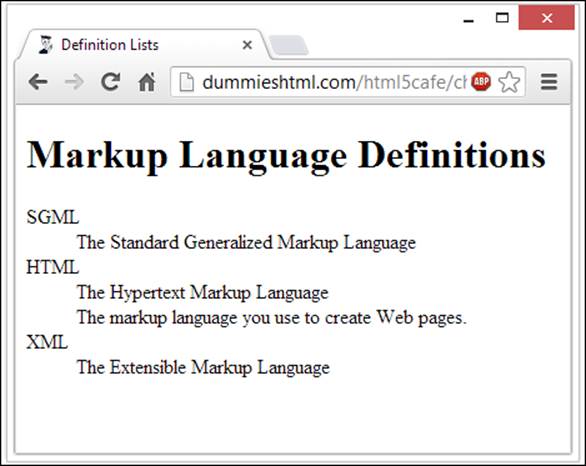
Figure 5-11: Definition lists group terms and their related definitions into one list.
If you think items in a list are too close together, you can use CSS styles to carefully control all aspects of list appearance, as shown in Chapters 14 and 17.
Note that definition lists often display differently inside different browsers, and they aren’t always handled the same by search engines or text-to-speech translators. About.com has a nice discussion of definition lists at
http://webdesign.about.com/od/htmltags/a/aa112006.htm
Alas, this means that definition lists may not be the best choice of formatting for lists you create (even lists of definitions). For a more detailed discussion, see the excellent coverage of this topic at
www.maxdesign.com.au/articles/definition
Nesting lists
You can create subcategories by nesting lists within lists. Some common uses for nested lists include the following:
![]() Site maps and other navigation tools
Site maps and other navigation tools
![]() Tables of content for online books and papers
Tables of content for online books and papers
![]() Outlines
Outlines
You can combine any of the three kinds of lists to create nested lists, such as a multilevel table of contents or an outline that mixes numbered headings with bulleted list items as the lowest outline level.
The following example starts with a numbered list that defines a list of things to do for the day and uses three bulleted lists to break down those items further into specific tasks:
<!DOCTYPE html>
<html>
<head>
<meta charset="UTF-8">
<title>Nested Lists</title>
</head>
<body>
<h1>Things to do today</h1>
<ol>
<li>Feed cat
<ul>
<li>Rinse bowl</li>
<li>Open cat food</li>
<li>Mix dry and wet food in bowl</li>
<li>Deliver on a silver platter to Pixel</li>
</ul></li>
<li>Wash car
<ul>
<li>Vacuum interior</li>
<li>Wash exterior</li>
<li>Wax exterior</li>
</ul></li>
<li>Grocery shopping
<ul>
<li>Plan meals</li>
<li>Clean out fridge</li>
<li>Make list</li>
<li>Go to store</li>
</ul></li>
</ol>
</body>
</html>
All nested lists follow the same markup pattern:
![]() Each list item in the top-level ordered list is followed by a complete second-level list.
Each list item in the top-level ordered list is followed by a complete second-level list.
![]() The second-level lists sit inside the top-level list, not in the list items.
The second-level lists sit inside the top-level list, not in the list items.
Figure 5-12 shows how a browser reflects this nesting in its display.
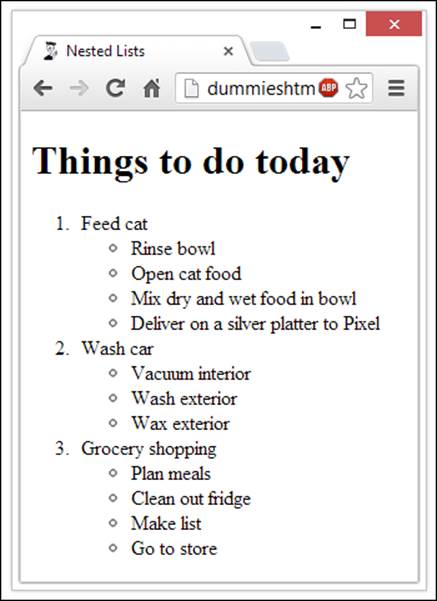
Figure 5-12: Nested lists combine lists for multilevel organization of information.
 While you build nested lists, watch opening and closing tags carefully. “Close first what you opened last” is an important axiom. If you don’t open and close tags properly, lists might not use consistent indents or numbers, or text might be indented incorrectly because a list somewhere was never properly closed.
All materials on the site are licensed Creative Commons Attribution-Sharealike 3.0 Unported CC BY-SA 3.0 & GNU Free Documentation License (GFDL)
If you are the copyright holder of any material contained on our site and intend to remove it, please contact our site administrator for approval.
© 2016-2026 All site design rights belong to S.Y.A.