HTML5 Games: Creating Fun with HTML5, CSS3, and WebGL (2012)
part 4
Local Storage and Multiplayer Games
Chapter 12 Local Storage and Caching
Chapter 13 Going Online with WebSockets
Chapter 14 Resources
Chapter 12
Local Storage and Caching
in this chapter
• Introducing Web Storage
• Storing data in cookies versus local storage
• Adding persistent data to the game
• Making a high score list
• Enabling offline play with application caching
The issue of storing data in the browser has traditionally been solved by using HTTP cookies. In this chapter, you learn how to use Web Storage, another technology born out of the HTML5 movement, to achieve some of the same functionality. You also learn how to use Web Storage to make the game remember where the player left off and how to add a high score list.
The final section of this chapter discusses the application cache introduced by HTML5 and how it can help you make your games accessible even when there’s no network connection.
Storing Data with Web Storage
Web Storage is often lumped in with other technologies under the HTML5 umbrella, although it has now been moved to its own specification (http://dev.w3.org/html5/webstorage/) and is being developed independently from HTML5.
Unlike cookies, data stored in Web Storage remains on the client and is never transferred to the server. Cookies, in contrast, are sent back and forth between the browser and the server with each HTTP request. This limits the amount of data you can store as cookies, and if the server has no use for the data, the bandwidth used to transmit the cookies is wasted. Browsers impose hard limits on the number and size of cookies; to stay on the safe side, you should store no more than 50 cookies and 4 KB per domain.
Using Web Storage solves both of these problems. First, the data never leaves the browser. Second, it allows you to store a larger amount of data. The W3C currently recommends a limit of 5 MB, but browsers are allowed to prompt the user for permission if more space is needed. Current browsers allow at least 2 MB of Web Storage data.
There are other storage related developments as well. The FileSystem API (www.w3.org/TR/file-system-api/) is another proposed specification that aims to become a W3C Recommendation. With the FileSystem API, web applications get access to a sandboxed file system with a nice API for reading and writing file data, binary as well as text. Chrome is currently the only browser with any support for the FileSystem API.
If you’re more interested in databases, then you can look forward to the IndexedDB API (www.w3.org/TR/IndexedDB/). This API provides the functionality needed for storing large amounts of data as well the ability to perform fast searches on this data. Firefox and Chrome both support IndexedDB and Internet Explorer is expected to join them with the upcoming Internet Explorer 10.
Using the storage interface
The Web Storage specification describes two storage objects, the local storage and the session storage, accessible through the global objects localStorage and sessionStorage. The storage objects use the same interface, which means that anything you can do with localStorage, you can also do with sessionStorage and vice versa.
Using the storage API
The storage objects are essentially doors to different data containers maintained by the browser. The localStorage object is tied to the domain, and the stored data is kept alive until you remove it.
The storage API consists of just a few functions. To change a value or to add a new value, use the localStorage.setItem() method:
localStorage.setItem(“myData”, “This is my data”)
The first argument is a unique key that identifies the data, and the second argument is the data you want to store. You can now retrieve the data with the localStorage.getItem() method:
var data = localStorage.getItem(“myData”);
Even if you close the browser, reload the page, or call localStorage.getItem() from another page (on the same domain), the data is still there.
Alternatively, you can access the data using square brackets notation. All the stored values are exposed as properties on the storage object:
var data = localStorage[“myData”];
localStorage[“myData”] = “This is my data”;
You can, of course, also use dot notation:
var data = localStorage.myData;
localStorage.myData = “This is my data”;
If you need to remove a stored value from the storage object, you can do so with the localStorage.removeItem() method:
localStorage.removeItem(“myData”);
Use the localStorage.clear() method if you need to clear everything from a storage object:
localStorage.clear(); // remove all stored data
Encoding complex data types
Web Storage is limited to string values, so you cannot store other data types without converting them to a string representation. You can easily get around this limit if you encode your data as JSON:
var data = {
key1 : “string”,
key2 : true,
key3 : [1,2.3]
};
localStorage.setItem(“myData”, JSON.stringify(data));
When you read the data back, just remember to decode the JSON string:
var data = JSON.parse(localStorage.getItem(“myData”));
Iterating over stored values
The length property of the storage object is equal to the number of key/value pairs that you have saved:
var numValues = localStorage.length;
The localStorage.key() method takes a single argument, an index between 0 and length-1, and returns the name of the key in that position:
var data = localStorage.key(0); // name of key at index 0
There is no guarantee that keys are in the order you added them, but the method can still be useful if, for example, you need to iterate over all the stored values:
for (var i=0,key,value;i<localStorage.length;i++) {
key = localStorage.key(i);
value = localStorage.getItem(key);
console.log(key, value);
}
![]()
The order of the key/value pairs is determined by the browser and can change when you add or remove an item. As long as you just read or write to existing keys, the order is untouched.
Creating a simple text editor
Time for a quick example. Listing 12.1 shows the code for a crude text editor that remembers the text entered into a textarea. This example is located in the file 01-localStorage.html.
Listing 12.1 Saving Data in the Local Storage
<textarea id=”input”></textarea>
<script>
var input = document.getElementById(“input”);
input.value = localStorage.getItem(“mytext”) || “”;
input.addEventListener(“keyup”, function() {
localStorage.setItem(“mytext”, input.value);
}, false);
</script>
When you load the page, the text is loaded into the textarea element from the localStorage object. The keyup event handler updates the stored value whenever you type in the field. Because the data is continuously saved in localStorage, you can close the window at any time and resume writing when you open the page again.
You can even read the same data from a different page. Listing 12.2 shows a read-only version that loads the text every 50 milliseconds. Find the code for this example in the file 02-localStorageReader.html.
Listing 12.2 Reading Data from Another Page
<textarea id=”input” disabled></textarea>
<script>
var input = document.getElementById(“input”);
setInterval(function() {
input.value = localStorage.getItem(“mytext”) || “”;
}, 50);
</script>
If you load the two pages in separate windows and place them side by side, you see that the second window automatically updates as you type into the first.
Using session storage
The session storage is available through the sessionStorage object and uses the same interface as localStorage. The difference between session storage and local storage lies in the lifetime and scope of the data. Data in the local storage is available to all browser windows and tabs that are viewing pages on the given domain, even after the user closes and opens the browser window. Session storage, in contrast, is tied to the browser session and is cleared when the browser session ends, which typically occurs when the window closes.
Session storage is useful for data that you need to store temporarily but you want to be able to access as the user clicks through different pages. A common use case could be a shopping basket that persists across page views but is emptied when the user closes the browser window.
You access the session storage the same way you access the local storage. Listing 12.3 shows the example from Listing 12.1 modified to use session storage. You can find this example in the file 03-sessionStorage.html.
Listing 12.3 Using the Session Storage
<textarea id=”input”></textarea>
<script>
var input = document.getElementById(“input”);
input.value = sessionStorage.getItem(“mytext”) || “”;
input.addEventListener(“keyup”, function() {
sessionStorage.setItem(“mytext”, input.value);
}, false);
</script>
Try to enter some text, and you see that it is still there if you reload the page. If you close the browser or the tab, however, the text is cleared.
Building a storage module
To implement the high score list, you need a storage module. This module is very simple and is essentially a wrapper for the localStorage object. You get around the string value limitation by encoding the values as JSON strings before saving them. This approach lets you store complex types such as objects and arrays. Just beware of host objects such as DOM elements; these objects have no meaningful JSON representation. Listing 12.4 shows the storage module storage.js.
Listing 12.4 The Storage Module
jewel.storage = (function() {
var db = window.localStorage;
function set(key, value) {
value = JSON.stringify(value);
db.setItem(key, value);
}
function get(key) {
var value = db.getItem(key);
try {
return JSON.parse(value);
} catch(e) {
return;
}
}
return {
set : set,
get : get
};
})();
Falling back to cookies
If you want to provide a fallback solution for browsers that do not support local storage, you can use cookies as long as you pay attention to the size limits. Listing 12.5 shows the cookie-based storage module, which you can find in the file storage.cookie.js.
Listing 12.5 Cookie-based Storage Module
jewel.storage = (function() {
var cookieKey = “JewelData”;
function load() {
var re = new RegExp(“(?:^|;)\\s?” + escape(cookieKey)
+ “=(.*?)(?:;|$)”, “i”),
match = document.cookie.match(re),
data = match ? unescape(match[1]) : “{}”;
return JSON.parse(data);
}
function set(key, data) {
var db = load();
db[key] = data;
document.cookie = cookieKey + “=”
+ escape(JSON.stringify(db)) + “; path=/”;
}
function get(key) {
var db = load(),
value = db[key];
return (value !== undefined ? value : null);
}
return {
set : set,
get : get
};
})();
I don’t go into details of the cookie implementation here. If you are interested in exploring this topic further, the Mozilla Developer Network has a detailed explanation of the cookie format as well as a more bulletproof cookie reader:https://developer.mozilla.org/en/DOM/document.cookie.
Loading the module
The storage module should be loaded early in the loader.js script. You can use the Modernizr.localstorage property to test for localStorage support and fall back to the cookie-based module if necessary. Listing 12.6 shows the storage modules placed in the beginning of the first loader stage.
Listing 12.6 Loading the Storage Modules
// loading stage 1
Modernizr.load([
{
test : Modernizr.localstorage,
yep : “scripts/storage.js”,
nope : “scripts/storage.cookie.js”
},{
load : [
“scripts/sizzle.js”,
“scripts/dom.js”,
“scripts/requestAnimationFrame.js”,
“scripts/game.js”
]
},{
...
}
]);
Making the Game State Persistent
In its current state, the game forgets everything when the player leaves or reloads the page. It would be nice if the game remembered the state of the active game so the player can stop playing, exit the game, and come back later to resume playing. In this section, you implement a feature that stores the game state and asks the user if he wants to continue the previous game.
Exiting the game
You haven’t handled exiting the game yet. The player should have an option to exit the current game and return to the main menu. Listing 12.7 shows a footer element with an exit button added to the game screen in index.html.
Listing 12.7 Adding a Footer to the Game Screen
...
<div id=”game”>
...
<div class=”screen” id=”game-screen”>
...
<footer>
<button name=”exit”>Exit</button>
</footer>
</div>
</div>
...
The CSS rules from main.css shown in Listing 12.8 position the footer at the bottom of the screen and style the button so it matches the rest of the game.
Listing 12.8 Styling the Footer
/* Game screen footer */
#game-screen footer {
display : block;
position : absolute;
bottom : 0;
height : 1.25em;
width : 100%;
}
.screen footer button {
margin-left : 0.25em;
padding : 0 0.75em;
font-family : Geo, sans-serif;
font-size : 0.5em;
color : rgba(200,200,100,0.5);
background : rgb(10,20,0);
border : 1px solid rgba(200,200,100,0.5);
border-radius : 0.2em;
}
It’s up to you to adjust the layout for mobile devices and landscape orientation.
Listing 12.9 shows the event handler attached in the setup() function in screen.game.js. If the player confirms that he wants to return to the menu, the game state is saved, the game timer is stopped, and the game switches to the main menu screen.
Listing 12.9 Responding to the Exit Button
jewel.screens[“game-screen”] = (function() {
...
function setup() {
...
dom.bind(“#game-screen button[name=exit]”, “click”,
function() {
togglePause(true);
var exitGame = window.confirm(
“Do you want to return to the main menu?”
);
togglePause(false);
if (exitGame) {
saveGameData();
stopGame();
jewel.game.showScreen(“main-menu”)
}
}
);
}
function stopGame() {
clearTimeout(gameState.timer);
}
...
})();
The code in Listing 12.9 introduces two new functions: togglePause() and saveGameData(). Let’s start with the pause functionality.
Pausing the game
The togglePause() function takes a single Boolean argument that specifies whether to enable or disable the pause mode. If the pause mode is enabled, togglePause() must stop the game timer and dim the screen while the exit dialog is active. You can add a dimming effect by placing a dark gray, semitransparent div element on top of the game screen. Listing 12.10 shows the new div element added to index.html.
Listing 12.10 Adding the Dimming Overlay
<div id=”game”>
...
<div class=”screen” id=”game-screen”>
...
<div class=”pause-overlay”></div>
</div>
</div>
The CSS rules in Listing 12.11 place it in front of the other content, make it take up the entire game screen, and color the background.
Listing 12.11 Styling the Overlay
/* Game screen pause overlay */
#game-screen .pause-overlay {
display : none;
position : absolute;
left : 0;
top : 0;
width : 100%;
height : 100%;
z-index : 100;
background : rgba(40,40,40,0.5);
}
Besides displaying the overlay div, the togglePause() function needs to do two things to stop the game timer. First, the active timeout must be cleared with the clearTimeout() function. The togglePause() method should also record the current time so the game timer can be adjusted when the timer resumes. Listing 12.12 shows the togglePause() function.
Listing 12.12 Pausing the Game
jewel.screens[“game-screen”] = (function() {
var ...,
paused = false,
pauseTime;
...
function togglePause(enable) {
if (enable == paused) return; // no change
var overlay = $(“#game-screen .pause-overlay”)[0];
paused = enable;
overlay.style.display = paused ? “block” : “none”;
if (paused) {
clearTimeout(gameState.timer);
gameState.timer = 0;
pauseTime = Date.now();
} else {
gameState.startTime += Date.now() - pauseTime;
setLevelTimer(false);
}
}
...
})();
If the enable value is equal to the current paused value, the function simply exits. You don’t need to do anything unless the pause state actually changes. When the pause mode is switched off, you modify the gameInfo.startTime value by adding the time passed since the game was paused, effectively turning back time so the timer appears not to have moved.
Saving the game data
Next up is the saveGameData() function, shown in Listing 12.13. This function stores the values necessary to restore the game state the next time the player loads the game.
Listing 12.13 Saving the Game
jewel.screens[“game-screen”] = (function() {
var storage = jewel.storage,
...
function saveGameData() {
storage.set(“activeGameData”, {
level : gameState.level,
score : gameState.score,
time : Date.now() - gameState.startTime,
jewels : board.getBoard()
});
}
...
})();
These four values are all you need to restore the game state, and they should all be self-explanatory. When a new game starts, the startGame() function must now check whether there is a previous game that the player can resume. You can’t be sure that the player actually wants to do so, so it’s best to ask. If the player chooses to resume the game, use the stored values to set up the game. Listing 12.14 shows the changes to the startGame() function.
Listing 12.14 Loading the State from the Previous Game
jewel.screens[“game-screen”] = (function() {
...
function startGame() {
...
var activeGame = storage.get(“activeGameData”),
useActiveGame,
startJewels;
if (activeGame) {
useActiveGame = window.confirm(
“Do you want to continue your previous game?”
);
if (useActiveGame) {
gameState.level = gameState.level;
gameState.score = gameState.score;
startJewels = activeGame.jewels;
}
}
board.initialize(startJewels, function() {
display.initialize(function() {
display.redraw(board.getBoard(), function() {
audio.initialize();
if (useActiveGame) {
setLevelTimer(true, activeGame.time);
updateGameInfo();
} else {
advanceLevel();
}
});
});
});
}
...
})();
If the player confirms that she wants to resume the previous game, the level and score values are restored. The jewels are a bit trickier because there is currently no way to initialize the board module with a given set of jewels. The board module can start only with its own randomly generated board. Modifying the board module in board.js to allow an initial jewel set is easy, however, as shown in Listing 12.15.
Listing 12.15 Passing the Initial Jewels to the Board Module
jewel.board = (function() {
...
function initialize(startJewels, callback) {
settings = jewel.settings
numJewelTypes = settings.numJewelTypes,
baseScore = settings.baseScore,
cols = settings.cols;
rows = settings.rows;
if (startJewels) {
jewels = startJewels;
} else {
fillBoard();
}
callback();
}
...
})();
The initialize() function now takes an additional parameter, and if you pass a set of jewels, it uses them in place of the randomly filled board.
The board module can also run as a web worker, so the board.worker-interface.js script that interacts with the worker also needs a slight modification, as shown in Listing 12.16.
Listing 12.16 Sending the Initial Jewels to the Worker
jewel.board = (function() {
...
function initialize(startJewels, callback) {
...
var data = {
settings : settings,
startJewels : startJewels
};
post(“initialize”, data, callback);
}
})();
Where the initialize() function in the worker received only a settings parameter, it now receives an object holding both the settings and the startJewels values. The worker script itself, board.worker.js, is modified as shown in Listing 12.17.
Listing 12.17 Using the Initial Jewels in the Worker
...
addEventListener(“message”, function(event) {
var board = jewel.board,
message = event.data;
switch (message.command) {
case “initialize” :
jewel.settings = message.data.settings;
board.initialize(
message.data.startJewels, callback
);
break;
...
}
...
}, false);
The game now saves the state when the player exits to the main menu, allowing her to resume the game when she returns.
![]()
You may also want to consider the case where the player simply closes the window or browser. In that case, any progress is lost. If you want to save the game continually, you can add saveGameData() calls in relevant places, such as setLevelTimer() and playBoardEvents().
Creating a High Score List
When the game ends due to the timer expiring, the game must switch automatically to the high score screen, passing along the final score. The high score module checks the score against the stored list of scores, and if the score is high enough to make it onto the list, the player is asked to enter her name. The high score module enters the score into the list along with the player name and displays the top 10 scores.
Building the high score screen
The high score screen consists of a title, an ordered list, and a footer with a button that leads back to the main menu. Listing 12.18 shows the new screen in index.html.
Listing 12.18 Adding the High Score Markup
<div id=”game”>
...
<div class=”screen” id=”hiscore”>
<h2 class=”logo”>High score</h2>
<ol class=”score-list”>
</ol>
<footer>
<button name=”back”>Back</button>
</footer>
</div>
</div>
Now you can populate the ol element with list items in the high score module. Add the CSS rules in Listing 12.19 to style the list.
Listing 12.19 Styling the High Score List
/* High score */
#hiscore h2 {
margin-top : 0.25em;
font-size : 1.25em;
}
#hiscore ol.score-list {
font-size : 0.65em;
width : 75%;
margin : 0 10%;
}
#hiscore ol.score-list li {
width : 100%;
}
#hiscore ol.score-list li span:nth-child(1) {
display : inline-block;
width : 70%;
}
#hiscore ol.score-list li span:nth-child(2) {
display : inline-block;
width : 30%;
text-align : center;
}
When the list items are added later, they all contain two child span elements: one for the player name and one for the score. Once again, you can make the necessary adjustments for landscape orientation on your own.
Adding the new module
The high score screen module, screen.hiscore.js, is shown in Listing 12.20. The basic structure should be familiar.
Listing 12.20 The High Score Screen Module
jewel.screens[“hiscore”] = (function() {
var dom = jewel.dom,
$ = dom.$,
game = jewel.game,
storage = jewel.storage,
numScores = 10,
firstRun = true;
function setup() {
var backButton =
$(“#hiscore footer button[name=back]”)[0];
dom.bind(backButton, “click”, function(e) {
game.showScreen(“main-menu”);
});
}
function run(score) {
if (firstRun) {
setup();
firstRun = false;
}
populateList();
if (typeof score != “undefined”) {
enterScore(score);
}
}
function populateList() {
}
function enterScore(score) {
}
return {
run : run
};
})();
Remember to add the new screen module to the second loading stage:
// loading stage 2
if (Modernizr.standalone) {
Modernizr.load([
{
...
},{
load : [
“loader!scripts/audio.js”,
“loader!scripts/input.js”,
“loader!scripts/screen.hiscore.js”,
“loader!scripts/screen.main-menu.js”,
“loader!scripts/screen.game.js”,
“loader!images/jewels”
+ jewel.settings.jewelSize + “.png”
]
}
]);
}
Transitioning to the high score screen
Before I explain the populateList() and enterScore() functions, you need to actually switch to the high score screen from the game screen. Return to the screen.game.js script and change the gameOver() function as shown in Listing 12.21.
Listing 12.21 Transitioning to the High Score Screen
jewel.screens[“game-screen”] = (function() {
...
function gameOver() {
audio.play(“gameover”);
stopGame();
storage.set(“activeGameData”, null);
display.gameOver(function() {
setTimeout(function() {
jewel.game.showScreen(
“hiscore”, gameState.score);
}, 2500);
});
}
...
})();
After the announce() function displays the “Game over” text, the game screen automatically switches to the high score list, passing on the player’s score.
Storing the high score data
You can now return to the high score screen and implement the enterScore() function. Listing 12.22 shows the function.
Listing 12.22 Entering a New High Score Entry
jewel.screens[“hiscore”] = (function() {
...
function getScores() {
return storage.get(“hiscore”) || [];
}
function enterScore(score) {
var scores = getScores(),
name, i, entry;
for (i=0;i<=scores.length;i++) {
if (i == scores.length || score > scores[i].score) {
name = prompt(“Please enter your name:”);
entry = {
name : name,
score : score
};
scores.splice(i, 0, entry);
storage.set(
“hiscore”, scores.slice(0, numScores)
);
populateList();
return;
}
}
}
...
})();
The enterScore() function goes through the list of saved scores until it either reaches the end or encounters a score that is smaller than the player’s score. After prompting the player for his name, it then inserts the player’s score and name at the current position using the splice() method. The function then uses slice() to get the first 10 elements and stores them in the storage module. Finally, it calls the populateList() function before returning.
Displaying the high score data
Now you just need to render the list of scores. That happens in populateList(), as shown in Listing 12.23.
Listing 12.23 Populating the List of High Scores
jewel.screens[“hiscore”] = (function() {
...
function populateList() {
var scores = getScores(),
list = $(“#hiscore ol.score-list”)[0],
item, nameEl, scoreEl, i;
// make sure the list is full
for (var i=scores.length;i<numScores;i++) {
scores.push({
name : “---”,
score : 0
});
}
list.innerHTML = “”;
for (i=0;i<scores.length;i++) {
item = document.createElement(“li”);
nameEl = document.createElement(“span”);
nameEl.innerHTML = scores[i].name;
scoreEl = document.createElement(“span”);
scoreEl.innerHTML = scores[i].score;
item.appendChild(nameEl);
item.appendChild(scoreEl);
list.appendChild(item);
}
}
...
})();
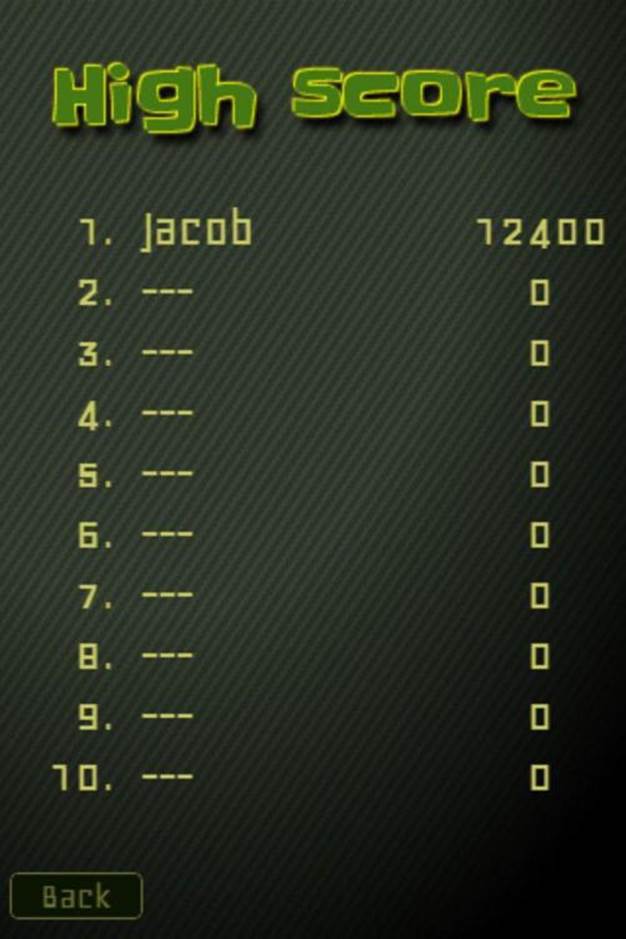
After populateList() retrieves the scores from the storage module, it makes sure that numScores entries appear in the list. That way, the high score list appears to be prefilled with scores with 0 points. The list element itself is simply filled with list items, each with two span elements. Figure 12-1 shows the resulting high score screen.
Application Cache
The final section of this chapter discusses another form of local data, the application cache. The application cache is a way for you to specify which resources the browser can cache locally and which ones it must always fetch from the origin. Being able to cache files locally has the obvious advantage of decreasing network traffic on subsequent visits, but it also allows the application to function if no network connection exists at all.
The relevant part of the HTML5 specification is available from the W3C at www.w3.org/TR/html5/offline.html.
The cache manifest
The application cache and offline web applications use a cache manifest to control which resources are cached and which ones are not. The manifest is a basic text file with a simple syntax. Listing 12.24 shows the basics of the manifest format.
Figure 12-1: The high score list
Listing 12.24 The Cache Manifest for Jewel Warrior
CACHE MANIFEST
# Jewel Warrior cache manifest
CACHE:
images/jewels32.png
images/jewels40.png
images/jewels64.png
...
NETWORK:
...
FALLBACK:
...
You can find the complete manifest for Jewel Warrior in the file manifest.appcache. The first line of the manifest is required and must be CACHE MANIFEST. Any line that starts with a # is treated as a comment and is ignored. The rest of the manifest is divided into three sections — CACHE,NETWORK, and FALLBACK — each starting with the section name followed by a colon. The CACHE section lists the resources the browser must download and store in the cache. The NETWORK section lists the resources that should be accessed online, and the FALLBACK section specifies a page to load if the application needs online access but no network connection is available.
Adding the manifest to the HTML page
When you have a valid manifest, you must add a reference to it in the html element on the main page. Just add an attribute called manifest and let the value be the path to the manifest file:
<html manifest=”manifest.appcache”>
There is currently no official extension that you should use when naming your manifest file. Some sites use .manifest, whereas others use .appcache. However, WHATWG suggests using the latter because an unrelated Microsoft technology also uses the .manifest extension.
It is important that the web server sends the manifest file with the mime type text/cache-manifest. Otherwise, you risk causing errors that stop your application from loading. Consult the documentation for your web server or contact your server administrator, if your web server sends an incorrect mime type. For web servers such as Apache and Nginx, you can add the following line to the mime.types configuration file:
text/cache-manifest appcache
The page that points to the cache manifest — for example, index.html — is automatically cached, so you don’t need to add that file to the CACHE section.
Handling online resources
Using a cache manifest fundamentally changes the way the browser loads resources.
Not all files should necessarily be cached in the application cache. For instance, you might not want to cache pages generated dynamically if you always need the latest data. You need to add these resources to a whitelist so the browser knows that it must retrieve the resource from the network. These resources go in the NETWORK section of the manifest. The following snippet shows a counter script added to the online whitelist so the browser can access it when online:
NETWORK:
# allow online access only to this file
counter.php
You can also use a wildcard to indicate that you want to allow access to all online URLs if they are not found in the cache:
NETWORK:
# allow online access to all URLs
*
But what if the browser needs to access a resource that hasn’t been cached and no network connection is available? Well, you can’t just create the resource out of thin air, but you do have a bit of control over how the browser reacts. The optional FALLBACK section of the manifest specifies a page shown when online resources are unreachable. Consider the following example from the HTML5 specification:
CACHE MANIFEST
FALLBACK:
/ /offline.html
NETWORK:
*
This manifest makes the browser add pages and files to the application cache as the user visits them. Every time the user visits a new page, it is added to the cache. When the user goes offline, only those pages remain accessible. If the user tries to visit any other page on the site, he sees theoffline.html page instead, where a helpful message could be displayed.
On one hand, this functionality frees you from specifying every single file in the manifest and forcing the browser to download everything. On the other hand, the user has offline access only to the content he has already seen. The limited offline availability can be useful for web sites with many pages where the user doesn’t necessarily need offline access to everything. If you want to be certain that the needed resources are available offline, it’s better to declare them explicitly in the CACHE section of the manifest.
![]()
No rules dictate how you must order the sections in the manifest. You can mix them up any way you want and even create multiple CACHE sections. Additionally, you can leave out the CACHE: header and simply list the cache resources under the CACHE MANIFESTline.
Forcing cache updates
Just because you change the contents of a file listed in the manifest doesn’t mean that the browser automatically picks on the change. The cache manifest must change also. That might seem counterintuitive when you haven’t changed the name of the file in question. Nevertheless, the manifest needs to change for the browser to recheck the cached files. Changing as little as one character in a comment is enough to trigger the check, so one solution is to keep a revision number near the top of the file and just increment it whenever you modify a file listed in the manifest. See Listing 12.25 for an example.
Listing 12.25 Cache Manifest with Revision Number
CACHE MANIFEST
# Jewel Warrior cache manifest, rev 47
CACHE:
images/jewels32.png
images/jewels40.png
...
Triggering a cache update makes the browser check all the files listed in the manifest. The files that have changed since they were last cached are downloaded, but the rest are skipped. These checks are done using the regular cache-related HTTP headers such as If-Modified-Since.
Because cached files are not automatically updated in the cache unless you modify the manifest, developing with the application cache turned on can be a challenging experience. If it gives you trouble, I suggest you simply disable it while working on the game, for example, by removing themanifest attribute from the html element.
Summary
In this chapter, you saw how the Web Storage specification lets you store client-side data that persists across browser sessions. You learned how to use local storage to save data that remains until actively removed, and you learned how the related session storage keeps the data alive only until the current browser session ends.
In addition, you saw how to use these features to add a persistent, local high score screen and how to save the game state so the game remembers where the player left off. Finally, this chapter discussed the application cache and how you can use it to make your games playable even when the user goes offline.
All materials on the site are licensed Creative Commons Attribution-Sharealike 3.0 Unported CC BY-SA 3.0 & GNU Free Documentation License (GFDL)
If you are the copyright holder of any material contained on our site and intend to remove it, please contact our site administrator for approval.
© 2016-2026 All site design rights belong to S.Y.A.