HTML5 Games: Creating Fun with HTML5, CSS3, and WebGL (2012)
part 1
Getting Started with HTML5 Games
Chapter 2
Taking the First Steps
in this chapter
• Setting out the rules and mechanics of the game
• Identifying various stages of the game
• Setting up the basic HTML
• Creating the first JavaScript modules
• Making a splash screen using web fonts
With the background and technological context covered in the previous chapter, it is now time to get our hands dirty. However, before you start writing code and markup, it is important to understand the project. In the first part of this chapter, I describe the rules, goals, and mechanics of the game. I also define the key stages of the game and identify the individual screens that make up the application.
With the game clearly defined, you can finally start putting down some code. Starting with the basics, I show you how to set up an HTML page with some simple structure to support the game. From there, I add some preliminary CSS and show how the JavaScript files are loaded using Modernizr’s script loader. I also introduce the first two JavaScript modules: a very simple framework for switching between game stages and a helper module to make Document Object Model manipulation easier.
Finally, I turn to the first of the game stages and use web fonts to create a splash screen with a fancy game logo.
Understanding the Game
The game I walk you through in this book is a match-three puzzle game, a game type made popular mainly by the Bejeweled game series by casual game developer PopCap Games. I have named the game Jewel Warrior; feel free to pick a better and more creative name as you go through the process yourself.
Before you begin actually building the game, I discuss the components and processes of the game. What are the core mechanics and rules of the game and what are the different stages of the game? From the initial launch of the application to the point where the player exits the game, the users see different stages of the application that all behave differently. Take a look at the mechanics of the actual game and leave other key stages such as menus and loading screens for later.
Swapping jewels
The core of the game revolves around an 8x8 grid filled with jewels of various shapes and colors. When the game begins, each of the 64 cells holds a random jewel type. The goal of the game is to score points by matching jewels in sets of three or more of the same kind. The player can swap two adjacent jewels by selecting first one and then the other.
Matching three
A swap is only legal if it produces a match of three or more jewels of the same color; any illegal swaps are simply reversed automatically. When the player performs a valid swap, all jewels included in the matching set are removed. If there are any jewels above the resulting gaps, these jewels fall down and new, randomly picked jewels enter the game area from the top. The simplest match is a match with three identical jewels, but it is also possible to create chains of four or five matching jewels. The more jewels the player matches in a single row or column, the more points they receive.
Triggering chain reactions reward the player with additional points. After a valid swap, the falling jewels can produce even more groups of matching jewels, which are then subject to a bonus multiplier. By carefully examining the board, the player can even trigger these chain reactions intentionally to score extra points.
During the course of a game, the player can also face a situation where no valid moves are left. If no swaps can produce a set of at least three identical jewels, the game board must be reshuffled. The board is cleared of jewels and new ones are brought in using the same randomized fill routing that was used when the board was initially set up.
Level progression
To create a sense of urgency, I introduce a timer that slowly counts down. If the timer reaches zero, the game ends. The player can progress to the next level by reaching a specified number of points before the timer runs out. This triggers a refill of the jewel board, resets the timer, and raises the number of points needed to advance to the next level. This might keep players on their toes, but without modification, a skilled player can keep playing indefinitely. To make the game harder and harder as time goes by, the point gap between levels increases each time the player advances. Eventually, even the best jewel swapper fails to gather enough points in the allotted time.
Identifying Game Stages
The game-playing stage of the application is by far the most complicated stage and is where the player will be spending most of his or her time. You do need a few additional stages, however, because you shouldn’t dump the player straight into the game.
Splash screen
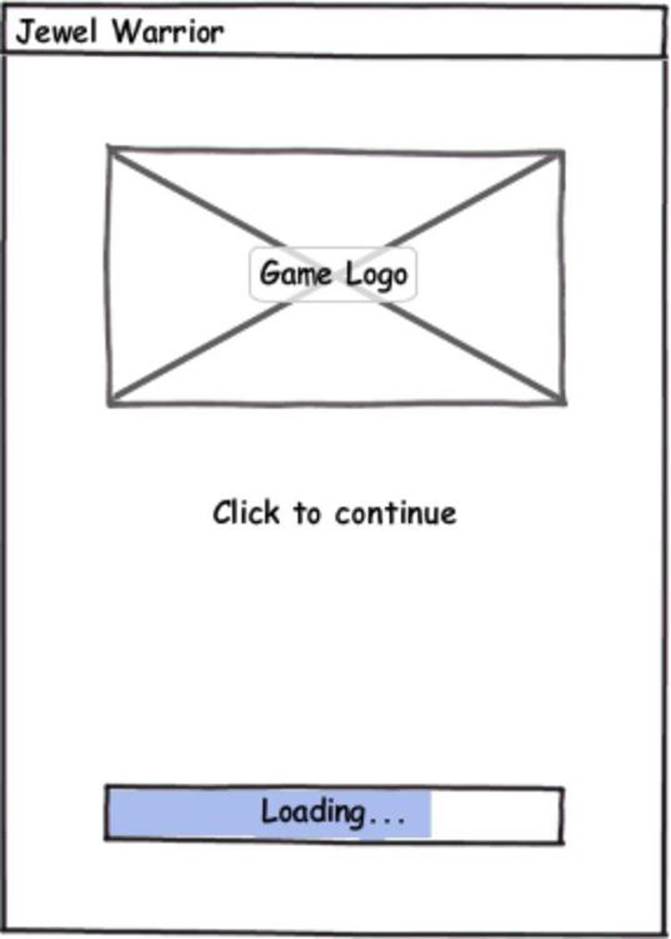
The very first thing the player sees is a splash screen. This screen serves two purposes: First and foremost, it introduces the player to the game by displaying the game logo front and center. Second, by adding a progress bar, it provides a nice waiting area while the game’s assets are preloaded behind the curtain. Not all assets necessarily need to be preloaded right away, but it arguably creates a better impression if all the graphics for the next stage are immediately available when the stage is activated. Figure 2-1 shows a sketch of what the splash screen will look like.
Figure 2-1: Sketch of the splash screen with preloader
Main menu
After the player clicks through the splash screen, she is taken to the main menu. This is a simple menu with just a few items. Most importantly, the menu gives access to the actual game but also features buttons for displaying the high score, further info about the game, and an option to exit the game. If the player selects a new or previous game, the game begins right away. Figure 2-2 shows a sketch of the main menu.
Playing the game
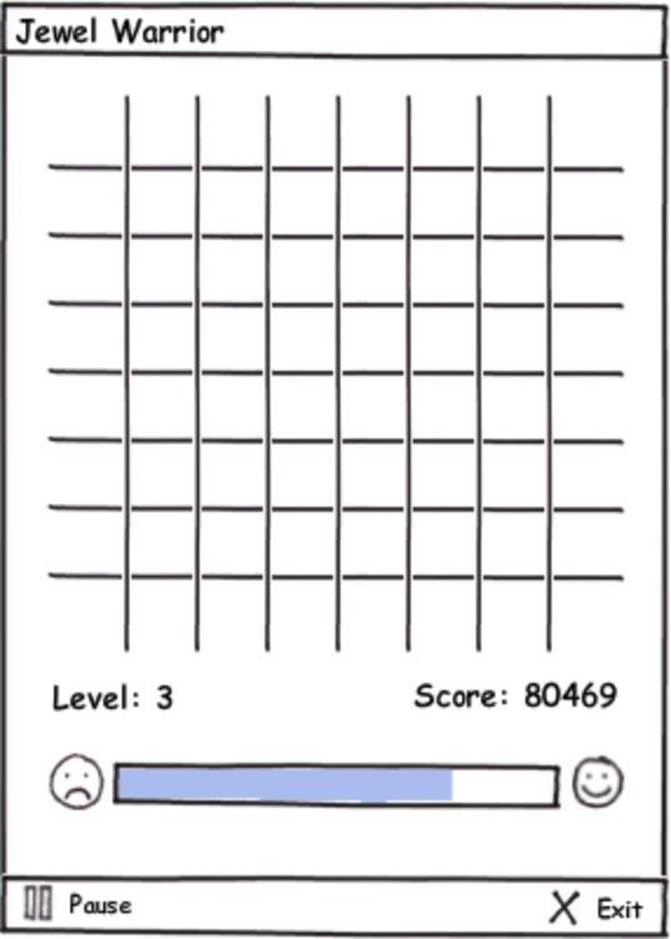
When the actual game begins, the game elements — the jewel board, player name, and current score — occupy most of the screen, but the player needs to be able to exit back to the main menu. I enable this by using a small slice of the screen to make a status or toolbar. See Figure 2-3 for a sketch of the game area.
Figure 2-2: Sketch of the main menu
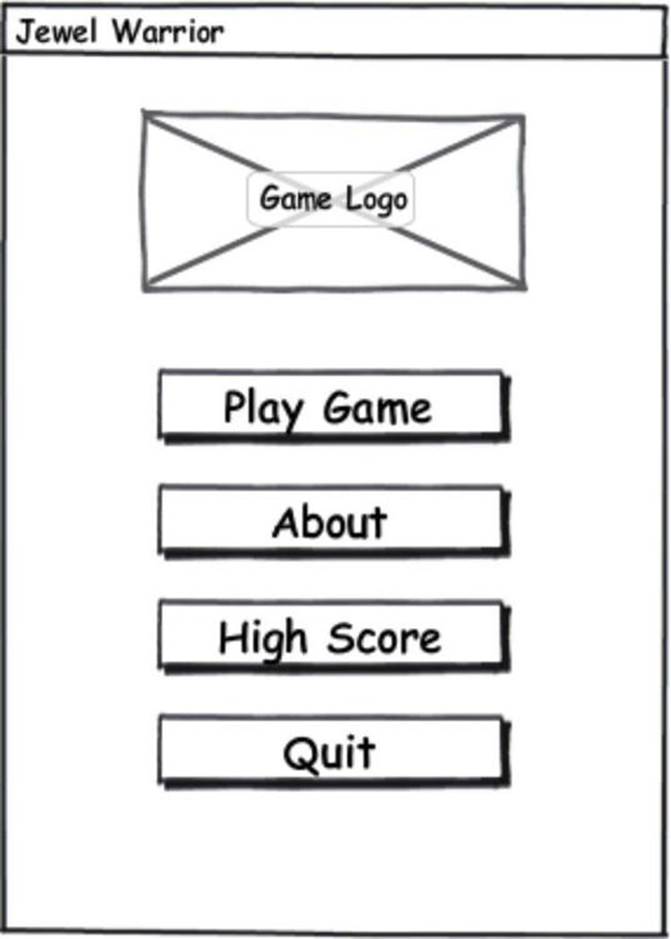
Figure 2-3: Sketch of the game screen
High score
When the game ends, the application switches to a high score list showing the top scores along with the player names. If the player achieved a high enough score, they are asked to enter their name, after which the score is entered into the list. This screen has an option to return to the main menu. The game uses a locally stored high score list based on WebStorage. The sketch in Figure 2-4 shows the basic layout of the high score lists.
Figure 2-4: Sketch of the high score list

Creating the Application Skeleton
You do not need any special tools or applications to follow the development of the game. When I get to the WebSocket discussion in Chapter 13, you do need to install Node.js and set it up on your web server. For everything else, however, your favorite text editor and a simple image editor will do.
Many web developers use libraries such as jQuery and Prototype so they don’t have to deal with the trivial parts of web development, such as selecting and manipulating DOM elements. Often, you’ll find that these libraries include a lot of functionality that you’re not using. It is sometimes a good idea to ask yourself if you really need a 50-100 KB library or if something simpler and smaller will do.
I try to be as library-agnostic as possible, but I do take the liberty of using a few small but helpful libraries to make things a bit easier. The Modernizr library, which helps you detect feature support and load JavaScript files dynamically, has already been discussed. It is assumed that you already know your way around the DOM. To minimize the amount of trivial DOM traversal code, I use Sizzle, the very fast CSS selector engine that also powers, for example, jQuery and Prototype. Sizzle makes it much easier to work with the DOM. For example, to select all elements with the class jewel in a div with the ID #gameboard, you can use simple code such as
var jewels = Sizzle(“div#gameboard .jewel”);
If you are used to working with libraries like jQuery or Prototype, this method of using CSS selectors to select DOM elements should be familiar to you. Check out the web site http://microjs.com/ for a collection of other small libraries that focus on particular areas of web development.
Modernizr and Sizzle are both available under the permissive MIT and BSD open source licenses, so you are free to use them in your own game projects with very few restrictions. The libraries are both included in the code archive for this chapter, but you can also grab the latest versions from their web sites, www.modernizr.com/ and http://sizzlejs.com/.
Okay, time to get started. Create an empty folder for the game project and create two sub-folders: scripts and styles. Later in the process, a few extra folders are added, but these two are enough for now. Put the modernizr.js and sizzle.js JavaScript files in the scripts folder. You can either copy them from the code archive for this chapter or, if you downloaded fresh versions, extract them from the downloaded archives.
Setting up the HTML
The foundation of the game is just a regular HTML document. Create a new file, name it index.html, and put it in the project folder. Listing 2.1 shows the initial content of index.html.
Listing 2.1 The Empty HTML Document
<!DOCTYPE HTML>
<html lang=”en-US”>
<head>
<meta charset=”UTF-8”>
<title>Jewel Warrior</title>
</head>
<body>
<div id=”game”>
<!-- game goes here -->
</div>
</body>
</html>
Notice the dead simple document type declaration. Compare this to, for example, the HTML 4.01 Strict DOCTYPE:
<!DOCTYPE HTML PUBLIC “-//W3C//DTD HTML 4.01//EN”
“http://www.w3.org/TR/html4/strict.dtd”>
Gone are the monstrosities of yesteryear. The DOCTYPE is now simple enough that you can actually memorize it. The meta tag used for declaring the character encoding got a similar treatment. Hooray for keeping things simple!
Back to the HTML document. The div tag in the body is the overall game container. The rest of the game markup goes inside this tag. The next level of markup contains the various game screens that I listed earlier in this chapter. A div container with the CSS class screen signifies a game screen and each screen has a unique id that is used to refer to that particular game screen. Listing 2.2 shows the first few screens added to the game container.
Listing 2.2 Adding Screen Elements to the Game Container
<div id=”game”>
<div class=”screen” id=”splash-screen”></div>
<div class=”screen” id=”main-menu”></div>
<div class=”screen” id=”game-screen”></div>
<div class=”screen” id=”high-scores”></div>
</div>
I return to the splash screen later in this chapter, but for now, you have enough structure in place that you can start adding some CSS.
Adding a bit of style
I introduce a few different style sheets throughout the book. The first style sheet, main.css, contains rules for styling the overall structure of the game application. Listing 2.3 shows the style sheet added to the head element.
Listing 2.3 Adding the Main Style Sheet
<head>
<meta charset=”UTF-8”>
<title>Jewel Warrior</title>
<link rel=”stylesheet” href=”styles/main.css” />
</head>
![]()
HTML5 defines a default value of text/css for the type attribute when the rel attribute is set to stylesheet. That means you no longer need to set the type attribute explicitly.
For now, the style sheet targets desktop browsers. In Chapter 3, I discuss how to deal with mobile browsers and show how you can use CSS media queries to load different style sheets for different devices and resolutions. Initially, you only need a few simple rules in the main style sheet. Listing 2.4 shows the CSS rules in main.css.
Listing 2.4 The Initial Content of the Main Style Sheet
body {
margin : 0;
}
#game {
position : absolute;
left : 0;
top : 0;
width : 320px;
height : 480px;
background-color : rgb(30,30,30);
}
#game .screen {
position : absolute;
width : 100%;
height : 100%;
display : none;
z-index : 10;
}
#game .screen.active {
display : block;
}
The body rule simply cancels any default margin added around the body element by the browser. The #game rule styles the containing div with a dark gray background and makes it fill a 320x480 rectangle, which is a nice size for a game like this and also works well with, for example, the iPhone. In Chapter 7, I show you how to create a nicer background using canvas. The screen div elements all have the display property set to none. This ensures that the screens are hidden by default and only appear when you want them to. An active CSS class on a screen div element switches the display property to block.
Loading the scripts
In recent years, script loading has become an art in itself as the issue of loading scripts efficiently has received more and more attention. The yepnope functionality in Modernizr gives you plenty of control over this important stage. The only scripts that need to load using old-fashioned script tags are the Modernizr library and a loader script that sets up the load order and kicks off the dynamic loading. You will create the loader.js script in a moment. Listing 2.5 shows the additions to the head element.
Listing 2.5 Adding Modernizr and the Loader Script
<head>
...
<script src=”scripts/modernizr.js”></script>
<script src=”scripts/loader.js”></script>
</head>
If you want to get the latest version of Modernizr, you need to make a custom build using the download tool at www.modernizr.com/download/. Here, you can select the individual feature tests that you need for your project, ensuring that you don’t include unnecessary code. For the purpose of the project in this book, just select all the tests and make sure the Modernizr.load() and Modernizr.addTest() features are also included. The generated file will likely have a filename such as modernizr.custom.12345.js, so make sure you rename the file to match the script element.
![]()
Just as with link elements and style sheets, you no longer need to explicitly set the script type on script tags. If the type attribute is absent, a default value of text/javascript is used.
The loader script takes care of calling Modernizr.load() for any other scripts that need to be loaded. To start with, tell it to load the Sizzle selector engine and two new scripts called game.js and dom.js. The loader script also creates a jewel namespace object in which all the game modules will live. Listing 2.6 shows the initial loader script.
Listing 2.6 The Initial Contents of loader.js
var jewel = {};
// wait until main document is loaded
window.addEventListener(“load”, function() {
// start dynamic loading
Modernizr.load([
{
// these files are always loaded
load : [
“scripts/sizzle.js”,
“scripts/dom.js”,
“scripts/game.js”
],
// called when all files have finished loading
// and executing
complete : function() {
// console.log(“All files loaded!”);
}
}
]);
}, false);
Once the page has finished loading the initial scripts, Modernizr kicks in and loads the remaining scripts. Modernizr automatically calls the complete() function when all the scripts have finished loading and have been executed, making it a good place to start the application logic.
Debugging web applications
It is assumed that you are somewhat familiar with the debugging tools available in modern browsers. Firefox, Chrome, and Internet Explorer 9 all have very nice console and inspection tools, usually available by pressing F12. Most browsers today support the now almost standard console output API, allowing you to output debugging messages to the console by adding lines such as:
console.log(“Your log message here”);
console.warn(“Your warning here”);
console.error(“Your error here”);
This is much nicer and less obtrusive than the alert() debugging that web developers had to resort to years ago. This book doesn’t make a big deal out of adding debugging mechanisms or error handling in the code, focusing instead on getting to know the new features and technologies available to us today. However, you are encouraged to add as many debug messages in the code as you want.
Creating a DOM helper module
You can get the sizzle.js file from the code archive for this chapter or by downloading it from the Sizzle web site (http://sizzlejs.com/). Sizzle makes searching out elements in the DOM a breeze, but you can always use a few extra helper functions for manipulating DOM elements. That is what the dom.js module provides. Listing 2.7 shows the dom.js module with the first batch of helper functions.
Listing 2.7 The DOM Helper Module
jewel.dom = (function() {
var $ = Sizzle;
function hasClass(el, clsName) {
var regex = new RegExp(“(^|\\s)” + clsName + “(\\s|$)”);
return regex.test(el.className);
}
function addClass(el, clsName) {
if (!hasClass(el, clsName)) {
el.className += “ “ + clsName;
}
}
function removeClass(el, clsName) {
var regex = new RegExp(“(^|\\s)” + clsName + “(\\s|$)”);
el.className = el.className.replace(regex, “ “);
}
return {
$ : $,
hasClass : hasClass,
addClass : addClass,
removeClass : removeClass
};
})();
All game modules are properties of the jewel namespace and are basically just objects with some public methods. If you have ever used the so-called Module Pattern in your own code, this method should be familiar to you. All functionality is defined inside an anonymous function that returns an object literal with references to the functions that should be exposed to the outside world. The anonymous function is immediately invoked and the return value is assigned to a property on the jewel namespace object.
This modular approach is an easy way to keep the application code from polluting the global scope, thereby making integration with third-party scripts more difficult. The encapsulation in an anonymous function effectively hides, for good or bad, all variables and functions declared inside the module unless they are explicitly made public.
The jewel.dom module initially only has a few functions for manipulating CSS classes. The module also exposes a $() function, which is just a reference to the Sizzle() function. The hasClass() function examines the className attribute on a given element and returns true if the specified class is found. The functions addClass() and removeClass() do what they advertise; that is, they add or remove a specified CSS class from an element.
Creating the game module
The game.js script defines the next module, jewel.game, which provides basic application logic such as switching between game states. Listing 2.8 shows the contents of the game module in game.js.
Listing 2.8 The Initial Game Module
jewel.game = (function() {
var dom = jewel.dom,
$ = dom.$;
// hide the active screen (if any) and show the screen
// with the specified id
function showScreen(screenId) {
var activeScreen = $(“#game .screen.active”)[0],
screen = $(“#” + screenId)[0];
if (activeScreen) {
dom.removeClass(screen, “active”);
}
dom.addClass(screen, “active”);
}
// expose public methods
return {
showScreen : showScreen
};
})();
![]()
The Sizzle selector engine always returns an array of elements, even when only one or no elements at all are present. When you select a single element, you therefore need to use the first element of this array rather than the array itself.
The jewel.game module only provides a single function so far. This function, showScreen(), simply displays the screen element with the specified ID. If another screen is already active and visible, it is automatically hidden prior to displaying the new screen.
If you load up index.html in a browser now, you should see the dark gray background of the game. If you want to test that the files are loaded correctly, try adding an alert() or console.log() call to the complete function in loader.js:
Modernizr.load([
{
...
complete : function() {
alert(“Success!”);
}
}
]);
Even if Jewel Warrior doesn’t use a very deep namespace hierarchy, having to type out the full module path to get to a function can still be annoying. To save on the typing, you can easily make shortcut references to modules as seen in Listing 2.7, where the jewel.game module has shorter, local references to the jewel.dom module and its $() function is declared near the top. Local references like these even improve JavaScript performance, because the JavaScript engine doesn’t need to traverse the namespace object structure to get to the variable every time it’s needed.
Activating the splash screen
Now that you are able to switch between game screens, go back to the loader.js script and make it show the splash screen when the necessary scripts have finished loading. In the complete callback function, add a call to showScreen() from the game module, as shown in Listing 2.9.
Listing 2.9 Toggling the Splash Screen from the Loader Script
Modernizr.load([
{
...
complete : function() {
// show the first screen
jewel.game.showScreen(“splash-screen”);
}
}
]);
That takes care of toggling the visibility of the splash screen element, but of course your screen has no content yet. In the next part, I show you how to use web fonts to put a nice game logo on the splash screen.
Creating the Splash Screen
The splash screen is a simple screen that displays the game logo and text telling the user to click to continue. The Jewel Warrior logo is just the name of the game, set in an interesting typeface. Embedded web fonts now make logos like that easy to create using just HTML and CSS. Listing 2.10 shows the markup added to the splash screen div.
Listing 2.10 Adding the Splash Screen Markup
<div id=”game”>
<div class=”screen” id=”splash-screen”>
<h1 class=”logo”>Jewel <br/>Warrior</h1>
<span>Click to continue</span>
</div>
...
</div>
Working with web fonts
It used to be that the list of typefaces you could safely use on the web was short enough to memorize. Not until recently have the efforts to bring better types to the web converged on a common standard. By using CSS @font-face rules, you can embed fonts in a way that works in most browsers. The W3C is currently working on a new, standardized font format, Web Open Font Format (WOFF), and all modern desktop browsers already support it. However, if you want the highest level of browser compatibility, it requires having the font available in several different formats. Apple devices like the iPhone and the iPad, for example, don’t support the new WOFF format yet, although support for embedded TrueType fonts (TTF) was added in iOS 4.2.
![]()
The WOFF web font format is not part of HTML5, but has its own specification. The W3C’s Web Font Working Group is still working on the specification, but it should reach final recommendation status sometime in 2011.
I have chosen two fonts for Jewel Warrior, Slackey Regular by Sideshow and Geo Regular by Ben Weiner. Both are available under free licenses from the Google Web Fonts directory (www.google.com/webfonts). On the Google Web Fonts site, simply pick the fonts you wish to use and use the “Add to Collection” function. When you are done, click the “Download your collection” link in the top right corner to download a ZIP archive containing the selected TTF files.
If you want to use different typefaces in this or other web projects, I recommend just looking around the web. The Google Web Fonts site is only one of many font collections that target web fonts specifically. At FontSquirrel (www.fontsquirrel.com/), you can find many free fonts pre-packaged in kits that contain all the necessary font files and CSS. They even have an easy-to-use, online generator that lets you upload, for example, a TTF file and have a @font-face kit generated for you. I used this feature to convert the TTF files from Google Web Fonts to WOFF files.
Copy the font files from the Chapter 2 code archive and place them in a new folder called fonts in the project folder. The CSS font declarations go in a new CSS file, fontfaces.css, in the styles folder. Listing 2.11 shows the content of this style sheet.
Listing 2.11 The Custom @font-face Rules
@font-face {
font-family: “Slackey”;
font-weight: normal;
font-style: normal;
src: url(“../fonts/slackey.woff”) format(“woff”),
url(“../fonts/slackey.ttf”) format(“truetype”);
}
@font-face {
font-family: “Geo”;
font-weight: normal;
font-style: normal;
src: url(“../fonts/geo.woff”) format(“woff”),
url(“../fonts/geo.ttf”) format(“truetype”);
}
Setting up @font-face rules is quite simple. The font-family value is the name you use to refer to the font when using the font in the rest of the CSS. The font-weight and font-style properties let you embed font files for different weights and styles (bold, italic, and so on). I have only included the regular fonts. When the browser encounters a @font-face rule, it reads the list of source files and downloads the first format it supports. Because Apple iOS devices don’t support WOFF files yet, they simply ignore that entry and download the TrueType file instead.
![]()
WOFF and TTF font files are enough to get support from recent versions of Chrome, Opera, Firefox, Safari, as well as Internet Explorer 9. If you wish to support older browsers, you need more formats and the @font-face declaration gets a bit more complicated. For a solid cross-browser solution, I recommend reading the great article “Bulletproof @font-face Syntax” by Paul Irish at http://paulirish.com/2009/bulletproof-font-face-implementation-syntax/.
Styling the splash screen
Throughout the game, I use Geo as the main font, so go ahead and set the font on the game container in main.css. This way, all the screen elements automatically inherit these values. Listing 2.12 shows the game container rule with the new font properties.
Listing 2.12 Adding a Reference to the Embedded Font
#game {
...
font-family : Geo;
color : rgb(200,200,100);
}
Remember to also put a link reference to fontfaces.css in the head element in index.html:
<head>
...
<link rel=”stylesheet” href=”styles/fontfaces.css” />
</head>
Now you can use the embedded fonts to make the splash screen look a bit nicer. The text on the splash screen already inherits the Geo font, but for this project, I want the logo to use Slackey. Listing 2.13 shows the CSS rules added to main.css.
Listing 2.13 Styling the Splash Screen
#splash-screen {
text-align : center;
padding-top : 100px;
}
#splash-screen .continue {
cursor : pointer;
font-size : 30px;
}
.logo {
font-family : Slackey;
font-size : 60px;
line-height : 60px;
margin : 0;
text-align : center;
color : rgb(70,120,20);
text-shadow : 1px 1px 2px rgb(255,255,0),
-1px -1px 2px rgb(255,255,0),
5px 8px 8px rgb(0,0,0);
}
The logo is now set in Slackey, is green, and everything is placed in the center. The text-shadow declaration serves two purposes. A bright yellow outline is added using two thin shadows in opposite directions. The third shadow adds a soft drop shadow to the text. Note that Internet Explorer does not support CSS text shadows yet. However, you can use Internet Explorer’s proprietary filters to achieve a similar effect by adding the following rule to main.css:
.no-textshadow .logo {
filter : dropshadow(color=#000000,offX=3,offY=3);
}
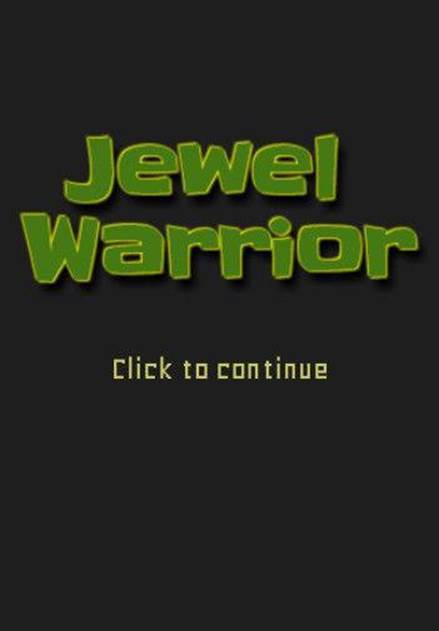
Now, open index.html in a browser. When the page has loaded, the loader script should automatically switch to the splash screen. Figure 2-5 shows the splash screen.
Figure 2-5: The splash screen in its current state
Summary
In this chapter, I laid out the concepts of the Jewel Warrior game. I discussed the rules of the game, the jewel swapping mechanics, and how the player scores points by matching sets of identical jewels. I then described the various stages of the game, starting with the splash screen that is shown when the game first loads, through the menu to the actual game, and the high score list displayed when the game ends.
I then showed you how the foundation of the game is set up using a simple HTML skeleton and a bit of CSS. You saw how the yepnope.js integration in Modernizr makes it easy to load script files dynamically. I also introduced a basic framework for setting up game stages and switching between the various game screens.
Near the end of the chapter, you learned how web fonts and CSS @font-face declarations enable embedded fonts and you used them to create a game logo for the splash screen.