Releasing HTML5 Games for Windows 8 (2013)
Chapter 10. Windows 8 Resources
While I tried my best to cover the most critical techniques you will need to know in order to successfully port your HTML5 games over to Windows 8 there are still some additional resources you can use to continue on your journey to publishing HTML5 games to Windows 8. To help you out, I have created this resources section to help offer more detailed examples of code to help take advantage of on Windows 8. Feel free to go through the content and links provided here to further enhance your HTML5 game on Windows 8.
Port to Windows 8 Task List
By now you have seen all of the detailed information you will need to know when porting over you game. To help you keep track of everything, I have created this handy checklist you can walk through in order to help better prepare for the porting process.
Mandatory
1. Run your game in IE10 first.
2. Import code into the Visual Studio project.
3. Connect up code in default.html.
4. Test run to make sure the game works on Windows 8.
5. Add logic to resize the game (support for full-screen, filled, and snap view).
6. Create a basic Live Tile.
7. Add a privacy policy.
8. Test your game and optimize.
9. Publish the game.
Optional steps:
10.Create more engaging Live Tiles.
11.Add support for roaming settings and game stats.
12.Support for game controller
13.Add instructions as a Settings charm.
WinJS App Lifecycle
We only touched the surface of the Windows 8 lifecycle for JavaScript apps. Outside of just tying into the onactivated() call, you may want to better integrate your app into the activate, suspend, and resume states. Here are some resources to better explain this process and how it works.
Windows Store JavaScript Samples
One of the best resources you will find for Windows 8 HTML5 app development is right inside of Visual Studio itself. Simply create a new project and select templates and it will pull down a list of sample projects covering a wide range of Windows 8 development scenarios (Figure 10-1).
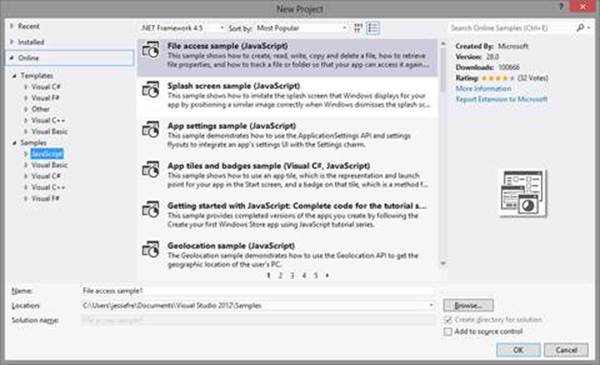
Figure 10-1. You can access a list of sample templates when you create a new project via the Online, Samples dropdown.
This book covered the basics of what you need to know in order to get an existing HTML5 game up and running on the platform. While this is a great way to create something quickly, I highly suggest going through the following Visual Studio code samples I’ve highlighted what I feel relates to games on Windows 8 along with their descriptions for you to give a try. I have also added additional links to some of these projects to help along the way.
Live Tiles
You can do a lot of really interesting things with Live Tiles. By default, you get a simple image to display your game’s icon, but you can animate this, display stats, and even push events and notifications to the user through the Live Tile. Here are some resources that talk about how to do additional things with the Live Tiles in a Windows 8 application:
Visual Studio Sample
§ App Tiles and Badges Sample – This sample shows how to use an app tile, which is the representation and launch point for your app in the start screen, and a badge on that tile, which is a method for the app to relay status information to the user when the app is not running.
§ Secondary Tiles Sample – This sample shows how to pin and use a secondary tile, which is a tile that directly accesses a specific, non-default section or experience within an app, such as a saved game or a specific friend in a social networking app.
Flyout Panels
Flyout panels are a great way to hide more advanced configuration options from the player until they really need to access them. We discuss how to make a simple flyout panel in the publishing section for the privacy policy. These panels are simply HTML pages you can load up on request, so anything you would do with a pop-up window or additional div overlay in your game will be moved over to these developer-defined flyout panels. Here are some more resources about setting them up:
Visual Studio Sample
§ App Settings Sample – This sample demonstrates how to use the ApplicationSettings API and settings flyout to integrate an app’s settings UI with the Settings Charm.
§ Edge Gesture Invocation Sample – This sample shows how to listen for events that occur in relation to edge-based UI, using the EdgeGesture class.
Loading/Saving to Local File System
Now that we have gone over how to store data locally, you may want to take advantage of the larger storage allocations Windows 8 offers you. One technique I use is to test to see if WinJS exists and switch over to saving to the computer instead of local storage. You can create a similar API like we did in the previous section to manage it. Of course in Windows 8 we are going to have to deal with some extra code, but let’s take a look at how to get that set up.
Visual Studio Sample
§ File Access Sample – This sample shows how to create, read, write, copy, and delete a file; how to retrieve file properties; and how to track a file or folder so that your app can access it again.
§ File Picker Sample – This sample shows how to access files and folders by letting the user choose them through the file pickers and how to save a file so that the user can specify the name, file type, and location of a file to save.
§ Reading and Writing Data Sample – This sample shows how to use the DataReader and DataWriter classes to store and retrieve data.
Accelerometer Support
While the accelerometer is fully supported in HTML5 games on Windows 8, I personally find using it a little difficult on larger tablets. It also doesn’t make much sense on a traditional computer, which is why I didn’t cover it in the chapter on input. However, adding accelerometer support is very easy. Here is some reference material on how to implement it:
Visual Studio Sample
§ Accelerometer Sensor Sample – This sample shows how to use the Windows.Devices.Sensors.Accelerometer API.
§ OrientationSensor Sample – This sample shows how to use the Windows.Devices.Sensors.OrientationSensor API. This sample allows the user to view the rotation matrix and Quaternion values that reflect the current device orientation.
Pen Support
When it comes to pen support, this is also a difficult feature to add in a game that may have been originally designed for the Web and desktop computers. If you remember back to our review of the pointer event in touch, you will remember that we can test the input type from the event. There may be some interesting things you can do when it comes to pen input in your game. While I wouldn’t rule it out, just keep in mind that not many form factors are shipping with pens, so again, just like with the accelerometer, think about your ROI and if supporting it is worth the time investment.
Visual Studio Sample
§ Input: Devices Capabilities Sample – This sample demonstrates how to query the input devices that are connected to the user’s device and support the input modes (pointer, touch, pen/stylus, mouse, keyboard) of a Windows Store app.
§ Input: Simplified Ink Sample – This sample demonstrates how to use ink functionality (capturing, manipulating, and interpreting ink strokes) in Windows Store apps using JavaScript, C#, and C++.
Splash Screen
We talked about how to set up a simple splash screen, which is set up automatically by Visual Studio. There are a lot of things you can do by setting up a better transition from the splash screen into your game. Visual Studio has an excellent example of how to do this.
Visual Studio Sample
§ Splash Screen Sample – This sample shows how to imitate the splash screen that Windows displays for your app by positioning a similar image correctly when Windows dismisses the splash screen that it displays.
Dialog Boxes
Your game may need to display dialog boxes. WinJS supports a built-in system for creating and showing standard Windows 8-style dialog boxes.
Visual Studio Sample
§ Message Dialog Sample – This sample demonstrates how to use the MessageDialog for displaying dialogs, settings commands and the actions they will perform, and changing the default button.
Trial and In-App Purchase
We talked about how to monetize your game but, if you are looking for more examples of how to do this on Windows 8, there is a very good sample for it.
Visual Studio Sample
§ Trial App and In-App Purchase Sample – This sample demonstrates how to use the licensing API provided by the Windows Store to determine the license status of an app or a feature that is enabled by an in-app purchase.
Installing Windows 8 on a Mac
I didn’t go over installing Windows 8 on PC hardware since it is very straightforward, but I thought it was important to call out that Windows 8 runs great on Mac hardware, too. For this book, I did testing on a 2012 Mac mini and in the past have used an 11” Air as my day-to-day Mac/Windows 8 development computer. The only downside of doing development on a Mac is the lack of a touchscreen.
To get started you will need to launch Boot Camp on the Mac and get a copy of Windows 8. I used Microsoft’s Windows 7 USB/DVD download tool to help turn an ISO of Windows 8 into a bootable USB drive. Boot Camp also has an option to do this for you if you don’t have access to another PC, but it may be problematic if you don’t have a CD/DVD drive in your Mac, which new ones don’t have.
Once you have the USB stick ready with Windows 8 on it, load Boot Camp on your Mac and you will see the screen shown in Figure 10-2.
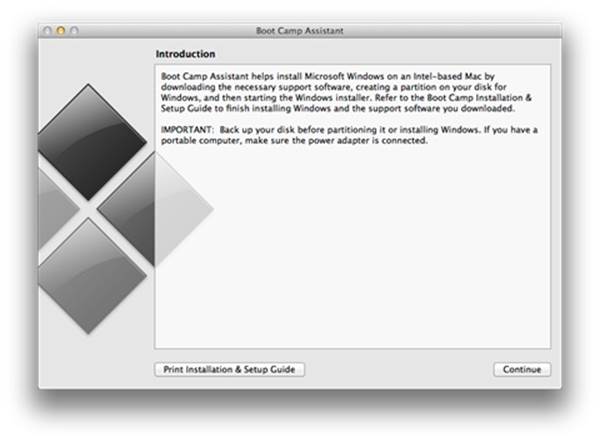
Figure 10-2. Boot Camp introduction screen.
From here you can choose to make a USB install disk of Windows 8 via Boot Camp, download the latest drivers, and install Windows 8 (Figure 10-3). Since I already created my own USB boot stick, I simply chose to download the drivers and go into installing Windows 8.
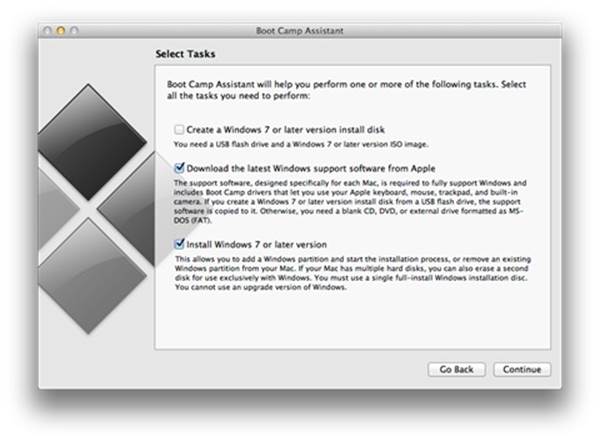
Figure 10-3. Select your options when setting up a Boot Camp installation.
You will be given a choice of where you want to install the drivers (Figure 10-4). Be sure to have an extra USB stick formatted in FAT32 so the Mac can write to it. If you are using a USB bootable installer for Windows 8, it may be formatted in a way that OS X can’t write to.
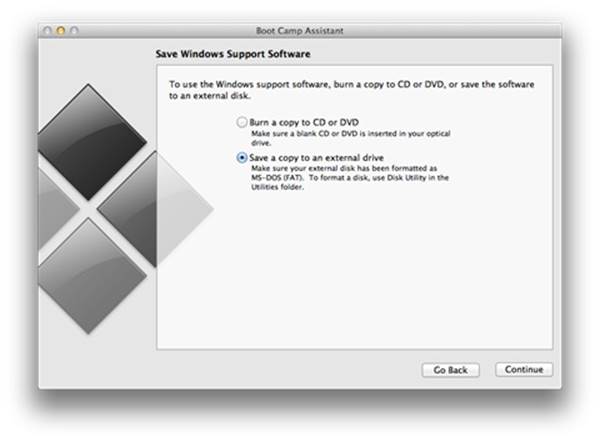
Figure 10-4. Choose a location to save the Windows drivers you’ll need to get everything running once Windows is installed.
Once you have downloaded and saved the drivers, you will need to create a new partition (Figure 10-5).
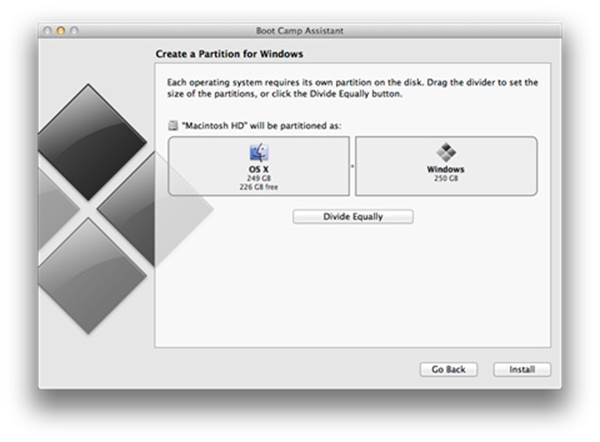
Figure 10-5. Choose the size of your partition.
I usually divide the drive up equally. Depending on what sized drive you have or how much is on it you may not have that luxury. I wouldn’t go below 32 gigs. That is generally the hard drive size of the low-end Windows devices, so it should be a decent enough amount of room to work on a few projects. Once you are happy with your partition, click on the Install button and you will be ready to go through the normal Windows installation process.
NOTE
Important Tip – When installing Windows 8, select the “Custom install” option, then the partition that says BOOTCAMP, and reformat it. You will see that option after clicking the Advanced option. The first time I tried to install Windows 8 on my Mac mini, I reformatted the partition. I got an error that Windows couldn’t install because of a Boot Loader problem. I simply restarted the computer, held down option, which brings up the boot drive selection menu, and picked the USB stick with the installer. Then I went back to the custom installation option and tried again. Everything worked. There are lots of resources online for how to do this, so if you run into a problem, it shouldn’t be too difficult to find a solution.
Once you have Windows 8 installed, you are going to want to install the Mac drivers. Chances are pretty good that you probably don’t have access to WiFi or native resolution. If you remember back to the WindowsSupport folder the BootCamp installer created, you want to make sure that is handy. If you open it up in Windows, you will see all the drivers, a guide, and the setup installer (Figure 10-6).
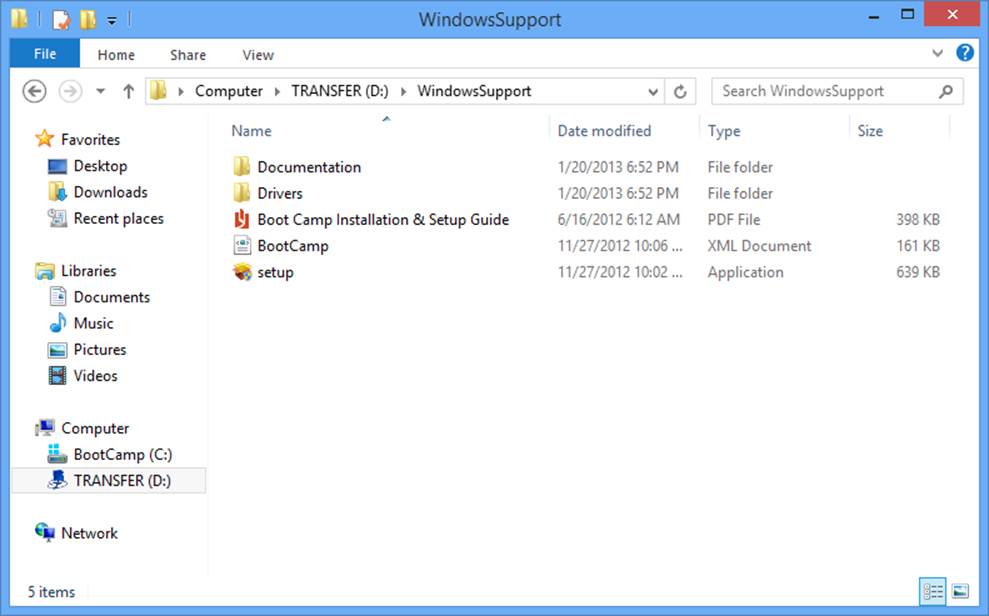
Figure 10-6. The Windows drivers.
Once you run the installer, Boot Camp will walk you through everything you need to get your computer working correctly under Windows 8 (Figure 10-7).
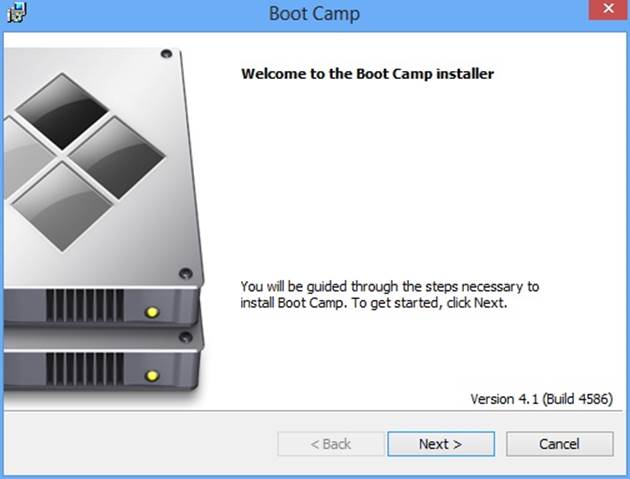
Figure 10-7. Installing the Windows drivers for Boot Camp.
Once everything is done installing, you will be prompted to restart your computer (Figure 10-8).
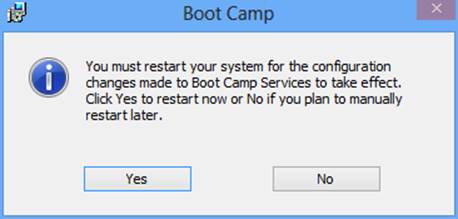
Figure 10-8. Make sure you restart your computer after installing the drivers.
Once everything reloads you should have a fully working Windows 8 install ready to go.
WARNING
You may have noticed that I didn’t really talk about using virtualization. While it is possible to run Windows 8 in a VM on your Mac, you may experience some performance issues that will not offer up a true-to-user experience on the same hardware. I noticed performance problems on my 11″ MacBook Air since it didn’t have a dedicated graphics card. I would only suggest using a VM if you really don’t have a choice and would suggest getting a dedicated testing device for performance validation and debugging.