Releasing HTML5 Games for Windows 8 (2013)
Chapter 9. Case Study: Heroine Dusk
Up until this part of the book we have talked about porting HTML5 games over to Windows 8 in theory, so I thought I would show off how I took an open-source game called Heroine Dusk and got it running on Windows 8 in only a few minutes. Here is how I did it.
About the Game
Heroine Dusk was created by Clint Bellanger. The game is a retro-style dungeon crawler that was designed to work on the Web and on mobile browsers (see Figure 9-1 and Figure 9-2).
Figure 9-1. The Heroine Dusk start screen.
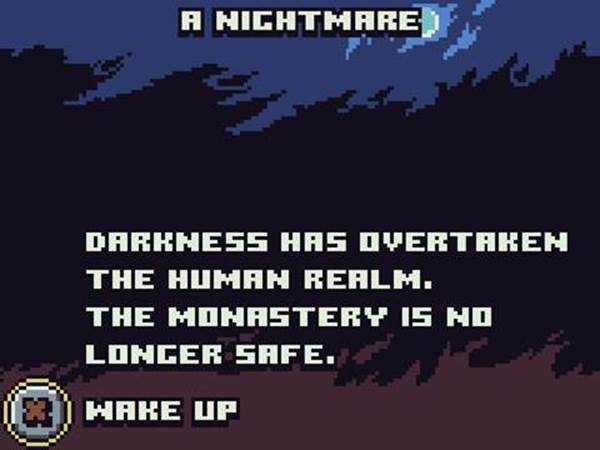
Figure 9-2. Starting a new game in Heroine Dusk.
What makes this game a perfect candidate is that it offers up simple controls that work great with a mouse or on a touchscreen (Figure 9-3).
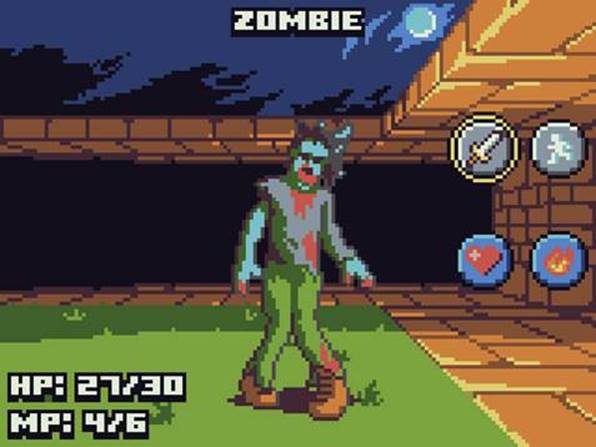
Figure 9-3. Combat is turn based.
Also, the game offers minimal animations but has a uniquely retro-graphic style that is easily identified by anyone who is a fan of this style of game (Figure 9-4).
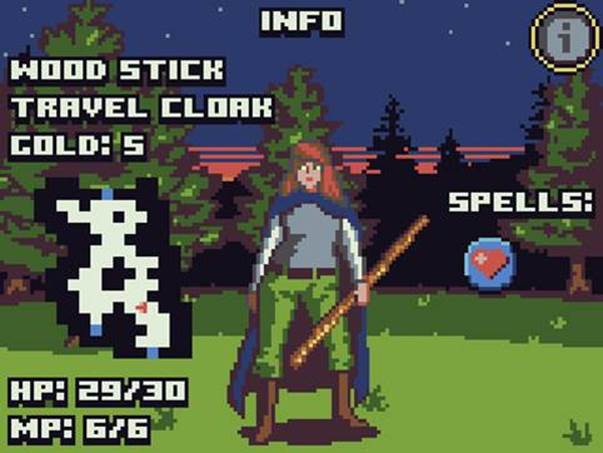
Figure 9-4. When you pause the game you get a world map, stats, and can see your character.
While the core mechanics of the game are easy to pick up, the game offers a good amount of depth and, as you will see in the following tutorial, Heroine Dusk made for a perfect candidate to get up and running on Windows 8.
Getting Started
To get started you are going to want to get a copy of Heroine Dusk’s source code on GitHub.
NOTE
Since Clint will be continuing to work on this game long after this book has been published, I forked his code so you can still follow along with the same codebase I started with. You can get my copy of the game here.
From there, simply open up Visual Studio and create a new Window 8 JavaScript project (Figure 9-5).
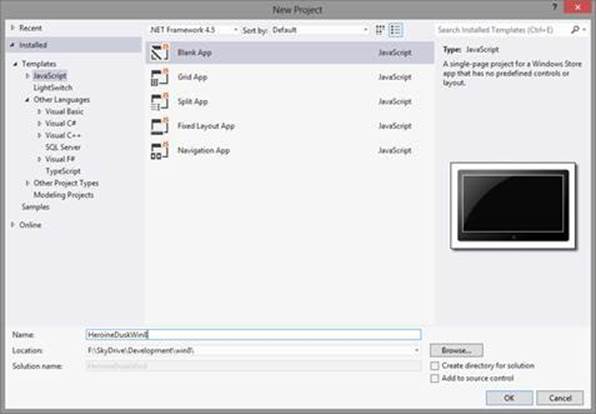
Figure 9-5. Start a new Blank App project in Visual Studio.
Now that we have a Windows 8 project, go to where you downloaded Heroine Dusk’s source code and copy over all the contents of the release folder to your Visual Studio project.
NOTE
Here is a neat trick for bringing existing code into Visual Studio. You can actually just copy files from the explorer and paste them into your Visual Studio solution, which not only copies them over but also includes them for you automatically.
One note, since Heroine Dusk has its own images folder and so does the default Visual Studio project, I simply moved its contents over by hand so I didn’t lose the default images our project needs for a Live Tile, store icon, and splash screen.
In Figure 9-6 you can see I now have all the files needed by the game, including its index.html file. Now you need to open up the package.appxmanifest files and change a few settings which you can see in Figure 9-7.

Figure 9-6. All of the files for Heroine Dusk sit in the root of the project folder once we copy them over.
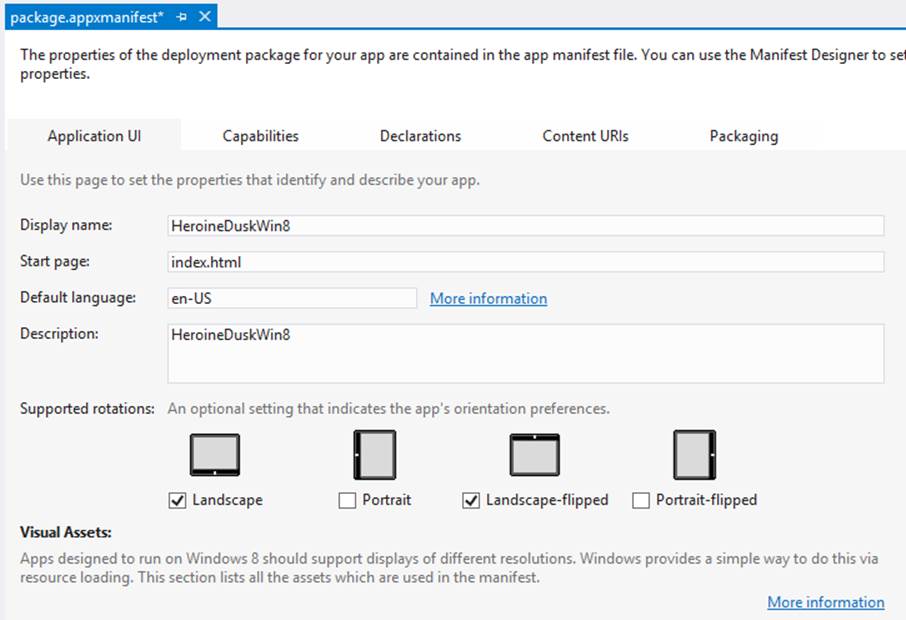
Figure 9-7. In the package.appxmanifest we can change the start page and supported orientations.
All I did here was change the start page to index.html and lock the supported rotations to landscape and landscape-flipped. This is a good technique to simply test that the game will run on Windows 8. When I am done testing this I would eventually integrate the WinJS library back into the game.
Now you are ready to compile the game and give it a try by clicking on the Build button (Figure 9-8).
![]()
Figure 9-8. When you are ready, simply click the run button to test the game out locally.
The game runs great and is already perfectly optimized for touchscreens, so there is nothing else you need to do to support Windows 8 tablets. There is one issue, however, and it’s one I wanted to bring up for people making pixel art games on Windows 8 who want to get crisp-looking graphics when they scale up the canvas.
If you play the game on Windows 8 via the above instructions, you may notice that the graphics are very blurry and don’t look as sharp as what you may see in Chrome or Firefox (Figure 9-9).
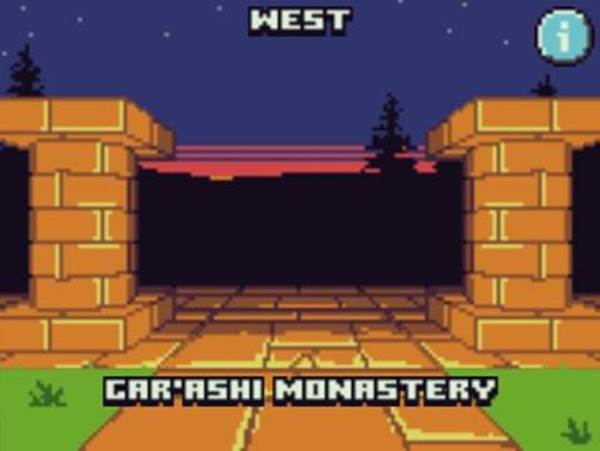
Figure 9-9. As you can see, the game runs great on Windows 8 but has some graphics issues since the artwork is all blurry.
The reason is that Clint is using an experimental feature for forcing nearest neighbor scaling, which is not supported by IE. This could be problematic for HTML5 game developers looking to maintain crisp-looking pixel art across multiple resolutions on Windows 8. For my own games I design for a much higher resolution so when my artwork scales up it doesn’t look as blurry. I’ve been chatting with Clint about it and he ended up generating larger artwork to support Windows 8 and other platforms. While not ideal, it’s something I wanted to highlight for people planning on making HTML5 games for the Windows Store so you can plan accordingly. I suggest supporting artwork that scales up well to 1024×768 at the bare minimum. My own games are designed for 800×480 and I scale up from there. This allows me to target mobile browsers and also still support larger resolutions on Windows 8.
With the new pre-scaled artwork Clint added to the GitHub project I was able to get a much more impressive-looking game to compile (Figure 9-10).
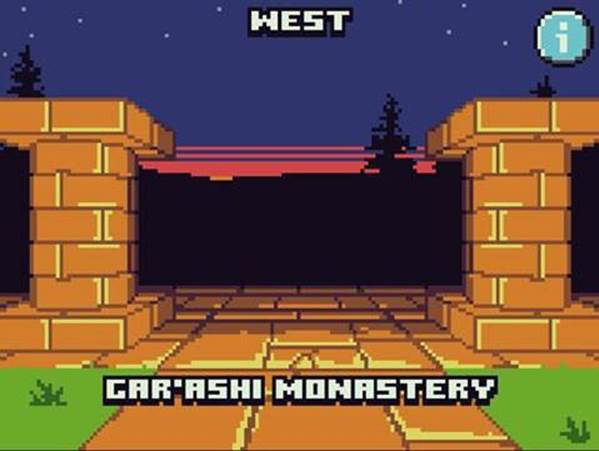
Figure 9-10. After swapping out the artwork the game now looks much clearer.
You will need to go into the pre-scaled folder and copy the desired image’s sizes. For Windows 8, I chose the 960×720 pre-scale six folder, which is close enough to Windows 8’s minimum screen resolution of 1024×768. You will also need to modify the config.js file to reflect the artwork size you are using.
So, this really took a few minutes to get up and running, but I didn’t stop there. I wanted to highlight a few cool things we can do with Node.js and Grunt to allow you to still maintain a Web build of the game and Windows 8 in the same Visual Studio project. I discussed how to set up Node.js in the previous chapter, so now we can cover how to put it to use.
The first thing we are going to do is clean up all of these JS files all over the place. I am a little OCD about my project organization, so let’s put all of the JavaScript files into a folder called src. Normally you would put these into the JS folder, but we are going to use Grunt to actually generate a single JS file for our Windows 8 app to use. Also, move the maze.css file into the css folder. Now you should have a much cleaner-looking project (Figure 9-11).
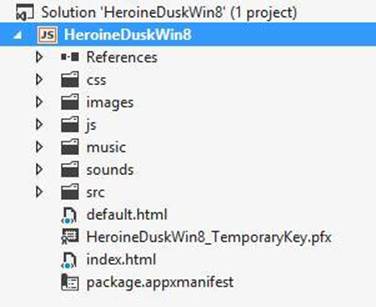
Figure 9-11. Here is what the project structure should look like after we have cleaned up all of the files.
Next we just need to fix a few paths. If you open up the index.html file you will open it up and correct the paths to the css file and all the JS files. We will actually end up replacing all of these JS files with a single minified version once Grunt is up and running, but it’s up to you how your own project could work.
Now let’s open up the command line and create a package.json file via NPM. Simply CD into the project’s directory and run the following command:
> npm init
Go through the wizard (Figure 9-12) and you should end up with something similar to this:
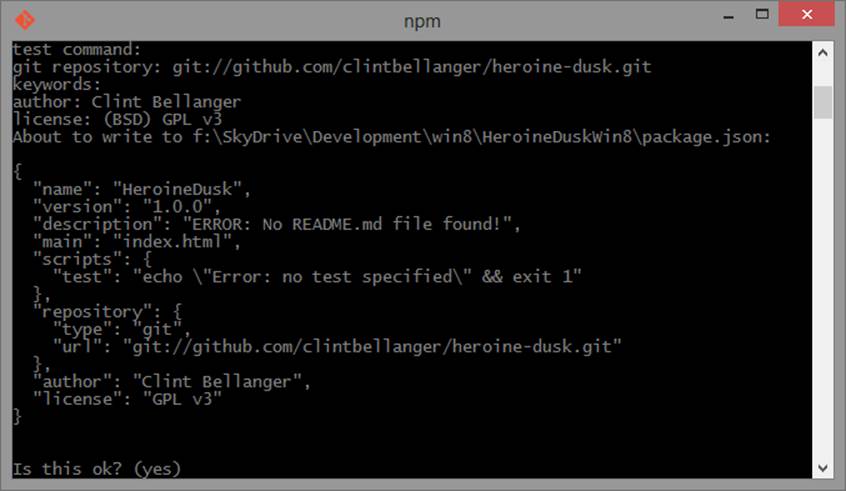
Figure 9-12. We’ll start by setting up a project.json file through npm init.
Don’t forget that you will need to make sure you have Grunt installed. You can read more about it here and, if you don’t have it installed, simply type the following into the command line:
> npm install -g grunt-cli
Now we just want to install a few Grunt tasks.
> npm install grunt-contrib-watch --save-dev
> npm install grunt-contrib-copy --save-dev
> npm install grunt-contrib-concat --save-dev
> npm install grunt-contrib-connect --save-dev
> npm install grunt-open --save-dev
You should end up with a package.json that looks like this:
{
"name": "HeroineDusk",
"version": "1.0.0",
"description": "ERROR: No README.md file found!",
"main": "index.html",
"scripts": {
"test": "echo \"Error: no test specified\" && exit 1"
},
"repository": {
"type": "git",
"url": "git://github.com/clintbellanger/heroine-dusk.git"
},
"author": "Clint Bellanger",
"license": "GPL v3",
"devDependencies": {
"grunt": "~0.4.1",
"grunt-contrib-watch": "~0.4.0",
"grunt-contrib-copy": "~0.4.1",
"grunt-contrib-connect": "~0.3.0",
"grunt-open": "~0.2.0",
"grunt-contrib-concat": "~0.3.0"
}
}
Next I created a custom GruntFile that looks like this:
module.exports = function (grunt) {
grunt.loadNpmTasks('grunt-contrib-watch');
grunt.loadNpmTasks('grunt-contrib-connect');
grunt.loadNpmTasks('grunt-open');
grunt.loadNpmTasks('grunt-contrib-concat');
grunt.loadNpmTasks('grunt-contrib-copy');
grunt.initConfig({
pkg: grunt.file.readJSON('package.json'),
connect: {
server: {
options: {
port: 8080,
base: './deploy/web'
}
}
},
concat: {
dist: {
src: [ "src/config.js",
"src/utils.js",
"src/input.js",
"src/bitfont.js",
"src/sounds.js",
"src/enemy.js",
"src/tileset.js",
"src/atlas.js",
"src/mazemap.js",
"src/avatar.js",
"src/action.js",
"src/power.js",
"src/combat.js",
"src/minimap.js",
"src/info.js",
"src/mapscript.js",
"src/explore.js",
"src/shop.js",
"src/dialog.js",
"src/boss.js",
"src/title.js",
"src/gamestate.js",
"src/main.js"],
dest: 'js/<%= pkg.name %>.min.js'
}
},
copy: {
main: {
files: [
{src: ['index.html'], dest: 'deploy/web/', filter: 'isFile'},
{ src: ['css/**', 'images/**', 'js/**'], dest: 'deploy/web/' }
]
}
},
watch: {
files: 'src/**/*.js',
tasks: ['concat', 'copy']
},
open: {
dev: {
path: 'http://localhost:8080/index.html'
}
}
});
grunt.registerTask('default', ['concat', 'copy', 'connect', 'open', 'watch']);
}
Basically this just creates a watch target for any changes to JavaScript files in the src folder. Once a file has been changed, I concatenate everything into a single JavaScript file then copy the images, js music, sound, and index.html files over to a deploy/Web folder. Finally, I start a server to host the contents of the Web folder by opening the index.html.
NOTE
You may have noticed that I manually list each of the JavaScript files in the game to be minified. That is because Heroine Dusk required each file to be loaded in a particular order for the game to work. You may have to do the same for you own games if you have similar requirements.
This workflow allows me to continue to edit the code for the game, maintain my Windows 8 build, and test it out in the browser at the same time. This means I can continue to maintain a Windows Store build of the game and Web version without doing anything extra outside of continuing to edit the game’s code. The other thing to keep in mind is that you’ll notice I am using Grunt’s concat task over uglify. This helps for debugging since you can still read the code if there is an error. If you try debugging uglified code you will not be very happy, but you still run that after everything is said and done if you want even more minification on the file.
Don’t forget to include the HeroineDusk.min.js file that gets generated into our js directory. You will need this in order to build for Windows 8. Also, your index.html should include this file, and you can remove the links to each of the individual files. Outside of that everything else should work perfectly. The only thing missing from this game is artwork for a Live Tile, store logo, and splash screen, which are automatically generated for you by Visual Studio when you make the project. And, of course, you would need to support snap view, which is easily done through CSS.
As you can see, it didn’t take much to get this game up and running on Windows 8. I was able to apply my own workflow to an existing HTML5 game and get it to seamlessly run inside of Visual Studio with builds for the Web and Windows 8. I can’t stress enough how easy it is to port existing HTML5 games to Windows 8, submit them to the Windows Store, and monetize them. I also wanted to thank Clint Bellanger for making his game open source and allowing me the opportunity to talk about porting it over to Windows 8 in this book. Hopefully this helps you better understand the process outlined in each of the chapters leading up to this case study.