Releasing HTML5 Games for Windows 8 (2013)
Chapter 8. Back to the Web
In this chapter we will discuss techniques for making sure your HTML5 game will still run on the Web as well as Windows 8. After spending all of this time getting your game to run on Windows 8, it’s important to make sure you can also get the most out of your hard work and take advantage of the ability to run HTML5 games on multiple platforms.
A Web-First Workflow
Throughout this book we focused solely on getting an exciting HTML5 game to run on Windows 8 inside of Visual Studio. While this is a great approach if you want to focus solely on Windows 8, you may want to have the same codebase run on the Web, Windows 8, and other platforms that support HTML5 games. For this, I tend to use what I call a “web-first workflow.” The basic idea is that we continue to develop the game in Visual Studio, or your Web editor of choice, but do all of our testing and debugging in the Web browser while continually testing the game out on Windows 8. It’s actually very easy to set up, and you may find it to be similar to the way you already work.
Setting Up a Local Web Server
Chances are good that you are already working with some kind of local Web server for testing your own HTML5 game. I tend to use Apache since it’s widely used at this point and there are several stable builds you can easily run on Windows 8. Some of the techniques I will describe will also work for other servers, so don’t worry if Apache isn’t your cup of tea. If you are interested in using Apache, you can use a copy of WAMP (Windows, Apache, MySQL, PHP), which you can get here. It’s a one-click Apache solution similar to XAMP, another one-click Apache install solution, if you have used that in the past. Setting it up is easy; I’ll quickly walk you through the process.
Simply download the installer and run through the setup wizard (Figure 8-1). It’s going to install to the root of your C: drive.
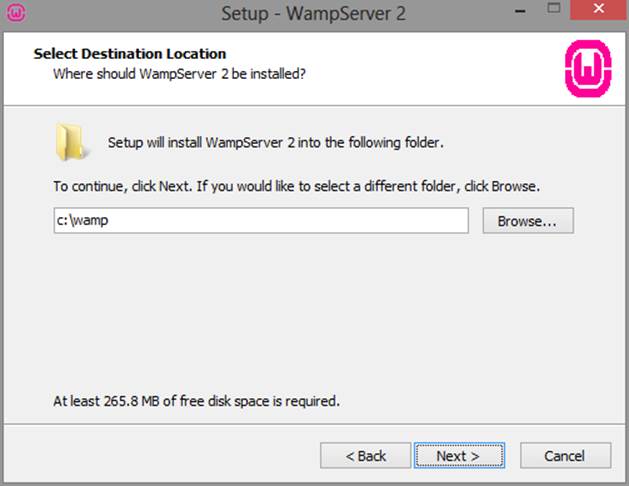
Figure 8-1. By default, WAMP will install to the root of the C: drive.
Once you have WAMP up and running, we are going to want to point the DocumentRoot to where you do your development. On my computer I have a directory called “Development,” which I keep inside of my SkyDrive folder (Figure 8-2). Inside of my Development directory I have each platform I work on broken out into its own folders as well. Figure 8-2 is a screenshot of how I have my workspace set up.
The reason I have all my development files organized like this is so that I can set the root of Apache to my Development directory. This way I can run Apache on any project I am working on. Figure 8-3 shows how I set that up by modifying the apache config file.
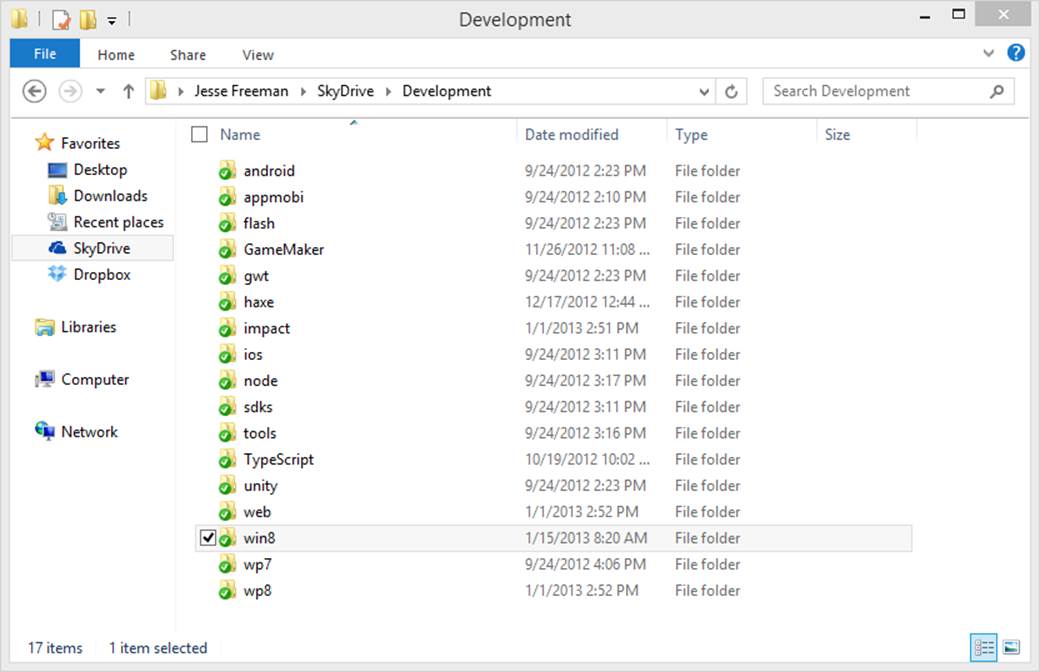
Figure 8-2. My Development directory inside of SkyDrive.
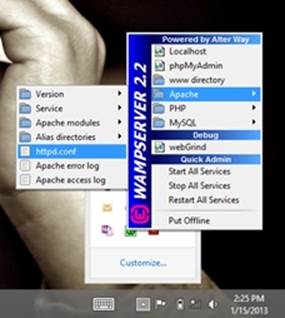
Figure 8-3. You can access the httpd.conf file from the try icon and navigating to the Apache tab.
In the WAMPServer icon in the Windows tray, go to the Apache section and select httpd.conf. This will open Apache’s config file in Notepad. You can do the same thing in XAMP as well.
Once we have the file open we are going to want to make a few modifications. The first is to change the port number. I do this in order to avoid any conflicts if you are running other servers like Node.js or Ruby. I use port 8888, but you can set it up to something else. Search for:
Listen 80
in the .conf file and change it to:
Listen 8888
Next, we are going to search for:
DocumentRoot "c:/wamp/www/"
This is WAMP’s default setup. Change it to the path where you plan on doing your own development. On my computer it is going to be:
DocumentRoot "C:\Users\Jesse\SkyDrive\Development"
Now we need to make one more modification. Search for:
<Directory "c:/wamp/www/">
Change it to your development path just like we did before. Here is how it looks for my computer:
<Directory "C:\Users\Jesse\SkyDrive\Development">
After you have made these changes we will need to restart Apache (Figure 8-4).
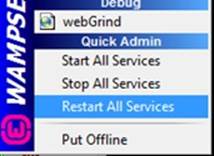
Figure 8-4. Restart Apache from the WAMP menu.
Now if you open your browser and navigate to your localhost you will see all of your projects. As you can see in Figure 8-5, I have navigated to my Win8 project folder in SkyDrive through the browser.
This will be especially helpful when you want to work on your game for the Web and also test it out on Windows 8.
NOTE
It is important to note that in Windows 8.1 SkyDrive has been integrated into the system and is not its own separate syncing app. During the writing of this book I only had access to the preview copy of Windows 8.1 and found some issues with this approach since SkyDrive now allows you to have all of your files visible locally but stay online unless you explicitly tell their parent directory to sync offline. Just keep this in mind and if you run into issues consider using another cloud syncing service or put all of your code in your documents folder.

Figure 8-5. Here are all of my Windows 8 projects now loading up through Apache.
Using Node.js
Another great alternative to Apache is Node.js. It offers a lot of advanatges, such as being able to run a Web server from any directory on the fly and being able to automate your project’s workflow. Let’s take a look at how to quickly set up a local server with Node.js.
Simply visit http://nodejs.org and download a copy of the installer for Windows (Figure 8-6).
Figure 8-6. The Node.js installer.
Once you install Node.js you will be able to start setting up a simple project workflow. There are a few automation tools out there, but I ended up settling on one called Grunt, which you can learn more about at http://gruntjs.com. Grunt is basically the Node.js equivalent of Ant and for the most part is actually better in many ways since you can use your existing JavaScript skills to write automated tasks and when used with NodeJS you can automate and serve your entire project from the same folder.. Another important reason to use Node.js is so we can create a constant working environment for our project. While you can easily just run a server from the command line, Grunt will allow us to do some powerful workflow automation tasks, which I will talk about in the next chapter. In order to install Grunt or any other Node.js modules, you need to do a few things on the command line, so open that up.
To install Node.js modules we will be using a utility that comes with the Node.js install called NPM. This command line-based app will go out and fetch modules for you and install them globally or in your project. To get started, simply type the following to make sure NPM is correctly installed:
> npm
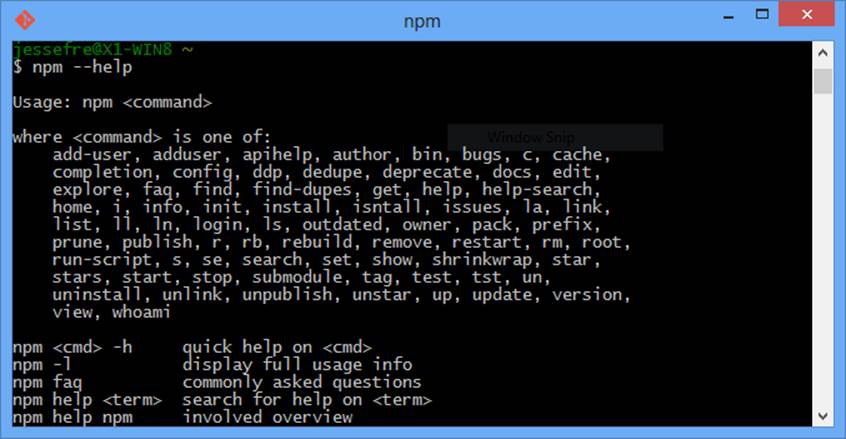
Figure 8-7. Running NPM from the command line will pull up help.
This will run you through all the commands you can use with NPM (Figure 8-7). Now that we see that NPM is working, I’m just going to go over a few of the basic setup commands I used for my own projects.
NOTE
On a side note, if you are on Windows and have GitBash installed you can use that instead of the command prompt. This is incredibly helpful for people like me who come from a Unix background so you can still continue to use all the commands you are used to.
So, once you are in a project, you are going to want to set up a file to keep track of all the modules your project needs. To do this just CD into your project’s directory and type the following:
> npm init
This will start a wizard to create a configuration file to store all of your modules. Simply walk through the setup questions (Figure 8-8).
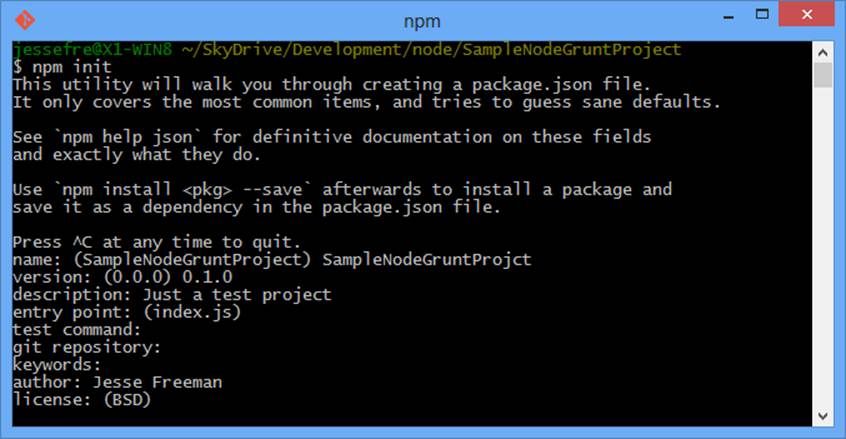
Figure 8-8. The NPM init wizard will walk you through creating a project.json file.
When you are done, you will be asked to save everything as shown in Figure 8-9.
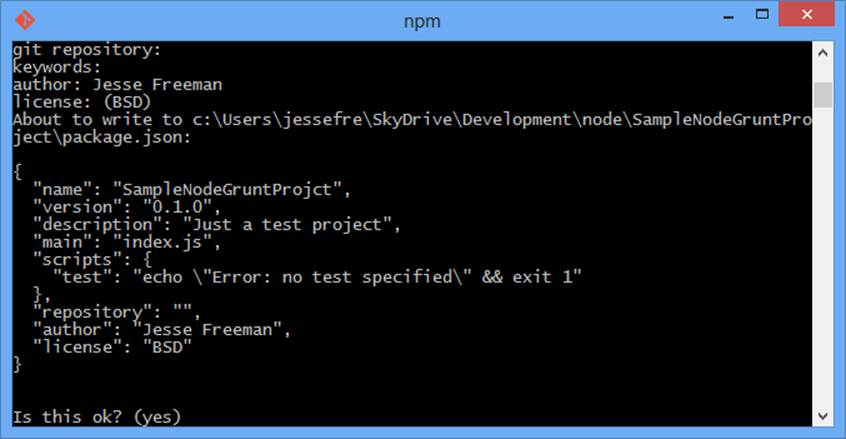
Figure 8-9. Once you fill in all the data you can save out the project.json file.
Now you should have a file named package.json. Next, we are going to want to add some modules to your project. Go back to the command line and type in the following:
> npm install -g grunt-cli
This command will install Grunt’s command line tools. From there you can install Grunt into your project.
> npm install grunt -save-dev
This will update our package.json with information on the module we just installed. This is critical for sharing your build with others so they can clearly see the dependencies your project may have. If you open up your package.json file you will now see a new object at the end called devDependencies.
"devDependencies": {
"grunt": "~0.4.1"
}
Now you will have everything you need to run Grunt; we just need to install two simple tasks to allow us to run a server in our project.
>npm install grunt-contrib-connect -save-dev
The last thing we will need is a way to open up a URL.
>npm install grunt-open -save-dev
By now your devDependencies should look something like this:
"devDependencies": {
"grunt": "~0.4.1",
"grunt-contrib-connect": "~0.2.0",
"grunt-open": "~0.2.0"
}
From here we will need to set up a GruntFile. Think of this as our Ant build.xml. Create a new GruntFile.js in your project and add the following to it:
module.exports = function (grunt) {
grunt.loadNpmTasks('grunt-contrib-connect');
grunt.loadNpmTasks('grunt-open');
grunt.initConfig({
pkg: grunt.file.readJSON('package.json'),
connect: {
server: {
options: {
port: 8080,
base: './'
}
}
},
open: {
dev: {
path: 'http://localhost:8080/index.html'
}
}
});
grunt.registerTask('default', ['connect', 'open']);
}
So, with this file you should be able to CD into your directory where the GruntFile.js is and run it. Let’s go through how the file works before we run it.
To start off, we need to import the modules we need, so you will see the following:
grunt.loadNpmTasks('grunt-contrib-connect');
grunt.loadNpmTasks('grunt-open');
Here we are simply importing the Grunt tasks for connect and open. After this we need to configure each command. Our first one sets up the server.
connect: {
server: {
options: {
port: 8080,
base: './'
}
}
}
The name of the object, “connect,” is how we will reference this task later on when we run it. Each task takes a set of options; in this case we are configuring a server with port 8080 and a base directory to serve as the root of the project. Now all we need is to set up a simple open task.
open: {
dev: {
path: 'http://localhost:8080/index.html'
}
}
This will allow us to open up our computer’s default browser and point it to our localhost.
The last thing we need to do is create some tasks to run this. In order to do this we simply register a task with Grunt.
grunt.registerTask('default', ['connect', 'open']);
Now that we have gone over how the task works you simply CD into the directory with the GruntFile.js and call grunt.
> grunt
With everything properly configured to your own project structure, you should see your browser open up when you run the Grunt build. Now you can continue to do your testing in your browser with Node.js running and make changes to your code in Visual Studio.
Project Structure
We have already gone over how a Windows 8 HTML5 project is structured in Visual Studio, so hopefully this will look familiar to you. You may recall that VS creates a default.html file to host your project. This will actually work to our advantage since you are probably used to using an index.html file to run your game from. The good news is that we can keep both in our project and they will not affect each other. When we want to deploy our game to the Web, we will use the index.html file and VS already should be set up to run the default.html file for our project.
Another great thing about this approach is that we can add Windows 8-specific JavaScript files to the default.html file and ignore them in our Web-based version, which loads up from the index.html file. This allows you to also build logic into your game’s core that knows when to load up the Windows 8-specific code or ignore it if it is running on the Web. Here is an easy way to test for that in your code:
if (typeof(WinJS) == 'undefined')
// Execute code for none win8 playback
As you can see, if we don’t have a reference to WinJS we can assume the game isn’t running on Windows 8.
Modifiying the Default JavaScript File
A new Windows 8 HTML5 project in Visual Studio makes use of a default.js file. This contains the boilerplate application lifecycle support; see Chapter 2 for more information on this and on how it works. Ideally, you want your game to start up when the WinJS app calls onActivated(). This works fine in Windows 8 but will fail on the Web since it is only loaded when your project is running inside of Windows 8. You may have something that looks like this from earlier:
(function () {
"use strict";
WinJS.Binding.optimizeBindingReferences = true;
var app = WinJS.Application;
var activation = Windows.ApplicationModel.Activation;
app.onactivated = function (args) {
if (args.detail.kind === activation.ActivationKind.launch) {
if (args.detail.previousExecutionState !== activation.ApplicationExecutionState.terminated) {
// Code to run your game for the first time
} else {
// Code to run when your game returns from suspension
}
args.setPromise(WinJS.UI.processAll());
}
};
. . .
app.start();
})();
Here you can see we have two places to trigger our game. So I wrap the constructor of my games in a startNewGame() function so I can easily call this when the page is ready to load the game. So I would add a call to startNewGame() in my app.onactivated callback when the game loads for the first time. This covers the Windows 8 playback. In the game’s main JavaScript file I would have something like:
if (typeof(WinJS) == 'undefined') {
startNewGame(800, 480);
}
Here you can see I test if WinJS exists before trying to start my game. If WinJS doesn’t exist, which would happen in a Web build of the game, it will automatically start the game.
I also maintain two separate HTML files for my game. One is the default.html that comes with the Visual Studio project; the second is an index.html file that will be used to deploy to a server. The index.html file doesn’t have any reference to WinJS, so it works perfectly without any ties to the Windows 8 environment.
There is a lot you can do with this multi-page setup, especially if you plan on deploying your game to other platforms that require their own JS libraries, such as PhoneGap or AppMobi. It also works great for wrapping up a Windows 8 HTML5 game into a Windows Phone app using a browser control.
Tips and Tricks
While we covered a lot in the chapter about supporting dual Web and Windows 8 development, I thought I would highlight a few other tips I found out by using these workflows myself.
Modularize Your Code
While it’s easy to test if WinJS exists when your game starts up, you may want to avoid adding in lots of branching logic for each platform. This could easily get out of control if you start to support other platforms like PhoneGap for mobile distribution or online game portals. Try to keep each platform’s code in its own module, plugin, or JavaScript file, which you can load based on what platform the game is running on.
Test Regularly
The one thing that can happen is that you tend to ignore doing a Windows 8 build. One of the greatest advantages of JavaScript is the fact that you don’t have to compile it. For the most part, this workflow is designed to keep your productivity high by being able to simply hit refresh in the browser without needing to compile. Theoretically, whatever you can get to run on the Web should run fine on Windows 8, but make sure you do regular builds just to make sure.
Use Automation
With either an Apache setup or a Node.js one, you can easily set up automation scripts to maintain a Windows 8 and Web build of your game. For Apache setups I rely on Ant, and for Node.js I use Grunt. In Chapter 9 I will go over an automation solution I used for a simple HTML5 game that I got running on Windows 8.