Custom SharePoint Solutions with HTML and JavaScript: For SharePoint 2013 and SharePoint Online (2015)
4. Building Custom Web Parts Using HTML and JavaScript
Brandon Atkinson1
(1)
VA, US
The Content Editor Web Part combined with the Script Editor Web Part allows you to quickly build solutions in your environment. While this combination certainly gives you options for developing a solution, it’s not an easily scalable or reusable solution. You may find it suits your needs for single-page solutions that are simple, but once your needs become more complex, you’ll find that solution limiting in many ways. Luckily, what you learned in the previous chapter can be expanded into more robust solutions.
In this chapter you’ll learn how to build robust, reusable web parts using the Etherson method. This method still works with HTML and JavaScript, expanding on the lessons from the previous chapter. You’ll see how to better structure your code and how this method will allow you to tackle just about any custom solution you can think of.
The Etherson Method
Over the past several years I’ve been fortunate enough to work as a consultant on many exciting SharePoint projects. In addition, I’ve been able to work with some of the most talented people—who push me every day. One of these people is Mike Etherigde. Mike and I worked on a SharePoint 2010 public-facing web site that needed to be responsive for mobile devices. It also needed to connect to external databases that were not integrated into SharePoint. Mike’s solution was to build custom WCF web services that could be called via JavaScript. These services were then deployed to the server along with custom HTML and JavaScript. The HTML was consumed via an XML Viewer Web Part that was placed on each page.
This solution worked great. It was easy to develop with and fast to deploy. It allowed us to easily bring data together on the server and return it to our pages, and the HTML could be easily served from the SharePoint server. This worked great in SharePoint 2010 and would work great in SharePoint 2013, but not SharePoint Online because no server-side code can be deployed there. Luckily, since Microsoft expanded the JavaScript Object Model and REST API, the solution could be tweaked to allow for a full development life cycle outside the server—and the Etherson method was born.
The Etherson method is made up of the following components:
· Document library
· Folders
· Content Editor Web Part
· HTML, JavaScript, and CSS
As you can see, this solution only requires a few components to make a big impact. At first glance, you may be thinking how could you possibly build robust solutions with such a simple set of items? The real power of this method lies in its simplicity and the power of the JavaScript Object Model and REST API. Let’s take a look at each component in detail.
Document Library
At the heart of this method is a document library. The library will act as the main repository for all code used in your custom web parts. All code will be stored in this library, with a folder for each web part. You can use multiple libraries if that suits your needs. For instance, you could have a library at the root of your site collection that is used for all your subsites. You can go more granular and put a library in each subsite that is only used for that site. You can be quite flexible in how you structure this, as it’s simply a place to put your code.
Setting up the library will require the following steps:
1.
Create a new document library.
2.
Turn off search indexing.
3.
Turn on versioning.
4.
Place unique permissions on the library.
First, we’ll simply create an out-of-the-box document library and call it Webparts, as shown in Figure 4-1.
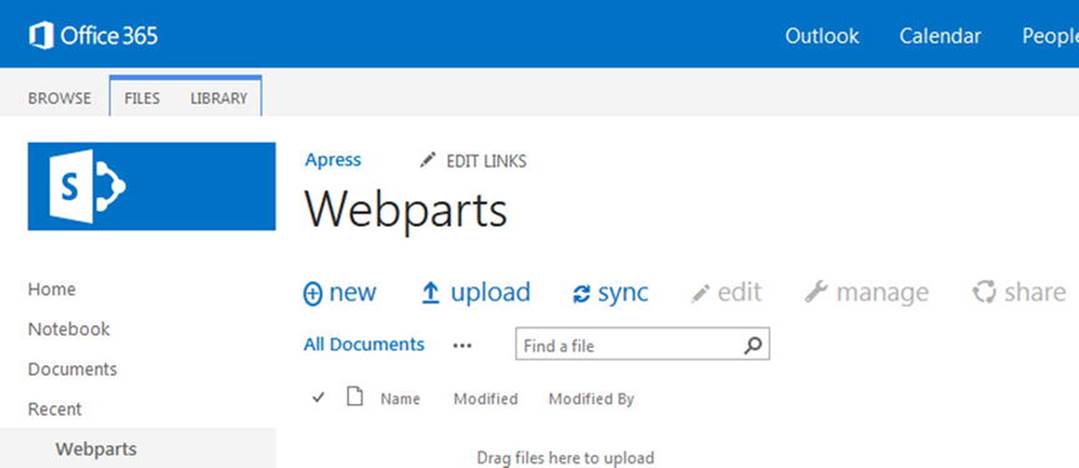
Figure 4-1.
A new out-of-the-box document library for our code
Nothing fancy about this: we simply add it via the Settings menu using the Add an App option and choose Document Library. Next, we’ll ensure that the search engine does not index this library. The reason for this is that the library will be used to store code. The average user has no need to see this code because it’s used to render custom web parts; thus, having it show up in search results will muddy up the user’s search experience. Turning off search indexing will ensure that the code files stay out of search results. Access the Library Settings from the Ribbon and choose Advanced Settings, as shown in Figure 4-2.
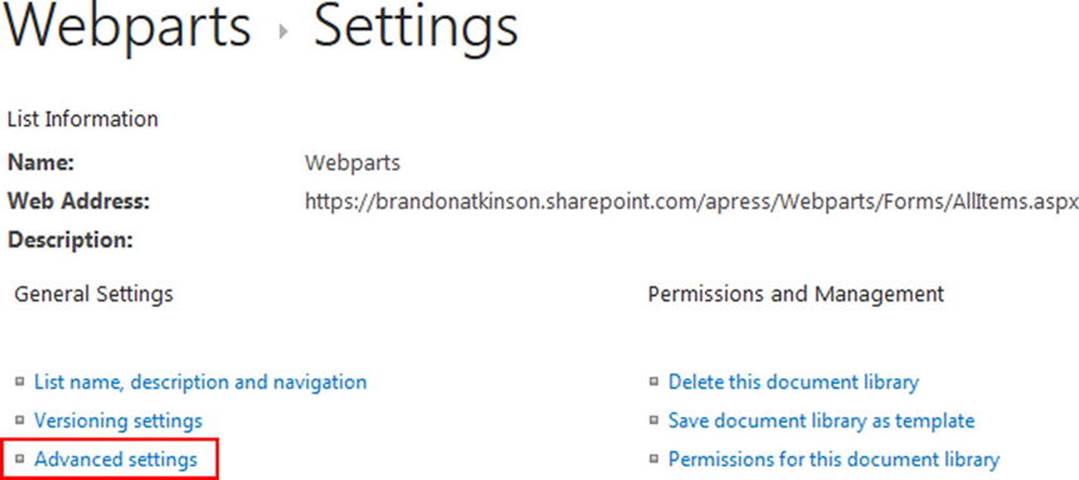
Figure 4-2.
Accessing the Advanced Settings page in the Library Settings
On the Advanced Settings page, you’ll find many options for the document library. Look about halfway down the page for the Search heading. There are only two options: allow items to appear in the search results or not. Click No, as shown in Figure 4-3.
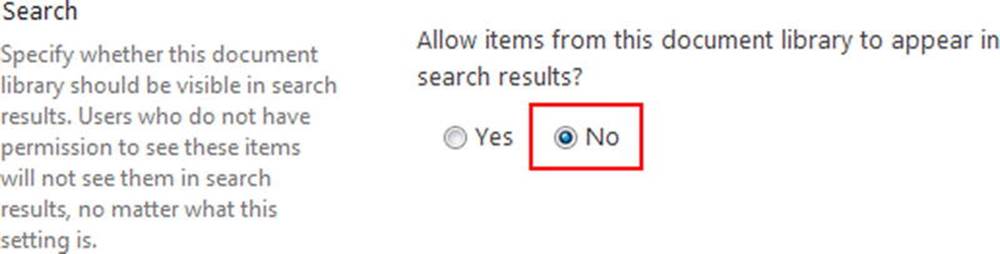
Figure 4-3.
Turning off the search indexing for the document library
Scroll to the bottom of the page and click OK to save your changes. You will be brought back to the Settings page, where you can move on to versioning. Versioning is important because it allows for easily rolling back code. This provides you some peace of mind if you need to implement changes to existing code. For instance, imagine you have developed a solution that meets the current business needs and everything is working fine. You are asked to make a big change and develop new code to meet the requirements. You test your code and everything looks great. You upload the changes—and the users immediately start to complain that something is wrong! You forgot to test in different browsers and your code is breaking for everyone using Chrome.
If you have versioning turned on, you can simply go to the document library and restore the previous code files. Just like that, users are presented with the previous code and at least everything is working again. As you can see, having the ability to quickly and easily roll back code changes will prove very helpful at some point in your development journey.
To turn on versioning, click the Versioning Settings link, as shown in Figure 4-4.
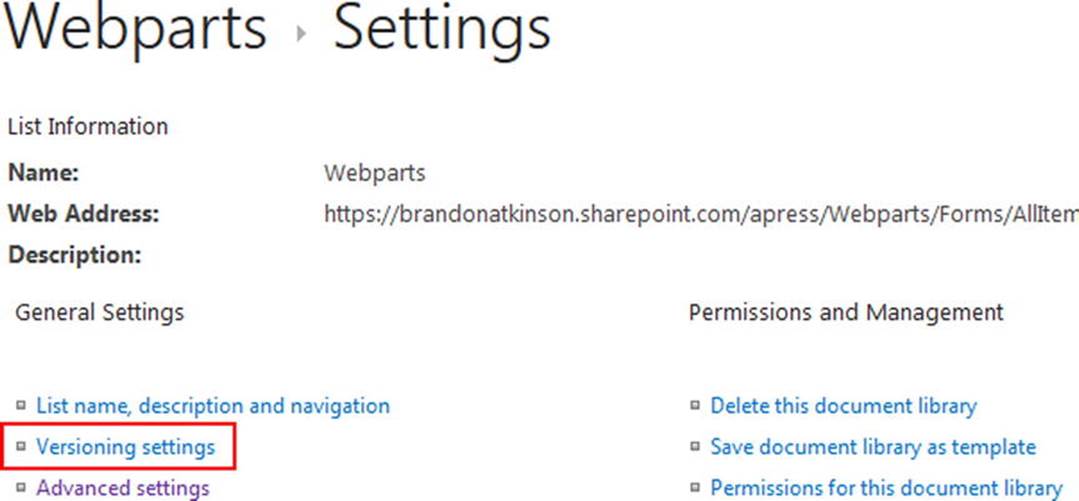
Figure 4-4.
Accessing the Versioning Settings for the document library
Once on the Versioning Settings page, click the Create Major Versions option under the Document Version History heading, as shown in Figure 4-5. You could also create major and minor versions; however, for this book we’ll keep it simple and just use major versions.
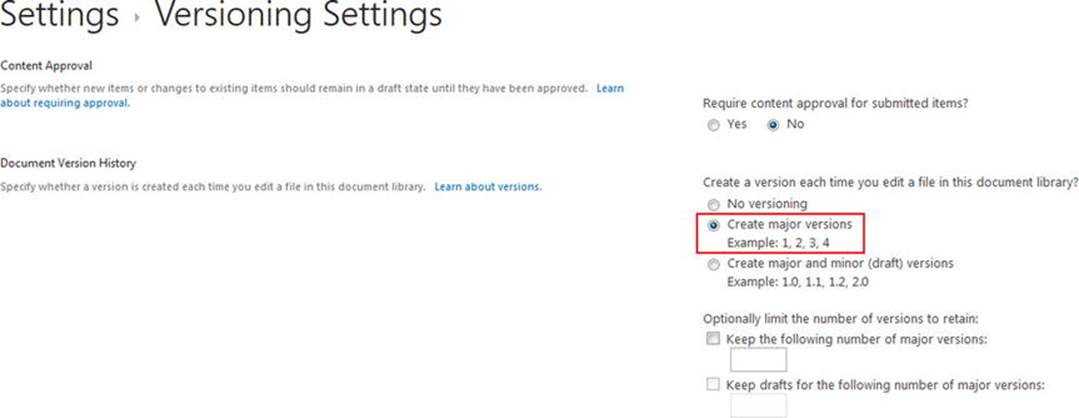
Figure 4-5.
Turning on Create Major Versions in the document library
Scroll to the bottom of the page and click OK to save the changes. You will be brought back to the Settings page, where you can move on to permissions.
Note
Depending on the type of site you have created, you may find that versioning is already turned on. For instance, a publishing portal or a team site with the Publishing infrastructure turned on will already have versioning on. In either case, open the versioning settings page to ensure that it is turned on.
Finally, you must secure the document library by applying unique permissions. We want to secure this library to control who can add or modify the code that has been placed into it. Users will need to have read access so that the code can be loaded into the web parts; but you only want developers to have contribute access. This is crucial, because you only want a small set of people with access to upload code and potentially delete code. To modify permissions, click the “Permissions for this document library” link, as shown in Figure 4-6.
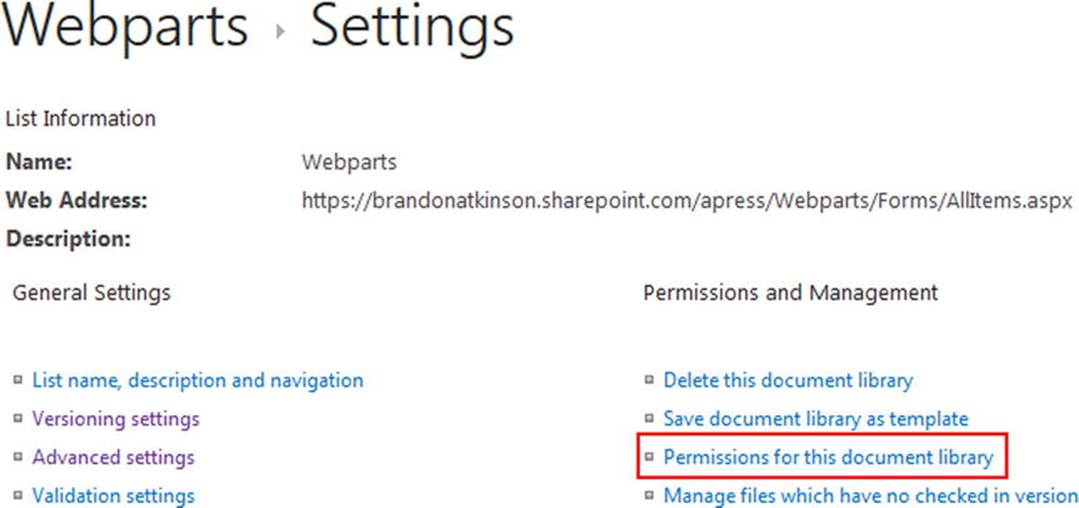
Figure 4-6.
Accessing the permissions settings for the document library
Clicking this link brings you to the permissions page for the document library. To apply unique permissions, click the Stop Inheriting Permissions button in the Ribbon, as shown in Figure 4-7.
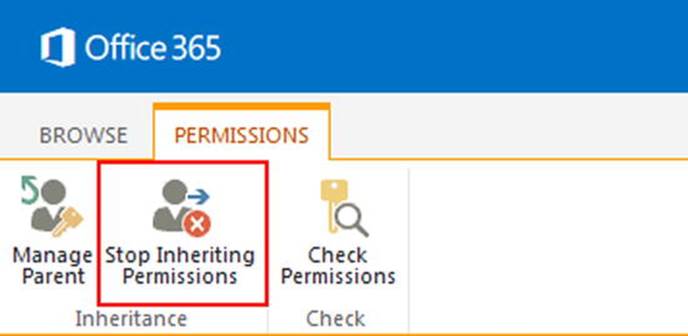
Figure 4-7.
The Permissions tab in the Ribbon for the document library
Normally, all items in SharePoint inherit the permissions of its parent. When you create this new document library, by default it has the permissions of the site where it is located. If you choose to stop inheriting permissions, SharePoint really wants to make sure that this is your intention and prompts you with a confirmation dialog, as shown in Figure 4-8.

Figure 4-8.
Confirmation dialog when breaking permissions
Click OK to confirm the change and you’ll be brought back to the permissions page. You’ll notice the Ribbon now has some additional options, most notably the Grant Permissions button, as shown in Figure 4-9. You’ll use the Grant Permissions option to add permissions back in.
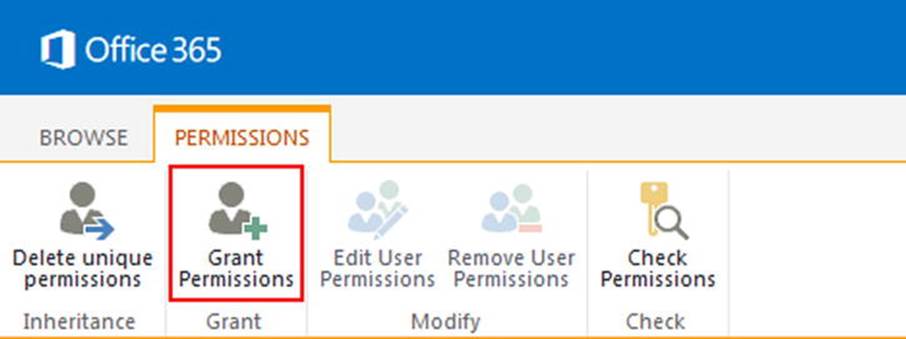
Figure 4-9.
Grant permissions using the Grant Permissions button in the Ribbon
Note
Once you stop inheriting permissions, you should remove all the users and groups currently in the list. Even though you’ve broken permissions, the previous users and groups will remain unless manually removed.
Clicking the Grant Permissions button launches the Share dialog, where you can choose who you want to grant permissions to, as shown in Figure 4-10. The first text box in the dialog allows you to specify which users or groups you would like to have access to the library. In this step, you want to grant everyone read access. As you type into the text box, SharePoint provides an autocomplete list of people and groups to choose from. Type Everyone and then choose it from the suggested list.
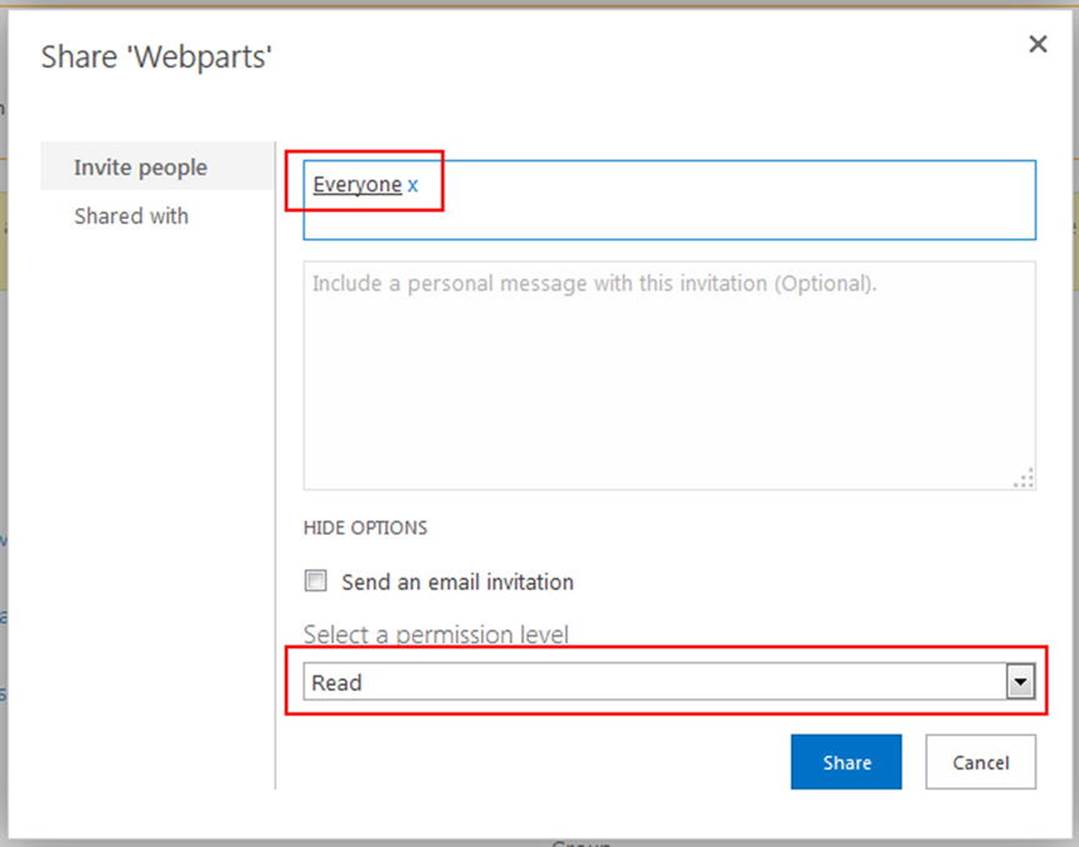
Figure 4-10.
Granting Read access to all users
You can click the Show Options link to expand the dialog and see the additional options available to you. You may want to uncheck the Send an Email Invitation option, especially when adding large groups. In this case, it would send an email to everyone who has access to SharePoint, which is probably not a good idea. Another option is the Select Permission Level drop-down; choose Read since we want everyone to have that particular level of access.
Click the Share button to save the custom permissions. At this point, all users now have Read access to the library. Repeat these same steps for any developers and give them the permission level of Contribute. This way, those users can upload new code and modify existing code in the library.
Note
If you are using a development environment or a site that is only accessed by a few people, you can skip applying unique permissions. This is crucial in a QA or production environment, but a development environment can be less stringent here.
Now that the document library has been created and configured, we can move on to the other components, like folders. Outside of writing code for your solutions, setting up the document library is the biggest task using the Etherson method. The remaining components will seem simple in comparison.
Folders
Using this method, each custom web part has a folder that contains all the files needed for that web part. You can also have a centralized folder that contains scripts that are shared across all web parts. For instance, if you wanted to store a copy of jQuery in a folder, you could avoid adding it in via the MasterPage and just have each web part reference it from the central folder. You may also have some utility scripts that perform common functions for multiple web parts. No matter the need, a central folder may come in handy.
Navigate to the Webparts document library that you created in the previous section. Using the New command in the menu, choose New Folder from the context menu, as shown in Figure 4-11.
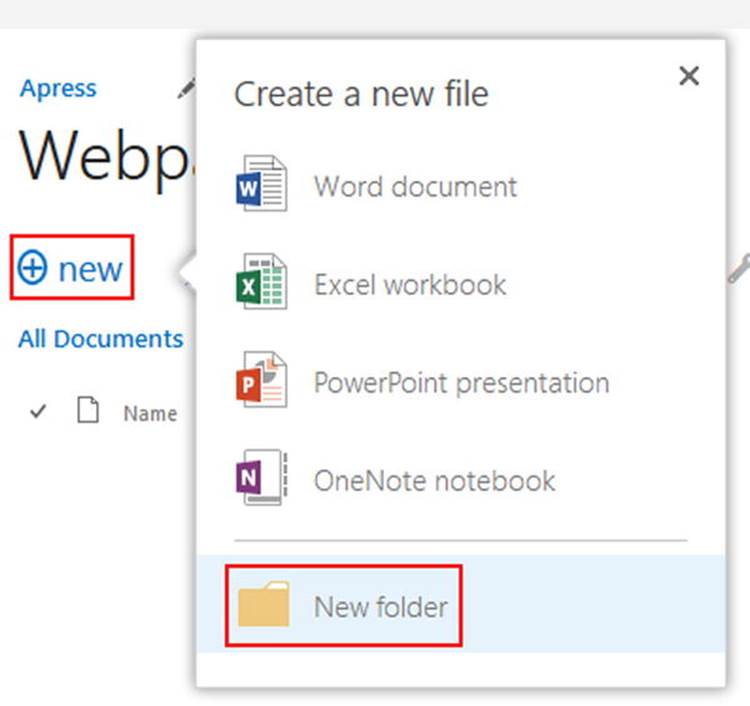
Figure 4-11.
Creating a new folder
Create a new folder and name it Simple Example. We’ll use this folder to host the HTML and JavaScript for our first example. At this point, you should have a single folder in the Webparts document library. You’ll add more folders as you progress through this book; but for now, it’s a good start.
HTML, JavaScript, and CSS
Now that we have a document library and a folder to host our code, let’s put together an HTML file and JavaScript file. For this section, we’ll use Visual Studio to write our code and to build our HTML and JavaScript files. If you installed Visual Studio Express in the first chapter, you’re all set. You can use any code editor you like—even Notepad! Launch Visual Studio and create a new file by clicking File ➤ New ➤ File, as shown in Figure 4-12.
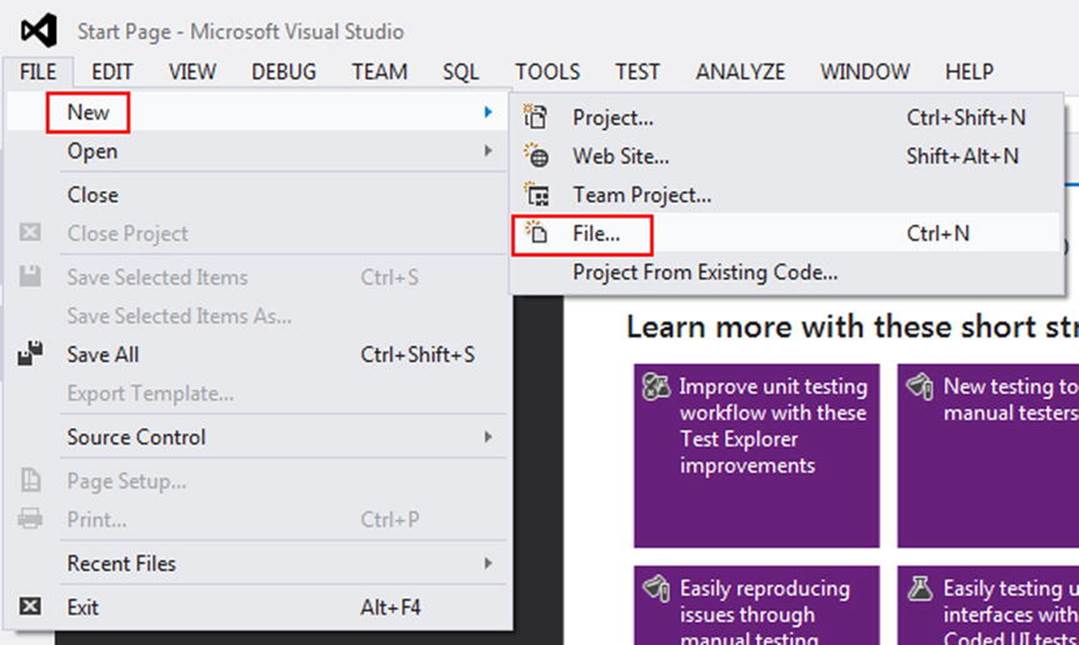
Figure 4-12.
Creating a new file in Visual Studio
This will open a new dialog screen where you can choose the kind of file you want to create. There are a lot of options here, but the one we’re looking for is right up front. Click HTML Page from the list, and then click Open, as shown in Figure 4-13.
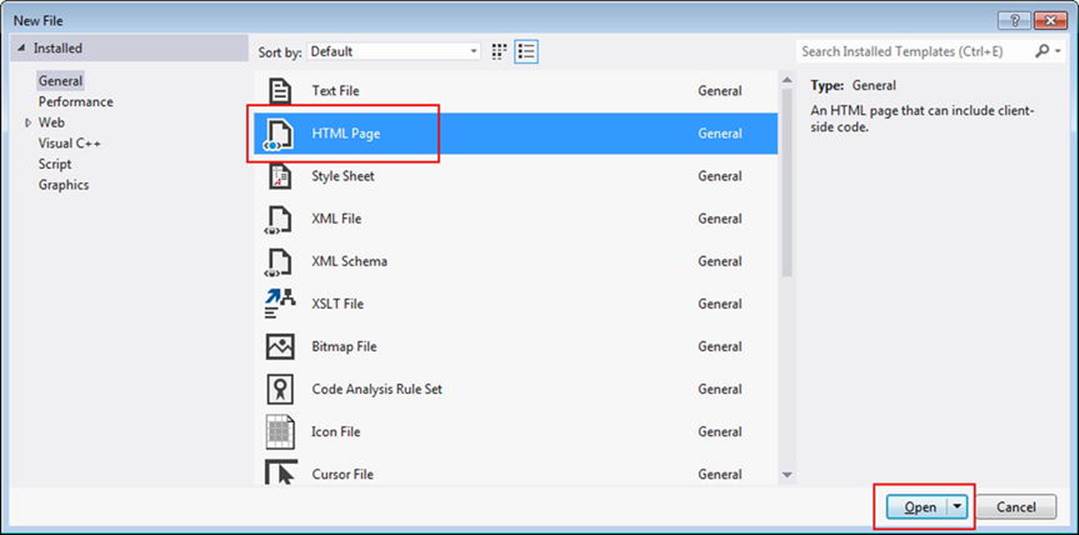
Figure 4-13.
Creating a new HTML page from the New File dialog
Once you click Open, you’ll have a new HTML file created and displayed. If you’re new to Visual Studio, you’ll get a very small taste of the efficiencies that a code editor will bring you. The newly created HTML file has some code already generated for you, as shown in Figure 4-14.
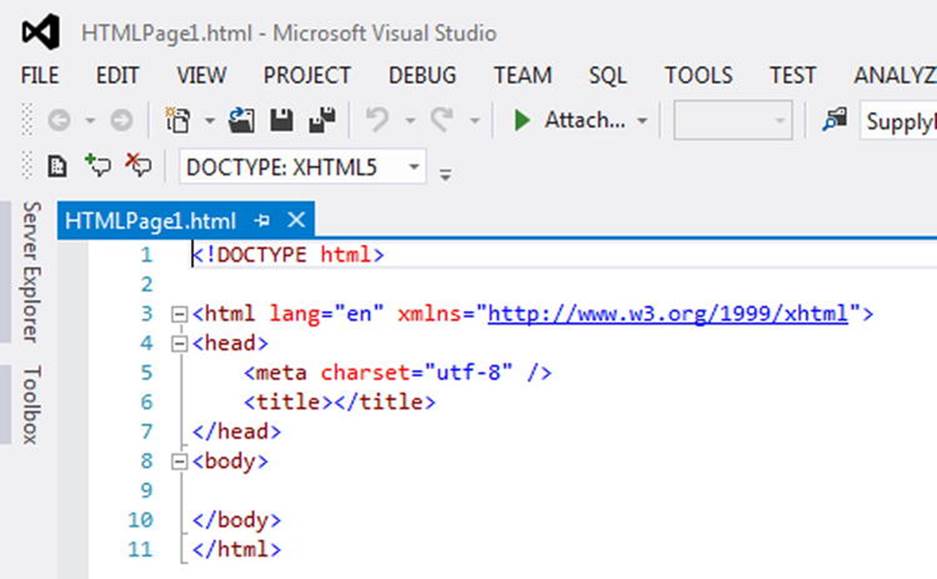
Figure 4-14.
Newly created HTML file with code
If you were to save this file and load it into SharePoint, it wouldn’t display anything because there is no content to render to the user in the browser. However, it is a perfectly valid HTML file! Although this is not overly impressive, you’ll find a lot of things like this that Visual Studio helps with as you write code.
For this example, we’ll start off using the code from Chapter 3, except we’ll split the code into an HTML file and a JavaScript file. Start by adding the following line to your new HTML page:
<div id="divHelloWorld">Hello World!</div>
Place this line between the two <body> tags, as shown in Figure 4-15.
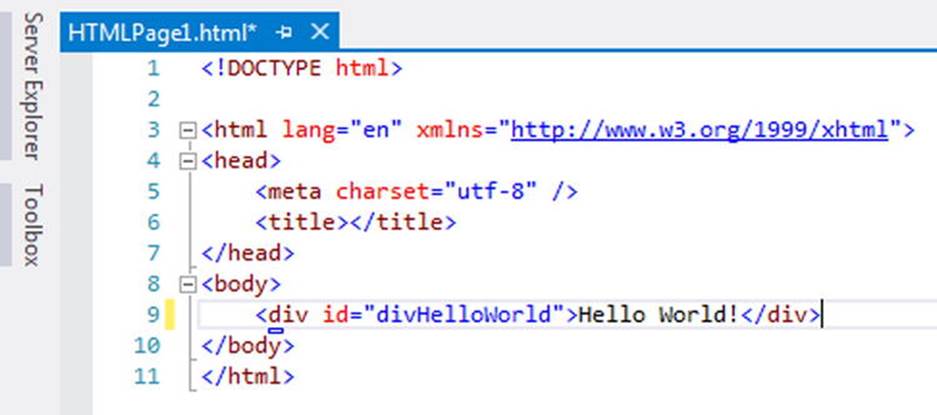
Figure 4-15.
New HTML file with code from the previous chapter
Now let’s create a JavaScript file to host our script. As before, choose File ➤ New ➤ File from the menu. When the New File dialog opens, you’ll notice that there is no option listed for creating a new JavaScript file. For this we’ll need to choose Web from the left navigation to view all the file templates for web sites. Scroll to the bottom of the templates listed, and you’ll find the JavaScript File template, as shown in Figure 4-16.
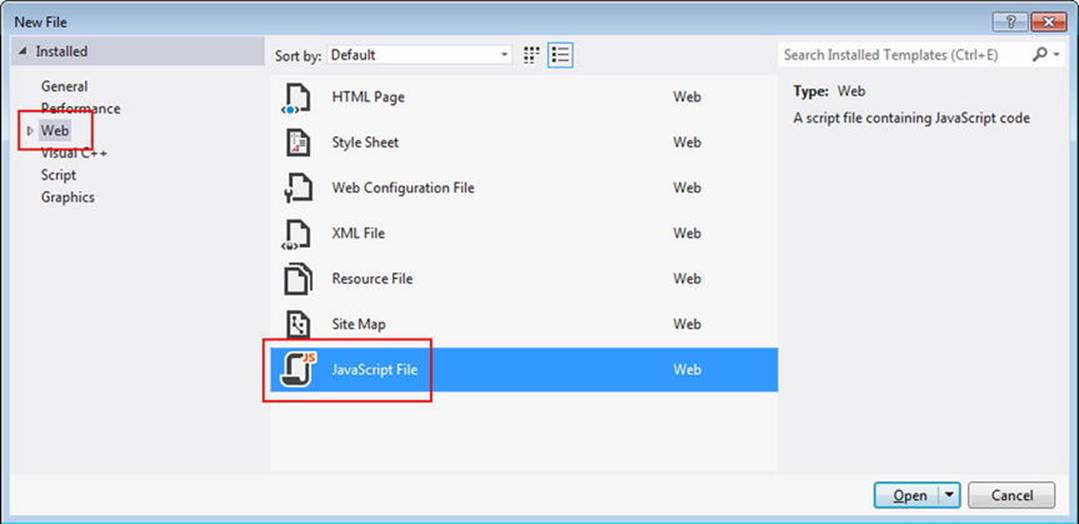
Figure 4-16.
JavaScript file option in the New File dialog
Once you create the new JavaScript file, you’ll notice that it looks very different from the HTML file you created before. In fact, it’s completely blank, as shown in Figure 4-17.
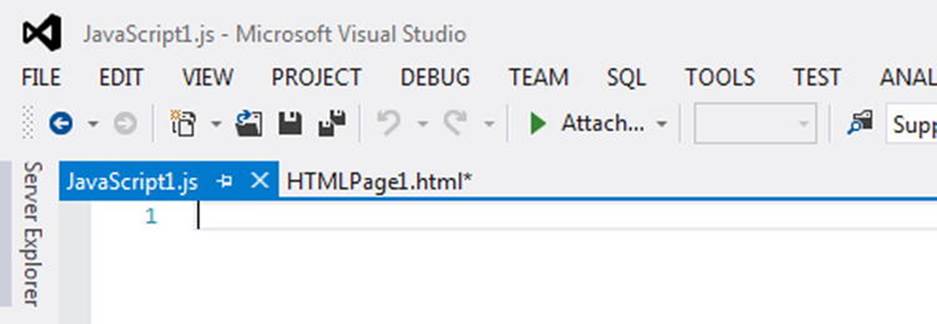
Figure 4-17.
New JavaScript file created in Visual Studio
As with the HTML file, you’ll use the same code from the Chapter 3 example. Place the following code into the new JavaScript file you just created:
$(function() {
$.ajax({
url: "/apress/_api/web/lists/GetByTitle('Demo List')",
type: "GET",
headers: {
"accept": "application/json;odata=verbose"
},
}).success(function(data) {
$("#divHelloWorld").html(data.d.Title + " : " + data.d.Created);
});
});
Note
In all the code examples in this book, the URLs are for my environment, which includes a root site collection and a subsite titled Apress, where all of my code resides. Thus, all of my URLs will appear as “/apress/…..”. You should update your URLs accordingly where your code is deployed, as well as the structure of your sites.
You’ll notice that unlike in the Chapter 3 example, you do not have the opening and closing <script></script> tags wrapping your code. Since the code is being served from a JavaScript file with a .js extension, the browser does not need to be told it’s a script with these tags, as shown in Figure 4-18.
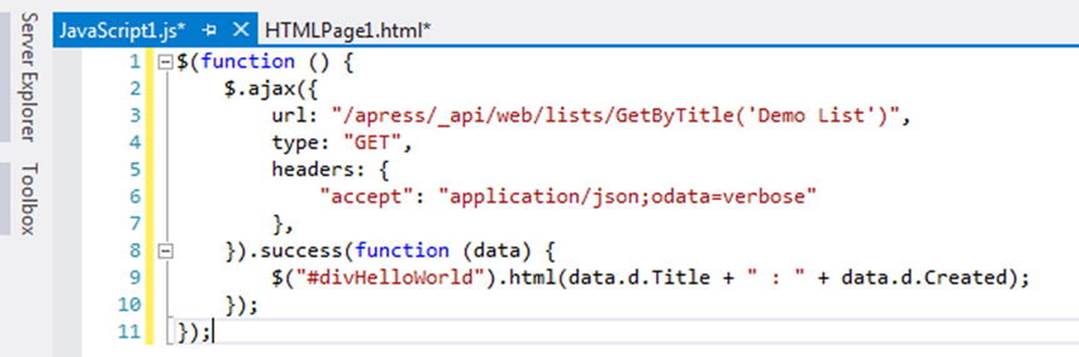
Figure 4-18.
JavaScript code in Visual Studio
Now that both files are created, you’ll save them. Save these files wherever you like on your computer. Name the HTML file SimpleExample.html and the JavaScript file SimpleExample.js. With the files saved, we now need to wire up the JavaScript file to the HTML file so that the code will fire appropriately. To do this, we need to add a JavaScript reference to the HTML file, similar to the following line:
<script type="text/javascript" src="/apress/webparts/Simple Example/SimpleExample.js"></script>
In my environment, I have a subsite titled Apress, which is where my Webparts document library is located. This script reference begins with a /, which means use the root URL of the site. Next, we place the subsite name, the document library name, the folder name, and finally, the script file name. Depending on how you’ve set up your environment, you may not need the subsite reference, or it may be titled something different.
Place the script reference in the <head> of the HTML file, as shown in Figure 4-19.

Figure 4-19.
The HTML file with the script reference added in
Save the SimpleExample.html file with the new script reference. Next, you’ll upload both files into the Simple Example folder that you created in the document library, as shown in Figure 4-20.
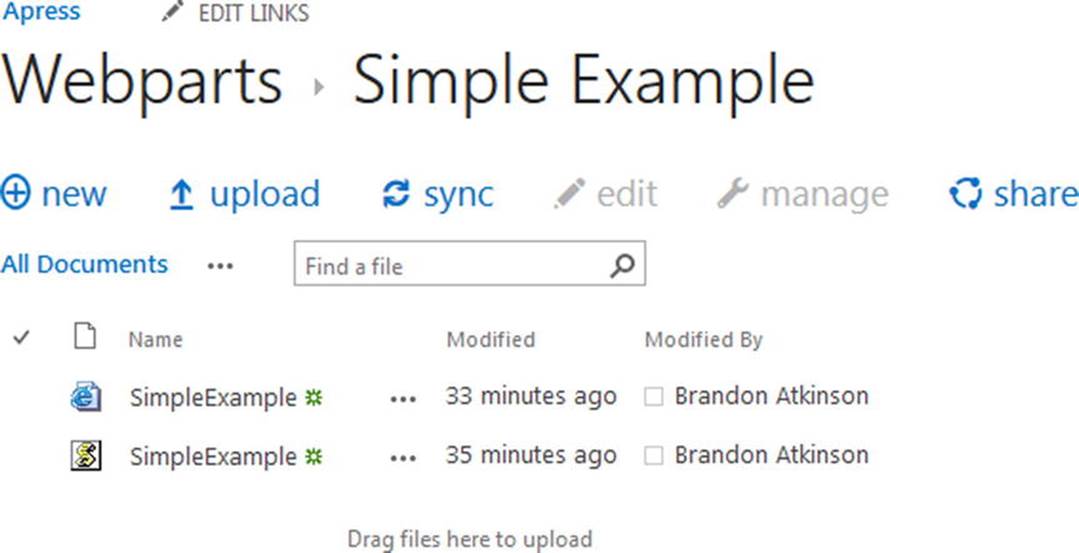
Figure 4-20.
HTML and JavaScript files uploaded to the Simple Example folder
At this point, using the Etherson method, you’ve created and uploaded the two files required to re-create the example in Chapter 3. If you had a more complex solution, you can imagine this folder holding several JavaScript files, CSS files, and maybe multiple HTML files. It all depends on how complex or simple your needs are. Next, let’s look at using the Content Editor Web Part to consume these files.
Content Editor Web Part
Now that we have the files needed to render some content, let’s place a CEWP on the page and consume them. We’ll use the same site and page from the Chapter 3 example. If you still have the CEWP and SEWPs on your page, go ahead and delete them so that the page is empty. Place the page into edit mode and then insert a new CEWP on the page. Save the page—we’ll come back to this web part in a moment.
Navigate back to the Webparts document library and open the Simple Example folder. Right-click the SimpleExample.html file and choose Copy Link Locationfrom the menu, as shown in Figure 4-21.
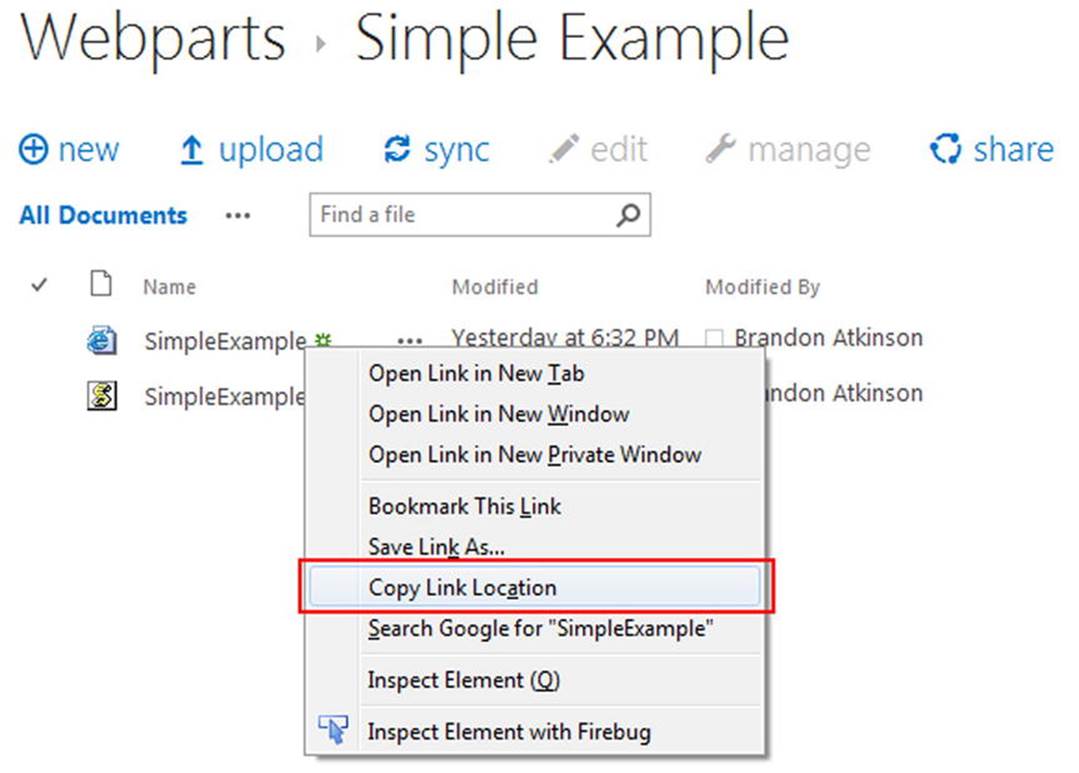
Figure 4-21.
Copying the location of the HTML file
Depending on which browser you are using, this option may be titled differently. For instance, if using Internet Explorer, you would choose Copy Shortcut. No matter which browser you use, right-clicking exposes an option to copy the URL to the file. Once you have it copied, you can navigate back to the page with the CEWP.
Place the page into edit mode, and then place the CEWP into edit mode. Just like in Chapter 3, in the CEWP tool pane, the first property is title Content Link. Paste the URL that you copied into this text box, as shown in Figure 4-22.
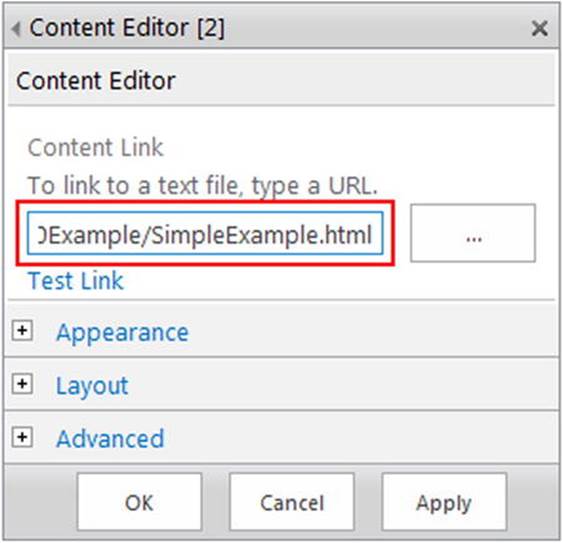
Figure 4-22.
The URL to the SimpleExample.html file in the CEWP Content Link property
Unlike the example in Chapter 3, since this HTML contains a reference to the JavaScript file, all we need to do is put the file’s URL into the Content Link property. When the HTML file loads, the JavaScript file will load as well. There is no need for a Script Editor Web Part in this example. Click OK and then save the page. When it reloads, the HTML file will render as shown in Figure 4-23.

Figure 4-23.
SimpleExample.html file rendered in the Content Editor Web Part
At this point, you may be wondering why you would perform so much setup and configuration, since using a CEWP and SEWP can produce quicker results. The benefits of using the Etherson method become more evident with more real-world solutions. For instance, imagine that you need to develop a custom solution that aggregates tasks and documents the user is following, and places them into a list of links for the user to click on to view the item. It will be deployed on the home page for each department subsite in a site collection. Using the CEWP/SEWP solution, not only do you need to paste that code onto each page, if a change to the solution is needed later, you will need to update all instances of that code. That can be quite a challenge. With the Etherson method, you still add a CEWP in each site, but only reference one set of code files. If a change is needed, you only need to update code in one spot. This is much more manageable.
Another benefit of this method is that the CEWP can perform some error handling for you. If for any reason the HTML file is no longer available—perhaps it was moved or deleted—the CEWP can display a friendly message to users. To demonstrate this, let’s remove the Content Link from the CEWP, and then click the Apply button. The content in the web part will be removed and you’ll be left with a blank CEWP, as shown in Figure 4-24.
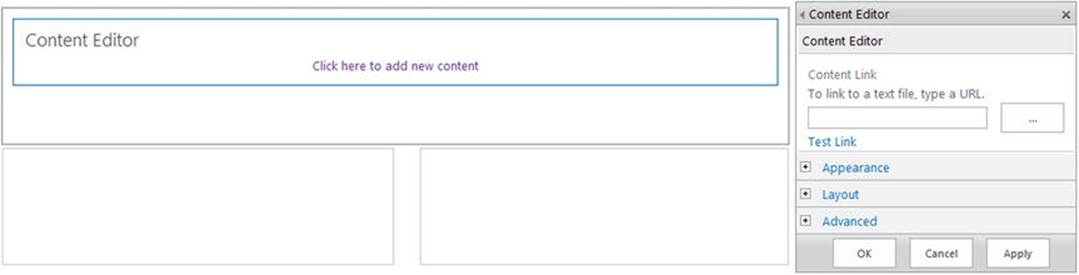
Figure 4-24.
Content Editor Web Part after the Content Link has been removed
At this point, you’ve pretty much reverted the CEWP back to its initial state when it was added. Click the “Click here to add new content” link in the middle of the web part. You’ll notice a cursor appear in the web part, in which you can type text directly. Here you’ll add the text Sorry, we’ve encountered an error. Next, you’ll add the link to the SimpleExample.html back into the Content Link property, as shown in Figure 4-25.
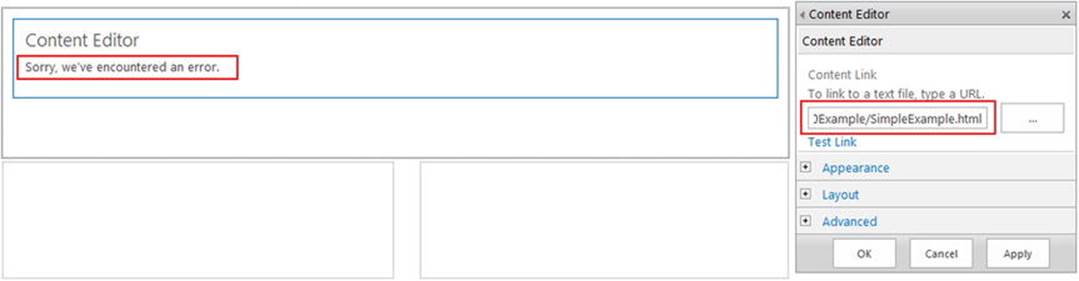
Figure 4-25.
Plain text and Content Link URL placed in the Content Editor Web Part
Click OK and then save the page. You’ll notice that the web part looks exactly the same way as it did when you only used the Content Link property. The plain-text message is not displayed and the content from the HTML page is rendered. The CEWP will always try to use any URL added to the Content Link property over displaying any plain text it may have. Now, let’s delete the HTML and JavaScript files from the Simple Example folder, as shown in Figure 4-26.
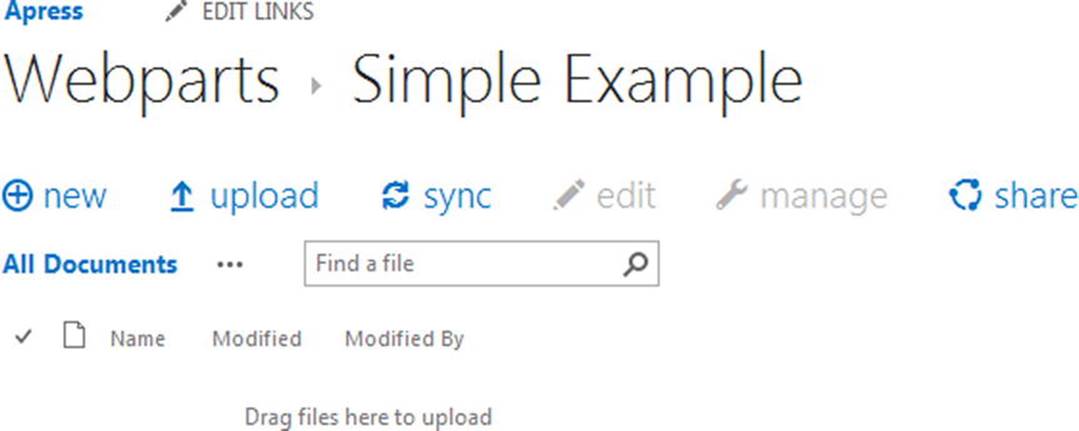
Figure 4-26.
HTML and JavaScript files deleted from the Simple Example folder
Once the HTML file has been deleted, the CEWP will no longer be able to load it; it’s gone. By providing the plain text in the web part, it will now display the error message that you loaded, as shown in Figure 4-27.
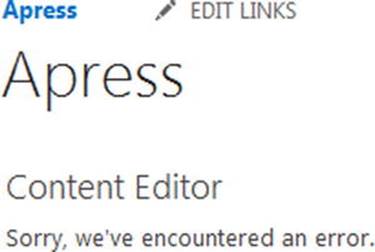
Figure 4-27.
The plain-text message displayed when the web part could not load the HTML file
You will want to code for errors in your development efforts, but this fallback that is built into the CEWP is a great option to have in case something else goes wrong. You should always provide some content in this manner. There are many scenarios where the CEWP cannot access your HTML file, such as the following:
· The files get deleted from the folder (like we just did)
· A network error occurs
· You manually type the URL into the Content Link property and misspell the file name
It’s definitely better to utilize this functionality just in case. Now let’s update the code in the previous example to do more than just display a list name.
Working with List Data
The previous example introduced you to the Etherson method. At this point, you have an HTML file and a JavaScript file that pulls data about a list and displays it. Not too bad, but clearly this is not something you would do in a real-world solution. So let’s expand on this code and actually pull some data from the list and display it to the user. If you haven’t already, put some data into your Demo List, as shown in Figure 4-28.
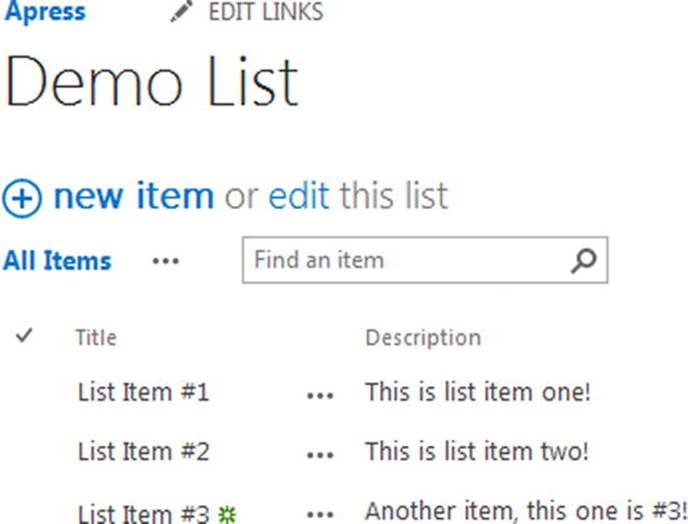
Figure 4-28.
The Demo List with a few items populated in it
The items in this list don’t really matter at this point; we just need some data to pull and display. Place as many items as you like; we’re going to grab them all. Now that we have more data in the list, we’ll update the SimpleExample.js file from earlier so that we request the list items rather than data about the list. Update your code with the following:
$(function () {
$.ajax({
url: "/apress/_api/web/lists/GetByTitle('Demo List')/items",
type: "GET",
headers: {
"accept": "application/json;odata=verbose"
},
}).success(function (data) {
var listItemInfo = ";
$.each(data.d.results, function (key, value) {
listItemInfo += "<strong>Title: </strong>" + value.Title + " <strong>Description: </strong>" + value.Description + "<br />";
});
$("#divHelloWorld").html(listItemInfo);
});
});
It looks similar to the previous code, but with some key things added. First, the URL in the AJAX call has been updated to include /items at the end:
url: "/apress/_api/web/lists/GetByTitle('Demo List')/items"
We are still calling the same list, but we need to let the REST API know that we want the items from the list this time. By providing /items and no other information, we are telling the API to return all items in the list.
Note
Unless you are confident that your list will not have much data in it, you should never request all the items in any call for data. You can provide ways to limit the data coming back by providing limitors or a CAML query that will return only the items you are looking for. We’ll dig deeper into these options later in the book.
In the success function of our JavaScript, we will loop through all the data that is returned:
var listItemInfo = ";
$.each(data.d.results, function (key, value) {
listItemInfo += "<strong>Title: </strong>" + value.Title + " <strong>Description: </strong>" + value.Description + "<br />";
});
We start with a new empty variable called listItemInfo. This variable is used to hold all the HTML that we build as we loop through the results of the API call. Next, we use a built-in jQuery function, each, to loop through the results. By using $.each, we’re saying that for each item in thedata.d.results object, perform the following function. You’ll use this function a lot in your custom solutions, as looping through list items is very common.
Like the example where we simply displayed properties and data about the list, we see the familiar data.d object. However, this time we have a new property called results. When we queried the list for its data, all the information we needed was found under the d property; for instance,d.Title. When you request list items, all the data will be found in the results property.
Inside the each function, we set the listItemInfo variable to some HTML grabbing the current list item Title and Description. Using the += syntax, we are setting the variable to the current value, plus the new values. This is a simple way of adding onto the HTML if there is any from the previous loop. After the loop is complete, we set the HTML to the Hello World DIV:
$("#divHelloWorld").html(listItemInfo);
Figure 4-29 shows the complete file in Visual Studio.

Figure 4-29.
The updated SimpleExample.js file in Visual Studio
Save the file with the updated code. Before uploading it to the document library, let’s quickly change the title of the CEWP so that this example is slightly more real world. Navigate back to the page where your web part is placed and put it into edit mode. Expand the Appearance accordion and update the Title property, as shown in Figure 4-30.
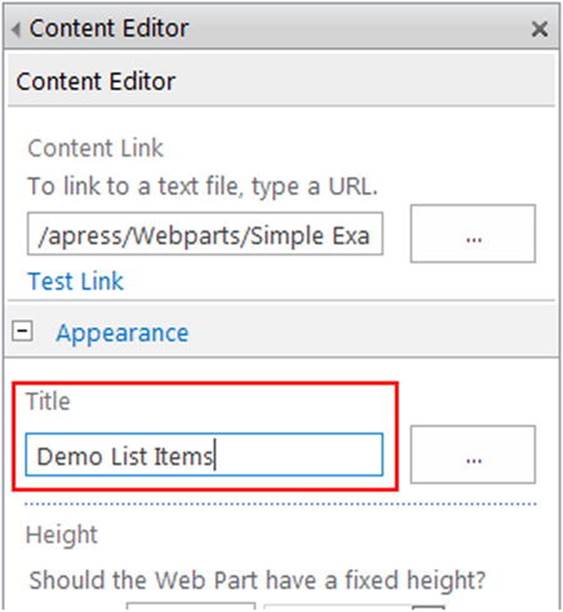
Figure 4-30.
Updating the title of the Content Editor Web Part
Click OK, and then save the page. Upload your updated SimpleExample.js file to the Simple Example folder in the Webparts document library. You will be prompted with a dialog asking if you would like to replace the current document; click OK. The beauty of the Etherson method is still in effect; because you have turned on versioning in the document library, you can replace files without any stress. If you make a mistake, you can restore the previous version! Navigate back to your page and you will see the updated code grabbing list items and displaying them, as shown in Figure 4-31.
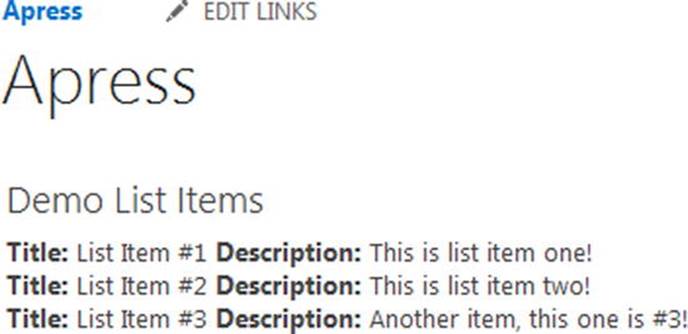
Figure 4-31.
Updated JavaScript fetching list items
Combined with the updated title, this CEWP now resembles more of a real-world solution! Of course, all we’ve really done here is re-create an out-of-the-box List View Web Part, but it should have shown how easy it is to begin working with SharePoint data using HTML and JavaScript. Next, let’s continue to look at some of the benefits of the Etherson method.
Rolling Changes Back with Versioning
Earlier in this chapter, when you created the document library to hold custom code, you enabled versioning. At some point during your development efforts you will make a mistake when writing your code, and it will get past testing. This happens to all of us and it is inevitable. Luckily, with versioning turned on you can quickly roll back changes if and when this happens. You may find that you need to roll back simply because users are not happy with the latest version of your code. No matter the reason, it’s quick and easy.
When you uploaded the new version of the SimpleExample.js file, you were asked if you wanted to replace the existing version. By clicking OK, you created a new version of the file in the library. Since versioning is on, you can restore the previous version with a few clicks. Navigate to the Simple Example folder and click the menu for the SimpleExample.js file, as shown in Figure 4-32.
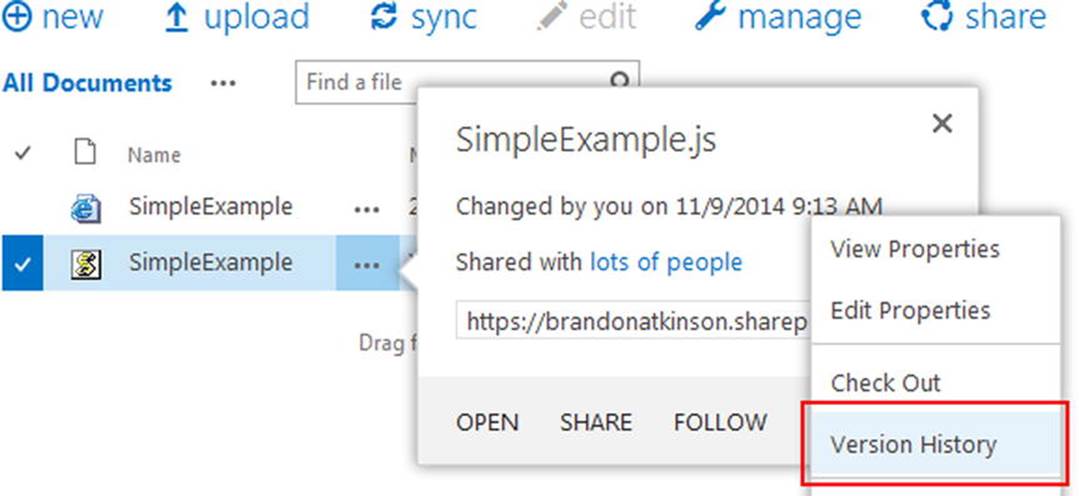
Figure 4-32.
Accessing the Version History on a file
Once the menu is open, you’ll need to access the secondary menu, where you can find the Version History options. Click this option and you’ll be presented with a dialog showing all the versions of the file. The number of versions shown here depends on how you set up your library. For instance, if you limited the number of versions to five, you would only see five previous versions here. Choose the version you want; in this case, it would be the second version in the list. Versions are listed in ascending order from the upload date. Using the menu options, choose Restore from the menu, as shown in Figure 4-33.
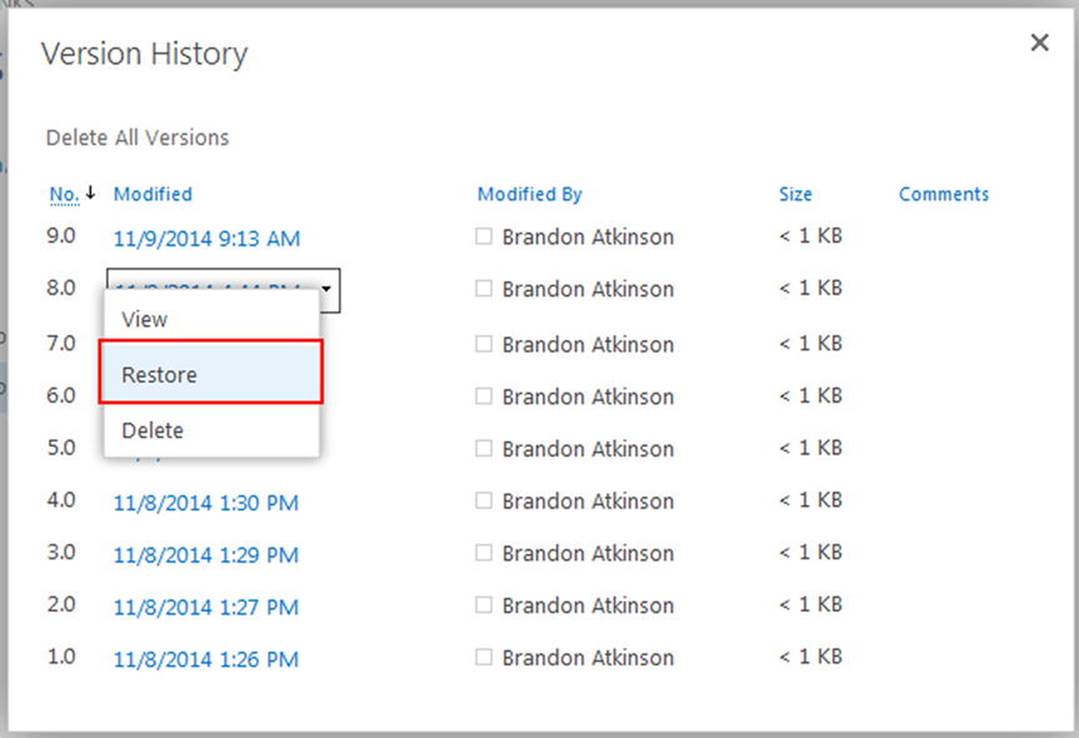
Figure 4-33.
Restoring a previous version on the file
When you click the Restore option, you are presented with a confirmation dialog stating, “You are about to replace the current version with the selected version.” Click OK to confirm the restoration, and the screen will refresh. A new version is added to the list. Navigate back to your page with the CEWP and refresh it. You may need to perform a hard refresh by pressing Ctrl+F5 on your keyboard; this will instruct the browser to load fresh copies of JavaScript files from the server. The result should be the previous script that loads data about the list, as shown in Figure 4-34.
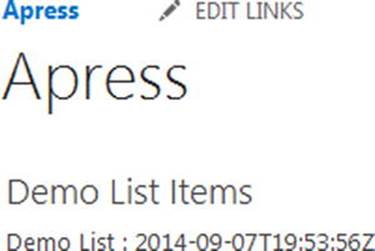
Figure 4-34.
Restored file being displayed in the Content Editor Web Part
One thing to note here is that while the script content has been updated, the title of the web part remains the same. Since these are two separate pieces of the puzzle, restoring a script file will do nothing to the web part itself!
Debugging with Firebug (Developer Tools)
When you’re writing code for anything, no matter the tools, language, or environment, you need to be able to debug it. In simple terms, stop the code from running and step through it line by line to see what data is coming in and how your code is processing it. Since the Etherson method utilizes HTML and JavaScript, you can easily debug code in your browser using Firebug or developer tools. As mentioned in Chapter 1, we’ll be using Firebug a plug-in for Firefox. You can use the built-in developer tools in any browser. To launch these tools, just press F12 on your keyboard and the tools will launch at the bottom of your screen, as shown in Figure 4-35.
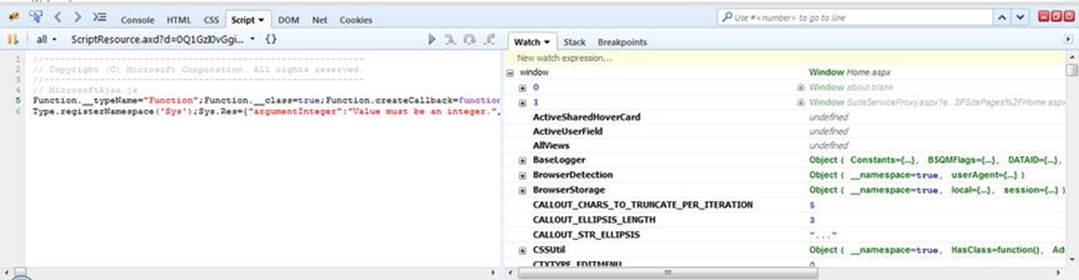
Figure 4-35.
Firebug console window in Firefox
If it’s not already open, select the Script tab in Firebug. If this is the first time you have launched Firebug, you may need to enable script debugging by pulling down the arrow on the tab and choosing Enabled in the options. This tab allows you to inspect all the scripts that are being loaded for the page. The left-hand pane shows the current script that you are looking at, and the right-hand pane shows any JavaScript objects that are loaded. These objects are found under the Watch tab in the right pane. Let’s open our SimpleExample.js script by using the drop-down list right above the left pane, as shown in Figure 4-36.
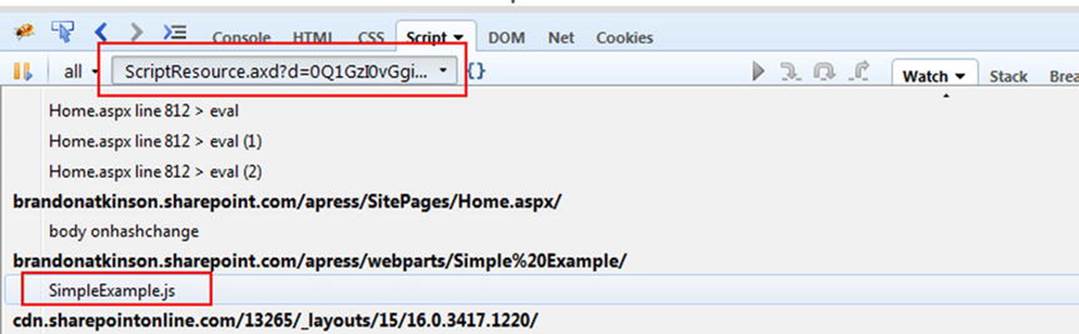
Figure 4-36.
Locating the SimpleExample.js file in Firebug
This list contains all the JavaScript files that were loaded for the page. Scroll down until you find SimpleExample.js, and then click it. You’ll notice that Firebug provides the path from where the script is loaded, which is very convenient should you need to locate it in your environment. Clicking the file loads it into the left pane, as shown in Figure 4-37.
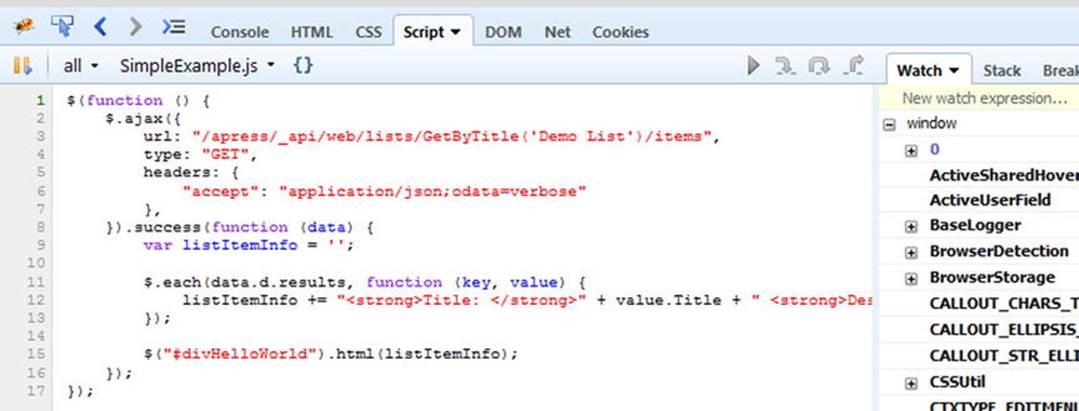
Figure 4-37.
SimpleExample.js file loaded in Firebug
You’ll notice that line numbers are provided on the left of the script file. These come in very handy if an error is thrown, as the browser will let you know which line an error occurred on. You can set a breakpoint by clicking one of the line numbers. A breakpoint is simply a location where your code will stop running so that you can inspect what is going on. You can set multiple breakpoints; in fact, you could set one on each line. When you set a breakpoint, a red dot appears next to the line number, as shown in Figure 4-38.
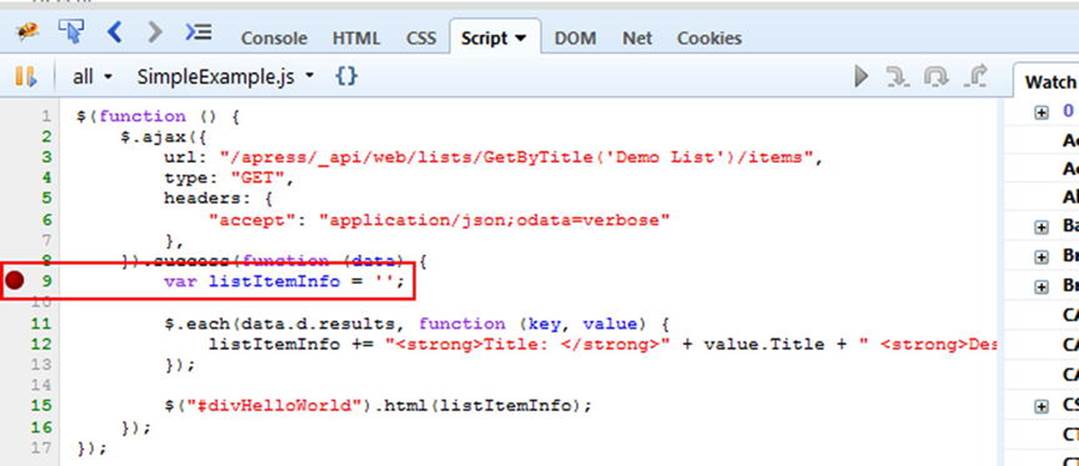
Figure 4-38.
Placing a breakpoint in the JavaScript file
Once a breakpoint is set, you can reload the page, and when the script is loaded, it will stop running once the breakpoint is hit. You can see this when the red dot has a yellow arrow inside of it and the line is highlighted, as shown in Figure 4-39.
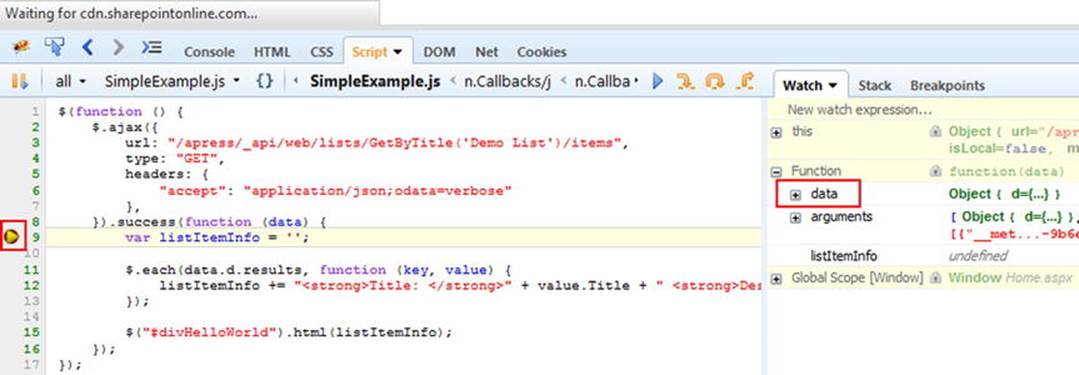
Figure 4-39.
Breakpoint hit while debugging SimpleExample.js in Firebug
Now that the script has stopped, you can look in the right pane in the Watch tab and see the objects that your script is consuming. For instance, in this success function we declared a variable called data, which is where the results are located. The Watch tab now has a data object that we can inspect. Click the + icon next to data, and you can expand it to view its properties. Continue to click the + icons until you see the results, as shown in Figure 4-40.
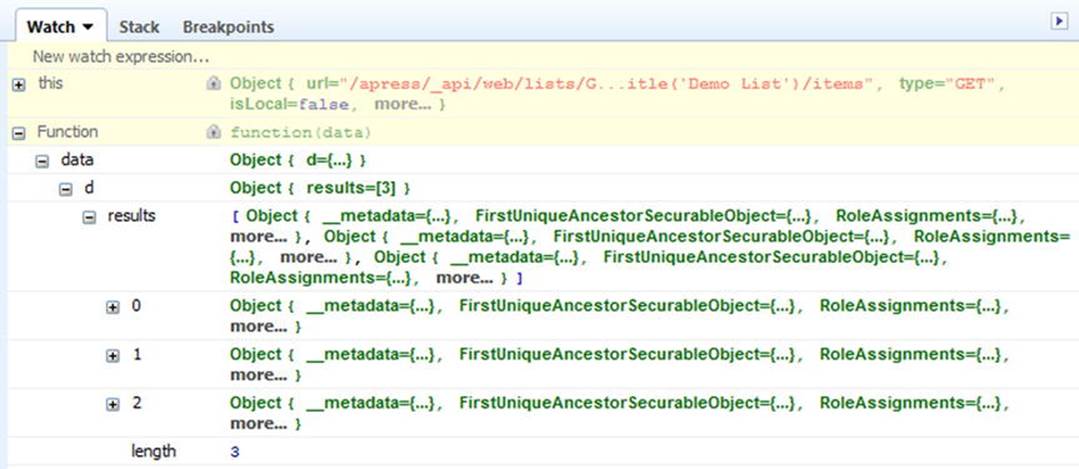
Figure 4-40.
Data object that is sent back from the REST API
We know the number of items that are coming back from our list and we can see these in the results object. They are labeled by their index, or position, in the list and indexing always starts at 0. You can further expand the items and view their properties as well. Click the + icon next to the item at the 0 index. You can see that SharePoint returns a lot of data about list items. This does not only apply to list items—just about anything you request data for in SharePoint comes with a lot of information tacked on. Scroll down to explore all the properties in the item and you’ll find the Title and Description properties that we display via the script, as shown in Figure 4-41.
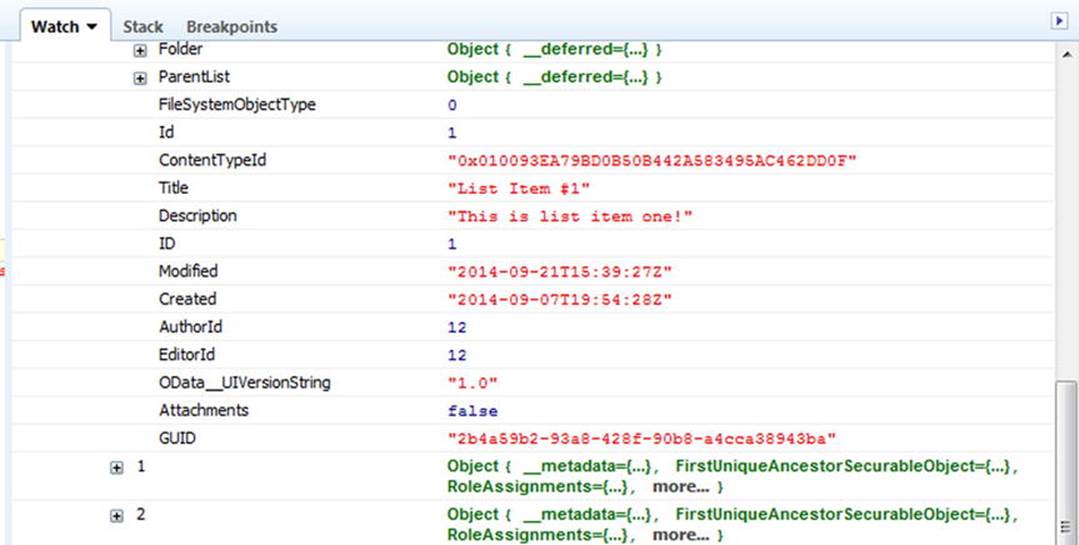
Figure 4-41.
Expanding the first list item to inspect its properties
Debugging will prove extremely useful to you as you develop custom solutions, because you can inspect all the data coming back to ensure that it’s exactly what you need. It’s very handy as well, because sometimes data is not in the places that you thought. Since the script is stopped at this point, you have a couple of ways to start it back up again. Pressing the F10 key on your keyboard will make the script move forward one line at a time. This is very helpful because you can see what happens as each line is executed. Some blocks of code will execute together; for instance, all the code inside the $.each loop will act as a single line if you are using F10 to step through the code. You can easily place another breakpoint inside the loop to stop it there as well.
The other option is to use the arrow icon, as shown in Figure 4-42.
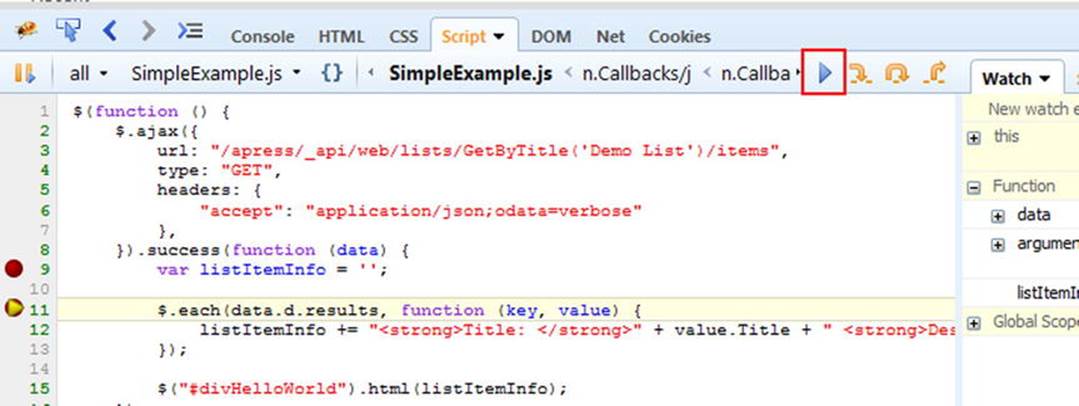
Figure 4-42.
Continue to run the script by clicking the Play icon
This icon simply tells the debugger to continue on and resume processing the script. If no other breakpoints are present, it will finish processing the script completely. The buttons and file locations can vary between developer tools a great deal. You can see Chrome and Internet Explorer developer tools in Figures 4-43 and 4-44.

Figure 4-43.
Developer tools in Chrome
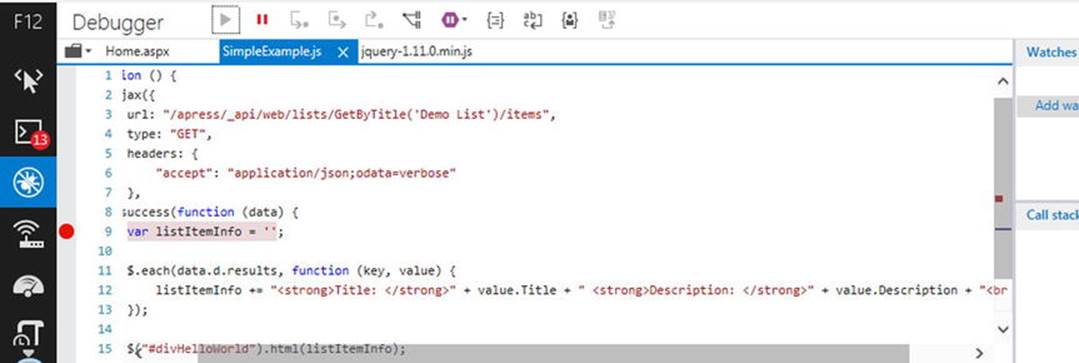
Figure 4-44.
Developer tools in Internet Explorer 11
No matter which browser you use or how strange the developer tools may appear, rest assured that they all perform the same functions. You can inspect the HTML, review and change the CSS, and most importantly, debug your JavaScript. As you progress down the path of custom solutions using HTML and JavaScript, you’ll find these tools as important as ever.
Summary
In this chapter, you were introduced to the Etherson method for building custom solutions using HTML and JavaScript. We covered the various components and you saw how to configure each and learned how they all worked together as a single unit. You built a couple of sample solutions and saw how you could easily restore code after uploading new files. As you work through this book, we’ll continue to use this method for many examples, and you’ll learn how to expand it using CSS.
In the next chapter, we’ll explore using JSLink to style and enhance List View Web Parts. JSLink is a new and exciting way to bring more functionality to out-of-the-box SharePoint. It can also be combined with JavaScript to create very unique solutions to meet your business needs.
© Brandon Atkinson 2015
Brandon AtkinsonCustom SharePoint Solutions with HTML and JavaScript10.1007/978-1-4842-0544-0_5