JavaScript, 20 Lessons to Successful Web Development (2015)
PART II Advanced JavaScript
LESSON 11 Looping Sections of Code

To view the accompanying video for this lesson, please visit mhprofessional.com/nixonjavascript/.
In Lesson 10 you learned all about program flow control, branching, and using if(), else, and switch() statements. These are perfect for altering the program flow according to values and expressions, but not so good when you need to repetitively execute a process, such as processing a document a word at a time to find typographical errors.
This is the type of situation where JavaScript’s looping statements come into their own. With them, you form a loop around a core group of statements and then keep the loop circulating until (or unless) one or more conditions are met, such as (in the case of a spelling checker) when the end of the document is reached.
More than that, the different loop types supported also enable you to preassign values to variables used in the loop, or only enter into a loop if a certain expression is satisfied.
Using while() Loops
The while() statement provides the simplest type of JavaScript loop. In English, what it does is something like this: “While such-and-such is true, then keep doing so-and-so until such-and-such is no-longer true, or forever if such-and-such is never false.” Here’s an example that displays the 10 times table (shown in Figure 11-1):
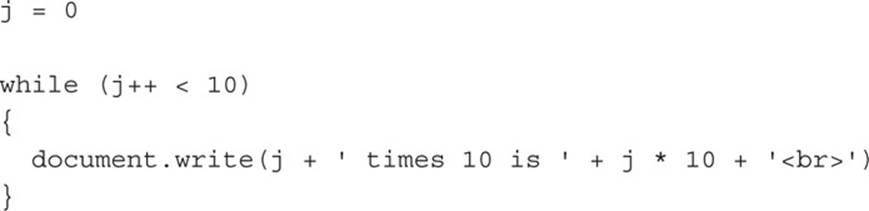
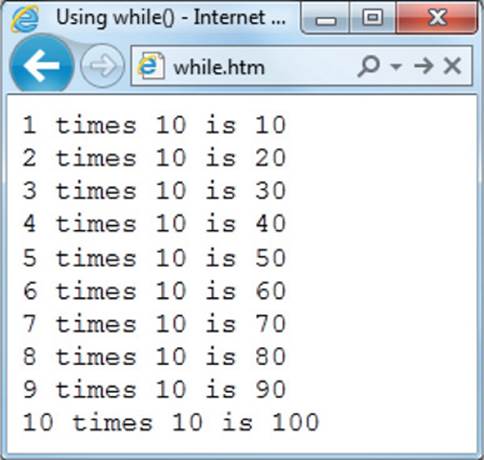
FIGURE 11-1 Using while() to calculate the 10 times table
The code used for this and the other examples in this lesson is available in the files while.htm, do_while.htm, for.htm, for_in.htm, break.htm, and continue.htm in the companion archive.
The Example in Detail
This code starts by initializing the variable j to 0. This variable is used both to decide when to loop (and when to stop looping) and to calculate the times table. Then the while() statement tests for j having a value of less than 10. The first time around, its value is 0 so the expression evaluates to true. Note also that j is post-incremented after making the test by using the ++ increment operator. This means that the second time around the loop, j will have a value of 1:
while (j++ < 10)
Inside the braces there is a single statement, which prints the value in j, some text, and then the result of multiplying j by 10. Because j was post-incremented after the test at the start of the loop, it now has a value of 1, so the sentence ′1 times 10 is 10′ is output to the browser:
document.write(j + ′ times 10 is ′ + j * 10 + ′<br>′)
After the document.write() statement is executed, the end of the loop is reached and so program flow returns to the start of the loop once more, where j is once again tested for having a value less than 10.
This time around, it now has a value of 1, so that satisfies the test, and then j is post-incremented, giving it a value of 2. Therefore, this time around the loop, j has a value of 2 and so the sentence 2 times 10 is 20 is output to the browser, and the loop goes round another time.
This process continues until j has a value of 10, and the test at the start of the loop therefore no longer results in true, so program execution jumps to just after the closing brace of the while() statement.

Because there is only a single statement inside this loop, just as with for() statements, you can omit the curly braces if you wish, like this:
Using do … while() Loops
With a while() loop, if the test at the start is not satisfied, program execution will not flow into the loop. Sometimes, however, you want program flow to go around a loop at least once, in which case it’s necessary to perform the loop test afterward.
For example, suppose you wish to calculate the factorial of the number 10 (sometimes displayed mathematically as 10!). This involves multiplying all the numbers from 1 to 10 together, like this: 10 × 9 × 8 × 7 × 6 × 5 × 4 × 3 × 2 × 1.
Using a loop to do this is an efficient method of calculating this value, particularly because once the loop has been built, it can be used to calculate the factorial of any number. And one thing we know for sure about this loop is that it will execute at least once. Therefore, a do … while()structure may be best suited, and you can achieve that like this:
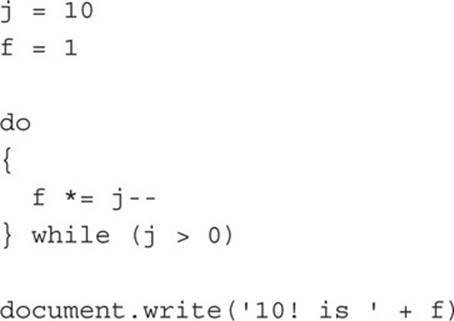
One of the neat things about this loop is that f always contains the running total of all previous multiplications, so all that’s necessary to do in each iteration is multiply f by the current value in j, save that value back into f, and then decrement j, which is performed by this statement:
f *= j--
As you will see, the *= assignment operator is ideal in this situation, because it performs both the multiplication and the assignment of the result back to f using a single operator. Also, the post-decrement operator applied to j makes for more efficient coding.
The Example in Detail
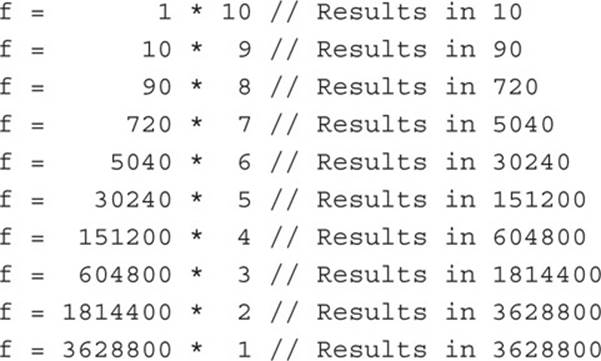
In detail, what occurs in the preceding example is that j is a loop counter that is initialized, to the value 10 (because there are 10 numbers to multiply) and f is the factorial, which is initialized to 1, as the loop will start with the expression f *= j--, which the first time around the loop will be the equivalent of f = 1 * 10.
The post-decrement operator after the j ensures that each time around the loop the multiplier is decremented by one (but only after the value in j is used in the expression). Therefore, the second time around the loop, f will now have a value of 10, and j will be 9, so the expression will be equivalent to f = 10 * 9.
Then on the next iteration, f will have a value of 90 as it enters the loop and j will be 8, so these two values will be multiplied together and placed back into f. The expressions evaluated in the loop are, therefore, as follows:
When the expression at the end of the loop (in the while() part) evaluates to false, this means that j is no longer greater than 0, and so the loop is not reentered, and program flow continues at the first instruction following the loop.
When this example is loaded into a browser (as shown in Figure 11-2), the result shown in the final line is displayed by the document.write() instruction that follows the loop.
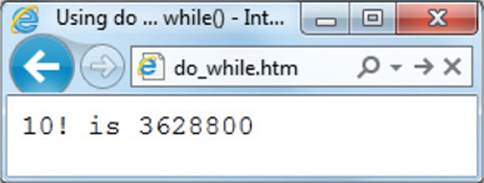
FIGURE 11-2 Using do … while() to calculate the factorial of a number
As with many other JavaScript constructs, if there is only one statement inside the loop, you can omit the curly braces if you like, and the loop could therefore be written like this:
do f *= j--
while (j > 0)
Using for() Loops
Although the preceding two types of loop structures may seem sufficient for most requirements, they can actually be improved on, especially because you must first initialize variables outside of these loops before they are even entered, and then you generally have to increment or decrement at least one variable inside the loop, too.
For these reasons, a third type of loop structure is supported, the for() loop, and it is one of the most compact and most used forms of loop structures for these reasons:
• It allows you to initialize all the variables you need within the creation of the loop.
• It allows you to specify the test condition within the creation of the loop.
• It allows you to specify variables to change after each loop iteration within the creation of the loop.
Let’s look at how you can do this by rewriting the previous example, as follows:
Doesn’t that look much simpler than the do … while() version? As before, there’s still a single statement inside the loop, but it no longer uses the post-decrement operator, because j is decremented within the setup section of the loop. Also, there are no variables preassigned outside of the loop because that is also handled within the loop setup.
The Example in Detail
Here’s what’s going on. A for() loop’s setup section (the part within parentheses) is divided into three parts that are separated with semicolons. Each part performs the following, in order:
1. Initializes any variables used within the loop.
2. Performs a test to see whether the loop should be entered.
3. Changes any variables required after each loop iteration.
The first and third sections may include more than one statement as long as you separate them using commas. Therefore, in the first section of the preceding example, j is initialized to a value of 10, and f to a value of 1, like this:
j = 10, f = 1
Next comes the loop test:
j > 0
And finally j is decremented:
--j
With the three sets of arguments inside the brackets looking like this:
j = 10, f = 1 ; j > 0 ; --j
And that’s really all there is to it. When the loop is first entered, the variables are initialized. This will not happen in any other iterations. Then the test in part 2 of the loop setup is made, and if the expression evaluates to true, the loop is entered.
Next, the statements in the loop are executed (in this case there’s only one), and then the third section of the loop setup is executed, which in this case decrements j.
Then, the second time and all subsequent times around the loop, section 1 of the setup section is skipped and program flow goes to the third section of the loop setup and then to the test in section 2.
If the test is true, the loop is again entered, the statements in it executed, and then the statements in the third part of the setup section are executed and the loop goes around again if the test still evaluates to true.
But if the test doesn’t evaluate to true, program flow goes to the code following the loop, which in this case is the document.write() statement, to print the calculated factorial value.
Because there is only a single statement within the loop of the preceding example, the braces may legally be omitted from the code, like this (or you can make the code even more compact by placing the statement directly after the loop section):
for (j = 10, f = 1; j > 0 ; --j)
f *= j
You can also include additional statements to the third argument of a for() loop by separating them with a comma, like this:
for (j = 10, f = 1; j > 0 ; --j, ++f)
Generally, for() loops are so powerful that they have become widespread and you will very rarely find that you need to use a while() or do … while() loop, because for() loops can compactly and neatly accomplish almost every type of looping structure you could want in JavaScript.
Using for(… in …) Loops
There is another type of for() loop, which was covered in much more detail in Lesson 7 . Using the for(… in …) loop, you can iterate through an array of existing values in an array named Balls, like this:
Here, the array Balls[] is populated with five string values, and then the for(.… in …) loop iterates through them all, assigning an array index (from 0 to that of the index of the final element of the array) to the variable j, which is then used within the loop section to print out the value of each element using a document.write() statement.
The result of running this code will be as follows:
Cricket
Tennis
Baseball
Hockey
Football
Breaking Out of a Loop
Amazingly, I haven’t yet finished introducing you to everything that JavaScript loops can do for you, because there’s still the matter of a couple of keywords you can use to further enhance their use.
The first of these is the break keyword, which I already showed being used with switch() statements in Lesson 10 to stop fall-through of program flow between cases, but the break keyword is not exclusive to switch() statements. In fact, it can also be used inside loops.
But why would you want to use a break within a loop? Surely, you have all the tests for conditions you could want already? Well, not quite, as it turns out. Sometimes, you may find that something other than the loop counter requires a loop to be exited, and the break keyword provides a tidy way to do this.
One reason why you might need to use a break keyword is when your loop structure has finished processing and it would be wasteful, pointless, or incorrect for it to continue looping. For example, consider the following code, in which the array Data is populated with a set of eight unique items of data (in elements 0 through 7), and the data is being searched to see if the value 11 can be found:
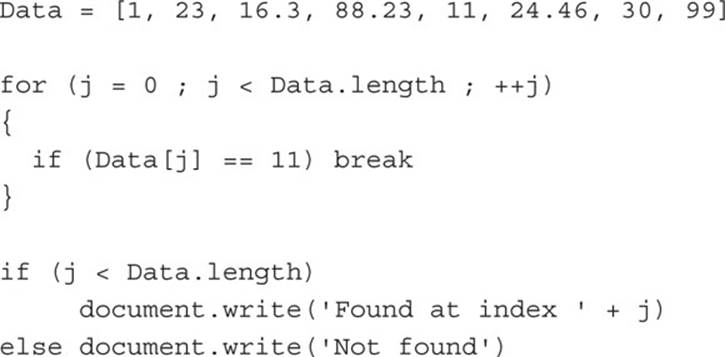
A for() loop is being used for the search, and it is simply iterating from element 0 through to the final element index, which can be found by looking up the value of Data.length (length being a property of all arrays, and the period between it and the array name is one means by which JavaScript can access object properties) and subtracting 1 from it. Therefore, as long as the loop variable j is less than that value, the loop will execute.
Within the loop, the if() statement tests for whether the value 11 is found in the current element pointed to by the index loop variable j. If it is, then the value being searched for 11 has been found and there is no reason to search the array any further (because in this instance we know that all the values in the array are unique). Therefore, a break statement is used to break out of the loop and divert program flow to the first statement following it.
In the final two lines, as long as the value in j is still less than Data.length, it represents the index of the array element that contains the value being searched for and displays the fact in the browser, as shown in Figure 11-3 (which illustrates the code searching for two values, the second of which is not in the array); otherwise, the string Not found is displayed.
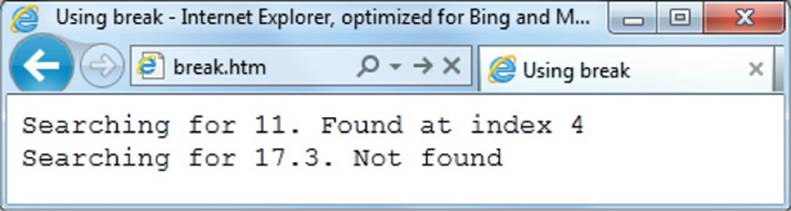
FIGURE 11-3 Using break to exit from a loop if a condition is met
As with other JavaScript structures, because this example has only a single statement in the loop, the braces can be omitted for simplicity, like this:

When you use the break keyword within a loop that is itself inside one or more other loops, only the current loop will be broken out of because the break keyword applies only to the innermost loop in which it exists.
The continue Statement
The break statement diverts flow to the statement immediately following the loop in which it exists, but sometimes this is too drastic a measure, because you may only want to skip the current iteration of a loop and not all remaining iterations.
When this is the case, you can use the continue statement, which forces program flow to skip over any remaining statements in a loop and to start again at the next iteration of the loop. One reason for wanting to do this might be, for example, to avoid encountering a division-by-zero error, which could generate invalid results.
For example, consider the case of some code that must calculate the reciprocal of all numbers between –5 and 5. The reciprocal of a number is found by dividing the value 1 by that number.
Therefore, if the number happens to be zero, an attempt would be made to divide 1 by 0, which in JavaScript results in the value Infinity, which is not a floating point number that can be used in general mathematical expressions, so we need to check for it and remove the possibility, like this:
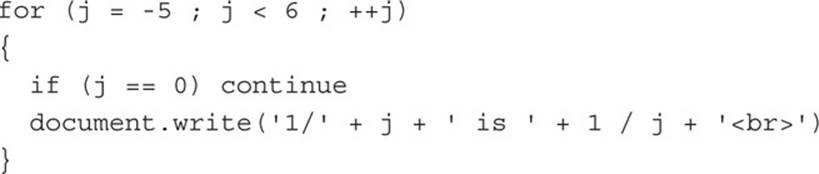
Figure 11-4 shows this code being run in a browser. As you can see, when the value 0 is reached for j, nothing is displayed, because the continue keyword has forced the loop to skip to its next iteration.
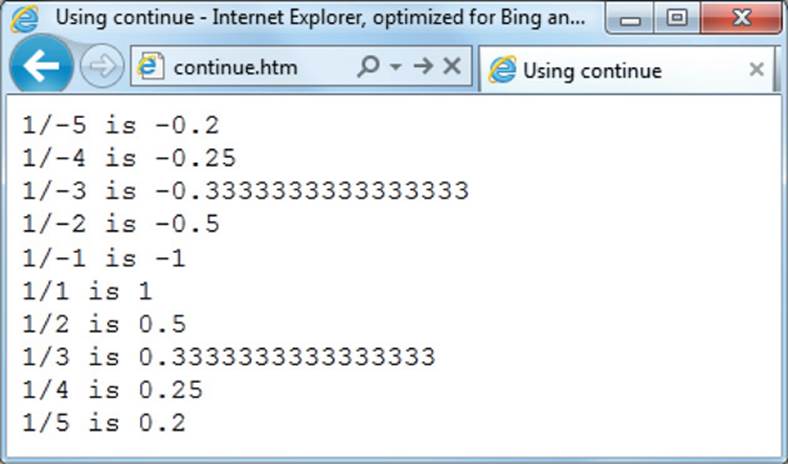
FIGURE 11-4 Using continue to skip a loop iteration
Summary
Now that you know how to use the wide variety of looping structures provided by JavaScript, you can begin to develop your own programming style, because it’s now possible for you to write most types of code that rely on loops in a number of different ways, and before long, you will begin to settle on the structures that fit your way of thinking the best.
For example, most programmers tend to generally use for() loops, but then they may need to occasionally use the break keyword for special instances, whereas those who prefer while() and do … while() loops rarely need to use break. It’s a matter of personal style. Anyway, whichever types of loop structures you find yourself migrating toward, in Lesson 12 you’ll discover even more powerful things you can do with JavaScript, including writing functions and using global and local variables.
Self-Test Questions
Using these questions, test how much you have learned in this lesson. If you don’t know an answer, go back and reread the relevant section until your knowledge is complete. You can find the answers in Appendix A.
1. When is the condition of a while() loop tested?
2. When is the condition of a do … while() loop tested?
3. When is it preferable to use do … while() in place of while()?
4. Write a simple while() loop to display the 8 times table.
5. How many arguments does a for() loop require?
6. How can you include initialization statements in a for() loop?
7. How can you add additional statements to the third argument of a for() loop?
8. What does a for(… in …) loop do?
9. How can you break out of a loop?
10. How can you skip the current iteration of a loop and move on to the next iteration?