Continuous Enterprise Development in Java (2014)
Chapter 2. Enabling Technologies
I get by with a little help from my friends.
— Paul McCartney and John Lennon
There’s a common misconception that the goal of a standard specification is to address every problem. This couldn’t be further from the truth: creating a standard is meant to address the 80% case in a manner that’s been proven through experience in the field. The Java Enterprise Edition and its subsystems, governed by the Java Community Process (JCP), is no exception.
By its very makeup, the JCP is designed to strive for consensus among all participants in an Expert Group on a given technology. Where corporate sponsors and individual contributors disagree or determine that a feature is not yet mature enough to be adequately standardized, latitude is given to specification implementors. This helps to foster creativity and provides differentiation between vendors. In fact, on a discussion regarding the Java EE7 Roadmap, Expert Group member David Blevins succinctly addressed the dynamic: “Vendors innovate, collectively we standardize.”
Though it’s not the goal of this book to provide exhaustive instruction on the complete featureset of Java EE, it is absolutely our intent to unify the development experience. Helping us along the way are a set of enabling technologies intended to smooth the rough edges of the EE platform and fill the gaps left open by its specifications.
The following open source projects are all made freely available for you to download, use, and modify (be sure to consult individual licensing terms).
Bootstrapping
For all the documentation surrounding Java EE and its use, the seemingly simple act of getting started gets quickly muddled:
§ How am I going to build my sources into deployments?
§ How should I organize my codebase?
§ How can my team best collaborate in parallel on the codebase?
§ What about libraries my code uses? How do I get those?
There are a number of valid answers to each of these questions, and the flexibility of choice can easily turn into a burden. Because we’ll be exploring fully functioning examples that are intended to be reproduced in your own environment, by necessity we’ve had to make some decisions in the interest of keeping focus on the code as opposed to our development tools. The following projects, when combined, work very well together but are certainly not the only solutions to the preceding bullet points.
One approach to undertaking a new project is to first lay out the scaffolding on your local filesystem. This will create the structure for your source code, build descriptors, and other resources used by your project. Often this process is fairly rote, involving commands to make new directories and text files in some sensible layout. Although there’s no formal rule dictating how your project tree is organized, some build systems employ a convention; others instead choose to allow you total control over your project’s build by encouraging you to script or otherwise instruct each build task.
Our examples will be built using a declarative build tool, which has standard commands that do not change from project to project.
Apache Maven
Perhaps the most prominent figure in the Java automated build tool landscape, Apache Maven positions itself as a “software project management and comprehension tool.” For simplicity’s sake, we can view it as a build tool; it’s capable of compiling, testing, and assembling.
One very nice feature of Maven is that it strives for "convention over configuration.” By following a set of recommended best practices, you’re likely to trim down on the amount of metadata you’d otherwise need to explicitly define. Additionally, Maven actions (called goals) are bound to adocumented lifecycle that is common to all Maven-based projects. For instance, in order to compile, test, and package your project, the command $> mvn package applies. This standardization relieves us from having to declare or learn different build commands for each project.
At the core of the Maven engine is a sophisticated dependency management solution capable of resolving libraries by name from a Central Repository (or additionally configured repository) onto a user’s local system. This feature allows us to skip the manual process of adding dependencies into our version control system, and allows us to instead fetch them on demand as part of the build process. As an added bonus, the requisite dependencies for all projects consuming ours are well-documented and automatically fetched for us, as shown in Figure 2-1.

Figure 2-1. Project dependencies as fetched from an external repository
Maven is not without its detractors, however. It’s been criticized for a few points. Among them are:
§ Maven plug-in versions are not bound to Maven Core versions, making guaranteed reproducible builds between different environments difficult to guarantee.
§ Project Object Model (POM, i.e., pom.xml) syntax, which is the metadata describing a project’s makeup, is verbose.
§ Transitive dependencies as a default trigger a lot of downloading on first build. Without care, a project may inherit more dependencies than are necessary or desired.
§ Deviation from the defined Maven standard is often difficult to reconcile.
It is possible to use Maven-structured repositories from outside Maven. In fact, standalone dependency manager Apache Ivy (often used in concert with task-based tool Apache Ant), does just that. Groovy-based Gradle seeks to provide the flexibility of Ant with the dependency management of Maven.
That said, Maven continues to be a popular and widely used tool in Java development, and will satisfy our requirements to build our examples.
JBoss Forge
If you’ve spent any time developing Java EE–based projects (or any nontrivial application, for that matter!), you’ve likely invested a good amount of energy in creating the project layout, defining dependencies, and informing the build system of the relevant class paths to be used in compilation and execution. Although Maven enables us to reduce that load as compared with undertaking project setup manually, there’s typically quite a bit of boilerplate involved in the pom.xml defining your requirements.
JBoss Forge offers “incremental project enhancement for Java EE.” Implemented as a command shell, Forge gives us the ability to alter project files and folders. Some concrete tasks we might use Forge to handle are:
§ Adding Java Persistence API (JPA) entities and describing their model
§ Configuring Maven dependencies
§ Setting up project scaffolding
§ Generating a view layer, reverse-engineered from a domain model
§ Deploying to an application server
Because Forge is built atop a modular, plug-in-based architecture, it’s extensible to additional tasks that may be specific to your application.
Overall, the goal of Forge is to ease project setup at all stages of development, so we’ll be employing it in this text to speed along the construction of our examples.
Version Control
From the moment we collaborate on a project with others or would like to inspect the evolution of our code over time, we need some form of version control. Until recently, the most common paradigm for synchronizing access to a shared codebase was the client/server model, wherein developers can keep a local working copy and check their changes into a centralized server, as shown in Figure 2-2.
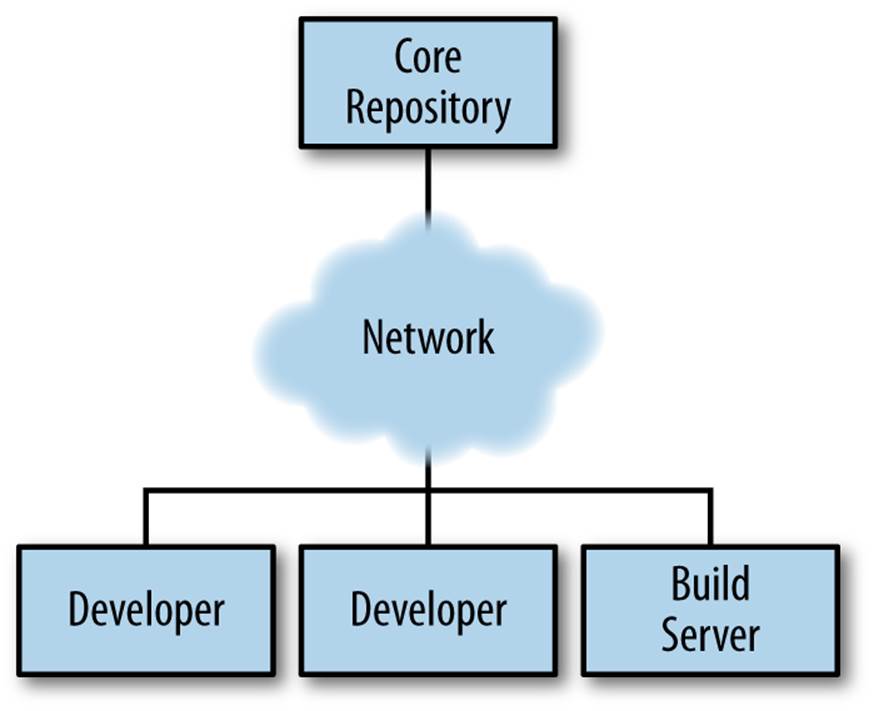
Figure 2-2. Clients interacting with a centralized version control system
Some systems utilize file-level locking to ensure that no conflicts arise during development; others allow concurrent access at the file granularity but cue the developer to resolve line-level conflicts upon committing changes upstream.
Likely the most widely deployed client/server version control system (VCS) from the 1990s through the 2000s has been Concurrent Versions Systems, most often referred to by its acronym, CVS. Although CVS has enabled teams to freely work on all files in the tree through unreserved checkouts, its shortcomings (including nonatomic commits and absent tracking for file renames) prompted the development of Subversion (SVN), heir apparent to CVS. Boasting a wider featureset and greater stability as contrasted with CVS, SVN has enjoyed its reign from the mid- to late-2000s.
These days, the centralized model has been superseded by distributed version control systems (DVCS), which are differentiated by their ability to store the full repository, including all history in any number of nodes.
This layout creates a “pull model,” where developers on a common project are given the authority over their own repository, free to incorporate changes from others (or not!). At first, this can be a confusing topic to grasp for users vested in the centralized “push model,” but it’s our opinion that the benefits of this design easily justify the initial confusion inherent when considering many full-fledged repositories representing the same project.
Some immediate gains to consider:
§ Repository operations such as committing and searching history are much faster.
§ Network connectivity is not required to alter the respository’s state.
§ Every repository is a full backup of the codebase’s history.
This is because each user is typically working on a local repository, and synchronization with a remote repository is only necessary when pushing changes to be visible by others.
In this text, we’ll be using the open source DVCS Git.
Git
Originally developed to coordinate development of the Linux kernel, Git is a DVCS whose usage has taken off in recent years, arguably due to the user-friendliness of the socially aware hosting site GitHub. In fact, this book’s text and examples are hosted on GitHub for all to participate.
From a high level, we’ve chosen Git for our projects because it enables:
True feature (topic) development
Branching is quick, easy, and cheap. You can work on feature X in isolation, with the ability to put your changes on top of development that may be occurring in the mainline branch.
Integration with third-party systems built to respond to Git events
For instance, we’ll be able to trigger builds and production deployments by pushing our local changes to a remote repository.
Rewriting of local history
Often it’s handy to commit liberally, giving yourself many “save” points along the way. However, before making these (sometimes breaking) changes visible to the rest of the world, it’s good practice to “squash” the mini-changes into a cohesive, singular commit. This helps keep the version history sane and facilitates later auditing if a bug should arise.
Again, it is not our aim to fully delve into the mechanics of each tool we’ll be employing. However, we will be issuing Git commands and explaining their use along the way. You can find a very good reference on the myriad Git subroutines in Pro Git by Scott Chacon (Apress, 2009), available for free in digital editions and in print via online retailers.
A Test Platform for Java EE
Java EE 5 introduced a POJO (Plain Old Java Object) programming model, which freed developers from having to adhere to any particular class hierarchy for its business objects. The introduction of Contexts and Dependency Injection (CDI) in Java EE 6 further pushed the notion of simplebusiness objects by providing typesafe injection.
The benefit to objects that can be easily created using the new operator is the same as their drawback: when we manually instantiate objects for use in testing, we’re not dealing with the same enterprise components we have in the target runtime. An EJB becomes such only in the context of an EJB container; a servlet is a servlet only when created by a servlet container. Any time we circumvent the target runtime environment to handle object creation and wiring on our own, we’re using mock objects.
Although many will advocate on the usefulness of mocks, by definition they provide an approximation of how your application will behave in a production environment. Remember that you’re responsible for validating that the full bevy of code running on your servers is working as expected, including the bits you did not write. Many not-so-subtle errors may arise while leveraging the full potential of the application server in production, and it’s best to be testing in an environment as close to the real thing as possible.
True Java EE testing in this sense is an area left largely unspecified by the EE platform, and we’ll be examining some tools to help bridge this divide.
Arquillian
Arquillian is an innovative and highly extensible testing platform for the JVM that enables developers to easily create automated integration, functional, and acceptance tests for Java middleware.
Picking up where unit tests leave off, Arquillian handles all the plumbing of container management, deployment, and framework initialization, so you can focus on the business of writing test logic. Instead of configuring a potentially complex test harness, Arquillian abstracts out the target runtime by:
§ Managing the lifecycle of the container (or containers).
§ Bundling the test case, dependent classes, and resources into a ShrinkWrap archive (or archives).
§ Deploying the archive (or archives) to the container (or containers).
§ Enriching the test case by providing dependency injection and other declarative services.
§ Executing the tests inside (or against) the container.
§ Capturing the results and returning them to the test runner for reporting.
§ To avoid introducing unnecessary complexity into the developer’s build environment, Arquillian integrates seamlessly with familiar testing frameworks (e.g., JUnit 4, TestNG 5), allowing tests to be launched using existing IDE, Ant, and Maven test plug-ins—without any add-ons.
The Arquillian project adheres to three core principles:
Tests should be portable to any supported container.
Keeping container-specific APIs out of the tests enables developers to verify application portability by running tests in a variety of containers. It also means that lightweight containers can be used as a substitute for full containers during development.
Tests should be executable from both the IDE and the build tool.
By leveraging the IDE, the developer can skip the build for a faster turnaround and has a familiar environment for debugging. These benefits shouldn’t sacrifice the ability to run the tests in continuous integration using a build tool.
The platform should extend or integrate existing test frameworks.
An extensible architecture encourages reuse of existing software and fosters a unified Java testing ecosystem. Regardless of how complex it becomes, executing an Arquillian test is as simple as selecting Run As → Test in the IDE or executing the “test” goal from the build tool, as shown in Figure 2-3.
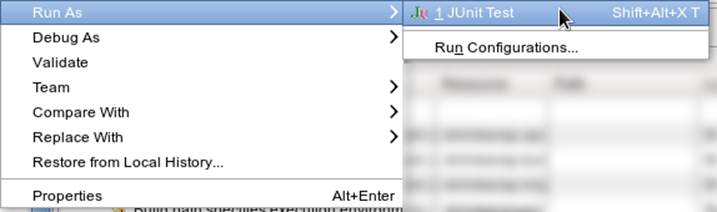
Figure 2-3. DCVS repositories and their relationships
ShrinkWrap
From the onset, ShrinkWrap was born from a need to more easily test Java Enterprise deployments. Traditionally defined as flat-file archives adhering to the ZIP standard, these have necessitated the introduction of some build step to package up all application resources. And a build step takes time:
$ mvn clean install
... terrifying output trace ...
[INFO] ------------------------------------------------------------------------
[INFO] BUILD SUCCESS
[INFO] ------------------------------------------------------------------------
[INFO] Total time: 1:13.492s
[INFO] ------------------------------------------------------------------------
But as developers, we live in our coding environments. Switching out of that mind set to run a build is wasteful. So we asked: “What if we could declare, in Java, an object to represent that archive?” What resulted was a Java API analogue to the “jar” tool, a virtual filesystem with an intuitive syntax:
JavaArchive archive = ShrinkWrap.create(JavaArchive.class,"myarchive.jar")
.addClasses(MyClass.class, MyOtherClass.class)
.addResource("mystuff.properties");
This enables us to take advantage of the IDE’s incremental compilation features, allowing us to skip the build, as shown in Figure 2-4.
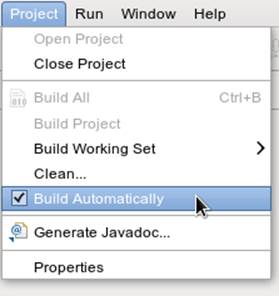
Figure 2-4. Incremental compilation in the Eclipse IDE
This piece fulfills the design goal of Arquillian to run tests based on full-fledged deployments directly from the IDE.
Although ShrinkWrap is a standalone virtual filesystem, in our examples we’ll be primarily exercising it as the deployment mechanism for Arquillian. Let’s take a moment to review its usage.
The first step is getting your hands on the ShrinkWrap binaries. The Core is composed of three pieces, as outlined in Table 2-1.
Table 2-1. ShrinkWrap modules and separation of API, SPI, and implementation
|
Name |
Maven coordinates |
|
API |
org.jboss.shrinkwrap:shrinkwrap-api |
|
SPI |
org.jboss.shrinkwrap:shrinkwrap-spi |
|
Implementation |
org.jboss.shrinkwrap:shrinkwrap-impl-base |
Only the API should be available upon your compilation class path, while the SPI and the Implementation modules are both required for the runtime. This is to enforce good separation between classes intended for direct use and the project’s internals.
In Maven, these can be brought in under the proper scopes easily by using the ShrinkWrap Dependency Chain POM, available in Maven Central:
<project xmlns="http://maven.apache.org/POM/4.0.0"
xmlns:xsi="http://www.w3.org/2001/XMLSchema-instance"
xsi:schemaLocation="
http://maven.apache.org/POM/4.0.0
http://maven.apache.org/xsd/maven-4.0.0.xsd">
<!-- snip -->
<dependency>
<groupId>org.jboss.shrinkwrap</groupId>
<artifactId>shrinkwrap-depchain</artifactId>
<version>${version.shrinkwrap}</version>
<type>pom</type>
</dependency>
<!-- snip -->
</project>
For projects not using the Maven repository system, the ShrinkWrap Distribution makes all modules available as a download, and you can set up the dependencies manually to suit your needs. Here are the prerequisites:
§ JRE5+ runtime
§ No additional dependencies
ShrinkWrap can run on any Java5 runtime or higher, but requires at least JDK6 for compilation.
The primary entry point to the ShrinkWrap library is the org.jboss.shrinkwrap.api.ShrinkWrap class. From here you can call the create method to make a new Archive, a generic view of the virtual filesystem that allows the addition of content called Assets into a location called an ArchivePath. Table 2-2 more easily shows ShrinkWrap nomenclature next to more common terms.
Table 2-2. ShrinkWrap archive types
|
Archive type |
Description |
|
org.jboss.shrinkwrap.api.GenericArchive |
Simplest type of concrete user-view of an Archive; supports generic operations |
|
org.jboss.shrinkwrap.api.spec.JavaArchive |
JAR type; allows addition of Classes, Packages, and Manifest operations |
|
org.jboss.shrinkwrap.api.spec.EnterpriseArchive |
Java EE EAR type; supports Manifest and related spec operations |
|
org.jboss.shrinkwrap.api.spec.WebArchive |
Java EE WAR type; supports operations common to web application deployments |
|
org.jboss.shrinkwrap.api.spec.ResourceAdaptorArchive |
Java EE RAR type; supports operations common to resource adapter deployments |
To create an Archive, simply choose your desired archive type and optionally supply a name to the static ShrinkWrap:create method:
GenericArchive myArchive = ShrinkWrap.create(GenericArchive.class,
"myArchive.jar");
That’s it! You’ve got your first ShrinkWrap archive!
Of course, an object representing an empty archive is pretty useless. So let’s have a look at adding in some content. As we noted before, content is modeled by the Asset class, so let’s first take a look at some of the Asset implementations provided by ShrinkWrap (as listed in Table 2-3).
Table 2-3. ShrinkWrap asset types
|
Asset |
Represents |
|
org.jboss.shrinkwrap.api.asset.ArchiveAsset |
Nested Archive content |
|
org.jboss.shrinkwrap.api.asset.ByteArrayAsset |
byte[] or InputStream content |
|
org.jboss.shrinkwrap.api.asset.ClassAsset |
Java Class content |
|
org.jboss.shrinkwrap.api.asset.ClassLoaderAsset |
A resource that can be loaded by an optionally specified ClassLoader |
|
org.jboss.shrinkwrap.api.asset.FileAsset |
File content |
|
org.jboss.shrinkwrap.api.asset.StringAsset |
String content |
|
org.jboss.shrinkwrap.api.asset.UrlAsset |
Content located at a given URL |
|
org.jboss.shrinkwrap.api.asset.EmptyAsset |
Empty (0-byte) content |
Additionally, because Asset is an interface, you can provide your own implementation to supply any byte-based content that may be represented as an InputStream. For instance, the following snippet shows how to present an Activation Framework DataSource as an Asset:
final DataSource dataSource = null; // Assume you have this
Asset asset = new Asset() {
@Override
public InputStream openStream() {
try {
return dataSource.getInputStream();
} catch (final IOException e) {
throw new RuntimeException(e);
}
}
};
The Archive:add method allows us to pass in some Asset content and add it under an ArchivePath:
myArchive.add(myAsset,"path/to/content");
System.out.println(myArchive.toString(true));
Passing a true verbosity flag into the toString method of Archive creates a recursive "ls -l" -style output:
myArchive.jar:
/path/
/path/to/
/path/to/content
The Archive views we covered before are also really helpful, depending upon the type of content you’re working with. For instance, a standard JAR file typically contains .class files and other resources, so the JavaArchive type lets you add these.
ShrinkWrap supports a simple mechanism allowing you to switch “views” of your archive, and it’s provided by the as method of the org.jboss.shrinkwrap.api.Assignable interface; each view in turn extends Assignable. So to get your archive to use the JavaArchive view in order to easily add Class resources, you could simply write this:
myArchive.as(JavaArchive.class).addClasses(String.class, Integer.class);
System.out.println(myArchive.toString(true));
archive.jar:
/java/
/java/lang/
/java/lang/String.class
/java/lang/Integer.class
Using this mechanism is central to keeping ShrinkWrap’s usage clean and intuitive, while providing for a versatility typically found in true multiple-inheritance languages.
Although ShrinkWrap has its roots in Java EE and close ties to the Arquillian Testing Platform, it’s certainly not limited to these domains. In fact, ShrinkWrap on its own intentionally is scoped to go no further than to act as a virtual filesystem for archives. As such, it provides a simple mechanism for playing nicely with flat-file structures.
Borrowing from the previous example, perhaps we’d like to use ShrinkWrap to package up all of the .class files in the current package and output these as a standard JAR in ZIP format. The code for that would actually be pretty simple:
JavaArchive archive = ShrinkWrap.create(JavaArchive.class, "myPackage.jar")
.addPackage(this.getClass().getPackage());
System.out.println(archive.toString(true));
archive.as(ZipExporter.class).exportTo(
new File("/home/alr/Desktop/myPackage.jar"), true);
myPackage.jar:
/org/
/org/alr/
/org/alr/test/
/org/alr/test/TestClass.class
So let’s see what’s going on here. First we create a JavaArchive and add all the contents of the current Class’s Package. Then we dump the output to the console, just to see what’s included. In the final line, we again use the Assignable facilities of the JavaArchive view to get us into a new view: one capable of exporting to ZIP format. In this case we use the appropriately named ZipExporter, allowing us to export to a File, OutputStream, or even get the contents as an InputStream so we can deal with the bytes ourselves.
Table 2-4 lists the three types of exporters that ship with ShrinkWrap.
Table 2-4. ShrinkWrap exporter types
|
Exporter |
Output format |
|
org.jboss.shrinkwrap.api.exporter.TarExporter |
TAR |
|
org.jboss.shrinkwrap.api.exporter.TarGzExporter |
TAR.GZ |
|
org.jboss.shrinkwrap.api.exporter.ZipExporter |
ZIP |
Of course, we can also obtain a ShrinkWrap archive from a flat file in a similar fashion by using one of the standard importers shown in Table 2-5.
Table 2-5. ShrinkWrap importer types
|
Importer |
Output format |
|
org.jboss.shrinkwrap.api.importer.TarImporter |
TAR |
|
org.jboss.shrinkwrap.api.importer.TarGzImporter |
TAR.GZ |
|
org.jboss.shrinkwrap.api.importer.ZipImporter |
ZIP |
The code for running an import to roundtrip the previous example might look like this:
JavaArchive roundtrip = ShrinkWrap
.create(ZipImporter.class, "myPackageRoundtrip.jar")
.importFrom(new File("/home/alr/Desktop/myPackage.jar"))
.as(JavaArchive.class);
Note how we can pass ZipImporter into the ShrinkWrap.create method, because it’s Assignable as well! Beginning to notice a theme here?
This concludes our brief introduction into manipulating archive content with ShrinkWrap.
ShrinkWrap Resolvers
Although ShrinkWrap is ideally suited for creating new archives containing byte-based resources, often our applications are composed with prebuilt libraries bundled alongside our code, making for more complex deployments. These may bundle other archives together, as shown in the following example Web application ARchive (WAR):
$> jar -tvf myApplication.war
0 Tue Apr 23 17:01:08 MST 2013 META-INF/
128 Tue Apr 23 17:01:06 MST 2013 META-INF/MANIFEST.MF
0 Tue Apr 23 17:01:08 MST 2013 WEB-INF/
0 Tue Apr 23 17:01:08 MST 2013 WEB-INF/classes/
0 Tue Apr 23 17:01:08 MST 2013 WEB-INF/lib/
3654 Tue Apr 23 16:59:44 MST 2013 WEB-INF/lib/hibernate.jar
3800 Tue Apr 23 17:01:00 MST 2013 WEB-INF/lib/commons-io.jar
4015 Tue Apr 23 17:00:44 MST 2013 WEB-INF/lib/myEjbModule.jar
As you can see, under WEB-INF/lib are a couple of third-party libraries used as dependencies by our own code, and an Enterprise JavaBeans (EJB) module that we’ve written for our application. This packaging structure is consistent with the final deployments used by most WARs andEnterprise application ARchives (EARs).
Often we don’t control the construction of these libraries, and we certainly shouldn’t be in the business of reassembling them (and hence further differentiating our tests from our production runtime deployments). With the advent of Maven and other build systems, typically third-party libraries and our own dependent modules are obtained from a backing software repository. In this case we supply a series of coordinates that uniquely identifies an artifact in the repository, and resolve the target files from there.
That is precisely the aim of the ShrinkWrap Resolvers project; it is a Java API to obtain artifacts from a repository system. Grammars and support for Maven-based repository structures are currently implemented (this is separate from the use of Maven as a project management system or build tool; it’s possible to use a Maven repository layout with other build systems).
ShrinkWrap Resolvers is comprised of the modules listed in Table 2-6.
Table 2-6. ShrinkWrap modules
|
Name |
Maven coordinates |
|
API |
org.jboss.shrinkwrap.resolver:shrinkwrap-resolver-api |
|
SPI |
org.jboss.shrinkwrap.resolver:shrinkwrap-resolver-spi |
|
Maven API |
org.jboss.shrinkwrap.resolver:shrinkwrap-resolver-api-maven |
|
Maven SPI |
org.jboss.shrinkwrap.resolver:shrinkwrap-resolver-spi-maven |
|
Maven Implementation |
org.jboss.shrinkwrap.resolver:shrinkwrap-resolver-impl-maven |
|
Maven Implementation with Archive Integration |
org.jboss.shrinkwrap.resolver:shrinkwrap-resolver-impl-maven-archive |
The separation between the Maven and non-Maven modules is there to enforce modular design and separate out generic resolution from Maven-specific grammars, should the project support other mechanisms in the future.
Adding ShrinkWrap Resolvers to your project
You can obtain ShrinkWrap Resolvers for use in your system in a single pass by declaring a dependency upon the depchain module in a Maven pom.xml file:
<dependencies>
...
<dependency>
<groupId>org.jboss.shrinkwrap.resolver</groupId>
<artifactId>shrinkwrap-resolver-depchain</artifactId>
<version>${version.shrinkwrap.resolvers}</version>
<scope>test</scope>
<type>pom</type>
</dependency>
...
</dependencies>
This will bring the APIs into the test classpath and the SPIs and Implementation modules into the runtime classpaths (which will not be transitively inherited, as per Maven rules in runtime scope).
Alternatively, you can have finer-grained control over using ShrinkWrap Resolvers by bringing in each module manually:
<dependencies>
...
<dependency>
<groupId>org.jboss.shrinkwrap.resolver</groupId>
<artifactId>shrinkwrap-resolver-api</artifactId>
<version>${version.shrinkwrap.resolvers}</version>
<scope>test</scope>
</dependency>
<dependency>
<groupId>org.jboss.shrinkwrap.resolver</groupId>
<artifactId>shrinkwrap-resolver-spi</artifactId>
<version>${version.shrinkwrap.resolvers}</version>
<scope>test</scope>
</dependency>
<dependency>
<groupId>org.jboss.shrinkwrap.resolver</groupId>
<artifactId>shrinkwrap-resolver-api-maven</artifactId>
<version>${version.shrinkwrap.resolvers}</version>
<scope>test</scope>
</dependency>
<dependency>
<groupId>org.jboss.shrinkwrap.resolver</groupId>
<artifactId>shrinkwrap-resolver-spi-maven</artifactId>
<version>${version.shrinkwrap.resolvers}</version>
<scope>test</scope>
</dependency>
<dependency>
<groupId>org.jboss.shrinkwrap.resolver</groupId>
<artifactId>shrinkwrap-resolver-impl-maven</artifactId>
<version>${version.shrinkwrap.resolvers}</version>
<scope>test</scope>
</dependency>
<dependency>
<groupId>org.jboss.shrinkwrap.resolver</groupId>
<artifactId>shrinkwrap-resolver-impl-maven-archive</artifactId>
<version>${version.shrinkwrap.resolvers}</version>
<scope>test</scope>
</dependency>
...
</dependencies>
The general entry point for resolution is the convenience org.jboss.shrinkwrap.resolver.api.maven.Maven class, which has static hooks to obtain a new org.jboss. shrinkwrap.resolver.api.maven.MavenResolverSystem. Let’s cover some of the most popular use cases for ShrinkWrap Resolvers.
TIP
If you happen to use Arquillian BOM in <dependencyManagement>, it already contains a ShrinkWrap Resolvers version. You must import the ShrinkWrap Resolvers BOM preceding the Arquillian OM in order to attain the 2.0.0-x version. Adding a ShrinkWrap BOM is recommended in any case.
You can import the ShrinkWrap Resolvers BOM via the following snippet:
<dependencyManagement>
<dependencies>
...
<!-- Override dependency resolver with latest version.
This must go *BEFORE* the Arquillian BOM. -->
<dependency>
<groupId>org.jboss.shrinkwrap.resolver</groupId>
<artifactId>shrinkwrap-resolver-bom</artifactId>
<version>${version.shrinkwrap.resolvers}</version>
<scope>import</scope>
<type>pom</type>
</dependency>
...
</dependencies>
</dependencyManagement>
Resolution of artifacts specified by Maven coordinates
Maven coordinates, in their canonical form, are specified as follows: groupId:artifactId:[packagingType:[classifier]]:version. Often, those are referred as G (groupId), A (artifactId), P (packagingType), C (classifier), and V (version). If you omit P and C, you will get the default value, which uses jar as the packaging type and an empty classifier. ShrinkWrap Resolvers additionally allows you to skip V in case it has version information available from the POM; here are some use cases:
§ The simplest use case is to resolve a file using coordinates. Here, the resolver locates an artifact defined by G:A:V and resolves it including all transitive dependencies. The result is formatted as an array of type File:
File[] = Maven.resolver().resolve("G:A:V").withTransitivity().asFile();
§ You might want to change the default Maven behavior and resolve only one artifact specified by G:A:V, avoiding Maven’s transitive dependencies. For this use case, ShrinkWrap Resolvers provides a shorthand for changing resolution strategy, called withoutTransitivity(). Additionally, you might want to return a single File instead of an array:
Maven.resolver().resolve("G:A:V").withoutTransitivity().asSingleFile();
§ Very often, you need to resolve more than one artifact. The resolve(String…) method allows you to specify many artifacts at the same time. The result of the call will be an array of File composed of artifacts defined by G1:A1:V1 and G2:A2:V2, including their transitive dependencies:
Maven.resolver().resolve("G1:A1:V1", "G2:A1:V1").withTransitivity().asFile();
§ Resolving a dependency with a specific packaging type. The packaging type is specified by P in the G:A:P:V coordinates description:
Maven.resolver().resolve("G:A:war:V").withTransitivity().asFile();
Packaging can be of any type; the most common are listed here:
|
jar |
war |
ear |
ejb |
rar |
par |
pom |
test-jar |
maven-plugin |
§ Resolving a dependency with a specific classifier. With a classifier, such as tests, you need to include all G:A:P:C:V parts of the coordinates string:
Maven.resolver().resolve("G:A:test-jar:tests:V").withTransitivity().asFile();
§ Returning resolved artifacts as a type other than File. ShrinkWrap Resolvers provides shorthands for returning an InputStream instead of File. Additionally, with shrinkwrap-resolver-maven-impl-archive on the runtime classpath, you can return results as ShrinkWrap archives, such as JavaArchive, WebArchive, or EnterpriseArchive:
§ Maven.resolver().resolve("G:A:V").withTransitivity().as(File.class);
§ Maven.resolver().resolve("G:A:V").withTransitivity().as(InputStream.class);
§ Maven.resolver().resolve("G:A:V").withTransitivity().as(JavaArchive.class);
§ Maven.resolver().resolve("G:A:war:V").withoutTransitivity().asSingle(
WebArchive.class);
NOTE
It’s the responsibility of the caller to close the returned InputStream.
§ Working with artifact metadata. Sometimes, you are more interested in metadata, such as dependencies of a given artifact instead of the artifact itself. ShrinkWrap Resolvers provides an API for such use cases:
§ MavenResolvedArtifact artifact = Maven.resolver().resolve("G:A:war:V")
§ .withoutTransitivity().asSingle(MavenResolvedArtifact.class);
§
§ MavenCoordinate coordinates = artifact.getCoordinate();
§ MavenArtifactInfo[] dependencies = artifact.getDependencies();
§ String version = artifact.getResolvedVersion();
ScopeType scope = artifact.getScope();
You can still retrieve the resolved artifact from MavenResolvedArtifact:
File file = artifact.asFile();
§ Excluding a dependency of the artifact you want to resolve. In case you need to resolve an artifact while avoiding some of its dependencies, you can follow the Maven concept known as <exclusions>. The following shows how to exclude G:B while resolving G:A:V:
§ Maven.resolver()
§ .addDependencies(
§ MavenDependencies.createDependency("G:A:V", ScopeType.COMPILE, false,
§ MavenDependencies.createExclusion("G:B"))).resolve().
withTransitivity().asFile();
§ Using a strategy to control what will be resolved. In special cases, excluding a single dependency is not the behavior you want to achieve. For instance, you want to resolve all test-scoped dependencies of an artifact, you want to completely avoid some dependency while resolving multiple artifacts, or maybe you’re interested in optional dependencies. For those cases, ShrinkWrap Resolvers allows you to specify a MavenResolutionStrategy. For instance, you can exclude G:B from G:A:V (e.g., the same as in previous examples) via the following snippet:
§ Maven.resolver().resolve("G:A:V").using(
new RejectDependenciesStrategy(false, "G:B")).asFile();
NOTE
withTransitivity() and withoutTransitivity() are just convenience methods you can use to avoid writing down strategy names. The first one calls TransitiveStrategy and the second one calls NotTransitiveStrategy.
Strategies are composed of an array of MavenResolutionFilter instances and TransitiveExclusionPolicy instances. Defining the former allows you to transform a dependency graph of resolved artifacts, and defining the latter allows you to change default behavior when resolving transitive dependencies. By default, Maven does not resolve any dependencies in provided and test scope, and it also skips optional dependencies. ShrinkWrap Resolvers behaves the same way by default, but allows you to change that behavior. This comes in handy especially when you want to, for instance, resolve all provided dependencies of G:A:V. For your convenience, ShrinkWrap Resolvers ships with the strategies described in Table 2-7.
Table 2-7. Strategies available in ShrinkWrap Resolvers
|
Name |
Description |
|
AcceptAllStrategy |
Accepts all dependencies of artifacts. Equals TransitiveStrategy. |
|
AcceptScopesStrategy |
Accepts only dependencies that have a defined scope type. |
|
CombinedStrategy |
Allows you to combine multiple strategies together. The behavior is defined as logical AND between combined strategies. |
|
NonTransitiveStrategy |
Rejects all dependencies that were not directly specified for resolution. This means that all transitive dependencies of artifacts for resolution are rejected. |
|
RejectDependenciesStrategy |
Rejects dependencies defined by G:A (version is not important for comparison, so it can be omitted altogether). By default, it is transitive: RejectDependenciesStrategy("G:A", "G:B") means that all dependencies that originate at G:A or G:B are removed as well. If you want to change that behavior to reject defined dependencies but to keep their descendants, instantiate the following strategy: RejectDependenciesStrategy(false, "G:A", "G:B") |
|
TransitiveStrategy |
Accepts all dependencies of artifacts. Equals AcceptAllStrategy. |
§ Control sources of resolution. ShrinkWrap Resolvers allows you to specify where you want to resolve artifacts from. By default, it uses the classpath (also known as Maven Reactor) and Maven Central repository; however, you can alter the behavior programmatically:
§ Maven.resolver().resolve("G:A:V").withClassPathResolution(false)
§ .withTransitivity().asFile();
§ Maven.resolver().resolve("G:A:V").withMavenCentralRepo(false)
§ .withTransitivity().asFile();
§ Maven.resolver().offline().resolve("G:A:V")
.withTransitivity().asFile();
Although classpath resolution is handy for testing SNAPSHOT artifacts that are not yet installed in any Maven repository, making ShrinkWrap Resolvers offline lets you avoid accessing any repositories but local cache.
§ Controlling classpath resolution and Maven Central comes in handy, but sometimes you might want to specify a completely different settings.xml file than THE default for your test execution. You can do this via the following API calls:
§ Maven.configureResolver().fromFile("/path/to/settings.xml")
§ .resolve("G:A:V").withTransitivity().asFile();
§
§ Maven.configureResolver().fromClassloaderResource("path/to/settings.xml")
.resolve("G:A:V").withTransitivity().asFile();
WARNING
ShrinkWrap Resolvers will not consume settings.xml files specified on the command line (-s settings.xml) or in the IDE. It reads settings.xml files at their standard locations, which are ~/.m2/settings.xml and $M2_HOME/conf/settings.xml unless overridden in the API or via a system property.
Resolution of artifacts defined in POM files
While previous calls allow you to manually define what you want to resolve, in Maven projects, you have very likely specified this information already in your pom.xml file. ShrinkWrap Resolvers allows you to follow DRY (Don’t Repeat Yourself) principles and can load metadata included there.
ShrinkWrap Resolvers constructs a so called effective POM model (simplified, that is your pom.xml file plus parent hierarchy and Super POM, the Maven default POM file). In order to construct the model, it uses all local repositories, the classpath repository, and all remote repositories. Once the model is loaded, you can automatically add the metadata in there to artifacts you want to resolve. The following use cases are supported:
Resolving an artifact with the version defined in effective POM
In case you want to resolve G:A:V, you can simply specify G:A instead. For artifacts with non-JAR packaging type or classifier, you must use alternative syntax with a question mark ?, such as G:A:P:? or G:A:P:C:?:
Maven.resolver().loadPomFromFile("/path/to/pom.xml")
.resolve("G:A").withTransitivity().asFile();
Maven.resolver().loadPomFromClassLoaderResource("/path/to/pom.xml")
.resolve("G:A:P:?").withTransitivity().asFile();
Resolving artifacts defined in effective POM
ShrinkWrap resolvers allows you to import artifacts defined with a specific scope into the list of artifacts to be resolved. This way, you don’t need to alter your tests if you change dependencies of your application. You can either use importDependencies(ScopeType…) or convenience methods that cover the most frequent usages (importRuntimeDependencies(), importTestDependencies(), and importRuntimeAndTestDependencies()):
Maven.resolver().loadPomFromFile("/path/to/pom.xml")
.importDependencies(ScopeType.TEST, ScopeType.PROVIDED)
.resolve().withTransitivity().asFile();
Maven.resolver().loadPomFromFile("/path/to/pom.xml").
importRuntimeDependencies().resolve().withTransitivity().asFile();
TIP
“Runtime” in convenience methods means all the Maven scopes that are used in the application runtime, which are compile, runtime, import, and system. If you need to select according to Maven scopes, go for importDependencies(ScopeType…) instead.
Specifying plug-ins to be activated
By default, ShrinkWrap Resolvers activates profiles based on property value, file presence, active by default profiles, operating system, and JDK. However, you can force profiles the same way you would via -P in Maven:
Maven.resolver().loadPomFromFile(
"/path/to/pom.xml", "activate-profile-1", "!disable-profile-2")
.importRuntimeAndTestDependencies().resolve().withTransitivity().asFile();
System properties
ShrinkWrap Resolvers allows you to override any programmatic configuration via System Properties, which are defined in Table 2-8.
Table 2-8. System Properties that alter the behavior of ShrinkWrap Resolvers
|
Name |
Description |
|
org.apache.maven.user.settings |
Path to the user settings.xml file. If both settings are provided, they are merged; user one has the priority. |
|
org.apache.maven.global-settings |
Path to the global settings.xml file. If both settings are provided, they are merged; user one has the priority. |
|
org.apache.maven.security-settings |
Path to settings-security.xml, which contains an encrypted master password for password-protected Maven repositories. |
|
org.apache.maven.offline |
Flag there to work in offline mode. |
|
maven.repo.local |
Path to local repository with cached artifacts. Overrides value defined in any of the settings.xml files. |
Experimental Features
WARNING
The following features are in their early development stages. However, they should work for the most common use cases. Feel free to report a bug in the SHRINKRES project if you encounter problems.
ShrinkWrap Resolvers Maven plug-in
The ShrinkWrap Resolvers Maven plug-in allows you to propagate settings specified on the command line into test execution. Settings include paths to the pom.xml and settings.xml files, activated/disabled profiles, offline flag, and path to local repository. No support for IDE exists at this moment.
To activate the plug-in, you need to add the following snippet to the <build> section of your pom.xml file:
<plugin>
<groupId>org.jboss.shrinkwrap.resolver</groupId>
<artifactId>shrinkwrap-resolver-maven-plugin</artifactId>
<version>${version.shrinkwrap.resolvers}</version>
<executions>
<execution>
<goals>
<goal>propagate-execution-context</goal>
</goals>
</execution>
</executions>
</plugin>
Then, in your test you can do the following:
Maven.configureResolverViaPlugin().resolve("G:A").withTransitivity().asFile();
MavenImporter
The MavenImporter is the most advanced feature of ShrinkWrap Resolvers. Instead of the user being responsible for specifying how the testing archive should look, it reuses information defined in your pom.xml to construct the archive. So, no matter how your project looks, you can get a full archive because you would deploy it into the application server within a single line of code.
MavenImporter is able to compile sources, construct manifest.mf files, fetch the dependencies, and construct archives as Maven would do. It does not require any data to be prepared by Maven; however, it can profit from those if they exist. For instance, the following example takes advantage of metadata defined in the POM file to determine the build output:
ShrinkWrap.create(MavenImporter.class)
.loadPomFromFile("/path/to/pom.xml").importBuildOutput().as(WebArchive.class);
ShrinkWrap.create(MavenImporter.class)
.loadPomFromFile("/path/to/pom.xml", "activate-profile-1",
"!disable-profile-2").importBuildOutput().as(WebArchive.class);
ShrinkWrap.create(MavenImporter.class).configureFromFile("/path/to/settings.xml")
.loadPomFromFile("/path/to/pom.xml").importBuildOutput().as(JavaArchive.class);
NOTE
MavenImporter currently supports only JAR and WAR packages. Also, it does not honor many of the Maven plug-ins—it currently supports only a limited subset.
Additionally, using different JDKs for running tests and compiling sources is not supported. However, it should work if you are compiling sources targeting JDK6 while being bootstrapped on JDK7.
By enabling resolution in a friendly, intuitive API, ShrinkWrap Resolvers arms ShrinkWrap archives with a powerful mechanism to create deployment units, which are applicable in real-world scenarios that require libraries and modules not owned by the current project.
Runtime
Being simply a component model, Java EE needs a concrete implementation to provide the runtime services to our applications.
WildFly
The latest community edition of the application server offered by JBoss has recently been renamed to WildFly, and this will be the default target runtime for our examples. Written from the ground up, WildFly (previously known as JBoss Application Server 7) was designed with the following goals at the core:
Speed
Startup, deployment, and request-processing demands leverage a concurrent-state machine and constant-time class loading.
Efficiency
Memory usage is kept to a minimum.
Modularity
Application libraries and server libraries are isolated from one another to avoid runtime conflicts.
Administration
Centralized settings via web interface, HTTP, Java, and command-line APIs.
Compliance
Java EE6 Full Profile Certification.
Testable
Uses Arquillian and ShrinkWrap in its own internal test suite.
Because a quick feedback loop is important in testing during development, the speed afforded by WildFly makes it a compelling candidate for our target runtime:
19:16:06,662 INFO [org.jboss.as] (Controller Boot Thread)
JBAS015874: WildFly 8.0.0.Alpha2 "WildFly" started in 2702ms -
Started 153 of 189 services (56 services are lazy, passive or on-demand)
The online user guide for WildFly is located at http://bit.ly/MAyZAR.
OpenShift
Although getting our applications running on our own machine is a great step in developing, the beauty of the Internet is that we can expose our content and services to the world at large. Until very recently, Java EE hosting typically involved a dedicated and expensive server colocated in a data center. With the rapid advent of virtualization and the cloud, we’re now able to gain public access much more easily, and at a far reduced cost.
OpenShift is Red Hat’s free Platform as a Service (PaaS) for applications. Although it supports a variety of frameworks bundled as “cartridges,” we’ll be using OpenShift’s built-in JBoss AS7 support. With just a little bit of initial setup, pushing changes from our local Git repository to the OpenShift remote will trigger a build and deployment of our application for all to see. We’ll be relieved of the responsibility of obtaining a server, installing JBossAS, configuring the networking and firewalls, or manually deploying new versions.
On to the Code
Now that we’ve familiarized ourselves with the technologies we’ll be using throughout the exercises, let’s dig in and create a new Java EE application, making it public to the world.
All materials on the site are licensed Creative Commons Attribution-Sharealike 3.0 Unported CC BY-SA 3.0 & GNU Free Documentation License (GFDL)
If you are the copyright holder of any material contained on our site and intend to remove it, please contact our site administrator for approval.
© 2016-2026 All site design rights belong to S.Y.A.