JavaScript Regular Expressions (2015)
Chapter 5. Node.js and Regex
So far, we've had fun learning how to create regular expressions for different situations. However, you may be wondering what it would be like to apply a regular expression in a real-world situation, such as reading a log file and presenting its information in a user-friendlier format?
In this chapter, we will learn how to implement a simple Node.js application that reads a log file and parses it using a regular expression. This way, we can retrieve specific information from it and output it in a different format. We are going to test all the knowledge we obtained from the previous chapters of this book.
In this chapter we will cover the following topics:
· Installing the required software to develop our example
· Reading a file with Node.js
· Analyzing the anatomy of an Apache log file
· Creating a parse with regular expressions to read an Apache log file
Setting up Node.js
Since we will be developing a Node.js application, the first step is to have Node.js installed. We can get it from http://nodejs.org/download/. Just follow the download instructions and we will have it set up on our computer.
Note
If this is your first time working with Node.js, please go through the tutorials at https://nodejs.org/.
To make sure we have Node.js installed, open the terminal application (Command Prompt, if you're using Windows), and type node –v. The Node.js version installed should be displayed as follows:
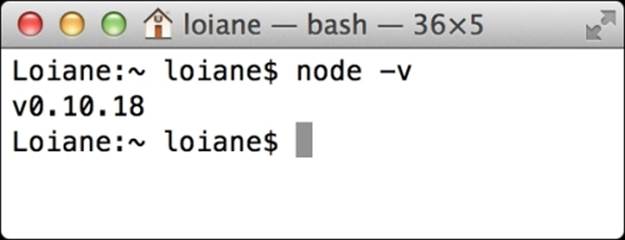
We are now good to go!
Getting started with our application
Let's start developing our sample application with Node.js, which will read a log file and parse its information using a regular expression. We are going to create all the required code inside a JavaScript file, which we will name as regex.js. Before we start coding, we will perform a simple test. Add the following content inside the regex.js:
console.log('Hello, World!');
Next, in the terminal application, execute the regex.js command node from the directory that the file was created in. The Hello, World! message should be displayed as follows:
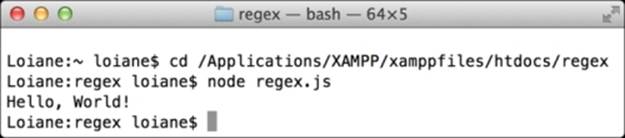
The hello world application with Node.js is created and it works! We can now start coding our application.
Reading a file with Node.js
As the main goal of our application is to read a file, we need the file that the application is going to read! We will be using a sample Apache log file. There are many files on the Internet, but we will be using the log file that can be downloaded fromhttp://fossies.org/linux/source-highlight/tests/access.log. Place the file in the same directory that the regex.js file was created.
Note
This sample Apache log file is also available within the source code bundle from this book.
To read a file with Node.js, we need to import the Node.js filesystem module. Remove the console.log message we placed inside the regex.js file and add the following line of code:
var fs = require('fs');
Note
To learn more about the Node.js filesystem module, please read its documentation at http://nodejs.org/api/fs.html.
The next step is to open the file and read its content. We are going to use the following code to do this:
fs.readFile('access.log', function (err, data) {//#1
if (err) throw err;//#2
var text = data.toString();//#3
var lines = text.split('\n');//#4
lines.forEach(function(line) {//#5
console.log(line);//#6
});
});
According to the Node.js documentation, the readFile function (#1) can receive three arguments: the name of the file (access.log), certain options (that we are not using in this example), and the callback function that will be executed when the contents of the file are loaded in the memory.
Note
To learn more about the readLine function, please access http://nodejs.org/api/fs.html#fs_fs_readfile_filename_options_callback.
The callback function receives two arguments. The first one is the error. In case something goes wrong, an exception will be thrown (#2). The second argument is data, which contains the file contents. We are going to store a string with all the file contents in a variable named text (#3).
Each record of the log is then placed in a row of the file. So, we can go ahead and separate the file records and store it into an array (#4). We can now iterate the array that holds the log rows (#5) and perform an action in each line. In this case, we are simply outputting the content of each line in console (#6) for now. We will replace line #6 of the code with a different logic in the next section.
If we execute the regex.js command node, all the file content should be displayed as follows:
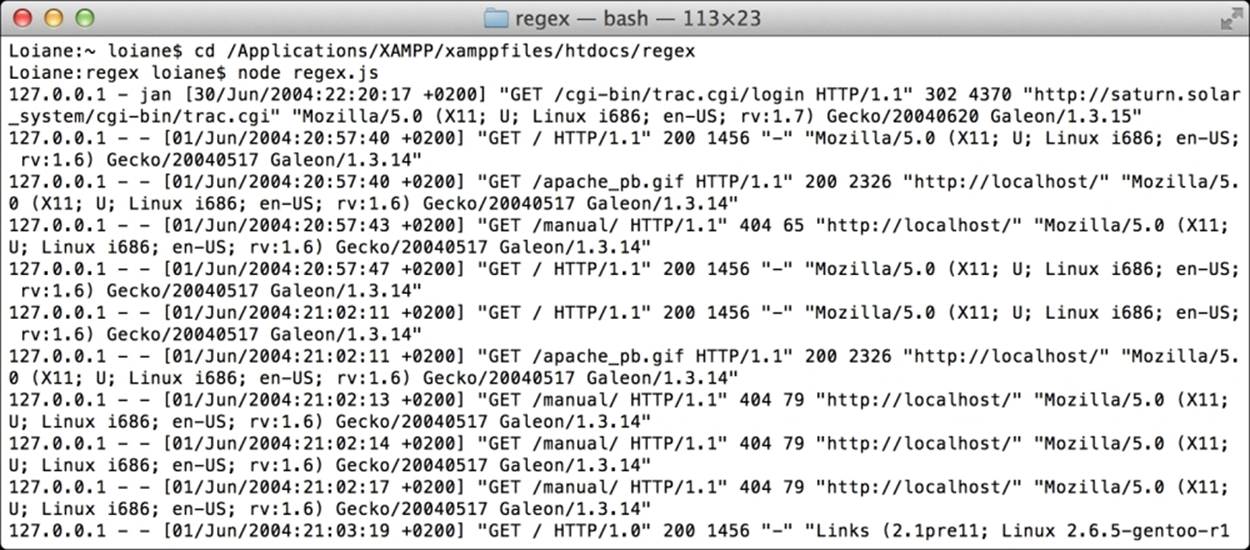
The anatomy of an Apache log file
Before we create the regular expression that will match a line of the Apache file, we need to understand what kind of information it holds.
Let's take a look at a line from access.log:
127.0.0.1 - jan [30/Jun/2004:22:20:17 +0200] "GET /cgi-bin/trac.cgi/login HTTP/1.1" 302 4370 "http://saturn.solar_system/cgi-bin/trac.cgi" "Mozilla/5.0 (X11; U; Linux i686; en-US; rv:1.7) Gecko/20040620 Galeon/1.3.15"
The Apache access log that we are reading follows the %h %l %u %t \"%r\" %>s %b \"%{Referer}i\" \"%{User-agent}i\" format. Let's take a look at each part:
· %h: The first part of the log is the (127.0.0.1) IP address
· %l: In the second part, the hyphen in the output indicates that the requested piece of information is not available
· %u: The third part is the user ID of the person requesting the (jan) document.
· %t: The fourth part is the time taken for the request to be received, such as ([30/Jun/2004:22:20:17 +0200]). It is in the [day/month/year:hour:minute:second zone] format, where:
· day = 2*digit
· month = 3*letter
· year = 4*digit
· hour = 2*digit
· minute = 2*digit
· second = 2*digit
· zone = (`+' | `-') 4*digit
· \"%r\": The fifth part is the request line from the client that is given in double quotes, such as ("GET /cgi-bin/trac.cgi/login HTTP/1.1")
· %>s: The sixth part is the status code that the server sends back to the (302) client
· %b: The seventh part is the size of the object returned to the (4370) client
· \"%{Referer}i\": The eighth part is the site that the client reports having been referred from, which is given in double quotes, such as ("http://saturn.solar_system/cgi-bin/trac.cgi")
· \"%{User-agent}i\": The ninth and last part is the user-agent HTTP request header and is also given in double quotes, such as ("Mozilla/5.0 (X11; U; Linux i686; en-US; rv:1.7) Gecko/20040620 Galeon/1.3.15")
All the parts are separated by a space. With this information and that given previously, we can start creating our regular expression.
Note
For more information about the format of Apache logs, please read http://httpd.apache.org/docs/2.2/logs.html.
Creating the Apache log Regex
In the Apache access log file, we have nine parts that we want to recognize and extract from each line of the file. We can try two approaches while creating a Regex: we can be very specific or more generic. As mentioned previously, the most powerful regular expressions are the ones that are generic. We will try to achieve these expressions in this chapter as well.
For example, for the first part of the log, we know it is an IP address. We can be specific and use a Regex for the (^\b\d{1,3}\.\d{1,3}\.\d{1,3}\.\d{1,3}\b) IPs or, as we know, the log starts with an IP we can use, such as ^(\S+), where, ^ means it matches the beginning of the input and \S matches a single character other than whitespace. The ^(\S+) expression will match exactly the first part of the log, which consists of some specific information until it finds a space (such as the IP address). Also, ^(\S+) is simpler than using ^\b\d{1,3}\.\d{1,3}\.\d{1,3}\.\d{1,3}\b and we've still achieved the same result.
Let's go ahead and test the regular expression created so far:

To recapitulate what we learned in Chapter 1, Getting Started with Regex, the exec method executes a search for a match in a string. It returns an array of information, as it is the first position the string has matched and then the subsequent position in each part of the Regex.
For the second and third parts, we can continue using the ^(\S+) Regex. The second and third part can contain certain information (including a set of alphanumeric characters), or it can contain a hyphen. We are interested in the information present in each part until it finds a space. So, we can add two more ^(\S+) to our Regex: ^(\S+) (\S+) (\S+) and test it:

The first three parts of the log line are recognized.
Creating a Regex for the time part
The fourth part is the time that is given between brackets. The Regex that is going to match the time from the log is \[([^:]+):(\d+:\d+:\d+) ([^\]]+)\].
Let's see how we can achieve this result.
First, we have the opening and closing brackets. We cannot simply use [] as part of the Regex, because brackets in a regular expression represent a set of characters (groups as we learned in Chapter 3, Special Characters). So, we need to use the (\) scape character before each bracket, so that we can represent the bracket as part of the regular expression.
The next piece of the time Regex is "([^:]+):". After the opening bracket, we want to match any character until we find the (:) colon. We learned in Chapter 2, The Basics about a negated range and this is exactly what we are going to use. We are expecting any character to be present except the colon, so we use [ˆ:] to represent it. Also, it can consist of one or more characters, such as (+). Next, we are expecting a (:) colon. With this piece of the regular expression, we can match "[30/Jun/2004:" from "[30/Jun/2004:22:20:17 +0200]".
The same Regex can be represented as "(\d{2}\/\w{3}\/\d{4}):", since the day is given in the form of two digits, the month is given in three characters, and the year in four digits, and are separated by \.
The next piece of the Regex is (\d+:\d+:\d+). It will match 22:20:17 from the example. The \d character matches any number (+ matches one or more), followed by a (:) colon. We could also use (\d{2}:\d{2}:\d{2}), since the hours, minutes, and seconds are represented by two digits each.
The final piece is ([^\]]+)\]. We are expecting any character except "]" ([^\]] – negate ] ). This will match the time zone (+0200). We could also use ([\+|-]\d{4}) as Regex, since the zone format is + or -, followed by four digits.
When we test the regular expression, we will get this:

Note
Note that each piece of the time was split (the date, time, and zone) by a subset, separated by a parenthesis group "()". If we want to have the time as a single piece, we can remove the subsets: \[(\d{2}\/\w{3}\/\d{4}:\d{2}:\d{2}:\d{2} [\+|-]\d{4})\].
Creating a Regex for the request information
Following the parts that we separated (in a few sections previous to this one), let's work on the fifth part of the log, which is the request information.
Let's take a look at the "GET /cgi-bin/trac.cgi/login HTTP/1.1" example, so we can create a regular expression from it.
The request is given in double quotes, so that we know a regular expression is to be created inside \" \". From the preceding example, there are three pieces (GET, /cgi-bin/trac.cgi/login, and HTTP/1.1). So, GET can be represented by (\S+).
Next, we have /cgi-bin/trac.cgi/login. We will use (.*?), meaning, it can be any character or nothing else. We will use this because we do not know the format of this information.
Then, we have the HTTP/1.1 protocol and to match it, we will also use (\S+).
This will be the result when we try to match the regular expression:

Tip
If we want to retrieve each part of the request separately (such as the method, resource, and protocol), we can use (), as we used in the first approach, for the time.
Creating a Regex for the status code and object size
The next two parts of the log are simple. The first one is the status, which is represented by 2xx, 3xx, 4xx, or 5xx, so, it is basically three digits. We can represent it in two ways: (\S+), which will match any character until it finds a space, or (\d{3}). Of course, we can be even more specific and allow the first digit to be only 2, 3, 4, or 5, though, let's not complicate it any more than is needed.
A number can also represent the object size. However, if no information is returned, it will be represented by a hyphen, so (\S+) represents best. Or we can also use ([\d|-]+).
The output will be the following:

Creating a Regex for the referrer and the user agent
Both parts are given in double quotes. We can represent the information using the "([^"]*)" expression, which means including any character except ". We can apply it in both parts.
With the addition of the last two parts of the log, we will get this output:
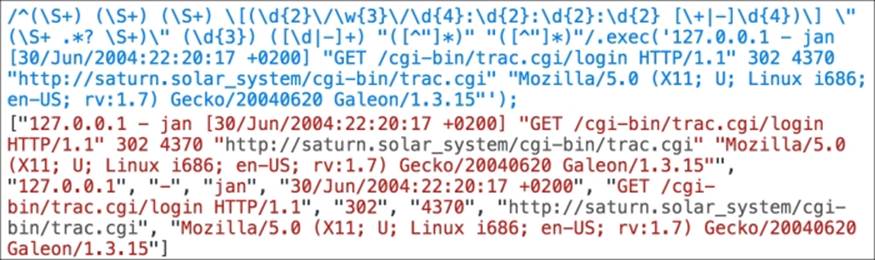
Our final Regex to match a line of the Apache access log, is given here:
^(\S+) (\S+) (\S+) \[(\d{2}\/\w{3}\/\d{4}:\d{2}:\d{2}:\d{2} [\+|-]\d{4})\] \"(\S+ .*? \S+)\" (\d{3}) ([\d|-]+) "([^"]*)" "([^"]*)"
Trying to create a regular expression at once can be tricky and complicated. However, we've split each part and created a Regex. At the end of all this, all we have to do is combine all these parts together.
We are now ready to continue coding our application.
Parsing each Apache log row
We now know the regular expression that we want to use, so all we need to do is add the (#1) Regex to the code, execute the Regex with each line (#2), and obtain the results (#3). We will simply output the results in the console for now (#4). The code is presented here:
var fs = require('fs');
fs.readFile('access.log', function (err, logData) {
if (err) throw err;
var text = logData.toString(),
lines = text.split('\n'),
results = {},
regex = /^(\S+) (\S+) (\S+) \[(\d{2}\/\w{3}\/\d{4}:\d{2}:\d{2}:\d{2} [\+|-]\d{4})\] \"(\S+ .*? \S+)\" (\d{3}) ([\d|-]+) "([^"]*)" "([^"]*)"/; //#1
lines.forEach(function(line) {
results = regex.exec(line); //#2
for (i=0; i<results.length; i++){ //#3
console.log(results[i]); //#4
}
}); //#5
});
Tip
Is this the only way of making Regex work with Node.js?
In this example, we used the JavaScript Regex, which we've learned throughout this book. However, Node.js has other packages that can make our lives easier when working with regular expressions. The node-regexp package is one of the packages that provides a new way of working with regular expressions while working with Node.js. It is worth taking a look at it and spending some time playing with it at https://www.npmjs.com/package/node-regexp.
We will continue completing our code in the next two sections.
Creating a JSON object for each row
Let's try to do something more useful with each row of the Apache log. We are going to create a JavaScript Object Notation (JSON) object with each row and add it to an array. To wrap our application, we will save the JSON content into a file.
Note
To learn more about JSON, please refer to http://www.json.org/.
So after the Regex declaration (which is inside the var declaration), we are going to add a new variable that will hold the collection of JSON objects we are going to create:
jsonObject = [],
row;
Instead of lines #3 and #4, as seen in the code of the previous section, we will place this code:
if (results){
row = {
ip: results[1],
available: results[2],
userid: results[3],
time: results[4],
request: results[5],
status: results[6],
size: results[7],
referrer: results[8],
userAgent: results[9],
}
jsonObject.push(row);
}
This code will verify if any result arises from the execution of the Regex, and will create a JSON object called row. Then, we simply need to add the JSON object into the jsonObject array.
Next, we will construct the last piece of the Node.js application. We will create a JSON file with the JSON array that we created. We need to place the following code in the #5 line of the code, as seen in the previous section:
var outputFilename = 'log.json';
fs.writeFile(outputFilename, JSON.stringify(jsonObject, null, 4), function(err) {
if(err) {
console.log(err);
} else {
console.log("JSON saved to " + outputFilename);
}
});
Note
To learn more about the writeFile function, please refer to http://nodejs.org/api/fs.html#fs_fs_writefile_filename_data_options_callback.
The result will be a JSON with content similar to the following:
[
{
"ip": "127.0.0.1",
"available": "-",
"userid": "jan",
"time": "30/Jun/2004:22:20:17 +0200",
"request": "GET /cgi-bin/trac.cgi/login HTTP/1.1",
"status": "302",
"size": "4370",
"referrer": "http://saturn.solar_system/cgi-bin/trac.cgi",
"userAgent": "Mozilla/5.0 (X11; U; Linux i686; en-US; rv:1.7) Gecko/20040620 Galeon/1.3.15"
}
//more content
]
Display the JSON in a table
The last step is to create a simple HTML page to display the Apache log content. We are going to create an HTML file and place the following code in it:
<!DOCTYPE html>
<html lang="en">
<head>
<title>Log</title>
<link rel="stylesheet" href="http://netdna.bootstrapcdn.com/bootstrap/3.0.3/css/bootstrap.min.css">
<link rel="stylesheet" href="https://cdnjs.cloudflare.com/ajax/libs/bootstrap-table/1.5.0/bootstrap-table.min.css">
<script src="http://cdnjs.cloudflare.com/ajax/libs/jquery/2.0.3/jquery.min.js"></script>
<script src="https://cdnjs.cloudflare.com/ajax/libs/bootstrap-table/1.5.0/bootstrap-table.min.js"></script>
<style>
body{
margin-top: 30px;
margin-right: 30px;
margin-left: 30px;
}
</style>
</head>
The preceding code contains the required JavaScript and CSS imports, so that we can display the Apache log.
Note
The table for this example was created using a Bootstrap table. For more information on its usage and examples, please access http://wenzhixin.net.cn/p/bootstrap-table/docs/examples.html.
The next and last piece of code is the body of the HTML:
<body>
<table data-toggle="table" data-url="log.json" data-cache="false" data-height="400" data-show-refresh="true" data-show-toggle="true" data-show-columns="true" data-search="true" data-select-item-name="toolbar1" >
<thead>
<tr>
<th data-field="ip">IP</th>
<th data-field="time">Time</th>
<th data-field="request">Request Info</th>
<th data-field="status">Status</th>
<th data-field="size">Size</th>
<th data-field="referrer">Referrer</th>
<th data-field="userAgent">User Agent</th>
</tr>
</thead>
</table>
</body>
</html>
The body will hold a table that will read the content of the log.json file, parse it, and display it.
To be able to open the html file in the browser, we need a server. This is because our code is using an Ajax request to load the JSON file created by the Node.js application. Since we have Node.js installed, we can use its simplest server to execute our code.
In the terminal, execute the following command to install the server:
npm install http-server –g
Then, change the directory to the one you created for the HTML file:
cd chapter05
Finally, start the server:
http-server
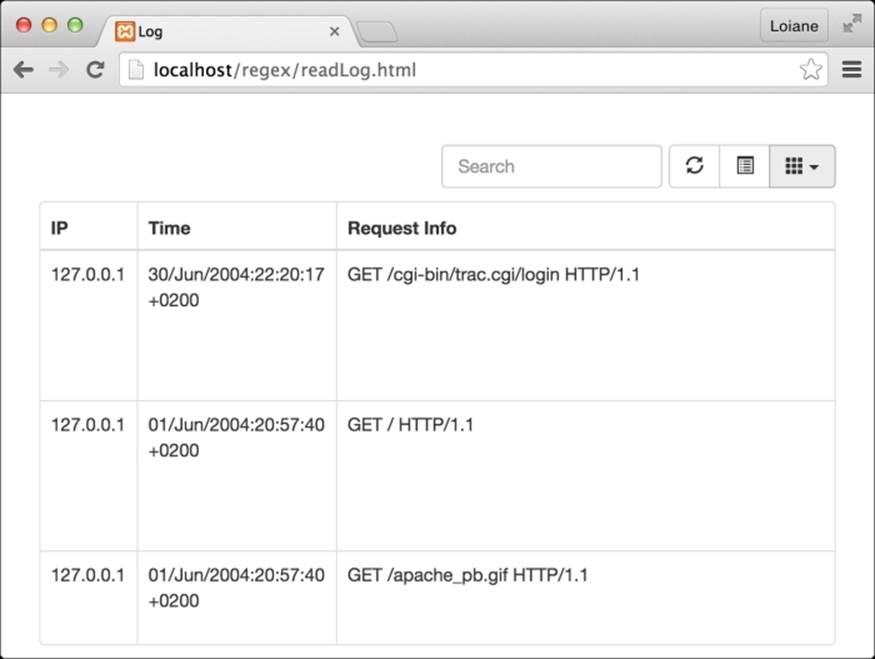
You will be able to see the results from the http://localhost:8080/ URL. We can see the final result in the following image:
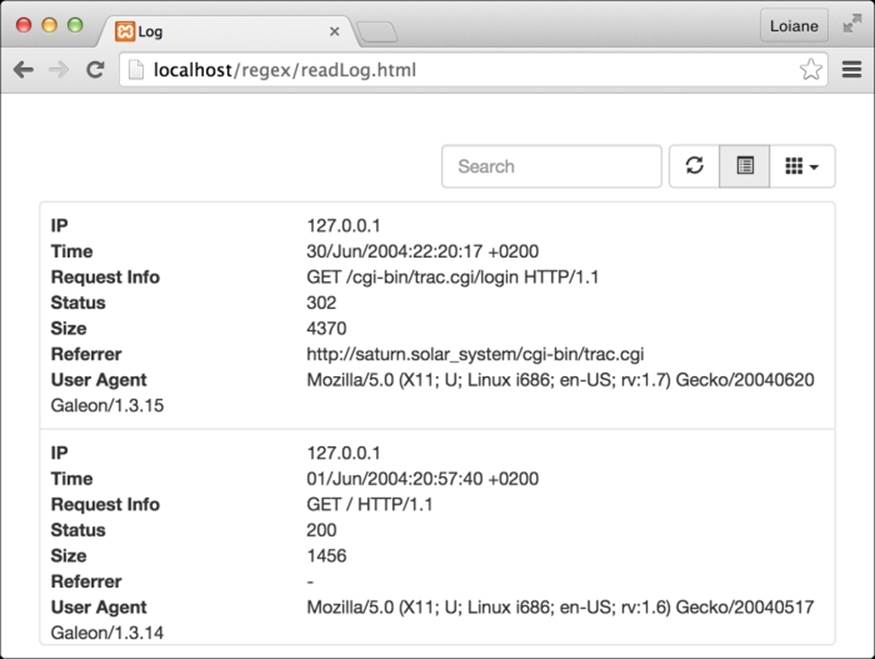
We can also toggle the results in the table and view the complete data:
Now we are done with our sample Node.js application, which has read and parsed an Apache log file and can be displayed in a friendlier way.
Summary
In this chapter, we learned how to create a simple Node.js application that read an Apache log file and extracted the log information using a regular expression. We were able to put in to practice the knowledge we acquired in the previous chapters of the book.
We also learned that to create a very complex Regex, it is best to do it in parts. We learned that we can be very specific while creating a regular expression or we can be more generic and achieve the same results.
As a new version of EcmaScript is being created (EcmaScript 6, which will add lots of new features to JavaScript), it is good to familiarize yourself with the improvements related to regular expressions as well. For more information please visithttp://www.ecmascript.org/dev.php.
We hope you enjoy the book! Have fun creating regular expressions!
All materials on the site are licensed Creative Commons Attribution-Sharealike 3.0 Unported CC BY-SA 3.0 & GNU Free Documentation License (GFDL)
If you are the copyright holder of any material contained on our site and intend to remove it, please contact our site administrator for approval.
© 2016-2026 All site design rights belong to S.Y.A.