Pragmatic Unit Testing in Java 8 with JUnit (2015)
Part 1. Unit-Testing Foundations
Chapter 4. Organizing Your Tests
Prior chapters have given you enough unit-testing fodder to hit the ground running. The problem with hitting the ground running, however, is that you’re leaping into a new, unfamiliar environment, and you’re liable to make a few wrong turns or even hurt yourself in the process.
Better that you take a few minutes to pick up a few pointers on what you’re getting into. This chapter introduces a few JUnit features as part of showing you how to best organize and structure your tests.
Some of the topics you’ll read about include:
· How to make your tests visually consistent using arrange-act-assert
· Keeping tests maintainable by testing behavior, not methods
· The importance of test naming
· Using @Before and @After for common initialization and cleanup needs
· How to safely ignore tests getting in your way
Keeping Tests Consistent with AAA
When we wrote tests for the first iloveyouboss example, we visually organized our tests into three chunks: arrange, act, and assert, also known as triple-A (AAA).
|
|
@Test |
|
|
public void answersArithmeticMeanOfTwoNumbers() { |
|
|
ScoreCollection collection = new ScoreCollection(); |
|
|
collection.add(() -> 5); |
|
|
collection.add(() -> 7); |
|
|
|
|
|
int actualResult = collection.arithmeticMean(); |
|
|
|
|
|
assertThat(actualResult, equalTo(6)); |
|
|
} |
Back then, we added comments to identify each of the chunks explicitly, but these comments add no value once you understand the AAA idiom.
AAA is a part of just about every test you’ll write. With AAA, you:
· Arrange. Before we execute the code we’re trying to test, ensure that the system is in a proper state by creating objects, interacting with them, calling other APIs, and so on. In some rare cases, we won’t arrange anything, because the system is already in the state we need.
· Act. Exercise the code we want to test, usually by calling a single method.
· Assert. Verify that the exercised code behaved as expected. This can involve inspecting the return value of the exercised code or the new state of any objects involved. It can also involve verifying that interactions between the tested code and other objects took place.
The blank lines that separate each portion of a test are indispensable visual reinforcement to help you understand a test even more quickly.
You might need a fourth step:
· After. If running the test results in any resources being allocated, ensure that they get cleaned up.
Testing Behavior Versus Testing Methods
When you write tests, focus on the behaviors of your class, not on testing the individual methods.
To understand what that means, think about the tedious but time-tested example of an ATM class for a banking system. Its methods include deposit(), withdraw(), and getBalance(). We might start with the following tests:
· makeSingleDeposit
· makeMultipleDeposits
To verify the results of each of those tests, you need to call getBalance(). Yet you probably don’t want a test that focuses on verifying the getBalance() method. Its behavior is probably uninteresting (it likely just returns a field). Any interesting behavior requires other operations to occur first—namely, deposits and withdrawals. So let’s look at the withdraw() method:
· makeSingleWithdrawal
· makeMultipleWithdrawals
· attemptToWithdrawTooMuch
All of the withdrawal tests require us to first make a deposit (initializing an ATM object with a balance is effectively making a deposit). There’s no easy or meaningful way to write the tests otherwise.
When you write unit tests, start with a more holistic view: you are testing aggregate behaviors of a class, not its individual methods.
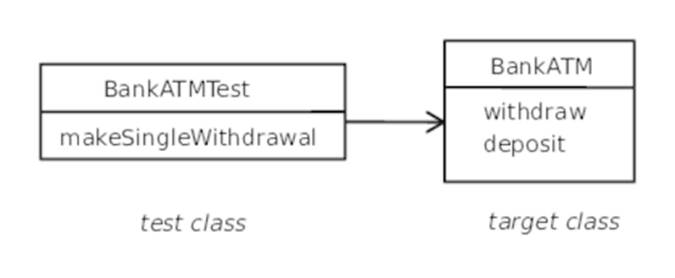
Relationship Between Test and Production Code
The JUnit tests you write will live in the same project as the production code that they verify. However, you’ll keep the tests separate from the production code within a given project. You’ll ship the production code (the target of the tests, sometimes known as the system under test or SUT), but the tests will typically stay behind.
When we say the tests you write, we mean you, a programmer. Unit testing is solely a programmer activity. No customers, end users, or nonprogrammers will typically see or run your tests.
Unit testing is a one-way street, as demonstrated in the following figure. Tests depend on the production-system code, but the dependency goes only in that direction. The production system has no knowledge of the tests.
That’s not to say that the act of writing tests can’t influence the design of your production system. The more you write unit tests, the more you’ll encounter cases where a different design would make it a lot easier to write tests. Go with the flow—you’ll make life easier on yourself by choosing the more testable design, and you’ll find that the design itself is usually better.
Separating Tests and Production Code
When you ship or deploy your production software, you could choose to include your tests too. Most shops don’t—it bloats the size of the JAR files that must be loaded (a minor slowdown), and it increases the attack surface[17] of your codebase. But if your product ships with the production source, you have no reason not to include the tests.
Beyond the consideration of whether or not to ship the tests, you need to decide where the tests go within your project. You have at least three options:
· Tests in same directory and package as production code. This solution is simple to implement, but no one does it on a “real” system. To avoid shipping tests when using this scheme, you need to script stripping them from your distribution. Either you need to identify them by name (for example, Test*.class) or you need to write a bit of reflective code that identifies test classes. Keeping the tests in the same directory also bloats the number of files you must wade through in a directory listing.
· Tests in separate directory, with package structure mirroring that of production code. Most shops use this option. Tools like Eclipse and Maven generally adhere to this model. Here’s a tree view showing an example:
|
|
├── src |
|
|
│ └── iloveyouboss |
|
|
│ ├── ScoreCollection.java |
|
|
│ └── Scoreable.java |
|
|
└── test |
|
|
└── iloveyouboss |
|
|
└── ScoreCollectionTest.java |
· You can see that the iloveyouboss package appears in both the src and test source directories. The iloveyouboss.ScoreCollectionTest test class ends up in ScoreCollectionTest.java in the test source directory, and the iloveyouboss.ScoreCollection and iloveyouboss.Scoreable production classes end up in the src directory.
· As the test directory’s structure mirrors that of the src directory, each test ends up in the same package as the target class that it verifies. The test class can access package-level elements of the target class if necessary. This is both a plus and a minus. See the next section, Exposing Private Data Versus Exposing Private Behavior, for further discussion.
· Tests in separate directory and separate but similar package structure. Here’s a tree view:
|
|
├── src |
|
|
│ └── iloveyouboss |
|
|
│ ├── ScoreCollection.java |
|
|
│ └── Scoreable.java |
|
|
└── test |
|
|
└── test |
|
|
└── iloveyouboss |
|
|
└── ScoreCollectionTest.java |
· In the preceding tree view, the test.iloveyouboss.ScoreCollectionTest test class appears in the test source folder, in a distinct package from the production classes. Prefixing the test-package names with test is one convention; you might choose a different organization.
· Putting the tests in a different package from the production code forces you to write tests through the public interface. Many developers choose this route as a conscious design decision. Let’s talk about it!
Exposing Private Data Versus Exposing Private Behavior
Some developers believe that you should test using only the public interface of production code. Interacting with nonpublic methods from a test violates notions of information hiding. One implication: tests that go after nonpublic code tie themselves to implementation details. If those details change, tests can break, even though technically no public behavior has changed.
Testing private details can result in lower-quality code. How? When small changes to code break numerous tests—because the tests are overly aware of private implementation details—programmers get frustrated at the effort required to fix the broken tests. The more tests they break, the more the programmers learn to avoid refactoring. And the less refactoring they do, the more rapidly their codebase degrades. We’ve seen some teams abandon their significant investment in unit tests because of such tight coupling.
Caveat aside, you’ll occasionally need to ask overly personal questions of your objects in order to write tests. To assert against an otherwise private field, you need to create a getter method for it. If you keep your tests in the same package as the production code, you can specify package-level access for the getter. You’ll sleep a little better knowing that you need not expose the field to the public world.
Exposing private data as needed to allow testing is unlikely to create overly tight coupling between your tests and production code. Exposing private behavior is another matter.
Larger classes often contain many complex private methods. You might feel compelled to write tests directly against that private behavior.
If your tests are in the same package as the production code, you can expose the methods to package-level access. If the tests are in a different package, you can cheat and use Java’s reflection capability to bypass access protection. But the best answer is to do neither.
The compulsion to test private behavior indicates that you have a design problem. Gobs of interesting, buried behavior is almost always a violation of the Single Responsibility Principle (SRP), which states that classes should be small and single-purpose. Your best bet is to extract the interesting private behavior and move it to another, possibly new, class where it becomes useful public behavior. We’ll work through cleaning up the Profile class in this fashion in The Profile Class and the SRP.
The Value of Focused, Single-Purpose Tests
The tests we built in Chapter 1, Building Your First JUnit Test are short—four lines of code each. We might consider combining them:
|
iloveyouboss/12/test/iloveyouboss/ProfileTest.java |
|
|
|
@Test |
|
|
public void matches() { |
|
|
Profile profile = new Profile("Bull Hockey, Inc."); |
|
|
Question question = new BooleanQuestion(1, "Got milk?"); |
|
|
|
|
|
// answers false when must-match criteria not met |
|
|
profile.add(new Answer(question, Bool.FALSE)); |
|
|
Criteria criteria = new Criteria(); |
|
|
criteria.add( |
|
|
new Criterion(new Answer(question, Bool.TRUE), Weight.MustMatch)); |
|
|
|
|
|
assertFalse(profile.matches(criteria)); |
|
|
|
|
|
// answers true for any don't care criteria |
|
|
profile.add(new Answer(question, Bool.FALSE)); |
|
|
criteria = new Criteria(); |
|
|
criteria.add( |
|
|
new Criterion(new Answer(question, Bool.TRUE), Weight.DontCare)); |
|
|
|
|
|
assertTrue(profile.matches(criteria)); |
|
|
} |
We could add the rest of the test cases to the matches test, prefacing each with an explanatory comment. That would reduce the overhead of repeated common setup that each test would need if separate. However, we’d lose the important benefit of test isolation that JUnit provides.
|
|
Split multiple cases into separate JUnit test methods, each named for the behavior it verifies. |

With separate tests:
· We immediately know what behavior went awry when an assertion fails, because JUnit displays the name of the failing test.
· We minimize the amount of sleuthing required to decipher a failed test. Because JUnit runs each test in a separate instance, it’s unlikely that other test failures have anything to do with the current failing test.
· We ensure that all cases get executed. When an assertion fails, the current test method aborts, because an assertion failure results in a java.lang.AssertionError getting thrown. (JUnit traps this in order to mark the test as failed.) Any test cases that appear after the assertion failure don’t get executed.
Tests as Documentation
Our unit tests should provide lasting and trustworthy documentation on the capabilities of the classes we build. Tests provide opportunities to explain things that the code itself can’t do as easily. In a sense, tests can supplant a lot of the comments you might otherwise feel compelled to write.
Documenting Our Tests with Consistent Names
The more you combine cases into a single test, the more generic and meaningless the test name becomes. A test named matches doesn’t tell anyone squat about what it demonstrates.
As you move toward more-granular tests, each focused on a distinct behavior, you have the opportunity to impart more meaning in each of your test names. Instead of suggesting what context you’re going to test, you can suggest what happens as a result of invoking some behavior against a certain context.
(Real examples, please, Jeff, and not so much babble.)
|
not-so-hot name |
cooler, more descriptive name |
|
makeSingleWithdrawal |
withdrawalReducesBalanceByWithdrawnAmount |
|
attemptToWithdrawTooMuch |
withdrawalOfMoreThanAvailableFundsGeneratesError |
|
multipleDeposits |
multipleDepositsIncreaseBalanceBySumOfDeposits |
Well, that last one is kind of obvious, but that’s because you already understand the ATM domain. Still, more-precise names go a long way toward helping other programmers understand what a test is about.
Of course, you can go too far. Reasonable test names probably consist of up to seven or so words. Longer names quickly become dense sentences that are tough to swallow. If many of your test names are long, it might be a hint that your design is amiss.
The cooler, more descriptive names all follow the form:
doingSomeOperationGeneratesSomeResult
You might also use a slightly different form such as:
someResultOccursUnderSomeCondition
Or you might decide to go with the given-when-then naming pattern, which derives from a process known as behavior-driven development:[18]
givenSomeContextWhenDoingSomeBehaviorThenSomeResultOccurs
Given-when-then test names can be a mouthful, though some alternate Java testing frameworks such as JDave[19] and easyb[20] support the longer names well. You can usually drop the givenSomeContext portion without creating too much additional work for your test reader:
whenDoingSomeBehaviorThenSomeResultOccurs
…which is about the same as doingSomeOperationGeneratesSomeResult.
Which form you choose isn’t as important as being consistent. Your main goal: make your tests meaningful to others.
Keeping Our Tests Meaningful
If others (or you yourself) have a tough time understanding what a test is doing, don’t simply add comments. Start by improving the test name. You can also:
· Improve any local-variable names.
· Introduce meaningful constants.
· Prefer Hamcrest assertions.
· Split larger tests into smaller, more-focused tests.
· Move test clutter to helper methods and @Before methods.
|
|
Rework test names and code to tell stories, instead of introducing explanatory comments. |
More on @Before and @After (Common Initialization and Cleanup)
In Chapter 2, Getting Real with JUnit, you learned how to eliminate duplicate initialization across tests by using an @Before method (sometimes referred to as a setup method).
As you add more tests for a given set of related behaviors, you’ll realize that many of them have the same initialization needs. You’ll want to take advantage of the @Before method to help ensure that your tests don’t become a maintenance nightmare of redundant code.
It’s important to understand the order in which JUnit executes @Before and @Test methods. Here’s a small example:
|
iloveyouboss/13/test/scratch/AssertTest.java |
|
|
|
private Account account; |
|
|
|
|
|
@Before |
|
|
public void createAccount() { |
|
|
account = new Account("an account name"); |
|
|
} |
Imagine that the class in which this @Before method resides has two tests, hasPositiveBalance and depositIncreasesBalance. Here’s the flow of execution when JUnit interacts with that test class:
|
|
@Before createAccount |
|
|
@Test depositIncreasesBalance |
|
|
@Before createAccount |
|
|
@Test hasPositiveBalance |
(Don’t forget that JUnit might run the tests in an order different from their ordering in the source file!)
In other words, the @Before method executes before each and every test method.
Sometimes your initialization needs will grow. For example, you might need to delete a file before running each test. Rather than combining the operations into a single @Before method, you can create additional @Before methods:
|
|
@Before createAccount |
|
|
@Before resetAccountLogs |
|
|
@Test depositIncreasesBalance |
|
|
... |
Be careful—the order in which JUnit executes multiple @Before methods is out of your control. You can’t guarantee that createAccount() will run prior to resetAccountLogs(). If you need to guarantee an order, use a single @Before method with its statements ordered how you need them to be.
An @Before method can have as much initialization code as you need. An @Before method applies to all tests in a class, so you only want to put code into it that makes sense to run before every test in that class.
You might have the rare need for an @After method—the bookend to @Before. An @After method runs on completion of each and every test method, even when a test fails. You use @After methods to clean up the messes a test can make. For example, you might close any open database connections. Here’s the execution flow for your imaginary test class that defines an @After method:
|
|
@Before createAccount |
|
|
@Test depositIncreasesBalance |
|
|
@After closeConnections |
|
|
@Before createAccount |
|
|
@Test hasPositiveBalance |
|
|
@After closeConnections |
BeforeClass and AfterClass
Normally the test-level setup (@Before) is all you need. In rare circumstances, you might need test-class-level setup of @BeforeClass, which runs once and only once, before any tests in the class execute. JUnit provides the expected @AfterClass bookend.
|
iloveyouboss/13/test/scratch/AssertMoreTest.java |
|
|
|
public class AssertMoreTest { |
|
|
@BeforeClass |
|
|
public static void initializeSomethingReallyExpensive() { |
|
|
// ... |
|
|
} |
|
|
|
|
|
@AfterClass |
|
|
public static void cleanUpSomethingReallyExpensive() { |
|
|
// ... |
|
|
} |
|
|
|
|
|
@Before |
|
|
public void createAccount() { |
|
|
// ... |
|
|
} |
|
|
|
|
|
@After |
|
|
public void closeConnections() { |
|
|
// ... |
|
|
} |
|
|
|
|
|
@Test |
|
|
public void depositIncreasesBalance() { |
|
|
// ... |
|
|
} |
|
|
|
|
|
@Test |
|
|
public void hasPositiveBalance() { |
|
|
// ... |
|
|
} |
|
|
} |
Here’s the flow of execution when JUnit interacts with AssertMoreTest:
|
|
@BeforeClass initializeSomethingReallyExpensive |
|
|
@Before createAccount |
|
|
@Test depositIncreasesBalance |
|
|
@After closeConnections |
|
|
@Before createAccount |
|
|
@Test hasPositiveBalance |
|
|
@After closeConnections |
|
|
@AfterClass cleanUpSomethingReallyExpensive |
Green Is Good: Keeping Our Tests Relevant
You should normally expect that all tests pass all of the time. In practice, that means that when you introduce a bug, only one or two tests fail. Isolating the problem is usually pretty easy in that environment.
Do not continue adding features when there are failing tests! Fix any test as soon as it fails, and keep all tests passing all of the time. “All green all of the time!” will keep you sane when you must change production code.
Keeping Our Tests Fast
Eclipse and other IDEs make it easy to run only the tests defined in a single test class. Some IDEs allow you to run just one unit test at a time. So one way to run your tests all the time and keep them green is to run only the ones you think you need.
But there’s a dark downside to limiting the number of tests you run: you could be creating bigger problems for yourself. The longer you go without the feedback that your entire suite of tests provides, the more likely you’re writing code that breaks something else in your application. Finding that problem later can cost you significantly more time than finding it now.
If your tests don’t interact with code that controls slow resources such as databases, it’s possible to run many thousands of them in a few seconds. At that rate, the easiest thing to do is to run all your tests all the time. In Eclipse and comparable IDEs, running all the tests all the time is as simple as right-clicking the project and running the tests at that level.
Some developers further bolster the definition of unit tests by insisting they must be lightning-fast.[21] In Chapter 10, Using Mock Objects, you’ll learn how to turn slow tests (that depend on things like databases) into fast tests by using mock objects.
If you can’t stand to run all of the tests, drop down a level from the project and run all of the tests in a package. Or consider a tool like Infinitest,[22] which runs the tests continuously in the background.
You’ll no doubt have a number of tests that are slow because they must hit an external resource. JUnit provides a feature called Categories that allows you to run only tests annotated with a specific category.[23]
The better solution is to minimize, with vigilance, the number of tests that fall into the slow bucket. Most of your unit tests should be blindingly fast. That’s not to say you won’t need slower, integration tests—you will—but this book focuses on unit tests that provide fast feedback.
|
|
Run as many tests as you can stand. |
Ignoring Tests
Your current test might be red as you develop it and/or the code, and that’s okay. Otherwise, avoid the headache of managing multiple test failures simultaneously.
As one solution for dealing with multiple failures, you could comment out other failing tests as you focus on the problematic test. JUnit provides a better mechanism than commenting, though: you can mark a test with an @Ignore annotation:
|
iloveyouboss/13/test/scratch/AssertTest.java |
|
|
|
@Test |
|
|
@Ignore("don't forget me!") |
|
|
public void somethingWeCannotHandleRightNow() { |
|
|
// ... |
|
|
} |
The explanatory-message argument to @Ignore is optional.
The JUnit test runner reminds us that we have ignored one or more tests. In Eclipse, the Runs: section in the JUnit view shows the number of skipped tests parenthetically. Having a reminder is great, since it’s easy to forget that you have commented-out tests. Committing commented-out tests to your repo is like burying a bag of money by an unmarked fence post in the middle of North Dakota.
After
JUnit is a seemingly simple tool that hides a good number of details beneath its surface. Though we only scratched the surface in this chapter, the JUnit features we discussed will suffice for most of your professional unit-testing needs.
You’ll be able to master the mechanics of JUnit in no time. The more enduring challenge is how to build unit tests with high quality. The next section focuses on a series of mnemonics to help you build better tests.
Footnotes
|
[17] |
http://en.wikipedia.org/wiki/Attack_surface |
|
[18] |
See http://en.wikipedia.org/wiki/Behavior-driven_development. |
|
[19] |
http://jdave.org |
|
[20] |
http://easyb.org |
|
[21] |
See http://www.artima.com/weblogs/viewpost.jsp?thread=126923. |
|
[22] |
https://infinitest.github.io/ |
|
[23] |
See https://github.com/junit-team/junit/wiki/Categories. |
All materials on the site are licensed Creative Commons Attribution-Sharealike 3.0 Unported CC BY-SA 3.0 & GNU Free Documentation License (GFDL)
If you are the copyright holder of any material contained on our site and intend to remove it, please contact our site administrator for approval.
© 2016-2026 All site design rights belong to S.Y.A.