Pro JavaScript Techniques, Second Edition (2015)
10. AngularJS and Testing
John Resig1, Russ Ferguson1 and John Paxton1
(1)
NJ, United States
In the previous chapter, you learned how to use the current set of tools to quickly put a site together and use version control to keep track of all the files you work with and the difference between them. In this chapter, we’ll dig in and understand how frameworks like Angular work.
Briefly, frameworks help you build large applications in a way that is more organized and easier to maintain. One of the other benefits to using a framework is a shorter learning curve for the team. Once a new member learns the framework, they have a better understanding of how the entire site works. With our example we will take a high-level look at AngularJS.
At the time of this writing, the current version of Angular is 1.4.1. Information can be found at https://angularjs.org/ . Information about Angular 2 can be found at https://angular.io/ .
One of the problems Angular tries to solve is to make it easy to develop dynamic applications. HTML on its own isn’t designed to make single-page applications. Angular provides a way to develop modern web applications in a way that is quick to learn. It does this by keeping each part of the application separate, so that each part can be updated independently of the others. This architectural pattern is called Model-View-Controller (MVC). You will find that other frameworks, like Backbone and Ember, work in a similar way.
In Chapter 9 we introduced some development tools that can help us be more productive. Yeoman (http://yeomanio/.) uses community-built generators to quickly develop all the files and folders needed to get a basic site working. Grunt ( http://gruntjs.com/ ) is used to automate tasks like unit testing and optimizing files for a production-ready site. This chapter assumes that both tools are installed. Please refer to the previous chapter or the sites listed for information on installing them.
To create a new Angular project, type your angular. In response, Yeoman asks some questions about how you want to set up the project:
· Would you like to use Sass (with Compass)? Sass ( http://sass-lang.com/ )stands for Syntactically Awesome Style Sheets. Sass gives you features like nesting selectors and using variables to develop style sheets. Compass is a tool written in Ruby that uses Sass files and adds features like generating sprite sheets out of a series of images.
· By agreeing to this option, you will get a SCSS file using Twitter Bootstrap’s styles as default. If you choose no, Yeoman will give you a regular CSS file with the same CSS selectors.
· Would you like to include Bootstrap? Twitter Bootstrap ( http://getbootstrap.com/ ) helps you develop the user interface for your website. Bootstrap can help make your site responsive so it can look good on multiple devices and gives you items like buttons, an image carousel, and other user interface components.
· If you choose to use this tool, Yeoman then asks whether to use the Sass version of Bootstrap.
· Which modules would you like to include? Modules give Angular extra abilities. For example, the angular-aria module provides accessibility features, while angular-route gives you the ability to add deep linking features. You can choose to add or remove any of the modules. Modules can also be added later manually.
Once you have answered the questions, all of the files needed will be downloaded, and Grunt will then launch a local server with the default browser loading http://localhost:9000, as shown in Figure 10-1.
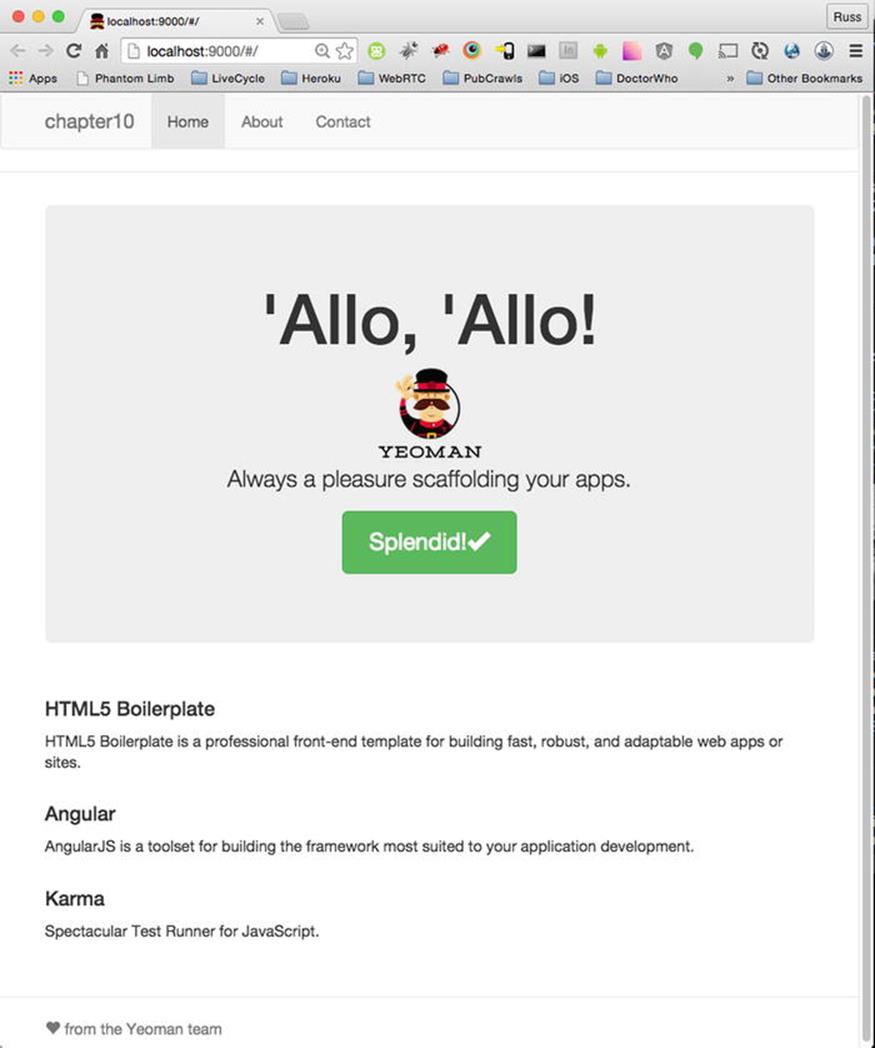
Figure 10-1.
AngularJS running on port 9000
From here we can look at the folders that make up this project. The app folder contains our main application, and it is where we are going to start.
The folders are very standard for what you would find in an HTML site. Inside the scripts folder is where it starts to get interesting.
At the root of the scripts folder is app.js. This is the main application file for Angular. Open this file to see how Angular is being bootstrapped. In Figure 10-2, you find the name of the application chapter10app (because that was the name of the folder the app was created in). This works with the ng-app directive in index.html. A directive gives added ability to DOM elements. In this case, it tells Angular that the application starts here and is called chapter10app.

Figure 10-2.
Using the ng-app directive tells Angular where the root element of the application is.
As you look at app.js, you see after the name of the application that numerous modules are loaded, which give Angular extra ability. One of these modules is named ngRoute; it will let you handle URLs for the application. The .config method uses $routeProvider to understand the URL and load the correct template with the controller by using a series of when statements.
The when statement enables you to customize the URLs for the application. In this example, if you were to type /about, Angular would know to load the about.html template and use AboutCtrl as the controller. Let’s explain in detail what that means.
Views and Controllers
We’ve discussed that Angular, like other frameworks, use the MVC pattern. This means that the application is broken up into three distinct parts.
· Model: Stores the data for the application.
· View: Creates a representation of the model data; for example, generating a chart to represent data.
· Controller: Sends commands to the model to update data. Also sends commands to the view to update the presentation of the model’s data.
The views folder contains the HTML templates that can be updated with the data coming from the model. The controllers folder contains the JavaScript files that will communicate with both the model and the view files.
Let’s look at the about.html file. Here we will add a button and have the controller work with it.
Open about.html, found in the views folder. Inside it, add a button tag. In this button tag we are going to use another directive, which will let Angular know when the button is clicked.
We need to add the ng-click directive to the button. Type ng-click='onButtonClick()' as shown in Listing 10-1. This will be resolved by our controller, giving us separation between the visual parts of the application and the business logic.
Listing 10-1. Defining a Method Using the ng-click Directive
<button ng-click="onButtonClick()">Button</button>
Open about.js in the controllers folder. Controllers let you add all the business logic you need for this part of the application to work. In the controller method you see the name AboutCtrl, which matches what we saw in the app.js file. The other thing you see in the controller method is the$scope property.
$scope lets you add methods or properties to the view that you are working with. Here we will deal with a function that was declared in the HTML file. Because ng-click="onButtonClick()" was defined in the HTML code, it is part of the scope of this controller.
Listing 10-2 shows how we get our controller and HTML to work together.
Listing 10-2. Using the Controller to Define the Function Declared in the HTML File
angular.module('chapter10App')
.controller('AboutCtrl', function ($scope, $http) {
$scope.awesomeThings = [
'HTML5 Boilerplate',
'AngularJS',
'Karma'
];
$scope.onButtonClick = function(){
console.log('hello world');
};
});
If the app is currently running in the browser, it should see that the JavaScript file has been updated and recompile everything. Once that is done, you can click the button, look at the console, and see the message.
Otherwise, go to the command line and in the main folder of your application type grunt serve.
This is just the beginning of being able to separate the application’s view from its business logic. For example, what if you wanted display a list of items?
Going back to the controller, we will add a JSON object to our scope; Listing 10-3 shows the code.
Listing 10-3. Data Assigned to the Scope of the about Controller
$scope.bands = [
{'name':"Information Society", 'album':"_hello world"},
{'name':"The Cure", 'album':"Wish"},
{'name':"Depeche Mode", 'album':"Delta Machine"}];
Now that we have data we need, the next step is to pass the data to the HTML template. Back in the about.html file, we will use the ng-repeat directive (Listing 10-4).
Listing 10-4. The ng-repeat Directive Loops through the Data Provided by the Controller to Display the Correct Number of Items in the List
<ul>
<li ng-repeat="band in bands">{{band.name}}<p>{{band.album}}</p></li>
</ul>
At this point your page should look something like Figure 10-3.
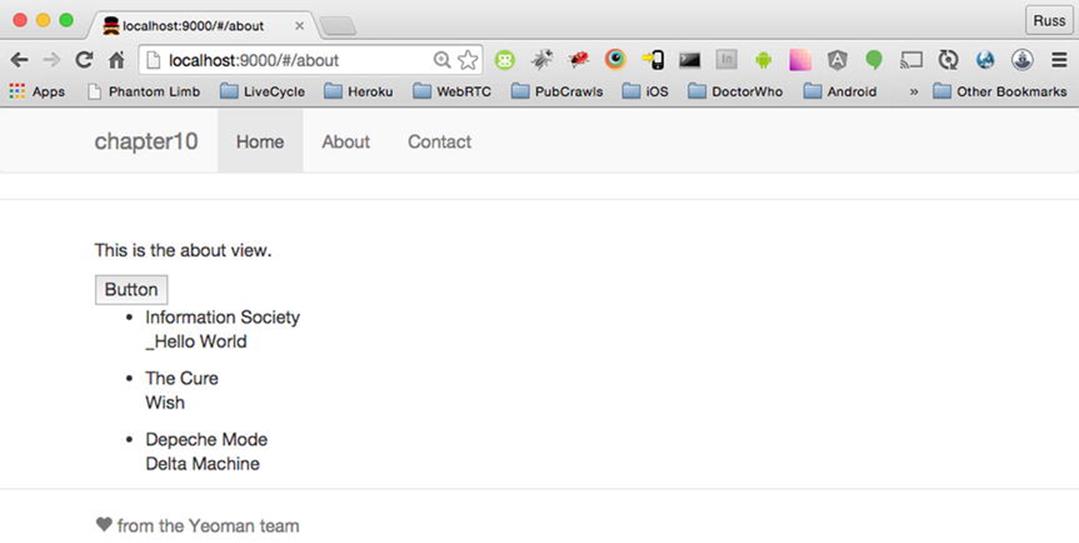
Figure 10-3.
The data from the controller rendered on the page
So far, we have been able to connect the controller to items that are defined in the HTML view using directives. Our data has also been defined in the controller. So, you may ask, suppose we wanted to get the data from an outside source; how do we make a call to a remote server and display the results? We will take that up in the next section.
Remote Data Sources
Let’s take our button method and use it as a way to get some remote data.
We are going to use the $http service, which will handle the remote call for us. This is similar to the AJAX method in JQuery. In order to take advantage of the service, we first need to add it to the controller method.
In the controller method add the $http service. It should now look something like Listing 10-5.
Listing 10-5. Adding the $http Service to the AboutCtrl Controller
.controller('AboutCtrl', function($scope, $http){
$scope.awesomeThings = [
'HTML5 Boilerplate',
'AngularJS',
'Karma'
];
});
Now that the service is available to the controller, we can use it with the onButtonClick method. We are going to use the get method, which matches the REST get verb. For more information about REST methods, look at this Wikipedia article:
http://en.wikipedia.org/wiki/Hypertext_Transfer_Protocol#Request_methods
We‘ll also use JSONPlaceholder, a service that lets you test your REST requests and return fake data. In the onButtonClick method, remove the existing code and add the code shown in Listing 10-6.
Listing 10-6. Making an HTTP Call and Assigning the Results to the results Property
$http.get(' http://jsonplaceholder.typicode.com/photos ').success(function(data){
$scope.results = data;
});
Looking at this code we see that we are using the get method but we are also listening for the success event. If the call is successful, we use an anonymous function to assign the result to a property called results.
Now that we have the results, we can update the template to display not just the text but also the thumbnail images that return from the service. We do that by using another directive for the image tag.
Open about.html and update the existing code. Remove the previous list and add the fcode shown in Listing 10-7 to the template.
Listing 10-7. Creating an Unordered List Based on the Results That Came Back from the REST Service
<ul>
<li ng-repeat="result in results">
<p>ID: {{result.id}}</p>
<p>{{result.title}}</p>
<p><img ng-src="{{result.thumbnailUrl}}"/></p>
</li>
</ul>
Here we are using the ng-src directive to tell the image tag where to find each image from the list. Just as in the previous example, this will loop though the whole list of results and display them all on screen. One of the nice things about using this directive is that the image tag will not try to display an image until the data has been received. So we just need to get results back from the REST service.
At this point the page should look something like Figure 10-4.
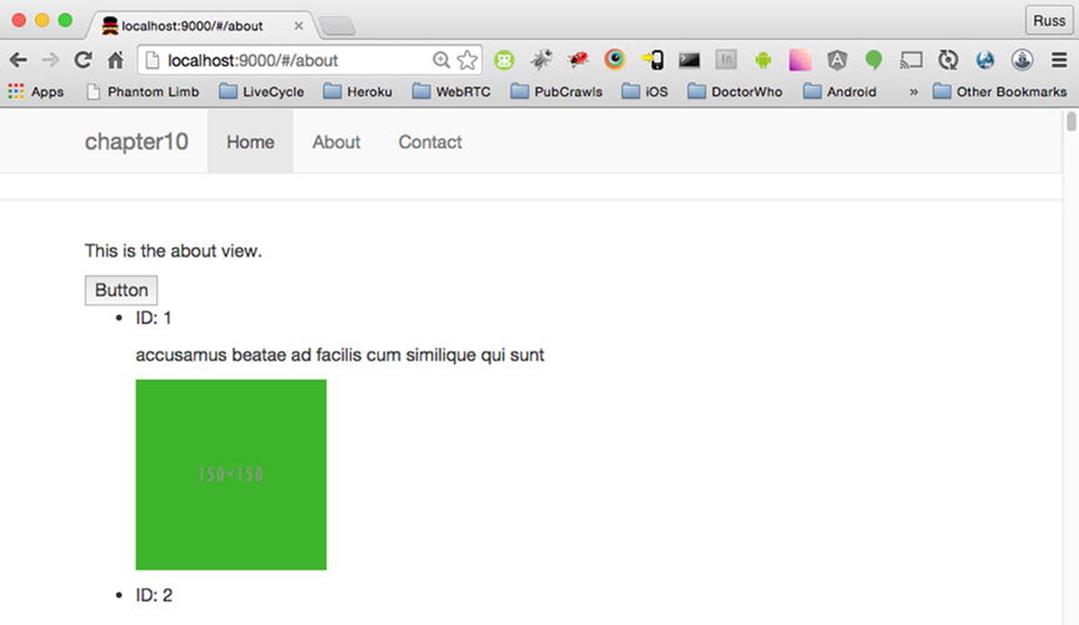
Figure 10-4.
Displaying the results from a REST service
With a few steps we have a site that is able to retrieve data from a remote source and render it to the browser when we need it. Angular has many features, but we are going to cover one more. Our next lesson will cover routes.
Routes
Routes allow us to create custom URLs for our application and give us the ability to bookmark a page so we can go directly to it later.
We saw an example of this in the app.js file. The .config method uses the $routeProvider API. Within the series of when statements, we are able to work out what HTML template will be loaded and which controller will be used with that template.
Now that we have a good feel for how this works, what if you wanted to pass parameters to the application? For example, suppose we only wanted to show one post from the previous example. Here we will create a route that will do exactly that.
If you created the application with Yeoman as in the previous lessons, then go over to the command line and type:
yo angular:route post
Using this command, Yeoman will update the app.js file by adding a new a new route. It will also create a new JavaScript file for your controller and an HTML file for the view. Not bad for one command.
If the application is running, you can go to the browser and type:
http://localhost:9000/#/post
You should see that the post view is ready to go.
The goal here is to load a post based on the number added to our URL. So, for example, if the URL looks like this:
http://localhost:9000/#/post/4
You should see the fourth post in the list based on the service we used in the last example.
Route Parameters
In order to get this to work we need to make our routing function a little more flexible. Open app.js; here we are going to update the post route so it can take variables in the URL.
It should go from:
/post
to:
/post/:postId
By adding :postId we create a variable that we can use in the controller. This variable will represent the number in the URL. To illustrate that, let’s update the controller.
Open post.js, where you’ll see that inside the controller method you have an anonymous function using $scope. In our other examples we saw that $scope gives us the ability to control our HTML template. We will add an extra parameter called $routeParams so that we can access our variable in the URL.
Now we can grab the variable from the URL and assign it to $scope. This will enable us to display it once we update the template.
Type the following in the controller method:
$scope.postId = $routeParams.postId;
To see our number on screen, we can quickly update the template.
Open the post.html file in the views folder. Here we can quickly update this template. First remove the copy between the paragraph tags, so that it looks like this:
<p>{{postId}}</p>
With that done, you can type a number into the url and see it displayed on screen. At this point, the browser should look like Figure 10-5.
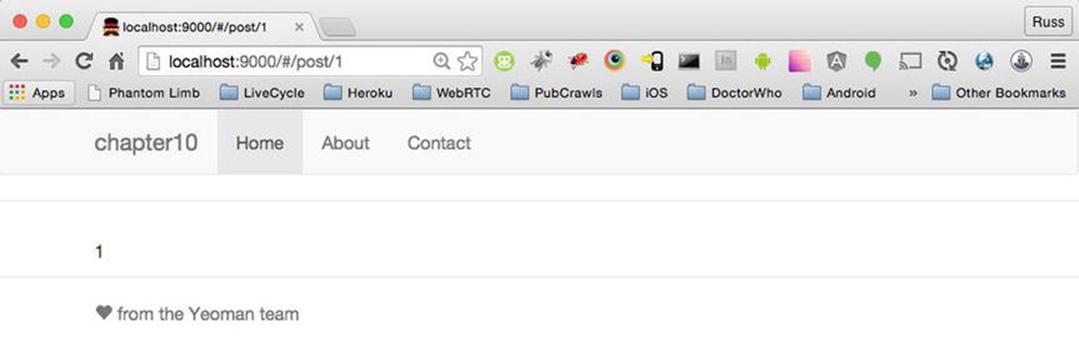
Figure 10-5.
Displaying a variable on screen based on the URL
That wasn’t so bad. So now we just need to connect it to a GET request and display the results. The code here will be very similar to what we did before. In the post control we need to add the $HTTP service so we can make the REST call. Listing 10-8 shows the code.
Listing 10-8. The Complete PostCtrl with Both the $routeParams and $http Services Added
.controller('PostCtrl', function($scope, $routeParams, $http){
$scope.awesomeThings = [
'HTML5 Boilerplate',
'AngularJS',
'Karma'
];
});
Right under this we will make the same REST call as before but this time add the postId variable, as shown in Listing 10-9.
Listing 10-9. Using the $http Service and routeParam to Get a Single Result
$http.get(' http://jsonplaceholder.typicode.com/photos/ '+$routeParams.postId).success(function(data){
$scope.results = data;
});
As for the HTML template (Listing 10-10), we’ll use the same code as the about example; the only difference is that we will remove the ng-repeat directive and make sure we use the word results.
Listing 10-10. HTML Template for Displaying the Post
<ul>
<li>
<p>ID: {{results.id}}</p>
<p>{{results.title}}</p>
<p><img ng-src='{{results.thumbnailUrl}}'/></p>
</li>
</ul>
Now as you update the number in the address bar, you should see a new post (Figure 10-6).
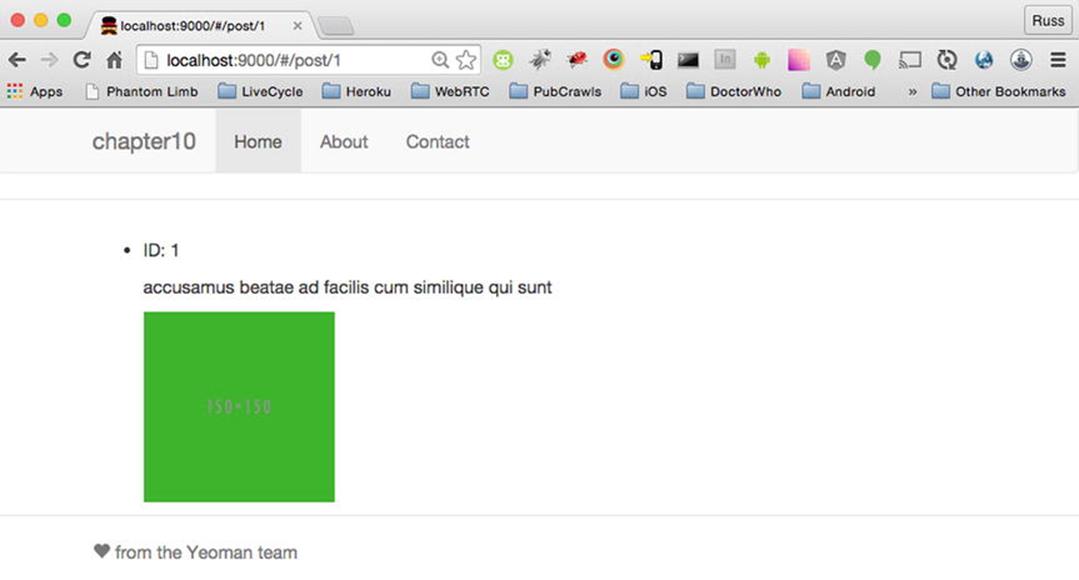
Figure 10-6.
Single post being displayed based on the URL variable
Application Testing
As you read the documentation for Angular, one of the things you will see is how to write tests that cover the different parts of the application you are building.
Testing helps you make sure that the code you write is stable all the time. For example, if you need to make a change to a function, it should still give you the same result, even if you change how the function works. If that change creates an unexpected result somewhere else in the application, the test should let you know.
So with that out of the way, how do you test an Angular application? There are two types of tests we will consider: unit testing and end-to-end (E2E) testing.
Unit Testing
When you write a function, you consider what parameters it should receive, what it does with that information, and what the result should be. Having a test for that unit of code will assure you that it behaves the way you expect it to.
If you have been using the Yeoman-generated version of Angular from the previous chapters, we need to install a few extra items to get the tests working. Go to the command line and type
npm install grunt-karma -–save-dev
This will install Karma.
Karma is described in the Angular developer guide as “a JavaScript command line tool that can be used to spawn a web server which loads your application’s source code and executes your tests.” In short, Karma will launch browsers, run the code against the tests that you have written, and give you the results. If you don’t have a browser installed that you want to test (for example, IE if you are using a Mac), you can use a service like BrowserStack ( https://www.browserstack.com/ ) or Sauce Labs ( https://saucelabs.com/ ). For the most up-to-date information about Karma, go to http://karma-runner.github.io/ .
Next we need to install PhantomJS. Type
npm install karma-phantomjs-launcher -–save-dev
at the command line.
PhantomJS is a headless browser—a browser without a user interface. By including it, you can run your application in a browser, and all the commands will be executed from the command line. For the latest information about PhantomJS, go to http://phantomjs.org/ .
Finally, type
npm install karma-jasmine -–save-dev
at the command line. This will install Jasmine, the testing framework we’ll use to test our application. You’ll find documentation at http://jasmine.github.io/ .
At this point, let’s make sure that everything works, by typing grunt test. This should run the tests that are in the test folder.
Adding New Tests
One of the benefits of using Yeoman is that when you create new controllers, it also creates corresponding files for unit tests.
Look at the main folder. There you will find a test folder. Inside that folder will be a spec folder, containing a controllers folder, which contains files that will unit-test every controller that has been created.
Open about.js so we can see how to test a controller.
Before we start writing tests, let us first look at the code that exists to get an idea of what is going on.
At the top there is a describe method, which is used to talk about the tests that are about to be written. The describe method can be used to describe at a high level everything that is about to be tested.
Next there is a beforeEach method, which will run before each test. This gives us access to the entire application by loading it as a module.
Two variables are created, AboutCtrl and scope; then we create another beforeEach method, which assigns the variables the values of the controller and the scope inside that controller, as if we were using the controller directly.
Finally we can write our tests, which we describe in a series of it methods. This helps to make the tests easy to document. Here you describe how the function should work.
The default test has the message "should attach a list of awesomeThings to the scope"; then it runs a function with an expect method. This method is important because it give you a chance to test the expected result. In this case, we check the length of the array awesomeThings and expect it to be 3. If it isn’t, the test will fail.
We can now test the length of the array bands that we created before. Add a new it method as shown in Listing 10-11.
Listing 10-11. Unit Test for the number of Bands That Should Be In the about Controller
it('should have at least 3 bands', function(){
expect(scope.bands.length).toBe(3);
});
If you go to the command line and type grunt test, this test should pass. If you had a different number in the expect method, for example 2, the test would fail. You can see that in Figure 10-7.
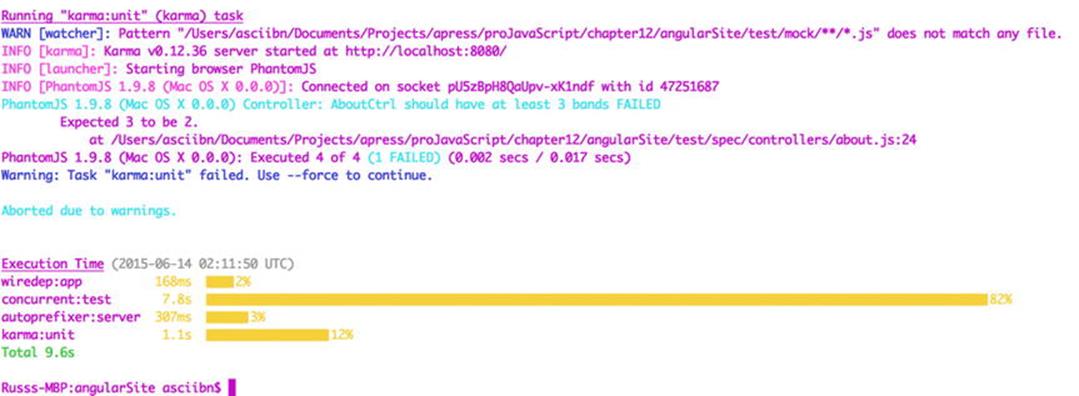
Figure 10-7.
Test expected two items and received three
We can also check the value of an item in the array (Listing 10-12).
Listing 10-12. Unit Test to Check the Value in the Array
it('should have the second album be Wish', function(){
expect(scope.bands[1].album).toEqual('Wish');
});
This is a very quick overview of how to test the controller. From here, you can test methods that have been written and evaluate the result. Jasmine gives you many ways to make sure the code you write is solid. Let’s take another look at testing, by opening post.js and testing our HTTP request.
Testing HTTP Requests with $httpBackend
In our previous example, we tested some of the data that was associated with the controller. In that case the data originated inside the controller. In most applications, you will get data from a remote source. So how do you write a test where you do not have control of the data source? In this case you use $httpBckend to make sure that the requests you create work independently of the service.
This test will recreate everything we did with $routeParams. It will be self-contained and will not actually make a call to the server.
First, we will add a few variables. In addition to PostCtrl and scope, add httpBackend and routeParams. In this case we are not referring to the directives, so you don’t need to add the dollar ($) sign.
The second beforeEach method is where we are currently initializing the controller. This is where we will add directives, just as in the real controller; here add $httpBackend and $routeParams.
Now we assign values to the variables we created earlier. In the browser we were able to get a single post by assigning a value to postId from the URL. We simulate it as shown in Listing 10-13.
Listing 10-13. Assigning Values So We Can Simulate Getting a Value from the Browser (Part 1)
beforeEach(inject(function($controller,$rootScope,$httpBackend,$routeParams){
scope = $routeScope.$new();
routeParams = $routeParams;
routeParams.postId = 1;
httpBackend = $httpBackend;
httpBackend.expectGet(' http://jsonplaceholder.typicode.com/photos/ '+routeParams.postId).respond({id:'1', title:'title 1', thumbnailUrl:'myImage.png'});
PostCtrl = $controller('PostCtrl', {
$scope: scope
});
httpBackend.flush();
});
Since we are not loading this in a browser to make sure it works, we will hard-code the value of postId to 1. Then, using httpBackend, we simulate the call the same way it’s done in the controller. In this case we use the method expectGet. This will simulate an HTTP GET request. If you wanted to do a POST request, you would use the expectPost method.
The response method gives us the payload that we can test against. Here we pass back a simple object that is just like what the API delivers.
After the scope is assigned, we see the httpBackend object once again using the flush method. This will make the response available for testing as if you had made the HTTP call.
Now on to the tests. Just as in the other example, a series of it methods describe what you are expecting.
Let us first make sure that we are only getting one result back from the server (Listing 10-14).
Listing 10-14. Assigning Values So We Can Simulate Getting a Value from the Browser (Part 2)
it('should be a single post', function(){
expect(scope.results).not.toBeGreaterThan(1);
});
Jasmine makes the tests easy to read. We have results and just want to make sure that we have only one object.
If we wanted to make sure there was an ID property on this object, we’d use the code shown in Listing 10-15.
Listing 10-15. Checking the ID Property
it('should have an id', function(){
expect(scope.results.id).toBeDefined();
}
Just as before, we can add tests that will allow us to understand the controller as we add more functionality to it. The process of writing tests first as you develop your code is called test-driven development. In this approach you first write a test knowing that it will fail, and then go back and write a minimum amount of code to get the test to work. After that, you can refactor as needed. Jasmine is used to test units of code. It is also used to test integration with the browser. So how do you simulate button clicks on multiple browsers? After all, from the history of web development, we know even things that seem simple sometimes don’t work in certain browsers. This is where Protractor comes in.
End to End Testing with Protractor
Protractor ( http://angular.github.io/protractor ) is a tool that lets you run real browsers and run tests in them. For example, you can make sure that when a button is clicked, it submits a form. Unlike unit testing where you are testing small units of code, end to end (E2E) testing lets you test whole sections of the application against an HTTP server. It is similar to you opening the site up in a browser and making sure things work. The nice part about this is that it’s automated.
Tasks like this should be automated. Protractor is able to do this because it is built on top of WebDriver, a tool used to automate testing inside a browser. Protractor also has features that support Angular, so there is very little configuration on your part.
Let’s install Protractor and run a few tests. At the command line, type:
npm install –g protractor –-save-dev
As it did with other node packages, this line will install Protractor globally so you can use it with other projects.
There is some configuration we need to do to get this working. Let’s create the config file.
Create a new file, which we will call protractor.conf.js, and save it in the test folder right next to the karma.config.js file.
In this file, we will give Protractor some information about where to find the Selenium server, what browsers to run, and where the test files are. Listing 10-16 shows the code.
Listing 10-16. Basic Configuration File for Protractor
export.config = {
seleniumAddress: 'http://localhost:4444/wd/hub',
multiCapabilities: [{browserName: ‘firefox’},{browserName: ‘chrome’}],
baseUrl: 'http://localhost.9000',
framework: 'jasmine',
specs: ['protractor/*.js']
};
There are a few things to unpack here, so let’s take a look.
The seleniumAddress property tells Protractor where the Selenium server is running. Next, the multiCapabilities property tells Protractor which browsers to run the tests on. As you can see, it’s an array of objects listing the name of each browser.
Because we are testing locally, we can only test browsers that are installed on the machine. So you can’t test IE if you are running a Mac. If you need to test browsers like IE or mobile browsers, you can add properties that will allow you to connect to either SauceLabs or BrowserStack.
Next we have the baseUrl property, which tells Protractor what server is hosting the application that is being tested. It’s important that the site is running on a local server when you run the tests. The framework property is set to Jasmine, because that is the framework we are using for our tests.
The specs property is important because it is where we tell Protractor what folder has the tests in it. In our case, it is in the protractor folder, and we use the wild card to tell it to look at any JavaScript file in that folder.
We now have Protractor set up. It’s time to write some tests. Within the tests folder create a Protractor folder. Here we will write a basic test.
Create a file called app-spec.js in the Protractor folder. The format will be very similar to what we did in the previous examples.
We start with the describe method for the suite of tests we are about to run. Right after that is our set of it statements (Listing 10-17). To make this simple we will use examples right from the Protractor site.
Listing 10-17. It Method Checking Whether the Site Has a Title
it('should have a title', function(){
browser.get(' http://juliemr.github.io/protractor-demo ');
expect(browser.getTitle()).toEqual('Super Calculator');
});
We now have everything we need. We are going to run this from the command line. If you are not already running the serve task and looking at the site locally, type:
grunt serve
This will let you run the site from the local server on port 9000, which is where we told Protractor to look when it runs the tests.
Now type
protractor test/protractor.conf.js
This will look in the test folder, run the configuration file, and launch the browser so it can run the tests.
As shown in Figure 10-8, we should be getting a passing result.
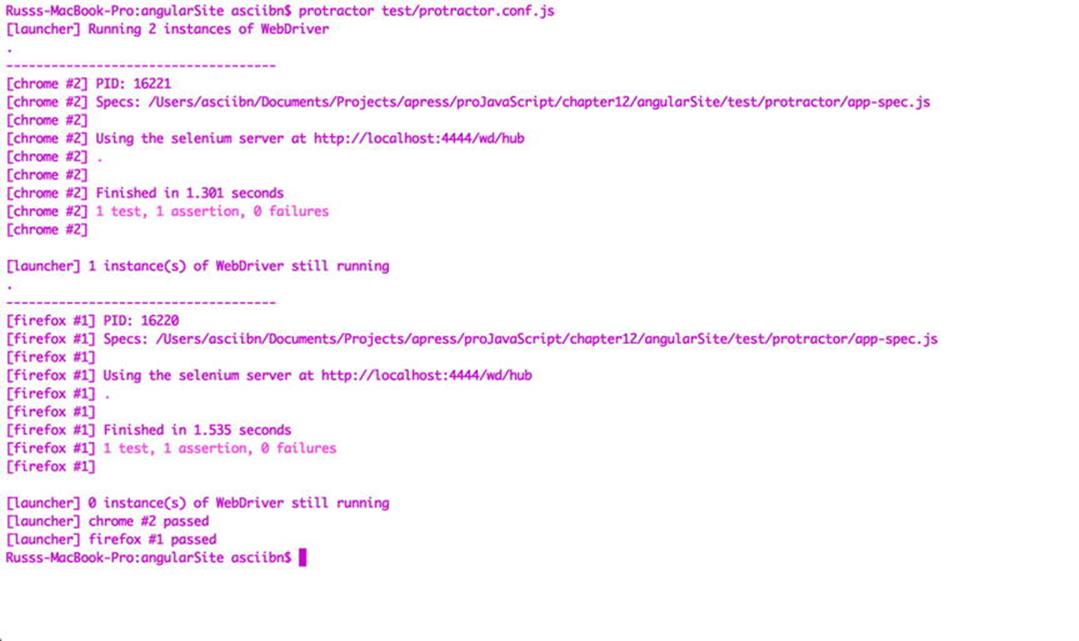
Figure 10-8.
Protractor test passing in both Firefox and Chrome
This will direct the browser to the URL and check the title. Pretty simple.
Now let’s write a test where we can use the same calculator to add two values together and then check the result. Listing 10-18 shows the code.
Listing 10-18. Typing in Two Text Fields and Then Testing the Result
describe('Protractor Demo App', function() {
it('should add one and two', function() {
browser.get(' http://juliemr.github.io/protractor-demo/ ');
element(by.model('first')).sendKeys(1);
element(by.model('second')).sendKeys(2);
element(by.id('gobutton')).click();
expect(element(by.binding('latest')).getText()).
toEqual('3');
});
});
Here we are able to look right into Angular’s ng-model directive to access the text fields and give them values. Then we can find the button by its ID and click on it. That click triggers the method doAddition. Finally, we are able to look at and check the value that is being updated by the result of the method.
Summary
This was a very high-level look at AngularJS and writing both unit and end-to-end tests. Both of these topics can be books own their own.
As your projects become larger and more involved, having a framework can help you keep everything organized. In addition, being able to test your code gives you more confidence in the code that you write.
Unit tests lets you know that your front-end code is working as expected. Integration tests lets you know if that same code works with different browsers.
The site Year of Moo ( www.yearofmoo.com/2013/09/advanced-testing-and-debugging-in-angularjs.html ) has an excellent breakdown of testing and debugging with Angular. It covers topics like when you should write tests, testing in older browsers, and what to test and what not to test.
Now you can refactor with confidence, knowing that what you wrote will not break the app; and if it does, you will know about it as soon as possible.