RaphaelJS: Graphics and Visualization on the Web (2014)
Chapter 2. Shapes
In the introduction, we looked at a complete working example of Raphael that drew a red dot on the page. Since Raphael is a fundamentally visual toolkit, this will take the place of the canonical “Hello World” example in the first chapter of programming books since time immemorial.
In case, like me, you never read the introduction, here it is again.
<!DOCTYPE html>
<html>
<head>
<title>Red dot</title>
</head>
<body>
<div id="container"></div>
<script src="http://cdnjs.cloudflare.com/ajax/libs/raphael/2.1.0/raphael-min.js"></script>
<script>
var paper = Raphael("container", 500, 300);
var dot = paper.circle(250, 150, 100).attr({
fill: "#FF0000",
stroke: "#000099",
"stroke-width": 3
});
</script>
</body>
</html>
See this code live on jsFiddle.
Let’s do a deep dive into this example.
Getting Raphael
Like jQuery, Google Maps, Backbone, or any other JavaScript library, Raphael is neatly packed in a single external library that you include in your webpage with a <script> tag:
<script src="http://cdnjs.cloudflare.com/ajax/libs/raphael/2.1.0/raphael-
min.js"></script>
CloudFlare is a cloud services company that generously provides a free CDN, or “content delivery network,” for fast, highly available access to Raphael (and many other JavaScript libraries). I’m using it here because it prevents me from needing to say things like “first download the Raphael script, then put it in same folder as your HTML page.” You can either continue using the file on CloudFlare or host the file yourself—whatever you prefer.
As of this writing, the most recent release of Raphael is 2.1.2. (CloudFlare is a tiny bit behind here.) That will change, but it is unlikely that examples you create in this version will break as new versions come out with new features. Or if you want to practice on jsFiddle, you can include Raphael from the list of available JavaScript libraries.
Initializing Raphael
Once this library is included in a page, you’ll have access to a JavaScript object intuitively named Raphael, from which all the wonderful capabilities of the toolkit extend. Your first task in any project is to tell the library where on your page you would like to start drawing:
var paper = Raphael("container", 500, 300);
The first argument in the function Raphael() is the id of the HTML element inside of which you’d like to start drawing things. You can pass a variety of elements, but in general a <div> will suit our needs wonderfully. The important point is that Raphael operates inside the cosmos of individual elements on the page. We’re going to cover the ways in which it integrates nicely with the rest of a web page, but to start, you should think of this <div> element as a blank canvas.
The next two arguments give the width and height of that canvas, which of course depend on how much you plan to draw. In relation to what else you’ve got going on on the page, it may be wise to explicitly set the element containing our canvas to the same dimensions. Otherwise, the <div>will dynamically resize to contain the new canvas.
Under the hood, declaring a Raphael() object will place a new element on the web page inside the element you chose to contain the whole project. This is the <svg> element that will contain everything else we create. It’s useful to remember that as we make circles, lines, pictures, and everything else, Raphael is taking our JavaScript commands and using them to create new objects on the screen. But one of the great joys of Raphael is that you don’t have to worry about this too much—it’s all taken care of. In fact, you can go ahead and smash the “<” and “>” keys on your keyboard, because we have freed ourselves of the need to write tags directly.
(Actually, scratch that, you may need them for “less than” and “greater than.” But you get the idea.)
The Raphael() function is actually quite flexible, and offers several other options for creating canvases, including generating its own HTML element to contain itself and appending it to the web page. (This is useful for situations like bookmarklets, where you’re writing JavaScript to execute on someone else’s page.) You can see all the possibilities on the documentation page.
I won’t waste valuable paper/pixels declaring a var paper object for every example in this book, but creating it is an essential first step to every project. And while you can name the Raphael object anything you like, almost every example you’ll see anywhere names it paper. So I will too.
And you should bookmark that URL to the Raphael documentation. We’re going to be coming back to it a lot.
Drawing Things
The paper object we just declared contains most of the tools we need to make beauty on the Web. That includes the circle function, which takes three arguments: the x and y values of the center of the circle and its radius, like so:
var dot = paper.circle(250, 150, 100);
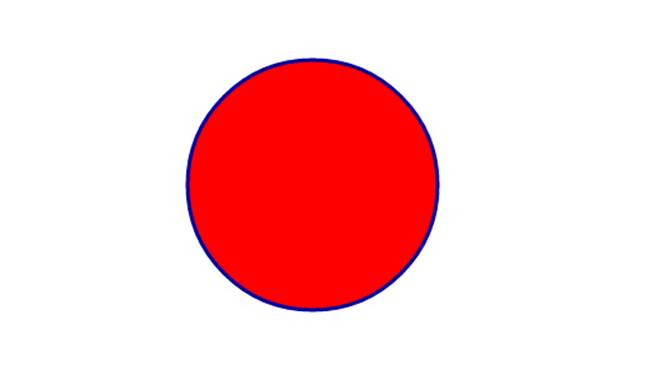
Simple enough, right? If you run this code, you should see an empty circle with a thin black border.
Let’s not be content with so bland a drawing. To give the circle a fill color and a stronger border, we can assign it attributes, like these:
dot.attr("fill", "red");
dot.attr("stroke", "blue");
dot.attr("stroke-width", 3);
You can achieve the exact same effect in one line, like this:
dot.attr({
fill: "red",
stroke: "blue",
"stroke-width": 3
});
If you’re new to JavaScript, the former method, while more verbose, will be easier to decipher. If you’re confused about when you do and don’t need quotation marks, you’ll want to beef up on “JavaScript Object Notation,” or JSON. We’ll be seeing him again.
Okay, so now we have a beautiful blue-encrusted red dot on the page. Let’s take a quick tour of the other shapes Raphael can make.
Basic Shapes
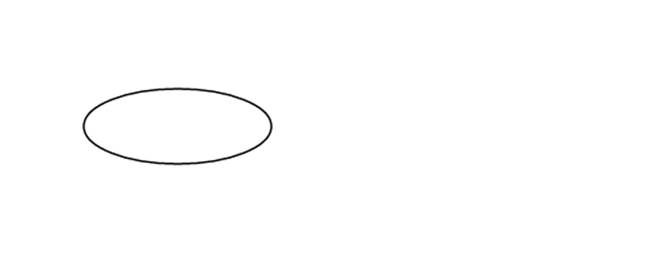
In addition to circles, Raphael has the built-in cability of drawing ellipses and rectangles. The former is exactly like the .circle() method, but takes four inputs instead of three: the x and y values of the center and two radii, one vertical and one horizontal:
var ell = paper.ellipse(100, 100, 50, 20);
The .rect() function takes the same four arguments and makes a rectangle:
var rec = paper.rect(100, 100, 50, 20);
Let’s try them at the same time, with a little color:
var ell = paper.ellipse(100, 100, 50, 20).attr("fill", "orange");
var rec = paper.rect(100, 100, 50, 20).attr("fill", "green");
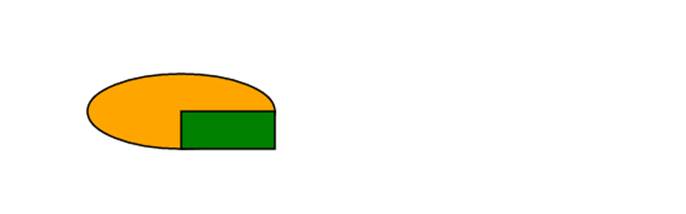
Wait a minute—if we entered the exact same numbers into the two shape functions, why is the rectangle so much smaller? It’s because the shapes interpret the inputs differently. To an ellipse, the first two arguments refer to the center of the shape and the following two numbers refer to the radii. For a rectangle, the x and y coordinates refer to the location of the upper-left corner, while the next two numbers refer to the length of the side.
Notice also that the rectangle appears on top of the ellipse. This is because the command to draw it occurs after the one to draw the ellipse. Unlike the “z-index” property of CSS, which determines which elements appear above or below others, Raphael draws things in the order you ask it to, painting over existing elements when there’s overlap. There are ways to manipulate this, but you should understand how it works by default.
Images
Like regular HTML, Raphael can load image files. While this may seem redundant, if you’re using an image as part of a larger drawing then you will be much, much happier loading it in Raphael than the old-fashioned way.
var fluffy = paper.image("mydog.png", 25, 20, 120, 100);
This will cause the script to look in the local directory for an image called “mydog.png” and place it on the canvas with the upper-left corner at the coordinates (25,20) with a width of 120 pixels and a height of 100 pixels, just like the syntax for a rectangle. Like a regular <img> tag, you can feed the function relative paths (“../img/mydog.png”) or the full url to the image. Unlike an <img> tag, you have to specificy the dimensions—Raphael will not fall back on the native dimensions of the image.
With that limitation, it would be reasonable to ask why you would bother loading images in Raphael instead of simply placing them on the page with an <img> tag. When combining photos with other drawing objects like lines and shapes—perhaps you’re making a chart that shows how various people are connected in a network—the case for SVG images is fairly obvious. But I would actually use Raphael for any diagram of images that requires placing them at different coordinates on a page, even if I didn’t need to draw anything else. This is because Raphael has a very simple Cartesian coordinate system, with 0,0 in the upper-left corner. The HTML document, meanwhile, has a much more complex set of rules for positioning elements based on the arrangement of parent containers, the CSS rules for each of those containers, and the model of the browser. You’ll save yourself a lot of tedium by loading images in Raphael when you need them in some sort of diagram.
And of course, you’re not limited to PNGs. Raphael accepts the same types as a regular web page—JPG, GIF, etc.
Text
To place text on the page, use the .text() method. I’m going to get ahead and pre-emptively make the font size large enough to read on the page.
var paper = Raphael(0, 0, 500, 200);
var goodnews = paper.text(200, 20, "I bought five copies of
RaphaelJS!").attr("font-size", 16);
var rec = paper.rect(200, 40, 100, 5).attr({ fill: "#CCF", "stroke-width": 0 });

Wait a second. Why is the rectangle, which I added as a reference point, at the center of the text when we fed both items the same coordinates? By default, text objects in Raphael are centered. If you want good old-fashioned left-aligned text, you can specify as much in the attributes. Let’s go ahead and change the font while we’re in there, and try a 12px font on for size.
var paper = Raphael(0, 0, 500, 200);
var rec = paper.rect(200, 40, 100, 5).attr({ fill: "#CCF", "stroke-width": 0 });
var message = "I bought TEN copies of RaphaelJS!"
var betternews = paper.text(200, 20, message).attr({
"text-anchor": "start",
"font-size": 12, //in pixels
"font-family": "Courier New"
});
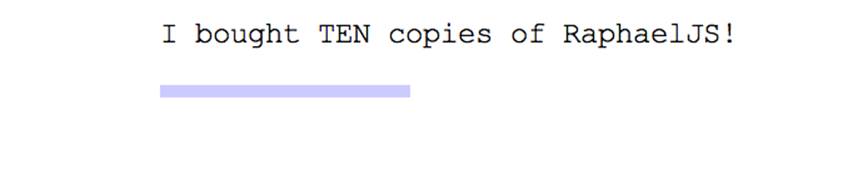
The text-anchor attribute is middle by default, and can also be set to end for right-justified text.
The SVG text element is not as flexible as text inside an HTML object. Unlike placing text inside a fixed-width <div> element, which will take care of making new lines when the text runs longer than its container, you have to specify line breaks manually here by inserting \n in the text itself where you want the break to occur. While this can be annoying, you generally want to have exact control over where the text appears on the page and when it breaks onto a new line.
For cases where you don’t really want to deal with this, we’ll cover how to borrow a regular HTML element and insert it seamlessly into your drawing. This is one of the beauties of Raphael—it plays very nicely with its big siblings.
NOTE
Most examples that we’ll look at in this book involve a single paper object, but there’s no reason you can’t make as many canvases as you want at different parts of the page. Just remember that each element belongs to one (and only one) canvas.
Attributes
We’ve now seen several examples where we’ve made a shape and then specified some attributes like fill color, stroke (outline) width, and font size.
Attributes are not limited to this sort of superficial styling. When you create a new rectangle, the coordinates and radius you choose become attributes as well. In the same way that you can set an attribute by passing two values to the .attr() method, you can get the current value just by passing the name of the attribute you’re curious about.
var bestnews = paper.text(200, 20, "I bought fifty copies of RaphaelJS!");
console.log(bestnews.attr("x"));
If you go to the developer tools and check out the console—the place where programmers can instruct the program to output messages for reference that the user never sees—you’ll see that it has spit out 200.
Likewise, you can set the x coordinate after making a new rectangle:
var rec = paper.rect(200, 20, 40, 40);
rec.attr("x", 100);
This will place the rectangle at the coordinates (100, 20) immediately after it’s made (you’ll never see it move). Why not just make it 100 to begin with? Down the line, we’ll be making dynamic, responsive animations in which shapes begin life at one location and move after some event triggers them, like a click of the mouse.
It’s worth a few minutes to browse all of the available attributes that Raphael offers in the documentation. Of course, not all apply to every object. You can set the font-size of your circles to whatever you like without much effect. And there are a few idiosyncracies: the .circle() and.ellipse() methods use cx and cy as the attributes representing the center coordinates, not x and y. The appropriate names of the relevant attributes are always specificied in the documentation for that particular method.
Transformations
There is one attribute, transform, that deserves special attention because of its importance and its trickiness. This is a versatile property that can manipulate an object in three ways: rotation, translation, and scale.
Let’s begin with a set of three rectangles of different colors:
var paper = Raphael(0,0,300,300);
var r1 = paper.rect(20, 20, 80, 40).attr("fill", "red");
var r2 = paper.rect(100, 20, 80, 40).attr("fill", "blue");
var r3 = paper.rect(180, 20, 80, 40).attr("fill", "green");
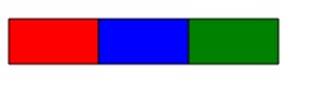
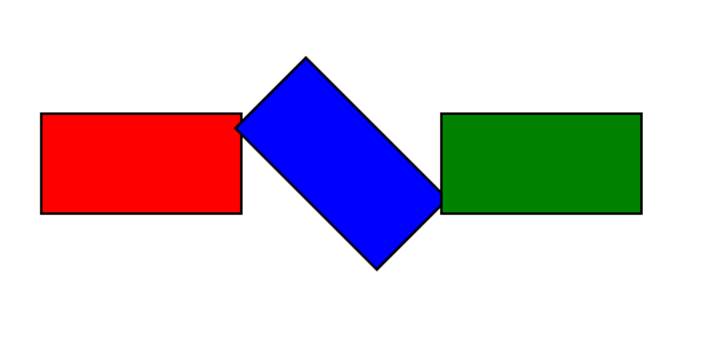
Transformations consist of strings with a letter—R, S, or T—followed by some numbers. To rotate an object by 45 degrees, for example, we say:
r2.attr("transform", "R45");
Easy enough. By default, the transform property rotates an object around its center. You don’t always want this. To specify a different anchor point around which to rotate, pass two more numbers for the coordinates of this point. Here, for example, I am rotating the green rectangle by 90 degrees using the center of the blue rectangle as the anchor point. (To better understand how it works, I’ve added a shaded version of the old rectangle there and drawn a dotteded line showing the path of the rotation.)
r3.attr("transform", "R90,140,60");
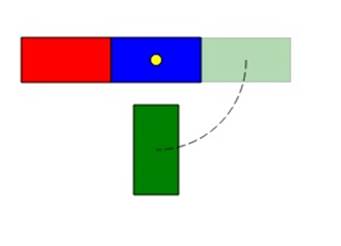
I’ve added a dotted path here and a yellow dot for the anchor point, just for reference.
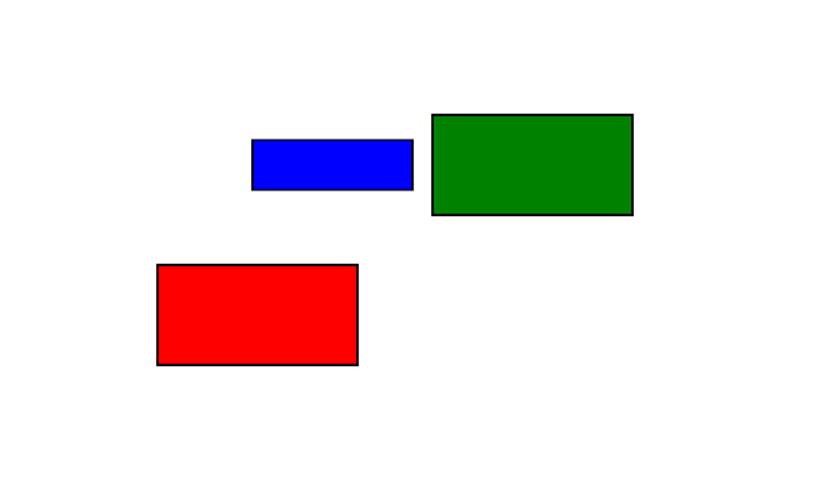
Likewise, scaling takes two numbers—the ratio of scaling on the x and y axes—and translation takes two for the number of pixels on the horizontal and vertical axis that you would like to move the object:
r1.attr("transform", "T50,60");
r2.attr("transform", "S0.8,0.5")
To remove all the transformations and return the shapes to their original state, one would just add the line:
r1.attr("transform", "");
It’s important to understand here that adding a transformation to a shape does not alter the values of the original attributes. We can see this very easily here:
var paper = Raphael(0, 0, 500, 500);
var r = paper.rect(50, 50, 100, 20);
r.attr("transform", "T30,25");
console.log(r.attr("x"));
If you check the output of the console, you will see that the x attribute of the rectangle is still reported as 50, even though the transformation moved the entire shape over to position (80,75). Transformations act on top of the original coordinates, not by modifying the original values.
These basic transformations are pretty straightforward. Where they get tricky is when you start combining them or overriding them with new transformations, but we’re not going to get into that just yet.
In the meantime, you may be wondering: What’s the point of scaling or translating my shapes, when I could just change the size and coordinates using my newfound mastery of attributes?
Good question. You could absolutely do this. But as our animations and infographics become more complex, we will repeatedly see situations where transformations are a much easier and cleaner way to manipulate our objects. In fact, here’s an example right now, in a concept known as…
Sets
There are many situations where objects on the screen are visually related to one another. It is often useful to be able manipulate the elements of all of these visual cousins in one swoop.
Consider the following visualization, which you might see in a children’s book of logic problems:
var paper = Raphael(0, 0, 500, 500);
//red row
var r1 = paper.rect(25, 25, 50, 50).attr({ 'stroke-width': 0, fill: 'red' });
var r2 = paper.circle(125, 50, 25).attr({ 'stroke-width': 0, fill: 'red' });
var r3 = paper.text(200, 50, "H").attr({
'stroke-width': 0,
fill: 'red',
'font-size': 60
});
//green row
var g1 = paper.rect(100, 100, 50, 50).attr({ 'stroke-width': 0, fill: 'green' });
var g2 = paper.circle(200, 125, 25).attr({ 'stroke-width': 0, fill: 'green' });
var g3 = paper.text(50, 125, "H").attr({
'stroke-width': 0,
fill: 'green',
'font-size': 60
});
//blue row
var b1 = paper.rect(175, 175, 50, 50).attr({ 'stroke-width': 0, fill: 'blue' });
var b2 = paper.circle(50, 200, 25).attr({ 'stroke-width': 0, fill: 'blue' });
//blank
var blank = paper.text(125, 200, "?").attr({
'stroke-width': 0,
fill: 'gray',
'font-size': 60
});
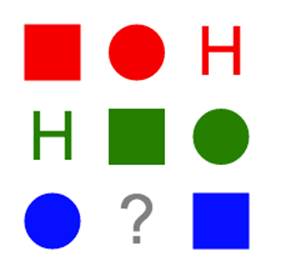
That’s all fine and good, but it’s a lot of tedious coding. And if we’re generating it dynamically, we might as well allow ourselves to vary the pattern—you know those kids are going to try and cheat.
To start, let’s get rid of those redundant attribute calls. To do so, we’re going to use the .set() method to group our objects by color and then paint them all at once.
var paper = Raphael(0, 0, 500, 500);
var r1 = paper.rect(25, 25, 50, 50);
var r2 = paper.circle(125, 50, 25);
var r3 = paper.text(200, 50, "H").attr("font-size", "60px");
var g1 = paper.rect(100, 100, 50, 50);
var g2 = paper.circle(200, 125, 25);
var g3 = paper.text(50, 125, "H").attr("font-size", "60px");
var b1 = paper.rect(175, 175, 50, 50);
var b2 = paper.circle(50, 200, 25);
var b3 = paper.text(125, 200, "?").attr("font-size", "60px");
var red_group = paper.set();
red_group.push(r1, r2, r3);
red_group.attr("fill", "red");
var green_group = paper.set(g1, g2, g3);
green_group.attr("fill", "green");
var blue_group = paper.set(b1, b2, b3).attr("fill", "blue");
b3.attr("fill", "gray");
See this code live on jsFiddle.
You’ll notice my set declarations got increasingly more compact each time as I condensed the syntax. Once you get the hang of Raphael, you’ll be able to save a lot of space by declaring elements and sets and adding attributes all at once, as I did with blue_group. But the verbose way is just fine, too. If you’ve hung around with JavaScript before, you’ll probably recognize the .push() method for adding elements to sets, which is identical to adding objects to arrays.
Sets operate like arrays in many ways for a simple reason: Under the hood, they are arrays, dressed up with some very handy methods for manipulating all the members of the array at once. If you were to output a set directly to the console using console.log, you would see the array itself along with some built-in functions. Nothing is preventing you from manipulating this array directly save for one thing: my wagging finger. Generally speaking, you’re asking for trouble if you circumvent the Raphael methods and go straight to the internal structure of an object. But it’s nice to know it’s an option for advanced users when you discover that there is no built-in method for something you’d like to do. Unlike many more rigid languages, JavaScript doesn’t automatically erect high walls around the internal cogs of an object.
Okay, fire off the code above and we’ll see that we’re getting there:
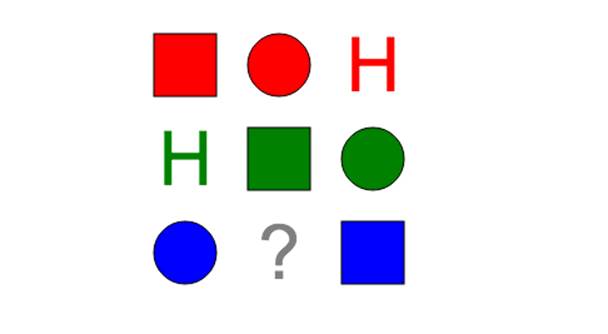
To get the text size where we want it, we’ll make a new set of just the text elements. And to eradicate the blue, 1-pixel strokes that appear by default, we’ll make a set of the first three sets that encompasses everything:
var text_group = paper.set(r3, g3, b3).attr("font-size", 60);
var all_groups = paper.set(red_group, blue_group, green_group).attr("stroke-width", 0);
Once you’ve run that, you’ll see we’re back to where we started.
A few important things to note here: Elements can belong to multiple sets, as you see here with the r3 element, which receives attributes from both red_group and text_group.
If we were to add a new element to red_group at the end of this little program, we might expect it to be (you guessed it) red. Let’s try adding a square to the end of the script:
red_group.push(paper.rect(300, 25, 50, 50));
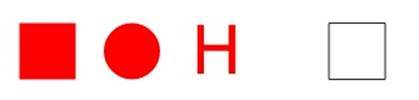
Bummer. What gives? When you add an attribute to a set in Raphael, it applies those attributes to whatever objects are contained in the set at that time, and has no purchase on what may happen in the future. To make that new square red, we’d have to do so manually or just apply the red fill attribute to the entire set again.
If you’re familiar with SVG terminology at all, you might think the Raphael .set() method creates a group tag, <g>, in the DOM, at which point we would expect new members of the set to assume the attributes of the set added previously. It does not. Sets exist only virtually to connect objects that have something in common. Any method that can be performed on a regular Raphael object, like changing the color or moving it, can be performed on a set of objects as well.
I promised that this section would have something to do with transformations. Let’s say we need to move this whole operation 150 pixels to the right. Let’s further suppose you read ahead in the Raphael documentation, and noticed that you can access the individual elements in a set of items the same way you would in an array.
We can’t just set the x value of each object to 150, since we need to add 150 to its existing value. So you might do this:
//loop through the all_groups set
for (var c = 0; c < all_groups.length; c += 1) {
// loop through the child sets (red_group, blue_group, green_group)
for (var i = 0; i < all_groups[c].length; i += 1) {
all_groups[c][i].attr("x", all_groups[c][i].attr("x") + 150);
}
}
Besides being laborious, and besides defeating the purpose of sets altogether, it doesn’t work. See for yourself:
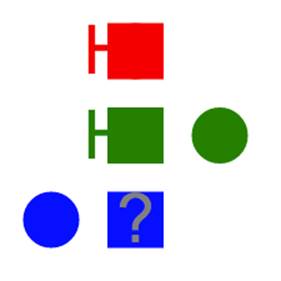
If we look closely, we see that the circles were left behind. This is because, as you may recall from a few pages back, circles (and ellipses) use cx and cy for their center coordinates, not x and y.
I have a better idea:
all_groups.attr("transform", "T150,0");
Try this out and you’ll see that everything fits perfectly. As we get into more complex shapes, we’ll see that transformations are the only feasible solution for moving objects around in an efficient manner.
Case Study: Let’s Make a Braille Generator
For all its splendid virtues, JavaScript can be a difficult language to teach or learn. While it’s capable of orchestrating every nook and cranny of a web page, one needs a fairly sophisticated sense of HTML and the Document Object Model to really understand why the browser needs a scripting language. If you’ve only just learned how to add an image to a page, your first priority is probably not to start manipulating it with code.
One of the reasons I love Raphael is that it offers a perfect point of entry for new programmers. Rather than get their hands dirty with form validation, DOM selectors, and other bone-dry topics, greenhorn coders can immediately see the fruits of their labor in the form of dots and squares on the page.
If you are one of the uninitiated, the extended example in this interlude will toss you into the fray. If you know JavaScript, it will serve as a tidy example of how to make Raphael work for you: we’re going to make a braille generator (see the following reference for the braille alphabet from the Braille Authority of North America.
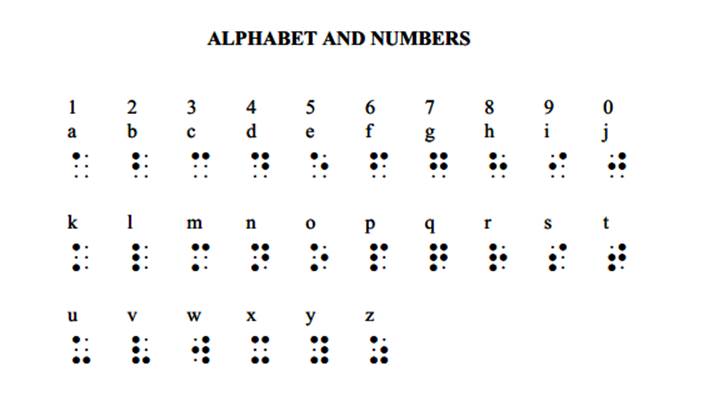
The Data
In the example at the end of Chapter 1, we got a taste of using data to generate the specs of the ellipses and circles. We’re going to extend that concept here by generating the braille patterns for each character dynamically. (I don’t know about you, but I do not feel like manually keying in the definitions for each letter and number by hand.)
Wikipedia comes to our rescue here with a handy chart defining each character as a series of numbers, one through six, indicating which of the spaces in the 3 by 2 matrix should be raised. A quick glance at the chart indicates that the pattern goes like this:
1 4
2 5
3 6
So V in braille, which looks like a capital L in the Latin alphabet, is 1-2-3-6.
Curiously, this definition takes up more memory than is necessary, since—as many have noted—braille was among the first binary definitions of language. A V is really 111001, which takes up more space on the screen but considerably fewer bits. We’ll stick with the way Wikipedia has it for simplicity.
I took the liberty of converting the text from the Wikipedia chart into a nice JavaScript object using a little trick called copy-and-paste plus tedious formating by hand.
var braille = {
"A": "1",
"B": "1-2",
"C": "1-4",
"D": "1-4-5",
"E": "1-5",
"F": "1-2-4",
"G": "1-2-4-5",
"H": "1-2-5",
"I": "2-4",
"J": "2-4-5",
"K": "1-3",
"L": "1-2-3",
"M": "1-3-4",
"N": "1-3-4-5",
"O": "1-3-5",
"P": "1-2-3-4",
"Q": "1-2-3-4-5",
"R": "1-2-3-5",
"S": "2-3-4",
"T": "2-3-4-5",
"U": "1-3-6",
"V": "1-2-3-6",
"W": "2-4-5-6",
"X": "1-3-4-6",
"Y": "1-3-4-5-6",
"Z": "1-3-5-6"
};
NOTE
From here on out, the longer coding examples will be broken into pieces to prevent us from getting lost in pages and pages of code. If you’re following along, you’ll see that future functions in this example will refer back to the braille object defined above without reprinting it every time.
Now for the fun part.
The Fun Part
At its core, this app will be drawing dots based on numbers. So let’s make a function to take a number from one to six and return a dot in the correct location. For now, we won’t worry about where on the screen each collection of dots (or “cell”) should go.
var paper = Raphael(0, 0, 500, 500),
SPACING = 14,
RADIUS = 2;
function make_dot(number) {
number -= 1; // normalize to 0-5
if (number < 0 || number > 5) {
console.log("Invalid number.");
return null;
}
// first or second column
var x = Math.floor(number / 3);
// first, second, or third row of that column
var y = number % 3;
var dot = paper.circle(x * SPACING, y * SPACING, RADIUS).attr("fill", "black");
return dot;
}
Hopefully, the comments explain everything you need to know, but you can try it out with make_dot(3) or make_dot(5) to see how it works. We’re simply mapping digits to spots in a braille letter’s grid. I’ve defined the spacing and radius of the dots in external variables, capitalized by convention to represent constant values, for easy adjustment if I decide to change the specs later.
Notice that I’m not only creating the dot corresponding to the number, I’m also returning it. This is so that we can collect all of a cell’s dots into one Raphael set. If you don’t know what a set is, you clearly did not read the previous chapter.
Let’s do future generations a favor and allow the function to accept either a string or an array of numbers:
function make_cell(dots) {
// if we get a string, make it an array
if (typeof dots === "string") {
dots = dots.split("-");
}
var cell = paper.set();
for (var c = 0; c < dots.length; c += 1) {
cell.push(make_dot(dots[c]));
}
return cell;
}
Let’s try out a few letters from the chart.
paper.text(10, 25, "V:");
make_cell("1-2-3-6").transform("T30,10");
paper.text(10, 85, "J:");
make_cell([2,4,5]).transform("T30,70");
We’re taking advantage of the fact that JavaScript does not make rigid distinctions about variable type. If we were writing in Python or Java, the compiler would flunk us for splitting a string into smaller strings and then treating them as as numbers just because they happen to be made of digits. JavaScript is a “loosely typed” language, which is computer science speak for “chill.”
(Note that you don’t actually have to feed the numbers in order here, per my previous comment about using Wikipedia for simplicity.)
Once again, we create and return the Raphael object. Next—almost done here—let’s write a function to make an individual word at a specific location on the page. We’ll feed that location as an object with x and y properties, defaulting to {x: 10, y: 10} if no position is supplied.
function make_word(word, pos) {
pos = pos || { x: 10, y: 10};
// capitalize
word = word.toUpperCase();
var myword = paper.set();
for (var c = 0; c < word.length; c += 1) {
// recall that "braille" is the object for the letter definitions
if (braille[word[c]]) {
var letter = make_cell(braille[word[c]]);
myword.push(letter);
letter.transform("T" + pos.x + "," + pos.y);
// move over 3 spaces -- two for the width of the letter and
// a space between
pos.x += SPACING * 3;
}
}
return myword;
}
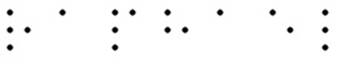
Give it a shot with something like make_word("Raphael", { x: 10, y: 10 }); and see the fruit of our labors:
Lastly, we need a function to string words together. We’ll try to be smart about it when it’s time to skip to a new line.
function make_words(message) {
var pos = { x: 10, y: 10 },
words = message.toUpperCase().split(" "),
myset = paper.set();
for (var c = 0; c < words.length; c += 1) {
// see if it's time for a carriage return
myset.push(make_word(words[c], pos));
if (pos.x > 10 && (pos.x + SPACING * 3 * words[c].length) > paper.width) {
pos.x = 10;
pos.y += SPACING * 5;
} else {
pos.x += SPACING * 3;
}
}
return myset;
}
See this code live on jsFiddle.
As you can see, Raphael sets nest quite nicely, just like objects (since that’s what they are). At each stage—letter, word, phrase—the function returns a Raphael set that is incorporated into a set at the next level. At the highest level, this returns one set with references to every dot on the screen (grouped into sets for letters and words), which allows us to easily erase the canvas and start over.
In the real world, we would probably want to allow users to type something in and see it in braille. No problem:
<input id="message" style="width: 200px" value="Raphael is great"/>
<input id="clickme" type="button" value="braille-ify" />
<div id="canvas"></div>
<script>
/* include all of the above code */
var braille_words = paper.set();
function make() {
// clear any existing words
braille_words.remove();
// write new ones, overwriting previous value of set
braille_words = make_words(document.getElementById("message").value);
};
// click event to invoke function
document.getElementById("clickme").onclick = make;
// call when page loads, which will draw defaul value ("Raphael is great")
make();
</script>
See this code live on jsFiddle.
Reflections
Like most problems in programming, Raphael powered apps work by breaking the task into small, manageable routines that can be strung together for more complex behavior. Because it is so neatly modularized, you could easily expand this code to allow for different styles and standards of braille, or pretty much any other visual way to represent alphabets. (I once wrote an app, overnight, in which a user could type in his or her name and see how it would look as signed by a certain U.S. White House administrator with a comically childish signature. Same concept.)
Since Raphael is just a fancy abstraction of JavaScript, it works perfectly with standard UI components like buttons and input boxes, as you see in the last part of this example. In the next chapter, we’ll learn how to orchestrate every aspect of user input to directly manipulate Raphael objects on the screen.
Final Thoughts: Seeing Things
Merely creating an object in JavaScript and calling it a circle does not make this circle appear on the page. All things on a web page, from paragraphs to text to shapes, are represented on the page as nodes or elements, typically as text surrounded by tags. You probably recognize <p>This guy</p> as a paragraph node and <img src="mydog.png" /> as an image node.
If you right click on the webpage we just made and select “view source,” you will not see any evidence of our circle in the HTML. This is not surprising. Raphael draws objects dynamically when the user loads the page, so we would not expect to see the circle hard-coded into the text file that the browser loads from the server. Fortunately, most browsers also allow you to view the source of the live version of the page. Firefox has a great plug-in called Firebug for just this sort of thing, while Chrome and Internet Explorer have a window called “developer tools” included.
In most browsers, you can right-click the element on the page and select “inspect element” to jump right to the live view. Otherwise, make your way to the “HTML” or “elements” tab in one of these tools and you’ll see that a new object has appeared. In any modern browser, it will look like this:
<circle cx="50" cy="50" r="20" fill="#ff0000" stroke="#0000ff" style=""
stroke-width="3"/>
As you see, all of the attributes we assigned to our circle are present as attributes in the element. So what’s that dot variable we made? That’s a JavaScript object that points to the “physical” object on the page. You can think of it like the HTML object’s shadow in the land of JavaScript.
A JavaScript object never forgets the physical element it represents. To make the connection explicitly, you merely have to append .node to the variable, like so:
var rec = paper.rect(200, 20, 40, 40);
console.log(rec.node);
Run that code and, depending on the browser, you’ll see something like this:
<rect x="200" y="20" width="40" height="40" r="0" rx="0" ry="0"
fill="none" stroke="#000"
style="-webkit-tap-highlight-color: rgba(0, 0, 0, 0);"></rect>
What you’re seeing is the actual representation of the square on the page, as an SVG element. Adding the .node gets you from the abstraction of the element to the element itself. If you’re dealing with pure Raphael, you may not find yourself needing this feature all that often. But if you want to weave Raphael in with another JavaScript library, then the elements on the page will be the common language you use across all functions.
Of course, not all objects need a shadow. We could just have easily declared the circle without assigning the output to a variable:
paper.circle(50, 50, 20);
That’s all well and good, but what happens when we want to update that object with a color and a wider border down the line? We’d have to dig through the page to find it again—a huge pain—or make sure we assign the object every attribute it needs at the time of its birth—a poor solution for any drawing that aspires to be interactive.
Storing references to our elements in JavaScript opens up a world of possibilities, and it’s this relationship that sits at the core of Raphael.
All materials on the site are licensed Creative Commons Attribution-Sharealike 3.0 Unported CC BY-SA 3.0 & GNU Free Documentation License (GFDL)
If you are the copyright holder of any material contained on our site and intend to remove it, please contact our site administrator for approval.
© 2016-2026 All site design rights belong to S.Y.A.