Sams Teach Yourself Java in 24 Hours, 7th Edition (2014)
Appendixes
Appendix A. Using the NetBeans Integrated Development Environment
Although it’s possible to create Java programs with nothing more than the Java Development Kit and a text editor, the experience is considerably more pleasant when you use an integrated development environment (IDE).
The first 23 hours of this book employ NetBeans, a free IDE offered by Oracle for Java programmers. NetBeans is a program that makes it easier to organize, write, compile, and test Java software. It includes a project and file manager, graphical user interface designer, and many other tools. One killer feature is a code editor that automatically detects Java syntax errors as you type.
Now in version 8.0, NetBeans has become a favorite of professional Java developers, offering functionality and performance that would be worth the money at 10 times the price. It’s also one of the easiest IDEs for Java novices to use.
In this appendix, you learn enough about NetBeans to install the software and put it to use throughout this book.
Installing NetBeans
From inauspicious beginnings, the NetBeans IDE has grown to become one of the leading programming tools for Java developers. James Gosling, the creator of the Java language, gave it the ultimate vote of confidence in his Foreword to the book NetBeans Field Guide: “I use NetBeans for all my Java development.” I’ve become a convert as well.
NetBeans supports all facets of Java programming for the three editions of the language—Java Standard Edition (JSE), Java Enterprise Edition (JEE), and Java Mobile Edition (JME). It also supports web application development, web services, and JavaBeans.
You can download the software, available for Windows, Mac OS, and Linux, from http://netbeans.org. NetBeans is available for download bundled with the Java Development Kit and can be downloaded separately. You must have NetBeans and the JDK installed on your computer.
If you’d like to ensure that you’re downloading the same versions of NetBeans and the JDK used in the preparation of this book, visit the book’s website at www.java24hours.com. Click the cover of this book to open the site for this edition and then look for the Download JDK and Download NetBeans 8.0 links. You’ll be steered to the proper sites.
Creating a New Project
The JDK and NetBeans are downloaded as installation wizards that set up the software on your system. You can install the software in any folder and menu group you like, but it’s best to stick with the default setup options unless you have a good reason to do otherwise.
When you run NetBeans for the first time after installation, you see a start page that displays links to news and programming tutorials (see Figure A.1). You can read these within the IDE using NetBeans’ built-in web browser.
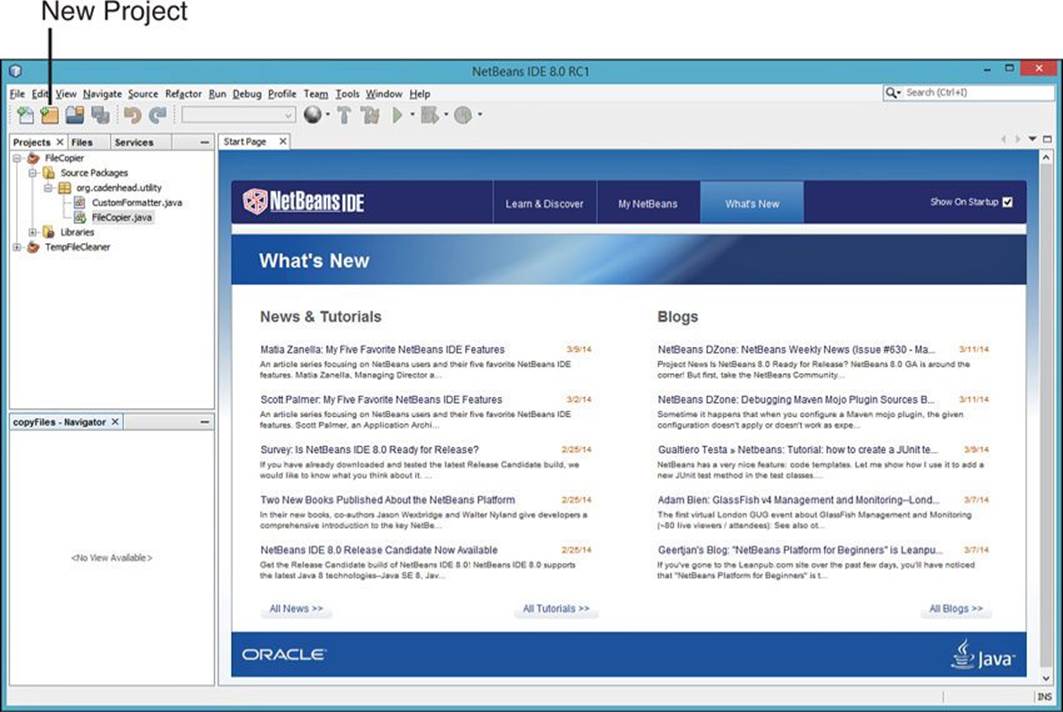
FIGURE A.1 The NetBeans user interface.
A NetBeans project consists of a set of related Java classes, files used by those classes, and Java class libraries. Each project has its own folder, which you can explore and modify outside NetBeans using text editors and other programming tools.
To begin a new project, click the New Project button shown in Figure A.1 or choose the File, New Project menu command. The New Project Wizard opens, as shown in Figure A.2.
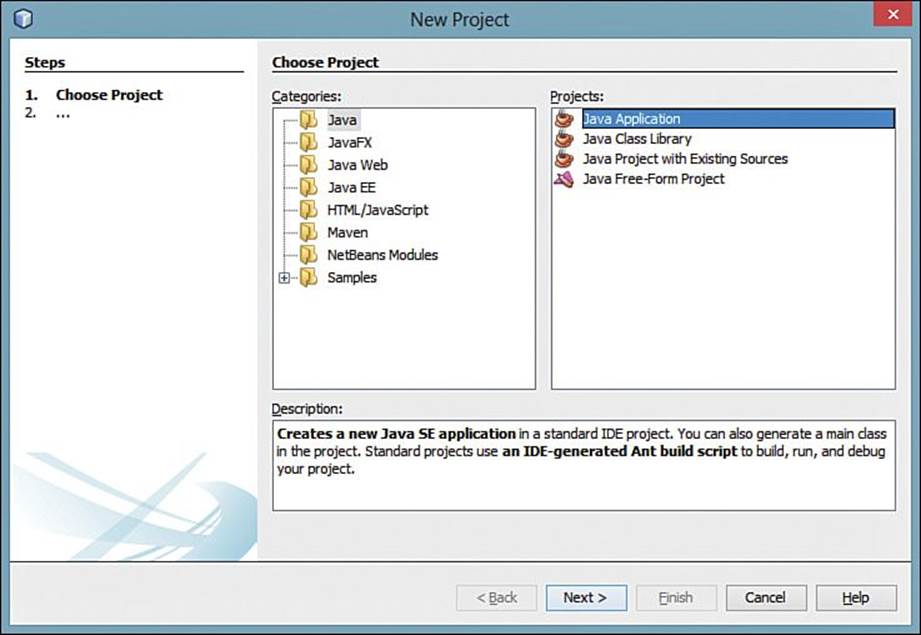
FIGURE A.2 The New Project Wizard.
NetBeans can create several types of Java projects, but during this book you can focus on one type: Java Application.
For your first project (and most of the projects in this book), choose the project type Java Application and click Next. The wizard asks you to choose a name and location for the project.
The Project Location text field identifies the root folder of the programming projects you create with NetBeans. On Windows, this may be a subfolder of your My Documents (or Documents) folder named NetBeansProjects. All projects you create are stored inside this folder, each in its own subfolder.
In the Project Name text field, enter Java24. The Create Main Class text box changes in response to the input, recommending java24.Java24 as the name of the main Java class in the project. Change this to Spartacus and click Finish, accepting all other defaults. NetBeans creates the project and its first class.
Creating a New Java Class
When NetBeans creates a new project, it sets up all the necessary files and folders and creates the main class. Figure A.3 shows the first class in your project, Spartacus.java, open in the source editor.
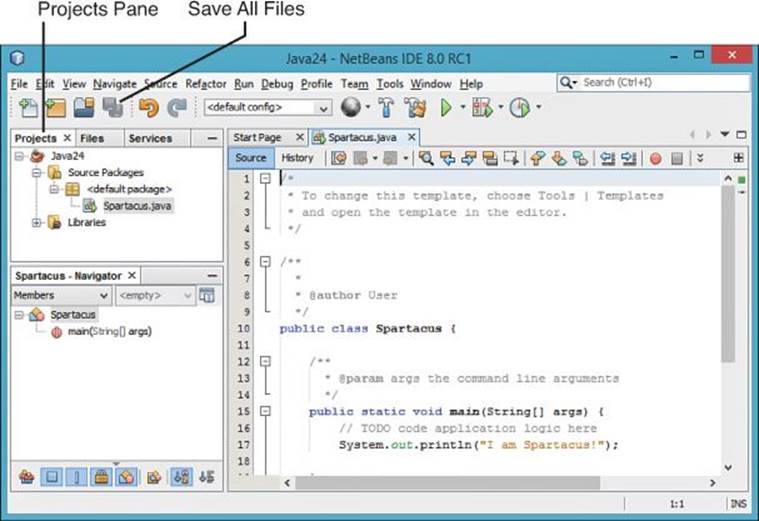
FIGURE A.3 The NetBeans source editor.
Spartacus.java is a bare-bones Java class that consists only of a main() method. All the light gray lines in the class are comments that explain the purpose and function of the class. Comments are ignored when the class is run.
Note
As you type, the source editor figures out what you’re doing and pops up helpful information related to the System class, the out instance variable, and the println() method. You’ll love this helpfulness later, but for now try your best to ignore it.
To make the new class do something, add the following line of code on a new line right below the comment // TODO code application logic here:
System.out.println("I am Spartacus!");
The method System.out.println() displays a string of text, in this case the sentence “I am Spartacus!”
Make sure to enter this exactly as it appears. After you make sure you typed the line correctly and ended it with a semicolon, click the Save All Files toolbar button to save the class.
Java classes must be compiled into executable bytecode before you can run them. NetBeans tries to compile classes automatically. You also can manually compile this class in two ways:
![]() Choose the menu command Run, Compile File.
Choose the menu command Run, Compile File.
![]() Right-click Spartacus.java in the Projects pane to open a pop-up menu and choose Compile File.
Right-click Spartacus.java in the Projects pane to open a pop-up menu and choose Compile File.
If NetBeans doesn’t allow you to choose either of these options, it already has compiled the class automatically.
If the class does not compile successfully, a red exclamation point appears next to the filename Spartacus.java in the Projects pane. To fix the error, compare what you’ve typed in the text editor to the full source code of Spartacus.java in Listing A.1 and save the file again. The line numbers in Listing A.1 should not appear in your program—they’re used in this book when describing how the code works. (Also, Line 8 will have your own username in place of the word “User.”)
LISTING A.1 The Java Class Spartacus.java
1: /*
2: * To change this template, choose Tools | Templates
3: * and open the template in the editor.
4: */
5:
6: /**
7: *
8: * @author User
9: */
10: public class Spartacus {
11:
12: /**
13: * @param args the command line arguments
14: */
15: public static void main(String[] args) {
16: // TODO code application logic here
17: System.out.println("I am Spartacus!");
18:
19: }
20:
21: }
The class is defined in lines 10–21. Everything above Line 10 is a comment included by NetBeans in every new class when you choose Java Application as the project type. These comments help explain things about the program to humans reading the source code. The compiler ignores them.
Running the Application
After you’ve created the Java class Spartacus.java and compiled it successfully, you can run it within NetBeans in two ways:
![]() Choose Run, Run File from the menu.
Choose Run, Run File from the menu.
![]() Right-click Spartacus.java in the Projects pane and choose Run File.
Right-click Spartacus.java in the Projects pane and choose Run File.
When you run a Java class, its main() method is called by the Java Virtual Machine. The string “I am Spartacus!” appears in the Output pane, as shown in Figure A.4.
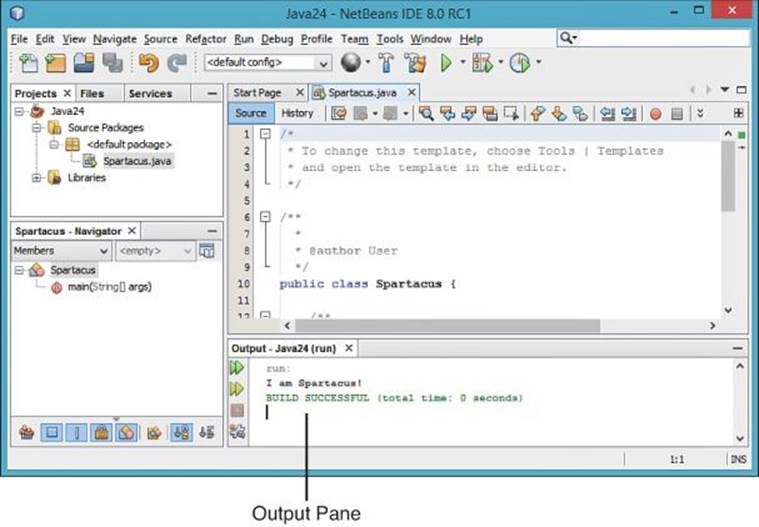
FIGURE A.4 Output of the Spartacus application.
A Java class must have a main() method to be run. If you attempt to run a class that lacks one, NetBeans responds with an error.
When you’re finished reviewing the program’s output, close the Output pane by clicking the X on the pane’s tab. This makes the source editor larger, which comes in handy when you are creating a program.
Fixing Errors
Now that the Spartacus application has been written, compiled, and run, it’s time to break something to get some experience with how NetBeans responds when things go terribly wrong.
Like any programmer, you’ll have plenty of practice screwing things up on your own, but pay attention here anyway.
Return to Spartacus.java in the source editor and take the semicolon off the end of the line that calls System.out.println() (line 17 in Listing A.1). Even before you save the file, NetBeans spots the error and displays a red alert icon to the left of the line (see Figure A.5).
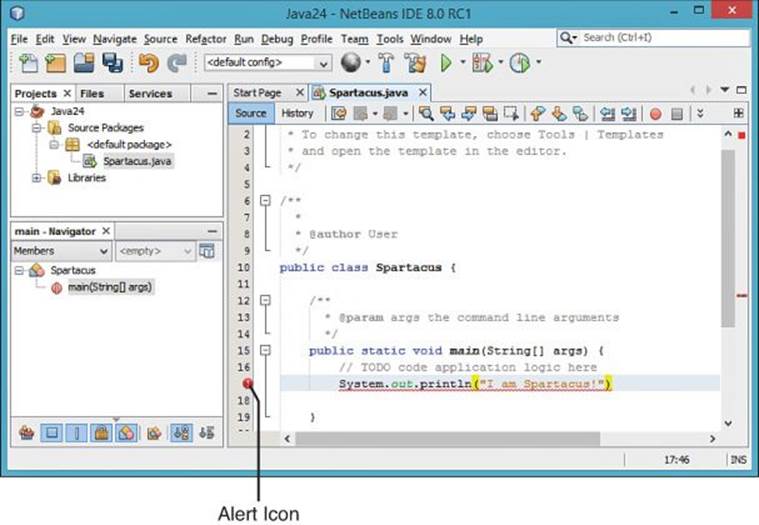
FIGURE A.5 Flagging errors in the source editor.
Hover over the alert icon to see a dialog appear that describes the error NetBeans thinks it has spotted.
The NetBeans source editor can identify most of the common programming errors and typos that it encounters as you write a Java program. The detection of an error stops the file from being compiled until the error has been fixed.
Put the semicolon back at the end of the line. The alert icon disappears and you can save and run the class again.
These basic features are all you need to create and compile the Java programs in this book.
NetBeans is capable of a lot more than the basic features described here, but you should focus on learning Java before diving too deeply into the IDE. Use NetBeans as if it was just a simple programming project manager and text editor. Write classes, flag errors, and make sure you can compile and run each project successfully.
When you’re ready to learn more about NetBeans, the Start page offers resources to learn how to use it. Oracle also offers training and documentation resources at http://netbeans.org/kb.