JavaScript: Academy: The Stress Free Way to Learning JavaScript Inside & Out (2016)
Chapter 7. The Different Types of Loops in JavaScript
When writing your own programs, you’ll encounter situations where you have to execute an action multiple times. Obviously, typing the same thing repeatedly can be time-consuming (and extremely boring). Fortunately, JavaScript offers various tools that can help you repeat statements quickly and easily. These tools, known as loops, are the main topic of this chapter.
Here are the loops that you can use in the JavaScript language:
While Loops
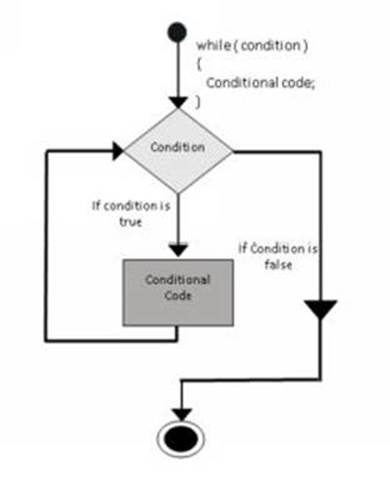
Programmers consider this as the most basic loop type in JavaScript. Basically, while loops execute a statement or block of code while an expression is true. The loops will end as soon as the expression becomes false.
Here is the flowchart of a while loop:
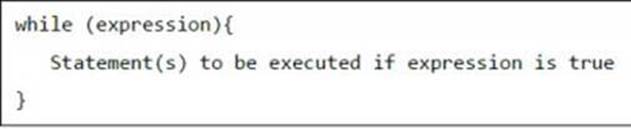
The Syntax
Here is the syntax of a while loop:
Before executing any statement, a while loop evaluates the condition of the assigned expression. That means if the expression is false, none of the statements will be performed.
Do… while Loops
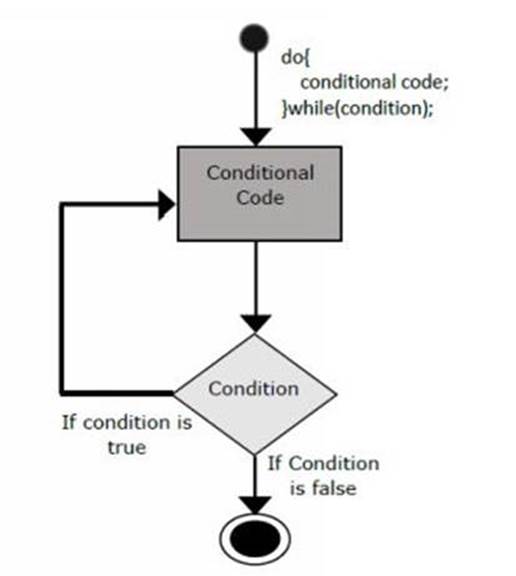
A“do… while” loop is similar to a while loop. The only difference is that it evaluates the expression after executing the assigned statement/s. If the result of the evaluation is true, the loop will execute the statement/s again. The process will only stop once the result becomes false. Because of this, a“do… while” loop will run at least once even if the result of the evaluation is false.
The flowchart of a typical“do… while” loop is:
The Syntax
Here is the syntax of a“do… while” loop:
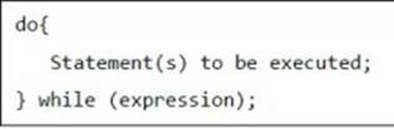
Important: The semicolon at the end of the syntax is mandatory. Make sure that you’ll include it in all of your“do… while” loops.
For Loops
This kind of loop is known for its compactness. In general,“for loops” have the following parts:
· Loop Initialization– This is the part where you begin your counter at an initial value. The interpreter of JavaScript executes this part before running the loop itself.
· Test Statement– This part of the loop evaluates the assigned condition. If the assigned condition is true, the interpreter will execute the code within the“for” loop. If the condition is false, however, the system control will be given to the statement after the“for” loop.
· Iteration Statement– You can use this part to increase or decrease the loop’s counter.
JavaScript allows you to place all of these parts in a single line. You just have to separate each part using semicolons.
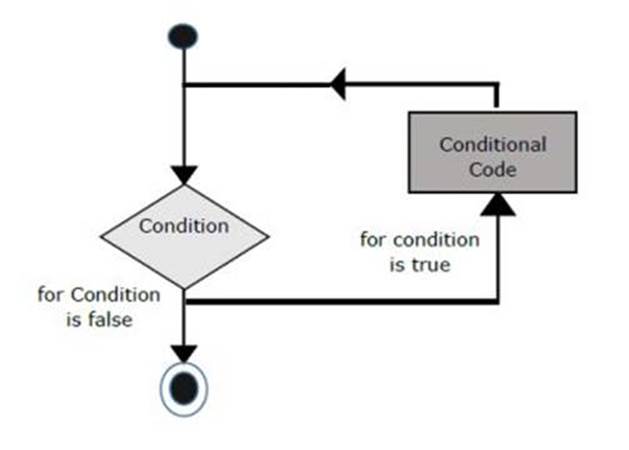
The image below shows the flowchart of a“for” loop:
The Syntax
The syntax of a“for” loop is:

How to Control Your Loops
The JavaScript language allows you to manipulate all of your loops and switches. In some cases, you have to exit a loop statement before reaching its final section. There are also some situations where you have to ignore a certain part of the code and initialize the next one.
To help you with such situations, this programming language offers two powerful tools: the break statement and the continuestatement. Let’s discuss each statement in detail.
Break Statements
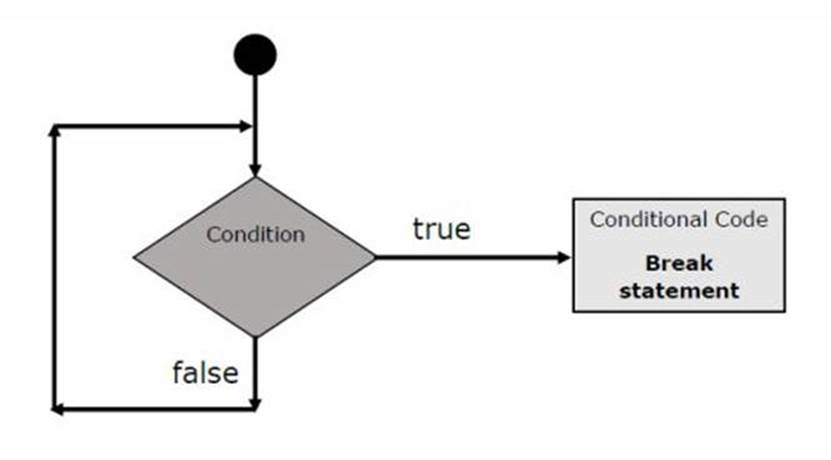
This statement, which was introduced in the previous chapter, allows you to exit any loop early. The image below will show you the flowchart of a basic break statement.
Note: You’ve seen how break statements work during our discussion about switch statements.
Continue Statements
A continue statement instructs the JavaScript interpreter to begin the next iteration of a loop and ignore the remaining blocks of code. Once the system encounters a continue statement, the flow of the program goes to the expression evaluation. If the condition is still true, the continue statement will begin the next iteration. If the condition becomes false, on the other hand, program control will go outside the loop.
All materials on the site are licensed Creative Commons Attribution-Sharealike 3.0 Unported CC BY-SA 3.0 & GNU Free Documentation License (GFDL)
If you are the copyright holder of any material contained on our site and intend to remove it, please contact our site administrator for approval.
© 2016-2026 All site design rights belong to S.Y.A.