Wrox Press Beginning JavaScript 5th (2015)
Chapter 5. JavaScript-An Object-Based Language
WHAT YOU WILL LEARN IN THIS CHAPTER:
· Using JavaScript’s built-in objects to work with complex data
· Creating custom objects to represent complex ideas and data
· Defining custom reference types
WROX.COM CODE DOWNLOADS FOR THIS CHAPTER
You can find the wrox.com code downloads for this chapter at http://www.wiley.com/go/BeginningJavaScript5E on the Download Code tab. You can also view all of the examples and related files at http://beginningjs.com.
In this chapter, you look at a concept that is central to JavaScript, namely objects. But what are objects, and why are they useful?
First, we have to break it to you: You have been using objects throughout this book (for example, an array is an object). JavaScript is an object-based language, and therefore most of what you do involves manipulating objects. You’ll see that when you make full use of these objects, the range of things you can do with JavaScript expands immensely.
We’ll start this chapter by taking a look at the idea of what objects are and why they are important. We’ll move on to what kinds of objects are used in JavaScript, how to create them and use them, and how they simplify many programming tasks for you. Finally, you’ll see in more detail some of the most useful objects that JavaScript provides and how to use these in practical situations.
Not only does the JavaScript language consist of a number of these things called objects (which are also called native JavaScript objects), but also the browser itself is modeled as a collection of objects available for your use. You learn about these objects in particular in Chapter 8.
OBJECT-BASED PROGRAMMING
Object-based programming is a slightly scarier way of saying “programming using objects.” But what are these objects that you will be programming with? Where are they and how and why would you want to program with them? In this section, you look at the answers to these questions, both in general programming terms and more specifically within JavaScript.
What Are Objects?
To start the introduction to objects, let’s think about what is meant by an object in the “real world” outside computing. The world is composed of things, or objects, such as tables, chairs, and cars (to name just a few!). Let’s take a car as an example, to explore what an object really is.
How would you define the car? You might say it’s a blue car with four-wheel drive. You might specify the speed at which it’s traveling. When you do this, you are specifying properties of the object. For example, the car has a color property, which in this instance has the value blue.
How do you use the car? You turn the ignition key, press the gas pedal, beep the horn, change the gear (that is, choose between 1, 2, 3, 4, and reverse on a manual car, or drive and reverse on an automatic), and so on. When you do this, you are using methods of the object.
You can think of methods as being a bit like functions. Sometimes, you may need to use some information with the method, or pass it a parameter, to get it to work. For example, when you use the changing-gears method, you need to say which gear you want to change to. Other methods may pass information back to the owner. For example, the dipstick method will tell the owner how much oil is left in the car.
Sometimes using one or more of the methods may change one or more of the object’s properties. For example, using the accelerator method will probably change the car’s speed property. Other properties can’t be changed: for example, the body-shape property of the car (unless you hit a brick wall with the speed property at 100 miles per hour!).
You could say that the car is defined by its collection of methods and properties. In object-based programming, the idea is to model real-world situations by objects, which are defined by their methods and properties.
Objects in JavaScript
You should now have a basic idea of what an object is—a “thing” with methods and properties. But how do you use this concept in JavaScript?
In the previous chapters you have (for the most part) been dealing with primitive data (that is, you’ve been working with actual data). This type of data is not too complex and is fairly easy to deal with. However, not all information is as simple as primitive data. Let’s look at an example to clarify things a little.
Suppose you had written a web application that displayed timetable information for buses or trains. Once the user has selected a journey, you might want to let him know how long that journey will take. To do that, you need to subtract the arrival time from the departure time.
However, that’s not quite as simple as it may appear at first glance. For example, consider a departure time of 14:53 (for 2:53 p.m.) and an arrival time of 15:10 (for 3:10 p.m.). If you tell JavaScript to evaluate the expression 15.10–14.53, you get the result 0.57, which is 57 minutes. However, you know that the real difference in time is 17 minutes. Using the normal mathematical operators on times doesn’t work!
What would you need to do to calculate the difference between these two times? You would first need to separate the hours from the minutes in each time. Then, to get the difference in minutes between the two times, you would need to check whether the minutes of the arrival time were greater than the minutes of the departure. If so, you could simply subtract the departure time minutes from the arrival time minutes. If not, you’d need to add 60 to the arrival time minutes and subtract one from the arrival time hours to compensate, before taking the departure time minutes from the arrival time minutes. You’d then need to subtract the departure time hours from the arrival time hours, before putting the minutes and hours that you have arrived at back together.
This would work okay so long as the two times were in the same day. It wouldn’t work, for example, with the times 23:45 and 04:32.
This way of working out the time difference obviously has its problems, but it also seems very complex. Is there an easier way to deal with more complex data such as times and dates?
This is where objects come in. You can define your departure and arrival times as Date objects. Because they are Date objects, they come with a variety of properties and methods that you can use when you need to manipulate or calculate times. For example, you can use the getTime() method to get the number of milliseconds between the time in the Date object and January 1, 1970, 00:00:00. Once you have these millisecond values for the arrival and departure times, you can simply subtract one from the other and store the result in another Date object. To retrieve the hours and minutes of this time, you simply use the getHours() and getMinutes() methods of the Date object. You see more examples of this later in the chapter.
The Date object is not the only type of object that JavaScript has to offer. Another object type was introduced in Chapter 2, but to keep things simple, we didn’t tell you what it was at the time: the Array object. Recall that an array is a way of holding a number of pieces of data at the same time.
Array objects have a property called length that tells you how many pieces of data, or rather how many elements, the array holds. They also have a number of methods. One example is the sort() method, which you can use to sort the elements within the array into alphabetical order.
You should now have an idea why objects are useful in JavaScript. You have seen the Date and Array objects, but JavaScript makes available many other types of objects so that you can achieve more with your code. These include the Math and String objects, which we talk more about later in the chapter.
Using JavaScript Objects
Now that you have seen the why of JavaScript objects, you need to look at the what and the how.
Each of JavaScript’s objects has a collection of related properties and methods that you can use to manipulate a certain kind of data. For example, the Array object consists of methods to manipulate arrays and properties to find out information from them. In most cases, to make use of these methods and properties, you need to define your data as one of these objects. In other words, you need to create an object.
In this section, you look at how to go about creating an object and, having done that, how you use its properties and methods.
Creating an Object
To create many types of objects, you use the new operator. The following statement creates a Date object:
var myDate = new Date();
The first half of the statement is familiar to you. You use the var keyword to define a variable called myDate. This variable is initialized, using the equals sign assignment operator (=), to the right-hand side of the statement.
The right-hand side of the statement consists of two parts. First you have the operator new. This tells JavaScript that you want to create a new object. Next you have Date(). This is the constructor for a Date object. It’s a function that tells JavaScript what type of object you want to create. Most objects have constructors like this. For example, the Array object has the Array() constructor (but remember, we typically don’t use it in favor of the literal []). The only exception you see in this book is the Math object, and this is explained in a later part of the chapter.
Because a constructor is a function, you can pass parameters to the constructor to add data to your object. For example, the following code creates a Date object containing the date 1 January 2014:
var myDate = new Date("1 Jan 2014");
How object data is stored in variables differs from how primitive data, such as text and numbers, is stored. (Primitive data is the most basic data possible in JavaScript.) With primitive data, the variable holds the data’s actual value. For example:
var myNumber = 23;
This code means that the variable myNumber holds the data 23. However, variables assigned to objects don’t hold the actual data, but rather a reference to the memory address where the data can be found. This doesn’t mean you can get hold of the memory address—this is something only JavaScript has details of and keeps to itself in the background. All you need to remember is that when you say that a variable references an object, you mean it references a memory address. This is shown in the following example:
var myArrayRef = [0, 1, 2];
var mySecondArrayRef = myArrayRef;
myArrayRef[0] = 100;
alert(mySecondArrayRef[0]);
First you set the myArrayRef variable to reference the new array object, and then you set mySecondArrayRef to the same reference—for example, now mySecondArrayRef is set to reference the same array object. So when you set the first element of the array to 100, as shown here:
myArrayRef[0] = 100;
and display the contents of the first element of the array referenced in mySecondArrayRef as follows:
alert(mySecondArrayRef[0]);
you’ll see it has also magically changed to 100! However, as you now know, it’s not magic; it’s because both variables reference the same array object—when it comes to objects, it’s a reference to the object and not the object itself that is stored in a variable. When you did the assignment, it didn’t make a copy of the array object, it simply copied the reference. Contrast that with the following:
var myVariable = "ABC";
var mySecondVariable = myVariable;
myVariable = "DEF";
alert(mySecondVariable);
In this case you’re dealing with a string, which is a primitive data type, as are numbers. This time the actual values are stored in the variable, so when you do this:
var mySecondVariable = myVariable;
mySecondVariable gets its own separate copy of the data in myVariable. So the alert at the end will still show mySecondVariable as holding "ABC".
To summarize this section, you create JavaScript objects using the following basic syntax:
var myVariable = new ConstructorName(optional parameters);
Using an Object’s Properties
Accessing the values contained in an object’s properties is very simple. You write the name of the variable containing (or referencing) your object, followed by a dot, and then the name of the object’s property.
For example, if you defined an Array object contained in the variable myArray, you could access its length property like this:
myArray.length
But what can you do with this property now that you have it? You can use it as you would any other piece of data and store it in a variable:
var myVariable = myArray.length;
Or you can show it to the user:
alert(myArray.length);
In some cases, you can even change the value of the property, like this:
myArray.length = 12;
However, unlike variables, some properties are read-only—you can get information from them, but you can’t change information inside them.
Calling an Object’s Methods
Methods are very much like functions in that they can be used to perform useful tasks, such as getting the hours from a particular date or generating a random number. Again like functions, some methods return a value, such as a Date object’s getHours() method, whereas others perform a task, but return no data, such as an Array object’s sort() method.
Using the methods of an object is very similar to using properties, in that you put the object’s variable name first, then a dot, and then the name of the method. For example, to sort the elements of an Array in the variable myArray, you can use the following code:
myArray.sort();
Just as with functions, you can pass parameters to some methods by placing the parameters between the parentheses following the method’s name. However, whether or not a method takes parameters, you must still put parentheses after the method’s name, just as you did with functions. As a general rule, anywhere you can use a function, you can use a method of an object.
Primitives and Objects
You should now have a good idea about the difference between primitive data, such as numbers and strings, and object data, such as Dates and Arrays. However, as was mentioned earlier, there is also a String object. Where does this fit in?
In fact, there are String, Number, and Boolean objects corresponding to the string, number, and boolean primitive data types. For example, to create a String object containing the text "I'm a String object" you can use the following code:
var myString = new String("I'm a String object");
String objects have the length property just as Array objects do. This returns the number of characters in the String object. For example,
var lengthOfString = myString.length;
would store the value 19 in the variable lengthOfString (remember that spaces are referred to as characters, too).
But what if you had declared a primitive string called mySecondString holding the text "I'm a primitive string" like this:
var mySecondString = "I'm a primitive string";
and wanted to know how many characters could be found in this primitive string?
This is where JavaScript helps you out. Recall from previous chapters that JavaScript can handle the conversion of one data type to another automatically. For example, if you tried to add a string primitive to a number primitive, like this:
theResult = "23" + 23;
JavaScript would assume that you want to treat the number as a string and concatenate the two together, the number being converted to text automatically. The variable theResult would contain "2323"—the concatenation of 23 and 23, and not the sum of 23 and 23, which would be 46.
The same applies to objects. If you declare a primitive string and then treat it as an object, such as by trying to access one of its methods or properties, JavaScript will know that the operation you’re trying to do won’t work. The operation will only work with an object; for example, it would be valid with a String object. In this case, JavaScript converts the plaintext string into a temporary String object, just for that operation, and destroys the object when it’s finished the operation.
So, for your primitive string mySecondString, you can use the length property of the String object to find out the number of characters it contains. For example:
var lengthOfSecondString = mySecondString.length;
This would store the data 22 in the variable lengthOfSecondString.
The same ideas expressed here are also true for number and boolean primitives and their corresponding Number and Boolean objects. However, these objects are not used very often, so we will not be discussing them further in this book.
JAVASCRIPT’S NATIVE OBJECT TYPES
So far, you have just been looking at what objects are, how to create them, and how to use them. Now take a look at some of the more useful objects that are native to JavaScript—that is, those that are built into the JavaScript language.
You won’t be looking at all of the native JavaScript objects, just some of the more commonly used ones, namely the String object, the Math object, the Array object, and the Date object.
String Objects
Like most objects, String objects need to be created before they can be used. To create a String object, you can write this:
var string1 = new String("Hello");
var string2 = new String(123);
var string3 = new String(123.456);
However, as you have seen, you can also declare a string primitive and use it as if it were a String object, letting JavaScript do the conversion to an object for you behind the scenes. For example:
var string1 = "Hello";
Using this technique is preferable. The advantages to doing it this way are that there is no need to create a String object itself, and you avoid the troubles with comparing string objects. When you try to compare string objects with primitive string values, the actual values are compared, but with String objects, the object references are compared.
The String object has a vast number of methods and properties. In this section, you look only at some of the less complex and more commonly used methods. However, in Chapter 6 you look at some of the trickier but very powerful methods associated with strings and the regular expression object (RegExp). Regular expressions provide a very powerful means of searching strings for patterns of characters. For example, if you want to find "Paul" where it exists as a whole word in the string "Pauline, Paul, Paula", you need to use regular expressions. However, they can be a little tricky to use, so we won’t discuss them further in this chapter—we want to save some fun for later!
With most of the String object’s methods, it helps to remember that a string is just a series of individual characters and that, as with arrays, each character has a position, or index. Also as with arrays, the first position, or index, is labeled 0 and not 1. So, for example, the string "Hello World" has the character positions shown in the following table:
|
CHARACTER INDEX |
0 |
1 |
2 |
3 |
4 |
5 |
6 |
7 |
8 |
9 |
10 |
|
Character |
H |
e |
l |
l |
o |
W |
o |
r |
l |
d |
The length Property
The length property simply returns the number of characters in the string. For example,
var myName = "Jeremy";
document.write(myName.length);
will write the length of the string "Jeremy" (that is, 6) to the page.
Finding a String Inside Another String—The indexOf() and lastIndexOf() Methods
The methods indexOf() and lastIndexOf() are used for searching for the occurrence of one string inside another. A string contained inside another is usually termed a substring. They are useful when you have a string of information but only want a small part of it. For example, in the trivia quiz, when someone enters a text answer, you want to check if certain keywords are present within the string.
Both indexOf() and lastIndexOf() take two parameters:
· The string you want to find
· The character position you want to start searching from (optional)
Character positions start at 0. If you don’t include the second parameter, searching starts from the beginning of the string.
The return value of indexOf() and lastIndexOf() is the character position in the string at which the substring was found. Again, it’s zero-based, so if the substring is found at the start of the string, then 0 is returned. If there is no match, the value -1 is returned.
For example, to search for the substring "Jeremy" in the string "Hello jeremy. How are you Jeremy", you can use the following code:
var myString = "Hello jeremy. How are you Jeremy";
var foundAtPosition = myString.indexOf("Jeremy");
alert(foundAtPosition);
This code should result in a message box containing the number 26, which is the character position of "Jeremy". You might be wondering why it’s 26, which clearly refers to the second "Jeremy" in the string, rather than 6 for the first "jeremy".
This is due to case sensitivity. JavaScript takes case sensitivity very seriously, both in its syntax and when making comparisons. If you type IndexOf() instead of indexOf(), JavaScript will complain. Similarly, "jeremy" is not the same as "Jeremy". Remember that mistakes with case are very common and so easy to make, even for experts, and it’s best to be very aware of case when programming.
You’ve seen indexOf() in action, but how does lastIndexOf() differ? Well, whereas indexOf() starts searching from the beginning of the string, or the position you specified in the second parameter, and works toward the end, lastIndexOf() starts at the end of the string, or the position you specified, and works toward the beginning of the string. Let’s modify the previous example to the following code:
var myString = "Hello Jeremy. How are you Jeremy";
var foundAtPosition = myString.indexOf("Jeremy");
alert(foundAtPosition);
foundAtPosition = myString.lastIndexOf("Jeremy");
alert(foundAtPosition);
First, notice the string value assigned to myString; both instances of "Jeremy" now begin with a capital letter. The first alert box displays the result of 6 because that is the position of the first occurrence of "Jeremy". The second alert box displays 26 because lastIndexOf()starts searching at the end of the string, and the position of the first occurrence of "Jeremy" from the end of the string is 26.
TRY IT OUT Counting Occurrences of Substrings
In this example, you look at how to use the “start character position” parameter of indexOf(). Here you will count how many times the word Wrox appears in the string:
<!DOCTYPE html>
<html lang="en">
<head>
<title>Chapter 5, Example 1</title>
</head>
<body>
<script>
var myString = "Welcome to Wrox books. " +
"The Wrox website is www.wrox.com. " +
"Visit the Wrox website today. Thanks for buying Wrox";
var foundAtPosition = 0;
var wroxCount = 0;
while (foundAtPosition != -1) {
foundAtPosition = myString.indexOf("Wrox", foundAtPosition);
if (foundAtPosition != -1) {
wroxCount++;
foundAtPosition++;
}
}
document.write("There are " + wroxCount + " occurrences of the word Wrox");
</script>
</body>
</html>
Save this example as ch5_example1.html. When you load the page into your browser, you should see the following sentence: There are 4 occurrences of the word Wrox.
At the top of the script block, you built up a string inside the variable myString, which you then want to search for the occurrence of the word Wrox. You also define two variables: wroxCount will contain the number of times Wrox is found in the string, andfoundAtPosition will contain the position in the string of the current occurrence of the substring Wrox.
You then used a while loop, which continues looping all the while you are finding the word Wrox in the string—that is, while the variable foundAtPosition is not equal to -1. Inside the while loop, you have this line:
foundAtPosition = myString.indexOf("Wrox", foundAtPosition);
Here you search for the next occurrence of the substring Wrox in the string myString. How do you make sure that you get the next occurrence? You use the variable foundAtPosition to give you the starting position of your search, because this contains the index after the index position of the last occurrence of the substring Wrox. You assign the variable foundAtPosition to the result of your search, the index position of the next occurrence of the substring Wrox.
Each time Wrox is found (that is, each time foundAtPosition is not -1) you increase the variable wroxCount, which counts how many times you have found the substring, and you increase foundAtPosition so that you continue the search at the next position in the string:
if (foundAtPosition != -1) {
wroxCount++;
foundAtPosition++;
}
Finally, you document.write() the value of the variable wroxCount to the page.
Chapter 3 talked about the danger of infinite loops, and you can see that there is a danger of one here. If foundAtPosition++ were removed, you’d keep searching from the same starting point and never move to find the next occurrence of the word Wrox.
The indexOf() and lastIndexOf() methods are more useful when coupled with the substr() and substring() methods, which you look at in the next section. Using a combination of these methods enables you to cut substrings out of a string.
Copying Part of a String—The substr() and substring() Methods
If you wanted to cut out part of a string and assign that cut-out part to another variable or use it in an expression, you would use the substr() and substring() methods. Both methods provide the same end result—that is, a part of a string—but they differ in the parameters they require.
The method substring() accepts two parameters: the character start position and the position after the last character desired in the substring. The second parameter is optional; if you don’t include it, all characters from the start position to the end of the string are included.
For example, if your string is "JavaScript" and you want just the text "Java", you could call the method like so:
var myString = "JavaScript";
var mySubString = myString.substring(0,4);
alert(mySubString);
The character positions for the string "JavaScript" are:
|
CHARACTER POSITION |
0 |
1 |
2 |
3 |
4 |
5 |
6 |
7 |
8 |
9 |
|
Character |
J |
a |
v |
a |
S |
c |
r |
i |
p |
t |
Like substring(), the method substr() again takes two parameters, the first being the start position of the first character you want included in your substring. However, this time the second parameter specifies the length of the string of characters that you want to cut out of the longer string. For example, you could rewrite the preceding code like this:
var myString = "JavaScript";
var mySubString = myString.substr(0,4);
alert(mySubString);
As with the substring() method, the second parameter is optional. If you don’t include it, all the characters from the start position onward will be included.
NOTE The substring() method was introduced long before substr(). Most of the time, you will use the substr() method.
Let’s look at the use of the substr() and lastIndexOf() methods together. Later in the book, you see how you can retrieve the file path and name of the currently loaded web page. However, there is no way of retrieving the filename alone. So if, for example, your file ishttp://mywebsite/temp/myfile.html, you may need to extract the myfile.html part. This is where substr() and lastIndexOf() are useful:
var fileName = window.location.href;
fileName = fileName.substr(fileName.lastIndexOf("/") + 1);
document.write("The file name of this page is " + fileName);
The first line sets the variable fileName to the current file path and name, such as /mywebsite/temp/myfile.html. Don’t worry about understanding this line right now; you’ll see it later.
The second line is where the interesting action is. You can see that this code uses the return value of the lastIndexOf() method as a parameter for another method, something that’s perfectly correct and very useful. The goal in using fileName.lastIndexOf("/") is to find the position of the final forward slash (/), which will be the last character before the name of the file. You add one to this value, because you don’t want to include that character, and then pass this new value to the substr() method. There’s no second parameter here (the length), because you don’t know it. As a result, substr() will return all the characters right to the end of the string, which is what you want.
NOTE This example retrieves the name of the page on the local machine, because you’re not accessing the page from a web server. However, don’t let this mislead you into thinking that accessing files on a local hard drive from a web page is something you’ll be able to do with JavaScript alone. To protect users from malicious hackers, JavaScript’s access to the user’s system, such as access to files, is very limited. You learn more about this later in the book.
Converting Case—The toLowerCase() and toUpperCase() Methods
If you want to change the case of a string (for example, to remove case sensitivity when comparing strings), you need the toLowerCase() and toUpperCase() methods. It’s not hard to guess what these two methods do. Both of them return a string that is the value of the string in the String object, but with its case converted to either upper or lower depending on the method invoked. Any non-alphabetical characters remain unchanged by these functions.
In the following example, you can see that by changing the case of both strings you can compare them without case sensitivity being an issue:
var myString = "I Don't Care About Case";
if (myString.toLowerCase() == "i don't care about case") {
alert("Who cares about case?");
}
Even though toLowerCase() and toUpperCase() don’t take any parameters, you must remember to put the two empty parentheses—that is, ()—at the end, if you want to call a method.
Selecting a Single Character from a String—The charAt() and charCodeAt() Methods
If you want to find out information about a single character within a string, you need the charAt() and charCodeAt() methods. These methods can be very useful for checking the validity of user input, something you see more of in Chapter 11 when you look at HTML forms.
The charAt() method accepts one parameter: the index position of the character you want in the string. It then returns that character. charAt() treats the positions of the string characters as starting at 0, so the first character is at index 0, the second at index 1, and so on.
For example, to find the last character in a string, you could use this code:
var myString = prompt("Enter some text", "Hello World!");
var theLastChar = myString.charAt(myString.length - 1);
document.write("The last character is " + theLastChar);
In the first line, you prompt the user for a string, with the default of "Hello World!", and store this string in the variable myString.
In the next line, you use the charAt() method to retrieve the last character in the string. You use the index position of (myString.length - 1). Why? Let’s take the string "Hello World!" as an example. The length of this string is 12, but the last character position is 11because the indexing starts at 0. Therefore, you need to subtract one from the length of the string to get the last character’s position.
In the final line, you write the last character in the string to the page.
The charCodeAt() method is similar in use to the charAt() method, but instead of returning the character itself, it returns a number that represents the decimal character code for that character in the Unicode character set. Recall that computers only understand numbers—to the computer, all your strings are just numeric data. When you request text rather than numbers, the computer does a conversion based on its internal understanding of each number and provides the respective character.
For example, to find the character code of the first character in a string, you could write this:
var myString = prompt("Enter some text", "Hello World!");
var theFirstCharCode = myString.charCodeAt(0);
document.write("The first character code is " + theFirstCharCode);
This will get the character code for the character at index position 0 in the string given by the user, and write it out to the page.
Character codes go in order, so, for example, the letter A has the code 65, B 66, and so on. Lowercase letters start at 97 (a is 97, b is 98, and so on). Digits go from 48 (for the number 0) to 57 (for the number 9). You can use this information for various purposes, as you see in the next example.
TRY IT OUT Checking a Character’s Case
This is an example that detects the type of the character at the start of a given string—that is, whether the character is uppercase, lowercase, numeric, or other:
<!DOCTYPE html>
<html lang="en">
<head>
<title>Chapter 5, Example 2</title>
</head>
<body>
<script>
function checkCharType(charToCheck) {
var returnValue = "O";
var charCode = charToCheck.charCodeAt(0);
if (charCode >= "A".charCodeAt(0) && charCode <= "Z".charCodeAt(0)) {
returnValue = "U";
} else if (charCode >= "a".charCodeAt(0) &&
charCode <= "z".charCodeAt(0)) {
returnValue = "L";
} else if (charCode >= "0".charCodeAt(0) &&
charCode <= "9".charCodeAt(0)) {
returnValue = "N";
}
return returnValue;
}
var myString = prompt("Enter some text", "Hello World!");
switch (checkCharType(myString)) {
case "U":
document.write("First character was upper case");
break;
case "L":
document.write("First character was lower case");
break;
case "N":
document.write("First character was a number");
break;
default:
document.write("First character was not a character or a number");
}
</script>
</body>
</html>
Type the code and save it as ch5_example2.html. When you load the page into your browser, you will be prompted for a string. A message will then be written to the page informing you of the type of the first character that you entered—whether it is uppercase, lowercase, a number, or something else, such as a punctuation mark.
To start with, you define a function checkCharType(). You start this function by declaring the variable returnValue and initializing it to the character "O" to indicate it’s some other character than a lowercase letter, uppercase letter, or numerical character:
function checkCharType(charToCheck) {
var returnValue = "O";
You use this variable as the value to be returned at the end of the function, indicating the type of character. It will take the values U for uppercase, L for lowercase, N for number, and O for other.
The next line in the function uses the charCodeAt() method to get the character code of the first character in the string stored in charToCheck, which is the function’s only parameter. The character code is stored in the variable charCode:
var charCode = charToCheck.charCodeAt(0);
In the following lines, you have a series of if statements, which check within what range of values the character code falls. You know that if it falls between the character codes for A and Z, it’s uppercase, and so you assign the variable returnValue the value U. If the character code falls between the character codes for a and z, it’s lowercase, and so you assign the value L to the variable returnValue. If the character code falls between the character codes for 0 and 9, it’s a number, and you assign the value Nto the variable returnValue. If the value falls into none of these ranges, the variable retains its initialization value of O for other, and you don’t have to do anything.
if (charCode >= "A".charCodeAt(0) && charCode <= "Z".charCodeAt(0)) {
returnValue = "U";
} else if (charCode >= "a".charCodeAt(0) &&
charCode <= "z".charCodeAt(0)) {
returnValue = "L";
} else if (charCode >= "0".charCodeAt(0) &&
charCode <= "9".charCodeAt(0)) {
returnValue = "N";
}
This probably seems a bit weird at first, so let’s see what JavaScript is doing with your code. When you write
"A".charCodeAt(0)
it appears that you are trying to use a method of the String object on a string literal, which is the same as a primitive string in that it’s just characters and not an object. However, JavaScript realizes what you are doing and does the necessary conversion of literal character "A" into a temporary String object containing "A". Then, and only then, does JavaScript perform the charCodeAt() method on the String object it has created in the background. When it has finished, the String object is disposed of. Basically, this is a shorthand way of writing the following:
var myChar = new String("A");
myChar.charCodeAt(0);
In either case, the first (and, in this string, the only) character’s code is returned to you. For example, "A".charCodeAt(0) will return the number 65.
Finally, you come to the end of the function and return the returnValue variable to where the function was called:
return returnValue;
}
You might wonder why you bother using the variable returnValue at all, instead of just returning its value. For example, you could write the code as follows:
if (charCode >= "A".charCodeAt(0) && charCode <= "Z".charCodeAt(0)) {
return "U";
} else if (charCode >= "a".charCodeAt(0) &&
charCode <= "z".charCodeAt(0)) {
return "L";
} else if (charCode >= "0".charCodeAt(0) &&
charCode <= "9".charCodeAt(0)) {
return "N";
}
return "O";
This would work fine, so why not do it this way? The disadvantage of this way is that it’s difficult to follow the flow of execution of the function, which is not that bad in a small function like this, but can get tricky in bigger functions. With the original code you always know exactly where the function execution stops: It stops at the end with the only return statement. The version of the function just shown finishes when any of the return statements is reached, so there are four possible places where the function might end.
The next chunk of code checks that the function works. You first use the variable myString, initialized to "Hello World!" or whatever the user enters into the prompt box, as your test string.
var myString = prompt("Enter some text", "Hello World!");
Next, the switch statement uses the checkCharType() function that you defined earlier in its comparison expression. Depending on what is returned by the function, one of the case statements will execute and let the user know what the character type was:
switch (checkCharType(myString)) {
case "U":
document.write("First character was upper case");
break;
case "L":
document.write("First character was lower case");
break;
case "N":
document.write("First character was a number");
break;
default:
document.write("First character was not a character or a number");
}
That completes the example, but before moving on, it’s worth noting that this example is just that—an example of using charCodeAt(). In practice, it would be much easier to just write
if (char >= "A" && char <= "Z")
rather than
if (charCode >= "A".charCodeAt(0) && charCode <= "Z".charCodeAt(0))
which you have used here.
Converting Character Codes to a String—The fromCharCode() Method
You can think of the method fromCharCode() as the opposite of charCodeAt(), in that you pass it a series of comma-separated numbers representing character codes, and it converts them to a single string.
However, the fromCharCode() method is unusual in that it’s a static method—you don’t need to have created a String object to use it with; it’s always available to you.
For example, the following lines put the string "ABC" into the variable myString:
var myString = String.fromCharCode(65,66,67);
The fromCharCode() method can be very useful when used with variables. For example, to build up a string consisting of all the uppercase letters of the alphabet, you could use the following code:
var myString = "";
var charCode;
for (charCode = 65; charCode <= 90; charCode++) {
myString = myString + String.fromCharCode(charCode);
}
document.write(myString);
You use the for loop to select each character from A to Z in turn and concatenate this to myString. Note that although this is fine as an example, it is more efficient and less memory-hungry to simply write this instead:
var myString = "ABCDEFGHIJKLMNOPQRSTUVWXYZ";
Removing Leading and Trailing Whitespace—The trim() Method
When working with user-provided data, you’re never guaranteed that the users input their data exactly how you want them to. Therefore, it’s always best to assume user input is incorrect, and it’s your job to make it correct.
The process of scrubbing data is dependent on the specific needs of your application, but you’ll commonly want to trim the whitespace from the start and end of the string. For this, String objects have the trim() method. It returns a new string with all leading and trailing whitespace removed. For example:
var name = prompt("Please enter your name");
name = name.trim();
alert("Hello, " + name);
This code prompts users to enter their name. You then trim their input of whitespace and use the resulting value in a greeting that is displayed in an alert box. So, if the user entered " Jim", he’d still only see "Hello, Jim" in the alert box because you trimmed his input.
Array Objects
You saw how to create and use arrays in Chapter 2, and this chapter mentioned earlier that they are actually objects.
In addition to storing data, Array objects provide a number of useful properties and methods you can use to manipulate the data in the array and find out information such as the size of the array.
Again, this is not an exhaustive look at every property and method of Array objects, but rather just some of the more useful ones.
Finding Out How Many Elements Are in an Array—The length Property
The length property gives you the number of elements within an array. Sometimes you know exactly how long the array is, but in some situations you may have been adding new elements to an array with no easy way of keeping track of how many have been added.
You can use the length property to find the index of the last element in the array. This is illustrated in the following example:
var names = [];
names[0] = "Paul";
names[1] = "Jeremy";
names[11] = "Nick";
document.write("The last name is " + names[names.length - 1]);
NOTE Note that you have inserted data in the elements with index positions 0, 1, and 11. The array index starts at 0, so the last element is at index length - 1, which is 11, rather than the value of the length property, which is 12.
Another situation in which the length property proves useful is where a JavaScript method returns an array it has built itself. For example, in the next chapter, you see that the String object has the split() method, which splits text into pieces and passes back the result as an Array object. Because JavaScript created the array, there is no way for you to know, without the length property, what the index is of the last element in the array.
Adding Elements—The push() Method
You’ll find that Array objects have many useful methods, but you will probably use the push() method more than any other. Its purpose is simple—add elements to the array—and it lets you do so without needing to specify an index, like this:
var names = [];
names.push("Jeremy");
names.push("Paul");
Its usage is simple—simply pass the value you want to add to the array, and that value will be pushed to the end of the array. So in the previous names array, "Jeremy" and "Paul" are in index positions of 0 and 1, respectively.
Joining Arrays—The concat() Method
If you want to take two separate arrays and join them into one big array, you can use the Array object’s concat() method. The concat() method returns a new array, which is the combination of the two arrays: the elements of the first array, then the elements of the second array. To do this, you use the method on your first array and pass the name of the second array as its parameter.
For example, say you have two arrays, names and ages, and separately they look like the following tables:
|
names array |
|||
|
ELEMENT INDEX |
0 |
1 |
2 |
|
VALUE |
Paul |
Jeremy |
Nick |
|
ages array |
|||
|
ELEMENT INDEX |
0 |
1 |
2 |
|
VALUE |
31 |
30 |
31 |
If you combine them using names.concat(ages), you will get an array like the one in the following table:
|
ELEMENT INDEX |
0 |
1 |
2 |
3 |
4 |
5 |
|
VALUE |
Paul |
Jeremy |
Nick |
31 |
30 |
31 |
In the following code, this is exactly what you are doing:
var names = [ "Paul", "Jeremy", "Nick" ];
var ages = [ 31, 30, 31 ];
var concatArray = names.concat(ages);
It’s also possible to combine two arrays into one but assign the new array to the name of the existing first array, using names = names.concat(ages).
If you were to use ages.concat(names), what would be the difference? Well, as you can see in the following table, the difference is that now the ages array elements are first, and the elements from the names array are concatenated on the end:
|
ELEMENT INDEX |
0 |
1 |
2 |
3 |
4 |
5 |
|
VALUE |
31 |
30 |
31 |
Paul |
Jeremy |
Nick |
Copying Part of an Array—The slice() Method
When you just want to copy a portion of an array, you can use the slice() method. Using the slice() method, you can slice out a portion of the array and assign it to a new variable name. The slice() method has two parameters:
· The index of the first element you want copied
· The index of the element marking the end of the portion you are slicing out (optional)
Just as with string copying with substring(), the start point is included in the copy, but the end point is not. Again, if you don’t include the second parameter, all elements from the start index onward are copied.
Suppose you have the array names shown in the following table:
|
INDEX |
0 |
1 |
2 |
3 |
4 |
|
VALUE |
Paul |
Sarah |
Jeremy |
Adam |
Bob |
If you want to create a new array with elements 1, Sarah, and 2, Jeremy, you would specify a start index of 1 and an end index of 3. The code would look something like this:
var names = [ "Paul", "Sarah", "Jeremy", "Adam", "Bob" ];
var slicedArray = names.slice(1,3);
When JavaScript copies the array, it copies the new elements to an array in which they have indexes 0 and 1, not their old indexes of 1 and 2.
After slicing, the slicedArray looks like the following table:
|
INDEX |
0 |
1 |
|
VALUE |
Sarah |
Jeremy |
The first array, names, is unaffected by the slicing.
Converting an Array into a Single String—The join() Method
The join() method concatenates all the elements in an array and returns them as a string. It also enables you to specify any characters you want to insert between elements as they are joined together. The method has only one parameter, and that’s the string you want between elements.
An example will help explain things. Imagine that you have your weekly shopping list stored in an array, which looks something like this:
|
INDEX |
0 |
1 |
2 |
3 |
4 |
|
VALUE |
Eggs |
Milk |
Potatoes |
Cereal |
Banana |
Now you want to write out your shopping list to the page using document.write(). You want each item to be on a different line, and you can do this by using the <br /> tag between each element in the array. The <br/> tag is an HTML line break, a visual carriage return for breaking text into different lines. First, you need to declare your array:
var myShopping = [ "Eggs", "Milk", "Potatoes", "Cereal", "Banana" ];
Next, convert the array into one string with the join() method:
var myShoppingList = myShopping.join("<br />");
Now the variable myShoppingList will hold the following text:
"Eggs<br />Milk<br />Potatoes<br />Cereal<br />Banana"
which you can write out to the page with document.write():
document.write(myShoppingList);
The shopping list will appear in the page with each item on a new line, as shown in Figure 5.1.
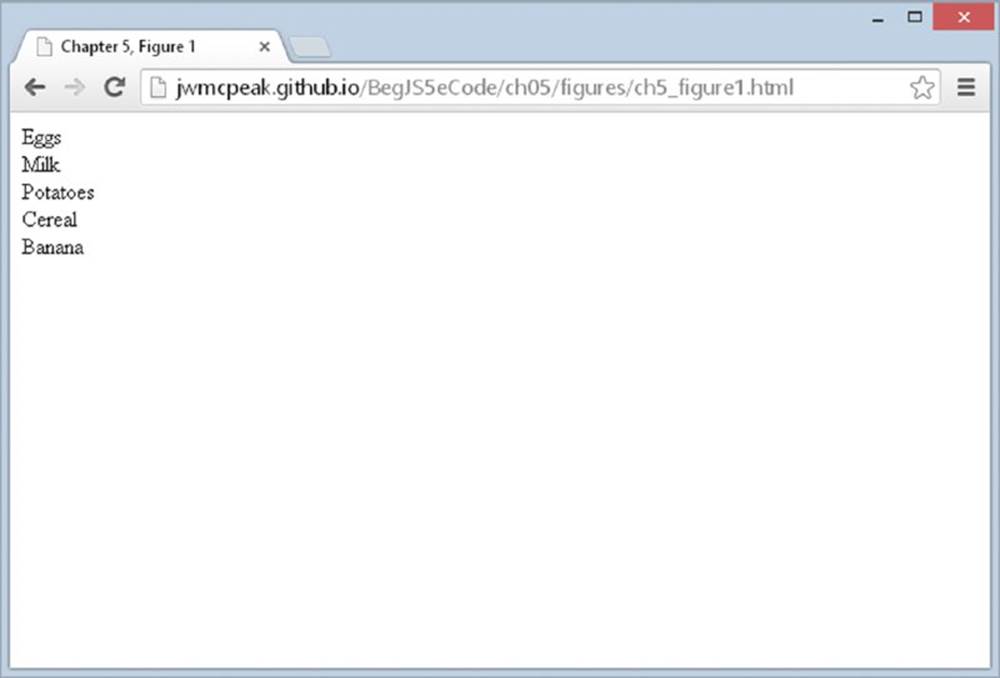
Figure 5.1
Putting Your Array in Order—The sort() Method
If you have an array that contains similar data, such as a list of names or a list of ages, you may want to put them in alphabetical or numerical order. This is something that the sort() method makes very easy. In the following code, you define your array and then put it in ascending alphabetical order using names.sort(). Finally, you output it so that you can see that it’s in order:
var names = [ "Paul", "Sarah", "Jeremy", "Adam", "Bob" ];
names.sort();
document.write("Now the names again in order <br />");
for (var index = 0; index < names.length; index++) {
document.write(names[index] + "<br />");
}
Don’t forget that the sorting is case sensitive, so Paul will come before paul. Remember that JavaScript stores letters encoded in their equivalent Unicode number, and that sorting is done based on Unicode numbers rather than actual letters. It just happens that Unicode numbers match the order in the alphabet. However, lowercase letters are given a different sequence of numbers, which come after the uppercase letters. So the array with elements Adam, adam, Zoë, zoë, will be sorted to the order Adam, Zoë, adam, zoë.
Note that in your for statement you’ve used the Array object’s length property in the condition statement, rather than inserting the length of the array (5), like this:
for (var index = 0; index < 5; index++)
Why do this? After all, you know in advance that you have five elements in the array. Well, what would happen if you altered the number of elements in the array by adding two more names?
var names = [ "Paul", "Sarah", "Jeremy", "Adam", "Bob", "Karen", "Steve" ];
If you had inserted 5 rather than names.length, your loop code wouldn’t work as you want it to. It wouldn’t display the last two elements unless you changed the condition part of the for loop to 7. By using the length property, you’ve made life easier, because now there is no need to change code elsewhere if you add array elements.
Okay, you’ve put things in ascending order, but what if you wanted descending order? That is where the reverse() method comes in.
Putting Your Array into Reverse Order—The reverse() Method
The next method for the Array object is the reverse() method, which, no prizes for guessing, reverses the order of the array so that the elements at the back are moved to the front. Let’s take the shopping list again as an example:
|
INDEX |
0 |
1 |
2 |
3 |
4 |
|
VALUE |
Eggs |
Milk |
Potatoes |
Cereal |
Banana |
If you use the reverse() method
var myShopping = [ "Eggs", "Milk", "Potatoes", "Cereal", "Banana" ];
myShopping.reverse();
you get
|
INDEX |
0 |
1 |
2 |
3 |
4 |
|
VALUE |
Banana |
Cereal |
Potatoes |
Milk |
Eggs |
To prove this, you could write it to the page with the join() method you saw earlier.
var myShoppingList = myShopping.join("<br />")
document.write(myShoppingList);
TRY IT OUT Sorting an Array
When used in conjunction with the sort() method, the reverse() method can be used to sort an array so that its elements appear in reverse alphabetical or numerical order. This is shown in the following example:
<!DOCTYPE html>
<html lang="en">
<head>
<title>Chapter 5, Example 3</title>
</head>
<body>
<script>
var myShopping = ["Eggs", "Milk", "Potatoes", "Cereal", "Banana"];
var ord = prompt("Enter 1 for alphabetical order, " +
"and -1 for reverse order", 1);
if (ord == 1) {
myShopping.sort();
document.write(myShopping.join("<br />"));
} else if (ord == -1) {
myShopping.sort();
myShopping.reverse();
document.write(myShopping.join("<br />"));
} else {
document.write("That is not a valid input");
}
</script>
</body>
</html>
Save the example as ch5_example3.html. When you load this into your browser, you will be asked to enter some input depending on whether you want the array to be ordered in forward or backward order. If you enter 1, the array will be displayed in forward order. If you enter –1, the array will be displayed in reverse order. If you enter neither of these values, you will be told that your input was invalid.
At the top of the script block, you define the array containing your shopping list. Next you define the variable ord to be the value entered by the user in a prompt box:
var ord = prompt("Enter 1 for alphabetical order, " +
"and -1 for reverse order", 1);
This value is used in the conditions of the if statements that follow. The first if checks whether the value of ord is 1—that is, whether the user wants the array in alphabetical order. If so, the following code is executed:
myShopping.sort();
document.write(myShopping.join("<br />"));
The array is sorted and then displayed to the user on separate lines using the join() method. Next, in the else if statement, you check whether the value of ord is -1—that is, whether the user wants the array in reverse alphabetical order. If so, the following code is executed:
myShopping.sort();
myShopping.reverse();
document.write(myShopping.join("<br />"));
Here, you sort the array before reversing its order. Again the array is displayed to the user by means of the join() method.
Finally, if ord has neither the value 1 nor the value -1, you tell the user that his input was invalid:
document.write("That is not a valid input");
Finding Array Elements—The indexOf() and lastIndexOf() Methods
As you can probably guess, the Array object’s indexOf() and lastIndexOf() methods behave similarly to the String object’s methods—they return the index of an item’s first and last occurrence in an array. Consider the following code:
var colors = [ "red", "blue", "green", "blue" ];
alert(colors.indexOf("red"));
alert(colors.lastIndexOf("blue"));
The first line of code creates an array called colors. It has four elements (two of which are blue). The second line alerts 0 to the user, because red is the first element of the array. The third line returns the value of 3 because the lastIndexOf() method begins its search at the very end of the array.
Both the indexOf() and lastIndexOf() methods return -1 if the provided value cannot be found in the array.
Iterating through an Array without Loops
The remaining five methods are called iterative methods because they iterate, or loop, through the array. In addition, these methods execute a function that you define on every element while they iterate through the array. The function these methods use must follow one rule—it must accept three arguments like the following code:
function functionName(value, index, array) {
// do something here
}
When executed, JavaScript passes three arguments to your function. The first is the value of the element, the second is the index of the element, and the third is the array itself. These three parameters enable you to perform just about any operation or comparison you might need in relation to the array and its elements.
Testing Each Element—The every(), some(), and filter() Methods
Let’s look at the every() and some() methods first. These are testing methods. The every() method tests whether all elements in the array pass the test in your function. Consider the following code:
var numbers = [ 1, 2, 3, 4, 5 ];
function isLessThan3(value, index, array) {
var returnValue = false;
if (value < 3) {
returnValue = true;
}
return returnValue;
}
alert(numbers.every(isLessThan3));
The first line shows the creation of an array called numbers; its elements hold the values 1 through 5. The next line defines the isLessThan3() function. It accepts the three mandatory arguments and determines if the value of each element is less than 3. The last line alerts the outcome of the every() test. Because not every value in the array is less than 3, the result of the every() test is false.
Contrast this with the some() method. Unlike every(), the some() test only cares if some of the elements pass the test in your function. Using the same numbers array and isLessThan3() function, consider this line of code:
alert(numbers.some(isLessThan3));
The result is true because some of the elements in the array are less than 3. It’s easy to keep these two methods straight. Just remember the every() method returns true if, and only if, all elements in the array pass the test in your function; the some() method returnstrue if, and only if, some of the elements in the array pass your function’s test.
Let’s assume you want to retrieve the elements that have a value less than 3. You already know some elements meet this criterion, but how do you identify those elements and retrieve them? This is where the filter() method becomes useful.
The filter() method executes your function on every element in the array, and if your function returns true for a particular element, that element is added to a new array that the filter() method returns. Keeping that in mind, look at the following code:
var numbers = [ 1, 2, 3, 4, 5 ];
function isLessThan3(value, index, array) {
var returnValue = false;
if (value < 3) {
returnValue = true;
}
return returnValue;
}
if (numbers.some(isLessThan3)) {
var result = numbers.filter(isLessThan3);
alert("These numbers are less than 3: " + result);
}
This code redefines the numbers array and the isLessThan3 function used in previous examples. The highlighted code determines if any elements in the numbers array contain a value less than 3, and if so, calls the filter() method to place those elements into a new array. The result of this code is shown in Figure 5.2.
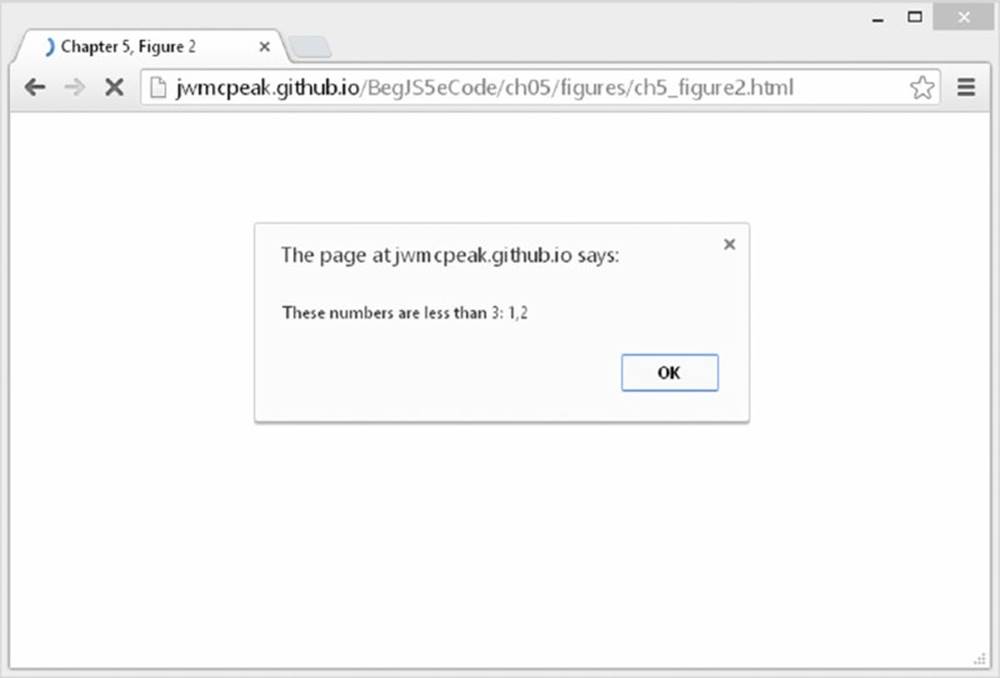
Figure 5.2
Operating on Elements—The forEach() and map() Methods
The final two methods are the forEach() and map() methods. Unlike the previous iterative methods, these two methods do not test each element in the array with your function; instead, the function you write should perform some kind of operation that uses the element in some way. Look at the following code:
var numbers = [ 1, 2, 3, 4, 5 ];
for (var i = 0; i < numbers.length; i++) {
var result = numbers[i] * 2;
alert(result);
}
As a programmer, you’ll often see and use this type of code. It defines an array and loops through it in order to perform some kind of operation on each element. In this case, the value of each element is doubled, and the result is shown in an alert box to the user.
This code can be rewritten to use the forEach() method. As its name implies, it does something for each element in the array. All you need to do is write a function to double a given value and output the result in an alert box, like this:
var numbers = [ 1, 2, 3, 4, 5 ];
function doubleAndAlert(value, index, array) {
var result = value * 2;
alert(result);
}
numbers.forEach(doubleAndAlert);
Notice that the doubleAndAlert() function doesn’t return a value like the testing methods. It cannot return a value; its only purpose is to perform an operation on every element in the array. This is useful in many cases, but you’ll want to use the map() method when you need to store the results of the function.
The premise of the map() method is similar to that of forEach(). It executes a given function on every element in an array, but it also returns a new array that contains the results of the function.
Let’s modify the previous example and write a new function called doubleAndReturn(). It will still double each element in the array, but it will return the doubled value instead of alerting it. The following code passes the doubleAndReturn() function to the Array object’smap() method:
var numbers = [ 1, 2, 3, 4, 5 ];
function doubleAndReturn(value, index, array) {
var result = value * 2;
return result;
}
var doubledNumbers = numbers.map(doubleAndReturn);
alert("The doubled numbers are: " + doubledNumbers);
Figure 5.3 shows the results of this code. It’s important to note that the map() method does not alter the original array.
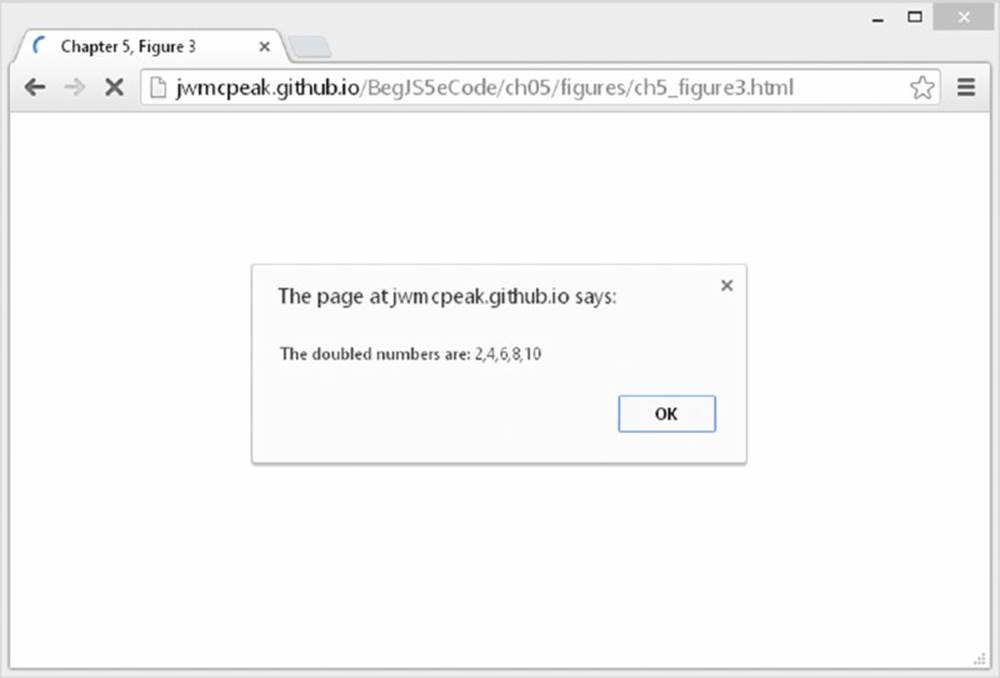
Figure 5.3
The Math Object
The Math object provides a number of useful mathematical functions and number manipulation methods. You take a look at some of them here, but you’ll find the rest described in detail at the Mozilla Developer Network: https://developer.mozilla.org/en-US/docs/Web/JavaScript/Reference/Global_Objects/Math.
The Math object is a little unusual in that JavaScript creates it for you automatically. There’s no need to declare a variable as a Math object or define a new Math object before being able to use it, making it a little bit easier to use.
The properties of the Math object include some useful math constants, such as the PI property (giving the value 3.14159 and so on). You access these properties, as usual, by placing a dot after the object name (Math) and then writing the property name. For example, to calculate the area of a circle, you can use the following code:
var radius = prompt("Give the radius of the circle", "");
var area = Math.PI * radius * radius;
document.write("The area is " + area);
The methods of the Math object include some operations that are impossible, or complex, to perform using the standard mathematical operators (+, –, *, and /). For example, the cos() method returns the cosine of the value passed as a parameter. You look at a few of these methods now.
The abs() Method
The abs() method returns the absolute value of the number passed as its parameter. Essentially, this means that it returns the positive value of the number. So -1 is returned as 1, -4 as 4, and so on. However, 1 would be returned as 1 because it’s already positive.
For example, the following code writes the number 101 to the page:
var myNumber = -101;
document.write(Math.abs(myNumber));
Finding the Largest and Smallest Numbers—The min() and max() Methods
Let’s say you have two numbers, and you want to find either the largest or smallest of the two. To aid you in this task, the Math object provides the min() and max() methods. These methods both accept at least two arguments, all of which must obviously be numbers. Look at this example code:
var max = Math.max(21,22); // result is 22
var min = Math.min(30.1, 30.2); // result is 30.1
The min() method returns the number with the lowest value, and max()returns the number with the highest value. The numbers you pass to these two methods can be whole or floating-point numbers.
NOTE The max() and min() methods can accept many numbers; you’re not limited to two.
Rounding Numbers
The Math object provides a few methods to round numbers, each with its own specific purpose.
The ceil() Method
The ceil() method always rounds a number up to the next largest whole number or integer. So 10.01 becomes 11, and –9.99 becomes –9 (because –9 is greater than –10). The ceil() method has just one parameter, namely the number you want rounded up.
Using ceil() is different from using the parseInt() function you saw in Chapter 2, because parseInt() simply chops off any numbers after the decimal point to leave a whole number, whereas ceil() rounds the number up.
For example, the following code writes two lines in the page, the first containing the number 102 and the second containing the number 101:
var myNumber = 101.01;
document.write(Math.ceil(myNumber) + "<br />");
document.write(parseInt(myNumber, 10));
The floor() Method
Like the ceil() method, the floor() method removes any numbers after the decimal point, and returns a whole number or integer. The difference is that floor() always rounds the number down. So if you pass 10.01 you will be returned 10, and if you pass –9.99 you will see –10 returned.
The round() Method
The round() method is very similar to ceil() and floor(), except that instead of always rounding up or always rounding down, it rounds up only if the decimal part is .5 or greater, and rounds down otherwise.
For example:
var myNumber = 44.5;
document.write(Math.round(myNumber) + "<br />");
myNumber = 44.49;
document.write(Math.round(myNumber));
This code would write the numbers 45 and 44 to the page.
Summary of Rounding Methods
As you have seen, the ceil(), floor(), and round() methods all remove the numbers after a decimal point and return just a whole number. However, which whole number they return depends on the method used: floor() returns the lowest, ceil() the highest, andround() the nearest equivalent integer. This can be a little confusing, so the following is a table of values and what whole number would be returned if these values were passed to the parseInt() function, and ceil(), floor(), and round() methods:
|
PARAMETER |
PARSEINT() RETURNS |
CEIL() RETURNS |
FLOOR() RETURNS |
ROUND() RETURNS |
|
10.25 |
10 |
11 |
10 |
10 |
|
10.75 |
10 |
11 |
10 |
11 |
|
10.5 |
10 |
11 |
10 |
11 |
|
−10.25 |
−10 |
−10 |
−11 |
−10 |
|
−10.75 |
−10 |
−10 |
−11 |
−11 |
|
−10.5 |
−10 |
−10 |
−11 |
−10 |
NOTE Remember that parseInt() is a native JavaScript function, not a method of the Math object, like the other methods presented in this table.
TRY IT OUT Rounding Methods Results Calculator
If you’re still not sure about rounding numbers, this example should help. Here, you look at a calculator that gets a number from the user, and then writes out what the result would be when you pass that number to parseInt(), ceil(), floor(), andround():
<!DOCTYPE html>
<html lang="en">
<head>
<title>Chapter 5, Example 4</title>
</head>
<body>
<script>
var myNumber = prompt("Enter the number to be rounded","");
document.write("<h3>The number you entered was " + myNumber +
"</h3>");
document.write("<p>The rounding results for this number are</p>");
document.write("<table width='150' border='1'>");
document.write("<tr><th>Method</th><th>Result</th></tr>");
document.write("<tr><td>parseInt()</td><td>" +
parseInt(myNumber, 10) + "</td></tr>");
document.write("<tr><td>ceil()</td><td>" + Math.ceil(myNumber) +
"</td></tr>");
document.write("<tr><td>floor()</td><td>"+ Math.floor(myNumber) +
"</td></tr>");
document.write("<tr><td>round()</td><td>" + Math.round(myNumber) +
"</td></tr>");
document.write("</table>");
</script>
</body>
</html>
Save this as ch5_example4.html and load it into a web browser. In the prompt box, enter a number (for example, 12.354), and click OK. The results of this number being passed to parseInt(), ceil(), floor(), and round() will be displayed in the page formatted inside a table, as shown in Figure 5.4.
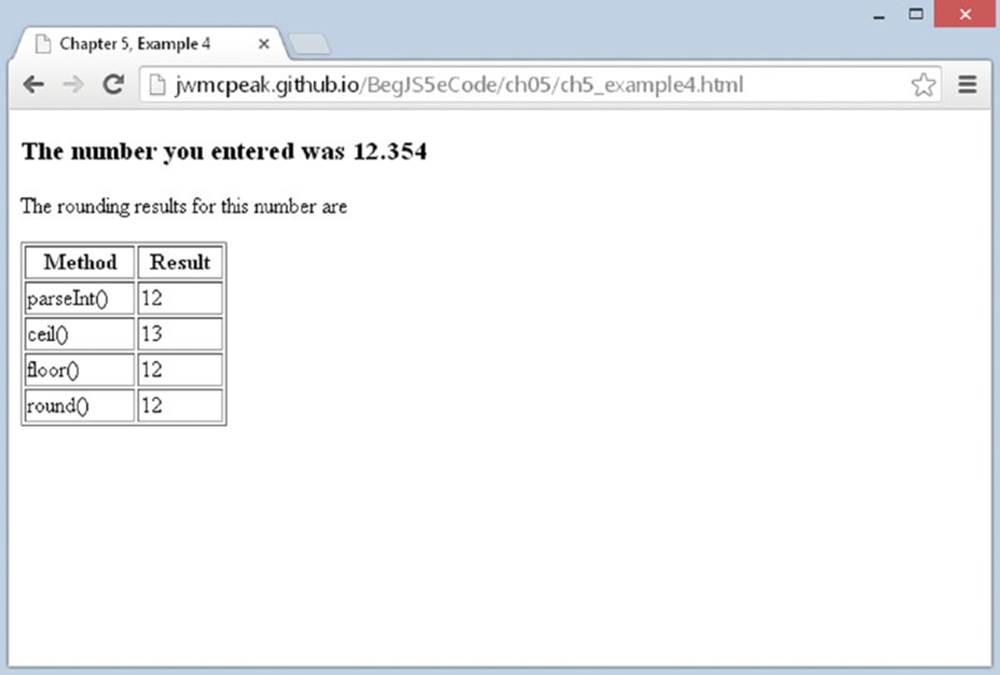
Figure 5.4
The first task is to get the number to be rounded from the user:
var myNumber = prompt("Enter the number to be rounded","");
Then you write out the number and some descriptive text:
document.write("<h3>The number you entered was " + myNumber + "</h3>");
document.write("<p>The rounding results for this number are</p>");
Notice how this time some HTML tags for formatting have been included—the main header being in <h3> tags, and the description of what the table means being inside a paragraph <p> tag.
Next you create the table of results:
document.write("<table width='150' border='1'>");
document.write("<tr><th>Method</th><th>Result</th></tr>");
document.write("<tr><td>parseInt()</td><td>" +
parseInt(myNumber, 10) + "</td></tr>");
document.write("<tr><td>ceil()</td><td>" + Math.ceil(myNumber) +
"</td></tr>");
document.write("<tr><td>floor()</td><td>"+ Math.floor(myNumber) +
"</td></tr>");
document.write("<tr><td>round()</td><td>" + Math.round(myNumber) +
"</td></tr>");
document.write("</table>");
You create the table header first before actually displaying the results of each rounding function on a separate row. The principles are the same as with HTML in a page: You must make sure your tag’s syntax is valid or otherwise things will appear strange or not appear at all.
Each row follows the same principle but uses a different rounding function. Let’s look at the first row, which displays the results of parseInt():
document.write("<tr><td>parseInt()</td><td>" +
parseInt(myNumber, 10) + "</td></tr>");
Inside the string to be written out to the page, you start by creating the table row with the <tr> tag. Then you create a table cell with a <td> tag and insert the name of the method from which the results are being displayed on this row. Then you close the cell with </td> and open a new one with <td>. Inside this next cell you are placing the actual results of the parseInt() function. Although a number is returned by parseInt(), because you are concatenating it to a string, JavaScript automatically converts the number returned by parseInt() into a string before concatenating. All this happens in the background without you needing to do a thing. Finally, you close the cell and the row with </td></tr>.
The random() Method
The random() method returns a random floating-point number in the range between 0 and 1, where 0 is included and 1 is not. This can be very useful for displaying random banner images or for writing a JavaScript game.
Let’s look at how you would mimic the roll of a single die. In the following page, 10 random numbers are written to the page. Click the browser’s Refresh button to get another set of random numbers.
<!DOCTYPE html>
<html lang="en">
<body>
<script>
var diceThrow;
for (var throwCount = 0; throwCount < 10; throwCount++) {
diceThrow = (Math.floor(Math.random() * 6) + 1);
document.write(diceThrow + "<br>");
}
</script>
</body>
</html>
You want diceThrow to be between 1 and 6. The random() function returns a floating-point number between 0 and just under 1. By multiplying this number by 6, you get a number between 0 and just under 6. Then by adding 1, you get a number between 1 and just under7. By using floor() to always round it down to the next lowest whole number, you can ensure that you’ll end up with a number between 1 and 6.
If you wanted a random number between 1 and 100, you would just change the code so that Math.random() is multiplied by 100 rather than 6.
The pow() Method
The pow() method raises a number to a specified power. It takes two parameters, the first being the number you want raised to a power, and the second being the power itself. For example, to raise 2 to the power of 8 (that is, to calculate 2 * 2 * 2 * 2 * 2 * 2 * 2 * 2), you would write Math.pow(2,8)—the result being 256. Unlike some of the other mathematical methods, like sin(), cos(), and acos(), which are not commonly used in web programming unless it’s a scientific application you’re writing, the pow() method can often prove very useful.
TRY IT OUT Using pow()
In this example, you write a function using pow(), which fixes the number of decimal places in a number:
<!DOCTYPE html>
<html lang="en">
<head>
<title>Chapter <5, Example 5</title>
</head>
<body>
<script>
function fix(fixNumber, decimalPlaces) {
var div = Math.pow(10, decimalPlaces);
fixNumber = Math.round(fixNumber * div) / div;
return fixNumber;
}
var number1 = prompt("Enter the number with decimal places you " +
"want to fix", "");
var number2 = prompt("How many decimal places do you want?", "");
document.write(number1 + " fixed to " + number2 + " decimal places is: ");
document.write(fix(number1, number2));
</script>
</body>
</html>
Save the page as ch5_example5.html. When you load the page into your browser, you will be presented with two prompt boxes. In the first, enter the number for which you want to fix the number of decimal places (for example, 2.2345). In the second, enter the number of decimal places you want fixed (for example, 2). Then the result of fixing the number you have entered to the number of decimal places you have chosen will be written to the page, as shown in Figure 5.5. For the example numbers, this will be 2.23.
Figure 5.5
You first define the function fix(). This function will fix its fixNumber parameter to a maximum of its decimalPlaces parameter’s number of digits after the decimal place. For example, fixing 34.76459 to a maximum of three decimal places will return 34.765.
The first line of code in the function sets the variable div to the number 10 raised to the power of the number of decimal places you want:
function fix(fixNumber, decimalPlaces) {
var div = Math.pow(10,decimalPlaces);
Then, in the next line, you calculate the new number:
fixNumber = Math.round(fixNumber * div) / div;
What the code Math.round(fixNumber * div) does is move the decimal point in the number that you are converting to after the point in the number that you want to keep. So for 2.2345, if you want to keep two decimal places, you convert it to 223.45. TheMath.round() method rounds this number to the nearest integer (in this case 223) and so removes any undesired decimal part.
You then convert this number back into the fraction it should be, but of course only the fractional part you want is left. You do this by dividing by the same number (div) that you multiplied by. In this example, you divide 223 by 100, which leaves 2.23. This is 2.2345 fixed to two decimal places. This value is returned to the calling code in the line:
return fixNumber;
}
Next, you use two prompt boxes to get numbers from the user. You then display the results of using these numbers in your fix() function to the user using document.write().
This example is just that—an example. In a few minutes, you learn about the Number object’s toFixed() method, which does the same thing as the fix() function.
Number Objects
As with the String object, Number objects need to be created before they can be used. To create a Number object, you can write the following:
var firstNumber = new Number(123);
var secondNumber = new Number('123');
However, as you have seen, you can also declare a number as primitive and use it as if it were a Number object, letting JavaScript do the conversion to an object for you behind the scenes. For example:
var myNumber = 123.765;
As with the String object, this technique is preferable so long as it’s clear to JavaScript what object you expect to have created in the background. So, for example,
var myNumber = "123.567";
will lead JavaScript to assume, quite rightly, that it’s a string, and any attempts to use the Number object’s methods will fail.
You look at just the toFixed() method of the Number object because that’s the most useful method for regular use.
The toFixed() Method
The toFixed() method cuts a number off after a certain point. Let’s say you want to display a price after sales tax. If your price is $9.99 and sales tax is 7.5 percent, that means the after-tax cost will be $10.73925. Well, this is rather an odd amount for a money transaction—what you really want to do is fix the number to no more than two decimal places. Let’s create an example:
var itemCost = 9.99;
var itemCostAfterTax = 9.99 * 1.075;
document.write("Item cost is $" + itemCostAfterTax + "<br />");
itemCostAfterTax = itemCostAfterTax.toFixed(2);
document.write("Item cost fixed to 2 decimal places is " +
"$" + itemCostAfterTax);
The first document.write()outputs the following to the page:
Item cost is $10.73925
However, this is not the format you want; instead you want two decimal places, so on the next line, enter this:
itemCostAfterTax = itemCostAfterTax.toFixed(2);
You use the toFixed() method of the Number object to fix the number variable that itemCostAfterTax holds to two decimal places. The method’s only parameter is the number of decimal places you want your number fixed to. This line means that the next document.writedisplays this:
Item cost fixed to 2 decimal places is $10.74
The first thing you might wonder is why 10.74 and not 10.73? Well, the toFixed() method doesn’t just chop off the digits not required; it also rounds up or down. In this case, the number was 10.739, which rounds up to 10.74. If it’d been 10.732, it would have been rounded down to 10.73.
Note that you can only fix a number from 0 to 20 decimal places.
Date Objects
The Date object handles everything to do with date and time in JavaScript. Using it, you can find out the current date and time, store your own dates and times, do calculations with these dates, and convert the dates into strings.
The Date object has a lot of methods and can be a little tricky to use, which is why Chapter 7 is dedicated to the date, time, and timers in JavaScript. However, in this section you focus on how to create a Date object and some of its more commonly used methods.
Creating a Date Object
You can declare and initialize a Date object in four ways. In the first method, you simply declare a new Date object without initializing its value. In this case, the date and time value will be set to the current date and time on the PC on which the script is run:
var theDate1 = new Date();
Secondly, you can define a Date object by passing the number of milliseconds since January 1, 1970, at 00:00:00 GMT. In the following example, the date is 31 January 2000 00:20:00 GMT (that is, 20 minutes past midnight):
var theDate2 = new Date(949278000000);
It’s unlikely that you’ll be using this way of defining a Date object very often, but this is how JavaScript actually stores the dates. The other formats for giving a date are simply for convenience.
The third way for you to declare a Date object is to pass a string representing a date, or a date and time. In the following example, you have "31 January 2014":
var theDate3 = new Date("31 January 2014");
However, you could have written 31 Jan 2014, Jan 31 2014, or any of a number of valid variations you’d commonly expect when writing down a date normally—if in doubt, try it out.
If you are writing your web pages for an international audience, you need to be aware of the different ways of specifying dates. In the United Kingdom and many other places, the standard is day, month, year, whereas in the United States the standard is month, day, year. This can cause problems if you specify only numbers—JavaScript may think you’re referring to a day when you mean a month.
In the fourth and final way of defining a Date object, you initialize it by passing the following parameters separated by commas: year, month, day, hours, minutes, seconds, and milliseconds. For example:
var theDate4 = new Date(2014,0,31,15,35,20,20);
This date is actually 31 January 2014 at 15:35:20 and 20 milliseconds. You can specify just the date part if you want and ignore the time. Something to be aware of is that in this instance January is month 0, not month 1, as you’d expect, and December is month 11.
TIP It’s very easy to make a mistake when specifying a month using either the third or fourth method of declaring a Date object. The easiest way to avoid such headaches is to always use the name of the month where possible. That way there can be no confusion.
Getting Date Values
It’s all very nice having stored a date, but how do you get the information out again? Well, you just use the get methods. These are summarized in the following table:
|
METHOD |
RETURNS |
|
getDate() |
The day of the month |
|
getDay() |
The day of the week as an integer, with Sunday as 0, Monday as 1, and so on |
|
getMonth() |
The month as an integer, with January as 0, February as 1, and so on |
|
getFullYear() |
The year as a four-digit number |
|
toDateString() |
Returns the full date based on the current time zone as a human-readable string, for example, “Wed 31 Dec 2003” |
For example, if you want to get the month in ourDateObj, you can simply write the following:
theMonth = myDateObject.getMonth();
All the methods work in a very similar way, and all values returned are based on local time, meaning time local to the machine on which the code is running. It’s also possible to use Universal Time, previously known as GMT, which we discuss in Chapter 7.
TRY IT OUT Using the Date Object to Retrieve the Current Date
In this example, you use the get date type methods you have been looking at to write the current day, month, and year to a web page:
<!DOCTYPE html>
<html lang="en">
<head>
<title>Chapter 5, Example 6</title>
</head>
<body>
<script>
var months = ["January", "February", "March", "April", "May",
"June", "July", "August", "September",
"October", "November", "December"];
var dateNow = new Date();
var yearNow = dateNow.getFullYear();
var monthNow = months[dateNow.getMonth()];
var dayNow = dateNow.getDate();
var daySuffix;
switch (dayNow) {
case 1:
case 21:
case 31:
daySuffix = "st";
break;
case 2:
case 22:
daySuffix = "nd";
break;
case 3:
case 23:
daySuffix = "rd";
break;
default:
daySuffix = "th";
break;
}
document.write("It is the " + dayNow + daySuffix + " day ");
document.write("in the month of " + monthNow);
document.write(" in the year " + yearNow);
</script>
</body>
</html>
Save the code as ch5_example6.html. When you load the page in your browser, you should see a correctly formatted sentence telling you the current date.
The first thing you do in the code is declare an array and populate it with the months of a year. Why do this? Well, there is no method of the Date object that’ll give you the month by name instead of as a number. However, this poses no problem; you just declare an array of months and use the month number as the array index to select the correct month name:
var months = ["January", "February", "March", "April", "May", "June", "July",
"August", "September", "October", "November", "December"];
Next you create a new Date object, and by not initializing it with your own value, you allow it to initialize itself to the current date and time:
var dateNow = new Date();
Following this you set the yearNow variable to the current year, as returned by the getFullYear() method:
var yearNow = dateNow.getFullYear();
You then populate your monthNow variable with the value contained in the array element with an index of the number returned by getMonth(). Remember that getMonth() returns the month as an integer value, starting with 0 for January—this is a bonus because arrays also start at 0, so no adjustment is needed to find the correct array element:
var monthNow = months[dateNow.getMonth()];
Finally, you put the current day of the month into the variable dayNow:
var dayNow = dateNow.getDate();
Next you use a switch statement, which you learned about in Chapter 3. This is a useful technique for adding the correct suffix to the date that you already have. After all, your application will look more professional if you can say "it is the 1st day", rather than "it is the 1 day". This is a little tricky, however, because the suffix you want to add depends on the number that precedes it. So, for the first, twenty-first, and thirty-first days of the month, you have this:
switch (dayNow) {
case 1:
case 21:
case 31:
daySuffix = "st";
break;
For the second and twenty-second days, you have this:
case 2:
case 22:
daySuffix = "nd";
break;
and for the third and twenty-third days, you have this:
case 3:
case 23:
daySuffix = "rd";
break;
Finally, you need the default case for everything else. As you will have guessed by now, this is simply "th":
default:
daySuffix = "th";
break;
}
In the final lines you simply write the information to the HTML page, using document.write().
Setting Date Values
To change part of the date in a Date object, you have a group of set functions, which pretty much replicate the get functions described earlier, except that you are setting, not getting, the values. These functions are summarized in the following table:
|
METHOD |
DESCRIPTION |
|
setDate() |
The date of the month is passed in as the parameter to set the date. |
|
setMonth() |
The month of the year is passed in as an integer parameter, where 0 is January, 1 is February, and so on. |
|
setFullYear() |
This sets the year to the four-digit integer number passed in as a parameter. |
NOTE that for security reasons, there is no way for web-based JavaScript to change the current date and time on a user’s computer.
So, to change the year to 2016, the code would be as follows:
myDateObject.setFullYear(2016);
Setting the date and month to the 27th of February looks like this:
myDateObject.setDate(27);
myDateObject.setMonth(1);
One minor point to note here is that there is no direct equivalent of the getDay() method. After the year, date, and month have been defined, the day is automatically set for you.
Calculations and Dates
Take a look at the following code:
var myDate = new Date("1 Jan 2010");
myDate.setDate(32);
document.write(myDate);
Surely there is some error—since when has January had 32 days? The answer is that of course it doesn’t, and JavaScript knows that. Instead JavaScript sets the date to 32 days from the first of January—that is, it sets it to the 1st of February.
The same also applies to the setMonth() method. If you set it to a value greater than 11, the date automatically rolls over to the next year. So if you use setMonth(12), that will set the date to January of the next year, and similarly setMonth(13) is February of the next year.
How can you use this feature of setDate() and setMonth() to your advantage? Well, let’s say you want to find out what date it will be 28 days from now. Given that different months have different numbers of days and that you could roll over to a different year, it’s not as simple a task as it might first seem. Or at least that would be the case if it were not for setDate(). The code to achieve this task is as follows:
var nowDate = new Date();
var currentDay = nowDate.getDate();
nowDate.setDate(currentDay + 28);
First you get the current system date by setting the nowDate variable to a new Date object with no initialization value. In the next line, you put the current day of the month into a variable called currentDay. Why? Well, when you use setDate() and pass it a value outside of the maximum number of days for that month, it starts from the first of the month and counts that many days forward. So, if today’s date is January 15 and you use setDate(28), it’s not 28 days from the 15th of January, but 28 days from the 1st of January. What you want is 28 days from the current date, so you need to add the current date to the number of days ahead you want. So you want setDate(15 + 28). In the third line, you set the date to the current date, plus 28 days. You stored the current day of the month in currentDay, so now you just add 28 to that to move 28 days ahead.
If you want the date 28 days prior to the current date, you just pass the current date minus 28. Note that this will most often be a negative number. You need to change only one line, and that’s the third one, which you change to the following:
nowDate.setDate(currentDay - 28);
You can use exactly the same principles for setMonth() as you have used for setDate().
Getting Time Values
The methods you use to retrieve the individual pieces of time data work much like the get methods for date values. The methods you use here are:
· getHours()
· getMinutes()
· getSeconds()
· getMilliseconds()
· toTimeString()
These methods return, respectively, the hours, minutes, seconds, milliseconds, and full time of the specified Date object, where the time is based on the 24-hour clock: 0 for midnight and 23 for 11 p.m. The last method is similar to the toDateString() method in that it returns an easily readable string, except that in this case it contains the time (for example, "13:03:51 UTC").
TRY IT OUT Writing the Current Time into a Web Page
Let’s look at an example that writes out the current time to the page:
<!DOCTYPE html>
<html lang="en">
<head>
<title>Chapter 5, Example 7</title>
</head>
<body>
<script>
var greeting;
var nowDate = new Date();
var nowHour = nowDate.getHours();
var nowMinute = nowDate.getMinutes();
var nowSecond = nowDate.getSeconds();
if (nowMinute < 10) {
nowMinute = "0" + nowMinute;
}
if (nowSecond < 10) {
nowSecond = "0" + nowSecond;
}
if (nowHour < 12) {
greeting = "Good Morning";
} else if (nowHour < 17) {
greeting = "Good Afternoon";
} else {
greeting = "Good Evening";
}
document.write("<h4>" + greeting + " and welcome to my website</h4>");
document.write("According to your clock the time is ");
document.write(nowHour + ":" + nowMinute + ":" + nowSecond);
</script>
</body>
</html>
Save this page as ch5_example7.html. When you load it into a web browser, it writes a greeting based on the time of day as well as the current time, as shown in Figure 5.6.
Figure 5.6
The first two lines of code declare two variables—greeting and nowDate:
var greeting;
var nowDate = new Date();
The greeting variable will be used shortly to store the welcome message on the website, whether this is "Good Morning", "Good Afternoon", or "Good Evening". The nowDate variable is initialized to a new Date object. Note that the constructor for the Date object is empty, so JavaScript will store the current date and time in it.
Next, you get the information on the current time from nowDate and store it in various variables. You can see that getting time data is very similar to getting date data, just using different methods:
var nowHour = nowDate.getHours();
var nowMinute = nowDate.getMinutes();
var nowSecond = nowDate.getSeconds();
You may wonder why the following lines are included in the example:
if (nowMinute < 10) {
nowMinute = "0" + nowMinute;
}
if (nowSecond < 10) {
nowSecond = "0" + nowSecond;
}
These lines are there just for formatting reasons. If the time is nine minutes past 10, then you expect to see something like 10:09. You don’t expect 10:9, which is what you would get if you used the getMinutes() method without adding the extra zero. The same goes for seconds. If you’re just using the data in calculations, you don’t need to worry about formatting issues—you do here because you’re inserting the time the code executed into the web page.
Next, in a series of if statements, you decide (based on the time of day) which greeting to create for displaying to the user:
if (nowHour < 12) {
greeting = "Good Morning";
} else if (nowHour < 17) {
greeting = "Good Afternoon";
} else {
greeting = "Good Evening";
}
Finally, you write out the greeting and the current time to the page:
document.write("<h4>" + greeting + " and welcome to my website</h4>");
document.write("According to your clock the time is ");
document.write(nowHour + ":" + nowMinute + ":" + nowSecond);
Setting Time Values
When you want to set the time in your Date objects, you have a series of methods similar to those used for getting the time:
· setHours()
· setMinutes()
· setSeconds()
· setMilliseconds()
These work much like the methods you use to set the date, in that if you set any of the time parameters to an illegal value, JavaScript assumes you mean the next or previous time boundary. If it’s 9:57 and you set minutes to 64, the time will be set to 10:04—that is, 64minutes from 9:00.
This is demonstrated in the following code:
var nowDate = new Date();
nowDate.setHours(9);
nowDate.setMinutes(57);
alert(nowDate);
nowDate.setMinutes(64);
alert(nowDate);
First you declare the nowDate variable and assign it to a new Date object, which will contain the current date and time. In the following two lines, you set the hours to 9 and the minutes to 57. You show the date and time using an alert box, which should show a time of9:57. The minutes are then set to 64 and again an alert box is used to show the date and time to the user. Now the minutes have rolled over the hour so the time shown should be 10:04.
If the hours were set to 23 instead of 9, setting the minutes to 64 would not just move the time to another hour, but also cause the day to change to the next date.
CREATING YOUR OWN CUSTOM OBJECTS
We’ve spent a lot of time discussing objects built into JavaScript, but JavaScript’s real power comes from the fact that you can create your own objects to represent complex data. For example, imagine that you need to represent an individual person in your code. You could simply use two variables for an individual person’s first name and last name, like this:
var firstName = "John";
var lastName = "Doe";
But what if you needed to represent multiple people? Creating two variables for every person would get unwieldy very quickly, and keeping track of every variable for every person would cause headaches for even the best programmers in the world. Instead, you could create an object to represent each individual person. Each of these objects would contain the necessary information that makes one person unique from other (such as a person’s first and last names).
To create an object in JavaScript, simply use the new operator in conjunction with the Object constructor, like this:
var johnDoe = new Object();
But like arrays, JavaScript provides a literal syntax to signify an object: a pair of curly braces ({}). So you can rewrite the previous code like this:
var johnDoe = {};
Today’s JavaScript developers favor this literal syntax instead of calling the Object constructor.
Once you have an object, you can begin to populate it with properties. It is similar to creating a variable, except you do not use the var keyword. Simply use the name of the object, followed by a dot, then the name of the property, and assign it a value. For example:
johnDoe.firstName = "John";
johnDoe.lastName = "Doe";
These two lines of code create the firstName and lastName properties on the johnDoe object and assign their respective values. JavaScript does not check if these properties exist before they’re created; it simply creates them. This free property creation might sound great (and it is!), but it does have drawbacks. The primary issue is that JavaScript won’t tell you if you accidentally misspell a property name; it’ll just create a new property with the misspelled name, something that can make it difficult to track bugs. So always be careful when creating properties.
You can assign methods in the same way, except you assign a function instead of another type of value, like this:
johnDoe.greet = function() {
alert("My name is " + this.firstName + " " + this.lastName;
};
This code creates a method called greet(), which simply alerts a greeting. A few important things are important to note in this code.
First, notice there is no name between function and (). A function that has no name is called an anonymous function. Anonymous functions, in and of themselves, are a syntax error unless you assign that function to a variable. Once you assign an anonymous function to a variable, that function’s name becomes the name of the variable. So you can execute the anonymous function assigned to johnDoe.greet like this:
johnDoe.greet();
Next, notice the use of this inside of the function: this.firstName and this.lastName. In JavaScript, this is a special variable that refers to the current object—the johnDoe object in this case. It literally means “this object.” So you could rewrite greet() like the following:
johnDoe.greet = function() {
alert("My name is " + johnDoe.firstName + " " + johnDoe.lastName;
};
However, you won’t always have the name of object to use in place of this. Therefore, it is preferred to refer to the current object inside of a method by using this rather than the actual name of the object.
The full code for creating this johnDoe object looks like this:
var johnDoe = {};
johnDoe.firstName = "John";
johnDoe.lastName = "Doe";
johnDoe.greet = function() {
alert("My name is " + johnDoe.firstName + " " + johnDoe.lastName;
};
This is perfectly valid JavaScript, but it takes four statements to create the complete object. These four statements can be reduced to one statement by defining the entire object using literal notation. Admittedly, it will look a little weird at first, but you’ll soon get used to it:
var johnDoe = {
firstName : "John",
lastName : "Doe",
greet : function() {
alert("My name is " +
this.firstName + " " +
this.lastName;
}
};
Take a moment and study this code. First, notice this code uses curly braces to enclose the entire object. Then notice that each property and method is defined by specifying the name of the property/method, followed by a colon, and then its value. So, assigning thefirstName property looks like this:
firstName : "John"
There is no equal sign used here. In object literal notation, the colon sets the value of the property.
Finally, notice that each property and method definition is separated by a comma—very much like how you separate individual elements in an array literal.
TRY IT OUT Using Object Literals
It is very important for you to understand object literals—they are used extremely liberally by JavaScript developers. Let’s look at an example that uses a function to create a custom object:
<!DOCTYPE html>
<html lang="en">
<head>
<title>Chapter 5, Example 8</title>
</head>
<body>
<script>
function createPerson(firstName, lastName) {
return {
firstName: firstName,
lastName: lastName,
getFullName: function() {
return this.firstName + " " + this.lastName
},
greet: function(person) {
alert("Hello, " + person.getFullName() +
". I'm " + this.getFullName());
}
};
}
var johnDoe = createPerson("John", "Doe");
var janeDoe = createPerson("Jane", "Doe");
johnDoe.greet(janeDoe);
</script>
</body>
</html>
Save this page as ch5_example8.html. When you load the page into a web browser, it displays the message: "Hello, Jane Doe. I'm John Doe".
First, this code creates a function called createPerson() that accepts a person’s first and last names as parameters. This function creates an object with the person’s first and last names using object literal notation:
function createPerson(firstName, lastName) {
return {
The first property created is the firstName property, and it is assigned the value of the firstName parameter:
firstName: firstName,
Next is the lastName property, which receives its value from the createPerson() function’s lastName parameter:
lastName: lastName,
Then a method called getFullName() is created. Its purpose is to return the first and last name of the person to the caller:
getFullName: function() {
return this.firstName + " " + this.lastName
},
This method uses the this variable to access this object’s firstName and lastName properties. Note that the this variable is the only way to retrieve these properties—the object doesn’t have a name; it is an anonymous object that is created and then returned to the caller.
The final method of this object is greet(). It accepts another person object as a parameter and uses its getFullName() in order to greet that person:
greet: function(person) {
alert("Hello, " + person.getFullName() +
". I'm " + this.getFullName());
}
};
}
The next two lines create two objects two represent two individual people:
var johnDoe = createPerson("John", "Doe");
var janeDoe = createPerson("Jane", "Doe");
Notice the absence of the new keyword. The createPerson() function is not a constructor function (you learn how to write constructor functions later). It’s simply a function that creates and returns an object.
Finally, John Doe greets Jane Doe by calling the greet() method and passing the janeDoe object to it:
johnDoe.greet(janeDoe);
CREATING NEW TYPES OF OBJECTS (REFERENCE TYPES)
This section’s focus is on some advanced stuff. It’s not essential stuff, so you may want to move on and come back to it later.
You’ve seen that JavaScript provides a number of objects built into the language and ready for us to use. You’ve also built custom objects that you can use to represent more complex data, but JavaScript also enables you to create your own type of objects. For example, you created an object that represented an individual person, but you can also create an object that is a Person object.
It’s a bit like a house that’s built already and you can just move on in. However, what if you want to create your own house, to design it for your own specific needs? In that case you’ll use an architect to create technical drawings and plans that provide the template for the new house—the builders use the plans to tell them how to create the house.
So what does any of this have to do with JavaScript and objects? Well, JavaScript enables you to be an architect and create the templates for your own objects to your own specification, to fit your specific needs. Going back to the person object example, JavaScript doesn’t come with built-in person objects, so you’d have to design your own.
Just as a builder of a house needs an architect’s plans to know what to build and how it should be laid out, you need to provide blueprints telling JavaScript how your object should look. You somewhat did this with the createPerson() function in ch5 _ example8.html, but you only created plain objects with custom properties and methods—you didn’t create an actual Person object.
But JavaScript supports the definition of reference types. Reference types are essentially templates for an object, as the architect’s drawings are the template used to build a house. Before you can use your new object type, you need to define it along with its methods and properties. The important distinction is that when you define your reference type, no object based on that type is created. It’s only when you create an instance of your reference type using the new keyword that an object of that type, based on your blueprint or prototype, is created.
Before you start, an important distinction must be made. Many developers refer to reference types as classes and use the two terms interchangeably. Although this is correct for many object-oriented languages such as Java, C#, and C++, it is not correct for JavaScript. JavaScript does not yet support a class construct, although the next version of JavaScript will provide formal classes. JavaScript does, however, fully support the logical equivalent, reference types.
It’s also important to point out that the built-in objects discussed thus far in this chapter are also reference types. String, Array, Number, Date, and even Object are all reference types, and the objects you created are instances of these types.
A reference type consists of three things:
· A constructor
· Method definitions
· Properties
A constructor is a function that is called every time one of your objects based on this reference type is created. It’s useful when you want to initialize properties or the object in some way. You need to create a constructor even if you don’t pass any parameters to it or if it contains no code. (In that case it’d just be an empty definition.) As with all functions, a constructor can have zero or more parameters.
You’ve created objects to represent individual people. Next you create a simple reference, called Person, to do the same thing—except that these objects will be actual Person objects.
Defining a Reference Type
The first thing you need to do is create the constructor, which is shown here:
function Person(firstName, lastName) {
this.firstName = firstName;
this.lastName = lastName;
}
Your first thought might be that what you have here is simply a function, and you’d be right. It’s not until you start defining the properties and methods that it becomes something more than a function. This is in contrast to some programming languages, which have a more formal way of defining types.
NOTE Typically, a reference type is defined with an uppercase letter. Doing so makes it easy to differentiate a function from a reference type easily and quickly.
Inside the function, notice the use of the this variable. Once again, it literally means “this object,” and it is the only way to access the object that is being created. So to create the firstName and lastName properties, you write the following code:
this.firstName = firstName;
this.lastName = lastName;
Now you need to define getFullName() and greet() methods. You can define them inside of the constructor, but it is more efficient to define them on Person’s prototype, like this:
Person.prototype.getFullName = function() {
return this.firstName + " " + this.lastName;
};
Person.prototype.greet = function(person) {
alert("Hello, " + person.getFullName() +
". I'm " + this.getFullName());
};
The first thing you notice is Person.prototype. Remember from Chapter 4 that functions are objects in JavaScript, and in this chapter you learned that objects have properties and methods. So it’s easy to assume that functions have properties and methods.
Every function object has a prototype property, but it is only useful for constructor functions. You can think of the Person.prototype property as an actual prototype for Person objects. Any properties and methods you assign to Person.prototype are usable on all Personobjects. In fact, they’re more than usable—they’re shared!
The functions assigned to Person.prototype.getFullName and Person.prototype.greet are shared between all objects, or instances, of Person. This means that the function object of one Person object’s getFullName is the exact same function object on another Person object’sgetFullName. To express that in code:
var areSame = person1.getFullName == person2.getFullName; // true
But why were firstName and lastName assigned in the constructor instead of Person.prototype? The firstName and lastName properties are called instance data. Instance data is unique to each individual object, or instance. So because firstName and lastName are instance data, we define them in the constructor—they shouldn’t be shared between all Person objects.
Creating and Using Reference Type Instances
You create instances of your reference type in the same way you created instances of JavaScript’s built-in types: using the new keyword. So to create a new instance of Person, you’d write this:
var johnDoe = new Person("John", "Doe");
var janeDoe = new Person("Jane", "Doe");
Here, as with a Date object, you have created two new objects and stored them in variables, johnDoe and janeDoe, but this time it’s a new object based on the Person type.
NOTE The use of the new keyword is very important when creating an object with a constructor. The browser does not throw an error if you do not use the new keyword, but your script will not work correctly. Instead of creating a new object, you actually add properties to the global window object. The problems caused by not using the new keyword can be hard to diagnose, so make sure you specify the new keyword when creating objects with a constructor.
You use these objects just like you did in ch5 _ example8.html. In the following code, Jane Doe greets John Doe:
janeDoe.greet(johnDoe);
Even though getFullName() and greet() are defined on Person.prototype, you still call them like normal methods. JavaScript is intelligent enough to look at Person.prototype for those methods.
Now for the million dollar question: Why define a reference type instead of creating plain, but custom, objects? It’s a valid question. Both the objects created in ch5_example8.html and from the Person constructor serve the same purpose: to represent an individual person. The main difference is how the objects are created. Objects created from a constructor typically consume less of the computer’s memory than literal objects.
Frankly, it’s a question you don’t have to worry about at this point in time. It’s more important to know how to create objects than using the correct approach. So practice both methods; create your own custom objects and reference types!
SUMMARY
In this chapter you’ve taken a look at the concept of objects and seen how vital they are to an understanding of JavaScript, which represents virtually everything with objects. You also looked at some of the various native reference types that the JavaScript language provides to add to its functionality.
You saw that:
· JavaScript is object-based—it represents things, such as strings, dates, and arrays, using the concept of objects.
· Objects have properties and methods. For example, an Array object has the length property and the sort() method.
· To create a new object, you simply write new ObjectType(). You can choose to initialize an object when you create it.
· To set an object’s property value or get that value, you simply write objectName.objectProperty.
· Calling the methods of an object is similar to calling functions. Parameters may be passed, and return values may be passed back. Accessing the methods of an object is identical to accessing a property, except that you must remember to add parentheses at the end, even when it has no parameters. For example, you would write objectName.objectMethod().
· The String type provides lots of handy functionality for text and gives you ways of finding out how long the text is, searching for text inside the string, and selecting parts of the text.
· The Math type is created automatically and provides a number of mathematical properties and methods. For example, to obtain a random number between 0 and 1, you use the method Math.random().
· The Array type provides ways of manipulating arrays. Some of the things you can do are find the length of an array, sort its elements, and join two arrays together.
· The Date type provides a way of storing, calculating with, and later accessing dates and times.
· JavaScript lets you create your own custom objects, giving them the properties and methods that you want them to have.
· JavaScript enables you to create your own types of objects using reference types. These can be used to model real-world situations and for making code easier to create and more maintainable, though they do require extra effort at the start.
EXERCISES
You can find suggested solutions to these questions in Appendix A.
1. Using the Date type, calculate the date 12 months from now and write this into a web page.
2. Obtain a list of names from the user, storing each name entered in an array. Keep getting another name until the user enters nothing. Sort the names in ascending order and then write them out to the page, with each name on its own line.
3. ch5_example8.html uses a function to create objects using literal notation. Modify this example to use the Person data type.
All materials on the site are licensed Creative Commons Attribution-Sharealike 3.0 Unported CC BY-SA 3.0 & GNU Free Documentation License (GFDL)
If you are the copyright holder of any material contained on our site and intend to remove it, please contact our site administrator for approval.
© 2016-2026 All site design rights belong to S.Y.A.