Linux Web Server Development (2015)
Chapter 7 Building Your Site
In this chapter, you will replace your current home page, the default Cherokee directory index, index.html, with another. As you may recall, index.html is the Cherokee test page.
Next, you will create web pages in the simplest way, using HTML. HTML stands for Hypertext Markup Language and was the first language invented for creating web pages. A detailed study of HTML is out of scope of this book but we’ll look at some basic HTML to get you started. There are plenty of online tutorials (e.g., http://www.w3.org and http://www.w3schools.com) where you can continue building your knowledge of HTML.
At the last section of this chapter, you will create a PHP page that you can use with your Cherokee server after you enable the server for PHP. The steps to install PHP and create a PHP virtual server are included in chapter 9. The PHP page that you will create is an online network tool that displays the IP address of the visitor.
Creating an HTML file
To create a new HTML file use gedit at the command line or right-click on the desktop or a folder and select Create New and then Empty File.
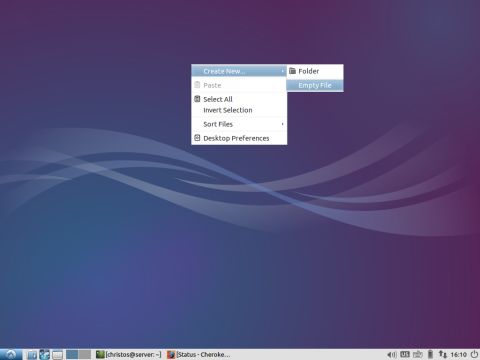
In the window that appears, enter the file name. If you create the directory index for your site and you want to keep the default directory index name, enter index.html.

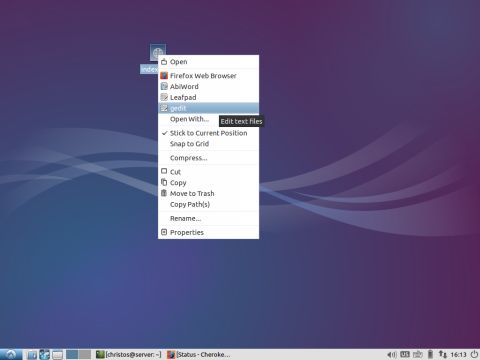
To open the file as a web page, double-click on the file or right-click and choose one of the available browsers (e.g. Firefox Web Browser). To edit the web page and enter HTML code, right-click and choose a text editor (e.g. gedit). If gedit is not available, install the package with apt-get. In a Linux terminal, enter:
$ sudo apt-get install gedit
The HTML Tags
You are ready to enter the HTML code. The HTML language uses various tags to define the limits in the document where a specific attribute is applied. For example, to make text bold:
<b>this is bold text</b>
The first tag indicates the start of the bold attribute and the second indicates the end (/) of the bold.
In the HTML code, you create two general sections: the head and the body. Those are specified by the <head> and <body> tags, respectively, and are included in the <html></html> tags. The head contains metadata (data about data) (e.g., the title of the document and the encoding). The body contains all of the contents of an HTML document (e.g., text, hyperlinks, images).
A simplified HTML document:
<!DOCTYPE html>
<html>
<title>Page Title</title>
<body>
The content of the document......
</body>
</html>
A simple HTML page
Through the examples in the next chapters, you run multiple virtual servers, sometimes simultaneously. To differentiate the content provided by each server, you can use single-colored pages. To paint the web page background with a specific color, use the bgcolor attribute of the <body> tag with a value that corresponds to the color name.
For example, to create a green-colored page, use the following simplified code:
<html>
<head>
<title>A green page</title>
</head>
<body bgcolor="green">
</body>
</html>
Designing Your Site
Earlier, you set the default web page (see the vServers section in Chapter 4). This is configured in the Directory indexes input field in the Administration Panel. By default, this is set to index.html. If, for example, your site is webserver.dynu.com and a user types http://webserver.dynu.com in the address bar, this will be the equivalent of typing http://webserver.dynu.com/index.html in the address bar. The html file specified by the Directory indexes input field must be found in the Document Root directory. This is also configured in the vServers section of the Administration Panel. The default setting is /var/www or /usr/local/var/www for Ubuntu but this value can be changed. Subdirectories can be created within this directory. For example, you could create the directory /var/www/images and place all the images for our site in this directory:
$ sudo mkdir /var/www/images
You can also create the directory /var/www/docs for additional documents and so on.
A New Home Page for Your Site
Let’s go to the default root directory (which we can change, as described later):
$ sudo cd /var/www
Instead of modifying index.html, let’s make a copy of the original. You can then start with your new index.html:
$ sudo mv index.html index_old.html
In your favorite editor, let’s now create your new index.html by using the application gedit:
$ sudo gedit index.html
Below is what you could use as the HTML code for your new directory index. If you copy this example, make sure that you save the file as index.html:
<html lang="en">
<head>
<meta charset="utf-8"/>
<title>Cherokee info</title>
</head>
<body style="background-color:lightblue">
<h1 style="font-size:300%; text-align:center; color:red">Web Servers</h1>
<p style="text-align:center">
<A HREF="http://cherokee-project.com/">
<img src="images/cherokee.png">
</A>
</p>
<p style="text-align:center">
<A HREF="docs/page1.html" style="font-size:200%">About Cherokee</A>
<br /><br />
<A HREF="docs/page2.html" style="font-size:200%">Other Web Servers</A>
</p>
</body>
</html>
The previous HTML code creates a web page with one image link and two text links. The image link is external to the site because it refers to a page from another site (cherokee-project.com). The text links are internal to the site (page1.html and page2.html).
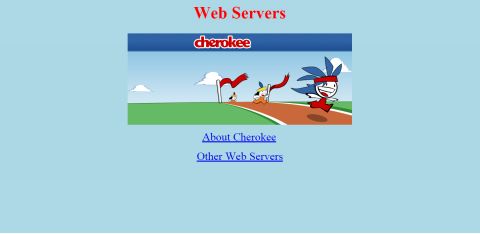
The two pages are placed in the docs subdirectory of /var/www and are therefore accessed with the relative (to the document root) names docs/page1.html and docs/page2.html. Similarly cherokee.png, the image used in the code, is placed in the images directory and is referred to with the relative name images/cherokee.png.
Creating a PHP page
PHP is a popular programming language used for server-side scripting, which offers dynamic content. In chapter 9, you will enable a Cherokee virtual server to allow the client request to be handled by the PHP parser. Also in chapter 13, you will run a database-enabled web site that builds on PHP and MySQL. In this section, you create your first PHP page called index.php.
As your first PHP page, you will create an online network tool similar to the one you have used before to find your IP address. The PHP page will display the current IP address of the visitor of your site.
Create the index.php file with your text editor and place the following lines:
<?php
$ip = $_SERVER['REMOTE_ADDR'];
echo "Your IP address is $ip";
?>
The previous code snippet assigns to variable $ip the value of the $_SERVER array’s element with index REMOTE_ADDR. Array $_SERVER is a ‘predefined’ variable containing information such as headers, paths, and script locations. The entries in this array are created on the fly by the Web server. At index REMOTE_ADDR in the array, the server stores the IP address of the user.
To change the text format – for example, to use green-colored text center aligned with text size 80 pixels – use the style attribute of the HTML paragraph (<p>) tag:
<?php
$ip = $_SERVER['REMOTE_ADDR'];
echo "<p style=\"font-size:80px; color: green; text-align: center\">Your IP address is $ip</p>";
?>
Note that in order to escape the double-quotes (") inside the echo command so that they are not interpreted as the end of the echo string, you use the backslash (\) as the escape character.
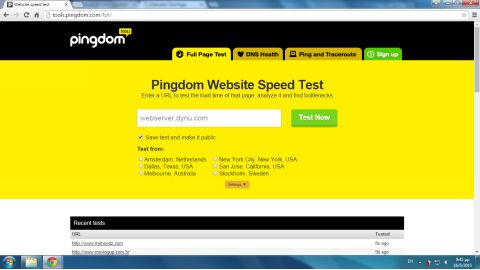
Follow the steps described later in chapter 9 to create a PHP enabled virtual server for Cherokee with the directory index file index.php. Test the site with an online network tool. The following image shows the page as viewed from tools.pingdom.com:
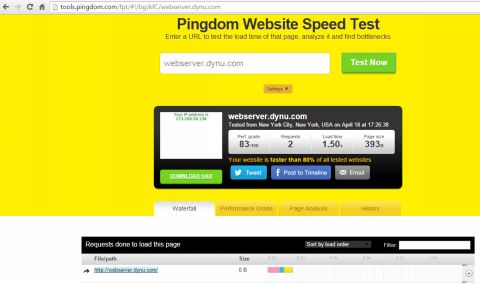
Click the remote browser’s screen of the previous image to zoom in:
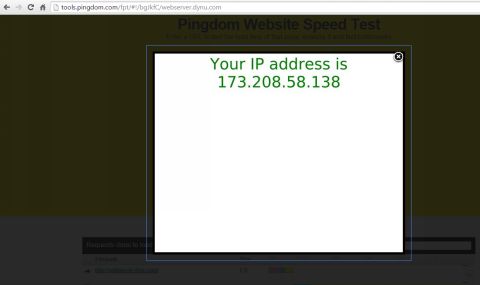
The IP address displayed is the IP address of the remote online tool. You can repeat the test by selecting a different system at tools.pingdom.com. Click the Settings link and select another server from a different country to display its IP address.