Professional ASP.NET MVC 5 (2014)
Chapter 12
Single Page Applications with AngularJS
—by K. Scott Allen
What's In This Chapter?
· Understanding and installing AngularJS
· How to build the Web API
· How to build applications and models
WROX.COM CODE DOWNLOADS FOR THIS CHAPTER
You can find the wrox.com code downloads for this chapter at http://www.wrox.com/go/proaspnetmvc5 on the Download Code tab. The code for this chapter is contained in the following file:
· AtTheMovies.C12.zip
In this book we've demonstrated how to combine jQuery and ASP.NET MVC 5 to build web pages that are interactive. jQuery is a great library, but you can only go so far with jQuery. As a library, jQuery gives you the ability to select DOM elements, manipulate DOM elements, wire up events, and communicate with the web server, but it doesn't provide any structure, patterns, or abstractions to address a true client-side HTML 5 application.
An HTML application (what some people would call a single page application, or SPA) is a complex beast. The typical browser application must manage data by requesting raw JSON data from the server and transforming the JSON into HTML, as well as retrieve input from UI controls on a page and push the input data into JavaScript objects. The typical browser application also manages multiple views by loading pieces of HTML into the DOM, which also requires the application to manage browser history for the back and forward buttons to work. With all this work to do on the client, you need to separate concerns like you do with the MVC pattern on the server, lest the code become an unmanageable mess of complexity.
One technique for managing complexity is to build on a framework that can hide complexity. Today, you have several client-side JavaScript frameworks, such as Durandal, EmberJS, and AngularJS. You should try each of these frameworks to see how they suit your personal taste. In this chapter, I'll take a closer look at AngularJS to see how it can work with ASP.NET and how the framework can help you build elaborate web applications without an elaborate amount of code or complexity.
First, we'll add AngularJS to an ASP.NET MVC 5 application, and build an API to provide data for AngularJS to consume. Using the two way data-binding features of Angular we'll display and edit the data, all the while exploring some of the core abstractions in AngularJS, like controllers, models, modules, and services.
Note
The code for this chapter is contained in the AtTheMovies-master.zip file
UNDERSTANDING AND SETTING UP ANGULARJS
This section covers the importance of AngularJS and the goals for this entire chapter. You then learn how to install and add AngularJS to your website.
What's AngularJS?
AngularJS is a JavaScript framework developed by a team inside Google. The team built an extensible, testable framework that provides data binding and server communication features as well as view management, history management, localization, validation, and more. AngularJS (hereafter referred to as Angular) also uses controllers, models, and views, which should sound familiar to you because ASP.NET MVC also has the concept of controllers, models, and views, but Angular is all about JavaScript and HTML instead of C# and Razor.
Why should you use models, views, and controllers on the client? For the same reason you use them on the server—to maintain a semblance of order in the code and divide different responsibilities into distinct abstractions. Let's see how this works by first getting set up with Angular.
Your Goal in This Chapter
The goal of the sample code in this chapter is to build a browser application that lets you manage a list of movies. Think of the site as an expansion of the MVC Music Store. Users want to create, update, list, and show the details for movies, but instead of using ASP.NET MVC views to create HTML you'll use Angular to manage the different views. Instead of navigating to different URLs, you'll keep the browser on the same original page. Instead of sending HTML from the server you'll call into a Web API controller to exchange JSON data and transform the data on the client into HTML.
Getting Started
First you'll create a new ASP.NET application named atTheMovies in Visual Studio 2013, as shown in Figure 12.1.
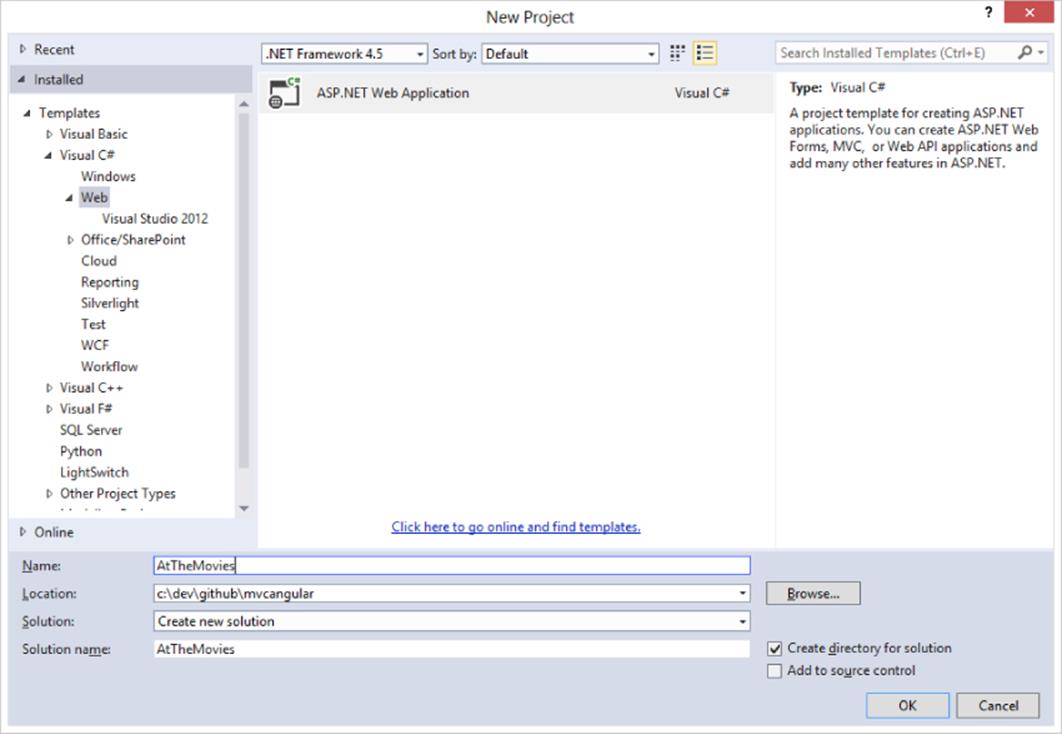
Figure 12.1
Many of the views in this project are constructed using HTML files, and the client mostly requests JSON from the server (except for the initial request). The best fit for this scenario is the Web API project template, which you select on the next screen, shown inFigure 12.2. Note that the Web API template also includes ASP.NET MVC support, which provides only a home page as a starting point. This is ideal for the application's needs.
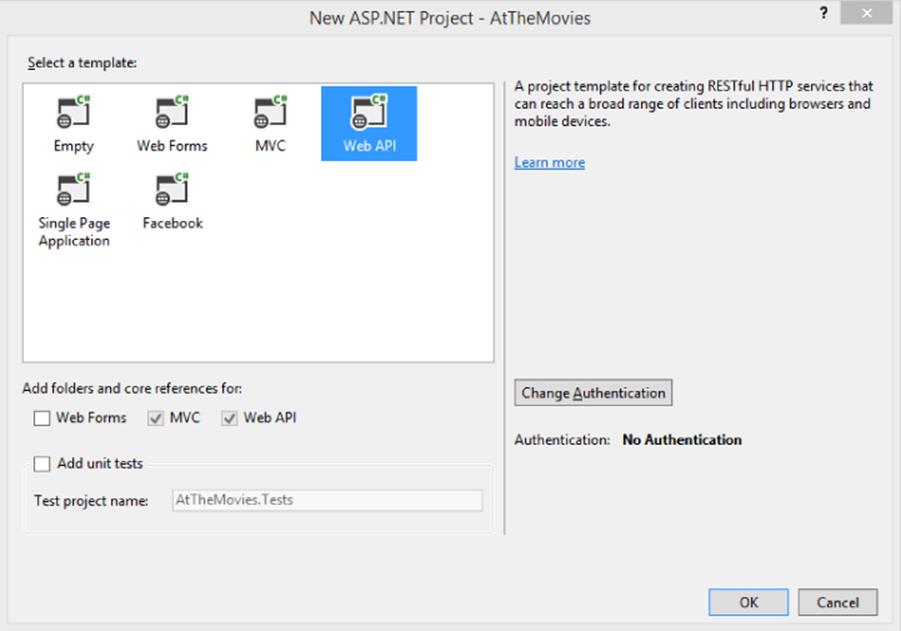
Figure 12.2
After you create the project, you can run the application and see the home page working, as shown in Figure 12.3.
Figure 12.3
Now, you can configure the home page to use Angular.
Adding AngularJS to the Site
You have different approaches for installing Angular. If you are particular about the Angular version and features you need, you might go to the Angular website (angularjs.org) and download the script files directly. The easiest approach, however, is to use NuGet and the Package Manager Console.
Install-Package AngularJS.core
The package installs a number of new script files into the Scripts folder of the project. The most important file is the angular.js file (see Figure 12.4) because it contains the essential pieces of the Angular framework.

Figure 12.4
The next step is to include the core Angular script in the application so it arrives in the browser. In some applications you might include the Angular scripts in the Layout view for a website, but not every page needs Angular. A better approach is to place the Angular script only on those pages that become client-side applications. In this ASP.NET MVC project, the home page is one such page, so you can modify the Index.cshtml view for the HomeController to include Angular. In fact, you can remove all the markup inside the Indexview and replace the code with the following:
@section scripts {
<script src="∼/Scripts/angular.js"></script>
}
<div ng-app>
{{2+3}}
</div>
Adding Angular to the home page is easy because the default layout view includes a section named “scripts” that allows you to place script tags at the bottom of a page. You can also use the bundling and minification features of ASP.NET to minify the Angular script, but in the preceding code you'll use a script tag pointing to the raw source code file.
The div in the previous listing includes a funny attribute ng-app, which is an Angular directive. A directive allows Angular to extend HTML with new features and abilities, and directives from the core of Angular start with an “ng” prefix (short for Angular). You'll see more of directives as you progress through the chapter, but for now you should know that the ng-app directive is the application bootstrap directive for Angular. In other words, ng-app tells Angular to jump in and take control of this section of the DOM by initializing an application and looking for other directives and templates inside (a process Angular refers to as compiling the DOM).
The previous listing also includes a template—{{2+ 3}}. The double curly braces identify templates in HTML, and an Angular application automatically finds all templates and evaluates the JavaScript expression inside. If you run the application, you'll see that Angular loads because it replaces the template {{2+3}} with the value 5, as shown in Figure 12.5.
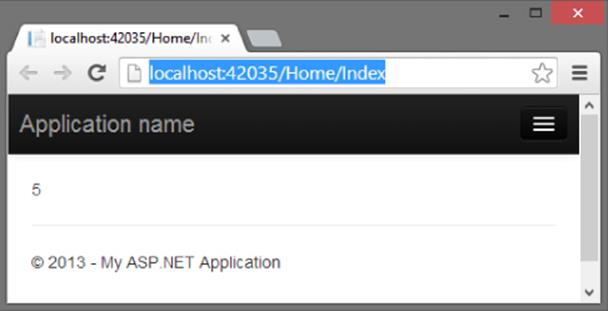
Figure 12.5
Here is a different variation of the previous code:
<div data-ng-app>
{{true ? "true" : "false"}}
</div>
Notice the following:
· The directive is now data-ng-app instead of just ng-app. Angular allows you to preface attribute directives with a data- prefix to remain conformant with the HTML 5 specifications.
· The template now uses a JavaScript ternary operator. Templates allow you to use a subset of the JavaScript language to express what you want to place in the DOM. In this second example, the output is the string true.
The examples you've seen so far might make templates that look too simple to be useful, but later you'll see how templates provide powerful two-way data binding between a view (the HTML) and a model (a JavaScript object). If the user modifies a value in a view (by typing into an input, for example), Angular automatically pushes the value back into a model JavaScript object. Similarly, if you update a model object with new information from the server, Angular automatically pushes the change into the view.
The implications are that client applications are far easier to write because you don't need to manually synchronize data between the model and the view. Synchronization is something you don't need to worry about on the server with ASP.NET MVC models and views, because you push the model into the view, create some HTML, and send the HTML to a client. The data is never synchronized because you only use the model once.
Client applications are different because the DOM and the web page are stateful. When the user changes data, you need the data moved to the model objects, and vice versa. Before you can see how templates can help with this job, you need some data to work with, and working data means you'll need some server-side code and a database.
Setting Up the Database
The template you use to create this project doesn't include the Entity Framework by default, so you'll need to return to the Package Manager Console window and run the following command:
Install-Package EntityFramework
The Entity Framework will store data in a SQL Server database. What data? You can add a Movie class to the Models folder, and this class holds the information you want to store in the database.
public class Movie
{
public int Id { get; set; }
public string Title { get; set; }
public int ReleaseYear { get; set; }
public int Runtime { get; set; }
}
You'll also need a DbContext derived class with a DbSet typed property to add, delete, and query movie objects.
public class MovieDb : DbContext
{
public DbSet<Movie> Movies { get; set; }
}
Back in the Package Manager Console, you can now enable Entity Framework migrations. Migrations allow you to manage the schema of the database and apply schema changes. However, in this chapter, I'll only be using migrations to seed the database with some initial data. In the console, you can execute the following command:
Enable-Migrations
Migrations create a Migrations folder in the project with a Configuration.cs file. Inside Configuration.cs you'll find a class with a Seed method. You can add the following code to the Seed method to populate the database with three movie objects.
protected override void Seed(MovieDb context)
{
context.Movies.AddOrUpdate(m=>m.Title,
new Movie
{
Title="Star Wars", ReleaseYear=1977, Runtime=121
},
new Movie
{
Title="Inception", ReleaseYear=2010, Runtime=148
},
new Movie
{
Title="Toy Story", ReleaseYear=1995, Runtime=81
}
);
}
You can also enable automatic migrations to make the process of adding new features easier. Automatic migrations are off by default, but you find the setting in the constructor of the Configuration class in the Migrations folder.
public Configuration()
{
AutomaticMigrationsEnabled = true;
}
With these settings in place, you can now create the database using the Package Manager console window and the Update-Database command. The output should look like the screenshot shown in Figure 12.6.
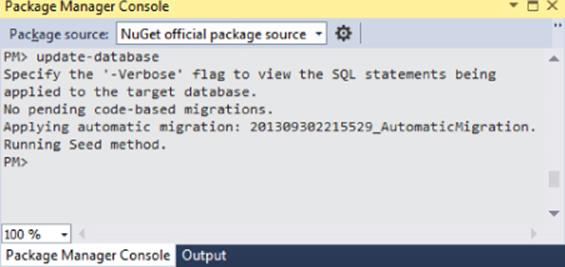
Figure 12.6
With a database in place, you can now create an API to manipulate and retrieve the data inside.
BUILDING THE WEB API
The Web API is simple to build because you only need basic create, read, update, and delete functionality, and the scaffolding provided by Visual Studio 2013 can generate the code you need. Just follow these steps:
1. Right-click the Controllers folder and select Add ![]() Controller, which opens the Add Scaffold dialog shown in Figure 12.7.
Controller, which opens the Add Scaffold dialog shown in Figure 12.7.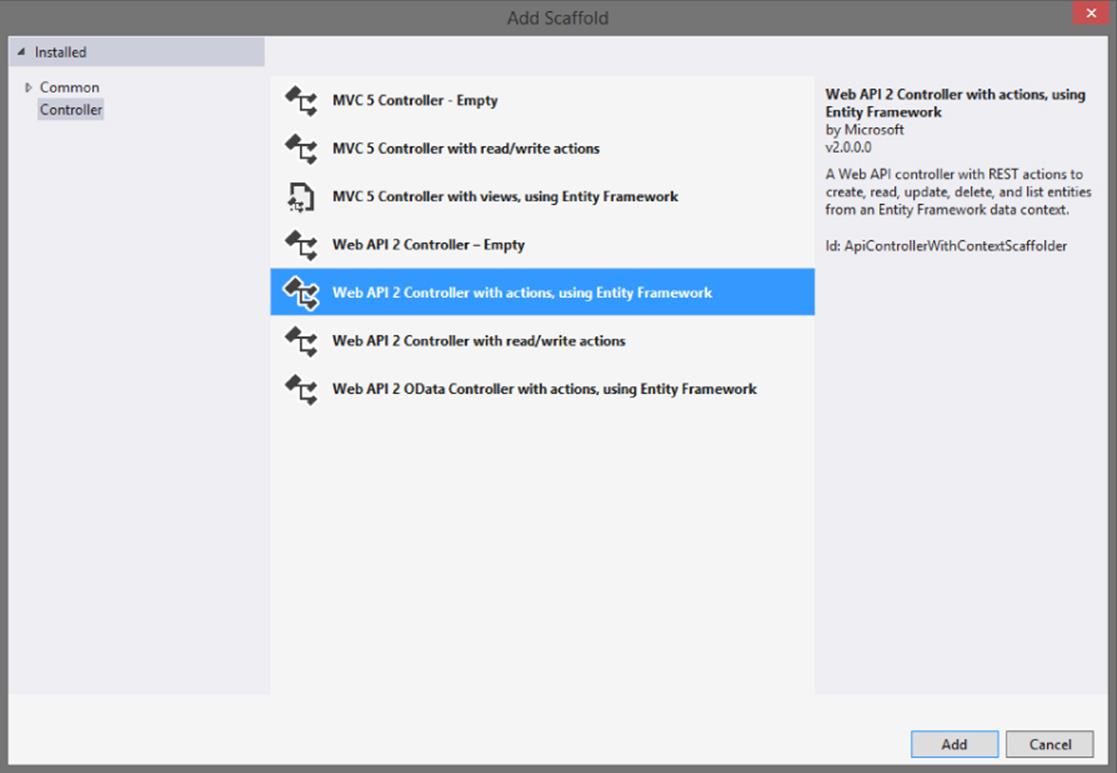
Figure 12.7
2. Use the “Web API 2 Controller with read/write actions, using Entity Framework” option and click Add. The Add Controller dialog appears, as shown in Figure 12.8.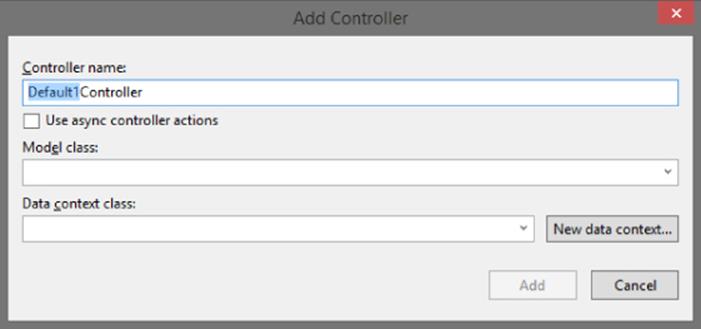
Figure 12.8
3. Name the new controller MovieController. The model class is the Movie class you created earlier, and the Data context class will be the MovieDb class. After you click Add, the new MovieController.cs file appears in Visual Studio.
4. Run the application and navigate to /api/movies in the browser. You should see movie information encoded into XML or JSON (depending on the browser), as shown in Figure 12.9.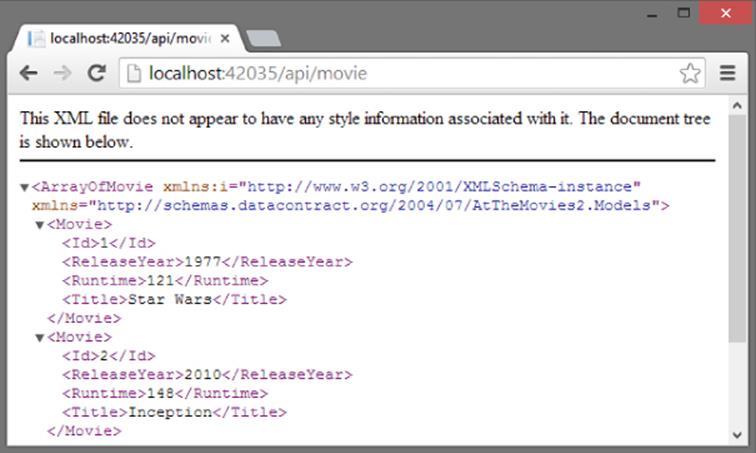
Figure 12.9
You now have all the code you need on the server. The rest of the chapter focuses on client code and AngularJS.
BUILDING APPLICATIONS AND MODULES
So far you've bootstrapped an Angular application in the home page of the website, but you've only used a single template in the page to output the result of a simple expression. Building out the features required for managing movies requires a proper application with modules.
A module in Angular is an abstraction that allows you to group various components to keep them isolated from other components and pieces of code in an application. One of the benefits of isolation is to make Angular code easier to unit test, and easy testability is one of the goals the framework creators set out to achieve.
Various features of the Angular framework are organized into different modules that you'll need for the application. But, before you use these modules you need a custom module for your application itself.
To start, follow these steps:
1. Create a new folder in the project named Client. Some people might call this folder App, but the name doesn't matter and you can name the folder whatever you like. The idea is to organize the scripts for the home page application into a dedicated folder instead of using the existing Scripts folder to hold all JavaScript. I group and organize C# source code into various files and directories to make code easier to maintain, and the same rules apply to JavaScript as you build bigger and bigger applications on the client.
2. Inside the Client folder, create a subfolder named Scripts. Inside this Scripts folder, create a new JavaScript file named atTheMovies.js with the following code:
3. (function () {
4. var app = angular.module("atTheMovies", []);
}());
The angular variable is the global Angular object. Just like the jQuery API is available through a global $ variable, Angular exposes a top-level API through angular. In the previous code, the module function creates a new module named atTheMovies, whereas the second parameter, the empty array, declares dependencies for the module (technically this module depends on the core Angular module “ng”, but you don't need to list it explicitly and you'll see examples of other dependencies later in the chapter).
5. Also modify the Index view to include the new script:
6. @section scripts {
7. <script src="∼/Scripts/angular.js"></script>
8. <script src="∼/Client/Scripts/atTheMovies.js"></script>
9. }
10. <div ng-app="atTheMovies">
</div>
Notice the div element in the code now specifies a value for the ng-app directive. The markup instructs Angular to load atTheMovies as the application module. This allows you to configure additional components into the module that are initialized when Angular bootstraps the application. The application needs these additional components to achieve the first goal, which is to display a list of all movies in the database. Specifically, the application needs a controller.
Creating Controllers, Models, and Views
Angular controllers are objects you use to govern a section of the DOM and set up a model. Angular controllers are stateful and live as long as their associated area of the DOM is still on display. This behavior makes controllers in Angular a little different from their counterparts in ASP.NET MVC, where controllers process a single HTTP request and then go away.
To create a controller to show a list of movies, first create a new script in the Client/Scripts folder named ListController.js with the following contents:
(function(app) {
}(angular.module("atTheMovies")));
The code uses an immediately invoked function expression to avoid creating global variables. The code also uses angular.module again, but not to create a module. Instead the code obtains a reference to the existing atTheMovies module you created in the previous script. The code passes the module reference into the function as a variable named app. Another way to write the code and obtain a reference to atTheMovies is like the following:
(function (app) {
var app = angular.module("atTheMovies");
}());
The choice between the last two code snippets is entirely subjective—pick the style you like the best. Ultimately, the code just needs a reference to the application module to register a new controller, which you can do by adding some additional code:
(function(app) {
var ListController = function() {
};
app.controller("ListController", ListController);
}(angular.module("atTheMovies")));
The preceding code defines a ListController function, which follows the JavaScript convention of using an initial capital letter to define a constructor function (a function used in conjunction with the new keyword to construct an object). The function is registered with Angular as a constructor by calling the application module's controller method. The first parameter is the name of the controller (Angular looks up the controller using this name), and the second parameter is the constructor function associated with the name.
Although the controller doesn't perform any interesting behavior yet, the markup inside the Index view can now put the controller in charge of a section of the DOM (after including the new ListController.js script).
@section scripts {
<script src="∼/Scripts/angular.js"></script>
<script src="∼/Client/Scripts/atTheMovies.js"></script>
<script src="∼/Client/Scripts/ListController.js"></script>
}
<div ng-app="atTheMovies">
<div ng-controller="ListController">
</div>
</div>
The ng-controller directive attaches the ListController to a div inside the application. Angular finds the controller by name and creates the controller. By adding an Angular template to the markup, you'll see a controller, view, and model:
<div data-ng-app="atTheMovies">
<div ng-controller="ListController">
{{message}}
</div>
</div>
The controller is the ListController, the view is the HTML, and the view wants to display a piece of information from the model using a template with the expression message inside. Making the message available is the controller's responsibility, which requires some additional code:
(function(app) {
var ListController = function($scope) {
$scope.message = "Hello, World!";
};
app.controller("ListController", ListController);
}(angular.module("atTheMovies")));
The $scope variable is an object constructed by Angular and passed as a parameter to the controller function. The controller's responsibility is to initialize $scope with data and behavior, because $scope is ultimately the model object consumed by the view. By adding a message attribute to the $scope object, the controller builds the model for the view to consume using a template that references the message. If you run the application you'll see the message successfully displayed on the screen, as shown in Figure 12.10.
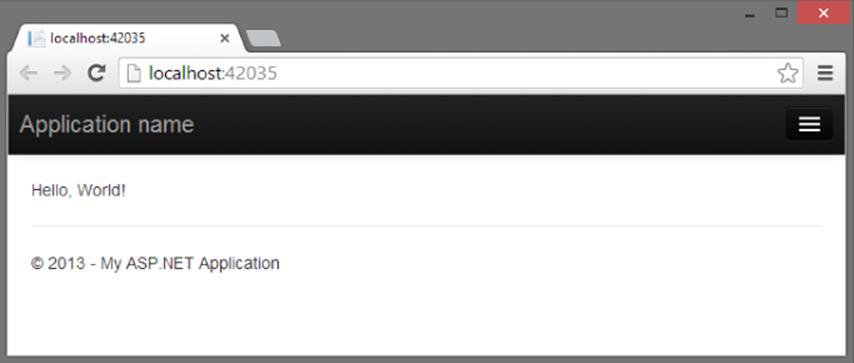
Figure 12.10
Although you barely have any functionality in the application, the code so far demonstrates three key abstractions:
· Controllers are responsible for putting together a model by augmenting the $scope variable. Controllers avoid manipulating the DOM directly. Instead, changes in the UI are propagated by updating information in the model that the view consumes.
· The model object is unaware of the view and controller. The model is only responsible for holding state as well as exposing some behavior to manipulate the state.
· The view uses templates and directives to gain access to the model and present information. This separation of concerns in an Angular application is closer to the Model View View Model (MVVM) design pattern in XAML-based applications than it is to a true MVC design pattern.
Some additional abstractions are still available with Angular, including the concept of services. The ListController must use a service to retrieve the movies from the server.
Services
Services in Angular are objects that perform specific tasks, such as communicate over HTTP, manage the browser history, perform localization, implement DOM compilation, and more. Services, like controllers, are registered in a module and managed by Angular. When a controller or other component needs to make use of a service, it asks Angular for a reference to the service by including the service as a parameter to its registered function (like the ListController function).
For example, one service that comes with Angular out of the box is the $http service, which exposes methods to make async HTTP requests. The ListController needs to use the $http service to communicate with the Web API endpoints on the server, so the function will include $http as a parameter.
(function(app) {
var ListController = function($scope, $http) {
};
app.controller("ListController", ListController);
}(angular.module("atTheMovies")));
How does Angular know the $http parameter is asking for the $http service? Because all components in Angular are registered by name, and $http is the name of the service that communicates with HTTP on the network. Angular literally looks at the source code to the function and inspects the parameter names, which is also how it recognizes that the controller needs a $scope object.
The name of the component responsible for providing an instance of the $http service is the Angular injector. The component has this name because Angular applications obey the dependency inversion principle and take dependencies as parameters instead of creating dependencies directly—a technique known as dependency injection. Dependency injection allows Angular applications to be flexible, modular, and easy to test.
Because Angular relies on the names of the parameters, you must be careful if you minify your scripts because most JavaScript minifiers change local variables and function parameter names to make the names as short as possible (thereby making the overall script smaller for download). Angular offers a different way to annotate a component with the names of the dependencies the component requires. These annotations work even if a minifier changes the script. One of the annotation techniques is to add an $inject property on the function that accepts the parameters:
(function(app) {
var ListController = function($scope, $http) {
};
ListController.$inject = ["$scope", "$http"];
app.controller("ListController", ListController);
}(angular.module("atTheMovies")));
The rest of the chapter does not use any dependency annotations, but you'll need to remember to use annotations if you go to production with minified scripts. A minifier won't change the string literals inside the $inject array, and Angular uses the property to uncover the true names of the dependencies.
With the $http service arriving as a parameter to the controller, the controller can now use the service to retrieve movies from the server by calling the Web API endpoint with an HTTP GET.
(function(app) {
var ListController = function($scope, $http) {
$http.get("/api/movie")
.success(function(data) {
$scope.movies = data;
});
};
app.controller("ListController", ListController);
}(angular.module("atTheMovies")));
The $http service has an API that includes methods such as get, post, put, and delete, and these methods each map to a corresponding HTTP verb of the same name. Thus, the new code in the last snippet is sending an HTTP GET request to the URL /api/movie. The return value is a promise object.
Promise objects have become popular in JavaScript libraries over the years because they offer an alternative to callback functions. Promise objects get their name because they promise to deliver a result in the future, and Angular uses promises for most asynchronous behavior, like network calls and timers.
When a method like $http.get returns a promise, you can use a success method of the promise to register the code you want to execute when the promise completes successfully—a stage most documentation refers to as resolved. You can also use an error method to register an error handler.
The previous code uses the promise object to register a success handler that sets the data returned from the server (a collection of movies) to a movies member of the $scope object. Now movies become available as part of the model for the view.
Over in the Index.cshtml view, changing the markup to the following code should display the number 3 on the screen. This is because you seeded the database with three movies, and the data returned from the Web API is JSON with an array of three movies.
<div data-ng-app="atTheMovies">
<div ng-controller="ListController">
{{movies.length}}
</div>
</div>
However, what the view should display is the titles of each movie:
<div data-ng-app="atTheMovies">
<div ng-controller="ListController">
<table>
<tr ng-repeat="movie in movies">
<td>{{movie.Title}}</td>
</tr>
</table>
</div>
</div>
In the previous code, you see a new Angular directive, the ng-repeat directive. ng-repeat is like a for loop in JavaScript. Given a collection (the array of movies), ng-repeat replicates the DOM elements it controls once for each object and makes the variable movie available inside the loop. Running the application now should give the result shown in Figure 12.11.
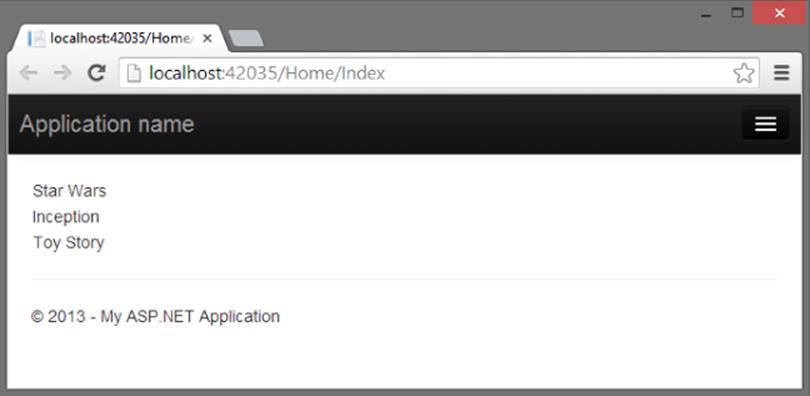
Figure 12.11
This achieves the first goal of the application, which is to list the movies in the database. The application also needs to show the details of a movie, as well as edit, create, and delete movies. I could include all this functionality in a single view and alternatively show and hide different UI elements depending on what the user clicks, and you will see how to hide and show different pieces of a UI inside of a view before the chapter is complete. But, I also want to show a different approach to implementing the additional functionality using separate views and the routing features of Angular.
Routing
Routing in Angular is conceptually similar to routing in ASP.NET. Given some URL, such as /home/index/#details/4, you want the application to respond by loading a specific controller, view, and model, and also give you controller information about parameters encoded into the URL, such as a movie identifier (the number 4).
Angular can take care of the preceding requirements, but you do need to download some additional modules and apply some configuration to the application. To do so, follow these steps:
1. Install the Angular routing module using NuGet.
Install-Package -IncludePrerelease AngularJS.Route
2. Include the routing module in the scripts section of Index.cshtml.
3. @section scripts {
4. <script src="∼/Scripts/angular.js"></script>
5. <script src="∼/Scripts/angular-route.js"></script>
6. <script src="∼/Client/Scripts/atTheMovies.js"></script>
7. <script src="∼/Client/Scripts/ListController.js"></script>
}
8. List the routing module as a dependency of the application module. You do this back in the atTheMovies.js file created earlier.
9. (function () {
10. var app = angular.module("atTheMovies", ["ngRoute"]);
}());
Remember, dependencies are the second parameter to the module method. The parameter is an array of strings containing the names of the required modules. For routing, the name is ngRoute.
With the dependency in place, you can now describe the routes you want Angular to process using a config method on the application module. You describe the routes to a component named $routeProvider that is made available by the ngRoute module.
(function () {
var app = angular.module("atTheMovies", ["ngRoute"]);
var config = function($routeProvider) {
$routeProvider
.when("/list",
{ templateUrl: "/client/views/list.html" })
.when("/details/:id",
{ templateUrl: "/client/views/details.html" })
.otherwise(
{ redirectTo: "/list" });
};
app.config(config);
}());
The $routeProvider offers methods, such as when and otherwise to describe the URL scheme for a single page. In the other words, “/list” is saying if the URL is /home/index#/list, then load the list.html view from the Client/Views directory. If the URL is/home/index#/details/3, load the details.html view and treat 3 as a parameter named id. If the user comes to the page without one of these two URLs, send them to the list view.
For the aforementioned routing to work, you need to provide a place in the DOM where Angular will load the requested view. The location in this application is the Index view, where you can remove all the markup currently inside the Angular application and replace it with an ngView directive.
@section scripts {
<script src="∼/Scripts/angular.js"></script>
<script src="∼/Scripts/angular-route.js"></script>
<script src="∼/Client/Scripts/atTheMovies.js"></script>
<script src="∼/Client/Scripts/ListController.js"></script>
}
<div data-ng-app="atTheMovies">
<ng-view></ng-view>
</div>
The ng-view directive is a placeholder for Angular to insert the current view. You've seen directives used as attributes; this is an example of a directive as an element. You can also have directives in HTML comments and as CSS classes.
The markup formerly inside the application will now live in a list.html file under the Views folder of the Client folder (see Figure 12.12). The file appears like the following code in the Solution Explorer window.
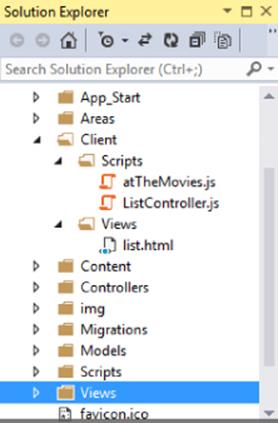
Figure 12.12
The contents of list.html is the markup that used to be inside the ng-app div.
<div ng-controller="ListController">
<table>
<tr ng-repeat="movie in movies">
<td>{{movie.Title}}</td>
</tr>
</table>
</div>
Note that you can also specify the controller for a view in the routing configuration, but here the view itself still specifies the controller using an ng-controller directive.
Details View
Running the application should produce the same results as when you ran it before, but now you can add a details view to see more information about a movie. The first step is to add a button or link beside each movie that points to the details URL.
<div ng-controller="ListController">
<table>
<tr ng-repeat="movie in movies">
<td>{{movie.Title}}</td>
<td>
<a href="#/details/{{movie.Id}}">Details</a>
</td>
</tr>
</table>
</div>
You can see here how to use a template inside of an attribute. Angular replaces {{movie.Id}} with the ID of the current movie. When the user clicks the link and changes the URL in the browser, Angular steps in and routes the request to a different view, the details view, which Angular loads into the ng-view placeholder. Notice the URL you're working with is the piece of the URL after the # sign, which is the client fragment.
For the link to work, you need to create a details.html view in the Client/Views folder.
<div ng-controller="DetailsController">
<h2>{{movie.Title}}</h2>
<div>
Released in {{movie.ReleaseYear}}.
</div>
<div>
{{movie.Runtime}} minutes long.
</div>
</div>
The view displays all properties of a movie and relies on a DetailsController to set up the proper model.
(function(app) {
var DetailsController = function($scope, $http, $routeParams) {
var id = $routeParams.id;
$http.get("/api/movie/" + id)
.success(function(data) {
$scope.movie = data;
});
};
app.controller("DetailsController", DetailsController);
}(angular.module("atTheMovies")));
The controller uses two services—the $routeParams service and the $http service. The $routeParams service contains parameters gleaned from the URL, such as the value for the ID of the movie. Taking the ID and combining it into the URL allows the $http service to retrieve the updated details for a specific movie, and place this data into the $scope for the view.
The DetailsController lives in its own DetailsController.js file in the Client/Scripts folder and needs to be included in Index.cshtml.
@section scripts {
<script src="∼/Scripts/angular.js"></script>
<script src="∼/Scripts/angular-route.js"></script>
<script src="∼/Client/Scripts/atTheMovies.js"></script>
<script src="∼/Client/Scripts/ListController.js"></script>
<script src="∼/Client/Scripts/DetailsController.js"></script>
}
Running the application and clicking a details link should produce a page like that shown in Figure 12.13.
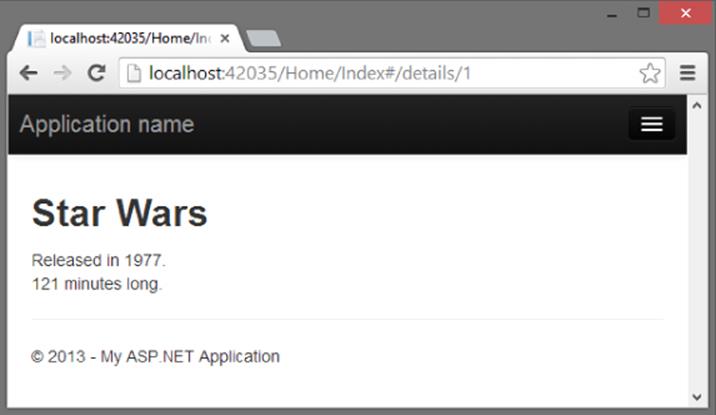
Figure 12.13
This details page might be a good location to allow the user to edit a movie. However, before you start editing a movie, you might find it useful to provide a thin abstraction over the $http service to make interacting with the Web API easier.
A Custom MovieService
With Angular you can define custom controllers and models, but you can also create custom directives, services, modules, and more. For this application, you might make use of a custom service that wraps the capabilities of the MoviesController Web API so your controllers don't need to use the $http service directly. The service definition will live in a movieService.js file and look like the following:
(function (app) {
var movieService = function ($http, movieApiUrl) {
var getAll = function () {
return $http.get(movieApiUrl);
};
var getById = function (id) {
return $http.get(movieApiUrl + id);
};
var update = function (movie) {
return $http.put(movieApiUrl + movie.Id, movie);
};
var create = function (movie) {
return $http.post(movieApiUrl, movie);
};
var destroy = function (movie) {
return $http.delete(movieApiUrl + movie.Id);
};
return {
getAll: getAll,
getById: getById,
update: update,
create: create,
delete: destroy
};
};
app.factory("movieService", movieService);
}(angular.module("atTheMovies")))
Notice the service is mimicking the server-side API of the MovieController by providing methods to retrieve all movies; get a movie by ID; and update, create, and delete a movie. Each of these methods forwards a call to the $http service, which is a dependency ofmovieService.
One more dependency of movieService is the movieApiUrl, which demonstrates how to pass configuration information from an application to the services and other components inside the application by registering constant values during application configuration. Back in the atTheMovies.js script where routing is defined, you can also register constant values using the constant method. These values take a key as the first parameter and the value to associate with the key as the second parameter.
(function () {
var app = angular.module("atTheMovies", ["ngRoute"]);
var config = function($routeProvider) {
$routeProvider
.when("/list",
{ templateUrl: "/client/views/list.html" })
.when("/details/:id",
{ templateUrl: "/client/views/details.html" })
.otherwise(
{ redirectTo: "/list" });
};
app.config(config);
app.constant("movieApiUrl", "/api/movie/");
}());
Any component that needs to call the MovieController can now request the movieApiUrl dependency, but only the movieService should need the value. To use the service, you include the script in the Index view:
@section scripts {
<script src="∼/Scripts/angular.js"></script>
<script src="∼/Scripts/angular-route.js"></script>
<script src="∼/Client/Scripts/atTheMovies.js"></script>
<script src="∼/Client/Scripts/ListController.js"></script>
<script src="∼/Client/Scripts/DetailsController.js"></script>
<script src="∼/Client/Scripts/movieService.js"></script>
}
<div data-ng-app="atTheMovies">
<ng-view></ng-view>
</div>
You can then change the ListController to use movieService instead of $http:
(function(app) {
var ListController = function($scope, movieService) {
movieService
.getAll()
.success(function(data) {
$scope.movies = data;
});
};
app.controller("ListController", ListController);
}(angular.module("atTheMovies")));
The DetailsController can also use the service:
(function(app) {
var DetailsController = function($scope, $routeParams, movieService) {
var id = $routeParams.id;
movieService
.getById(id)
.success(function(data) {
$scope.movie = data;
});
};
app.controller("DetailsController", DetailsController);
}(angular.module("atTheMovies")));
With the movieService in place, you can now turn to look at deleting, editing, and creating movies.
Deleting Movies
To delete a movie, you can provide a button on the list view for the user to click:
<div ng-controller="ListController">
<table class="table">
<tr ng-repeat="movie in movies">
<td>{{movie.Title}}</td>
<td>
<a class="btn btn-default" href="#/details/{{movie.Id}}">
Details
</a>
<button class="btn btn-default" ng-click="delete(movie)">
Delete
</button>
</td>
</tr>
</table>
</div>
The view is now using some Bootstrap classes to provide a consistent styling to the links and buttons. The application will look like the screen in Figure 12.14 when running.
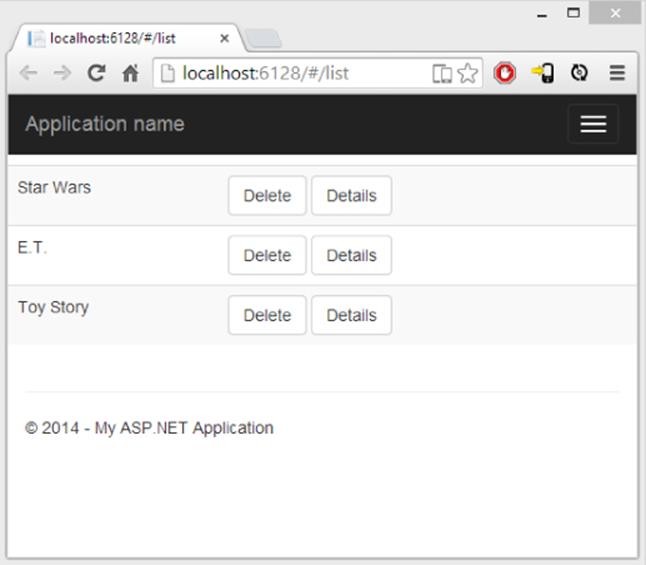
Figure 12.14
In the last code sample, both the details link and the delete button are styled like buttons, but they do behave differently. The details link is a normal anchor tag and when the user clicks the link, the browser navigates to the new URL (which is just a change in the client fragment portion of the URL, /#/details/:id). The Angular router picks up the new location of the browser and loads the details view into the existing page.
The delete button is an HTML button element. Here, you can see a new directive—the ng-click directive. This directive listens to the click event of an element and evaluates an expression like delete(movie), which in this example calls a method on the model (thedelete method) and passes the current movie associated with this instance of the repeater directive.
The model inside of ListController is now responsible for providing an implementation for delete:
(function(app) {
var ListController = function ($scope, movieService) {
movieService
.getAll()
.success(function(data) {
$scope.movies = data;
});
$scope.delete = function (movie) {
movieService.delete(movie)
.success(function () {
removeMovieById(movie.Id);
});
};
var removeMovieById = function (id) {
for (var i = 0; i < $scope.movies.length; i++) {
if ($scope.movies[i].Id == id) {
$scope.movies.splice(i, 1);
break;
}
}
};
};
app.controller("ListController", ListController);
}(angular.module("atTheMovies")));
You have two new functions in the latest version of the ListController. The first function is the delete method attached to $scope. As a method on the $scope object, delete is reachable by the ng-click directive and the method uses the movieService to call the server and delete the movie. When the call is successful, the method calls into removeMovieById. The removeMovieById function is interesting because it is not associated with the $scope object and is therefore a private implementation detail inside the controller. removeMovieByIdlocates the deleted movie inside the model and removes it from the array of all movies.
With the deletion capability implemented, it is time to look at editing and creating movies, which are similar features.
Editing and Creating Movies
You might want a feature that lets users edit a movie in multiple views of the application. For example, in the view with a list of movies, you might want to give the user the ability to create a movie without leaving the list. Likewise, on the details screen, you might want to allow the user to edit the movie as he or she views the details.
To share the edit functionality, you can create a new view to use inside both the list and details views (think of it as similar to a partial view in ASP.NET MVC). Name the view edit.html and place it in the Client/Views directory.
<div ng-controller="EditController">
<form ng-show="isEditable()">
<fieldset>
<div class="form-group">
<label for="title">
Title
</label>
<input id="title" type="text"
ng-model="edit.movie.title" required
class="form-control" />
</div>
<div class="form-group">
<label for="release">
Release Year
</label>
<input id="release" type="number"
ng-model="edit.movie.releaseYear"
required min="1900" max="2030"
class="form-control" />
</div>
<div class="form-group">
<label for="runtime">
Length
</label>
<input id="runtime" type="number"
ng-model="edit.movie.runtime"
required min="0" max="500"
class="form-control" />
</div>
<button class="btn btn-default"
ng-click="save()">Save
</button>
<button class="btn btn-default"
ng-click="cancel()">Cancel
</button>
</fieldset>
</form>
</div>
In this view, you'll see two new directives: ng-model and ng-show. The ng-model directive sets up a two way data binding between the model and form elements like input, textarea, and select. ng-model can also provide validation services and monitor the state (clean or dirty) of the underlying control.
The ng-show directive hides or shows a section of the DOM based on the expression you give it. In this case, the form element only displays when an isEditable function from the model returns true.
By now, you might have realized one of the true purposes of directives. Directives are the brokers between a model and a view. A model (or a controller) never directly touches or manipulates DOM elements. Instead, directives manipulate DOM elements and form a binding with the model. Making a change to the model can change the display of the view, and when a user changes something in the view, it propagates to the model. Directives help to separate concerns.
The edit view relies on an EditController to be present, but before you implement, you also need to change the EditController, the ListController and DetailsController so they work with the edit view, because the edit view is present on the views where ListControllerand DetailsController are working.
Notice the edit view uses directives to bind to edit.movie properties, like edit.movie.Title. When the ListController and DetailsController want to edit a movie, they must move information into matching properties in the model. First, here's the view for theListController:
<div ng-controller="ListController">
<table class="table">
<tr ng-repeat="movie in movies">
<td>{{movie.Title}}</td>
<td>
<a class="btn btn-default" href="#/details/{{movie.Id}}">
Details
</a>
<button class="btn btn-default" ng-click="delete(movie)">
Delete
</button>
</td>
</tr>
</table>
<button class="btn btn-default" ng-click="create()">Create</button>
<div ng-include="'/Client/views/edit.html'">
</div>
</div>
The view now includes a button to invoke a create method on the model, and uses the ng-include directive to compose the edit view into itself. Pay special attention to the single quotes in the value of the ng-include directive. The quotes ensure the path to the view is recognized as a string literal; otherwise, Angular will think of the text inside as an expression and try to find the information on the model instead of just using the string value literally. The create method needs to make the edit.movie property available from the controller scope.
(function(app) {
var ListController = function ($scope, movieService) {
movieService
.getAll()
.success(function(data) {
$scope.movies = data;
});
$scope.create = function () {
$scope.edit = {
movie: {
Title: "",
Runtime: 0,
ReleaseYear: new Date().getFullYear()
}
};
};
$scope.delete = function (movie) {
movieService.delete(movie)
.success(function () {
removeMovieById(movie.Id);
});
};
var removeMovieById = function (id) {
for (var i = 0; i < $scope.movies.length; i++) {
if ($scope.movies[i].Id == id) {
$scope.movies.splice(i, 1);
break;
}
}
};
};
app.controller("ListController", ListController);
}(angular.module("atTheMovies")));
Likewise, the details view can also include the edit view and a clickable button for the user to enter edit mode.
<div ng-controller="DetailsController">
<h2>{{movie.Title}}</h2>
<div>
Released in {{movie.ReleaseYear}}.
</div>
<div>
{{movie.Runtime}} minutes long.
</div>
<button ng-click="edit()">Edit</button>
<div ng-include="'/Client/views/edit.html'"></div>
</div>
The DetailsController needs to make only the current movie available for editing.
(function(app) {
var DetailsController = function(
$scope, $routeParams, movieService) {
var id = $routeParams.id;
movieService
.getById(id)
.success(function(data) {
$scope.movie = data;
});
$scope.edit = function () {
$scope.edit.movie = angular.copy($scope.movie);
};
};
app.controller("DetailsController", DetailsController);
}(angular.module("atTheMovies")));
Notice that the editable movie is a copy of the movie being detailed. If the user decides to cancel the editing activity, the code doesn't need to undo changes but instead just throws away the copied movie. On a successful save, the code needs to copy the updated information into the original movie object. The copy behavior is the responsibility of the EditController itself.
(function (app) {
var EditController = function ($scope, movieService) {
$scope.isEditable = function () {
return $scope.edit && $scope.edit.movie;
};
$scope.cancel = function () {
$scope.edit.movie = null;
};
$scope.save = function () {
if ($scope.edit.movie.Id) {
updateMovie();
} else {
createMovie();
}
};
var updateMovie = function () {
movieService.update($scope.edit.movie)
.success(function () {
angular.extend($scope.movie, $scope.edit.movie);
$scope.edit.movie = null;
});
};
var createMovie = function () {
movieService.create($scope.edit.movie)
.success(function (movie) {
$scope.movies.push(movie);
$scope.edit.movie = null;
});
};
};
app.controller("EditController", EditController);
}(angular.module("atTheMovies")));
The file for the EditController above needs to be included into the scripts that are loaded in Index.cshtml, which should now look like the following.
@section scripts{
<script src="∼/Scripts/angular.js"></script>
<script src="∼/Scripts/angular-route.js"></script>
<script src="∼/Client/Scripts/atTheMovies.js"></script>
<script src="∼/Client/Scripts/MovieService.js"></script>
<script src="∼/Client/Scripts/ListController.js"></script>
<script src="∼/Client/Scripts/DetailsController.js"></script>
<script src="∼/Client/Scripts/EditController.js"></script>
}
<div ng-app="atTheMovies">
<ng-view></ng-view>
</div>
In the controller, notice how the isEditable property can “turn on” the view by returning true when an edit.movie property is available on $scope. How is it that the EditController has access to edit.movie? Isn't the edit property only available on the list and detail controllers?
The answer is that the editable movie is available and this behavior is important in Angular. The $scope object in a controller inherits from a $scope object in a parent controller by virtue of a JavaScript prototype reference. Because EditController is nested inside theListController and DetailsController, the EditController can read all $scope properties in the parent.
The EditController uses this behavior to push a new movie into the movies array when creating a movie and copying properties into an existing movie when updating (via angular.extend). If you feel like the edit code is tightly coupled to the parent controller, an alternative is to use $scope.emit to raise an event so the other controllers can handle the update and save functionality on their own.
SUMMARY
This chapter was a fast tour of some basic AngularJS features using a single page to list, create, delete, and update movies. You saw data-binding, controllers, models, views, services, and routing. Angular also includes many additional features we didn't have the space to cover, including libraries for easy unit testing, integration testing, animations, validation, localization, and more. Thanks to third-party plugins, you can find also many components, widgets, and services offering functionality that ranges from asynchronous file uploads to Twitter Bootstrap integration. Hopefully, the story in this chapter has piqued your interest into investigating the world of AngularJS.