Professional ASP.NET MVC 5 (2014)
Chapter 3
Views
—by Phil Haack and Jon Galloway
What's In This Chapter?
· The purpose of views
· Understanding view basics
· View conventions 101
· All about strongly typed views
· Understanding view models
· How to add a view
· Using Razor
· How to specify a partial view
WROX.COM CODE DOWNLOADS FOR THIS CHAPTER
All code for this chapter is provided via NuGet, as described in the introduction at the front of this book. NuGet code samples will be clearly indicated via notes at the end of each applicable section. You can also visit http://www.wrox.com/go/proaspnetmvc5 for offline use.
Developers spend a lot of time focusing on crafting well-factored controllers and model objects—and for good reason, because clean, well-written code in these areas forms the basis of a maintainable web application.
But when a user visits your web application in a browser, none of that work is visible. A user's first impression and entire interaction with your application starts with the view.
The view is effectively your application's ambassador to the user.
Obviously, if the rest of your application is buggy, no amount of spit and polish on the view will make up for the application's shortcomings. Likewise, build an ugly and hard-to-use view, and many users will not give your application a chance to prove just how feature-rich and bug-free it might well be.
In this chapter, we won't show you how to make a pretty view. Visual design is a separate concern from rendering content, although clean markup can make your designer's life a lot easier. Instead, we will demonstrate how views work in ASP.NET MVC and what their responsibilities are, and provide you with the tools to build views that your application will be proud to wear.
THE PURPOSE OF VIEWS
Chapter 2 demonstrated how controllers can return strings, which are then output to the browser. That's useful for getting started with controllers, but in any non-trivial web application, you'll notice a pattern emerging very quickly: Most controller actions need to display dynamic information in HTML format. If the controller actions are just returning strings, they'll be doing a lot of string substitution, which gets messy fast. A templating system is clearly needed, which is where the view comes in.
The view is responsible for providing the user interface (UI) to the user. After the controller has executed the appropriate logic for the requested URL, it delegates the display to the view.
Unlike file-based web frameworks, such as ASP.NET Web Forms and PHP, views are not themselves directly accessible. You can't point your browser to a view and have it render. Instead, a view is always rendered by a controller, which provides the data the view will render.
In some simple cases, the view needs little or no information from the controller. More often, the controller needs to provide some information to the view, so it passes a data transfer object called a model. The view transforms that model into a format ready to be presented to the user. In ASP.NET MVC, the view accomplishes this by examining a model object handed off to it by the controller and transforming the contents of that to HTML.
Note
Not all views render HTML. HTML is certainly the most common case when building web applications. But, as the section on action results in Chapter 16 points out, views can render a wide variety of other content types as well.
VIEW BASICS
We're going to start off pretty slow, for those of you who are new to ASP.NET MVC in general. The easiest way to get the hang of what views do is to take a look at the sample views that are created in a new ASP.NET MVC application. Let's start by taking a look at the simplest case: a view that doesn't need any information from the controller. Open the /Views/Home/Index.cshtml file (see Listing 3.1) from the project you created in Chapter 2 (or in any new MVC 5 project).
Listing 3.1: Home Index view—Index.cshtml
@{
ViewBag.Title = "Home Page";
}
<div class="jumbotron">
<h1>ASP.NET</h1>
<p class="lead">ASP.NET is a free web framework for building
great Web sites and Web applications using HTML,
CSS and JavaScript.</p>
<p><a href="http://asp.net" class="btn btn-primary btn-large">
Learn more »</a></p>
</div>
<div class="row">
<div class="col-md-4">
<h2>Getting started</h2>
<p>
ASP.NET MVC gives you a powerful, patterns-based way
to build dynamic websites that enables a clean separation
of concerns and gives you full control over markup
for enjoyable, agile development.
</p>
<p><a class="btn btn-default"
href="http://go.microsoft.com/fwlink/?LinkId=301865">
Learn more »</a>
</p>
</div>
<div class="col-md-4">
<h2>Get more libraries</h2>
<p>NuGet is a free Visual Studio extension that makes it easy
to add, remove, and update libraries and tools in
Visual Studio projects.</p>
<p><a class="btn btn-default"
href="http://go.microsoft.com/fwlink/?LinkId=301866">
Learn more »</a>
</p>
</div>
<div class="col-md-4">
<h2>Web Hosting</h2>
<p>You can easily find a web hosting company that offers the
right mix of features and price for your applications.
</p>
<p><a class="btn btn-default"
href="http://go.microsoft.com/fwlink/?LinkId=301867">
Learn more »</a>
</p>
</div>
</div>
Aside from the tiny bit of code at the top that sets the page title, this is all just standard HTML. Listing 3.2 shows the controller that initiated this view:
Listing 3.2: Home Index method—HomeController.cs
public ActionResult Index() {
return View();
}
Browsing to the root of the site (as shown in Figure 3.1) yields no surprises: the Index method of the HomeController renders the Home Index view, which is just the preceding view's HTML content wrapped in a header and footer provided by the site layout (we'll get to the layout part later in the chapter).
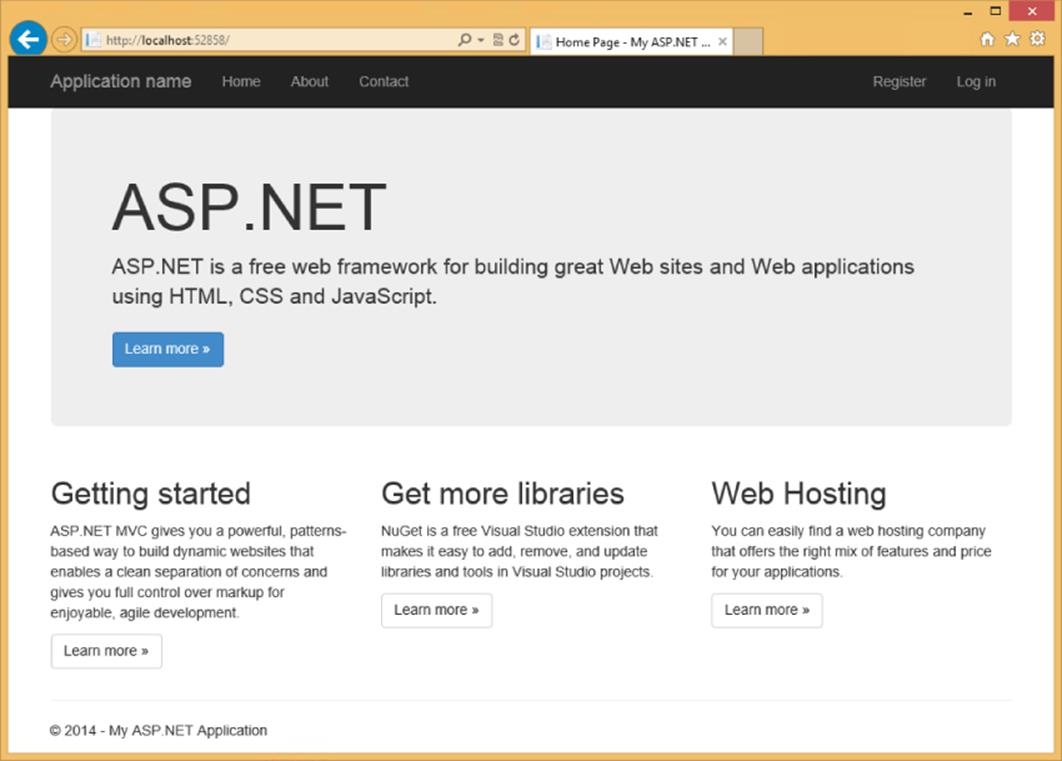
Figure 3.1
Okay, that example was pretty basic—in the simplest case, you make a request to a controller, which returns a view that's really just some static HTML. Easy to get started, but not so dynamic. We said earlier that views offer a templating engine, so let's take advantage of that by passing a tiny bit of data from the controller to a view. The easiest way to do that is using a ViewBag. ViewBag has limitations, but it can be useful if you're just passing a little data to the view. Take a look at the About action method inHomeController.cs, shown in Listing 3.3.
Listing 3.3: Home About method—HomeController.cs
public ActionResult About()
{
ViewBag.Message = "Your application description page.";
return View();
}
This is nearly identical to the Index method you looked at earlier, but notice that the controller sets the ViewBag.Message property to a string before calling return View(). Now take a look at the corresponding view, found in /Views/Home/About.cshtml and shown in Listing 3.4.
Listing 3.4: Home About view—About.cshtml
@{
ViewBag.Title = "About";
}
<h2>@ViewBag.Title.</h2>
<h3>@ViewBag.Message</h3>
<p>Use this area to provide additional information.</p>
This view is really simple—it sets the page title to ViewBag.Title, and then displays both the ViewBag.Title and ViewBag.Message values in header tags. The @ character before both ViewBag values is the most important part of Razor syntax you'll learn in this chapter: It tells the Razor view engine that the following characters are code, not HTML text. The resulting About view displays as shown in Figure 3.2.
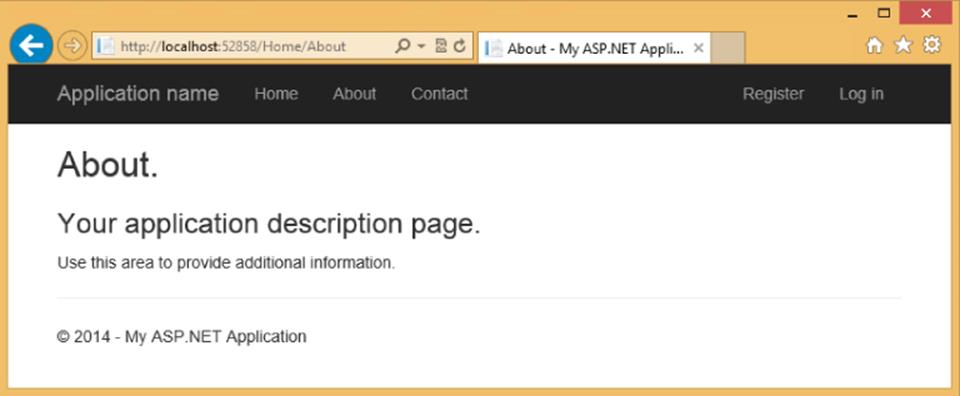
Figure 3.2
UNDERSTANDING VIEW CONVENTIONS
In the previous section, you looked at some examples that illustrate how to use views to render HTML. In this section, you learn how ASP.NET MVC finds the correct view to render and how you can override this to specify a particular view for a controller action.
The controller actions you've looked at so far in this chapter have just called return View() to render the view—they haven't had to specify the view's filename. That's because they take advantage of some implicit conventions in the ASP.NET MVC Framework, which define the view selection logic.
When you create a new project template, you'll notice that the project contains a Views directory structured in a very specific manner (see Figure 3.3).
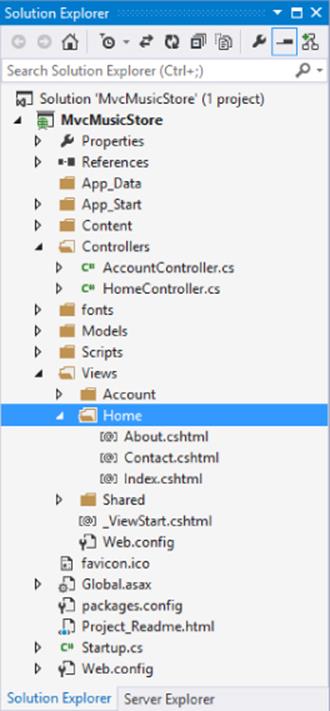
Figure 3.3
Each controller folder contains a view file for each action method, and the file is named the same as the action method. This provides the basis for how views are associated to an action method.
The view selection logic looks for a view with the same name as the action within the /Views/ControllerName directory (the controller name without the Controller suffix in this case). The view selected in this case would be /Views/Home/Index.cshtml.
As with most things in ASP.NET MVC, you can override this convention. Suppose that you want the Index action to render a different view. You could supply a different view name, as follows:
public ActionResult Index()
{
return View("NotIndex");
}
In this case, it will still look in the /Views/Home directory, but choose NotIndex.cshtml as the view. In some situations, you might even want to specify a view in a completely different directory structure. You can use the tilde syntax to provide the full path to the view, as follows:
public ActionResult Index()
{
return View("∼/Views/Example/Index.cshtml");
}
When using the tilde syntax, you must supply the file extension of the view because this bypasses the view engine's internal lookup mechanism for finding views.
STRONGLY TYPED VIEWS
So far in this chapter, we've just looked at very simple examples that pass a little bit of data to the view via the ViewBag. Although using the ViewBag is easy for simple cases, it becomes unwieldy when working with real data. That's where strongly typed views come in—we'll look at those now.
We'll start with an example showing how ViewBag falls short—don't worry about typing this part; it's just for illustration.
How ViewBag Falls Short
Suppose you need to write a view that displays a list of Album instances. One possible approach is to simply add the albums to the ViewBag and iterate over them from within the view.
For example, the code in your controller action might look like this:
public ActionResult List()
{
var albums = new List<Album>();
for(int I = 0; i < 10; i++) {
albums.Add(new Album {Title = "Product " + i});
}
ViewBag.Albums = albums;
return View();
}
In your view, you can then iterate and display the products, as follows:
<ul>
@foreach (Album a in (ViewBag.Albums as IEnumerable<Album>)) {
<li>@a.Title</li>
}
</ul>
Notice that you needed to cast ViewBag.Albums (which is dynamic) to an IEnumerable<Album> before enumerating it. You could have also used the dynamic keyword here to clean the view code up, but you would have lost the benefit of IntelliSense when accessing the properties of each Album object.
<ul>
@foreach (dynamic p in ViewBag.Albums) {
<li>@p.Title</li>
}
</ul>
It would be nice to have the clean syntax afforded by the dynamic example without losing the benefits of strong typing and compile-time checking of things, such as correctly typed property and method names. This is where strongly typed views come in: strongly typed views allow you to set a model type for a view. This allows you to pass a model object from the controller to the view that's strongly typed on both ends, so you get the benefit of IntelliSense, compiler checking, and so on. In the Controller method, you can specify the model via an overload of the View method whereby you pass in the model instance:
public ActionResult List()
{
var albums = new List<Album>();
for (int I = 0; i < 10; i++)
{
albums.Add(new Album {Title = "Album " + i});
}
return View(albums);
}
The next step is to indicate to the view what type of model is using the @model declaration. Note that you might need to supply the fully qualified type name (namespace plus type name) of the model type.
@model IEnumerable<MvcMusicStore.Models.Album>
<ul>
@foreach (Album p in Model) {
<li>@p.Title</li>
}
</ul>
To avoid needing to specify a fully qualified type name for the model, you can make use of the @using declaration.
@using MvcMusicStore.Models
@model IEnumerable<Album>
<ul>
@foreach (Album p in Model) {
<li>@p.Title</li>
}
</ul>
An even better approach for namespaces, which you'll end up using often in views, is to declare the namespace in the web.config file within the Views directory.
<system.web.webPages.razor>
…
<pages pageBaseType="System.Web.Mvc.WebViewPage">
<namespaces>
<add namespace="System.Web.Mvc" />
<add namespace="System.Web.Mvc.Ajax" />
<add namespace="System.Web.Mvc.Html" />
<add namespace="System.Web.Routing" />
<add namespace="MvcMusicStore.Models" />
</namespaces>
</pages>
</system.web.webPages.razor>
To see the previous two examples in action, use NuGet to install the Wrox.ProMvc5.Views.AlbumList package into a default ASP.NET MVC 5 project, as follows:
Install-Package Wrox.ProMvc5.Views.AlbumList
This places the two view examples in the \Views\Albums folder and the controller code in the \Samples\AlbumList folder. Press Ctrl+F5 to run the project and visit /albums/listweaklytyped and /albums/liststronglytyped to see the result of the code.
Understanding ViewBag, ViewData, and ViewDataDictionary
We started out by talking about the ViewBag to pass information from the controller to the view, and then moved to passing a strongly typed model. In reality, both these values are passed via the ViewDataDictionary. Let's look at that in more detail.
Technically, all data is passed from the controllers to the views via a ViewDataDictionary (a specialized dictionary class) called ViewData. You can set and read values to the ViewData dictionary using standard dictionary syntax, as follows:
ViewData["CurrentTime"] = DateTime.Now;
Although this continues to be available, ASP.NET MVC 3 leveraged the C# 4 dynamic keyword to allow for a simpler syntax. The ViewBag is a dynamic wrapper around ViewData. It allows you to set values as follows:
ViewBag.CurrentTime = DateTime.Now;
Thus, ViewBag.CurrentTime is equivalent to ViewData[”CurrentTime”].
Generally, most current code you'll encounter uses ViewBag rather than ViewData. For the most part, you don't have a real technical advantage when choosing one syntax over the other. ViewBag is just syntactic sugar that some people prefer over the dictionary syntax. It just looks nicer.
ViewData and ViewBag
Although you might not have a technical advantage to choosing one format over the other, you should be aware of some important differences between the two syntaxes.
One obvious difference is that ViewBag works only when the key you're accessing is a valid C# identifier. For example, if you place a value in ViewData["Key With Spaces"], you can't access that value using ViewBag because the code won't compile.
Another key issue to consider is that you cannot pass in dynamic values as parameters to extension methods. The C# compiler must know the real type of every parameter at compile time in order to choose the correct extension method.
If any parameter is dynamic, compilation will fail. For example, this code will always fail: @Html.TextBox("name", ViewBag.Name). To work around this, either use ViewData["Name"] or cast the value to a specific type: (string)ViewBag.Name.
As we just mentioned, ViewDataDictionary is a specialized dictionary class, not just a generic Dictionary. One reason for this is that it has an additional Model property that allows for a specific model object to be available to the view. Because you can only have one model object in ViewData, using this to pass a specific class to the view is convenient. This allows your view to specify the class it is expecting the model object to be, which means you can take advantage of strong typing.
VIEW MODELS
Often a view needs to display a variety of data that doesn't map directly to a domain model. For example, you might have a view meant to display details about an individual product. But this same view also displays other information that's ancillary to the product, such as the name of the currently logged-in user, whether that user is allowed to edit the product or not, and so on.
One easy approach to displaying extra data that isn't a part of your view's main model is to simply stick that data in the ViewBag. This is especially useful when you have a clearly defined model and some additional reference data. A common application of this technique is using the ViewBag to provide form options for a dropdown. For example, the Album Edit view for the MVC Music Store needs to populate dropdowns for Genres and Albums in our system, but those lists don't fit in the Album model. To handle this without polluting our Album model with extraneous information, we can pop the Genre and Album information into the ViewBag, as shown in Listing 3.5.
Listing 3.5: Populating dropdowns via ViewBag
//
// GET: /StoreManager/Edit/5
public ActionResult Edit(int id = 0)
{
Album album = db.Albums.Find(id);
if (album == null)
{
return HttpNotFound();
}
ViewBag.GenreId = new SelectList(
db.Genres, "GenreId", "Name", album.GenreId);
ViewBag.ArtistId = new SelectList(
db.Artists, "ArtistId", "Name", album.ArtistId);
return View(album);
}
It certainly gets the job done and provides a flexible approach to displaying data within a view. But it's not something you'll want to use very often. You'll generally want to stick with strongly typed model objects for the reasons we've mentioned earlier — you want to control the data that flows into your view and have it all be strongly typed so your view authors can take advantage of IntelliSense.
One recommended approach is to write a custom view model class. You can think of a view model as a model that exists just to supply information for a view. Note that the term view model here is different from the concept of view model within the Model View ViewModel (MVVM) pattern. That's why I tend to use the term view specific model when I discuss view models.
For example, if you had a shopping cart summary page that needed to display a list of products, the total cost for the cart, and a message to the user, you could create the ShoppingCartViewModel class, shown as follows:
public class ShoppingCartViewModel {
public IEnumerable<Product> Products { get; set; }
public decimal CartTotal { get; set; }
public string Message { get; set; }
}
Now you can make a view strongly typed to this model, using the following @model directive:
@model ShoppingCartViewModel
This gives you the benefits of a strongly typed view (including type checking, IntelliSense, and freedom from having to cast untyped ViewDataDictionary objects) without requiring any changes to the Model classes.
To see an example of this shopping cart view model, run the following command in NuGet:
Install-Package Wrox.ProMvc5.Views.ViewModel
This NuGet package adds a Samples directory to your project that contains a ProductModel and ShoppingCartViewModel, as well as a ShoppingCartController to display them. To view the output, run the application and browse to /ShoppingCart.
The preceding sections introduced a few concepts associated with models as they relate to the view. The following chapter discusses models in much greater detail.
ADDING A VIEW
In the “View Basics” and “View Conventions” sections you learned how a controller specifies a view. But how does that view get created in the first place? You could certainly create a file by hand and add it to your Views directory, but the ASP.NET MVC tooling for Visual Studio makes adding a view using the Add View dialog very easy.
The easiest way to display the Add View dialog is to right-click in an action method. You can use any action method you'd like; for this example you can just add a new action method named Edit and then create a view for that action using the Add View dialog. Begin by adding an Edit action method to the HomeController in an MVC 5 application that contains the following code:
public ActionResult Edit()
{
return View();
}
Next, launch the Add View dialog by right-clicking an action method and selecting Add View (see Figure 3.4).

Figure 3.4
This brings up the Add View dialog, as shown in Figure 3.5.
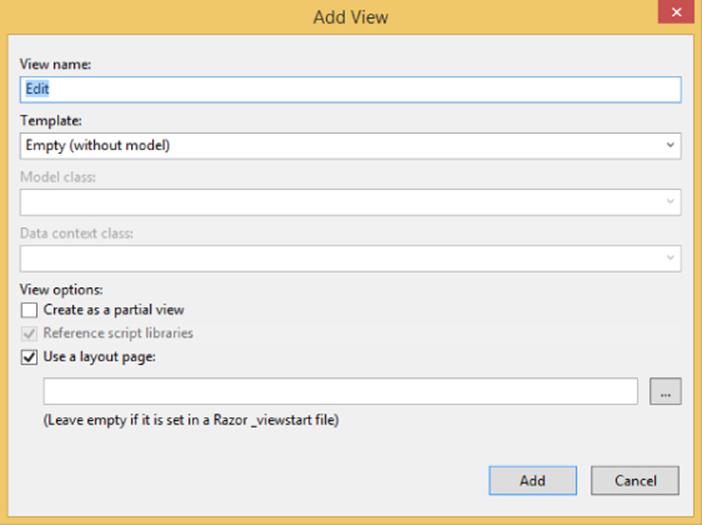
Figure 3.5
The following list describes each menu item in detail:
· View name: When launching this dialog from the context of an action method, the view name is prepopulated using the name of the action method. Naturally, the view name is required.
· Template: After you select a type, you can also choose a scaffold template. These templates use the Visual Studio templating system to generate a view based on the model type selected. The templates are shown in Figure 3.6 and explained in Table 3.1.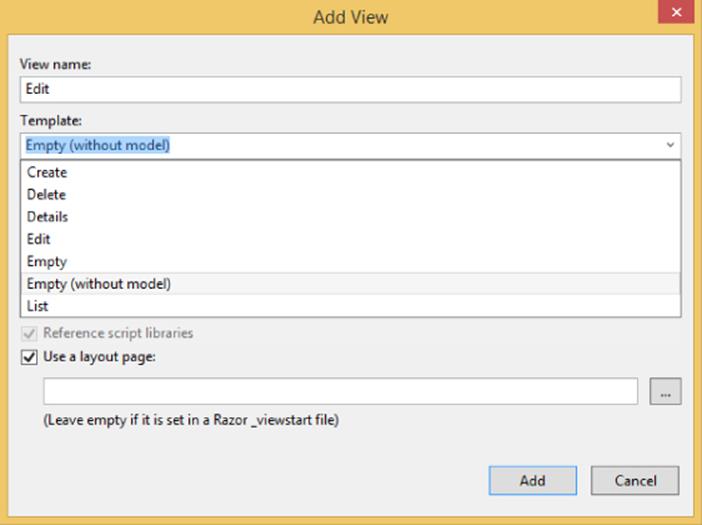
Figure 3.6
Table 3.1 View Scaffold Types
|
Scaffold |
Description |
|
Create |
Creates a view with a form for generating new instances of the model. Generates a label and input field for each property of the model type. |
|
Delete |
Creates a view with a form for deleting existing instances of the model. Displays a label and the current value for each property of the model. |
|
Details |
Creates a view that displays a label and the value for each property of the model type. |
|
Edit |
Creates a view with a form for editing existing instances of the model. Generates a label and input field for each property of the model type. |
|
Empty |
Creates an empty view. Only the model type is specified using the @model syntax. |
|
Empty (without model) |
Creates an empty view, as with the Empty scaffold. In this case, however, there's no model so you're not required to select a model type when you select this scaffold. This is the only scaffold type which does not require you to select a model type. |
|
List |
Creates a view with a table of model instances. Generates a column for each property of the model type. Make sure to pass an IEnumerable<YourModelType> to this view from your action method. The view also contains links to actions for performing the create/edit/delete operations. |
· Reference script libraries: This option indicates whether the view you are creating should include references to a set of JavaScript files if it makes sense for the view. By default, the _Layout.cshtml file references the main jQuery library, but doesn't reference the jQuery Validation library or the Unobtrusive jQuery Validation library.
When creating a view that will contain a data entry form, such as an Edit view or a Create view, selecting the Reference script libraries option adds a script reference to the jqueryval bundle. These libraries are necessary for implementing client-side validation. In all other cases, this checkbox is completely ignored.
Note
For custom view scaffold templates and other view engines, the behavior of this checkbox might vary, because it's entirely controlled by the particular view scaffold T4 template.
· Create as a partial view: Selecting this option indicates that the view you will create is not a full view, thus the Layout option is disabled. The resulting partial view looks much like a regular view, except you'll have no <html> tag or <head> tag at the top of the view.
· Use a layout page: This option determines whether or not the view you are creating references a layout or is a fully self-contained view. Specifying a layout is not necessary if you choose to use the default layout because the layout is already specified in the_ViewStart.cshtml file. However, you can use this option to override the default Layout file.
Customizing Scaffolded Views
As mentioned throughout this section, the scaffolded views are generated using T4 templates. You can both customize the existing templates and add new templates, as discussed in Chapter 16.
The Add View dialog really gets interesting when you're working with models. You'll see that in detail in Chapter 4, which walks through building out models and creating scaffolded views using the view scaffold types we've just discussed.
THE RAZOR VIEW ENGINE
The previous two sections looked at how to specify a view from within a controller as well as how to add a view. However, they didn't cover the syntax that goes inside of a view. ASP.NET MVC includes two different view engines: the newer Razor view engine and the older Web Forms view engine. This section covers the Razor view engine, which includes the Razor syntax, layouts, partial views, and so on.
What Is Razor?
The Razor view engine was introduced with ASP.NET MVC 3 and is the default view engine moving forward. This chapter focuses on Razor and does not cover the Web Forms view engine.
Razor is the response to one of the most requested suggestions received by the ASP.NET MVC feature team—to provide a clean, lightweight, simple view engine that didn't contain the “syntactic cruft” contained in the existing Web Forms view engine. Many developers felt all that syntactic noise required to write a view only created friction when developers tried to read that view.
This request was finally answered in ASP.NET MVC 3 with the introduction of the Razor view engine.
Razor provides a streamlined syntax for expressing views that minimizes the amount of syntax and extra characters. It effectively gets out of your way and puts as little syntax as possible between you and your view markup. Many developers who have written Razor views have commented on feeling the view code just flowing from their fingertips, akin to a mind-meld with their keyboard. This feeling is enhanced with the first-rate IntelliSense support for Razor in Visual Studio.
Razor accomplishes this by understanding the structure of markup so that it can make the transitions between code and markup as smoothly as possible. To understand what is meant by this, some examples will help. The following example demonstrates a simple Razor view that contains a bit of view logic:
@{
// this is a block of code. For demonstration purposes,
// we'll create a "model" inline.
var items = new string[] {"one", "two", "three"};
}
<html>
<head><title>Sample View</title></head>
<body>
<h1>Listing @items.Length items.</h1>
<ul>
@foreach(var item in items) {
<li>The item name is @item.</li>
}
</ul>
</body>
</html>
The previous code sample uses C# syntax, which means the file has the .cshtml file extension. Similarly, Razor views, which use the Visual Basic syntax, have the .vbhtml file extension. These file extensions are important because they signal the code language syntax to the Razor parser.
Don't Overthink It
We're about to dig into the mechanics of Razor syntax. Before we do, the best advice I can give you is to remember that Razor was designed to be easy and intuitive. For the most part, you don't have to worry about Razor syntax—just write your views as HTML and press the @ sign when you want to insert some code.
If you're completely new to ASP.NET MVC, just skimming the rest of this chapter and coming back to it later is okay. Because minimizing the amount of logic in your views is generally considered good practice, needing more than a basic understanding of Razor even for complex websites is rare.
Code Expressions
The key transition character in Razor is the “at” sign (@). This single character is used to transition from markup to code and sometimes also to transition back. The two basic types of transitions are code expressions and code blocks. Expressions are evaluated and written to the response.
For example, in the following snippet:
<h1>Listing @items.Length items.</h1>
notice that the expression @stuff.length is evaluated as an implicit code expression and the result, 3, is displayed in the output. One thing to notice, though, is that we didn't need to demarcate the end of the code expression. In contrast, with a Web Forms view, which supports only explicit code expressions, this would look like:
<h1>Listing <%: stuff.Length %> items.</h1>
Razor is smart enough to know that the space character after the expression is not a valid identifier, so it transitions smoothly back into markup.
Notice that in the unordered list, the character after the @item code expression is a valid code character. How does Razor know that the dot after the expression isn't meant to start referencing a property or method of the current expression? Well, Razor peeks at the next character and sees an angle bracket, which isn't a valid identifier, and transitions back into markup mode. Thus the first list item renders out:
<li>The item name is one.</li>
This ability for Razor to automatically transition back from code to markup is one of its big appeals and is the secret sauce in keeping the syntax compact and clean. However, this feature might make some of you worry that ambiguities can occur. For example, what if you had the following Razor snippet?
@{
string rootNamespace = "MyApp";
}
<span>@rootNamespace.Models</span>
In this particular case, the hoped-for output was:
<span>MyApp.Models</span>
Instead, you get an error that there is no Models property of string. In this admittedly edge case, Razor couldn't understand your intent and thought that @rootNamespace.Models was the code expression. Fortunately, Razor also supports explicit code expressions by wrapping them in parentheses:
<span>@(rootNamespace).Models</span>
This tells Razor that .Models is literal text and not part of the code expression.
While we're on the topic of code expressions, we should also look at the case where you intend to show an e-mail address. For example, consider the following e-mail address:
<span>support@megacorp.com</span>
At first glance, this seems like it would cause an error because @megacorp.com looks like a valid code expression where we're trying to print out the com property of the megacorp variable. Fortunately, Razor is smart enough to recognize the general pattern of an e-mail address and will leave this expression alone.
Note
Razor uses a simple algorithm to determine whether something looks like an e-mail address. It's not meant to be perfect, but it handles most cases. Some valid e-mails might appear not to be e-mails, in which case you can always escape the @ sign with an @@ sign.
But, of course, what if you really did mean for this to be an expression? For example, going back to an earlier example in this section, what if you had the following list items:
<li>Item_@item.Length</li>
In this particular case, that expression seems to match an e-mail address, so Razor will print it out verbatim. But it just so happens that you expected the output to be something like:
<li>Item_3</li>
Once again, parentheses to the rescue! Any time there's an ambiguity in Razor, you can use parentheses to be explicit about what you want. You are in control.
<li>Item_@(item.Length)</li>
As mentioned earlier, you can escape the @ sign with an @@ sign. This comes in handy when you need to display some Twitter handles, which conventionally start with an @ sign:
<p>
You should follow
@aspnet
</p>
Well, Razor is going to attempt to resolve those implicit code expressions and fail. In the case where you need to escape the @ sign, you can do so by using an @@ sign. Thus, this view becomes:
<p>
You should follow
@@aspnet
</p>
Fortunately, the extra parentheses and escape sequences are rarely needed. Even in very large applications these extra bits of sequences might not be used at all. Rest assured that the Razor view engine was designed with terseness in mind and that you won't have to fight it to get what you want, how you want it.
HTML Encoding
Given that many cases exist where a view is used to display user input, such as a blog post comment or a product review, the potential always exists for cross-site script injection attacks (also known as XSS, which Chapter 7 covers in more detail). The good news is that Razor expressions are automatically HTML encoded.
@{
string message = "<script>alert('haacked!');</script>";
}
<span>@message</span>
This code does not result in an alert box popping up but instead renders the encoded HTML:
<span><script>alert('haacked!');</script></span>
However, in cases where you intend to show HTML markup, you can return an instance of System.Web.IHtmlString and Razor will not encode it. For example, all the view helpers discussed later in this section return instances of this interface because they want HTML to be rendered to the page. You can also create an instance of HtmlString or use the Html.Raw convenience method:
@{
string message = "<strong>This is bold!</strong>";
}
<span>@Html.Raw(message)</span>
This results in the message being displayed without HTML encoding:
<span><strong>This is bold!</strong></span>
This automatic HTML encoding is great for mitigating XSS vulnerabilities by encoding user input meant to be displayed as HTML, but it is not sufficient for displaying user input within JavaScript. For example:
<script type="text/javascript">
$(function () {
var message = "Hello @ViewBag.Username';
$("#message").html(message).show('slow');
});
</script>
In this code snippet, a JavaScript variable, message, is being set to a string, which includes the value of a user-supplied username. The username comes from a Razor expression.
Using the jQuery HTML method, this message is set to be the HTML for a DOM element in the ID “message.” Even though the username is HTML encoded within the message string, a potential XSS vulnerability still exists. For example, if someone supplies the following as their username, the HTML will be set to a script tag that will get evaluated:
\x3cscript\x3e%20alert(\x27pwnd\x27)%20\x3c/script\x3e
When setting variables in JavaScript to values supplied by the user, using JavaScript string encoding and not just HTML encoding is important. Use the @Ajax.JavaScriptStringEncode to encode the input. Here's the same code again using this method to better protect against XSS attacks:
<script type="text/javascript">
$(function () {
var message = "Hello @Ajax.JavaScriptStringEncode(ViewBag.Username)';
$("#message").html(message).show('slow');
});
</script>
Note
Understanding the security implications of HTML and JavaScript encoding is very important. Incorrect encoding can put both your site and your users at risk. Chapter 7 discusses these aspects in detail.
Code Blocks
In addition to code expressions, Razor also supports code blocks within a view. Going back to the sample view, you might remember seeing a foreach statement:
@foreach(var item in stuff) {
<li>The item name is @item.</li>
}
This block of code iterates over an array and displays a list item element for each item in the array.
What's interesting about this statement is how the foreach statement automatically transitions to markup with the open <li> tag. Sometimes, when people see this code block, they assume that the transition occurs because of the new line character, but the following valid code snippet shows that's not the case:
@foreach(var item in stuff) {<li>The item name is @item.</li>}
Because Razor understands the structure of HTML markup, it also transitions automatically back to code when the <li> tag is closed. Thus we didn't need to demarcate the closing curly brace at all.
Contrast this to the Web Forms view engine equivalent snippet, where the transitions between code and markup have to be explicitly denoted:
<% foreach(var item in stuff) { %>
<li>The item name is <%: item %>.</li>
<% } %>
Blocks of code (sometimes referred to as a code block) require curly braces to delimit the block of code in addition to an @ sign. One example of this is in a multi-line code block:
@{
string s = "One line of code.";
ViewBag.Title "Another line of code";
}
Another example of this is when calling methods that don't return a value (that is, the return type is void):
@{Html.RenderPartial("SomePartial");}
Note that curly braces are not required for block statements, such as foreach loops and if statements, because the Razor engine has special knowledge of those C# keywords.
The handy Razor quick reference in the next section, “Razor Syntax Samples,” shows the various Razor syntaxes as well as comparisons to Web Forms.
Razor Syntax Samples
This section provides samples that illustrate Razor syntax for a number of common use cases.
Implicit Code Expression
As described previously, code expressions are evaluated and written to the response. This is typically how you display a value in a view:
<span>@model.Message</span>
Code expressions in Razor are always HTML encoded.
Explicit Code Expression
Code expressions are evaluated and written to the response. This is typically how you display a value in a view:
<span>1 + 2 = @(1 + 2)</span>
Unencoded Code Expression
In some cases, you need to explicitly render some value that should not be HTML encoded. You can use the Html.Raw method to ensure that the value is not encoded.
<span>@Html.Raw(model.Message)</span>
Code Block
Unlike code expressions, which are evaluated and outputted to the response, blocks of code are simply sections of code that are executed. They are useful for declaring variables that you might need to use later.
@{
int x = 123;
string y = "because.";
}
Combining Text and Markup
This example shows what intermixing text and markup looks like using Razor.
@foreach (var item in items) {
<span>Item @item.Name.</span>
}
Mixing Code and Plain Text
Razor looks for the beginning of a tag to determine when to transition from code to markup. However, sometimes you want to output plain text immediately after a code block. For example, the following sample displays some plain text within a conditional block.
@if (showMessage) {
<text>This is plain text</text>
}
or
@if (showMessage) { @:This is plain text.
}
Note that two different ways exist for doing this with Razor. The first case uses the special <text> tag. The tag itself is a special tag and is not written to the response; only its contents are written out. I personally like this approach because it makes logical sense to me. If I want to transition from code to markup, I use a tag.
Others prefer the second approach, which is a special syntax for switching from code back to plain text, though this approach works only for a single line of text at a time.
Escaping the Code Delimiter
As you saw earlier in this chapter, you can display @ by encoding it using @@. Alternatively, you always have the option to use HTML encoding:
Razor:
The ASP.NET Twitter Handle is @aspnet
or
The ASP.NET Twitter Handle is @@aspnet
Server-Side Comment
Razor includes a nice syntax for commenting out a block of markup and code.
@*
This is a multiline server side comment.
@if (showMessage) {
<h1>@ViewBag.Message</h1>
}
All of this is commented out.
*@
Calling a Generic Method
Calling a generic method is really no different from calling an explicit code expression. Even so, many folks get tripped up when trying to call a generic method. The confusion comes from the fact that the code to call a generic method includes angle brackets. And as you've learned, angle brackets cause Razor to transition back to markup unless you wrap the whole expression in parentheses.
@(Html.SomeMethod<AType>())
Layouts
Layouts in Razor help maintain a consistent look and feel across multiple views in your application. If you're familiar with Web Forms, layouts serve the same purpose as master pages, but offer both a simpler syntax and greater flexibility.
You can use a layout to define a common template for your site (or just part of it). This template contains one or more placeholders that the other views in your application provide content for. In some ways, it's like an abstract base class for your views.
Let's look at a very simple layout; we'll creatively call it SiteLayout.cshtml:
<!DOCTYPE html>
<html>
<head><title>@ViewBag.Title</title></head>
<body>
<h1>@ViewBag.Title</h1>
<div id="main-content">@RenderBody()</div>
</body>
</html>
It looks like a standard Razor view, but note that there's a call to @RenderBody in the view. This is a placeholder that marks the location where views using this layout will have their main content rendered. Multiple Razor views may now take advantage of this layout to enforce a consistent look and feel.
Let's look at an example that uses this layout, Index.cshtml:
@{
Layout = "∼/Views/Shared/SiteLayout.cshtml";
ViewBag.Title = "The Index!";
}
<p>This is the main content!</p>
This view specifies its layout via the Layout property. When this view is rendered, the HTML contents in this view are placed within the DIV element, main-content of SiteLayout.cshtml, resulting in the following combined HTML markup:
<!DOCTYPE html>
<html>
<head><title>The Index!</title></head>
<body>
<h1>The Index!</h1>
<div id="main-content"><p>This is the main content!</p></div>
</body>
</html>
Notice that the view content, the title, and the h1 heading have all been marked in bold to emphasize that they were supplied by the view and everything else was supplied by the layout.
A layout may have multiple sections. For example, add a footer section to the previous layout, SiteLayout.cshtml:
<!DOCTYPE html>
<html>
<head><title>@ViewBag.Title</title></head>
<body>
<h1>@ViewBag.Title</h1>
<div id="main-content">@RenderBody()</div>
<footer>@RenderSection("Footer")</footer>
</body>
</html>
Running the previous view again without any changes will throw an exception stating that a section named Footer was not defined. By default, a view must supply content for every section defined in the layout.
Here's the updated view:
@{
Layout = "∼/Views/Shared/SiteLayout.cshtml";
ViewBag.Title = "The Index!";
}
<p>This is the main content!</p>
@section Footer {
This is the <strong>footer</strong>.
}
The @section syntax specifies the contents for a section defined in the layout.
Earlier, it was pointed out that, by default, a view must supply content for every defined section. So what happens when you want to add a new section to a layout? Will that break every view?
Fortunately, the RenderSection method has an overload that allows you to specify that the section is not required. To mark the Footer section as optional you can pass in false for the required parameter:
<footer>@RenderSection("Footer", required: false)</footer>
But wouldn't it be nicer if you could define some default content if the section isn't defined in the view? Well, here's one way. It's a bit verbose, but it works.
<footer>
@if (IsSectionDefined("Footer")) {
RenderSection("Footer");
}
else {
<span>This is the default footer.</span>
}
</footer>
Chapter 15 provides a look at an advanced feature of the Razor syntax you can leverage called Templated Razor Delegates to handle default content more elegantly.
Default Layout Changes in MVC 5
When you create a new MVC 5 application using either the Internet or Intranet template, you'll get a default layout with some basic style applied using the Bootstrap framework.
The default layout design has grown up quite a bit over the years. Prior to MVC 4, the design in the default templates was very Spartan—just a block of white text on a blue background. In ASP.NET MVC 4, the default templates were completely rewritten to provide a better visual appearance as well as an adaptive design using CSS Media Queries. It was a big improvement, but it was all custom HTML and CSS.
As mentioned in Chapter 1, the default templates have been updated to use the (justifiably) popular Bootstrap framework. This builds on some of the benefits which drove the MVC 4 template update, but adds a lot more. We'll look at how this works in more detail in Chapter 16.
ViewStart
In the preceding examples, each view specified its layout page using the Layout property. For a group of views that all use the same layout, this can get a bit redundant and harder to maintain.
You can use the _ViewStart.cshtml page to remove this redundancy. The code within this file is executed before the code in any view placed in the same directory. This file is also recursively applied to any view within a subdirectory.
When you create a default ASP.NET MVC project, you'll notice a _ViewStart.cshtml file is already in the Views directory. It specifies a default layout:
@{
Layout = "∼/Views/Shared/_Layout.cshtml";
}
Because this code runs before any view, a view can override the Layout property and choose a different one. If a set of views shares common settings, the _ViewStart.cshtml file is a useful place to consolidate these common view settings. If any view needs to override any of the common settings, the view can set those values to another value.
SPECIFYING A PARTIAL VIEW
In addition to returning a view, an action method can also return a partial view in the form of a PartialViewResult via the PartialView method. Here's an example:
public class HomeController : Controller {
public ActionResult Message() {
ViewBag.Message = "This is a partial view.";
return PartialView();
}
}
In this case, the view named Message.cshtml is rendered; however, if the layout is specified by a _ViewStart.cshtml page (and not directly within the view), the layout is not rendered.
The partial view itself looks much like a normal view, except it doesn't specify a layout:
<h2>@ViewBag.Message</h2>
This is useful in partial update scenarios using Ajax. The following shows a simple example using jQuery to load the contents of a partial view into the current view using an Ajax call:
<div id="result"></div>
@section scripts {
<script type="text/javascript">
$(function(){
$('#result').load('/home/message');
});
</script>
}
The preceding code uses the jQuery load method to make an Ajax request to the Message action and updates the DIV with the id result with the result of that request.
To see the examples of specifying views and partial views described in the previous two sections, use NuGet to install the Wrox.ProMvc5.Views.SpecifyingViews package into a default ASP.NET MVC 5 project, as follows:
Install-Package Wrox.ProMvc5.Views.SpecifyingViews
This adds a sample controller to your project in the samples directory with multiple action methods, each specifying a view in a different manner. To run each sample action, press Ctrl+F5 on your project and visit:
· /sample/index
· /sample/index2
· /sample/index3
· /sample/partialviewdemo
SUMMARY
View engines have a specific, constrained purpose. They exist to take data passed to them from the controller and generate formatted output, usually HTML. Other than those simple responsibilities, or concerns, as the developer you are empowered to achieve the goals of your view in any way that makes you happy. The Razor view engine's terse and simple syntax makes writing rich and secure pages easy, regardless of whether the pages are simple or complex.
All materials on the site are licensed Creative Commons Attribution-Sharealike 3.0 Unported CC BY-SA 3.0 & GNU Free Documentation License (GFDL)
If you are the copyright holder of any material contained on our site and intend to remove it, please contact our site administrator for approval.
© 2016-2026 All site design rights belong to S.Y.A.