PHP, MySQL, JavaScript & HTML5 All-in-One For Dummies (2013)
Book III: JavaScript
Chapter 2: Building a JavaScript Program
In This Chapter
![]() Understanding the basic syntax of JavaScript
Understanding the basic syntax of JavaScript
![]() Implementing JavaScript functions
Implementing JavaScript functions
![]() Working with JavaScript and HTML
Working with JavaScript and HTML
![]() Using JavaScript with a web browser
Using JavaScript with a web browser
The preceding chapter shows how to add the JavaScript tag to a page, and this chapter concentrates on what you can do after that. Key to understanding a programming language is learning its syntax. Just like when you learn a foreign language and you need to learn the words and grammar of the language, the syntax of a programming language is just that: the words and grammar that make up the language.
JavaScript is viewed through a web browser and programmed in a text editor, just like HTML and CSS. The examples you see throughout this chapter can be programmed just like any of the other examples you see throughout the book.
In this chapter, you’ll see how to build a JavaScript program, including some of the ins and outs of programming in JavaScript.
Getting Started with JavaScript Programming
Since this might be your first exposure to programming of any kind, this section starts with some basic information to get you up to speed.
Sending an alert to the screen
You can use JavaScript to send an alert to the screen. Although this isn’t used much on web pages, you do use it for troubleshooting your programs, and it’s a quick way to see JavaScript in action too.
Begin by opening your text editor with a new or blank document. In the text editor, place the following HTML and JavaScript:
<!doctype html>
<html>
<head>
<title>Another Basic Page</title>
</head>
<body>
<h1>Here's another basic page</h1>
<script type="text/javascript">
alert("hello");
</script>
</body>
</html>
Save the file as basic.html in your document root.
View the page by opening your web browser and navigating to http://localhost/basic.html. You should see a page like that in Figure 2-1.
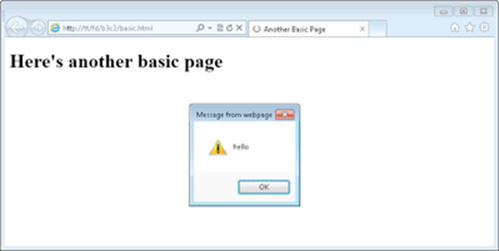
Figure 2-1: Loading a page with an alert.
Click OK to dismiss the alert.
Congratulations, you’re now a JavaScript programmer!
Looking at that program, contained in a single line between the opening and closing <script> tags, there's just the word alert with the word "hello" enclosed in quotes and parentheses. The word alert is actually a built-in function (more on functions later in the Using Functions to Avoid Repeating Yourself section).
 The line of JavaScript ends with a semicolon. That’s an important concept and should be a primary takeaway from this exercise: You end almost every line of JavaScript with a semicolon.
Adding comments
Just like the alert function is useful, so too are comments, which are like sticky notes for your code. A comment can be used so that you remember what a certain piece of code is supposed to do or can be used to skip over parts of the code that you don't want to run.
A common form of comment begins with two slashes, like this:
// This is a comment
You see that form of comment in the preceding chapter. The words that follow the two slashes won’t be read by the web browser, but they can be read by people viewing your JavaScript so keep it clean!
Another type of comment begins with a front slash and an asterisk, like this /*, and closes with an asterisk and a front slash, like this */. With that style of comment, everything in between the opening and closing comment isn't read.
/*
This won't be read, it's in a comment
*/
Holding data for later in variables
When you work with a programming language like JavaScript, you frequently need to hold data for later use. You’ll get a value, such as input from a form that the user fills out, and then you’ll need to use it later.
To hold data, you use a variable, which keeps track of the data that you tell it to store for the lifetime of your program. That’s an important concept: The contents of a variable only live as long as your program. Unlike data in a database, there’s no persistence for variable data.
Variables are defined in JavaScript with the var keyword, short for variable.
var myVariable;
 JavaScript is case sensitive. You see in the example that the var keyword is lowercase and the variable myVariable uses mixed case. It's important to use the same case for variable names and always be aware that, for instance, MYVARIABLE is not the same as myVariable ormyvariable. Always follow case sensitivity for JavaScript, and you'll never have a problem with it!
When you create a variable, it’s common to give it some data to hold onto. You do this with the equals sign:
var myVariable = 4;
That bit of code sets the variable named myVariable equal to the number 4. If you don't set the variable right when you create it, like in that example, you can set it any time merely by setting it equal to the value that you want. Here's an example:
var myVariable;
myVariable = 4;
You can take a spin with variables by modifying the JavaScript you created in the preceding exercise to look like that in Listing 2-1.
Listing 2-1: Trying Out a Variable
<!doctype html>
<html>
<head>
<title>JavaScript Chapter 2</title>
</head>
<body>
<h1>Here's another basic page</h1>
<script type="text/javascript">
var myVariable = 4;
alert(myVariable);
</script>
</body>
</html>
If you view that code in a browser, you’ll see an alert like the one shown in Figure 2-2.
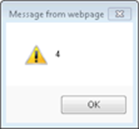
Figure 2-2: Displaying the contents of a variable.
JavaScript variables can hold strings, which are essentially words enclosed in quotes, or numbers, like you saw in the example.
Variables need to be named in a certain way. Variables need to begin with a letter and can’t begin with a number. Though certain special characters are fine, in general variables should contain only letters and numbers. Variable names should be descriptive of what they contain or what they do.
Holding multiple values in an array
Variables hold one thing and they do it well, but there are times when you want to hold multiple things. Sure, you could just create multiple variables, one for each thing. You could also create an array. An array is a special type of variable used to hold multiple values. Here’s an example:
var myArray = ["Steve","Jakob","Rebecca","Owen"];
This array contains four things, known as elements. You see more about arrays later, when we tell you about loops.
Creating strings to keep track of words
When you place words in quotes in JavaScript you create what’s called a string. It’s typical to place the contents of strings into variables, like this:
var aString = "This is a string.";
Strings can contain numbers, and when you put a number in quotes it will be a string. The key is the quotes, as shown here:
var anotherString = "This is more than 5 letters long!";
 Strings can be enclosed in single quotes or double quotes.
Strings can be put together using the plus sign (+), as in the exercise you're about to work through.
Joining strings is called concatenation, and we talk a little more about that when we tell you about joining strings in Book IV, Chapter 1.
To practice creating a concatenated string, begin by opening your text editor with a new or blank document.
In the text editor, place the following HTML and JavaScript:
<!doctype html>
<html>
<head>
<title>JavaScript Chapter 2</title>
</head>
<body>
<h1>Here's another basic page</h1>
<script type="text/javascript">
var myString = "Partly" + "Cloudy";
alert(myString);
</script>
</body>
</html>
Save the file as string.html in your document root.
Open your browser and view the page by going to http://localhost/string.html. You should see an alert like the one in Figure 2-3.
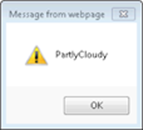
Figure 2-3: A concate-nated string.
Look closely at Figure 2-3. Notice that there’s no space between the words Partly and Cloudy. In order to have a space there it needs to be added either on the end of the word Partly or at the beginning of the word Cloudy.
Working with numbers
You already saw that JavaScript variables can hold numbers. You can also do math with JavaScript, either directly on the numbers or through variables. For example, adding two numbers:
var myNumber = 4 + 4;
Subtraction is accomplished with the minus sign (-), division with the front slash (/), and multiplication with the asterisk (*).
//Subtraction
var subtraction = 5 - 3;
//Division
var division = 20 / 5;
//Multiplication
var multiply = 2 * 2;
Testing Things with Conditionals
With a few pages of JavaScript primer done, it’s time to look at a way to make decisions with JavaScript. These decisions are called conditionals. A good way to explain them is by explaining Steve’s thought process around mowing the lawn: If it’s greater than 75 degrees, then it’s too hot to mow. If it’s raining, then he can’t mow. Otherwise, he can mow the lawn. This can be set up in JavaScript something like this:
if (temperature > 75) {
alert("It's too hot to mow");
} else if (weather == "raining") {
alert("It's raining, can't mow");
} else {
alert("Gotta mow");
}
That little bit of code reveals all you need to know about conditionals in JavaScript! You test a condition and then do something based on the results of that condition.
When you set up a condition, you use parentheses to contain the test and everything that you want to happen then appears between the opening and closing braces.
Conditionals are one of the cases where you don’t end each line with a semicolon.
Here’s an exercise that you can experiment with to work with conditionals. Begin by opening your text editor with a new or blank document. In the text editor, place the following HTML and JavaScript:
<!doctype html>
<html>
<head>
<title>JavaScript Chapter 2</title>
</head>
<body>
<h1>Here's another basic page</h1>
<script type="text/javascript">
var temperature = 76;
var weather = "raining";
if (temperature > 75) {
alert("It's too hot to mow");
} else if (weather == "raining") {
alert("It's raining, can't mow");
} else {
alert("Gotta mow");
}
</script>
</body>
</html>
Save the file as cond.html in your document root, and view the page in a browser by going to http://localhost/cond.html. You should see an alert like the one in Figure 2-4.
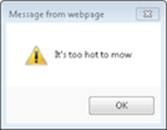
Figure 2-4: An alert based on a conditional test.
Click OK to dismiss the alert.
To see how the program responds when you change a value, within the editor, change the value for temperature to 70. Here’s the code; the line that changed is in bold:
<!doctype html>
<html>
<head>
<title>JavaScript Chapter 2</title>
</head>
<body>
<h1>Here's another basic page</h1>
<script type="text/javascript">
var temperature = 70;
var weather = "raining";
if (temperature > 75) {
alert("It's too hot to mow");
} else if (weather == "raining") {
alert("It's raining, can't mow");
} else {
alert("Gotta mow");
}
</script>
</body>
</html>
Save cond.html.
Reload the page in your browser by pressing Ctrl+R or Command+R. You should see an alert like the one in Figure 2-5.
Figure 2-5: Getting into the else if condition.
Click OK to dismiss the alert.
Take a look at what happens when you change another variable. Within cond.html, change the weather variable to "sunny". The code should look like this; again the change has been bolded.
<!doctype html>
<html>
<head>
<title>JavaScript Chapter 2</title>
</head>
<body>
<h1>Here's another basic page</h1>
<script type="text/javascript">
var temperature = 70;
var weather = "sunny";
if (temperature > 75) {
alert("It's too hot to mow");
} else if (weather == "raining") {
alert("It's raining, can't mow");
} else {
alert("Gotta mow");
}
</script>
</body>
</html>
Save cond.html and reload the page in your browser. You should see an alert like the one in Figure 2-6.
Figure 2-6: Getting into the else condition.
Click OK to dismiss the alert.
If a test fails, a conditional can be set up to run another test. In the case of the example, a second test is set up to look at the weather to see if it's raining. Notice the use of the double equals signs in the else if condition.
Finally, if all tests fail then a block of code can be set up so that it runs when all else fails. This is noted by the else keyword in the code sample.
It’s important to note that once a condition is true, in the example once the temperature is greater than 75, the code in that block will execute but none of the other conditions will be evaluated. This means that none of the other code in any of the other blocks will ever run.
Performing Actions Multiple Times with Loops
Sometimes you want to repeat the same code over and over again. This is called looping, and JavaScript includes a couple ways to do it, including for and while.
For what it’s worth
If you want to do something multiple times in JavaScript, a common way to do it is with a for loop. A for loop has pretty specific syntax, as you see here:
for (var i = 0; i < 10; i++) {
// Do something here
}
That structure includes three specific things within the parentheses.
![]() Variable: First, a variable is set up, in this case simply called i. That variable is set to the number 0.
Variable: First, a variable is set up, in this case simply called i. That variable is set to the number 0.
![]() Condition: Next is the condition to be tested. In this case, the loop tests whether the variable i is less than 10. If i is less than 10, the code inside the braces runs.
Condition: Next is the condition to be tested. In this case, the loop tests whether the variable i is less than 10. If i is less than 10, the code inside the braces runs.
![]() Postfix operator: The final piece of the for loop construct increments the i variable using something called a postfix operator (i++), which basically increments the value by 1.
Postfix operator: The final piece of the for loop construct increments the i variable using something called a postfix operator (i++), which basically increments the value by 1.
In plain language, this loop creates a variable and sets it to 0, then it tests to see whether the variable is still less than 10. If it is, then the code within the block is executed. For now, that code is merely a comment so nothing happens. If not, then the variable is incremented by 1 and the whole thing starts all over again.
The first two parts of a for loop use semicolons; the last part doesn't.
The first time through, the variable i is 0, which is (obviously) less than 10 — and the code inside the block executes so that i is incremented by 1. The next time through, the value of i is 1, which is still less than 10, so the code in the block is executed again. This keeps going until the value of i is 10.
Try it out with an exercise. Begin by opening your text editor with a new or blank document. In the text editor, place the following HTML and JavaScript:
<!doctype html>
<html>
<head>
<title>JavaScript Chapter 2</title>
</head>
<body>
<h1>Here's another basic page</h1>
<script type="text/javascript">
for (i = 0; i < 10; i++) {
alert("The variable i is currently set to " + i);
}
</script>
</body>
</html>
Save the file as for.html in your document root.
View the file in a browser by going to http://localhost/for.html. You'll see a series of alerts, one of which is shown in Figure 2-7.
Figure 2-7: The results of a for loop.
Now take a look at how to determine the length of an array. Earlier in the chapter you saw an array like this one:
var myArray = ["Steve","Jakob","Rebecca","Owen"];
A common use of a for loop is to spin through an array and do something with each value. The conditional in the example for loop you saw earlier set the value at 10. But how do you know how many values are in an array? Yes, you easily could count the number of variables in the array shown, but sometimes you have no idea how many elements are in an array.
You can ask the array itself to tell you how long it is by asking it. You ask through the length property, like this:
myArray.length;
Listing 2-2 shows an example that loops through the array shown and displays each element.
Listing 2-2: Using a for Loop on an Array
<!doctype html>
<html>
<head>
<title>JavaScript Chapter 2</title>
</head>
<body>
<h1>Here's another basic page</h1>
<script type="text/javascript">
var myArray = ["Steve","Jakob","Rebecca","Owen"];
for (i = 0; i < myArray.length; i++) {
alert("Hello " + myArray[i]);
}
</script>
</body>
</html>
This code uses a standard for loop but instead of setting the length to a certain number, it uses the length property to find out how long myArray really is. Each time through the loop, an alert is shown, like the one in Figure 2-8.
Figure 2-8: Displaying an alert from an array.
The i variable is used right within the loop, to access each element of the myArray variable. You see, an array is an ordered list of things, with the order being provided by numbers that you don't normally see. These hidden numbers are called indexes. The index of the first element in an array is 0 (not 1 as you might expect).
In this example, since i is 0 the first time through the loop it can access the first element. The second time through the loop, as shown in Figure 2-8, i is equal to 1 and so the second element is shown.
The syntax that you see there, myArray[i], is a really common syntax that you see in for loops.
While you’re here
Another type of loop is called a while loop, and it looks like this:
while (i < 10) {
// Do something interesting
// Don't forget to increment the counter!
}
A while loop is similar to a for loop insofar as the code within the braces executes as long as the condition is true. Unlike a for loop, though, you need to explicitly do something inside of the loop in order to break out of the loop. If you forget, you'll be stuck in an endless loop!
Using Functions to Avoid Repeating Yourself
A good programming practice is to reuse code whenever possible. Not only does this cut down on the number of possible errors in your code, but it also makes for less work, which is always good when it comes to coding. This section looks at a primary way to implement code reuse: functions.
JavaScript includes a number of built-in functions. You've been using one throughout the chapter: alert(). The alert() function creates a dialog in the browser.
Creating functions
Functions are created with the function keyword followed by the name of the function, parentheses, and opening and closing braces, like this:
function myFunction() {
// Function code goes here
}
What you do inside of the function is up to you. Anything that you can do outside of the function you can do inside of it. If you find that your page needs to update a bunch of HTML, you could use a function so that you don’t need to keep repeating that same code over and over again.
Adding function arguments
The power of functions comes with their capability to accept input, called arguments, and then do something with that input.
For example, here’s a simple function to add two numbers:
function addNumbers(num1,num2) {
alert(num1+num2);
}
This function accepts two arguments called num1 and num2. Those arguments are then used within the alert() function. You've seen the alert() function throughout the chapter and now you understand a bit more about what's going on! The alert() function accepts one argument, the text to display in the alert dialog. In this case, because you're adding two numbers the alert displays the resulting number. You work through an exercise for this in the following section.
Calling a function
Just creating the function isn't enough; you need to call it too. Calling a function means that you execute it, just like when you called the alert() function earlier in this chapter. Until you call a function it doesn't really do anything, much like the alert() function doesn't do anything until you invoke it.
Calling one of your own functions looks just like the call to the alert() function. Here's that exercise we promised. Begin by opening your text editor with a new or blank document. In the text editor, place the following HTML and JavaScript:
<!doctype html>
<html>
<head>
<title>JavaScript Chapter 2</title>
</head>
<body>
<h1>Here's another basic page</h1>
<script type="text/javascript">
// Define the function
function addNumbers(num1,num2) {
alert(num1+num2);
}
// Call the function
addNumbers(49,2);
</script>
</body>
</html>
Save the file as func.html in your document root. Open your browser and point to http://localhost/func.html. You should see an alert like the one shown in Figure 2-9.

Figure 2-9: Executing a function.
Improving the addNumbers function
The function that you've created, addNumbers(), accepts two arguments and adds them. But what if you send in something that isn't a number? The function has no way to test that and so it happily tries to add them. To experiment with this, change the 2 in the call to addNumbers to "two", like this:
addNumbers(49,"two");
When you reload the page, you’ll see an alert like the one in Figure 2-10.
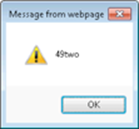
Figure 2-10: Trying to add something that isn’t a number.
JavaScript includes a function to test whether something is a number. The function is called isNaN(), which stands for is not a number. This can be added anywhere that you need to test to make sure something is a number before working with it, like in the case of the addNumbers()function. You use the isNaN() function within an if conditional and then react accordingly if it isn't a number. Here's an updated addNumbers() function:
function addNumbers(num1,num2) {
if (isNaN(num1)) {
alert(num1 + " is not a number");
} else if (isNaN(num2)) {
alert(num2 + " is not a number");
} else {
alert(num1+num2);
}
}
If you call it with one of the two arguments as something other than a number, you'll receive an alert stating that. For example, if you changed the number 2 to "two", you'd receive the alert shown in Figure 2-11.
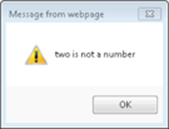
Figure 2-11: An alert generated using isNaN().
JavaScript is case sensitive, so you need to make sure you use isNaN() with the correct case.
You see variations on functions throughout the remainder of the book that help build on this introduction.
Returning results from functions
The function that you created in this section sends an alert. But there are times when you want to have the function send something back to you — to do something and then return the results.
The return keyword is used to return results from a function. In the addNumbers() function example shown, instead of using an alert() right within the function you could return the result. Here's an example:
function addNumbers(num1,num2) {
var result = num1+num2;
return result;
}
You can call the function just like before, but you now need to capture the result, typically into another variable, like this:
var myResult = addNumbers(49,2);
Listing 2-3 shows the full HTML for this example:
Listing 2-3: Returning a Value from a Function
<!doctype html>
<html>
<head>
<title>JavaScript Chapter 2</title>
</head>
<body>
<h1>Here's another basic page</h1>
<script type="text/javascript">
// Define the function
function addNumbers(num1,num2) {
var result = num1+num2;
return result;
}
// Call the function
var myResult = addNumbers(49,2);
</script>
</body>
</html>
Only one return is allowed from a function and nothing after the return statement executes. Once you call a return, the function ends.
Objects in Brief
You've seen arrays and how they can be used to hold multiple values. Arrays hold that data using an unseen numbered index. On the other hand, objects can hold multiple values but those values are accessed through a named index, called a property. Objects can actually do a lot more than this, such as hold functions (called methods) but for this example, consider this narrow focus, using an object to hold multiple values.
Creating objects
Here’s an example object for a ball:
var ball = {
"color": "white",
"type": "baseball"
};
Whereas arrays are created with square brackets, objects are created with curly braces, as shown in the example. When you define an object, you can define one or more properties (akin to the elements in an array). In this instance, you created two properties, one called color and one called type. The values are then set to white and baseball, respectively.
You can access objects using a single dot, like so:
ball.color
The single dot is known as dot notation when used in this way.
Listing 2-4 shows HTML to create a ball object and display its color property.
Listing 2-4: Creating an Object and Displaying a Property
<!doctype html>
<html>
<head>
<title>JavaScript Chapter 2</title>
</head>
<body>
<h1>Here's another basic page</h1>
<script type="text/javascript">
var ball = {
"color": "white",
"type": "baseball"
};
alert(ball.color);
</script>
</body>
</html>
When viewed in a browser, you get an alert like the one shown in Figure 2-12.
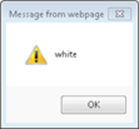
Figure 2-12: Displaying an object property.
Adding properties to objects
Sometimes you want to add properties onto objects after they’ve been created. This too can be done using dot notation, like so:
ball.weight = 15;
Here’s an exercise to create an object, add to it, and then loop through it using a new kind of loop constructor. Begin by opening your text editor with a new or blank document. In the text editor, place the following HTML and JavaScript:
<!doctype html>
<html>
<head>
<title>JavaScript Chapter 2</title>
</head>
<body>
<h1>Here's another basic page</h1>
<script type="text/javascript">
var ball = {
"color": "white",
"type": "baseball"
};
ball.weight = 15;
for (var prop in ball) {
alert(ball[prop]);
}
</script>
</body>
</html>
Save this as obj.html in your document root. View the page in a browser by going to http://localhost/obj.html. You should see three alerts, like the ones in Figure 2-13.
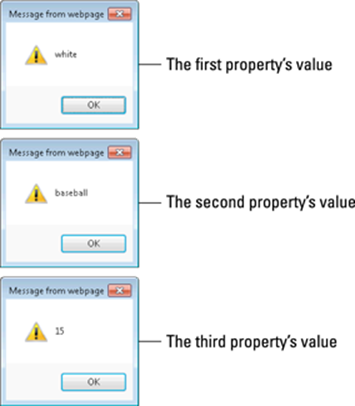
Figure 2-13: Three object property alerts.
As you can see from the alerts, the properties that were created right along with the object are shown, as is the weight property that was added later using the dot notation.
Later in this chapter, you see much more about objects, so this bit of background will be helpful.
Working with HTML Documents
All this JavaScript programming gets put to practical use when you start adding it to web pages. JavaScript integrates into HTML and has access to everything in a web page. This means that you can add HTML to a page, take it away, or change it, all on the fly, in real time.
In order to work together, JavaScript and HTML need a common language so that JavaScript can know what to do on a page. JavaScript and HTML work together through something called the Document Object Model (DOM). The DOM gives JavaScript access to a web page so that it can manipulate the page.
The connection between JavaScript and HTML is through the document object. You see the document object used in this section along with other functions to access pieces of a page using JavaScript. The document object is actually a child of the window object and there are other children that are interesting too, as you see later in this chapter.
Accessing HTML with JavaScript
You access parts of a web page, the document object, using JavaScript functions. You can look at a piece of the page to see what text it has in it or change the text in the page. You can also add to the page with JavaScript and much more.
Using GetElementById to access a specific element
The most specific way that you can access an element on a page is to use its ID. Recall that ID attributes can be placed on any element, and they’re (supposed to be) unique throughout the page. In this way, each element that is already part of the DOM can be accessed directly rather than by traversing the document tree.
Consider the HTML in Listing 2-5.
Listing 2-5: Basic HTML for Demonstrating the DOM
<!doctype html>
<html>
<head>
<title>Chapter 2</title>
</head>
<body>
<div id="myDiv">Hello</div>
<div class="divClass">Second Line</div>
<div class="divClass">
<p class="pClass">This is in a paragraph.</p>
</div>
<div class="divClass">Last Line</div>
</body>
</html>
That HTML, when viewed in a browser, creates a page like the one shown in Figure 2-14.
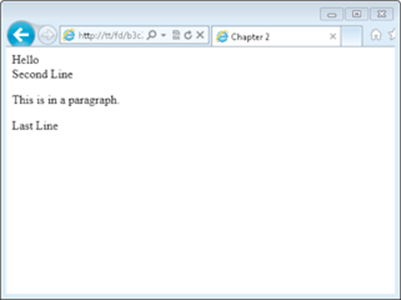
Figure 2-14: Creating a basic page to demonstrate the DOM.
Looking at the HTML again, you can see an ID attribute on the first <div> on the page. You can use the getElementById function to access that element. You're saying, "Great, I can access the element but what can I do with it?" Glad you asked.
When you access an element, you view its current HTML or make changes such as CSS styling or the actual contents of the element itself. Try it out in an exercise.
1. Open your text editor with a new or blank document.
2. In the text editor, place the following HTML and JavaScript:
<!doctype html>
<html>
<head>
<title>Chapter 2</title>
</head>
<body>
<div id="myDiv">Hello</div>
<div class="divClass">Second Line</div>
<div class="divClass">
<p class="pClass">This is in a paragraph.</p>
</div>
<div class="divClass">Last Line</div>
<script type="text/javascript">
var theDiv = document.getElementById("myDiv");
alert("The content is " + theDiv.innerHTML);
</script>
</body>
</html>
3. Save the file as getbyid.html in your document root.
4. Open your web browser and view the page at http://localhost/getbyid.html.
You should see an alert like the one shown in Figure 2-15.
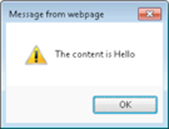
Figure 2-15: An alert produced by the getElementById function.
5. Click OK to dismiss the alert and close your browser.
6. Back within getbyid.html in your editor, remove the JavaScript line that begins with alert(. Replace that line with these two:
theDiv.style.border = "3px solid black";
theDiv.innerHTML = "This is now changed text.";
The entire script block should now look like this:
<script type="text/javascript">
var theDiv = document.getElementById("myDiv");
theDiv.style.border = "3px solid black";
theDiv.innerHTML = "This is now changed text.";
</script>
When viewed in a browser, the page now looks like that in Figure 2-16. Notice specifically that the text of the top line has been changed and now has a border.
In this exercise, you created HTML and JavaScript. In the JavaScript, you accessed an HTML element using the getElementById function. From there you displayed it using an alert().
The second part of the exercise saw you change the element's contents using innerHTML and also change the CSS style of the element using the style.border property.
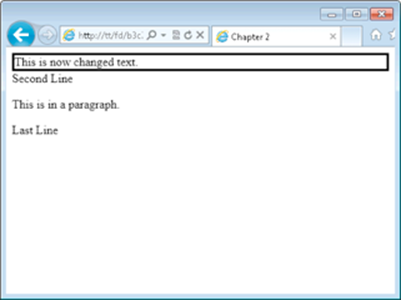
Figure 2-16: The page after changing it with getElementById.
You've now seen how to use getElementById as part of the DOM in JavaScript, so check that one off of your bucket list. It's good to have the understanding that getElementById is there in case you need to work with someone else's JavaScript. However, there's a better way to work with web pages through JavaScript and it's called jQuery. You learn about jQuery in the next chapter of this minibook. For now, savor your victory over the DOM.
Working with Web Browsers
This JavaScript primer wraps up with a quick look at JavaScript's view of the web browser. As you just saw, when a page is loaded, the document object gives a view of the page to JavaScript. Likewise, a couple other objects give JavaScript a view of the web browser itself.
Using these objects, which are children of the window object, you can do things like detect what type of browser the visitor is using and also redirect the user to a different web page entirely.
Detecting the browser
The navigator object is used to detect things about the visitor's browser, like what version it is. This information can be used to present a specific page or layout to the user.
Limitations of browser detection
When you use a method like the one shown here, you need to be aware that it isn't always accurate. Detecting the browser in this way relies solely on what the browser claims that it is and this information can be trivially faked by the user. Therefore, when you use the navigator object (or any other "User Agent Sniffer") method, you should be aware that there are limitations to its accuracy and it is definitely not 100% foolproof.
Listing 2-6 shows HTML and JavaScript to display the userAgent property of the navigator object.
Listing 2-6: Displaying the User Agent
<!doctype html>
<html>
<head>
<title>Chapter 2</title>
</head>
<body>
<div id="output"></div>
<script type="text/javascript">
var outputDiv = document.getElementById("output");
outputDiv.style.border = "3px solid black";
outputDiv.style.padding = "3px";
var userAgent = navigator.userAgent;
outputDiv.innerHTML = "You are using " + userAgent;
</script>
</body>
</html>
When viewed in a browser, the output looks like that in Figure 2-17. Note that if you run this code, your browser version will likely be different than this.
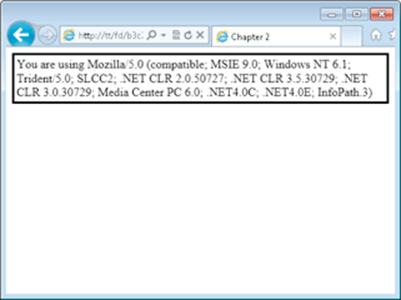
Figure 2-17: Viewing the userAgent property.
Redirecting to another page
You’ve probably encountered one somewhere along the way, a page that says “Click here if you’re not automatically redirected” and then automatically redirects you anyway. Did you ever wonder why they bother with the “Click here” part? That’s done in case your browser doesn’t have JavaScript enabled. This section shows the code for such a page.
The location object provides the capability to redirect to another page, and it's one of the simplest JavaScript pages you'll ever write. Listing 2-7 shows the HTML and JavaScript.
Listing 2-7: A Redirect Page
<!doctype html>
<html>
<head>
<title>Chapter 2</title>
</head>
<body>
<div>
<a href="http://www.braingia.org"> Click here if you're not automatically redirected...
</a>
</div>
<script type="text/javascript">
window.location.replace("http://www.braingia.org");
</script>
</body>
</html>
A page viewed in a browser looks like the one in Figure 2-18, but only for a short time. In fact, you may not even see it before being redirected!
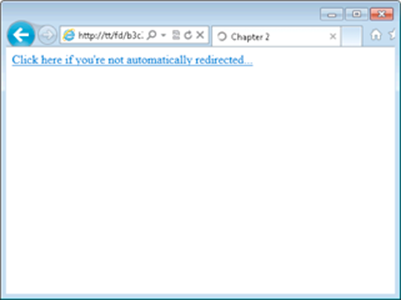
Figure 2-18: The redirect page just prior to being redirected.
The HTML for this page simply sets up a basic <a> element with a link, no JavaScript necessary. Then the JavaScript uses the location.replace object to send the user to a different page. Almost nothing to it!
There's more to both the navigator and location objects in JavaScript. For more information on the navigator object, go to this page on Mozilla Developer Network:
https://developer.mozilla.org/en-US/docs/DOM/window.navigator
For more information on the location object, see this page:
https://developer.mozilla.org/en-US/docs/DOM/window.location