Jump Start PHP Environment (2015)
Chapter 7 Composer
This chapter deals exclusively with Composer, the PHP package manager. If you’re familiar with the tool, feel free to move onto the next chapter.
Spaghetti Western
Let’s talk about what led to the development of Composer in the first place.
Back when PHP was first created, a “web application” consisted of individual files of PHP code which, when used in the right order, solved many of what was then modern web development problems (submitting forms, writing to the database, and so on). If you had a file called file-a.phpwith a specific bit of logic and file-b.php with more logic, and you wanted to use them both, you would include them in yet another file, file-c.php.
For example, say file-a.php has the code:
<?php
$word1 = "Hello";
?>
and file-b.php has the code:
<?php
$word2 = "World";
?>
You could use them in file-c.php like so:
<?php
include 'file-a.php';
include 'file-b.php';
echo "I am now using file-a and file-b, yay! {$word1} {$word2}!";
?>
This would output:
I am now using file-a and file-b, yay! Hello World!
With more files, the include lists grew larger and larger. It follows then that PHP applications were mile-long invocations of these helper scripts, one after the other. We call this code spaghetti code because it’s a mess―one line intertwined with the next, no structure or order, a bit of logic calling another bit of logic that’s defined in an arbitrary external location. Spaghetti code is very hostile to other developers (or even the original developer a couple of months later!).

Figure 7.1. Spaghetti mess
With the advent of object-oriented PHP in version 5, we gained the ability to write blocks of code called classes. A class grouped together logic that belonged in a specific context. Specifically, in the realm of the Web, a User class could have the methods (aka internal functions, abilities)login and logout.
In an application, using this class would allow a developer to implement login and log-out functionality. Classes could talk to other classes by including them just like the files above (for example, a User class could include a Database class in order to use it to check if the database contains the matching username and password combination), but has the added advantage of being transparent about their context. After all, it was very easy to find out what a certain class was intended to do by just looking inside its file, or even at its name alone.
Different classes with related contexts are called a package (also known as a library). In the same package, one class could be dedicated to handling user logins and log-outs, another to sending “reset password” emails, yet another to checking the role of a user (admin, guest), and so on. The whole package could then be called Authentication.
But as packages and classes proliferated, the problem of collisions appeared. If I had a class User and borrowed, for example, Jim's User class, trying to use them at the same time to get the best of both worlds would cause an error in PHP (maybe his User class also supported profile picture uploads, which mine lacked). Two classes cannot have the same name because PHP has no idea which of the two classes to use! In PHP version 5.3, this problem was solved with namespaces.
Namespaces and Ye Olde Package Management
A common feature in some other languages, namespaces found their way into PHP with version 5.3. They sound intimidating, but in reality they're literally just prefixes in front of PHP class names.
The aforementioned User class by our buddy Jim would thus be called Jim\User (the backslash \ is special notation used to separate fragments of namespaces; this allows namespaces to be nested into an arbitrary number of levels), while ours could be called SitePoint\Authentication\User. While their final “name” is the same (User), their fully qualified names are different, and PHP is happy to let us use both at the same time.
But still, using several packages and classes means we have to include them all, just like the previous example above―one file “calling” the others by filename, making sure they're summoned for use. There are some ways around this, of course―special functions called “autoloaders” were developed that looked for classes in locations based on their names (for example, Jim\User could be in classes\Jim\User.php); however, it is still tedious to not only find other people's classes, but also effectively include them and make them conform to the autoloader function in use.
To solve this problem, we use a tool called Composer.
What is Composer?
Composer is a package manager for PHP. We already defined a package as a collection of classes. So what’s a package manager, then?
A package manager is a tool that removes the human element from the process of finding and installing packages or programs into an environment. If you're using OS X, for example, there is a package manager for the OS called Homebrew. Rather than scour the Web in search of an application such as MPlayer, a media player, one can use the terminal to run the command:
brew install mplayer
Like magic, the application will be installed and instantly available. On Linux operating systems, there are several package managers. A popular one is Aptitude and is used in a similar fashion:
sudo apt-get install chrome
This command installs the latest Chrome browser, just like that.
Package managers make sure packages (an application is a package―it’s a set of files working together towards a singular purpose, be it media playback, web browsing, or something else entirely) are installed cleanly, quickly, and safely.
Similarly, in the context of programming languages (such as PHP), a package manager is used to retrieve, install, update, and uninstall packages. While the grunt work of setting up autoloading for classes without Composer is easy enough, Composer removes the process completely. It automates the manual process of finding a package online, downloading it, unzipping, putting it into your project’s folder, including it, configuring it, and so on.
Composer ties into Packagist, the de facto online directory of packages from PHP users. Let’s explain what happens when you install a package with Composer.
Installing packages with Composer is as easy as calling Composer’s require command while inside the folder of your application:
composer require nesbot/carbon
At this point Composer will, in order:
1. Look at the argument after require and determine that it is a valid package name. Note that package names use the normal forward slash (/).
2. Look at its configuration (a special file called composer.json) for information on where to find nesbot/carbon. No information is found, so it will move to the next step.
3. Go to Packagist and look up the entry for nesbot/carbon. If it’s there, it then moves to the next step.
4. Read the configuration of that package to find out if the package itself has any dependencies (which are other packages it needs to do what it does). It then starts the process over for each of them before finishing nesbot/carbon.
5. After all dependencies have been installed, it downloads nesbot/carbon, updates an autoload file (located in the main project’s folder, under vendor/autoload.php by default), and makes sure the newly installed package is usable in your application.
To use this package, ensure that the aforementioned autoload.php file is included in your app. This only needs to be done once, regardless of how many packages you install. They’re all autoloaded with this one file:
<?php
include 'vendor/autoload.php';
This might seem a bit abstract, so let’s see it in action.
Usage Example
PHP has a built-in class called DateTime (documented at http://php.net/manual/en/class.datetime.php), which can be used to do time-related calculations and operations. The class is somewhat unintuitive, however.
The nesbot/carbon package has a single class with the ability to manipulate time. Well, not manipulate time per se―PHP isn’t that powerful (yet!)―but to manipulate DateTime values.
Carbon was developed as an upgrade of DateTime, and lets you use very human expressions to obtain the values you need. Let’s try and use this handy package! As per the Carbon instructions, we could just download, unzip, and manually include it in our project with include 'Carbon.php'; however, it really is recommended that you use Composer every chance you can.
Bootstrapping
We start off by booting up a new virtual machine, as per Chapter 4. The following five commands executed from the host computer’s terminal do everything for us:
git clone https://github.com/swader/homestead_improved hi_carbontest
cd hi_carbontest;
bin/folderfix.sh
vagrant up
vagrant ssh
The last command enters the VM, so you’re inside it, as if connected to a server. Then, execute:
cd Code
touch index.php
The touch command creates an empty file with the given name.
Open this index.php file with your text editor or IDE of choice, either in the terminal with vim index.php or on your host machine by going into the folder and double clicking on it. Then give it the content:
<?php
echo "Hello World";
Save and exit the file, then in the terminal inside the VM run:
php index.php
You should see “Hello World” appear onscreen.
Note: Command Line Interface Mode
In this instance, we are executing PHP on the command line for the sake of simplicity. In other words, we’re not using the browser to see the output. Rather, we’re having PHP print its output on the screen of the terminal. This is also called CLI mode, which is short for “Command Line Interface.”
Installing Carbon
Composer usually has to be manually installed onto fresh servers, but our Homestead Improved VM comes with Composer pre-installed and accessible from any location, so all we need to do is execute:
composer require nesbot/carbon
As soon as the procedure is done, reopen the index.php file from earlier, and add a new line after <?php so that it now looks like this:
<?php
include 'vendor/autoload.php';
echo "Hello World";
Including the vendor/autoload.php file ensures that the classes we install with Composer are automatically loaded into our application, without the need for manually specifying include or require statements to combine them all into one app.
Testing
Now that Carbon is installed and autoloaded into our application, we can give it a try.
In index.php, instead of the Hello World line, add the following code so that the file now looks like this:
<?php
include 'vendor/autoload.php';
echo Carbon\Carbon::now();
echo "\n";
The last line prints out a blank line, so the output looks prettier.
Then, in the terminal, run php index.php. You should see a message not unlike Figure 7.2.
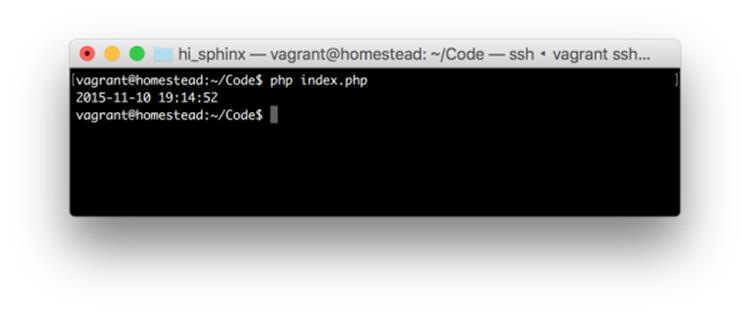
Figure 7.2. Example output
It works! Let’s find out what day of the week it will be this time in five years by adding the line:
echo Carbon\Carbon::now()->addYears(5)->dayOfWeek;
You should see output similar to Figure 7.3.
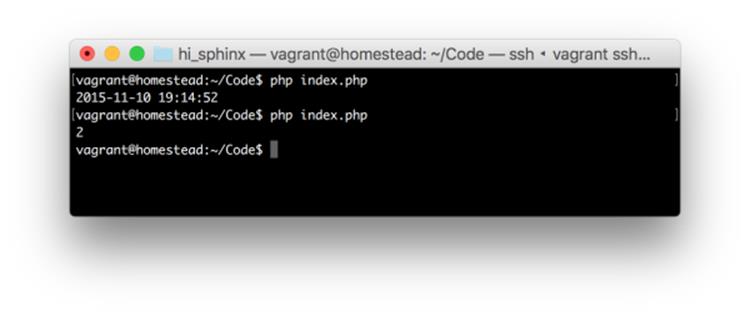
Figure 7.3. Example output 2
This first creates a new “current time” with now(), adds five years to it, and then grabs the day of week out of that value. Days start on Sunday (0), so Wednesday is 3, Friday is 5, and so on. In the example output, we got back Tuesday.
We’ve successfully installed and used the Carbon package in just a few lines of code.
Cleanup
As we have no need for this VM anymore, nor this Carbon experiment, feel free to delete it with the following commands:
exit # this exits the virtual machine
vagrant destroy # this shuts down and deletes the VM
cd .. # this goes up one folder
rm -rf hi_carbontest # this deletes the hi_carbontest folder
More Tricks to Try
There are some other commands and features worth mentioning.
Update versus Install and Composer Lock
When a package is installed with Composer, a composer.json file is automatically created. Here’s the file that was created after we installed Carbon in the earlier example:
{
"require": {
"nesbot/carbon": "^1.21"
}
}
The format you’re seeing here is called JSON, but it’s beyond this book’s purview. Feel free to explore it on your own. What we can see here is that Composer automatically figured out that 1.21 is the most recent version of Carbon and put that into the file.
Likewise, a composer.lock file was created. As it’s a bit too large to include in this book, let’s look at the relevant segment only:
…
"packages": [
{
"name": "nesbot/carbon",
"version": "1.21.0",
"source": {
"type": "git",
"url": "https://github.com/briannesbitt/Carbon.git",
"reference": "7b08ec6f75791e130012f206e3f7b0e76e18
↵e3d7"
},
"dist": {
"type": "zip",
"url": "https://api.github.com/repos/briannesbitt/
↵Carbon/zipball/7b08ec6f75791e130012f206e3f7b0e76e18e3d7",
"reference": "7b08ec6f75791e130012f206e3f7b0e76e18
↵e3d7",
"shasum": ""
},
…
It seems to have the same requirements listed, but in a much more verbose way. What gives?
The composer.lock file is used to list all the installed dependencies at a given time. composer.lock is then committed (see Chapter 5) into your application’s repository along with all source code, and on the live server (when deploying). composer install then looks for this file. If the command finds it, it will use the versions listed in this file―no matter how outdated! If there is no lock file, it will look for the newest versions of the required packages, generate a completely new composer.lock file, and proceed as usual.
Why is this important?
Imagine using PackageX v1.2 in your local development environment, testing your application, and after ensuring it all works, deploying it to a live server. Yet in the time between your checks and the app being deployed, PackageX was updated to v1.3, which differs from v1.2 enough to no longer share some functionality. Maybe a method was renamed? Letting Composer determine the newest version on its own would install the latest version and make your app use a non-existent method, thus crashing the application. Disaster! That's why composer.lock is there―to ensure the version that was used in development is what's installed.
So, how do we then update the package to 1.3 if we actually want to? We use the composer update command.
composer update looks at all the installed packages, regardless of the presence of a composer.lock file, updates both composer.json and composer.lock with the newest versions, and installs them. Typically, composer update is run only in development (not production); when you’re certain everything works with the latest version, the newly generated composer.lock is deployed with the app as usual, and composer install is run in production, again ensuring only the versions locked by composer.lock are installed.
require-dev and global
During development, it’s common to write unit tests for your code. A final version of your application/package, however, can omit those tests. Tests are for development, to make sure the code works. Including them in final versions of your work bloats the file size without any benefit to end users (though it is good for developers who want to contribute to your code).
For this purpose, a --dev option exists when calling composer require. For example, if I’m using a package called PHPUnit to write my unit tests, I would install it like so:
composer require phpunit/phpunit --dev
This places it in a special require-dev block in composer.json, rather than require, and ensures it stays out of the end user’s way when a package is installed with the --update-no-dev flag. For example, we developed SitePoint\Authorization\User with PHPUnit for tests, but Jim just wants to use the package only―no need for tests. He installs it with:
composer require sitepoint/auth-user --update-no-dev
PHPUnit, however, is a tool which is useful across many projects, but installing it for each one is wasteful, as it’s quite large. That’s where global comes in. The global option of the composer require command will make sure it’s installed as a global package, instantly becoming available across the entire operating system we’re working on:
composer global require phpunit/phpunit --dev
Is that all there is?
Of course not! Composer has a multitude of commands. All the above and much more is what makes Composer an essential tool in a PHP developer’s daily routine. From removing the mental overhead of tracking used packages and classes, to smooth updates and flawless cooperation with other Composer users, this package manager continues to take the PHP ecosystem by storm.
There’s also the very useful scripts block, which lets a package author execute arbitrary scripts in the various stages of a command’s execution (that is, before installing or after updating), the composer remove command for removing packages you no longer need, and so on.
However, this is not a Composer book, so we’ll avoid going into the full details here. Instead, I suggest you have a look at the tutorials at the end of this chapter. They include not only a top-down introduction into Composer that’s a bit more advanced than what you went through here, but list tips, tricks, and shortcuts to use with it, maximizing the tool’s potential.
At this point in your programming career you’ll only be using it occasionally, and what you learned here will be enough; once you progress further, you should find these tutorials invaluable.
For Those Who Want More
If you’d like to explore the concepts of modern PHP applications in depth, I cannot recommend Paul M. Jones’ book enough. Modernizing Legacy Applications in PHP is a complete hands-on guide to turning spaghetti code into maintainable object-oriented professional code. While it probably would be unwise to dive into that book without first going through a beginner-friendly PHP coding book such as PHP and MySQL: Novice to Ninja, I wholeheartedly recommend you put it on your to-read list for later.
Additionally, some useful tutorials on SitePoint related to the material presented in this chapter can be found at the following links:
· Namespaces introduction: http://www.sitepoint.com/php-53-namespaces-basics/
· Composer introduction: http://www.sitepoint.com/php-dependency-management-with-composer/
· Composer cheat sheet: http://www.sitepoint.com/composer-cheatsheet/
· Mastering Composer―tips and tricks: http://www.sitepoint.com/mastering-composer-tips-tricks/
All materials on the site are licensed Creative Commons Attribution-Sharealike 3.0 Unported CC BY-SA 3.0 & GNU Free Documentation License (GFDL)
If you are the copyright holder of any material contained on our site and intend to remove it, please contact our site administrator for approval.
© 2016-2026 All site design rights belong to S.Y.A.