PHP & MySQL: Novice to Ninja, 5th Edition (2012)
Appendix A. Manual Installation Instructions
In Chapter 1, I recommended using a packaged solution like XAMPP or MAMP to set up a PHP-capable web server and MySQL database server on your computer. Especially when you’re just starting out, it’s useful to have your development web server bundled together so that you can switch it on and off—even throw it away and start from scratch all at once, whenever you need to. That said, the time may come when you want to do it all yourself, if only to understand how all the parts fit together. In this appendix, I’ll walk you through a manual installation process on each of the three major platforms that PHP and MySQL support: Windows, OS X, and Linux.
Windows
Installing MySQL
You can download MySQL free of charge. Simply proceed to the MySQL Downloads page and click the Download link for the free MySQL Community Server. This will take you to a page with a list of download links for the current recommended version of MySQL (as of this writing, it’s MySQL 5.5.22). At the top of the list you’ll see links for Windows 64-bit and Windows 32-bit. If you’re positive you’re running a 64-bit version of Windows, go ahead and click the Download button next to Windows (x86, 64-bit), MSI Installer to download the package (about 33MB in size). If you know you’re running a 32-bit version of Windows, or if you’re at all unsure, click the Download button next to Windows (x86, 32-bit), MSI Installer to download that package (about 31MB); it will work even if it turns out you’re running a 64-bit version of Windows. Once you’ve downloaded the file, double-click it and go through the installation as you would for any other program. Choose the Typical option when prompted for the setup type, unless you have a particular preference for the directory in which MySQL is installed. When you reach the end, you’ll be prompted to choose whether you want to Launch the MySQL Instance Configuration Wizard. Go ahead and launch it, and choose Detailed Configuration, which we’ll use to specify a number of options that are vital to ensuring compatibility with PHP. For each step in the wizard, select the options indicated here:
1. Server Type
Assuming you’re setting up MySQL for development purposes on your desktop computer, choose Developer Machine.
2. Database Usage
Although any of these options will work fine with the examples in this book, go with the default Multifunctional Database option.
3. InnoDB Tablespace Settings
This lets you control where your database files are stored. The default option of storing them in your MySQL Installation Path is perfect for a development server. No need to touch anything here.
4. Connection Limit
Select Decision Support (DSS)/OLAP to optimize MySQL for a relatively modest number of connections.
5. Networking Options
Uncheck the Enable Strict Mode option to ensure MySQL’s compatibility with older PHP code that you might need to use in your own work.
6. Default Character Set
Select Best Support For Multilingualism to tell MySQL to assume you want to use UTF-8 encoded text, which supports the full range of characters in use on the Web today.
7. Windows Options
Allow MySQL to be installed as a Windows Service that’s launched automatically. Select Include Bin Directory in Windows PATH to make it easier to run MySQL’s administration tools from the command prompt.
8. Security Options
Go ahead and set a password for the MySQL root user account, which grants full access to all databases stored in your MySQL server. Leave the other options alone.
Once the wizard has completed, your system should now be fully equipped with a running MySQL server! To verify that the MySQL server is running properly, type Ctrl+Alt+Del and choose the option to open the Task Manager. On the Processes tab, click the Show processes from all usersbutton unless it’s already selected. If all is well, the server program (mysqld.exe) should be listed. It will also start up automatically whenever you restart your system.
Installing PHP
The next step is to install PHP, so head over to the PHP Downloads page. There are two versions of PHP 5.4.x for Windows: VC9 Non Thread Safe and VC9 Thread Safe. Talk about confusing! You definitely want a Thread Safe version of PHP. The Non Thread Safe versions are unsuitable for use as a plugin for Apache. Download the Zip package of the VC9 Thread Safe release of PHP. PHP was designed to run as a plugin for existing web server software such as Apache or Internet Information Services, so before you can install PHP, you must first set up a web server. Many versions of Windows come with Microsoft’s powerful Internet Information Services (IIS) web server, but not all do. Windows XP Home, Windows Vista Home, and Windows 7 Home Basic (among others) are without IIS, so you need to install your own web server on these versions of Windows if you want to develop database driven websites. On top of that, assorted versions of Windows come with different versions of IIS, some of which vary dramatically in how you configure them to work with PHP. With that in mind, if you’re still considering IIS, you should know it’s relatively uncommon to host websites built using PHP with IIS in the real world. It’s generally less expensive and more reliable to host PHP-powered sites on servers running some flavor of the Linux operating system, with the free Apache web server installed. About the only reason for hosting a PHP site on IIS is if your company has already invested in Windows servers to run applications built using ASP.NET (a Microsoft technology built into IIS), and you want to reuse that existing infrastructure to host a PHP application as well. Although it’s by no means a requirement, it’s generally easiest to set up your development server to match the environment your website will be deployed in publicly as closely as possible. For this reason, I recommend using the Apache web server —even for development on a Windows computer. If you insist (or your boss insists) on hosting your PHP-based site using IIS, you’ll find the necessary installation instructions in the install.txt file contained in the PHP zip package you downloaded from the PHP website. If you need to install Apache on your computer, surf on over to the Apache Lounge website and download the latest version of Apache (as of writing it’s version 2.4.1). Once the ZIP file has downloaded, right-click it and choose Extract All… to extract the file’s contents into a folder. Inside, you’ll find a couple of text files containing installation instructions. The first is a reminder to download and install the latest Microsoft Visual C++ Redistributable Package. Go ahead and do that now. When you’re done, drag the .exe file you downloaded to the Recycle Bin. Next, the installation instructions will tell you to drag the Apache24 folder that you extracted from the ZIP file to the root of your C: drive, so that Apache will be installed in C:\Apache24. (It’s possible to change this path if you really want to, but it’s a bit of a pain to edit the relevant configuration files so I recommend just going with it.) Now Apache is installed, but to launch it for the first time (and configure it to run automatically at system startup), you’ll need to open a Command Prompt. On your Start Menu, find All Programs > Accessories > Command Prompt, then right-click on Command Prompt and choose Run as administrator. This will drop you in a window showing the current directory (C:\Windows\system32 on my system):
C:\Windows\system32>
At the end of this prompt, you’ll see a cursor blinking away. Type C: and hit Enter to make sure you’re working on C: drive, then type cd \Apache24\bin and hit Enter to switch to the C:\Apache24\bin folder:
C:\Windows\system32>
C:
C:\Windows\system32>
cd \Apache24\bin
C:\Apache24\bin>
Now, to launch Apache for the first time, type httpd.exe and hit Enter:
C:\Apache24\bin>
httpd.exe
If all goes well, it should look like nothing is happening. There won’t be another prompt; your command will just sit there running. On the other hand, you might receive an error message like this:
C:\Apache24\bin>
httpd.exe
(OS 10013)An attempt was made to access a socket in a way forbidden
by its access permissions. : AH00072: make_sock: could not bind to
address [::]:80(OS 10013)An attempt was made to access a socket in a
way forbidden by its access permissions. : AH00072: make_sock:
could not bind to address 0.0.0.0:80AH00451: no listening sockets
available, shutting downAH00015: Unable to open logs
C:\Apache24\bin>
This overwhelming error is Apache’s way of telling you that you already have a web server running on your computer, listening for web browsers to connect on port 80 (the standard port for web servers). Check if you have IIS running, or another copy of Apache (perhaps bundled in a package like XAMPP?). Shut it down, then try launching Apache from the Command Prompt again. With Apache up and running, open your web browser of choice and type http://localhost into the location bar. Hit Enter, and you should see a page like that shown in Figure A.1, confirming Apache is working correctly.
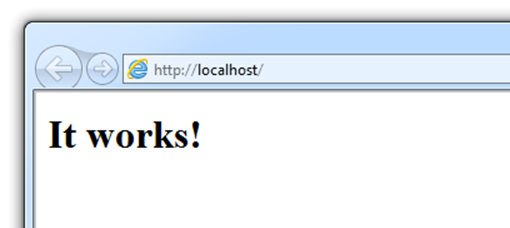
Figure A.1. You can take my word for it!
Close your browser and return to the Command Prompt. Shut down Apache by hitting Ctrl+C. After a moment, there’ll be another prompt:
C:\Apache24\bin>
httpd.exe
C:\Apache24\bin>
You probably don’t want to have to open a Command Prompt every time you need to run Apache. Instead, type httpd.exe -k install to install Apache as a system service. Here’s what you should see:
C:\Apache24\bin>
httpd.exe -k install
Installing the Apache2.4 service
The Apache2.4 service is successfully installed.
Testing httpd.conf....
Errors reported here must be corrected before the service can be
↵started.
But you might see this instead:
C:\Apache24\bin>
httpd.exe -k install
Installing the Apache2.4 service
(OS 5)Access is denied. : AH00369: Failed to open the WinNT service
↵ manager, perhaps you forgot to log in as Adminstrator?yoss
If that’s the case, it means you neglected to right-click and choose Run as administrator when launching Command Prompt above. Try again with a Command Prompt window running as administrator. With Apache set up as a system service, close the Command Prompt and navigate toC:\Apache24\bin in Windows Explorer. In that folder, you’ll find a file named ApacheMonitor.exe. This is a program that will help you monitor and control your Apache server now that it’s set up as a service. Pin it to your Start Menu (or, if you prefer, create a shortcut to it and put that wherever you like in your All Programs menu), then launch it. A new Apache Monitor icon will appear in your system tray (you may need to customize your system tray to keep it visible). Click the icon, and you’ll see the Apache2.4 system service listed. Hover over that service and a fly-out menu will appear with options to Start, Stop, and Restart the server. Choose Start to fire up Apache. The icon will change to show a tiny green arrow that indicates Apache is running.
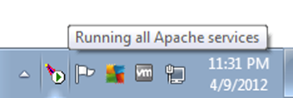
Figure A.2. The green light means Apache is up and running
You can also use the Apache Monitor icon to stop Apache running, once you’ve finished your web development work for the day.
With Apache standing on its own two feet, you can now install PHP. Follow these steps:
1. Unzip the file you downloaded from the PHP website into a directory of your choice. I recommend C:\php and will refer to this directory from this point forward, but feel free to choose another directory if you like.
2. Find the file called php.ini-development in the PHP folder and make a duplicate copy of it. The easiest way to do it is to right-click and drag the file’s icon, drop it in the same Explorer window, and choose Copy Here from the pop-up menu. You’ll be left with a new file named along the lines of php - Copy.ini-development (depending on the version of Windows you’re using). Find this new file and rename it to php.ini. Windows will ask if you’re sure about changing the filename extension (from .ini-dist to .ini); click Yes.
Important: Windows Hides Known Filename Extensions by Default
When you rename the file to php.ini, you might notice that the new filename appearing next to the icon is actually just php. If this happens, it’s because your copy of Windows is set up to hide the filename extension if it recognizes it. Since Windows knows that .ini files are Configuration Settings files, it hides this filename extension. As you can imagine, this feature can cause a certain amount of confusion. When you return to edit the php.ini file in the future, it would help to be able to see its full filename so that you could tell it apart from the php.gif and php.exe files in the same folder. To switch off filename extension hiding, open the Windows Control Panel and search for Folder Options. Open the Folder Options window and switch to the View tab. Under Files and Folders, uncheck the Hide extensions for known file types checkbox, as shown in Figure A.3.
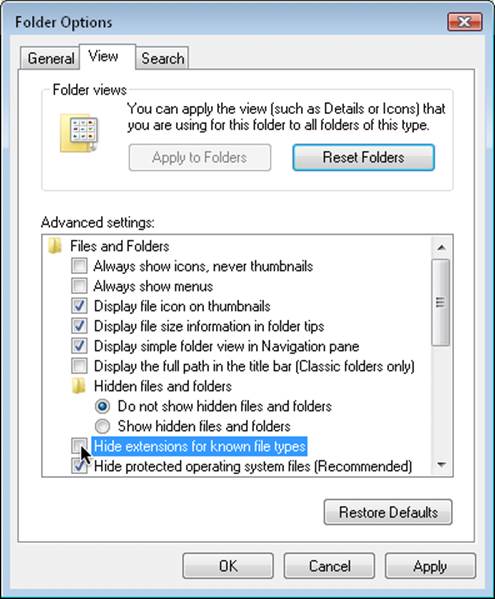
Figure A.3. Make filename extensions visible for all files
3. Open the php.ini file in your favorite text editor. If you have no particular preference, just double-click the file to open it in Notepad. It’s a large file with a lot of confusing options, but look for the line that begins with doc_root (Notepad’s Edit > Find… feature will help). Out of the box, the line looks like this:
doc_root =
To the end of this line, add the path to your web server’s document root directory. For the Apache server, this is the htdocs folder in the main Apache web server directory. If you installed Apache in the default location, the path should be "C:\Apache24\htdocs". If you installed it elsewhere, find the htdocs folder and type its path:
doc_root = "C:\Apache24\htdocs"
Just a little further down in the file, look for the line that begins with ; extension_dir, remove the semicolon from the start of the line, and set it so that it points to the ext subfolder of your PHP folder:
extension_dir = "C:\php\ext"
Scroll further down in the file and you’ll see a bunch of lines beginning with ;extension=. These are optional extensions to PHP, disabled by default. We want to enable the MySQL extension so that PHP can communicate with MySQL. To do this, remove the semicolon from the start of the php_mysqli.dll line:
extension=php_mysqli.dll
Warning: php_mysqli, not php_mysql
Just above the line for php_mysqli.dll there is a line for php_mysql.dll. The i in php_mysqli stands for improved. You want to enable the new improved MySQL extension. The one without the i is obsolete, and some of its features are incompatible with current versions of MySQL.
Keep scrolling even further down in the file, and look for a line that starts with ;session.save_path. Once again, remove the semicolon to enable this line, and set it to your Windows Temp folder:
session.save_path = "C:\Windows\Temp"
Save the changes you made and close your text editor.
That takes care of setting up PHP. Now you can set up your Apache server to use it as a plugin:
1. Launch Notepad (or your text editor of choice) and choose File > Open…. Browse to the conf subfolder in your Apache installation folder (by default, C:\Apache24\conf), and select the httpd.conf file located there. In order to make this file visible for selection, you’ll need to select All Files (*.*) from the file type drop-down menu at the bottom of the Open window.
2. Look for the existing line in this file that begins with DirectoryIndex, shown here:
3. <IfModule dir_module>
4. DirectoryIndex index.html
</IfModule>
This line tells Apache which filenames to use when it looks for the default page for a given directory. Add index.php to the end of this line:
<IfModule dir_module>
DirectoryIndex index.html index.php
</IfModule>
5. The remaining options in this long and intimidating configuration file should be fine as is. All you need to do is add the following lines to the very end of the file:
6. LoadModule php5_module "C:/php/php5apache2_4.dll"
7. AddType application/x-httpd-php .php
PHPIniDir "C:/php"
Make sure the LoadModule and PHPIniDir lines point to your PHP installation directory, and note the use of forward slashes (/) instead of backslashes (\) in the paths.
Important: PHP and Apache Versions
Historically, major new versions of the Apache server have required new versions of the .dll file you see referenced in the LoadModule line, and sometimes PHP lags behind new Apache releases. At the time of this writing, for example, the Windows PHP distribution doesn’t actually include a php5apache2_4.dll file! If you take another look in your PHP installation directory, you’ll probably see there are files named php5apache2_2.dll and php5apache2_3.dll in there. These files were provided for use with Apache 2.2 and 2.3, respectively. By the time you read this, it’s possible that Apache has undergone another major release, which might need yet another new .dll file. For example, Apache 2.5 might require you to use a new file named php5apache2_5.dll. If indeed there is no file to match the version of Apache you’ve installed, return to the Apache Lounge download page; you should find it available for download there (for example, php5apache2_4.dll-php-5.4-win32.zip). Download the ZIP file, extract it, and drop the missing .dll file in your PHP installation folder. Apache will now be able to find it where your LoadModule command says it should be.
8. Save your changes and close Notepad.
9. Restart Apache using the Apache Monitor system tray icon. If all is well, Apache will start up again without complaint. If Apache fails to start, try launching it from the Command Prompt again (as previously); this will give you a more detailed error message. Chances are you made a small mistake when editing httpd.conf.
10.Double-click the Apache Monitor icon to open the Apache Service Monitor window. If PHP is installed correctly, the status bar of this window should indicate the version of PHP you’ve installed, as shown in Figure A.4.
11.Click OK to close the Apache Service Monitor window.
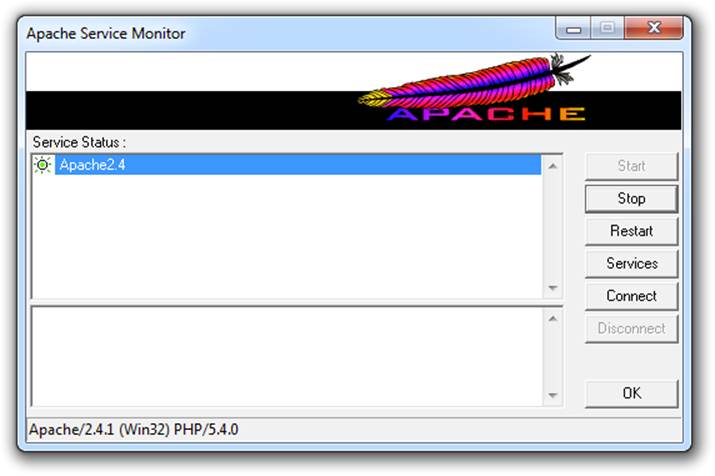
Figure A.4. The PHP version number indicates Apache is configured to support PHP
With MySQL, Apache, and PHP installed, you’re ready to start working with your new web server!
OS X
The following instructions assume you’re running Mac OS X 10.6 (Snow Leopard) or later. If you’re running an earlier version of OS X, you should stick with the all-in-one option.
Installing MySQL
Start by visiting the The MySQL Downloads page. Click the Download link for the free MySQL Community Server. This will take you to a page with a long list of download links for the current recommended version of MySQL (as of this writing, it’s MySQL 5.5.22). You’ll be presented with the list of downloads shown in Figure A.5. Which one you need to choose depends on your operating system version and platform architecture. If you know your Mac has a 64-bit processor, you can safely pick the Mac OS X ver. 10.6 (x86, 64-bit), DMG Archive version. If you’re at all unsure, your best bet is the Mac OS X ver. 10.6 (x86, 32-bit), DMG Archive version; all it requires is that you have an Intel-based Mac (to be sure, check the processor information in the About This Mac window, which you can access from the Apple menu). The 32-bit version is the safe bet, since it will run on 64-bit systems too.
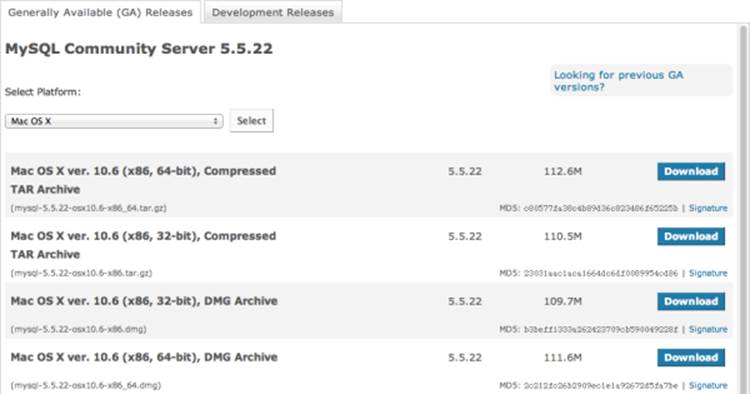
Figure A.5. The 32-bit version of MySQL for Intel processors will work on most current Macs
Once you’ve downloaded the mysql-version-osxversion-platform.dmg file, double-click it to mount the disk image. As shown in Figure A.6, it contains the installer in .pkg format, as well as a MySQLStartupItem.pkg file. Double-click the installer, which will guide you through the installation of MySQL.
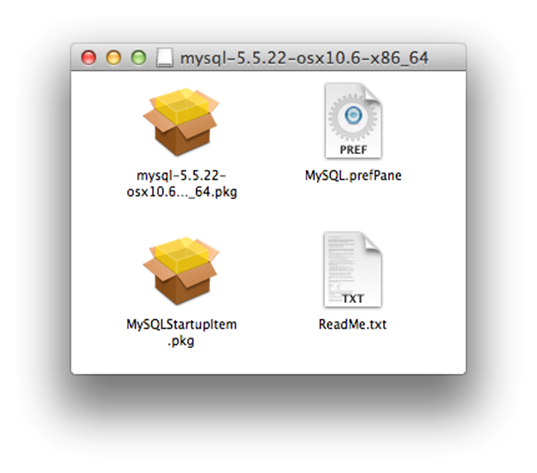
Figure A.6. The MySQL Mac OS X package contains lots of goodies
With MySQL is installed, you can launch the MySQL server. Open a Terminal window[65] and type this command:
Machine:~ user$
sudo /usr/local/mysql/bin/mysqld_safe
Note: What to Type
The Machine:~ user$ portion (where Machine is your computer’s name) represents the prompt that’s already displayed. You only need to type the command, which is shown in bold.
When you’ve typed the command, hit Enter. This command runs the mysqld_safe script with administrator privileges, which will require you to input your password. A status message will confirm that MySQL is running. Once MySQL is running, you can switch it to background execution by typing Ctrl+Z to stop the process, and then typing this command to let it continue running in the background:
Machine:~ user$
bg
You can then quit the Terminal application and MySQL will continue to run as a server on your system. When you want to shut down the MySQL server, open a new Terminal window and type this command:
Machine:~ user$
sudo /usr/local/mysql/bin/mysqladmin shutdown
Though you’ll gain plenty of geek cred for memorizing these commands, there’s a much less tedious way to control your MySQL server. Back in the installation disk image shown in Figure A.6, you’ll notice a file named MySQL.prefPane. Double-click this to install a new pane in Mac OS X’s System Preferences, and the window shown in Figure A.7 will open.
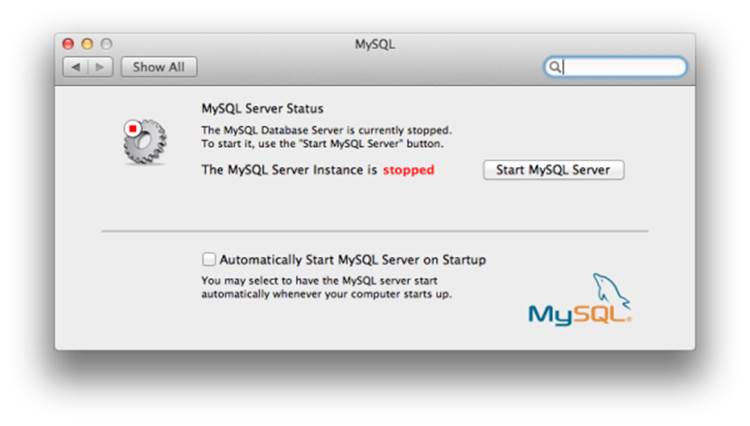
Figure A.7. The MySQL System Preferences pane
This window will tell you if your MySQL server is running or not, and lets you start it up and shut it down with the click of a button! Presumably, you’ll want your system to launch the MySQL server at startup automatically, so that you can avoid having to repeat the above process whenever you restart your system. The system preferences pane has a checkbox that does this, but for this checkbox to do anything you must first install the MySQLStartupItem.pkg from the installation disk image. When you have everything set up the way you want it, you can safely drag the MySQL installation disk icon on your desktop to the trash, then delete the .dmg file you downloaded. One last task you’ll want to do is add the /usr/local/mysql/bin directory to your system path. Doing this enables you to run programs like mysqladmin and mysql in the Terminal without typing out their full paths. Pop open a new Terminal window and type these commands:
Machine:~ user$
sudo su
Password:
(type your password)
sh-3.2#
echo '/usr/local/mysql/bin' >> /etc/paths.d/mysql
sh-3.2#
exit
Close the Terminal window and open a new one to allow this change to take effect. Then, with your MySQL server running, try running the mysqladmin program from your home directory:
Machine:~ user$
mysqladmin status
If everything worked the way it’s supposed to, you should see a brief list of statistics about your MySQL server.
Installing PHP
Mac OS X 10.5 (Leopard) comes with Apache 2.2 and PHP 5 built right in! All you need to do is switch them on:
1. Open System Preferences (System Preferences… on the Apple menu).
2. In the main System Preferences menu, click Sharing under Internet & Wireless.
3. Make sure that Web Sharing is checked, as shown in Figure A.8.
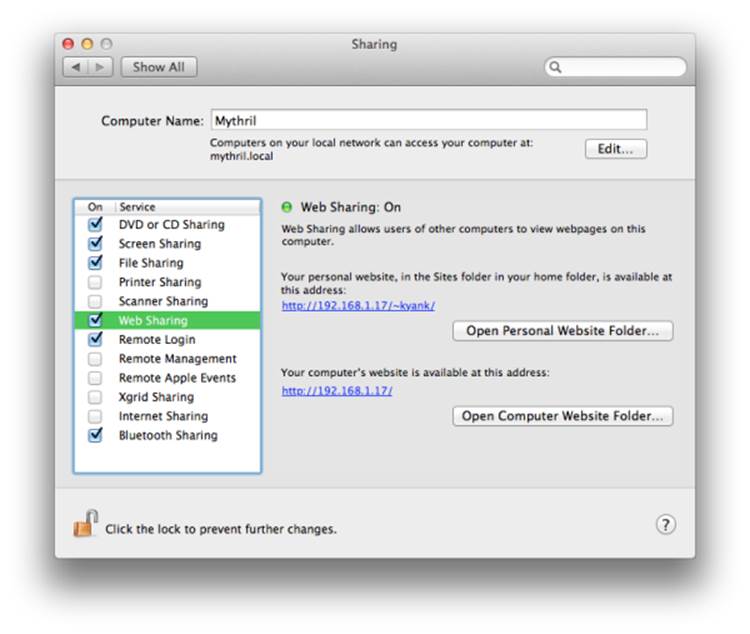
Figure A.8. Enable Web Sharing in Mac OS X
4. Quit System Preferences.
5. Open your browser, type http://localhost into the address bar, and hit Enter. Your browser should display the standard Apache welcome message shown in Figure A.9.
Figure A.9. The standard Apache welcome page
With this procedure complete, Apache will be run at startup automatically on your system. You’re now ready to enhance this server by enabling PHP support:
1. In the Finder menu bar, choose Go > Go to folder (⇧+⌘+G), and type /private/etc/apache2/ before clicking Go.
2. In the Finder window that opens, there should be a file named httpd.conf. This is the Apache configuration file. By default, it’s read-only. Right-click the file and choose Get Info (⌘+I) to open the file’s properties. Scroll down to the bottom of the httpd.conf Info window to find theSharing & Permissions setting. By default, the settings in this section are disabled. Click the little lock icon shown in Figure A.10 to enable them. Enter your password when prompted.

Figure A.10. Click the lock to make changes to these settings
To make this file editable, change the value in the Privilege column for everyone to Read & Write, as shown in Figure A.11.
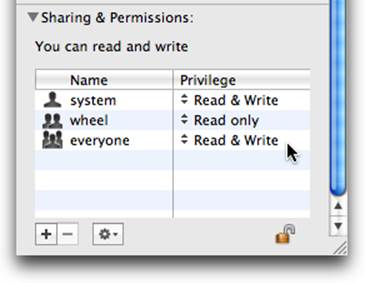
Figure A.11. Set the permissions for everyone to Read & Write
3. Back in the Finder window for the apache2 folder, right-click in the background of the folder window and choose Get Info to open the folder’s properties. As in the previous step, set the Sharing & Permissions settings from everyone to Read & Write.
4. Finally, double-click the httpd.conf file to open it in TextEdit.
5. In the httpd.conf file, search for this line:
#LoadModule php5_module libexec/apache2/libphp5.so
Enable this command by deleting the hash (#) character at the start of the line.
6. Save your changes, and close the file.
7. If you like to tidy up after yourself, you can go back and reset the privileges on the httpd.conf file and the apache2 folder. This will keep other users of your computer from making changes to the Apache configuration.
8. Open a Terminal window and type this command to restart Apache:
9.
10. Machine:~ user$
11. sudo /usr/sbin/apachectl restart
Type your password when prompted.
12.Load http://localhost in your browser again to ensure that Apache is still running. Give it a minute if it’s not available right away. If it fails to come back up, open Console (in the Utilities subfolder of Applications). In the sidebar under /var/log, select apache2 > error_log to view the Apache error log and look for clues as to what went wrong. If you’re still stuck, you could head over to the SitePoint Forums for help.
Your computer is now equipped with an Apache web server with PHP support. If you need to make changes to Apache’s configuration, you know how to edit its httpd.conf file using the instructions above. The PHP plugin, however, has its own configuration file, named php.ini. You need to edit that file to tell PHP how to connect to your MySQL server. With the version of PHP built into Mac OS X, there is no php.ini file by default—PHP just runs with the default settings. In order to modify those settings, you’ll need to open Terminal and copy the /private/etc/php.ini.defaultfile to /private/etc/php.ini:
Machine:~ user$
cd /private/etc
Machine:etc user$
sudo cp php.ini.default php.ini
Password:
(type your password)
To make this new php.ini file editable by users like yourself, use the same procedure described above for editing httpd.conf: in Finder use Go > Go to folder to open /private/etc, modify the permissions of both the php.ini file and the folder that contains it, then open the file with TextEdit. Scroll down through the file or use Edit > Find > Find… (⌘+F) to locate the mysql.default_socket option. Edit this line of the php.ini file so that it looks like this:
mysql.default_socket = /tmp/mysql.sock
You should only have to add the portion in bold. Scroll down further to locate the mysqli.default_socket option (mysqli, not mysql), and make the same change:
mysqli.default_socket = /tmp/mysql.sock
Save your changes, quit TextEdit, and restore the file and directory permissions if you want to. Finally, open a Terminal window and type this command to restart Apache once more:
Machine:~ user$
sudo /usr/sbin/apachectl restart
Type your password when prompted. Once Apache is up and running again, load http://localhost in your browser once more to make sure that all is well. And we’re done! With MySQL, Apache, and PHP installed, you’re ready to get to work.
Linux
This section will show you the procedure for manually installing Apache, PHP, and MySQL under most current distributions of Linux. These instructions were tested under Ubuntu 10.04.4; however, they should work on other distributions such as Fedora, Debian, openSUSE, and Gentoowithout much trouble. The steps involved will be very similar, almost identical. Most Linux distributions come with a package manager of one kind or another. Ubuntu’s Synaptic Package Manager is a graphical front end to APT, the Debian package manager. Other distributions use the older RPM package manager. Regardless of which distribution you use, prepackaged versions of Apache, PHP, and MySQL should be readily available. These prepackaged versions of software are really easy to install; unfortunately, they also limit the software configuration options available to you. For this reason—and because any attempt to document the procedures for installing the packaged versions across all popular Linux distributions would be doomed to failure—I will instead show you how to install them manually. If you already have Apache, PHP, and MySQL installed in packaged form, feel free to use those versions. If you encounter any problems, you can always uninstall the packaged versions and return here to install them by by hand.
Installing MySQL
Start by downloading MySQL. Simply proceed to the MySQL Downloads page and click the Download link for the free MySQL Community Server. This will take you to a page with a long list of download links for the current recommended version of MySQL (as of this writing, it’s MySQL 5.5.22). Make sure Linux – Generic is selected from the menu near the top of the list of files to download. Now you need to choose the package that corresponds to your system architecture. If you’re positive you’re running a 64-bit version of Linux, go ahead and download the Linux – Generic 2.6 (x86, 64-bit), Compressed TAR Archive package (about 177MB in size). If you’re running a 32-bit version of Linux, download the Linux – Generic 2.6 (x86, 32-bit), Compressed TAR Archive package (about 171MB); this will still work even if it turns out you’re running a 64-bit version of Linux. Click the Download button next to whichever version is right for you. Once you’ve downloaded the file, open a Terminal and log in as the root user:
user@machine:~$
sudo su
You will, of course, be prompted for your password. Change directories to /usr/local and unpack the downloaded file:
root@machine:/home/user#
cd /usr/local
root@machine:/usr/local#
tar xfz ~user/Desktop/mysql-version-linux2.
↵6-platform.tar.gz
The second command assumes you left the downloaded file on your desktop, which is the Desktop directory in your home directory. You’ll need to replace user with your username, version with the MySQL version you downloaded, and platform with the architecture and compiler version of the release you downloaded; this is so that the command matches the path and filename of the file you downloaded exactly. On my computer, for example, the exact command looks like this:
root@mythril:/usr/local#
tar xfz ~kyank/Desktop/mysql-5.5.22-linux2.
↵6-x86_64.tar.gz
After a minute or two, you’ll be returned to the command prompt. A quick ls will confirm that you now have a directory named mysql-version-linux-platform . This is what it looks like on my computer:
root@mythril:/usr/local#
ls
bin games lib mysql-5.5.22-linux2.6-x86_64 share
etc include man sbin src
Next, create a symbolic link to the new directory with the name mysql to make accessing the directory easier. Then enter the directory:
root@machine:/usr/local#
ln -s mysql-version-linux-platform mysql
root@machine:/usr/local#
cd mysql
While you can run the server as the root user, or even as yourself (for example, if you were to install the server in your home directory), you should normally set up a special user on the system whose sole purpose is to run the MySQL server. This will remove any possibility of an attacker using the MySQL server as a way to break into the rest of your system. To create a special MySQL user, type the following commands (still logged in as root):
root@machine:/usr/local/mysql#
groupadd mysql
root@machine:/usr/local/mysql#
useradd -g mysql mysql
Now give ownership of your MySQL directory to this new user:
root@machine:/usr/local/mysql#
chown -R mysql .
root@machine:/usr/local/mysql#
chgrp -R mysql .
MySQL is now installed, but before it can do anything useful, its database files need to be installed, too. Still in the new mysql directory, type the following command:
root@machine:/usr/local/mysql#
scripts/mysql_install_db --user=mysql
If this command generates an error about libaio.so, you’ll need to install that library before trying again. On Ubuntu Linux, you can do that with a simple apt-get:
root@machine:/usr/local/mysql#
apt-get install libaio1
root@machine:/usr/local/mysql#
scripts/mysql_install_db --user=mysql
Now everything’s prepared for you to launch the MySQL server for the first time. From the same directory, type the following command:
root@machine:/usr/local/mysql#
bin/mysqld_safe --user=mysql &
If you see the message mysql daemon ended, the MySQL server was prevented from starting. The error message should have been written to a file called hostname.err (where hostname is your machine’s host name) in MySQL’s data directory. You’ll usually find that this happens because another MySQL server is already running on your computer. If the MySQL server was launched without complaint, the server will run (just like your web or FTP server) until your computer is shut down. To test that the server is running properly, type the following command:
root@machine:/usr/local/mysql#
bin/mysqladmin -u root status
A little blurb with some statistics about the MySQL server should be displayed. If you receive an error message, check the hostname.err file to see if the fault lies with the MySQL server upon starting up. If you retrace your steps to ensure you followed the process described above, and this fails to solve the problem, a post to the SitePoint Forums will help you pin it down in little time. If you want your MySQL server to run automatically whenever the system is running, you’ll have to set it up to do so. In the support-files subdirectory of the mysql directory, there’s a script called mysql.server that can be added to your system startup routines to do this. For most versions of Linux, you can do this by creating a link to the mysql.server script in the /etc/init.d directory, then create two links to that: /etc/rc2.d/S99mysql and /etc/rc0.d/K01mysql. Here are the commands to type:
root@machine:/usr/local/mysql#
cd /etc
root@machine:/etc#
ln -s /usr/local/mysql/support-files/mysql.server
↵ init.d/
root@machine:/etc#
ln -s /etc/init.d/mysql.server rc2.d/S99mysql
root@machine:/etc#
ln -s /etc/init.d/mysql.server rc0.d/K01mysql
That’s it! To test that this works, reboot your system, and request the status of the server with mysqladmin as you did earlier. You should now take a moment to set a root user password. Run the bin/mysql_secure_installation program to do this:
root@machine:/usr/local/mysql#
./bin/mysql_secure_installation
Note: Having trouble removing test database?
If the mysql_secure_installation program appears to struggle dropping the test database, don’t worry about it. This is a problem in the packaging of the MySQL database for Linux: the data/test folder (where the test database files are stored) contains a file named .empty that MySQL fails to recognize, and therefore will not delete. If you delete this file yourself, MySQL will be able to drop the test database.
One final task you might like to do for the sake of convenience is to place the MySQL client programs—which you’ll use to administer your MySQL server later on—in the system path. To this end, you can place symbolic links to mysql, mysqladmin, and mysqldump in your /usr/local/bindirectory:
root@machine:/etc#
cd /usr/local/bin
root@machine:/usr/local/bin#
ln -s /usr/local/mysql/bin/mysql .
root@machine:/usr/local/bin#
ln -s /usr/local/mysql/bin/mysqladmin .
root@machine:/usr/local/bin#
ln -s /usr/local/mysql/bin/mysqldump .
Once you’ve done this, you can log out of the root account. From this point on, you can administer MySQL from any directory on your system:
root@machine:/usr/local/bin#
exit
user@machine:~$
mysqladmin -u root -p status
Installing PHP
As mentioned, PHP is more a web server plugin module than a program. There are actually three ways to install the PHP plugin for Apache:
· as a CGI program that Apache runs every time it needs to process a PHP-enhanced web page
· as an Apache module compiled right into the Apache program
· as an Apache module loaded by Apache each time it starts up
The first option is the easiest to install and set up, but it requires Apache to launch PHP as a program on your computer every time a PHP page is requested. This activity can really slow down the response time of your web server, especially if more than one request needs to be processed at a time. The second and third options are almost identical in terms of performance, but the third option is the most flexible, since you can add and remove Apache modules without having to recompile it each time. For this reason, we’ll use the third option. Assuming you don’t already have Apache running on your computer (and don’t simply want to install it automatically with, say, sudo apt-get install apache2 on Ubuntu Linux), surf on over to the Apache HTTP Server Project and look for the version of Apache described as “the best available version” (as of this writing it’s version 2.4.1). Once you get to the Download page, scroll down to find the links to the various versions available. The one you want is Unix Source, shown in Figure A.12. Both the .tar.gz or the .tar.bz2 are the same; just grab whichever archive format you’re used to extracting.
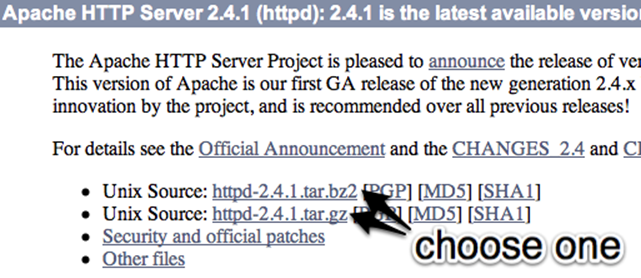
Figure A.12. This is the one you need
What you’ve just downloaded is actually the source code for the Apache server. The first step, then, is to compile it into an executable binary installation. Pop open a Terminal, navigate to the directory where the downloaded file is located, extract it, and then navigate into the resulting directory:
user@machine:~$
cd Desktop
user@machine:~/Desktop$
tar xfz httpd-version.tar.gz
user@machine:~/Desktop$
cd httpd-version
The first step in compiling Apache is to configure it to your requirements. Most of the defaults will be fine for your purposes, but you’ll need to enable dynamic loading of Apache modules (like PHP), which is off by default. Additionally, you should probably enable the URL rewriting feature, upon which many PHP applications rely (although it’s unnecessary for the examples in this book). To make these configuration changes, type this command:
user@machine:~/Desktop/httpd-version$
./configure --enable-so
↵ --enable-rewrite
A long stream of status messages will scroll up your screen. If the process stops with an error message, your system may be missing some critical piece of software that’s required to compile Apache. Some Linux distributions lack the essential development libraries or even a C compiler installed by default. Installing these should enable you to return and run this command successfully. Current versions of Ubuntu, however, should come with everything that’s needed. After several minutes, the stream of messages should come to an end:
…
config.status: creating build/rules.mk
config.status: creating build/pkg/pkginfo
config.status: creating build/config_vars.sh
config.status: creating include/ap_config_auto.h
config.status: executing default commands
user@machine:~/Desktop/httpd-version$
You’re now ready to compile Apache. The one-word command make is all it takes:
user@machine:~/Desktop/httpd-version$
make
Again, this process will take several minutes to complete, and should end with the following message:
…
make[1]: Leaving directory `/home/user/Desktop/httpd-version'
user@machine:~/Desktop/httpd-version$
To install your newly compiled copy of Apache, type sudo make install (the sudo is required, since you need root access to write to the installation directory).
user@machine:~/Desktop/httpd-version$
sudo make install
Enter your password when prompted. As soon as this command has finished copying files, your installation of Apache is complete. Navigate to the installation directory and launch Apache using the apachectl script:
user@machine:~/Desktop/httpd-version$
cd /usr/local/apache2
user@machine:/usr/local/apache2$
sudo bin/apachectl -k start
You’ll likely see a warning message from Apache complaining that it was unable to determine the server’s fully qualified domain name. That’s because most personal computers come without one. Don’t sweat it. If instead you elected to use your Linux distribution’s package installer to install Apache, you should be able to fire it up with a command like this (on Ubuntu):
user@machine:~$
sudo service apache2 start
Fire up your browser and type http://localhost into the address bar. If Apache is up and running, you should see a welcome message like the one in Figure A.13.

Figure A.13. You can take my word for it!
As with your MySQL server, you’ll probably want to configure Apache to start automatically when your system boots. If you installed Apache with a package installer, it’s likely to be already set up for you. The procedure to set this up is similar to that for MySQL; just copy and link theapachectl script from your Apache installation:
user@machine:/usr/local/apache2$
sudo su
root@machine:/usr/local/apache2#
cd /etc
root@machine:/etc#
ln -s /usr/local/apache2/bin/apachectl init.d/
root@machine:/etc#
ln -s /etc/init.d/apachectl rc2.d/S99httpd
root@machine:/etc#
ln -s /etc/init.d/apachectl rc0.d/K01httpd
To test that this works, restart your computer and then hit the http://localhost page in your browser again. With a shiny new Apache installation up and running, you’re now ready to add PHP support to it. To start, download the PHP Complete Source Code package from the PHP Downloads page. Again, the .tar.gz and .tar.bz2 versions are identical; just download whichever one you’re used to extracting. The file you downloaded should be called php-version.tar.gz (or .bz2). Pop open a new Terminal window, navigate to the directory containing the downloaded file, extract it, and move into the resulting directory:
user@machine:~$
cd Desktop
user@machine:~/Desktop$
tar xfz php-version.tar.gz
user@machine:~/Desktop$
cd php-version
To install PHP as an Apache module, you’ll need to use the Apache apxs program. This will have been installed along with the Apache server if you followed the instructions to compile it yourself. But if you used your distribution’s package manager to install Apache, you may need to install the Apache development package to access Apache apxs. You should be able to install this package by using the same package manager you used to install Apache. For example, on Ubuntu, you can use apt-get to install it as follows:
user@machine:~$
sudo apt-get install apache2-dev
Now, to install PHP you must be logged in as root:
user@machine:~/Desktop/php-version$
sudo su
[sudo] password for user: (type your password)
root@machine:/home/user/Desktop/php-version#
The first step is to configure the PHP installation program by telling it which options you want to enable, and where it should find the programs it needs to know about (such as Apache apxs and MySQL). The command should look like this (all on one line):
root@machine:/home/user/Desktop/php-version#
./configure
↵ --prefix=/usr/local/php --with-apxs2=/usr/local/apache2/bin/apxs
↵ --with-mysqli=/usr/local/mysql/bin/mysql_config
The --prefix option tells the installer where you want PHP to be installed (/usr/local/php is a good choice). The --with-apxs2 option tells the installer where to find the Apache apxs program mentioned. When installed using your Linux distribution’s package manager, the program is usually found at /usr/bin/apxs2. If you compiled and installed Apache yourself as described before, however, it will be in the Apache binary directory, at /usr/local/apache2/bin/apxs. The --with-mysqli option tells the installer where to find your MySQL installation. More specifically, it must point to the mysql_config program in your MySQL installation’s bin directory (/usr/local/mysql/bin/mysql_config). Again, a parade of status messages will appear on your screen. When it stops, check for error messages and install any files it identifies as missing. On a default Ubuntu 10.04.4 installation, for example, you’re likely to see an error complaining about an incomplete libxml2 installation. To correct this particular error, open Synaptic Package Manager, then locate and install the libxml2-dev package (libxml2 should already be installed). Alternatively, at the Terminal prompt, just run apt-get install libxml2-dev. Once it’s installed, try the configure command again. After you watch several screens of tests scroll by, you’ll be returned to the command prompt with the comforting message “Thank you for using PHP.” The following two commands will compile and then install PHP:
root@machine:/home/user/Desktop/php-version#
make
root@machine:/home/user/Desktop/php-version#
make install
Take a coffee break. This will take some time. Upon completion of the make install command, PHP will be installed in /usr/local/php (unless you specified a different directory with the --prefix option of the configure script). Now you just need to configure it. The PHP configuration file is called php.ini. PHP comes with two sample php.ini files called php.ini-development and php.ini-production. Copy these files from your installation work directory to the /usr/local/php/lib directory, then make a copy of the php.ini-development file and call it php.ini:
root@machine:/home/user/Desktop/php-version#
cp php.ini* /usr/local/
↵php/lib/
root@machine:/home/user/Desktop/php-version#
cd /usr/local/php/lib
root@machine:/usr/local/php/lib#
cp php.ini-development php.ini
You may now delete the directory from which you compiled PHP—it’s no longer needed. We’ll worry about fine-tuning php.ini shortly. For now, we need to tweak Apache’s configuration to make it more PHP-friendly, so locate your Apache configuration file. It can usually be found in theconf subdirectory of your Apache installation (/usr/local/apache2/conf/httpd.conf), or in /etc/apache2/apache2.conf if you installed Apache with a package manager. To edit this file you must be logged in as root, so launch your text editor from the Terminal window where you’re still logged in as root:
root@machine:/usr/local/php/lib#
cd /usr/local/apache2/conf
root@machine:/usr/local/apache2/conf#
gedit httpd.conf
Go right to the bottom of the file and add these lines to tell Apache that files with names ending in .php should be treated as PHP scripts:
<FilesMatch \.php$>
SetHandler application/x-httpd-php
</FilesMatch>
That should do it. Save your changes and restart your Apache server:
root@machine:/usr/local/apache2/conf#
/usr/local/apache2/bin/
↵apachectl -k restart
If it all goes according to plan, Apache should start up without any error messages. If you run into any trouble, the helpful individuals in the SitePoint Forums (myself included) will be happy to help.
[65] To open a Terminal window, launch the Terminal application, which you can find in the Utilities folder in the Applications folder.
All materials on the site are licensed Creative Commons Attribution-Sharealike 3.0 Unported CC BY-SA 3.0 & GNU Free Documentation License (GFDL)
If you are the copyright holder of any material contained on our site and intend to remove it, please contact our site administrator for approval.
© 2016-2026 All site design rights belong to S.Y.A.