PHP & MySQL: Novice to Ninja, 5th Edition (2012)
Chapter 12. Binary Data
All the examples of database driven websites we’ve seen so far have dealt with sites based around textual data. Jokes, authors, categories … all these elements can be fully represented with strings of text. But what if you ran, say, an online digital photo gallery to which people could upload pictures taken with digital cameras? For this idea to work, visitors need to be able to upload their photos to our site, and we need the ability to keep track of them. In this chapter, you will develop a system whereby users can upload binary files (images, documents … whatever!) and have them stored on your web server for display on your site. There are several techniques you’ll need to learn on the way, though, and I’ll cover all of these in this chapter: working with files in PHP, handling uploaded files in PHP, and storing and retrieving binary data in MySQL. As we learn to juggle files with PHP, we’ll also take the opportunity to relieve some of the load on your web server with the help of semidynamic pages.
Semidynamic Pages
As the owner of a successful—or soon-to-be successful—website, site traffic is probably worth encouraging. Unfortunately, high site traffic can be just what a web server administrator dreads—especially when that site’s primarily composed of dynamically generated, database driven pages. Such pages use a great deal more horsepower on the computer that runs the web server software than do plain old HTML files, because every page request is like a miniature program that runs on that computer. While some pages of a database driven site must always display current-to-the-second data taken from the database, others do not. Consider the front page of a website like sitepoint.com. Typically, it presents a digest of what’s new and fresh on the site. But how often does that information actually change? Once an hour? Once a day? And how important is it that visitors to your site see those changes the instant they occur? Would your site really suffer if changes took effect after a slight delay? By converting high-traffic dynamic pages into semidynamic equivalents—static pages that are regenerated dynamically at regular intervals to freshen their content—you can significantly reduce the toll that the database driven components of your site take on your web server’s performance. Say that you have a controller script—index.php—that uses a PHP template to generate your front page, which provides a summary of new content on your site. Through examining the server logs, you’ll probably find that this is one of the most requested pages on your site. If you ask yourself some of the questions just mentioned, you’ll realize that there’s no need to dynamically generate this page for every request. As long as it’s updated every time new content is added to your site, it’ll be as dynamic as it needs to be. Instead of using a controller script to handle every request for the front page of your site, you can use the PHP code to generate a static snapshot of the PHP template’s output and put this snapshot online—in place of the dynamic version—as index.html. This little trick will require some reading, writing, and juggling of files. PHP is perfectly capable of accomplishing this task, but we’re yet to cover the functions we’ll need:
file_get_contents
This function opens a file and reads the contents, returning them in the form of a PHP string. The file can be stored on the server’s hard disk, or PHP can load it from a URL just like a web browser would. If an error occurs, the function returns FALSE instead.
file_put_contents
This function opens a file and writes the specified data into it. You can optionally specify settings such as whether the data should be added to the end of the existing file, rather than replacing the file completely (the default).[61]
file_exists
This function checks if a file with a specific name exists or not. If the file exists, the function returns TRUE; otherwise, it returns FALSE.
copy
This function performs a run-of-the-mill file copy operation.
unlink
This function deletes a file from the hard disk.
Do you see where we’re headed? If not, I assure you that you will in a moment. Let’s begin with a dead-simple controller script and template for displaying a list of the three most recent jokes in the databases of the Internet Joke Database, as we last left it in Chapter 10:
chapter12/recentjokes/controller.php
<?php
include_once $_SERVER['DOCUMENT_ROOT'] . '/includes/db.inc.php';
try
{
$sql = 'SELECT id, joketext FROM joke
ORDER BY jokedate DESC
LIMIT 3';
$result = $pdo->query($sql);
}
catch (PDOException $e)
{
$error = 'Error fetching jokes.';
include $_SERVER['DOCUMENT_ROOT'] . '/includes/error.html.php';
exit();
}
foreach ($result as $row)
{
$jokes[] = array('text' => $row['joketext']);
}
include 'jokes.html.php';
chapter12/recentjokes/jokes.html.php
<?php include_once $_SERVER['DOCUMENT_ROOT'] .
'/includes/helpers.inc.php'; ?>
<!DOCTYPE html>
<html lang="en">
<head>
<meta charset="utf-8">
<title>Recent Jokes</title>
<link rel="canonical" href="/recentjokes/">
</head>
<body>
<p>Here are the most recent jokes in the database:</p>
<?php foreach ($jokes as $joke): ?>
<?php markdownout($joke['text']); ?>
<?php endforeach; ?>
</body>
</html>
Normally, you’d name the controller script index.php, so that a browser request for http://www.example.com/recentjokes/ would run the controller script and build the list of jokes on the fly. However, the controller is named controller.php in this case. A browser that knew this filename could still request the controller, but as indicated by the <link rel="canonical"> tag[62] in the jokes.html.php template, we still expect most visitors to access the page as http://www.example.com/recentjokes/. Instead of triggering the controller, though, browsers that request this URL will hit a static version of the page that’s been prepared in advance. To generate this static version, we’ll write another script: generate.php. It will be the responsibility of this script to load controller.php—the dynamic version of your front page—as a web browser would, then to write an up-to-date static snapshot of the page as index.html. If anything goes wrong in this process, you’ll want to hold onto the existing version of index.html; we’ll make this script write the new static version into a temporary file (tempindex.html), then copy it over index.html if all is well. We start out by setting some PHP variables to configure the URL of the PHP script we wish to load, the temporary filename to use in the process, and the name of the static page we wish to create:
chapter12/recentjokes/generate.php (excerpt)
<?php
$srcurl = 'http://localhost/recentjokes/controller.php';
$tempfilename = $_SERVER['DOCUMENT_ROOT'] .
'/recentjokes/tempindex.html';
$targetfilename = $_SERVER['DOCUMENT_ROOT'] .
'/recentjokes/index.html';
Important: $srcurl Must Be a URL
Resist the temptation to set $srcurl to the filename of controller.php on your web server. In order for this script to retrieve the page produced by the controller.php script, it must request the script using a URL that points to your web server. If you pointed the script directly at the file, it would receive the code of the controller.php script itself rather than the HTML output it produces.
Now, to do the work. We start out by deleting the temporary file, in case it was previously left lying around by a failed execution of this script. We use file_exists to check if the file exists, then unlink to delete it if it does:
chapter12/recentjokes/generate.php (excerpt)
if (file_exists($tempfilename))
{
unlink($tempfilename);
}
Now we can load the dynamic page (controller.php) by requesting its URL with file_get_contents. Since we’re requesting the file as a URL rather than directly using its filename, the PHP script will be processed by the web server before we receive it, so what we’ll end up with is essentially a static HTML page:
chapter12/recentjokes/generate.php (excerpt)
$html = file_get_contents($srcurl);
if (!$html)
{
$error = "Unable to load $srcurl. Static page update aborted!";
include $_SERVER['DOCUMENT_ROOT'] . '/includes/error.html.php';
exit();
}
With the page contents tucked away in the $html variable, we now want to write them into a static HTML file. The file_put_contents function makes this a piece of cake:
chapter12/recentjokes/generate.php (excerpt)
if (!file_put_contents($tempfilename, $html))
{
$error = "Unable to write $tempfilename. Static page update
↵ aborted!";
include $_SERVER['DOCUMENT_ROOT'] . '/includes/error.html.php';
exit();
}
The static page has now been written into a temporary file, so we should copy the temporary file and paste over the previous version of the static file using copy. We can then delete the temporary file with unlink:
chapter12/recentjokes/generate.php (excerpt)
copy($tempfilename, $targetfilename);
unlink($tempfilename);
Now, whenever generate.php is executed, a fresh copy of index.html will be generated from controller.php. Go ahead and request generate.php with your browser, then load the recentjokes directory (for example, http://localhost/recentjokes/). You should see the contents of the generatedindex.html file.
Note: Errors Due to File Permissions
Particularly on Mac OS X and Linux servers, the script could be tripped up if it has insufficient privileges to copy and delete files in this directory on your server. If generate.php outputs errors that indicate this, you’ll need to make the directory containing these files writable by your web server. Usually, this can be done with a simple chmod command:
chmod 777 /path/to/recentjokes/
Check with your web host if you need help setting permissions to make a directory PHP-writable on your site.
Of course, it would be a pain to have to manually request the generate.php script whenever the content of your site changes. The easiest way to automate this process is to include the generate.php script from within the code of your site’s content management system whenever a joke is added, updated, or removed from the site. If a page is quite complex, it may be difficult to find all the right places within your CMS to regenerate its static version. Alternatively, you may simply wish to set up your server to run generate.php at regular intervals—say, every hour. Under Windows, you can use the Task Scheduler to run php.exe (a standalone version of PHP included with XAMPP and other distributions of PHP for Windows) automatically every hour. Just create a batch file called generate.bat that contains this line of text:
chapter12/recentjokes/generate.bat
@C:\xampp\php\php.exe generate.php
Adjust the paths and filenames as necessary, then set up Task Scheduler to run generate.bat every hour. Done! Under OS X or Linux, you can do a similar thing with cron—a system-level utility that lets you define tasks to be run at regular intervals. Type man crontab at your system’s Terminal prompt to read about how you can set up tasks for cron. The task you’ll set cron to run will be very similar to the Windows task just discussed. MAMP includes a standalone version of PHP that you can run with cron (it’s /Applications/MAMP/bin/php/php5.3.6/bin/php in the version I’m using). For experienced cron users in a hurry, here’s what the line in your crontab file should look like:
0 0-23 * * * /Applications/MAMP/bin/php/php5.3.6/bin/php
↵/path/to/generate.php > /dev/null
Handling File Uploads
Okay, we can now juggle files we’ve created ourselves. The next piece of the puzzle is to accept files uploaded by visitors to your site, and handle them just as deftly. We’ll start with the basics: let’s write an HTML form that allows users to upload files. HTML makes this quite easy with its<input type="file"> tag. By default, however, only the name of the file selected by the user is sent. To have the file itself submitted with the form data, we need to add enctype="multipart/form-data" to the <form> tag:
<form action="index.php" method="post"
enctype="multipart/form-data">
<div><label for="upload">Select file to upload:
<input type="file" id="upload" name="upload"></label></div>
<div>
<input type="hidden" name="action" value="upload">
<input type="submit" value="Submit">
</div>
</form>
As we can see, a PHP script (index.php, in this case) will handle the data submitted with this form. Information about uploaded files appears in a array called $_FILES that’s automatically created by PHP. As you’d expect, an entry in this array called $_FILES['upload'] (from the name attribute of the <input> tag) will contain information about the file uploaded in this example. However, instead of storing the contents of the uploaded file, $_FILES['upload'] contains yet another array. We therefore use a second set of square brackets to select the information we want:
$_FILES['upload']['tmp_name']
Provides the name of the file stored on the web server’s hard disk in the system temporary file directory, unless another directory has been specified using the upload_tmp_dir setting in your php.ini file. This file is only kept as long as the PHP script responsible for handling the form submission is running. So, if you want to use the uploaded file later on (for example, store it for display on the site), you need to make a copy of it elsewhere. To do this, use the copy function described in the section called “Semidynamic Pages”.
$_FILES['upload']['name']
Provides the name of the file on the client machine before it was submitted. If you make a permanent copy of the temporary file, you might want to give it its original name instead of the automatically generated temporary filename that’s described.
$_FILES['upload']['size']
Provides the size (in bytes) of the file.
$_FILES['upload']['type']
Provides the MIME type of the file. (It is sometimes referred to as file type or content type, an identifier used to describe the file format; for example, text/plain, image/png, and so on.)
Remember, 'upload' is just the name attribute of the <input> tag that submitted the file, so the actual array index will depend on that attribute. You can use these variables to decide whether to accept or reject an uploaded file. For example, in a photo gallery we’d only really be interested in JPEG, and possibly GIF and PNG files. These files have MIME types of image/jpeg, image/gif, and image/png, respectively, but to cater for differences between browsers,[63] you should use regular expressions to validate the uploaded file’s type:
if (preg_match('/^image\/p?jpeg$/i', $_FILES['upload']['type']) or
preg_match('/^image\/gif$/i', $_FILES['upload']['type']) or
preg_match('/^image\/(x-)?png$/i', $_FILES['upload']['type']))
{
… Handle the file…
}
else
{
$error = 'Please submit a JPEG, GIF, or PNG image file.';
include $_SERVER['DOCUMENT_ROOT'] . '/includes/error.html.php';
exit();
}
See Chapter 8 for help with regular expression syntax. While you can use a similar technique to disallow files that are too large (by checking the $_FILES['upload']['size'] variable), I advise against it. Before this value can be checked, the file is already uploaded and saved in the temporary directory. If you try to reject files because you have limited disk space and/or bandwidth, the fact that large files can still be uploaded (even though they’re deleted almost immediately) may be a problem for you. Instead, you can tell PHP in advance the maximum file size you’ll accept. There are two ways to do this. The first is to adjust the upload_max_filesize setting in your php.ini file. The default value is 2MB, so if you want to accept uploads larger than that, you’ll need to change that value immediately.[64] The second method is to include a hidden <input> field in your form with the name MAX_FILE_SIZE, and the actual maximum file size you want to accept with this form as its value. For security reasons, this value can’t exceed the upload_max_filesize setting in your php.ini, but it does provide a way for you to accept different maximum sizes on different pages. The following form, for example, will allow uploads of up to one kilobyte (1024 bytes):
<form action="upload.php" method="post"
enctype="multipart/form-data">
<p><label id="upload">Select file to upload:
<input type="hidden" name="MAX_FILE_SIZE" value="1024">
<input type="file" id="upload" name="upload"></label></p>
<p>
<input type="hidden" name="action" value="upload">
<input type="submit" value="Submit">
</p>
</form>
Note that the hidden MAX_FILE_SIZE field must come before any <input type="file"> tags in the form, so that PHP is apprised of this restriction before it receives any submitted files. Note also that this restriction can easily be circumvented by malicious users who simply write their own form without the MAX_FILE_SIZE field. For fail-safe security against large file uploads, use the upload_max_filesize setting in php.ini.
Assigning Unique Filenames
As I explained, to keep an uploaded file you need to copy it to another directory. And while you have access to the name of each uploaded file with its $_FILE['upload']['name'] variable, there’s no guarantee that two files with the same name will not be uploaded. In such a case, storage of the file with its original name may result in newer uploads overwriting older ones. For this reason, you’ll usually want to adopt a scheme that allows you to assign a unique filename to every uploaded file. Using the system time (which you can access using the PHP time function), you can easily produce a name based on the number of seconds since January 1, 1970. But what if two files happen to be uploaded within one second of each other? To help guard against this possibility, we’ll also use the client’s IP address (automatically stored in $_SERVER['REMOTE_ADDR'] by PHP) in the filename. Since you’re unlikely to receive two files from the same IP address within one second of each other, it’s acceptable for most purposes:
// Pick a file extension
if (preg_match('/^image\/p?jpeg$/i', $_FILES['upload']['type']))
{
$ext = '.jpg';
}
else if (preg_match('/^image\/gif$/i', $_FILES['upload']['type']))
{
$ext = '.gif';
}
else if (preg_match('/^image\/(x-)?png$/i',
$_FILES['upload']['type']))
{
$ext = '.png';
}
else
{
$ext = '.unknown';
}
// The complete path/filename
$filename = 'C:/uploads/' . time() . $_SERVER['REMOTE_ADDR'] . $ext;
// Copy the file (if it is deemed safe)
if (!is_uploaded_file($_FILES['upload']['tmp_name']) or
!copy($_FILES['upload']['tmp_name'], $filename))
{
$error = "Could not save file as $filename!";
include $_SERVER['DOCUMENT_ROOT'] . '/includes/error.html.php';
exit();
}
Important to note in this code is the use of the is_uploaded_file function to check if the file is “safe.” All this function does is return TRUE if the filename it’s passed as a parameter ($_FILES['upload']['tmp_name'] in this case) was uploaded as part of a form submission. If a malicious user loaded this script and manually specified a filename such as /etc/passwd (the system password store on Linux servers), and you had failed to use is_uploaded_file to check that $_FILES['upload'] really referred to an uploaded file, your script might be used to copy sensitive files on your server into a directory where they’d become publicly accessible over the Web! Thus, before you ever trust a PHP variable that you expect to contain the filename of an uploaded file, be sure to use is_uploaded_file to check it. A second trick I’ve used in the aforementioned code is to combine is_uploaded_file and copy together as the condition of an if statement. If the result of is_uploaded_file($_FILES['upload']['tmp_name']) is FALSE (making !is_uploaded_file($_FILES['upload']['tmp_name']) TRUE), PHP will know immediately that the entire condition will beTRUE when it sees the or operator separating the two function calls. To save time, it will refrain from bothering to run copy, so the file won’t be copied when is_uploaded_file returns FALSE. On the other hand, if is_uploaded_file returns TRUE, PHP goes ahead and copies the file. The result ofcopy then determines whether or not an error message is displayed. Similarly, if we’d used the and operator instead of or, a FALSE result in the first part of the condition would cause PHP to skip evaluating the second part. This characteristic of if statements is known as short-circuit evaluation , and it works in other conditional structures such as while and for loops, too. Finally, note that I’ve used UNIX-style forward slashes (/) in the path, despite it being a Windows path. If I’d used backslashes, I would’ve had to replace them with double-backslashes (\\) to stop PHP from interpreting them as escaped characters. PHP is smart enough to convert forward slashes in a filepath to backslashes when it’s running on a Windows system. Since we can also use single slashes (/) as usual on non-Windows systems, adopting forward slashes in general for filepaths in PHP will make your scripts more portable.
Recording Uploaded Files in the Database
So, you’ve created a system whereby visitors can upload JPEG, GIF, and PNG images and have them saved on your server … but this book was supposed to be about database driven websites—right? If we used the system as it stands now, the submitted images would need to be collected from the folder in which they’re saved, then added to the website by hand! If you think back to the end of Chapter 9 when I suggested you develop a system that enabled site visitors to submit jokes to be stored in the database ready for quick approval by a content administrator, you’ll know there must be a better way! MySQL has several column types that allow you to store binary data. In database parlance, these column types let us store BLOBs (Binary Large OBjects); however, the storage of potentially large files in a relational database is often a bad idea. While there’s convenience in having all the data located in one place, large files lead to large databases, and large databases lead to reduced performance and humongous backup files. The best alternative is usually to store the filenames in the database. As long as you remember to delete files when you delete their corresponding entries in the database, everything should work the way you need it to. Since we’ve seen all the SQL code involved in this time and again, I’ll leave the details to you. As usual, the SitePoint Forum community is there to offer a helping hand if necessary. In cases where you’re dealing with relatively small files—for example, head shots for use in a staff directory—the storage of data in MySQL is quite practical. In the rest of this chapter, I’ll demonstrate how to use PHP to store binary files uploaded over the Web in a MySQL database, and how to retrieve those files for download or display.
Binary Column Types
As with most database driven web applications, the first factor to consider is the layout of the database. To keep this example separate from the Internet Joke Database, I recommend creating a new database for it:
CREATE DATABASE filestore
If this isn’t possible (for example, if you’re working on a hosted MySQL server where you’re only allowed a single database), go ahead and stick with your existing database. For each file that’s stored in our database, we’ll store the filename, the MIME type (for example, image/jpeg for JPEG image files), a short description of the file, and the binary data itself. Here’s the CREATE TABLE statement to create the table:
chapter12/sql/filestore.sql (excerpt)
CREATE TABLE filestore (
id INT NOT NULL PRIMARY KEY AUTO_INCREMENT,
filename VARCHAR(255) NOT NULL,
mimetype VARCHAR(50) NOT NULL,
description VARCHAR(255) NOT NULL,
filedata MEDIUMBLOB
) DEFAULT CHARACTER SET utf8 ENGINE=InnoDB
Most of this syntax should be familiar to you; however, the MEDIUMBLOB column type is new. If you consult the MySQL Column Type Reference in Appendix D, you’ll find that MEDIUMBLOB is the same as MEDIUMTEXT, except that it performs case-sensitive searches and sorts. In fact, there’s no difference between binary data and blocks of text from MySQL’s point of view—both are just long strings of bytes to be stored in the database. MySQL just applies a bunch of extra rules to text column types to ensure that the expected sorting behavior and character encoding conversions are performed transparently. Aside from the increased performance you gain from avoiding these extra rules, MySQL provides BLOB column types like MEDIUMBLOB to support situations in which you might need to compare the contents of one binary file with another. In such cases, you’d want the comparison to be case-sensitive, as binary files may use byte patterns that are the equivalent to alphabetical letters; for example, you’d want to distinguish the byte pattern that represents “A” from that representing “a,” which a MEDIUMTEXT column would consider equal. MEDIUMBLOB is one of several BLOB column types designed to store variable-length binary data. These column types differ from one another only in two aspects: the maximum size of the data a particular value in the column can contain, and the number of bytes used to store the length of each data value. The different binary column types are listed with these details in Table 12.1.
Table 12.1. Binary Column Types in MySQL
|
Column type |
Maximum size |
Space required per entry |
|
TINYBLOB |
255B |
Data size + 1 byte |
|
BLOB |
65KB |
Data size + 2 bytes |
|
MEDIUMBLOB |
16.7MB |
Data size + 3 bytes |
|
LONGBLOB |
4.3GB |
Data size + 4 bytes |
As you can see, the table we’ve created will be able to store files up to 16.7MB in size. If you think you’ll need larger files, you can bump the filedata column up to a LONGBLOB. Each file will occupy one more byte in the database, because MySQL will require that extra byte in order to record larger file sizes, but you’ll be able to store files up to 4.3GB (assuming that your operating system allows files of this size)! If you took my advice to create this table in a separate database, you’ll need a new db.inc.php file to enable this example to connect to the database:
chapter12/filestore/db.inc.php
<?php
try
{
$pdo = new PDO('mysql:host=localhost;dbname=filestore',
'filestoreuser', 'mypassword');
$pdo->setAttribute(PDO::ATTR_ERRMODE, PDO::ERRMODE_EXCEPTION);
$pdo->exec('SET NAMES "utf8"');
}
catch (PDOException $e)
{
$error = 'Unable to connect to the database server.';
include 'error.html.php';
exit();
}
Storing Files
With the database ready and waiting, the next step is to create a PHP controller script and template that lets users upload files and store them in the database. You can hold off copying the code in the next two sections; I’ll present the completed code at the end of the chapter. Here’s the code for the form—there should be no surprises here:
chapter12/filestore/files.html.php (excerpt)
<form action="" method="post" enctype="multipart/form-data">
<div>
<label for="upload">Upload File:
<input type="file" id="upload" name="upload"></label>
</div>
<div>
<label for="desc">File Description:
<input type="text" id="desc" name="desc"
maxlength="255"></label>
</div>
<div>
<input type="hidden" name="action" value="upload">
<input type="submit" value="Upload">
</div>
</form>
As you’ll know from your reading in this chapter, this form will create a temporary file on the server and store the name of that file in $_FILES['upload']['tmp_name']. It also creates $_FILES['upload']['name'] (the original name of the file), $_FILES['upload']['size'] (the file size measured in bytes), and finally, $_FILES['upload']['type'] (the MIME type of the file). Inserting the file into the database is a relatively straightforward process: read the data from the temporary file into a PHP variable, then use that variable in a standard MySQL INSERT query. Again, we make use ofis_uploaded_file to make sure the filename we use does, in fact, correspond to an uploaded file before we start any of this. Here’s the code:
chapter12/filestore/index.php (excerpt)
<?php
include_once $_SERVER['DOCUMENT_ROOT'] .
'/includes/magicquotes.inc.php';
if (isset($_POST['action']) and $_POST['action'] == 'upload')
{
// Bail out if the file isn't really an upload
if (!is_uploaded_file($_FILES['upload']['tmp_name']))
{
$error = 'There was no file uploaded!';
include $_SERVER['DOCUMENT_ROOT'] . '/includes/error.html.php';
exit();
}
$uploadfile = $_FILES['upload']['tmp_name'];
$uploadname = $_FILES['upload']['name'];
$uploadtype = $_FILES['upload']['type'];
$uploaddesc = $_POST['desc'];
$uploaddata = file_get_contents($uploadfile);
include 'db.inc.php';
try
{
$sql = 'INSERT INTO filestore SET
filename = :filename,
mimetype = :mimetype,
description = :description,
filedata = :filedata';
$s = $pdo->prepare($sql);
$s->bindValue(':filename', $uploadname);
$s->bindValue(':mimetype', $uploadtype);
$s->bindValue(':description', $uploaddesc);
$s->bindValue(':filedata', $uploaddata);
$s->execute();
}
catch (PDOException $e)
{
$error = 'Database error storing file!';
include $_SERVER['DOCUMENT_ROOT'] . '/includes/error.html.php';
exit();
}
header('Location: .');
exit();
}
Viewing Stored Files
Armed with the code that accepts file uploads and stores them in a database, you’re halfway home. But you still need to be able to pull that data out of the database to use it. For our purposes, this will mean sending the file to a requesting browser. Once again, this turns out to be a relatively straightforward process. We simply retrieve the data for the requested file from the database and send it to the web browser. The only tricky part is to send the browser information about the file:
the file size
so that the browser can display accurate download-progress information to the user
the file type
so that the browser knows what to do with the data it receives; that is, display it as a web page, text file, or image, or offer to save the file
the filename
without specifying this, the browser will assume all files downloaded from our script have the same filename as our controller script
All this information is sent to the browser using HTTP headers , which is information that precedes the transmission of the file data itself. As we’ve already seen, sending HTTP headers via PHP is quite easy using the header function, but as headers must be sent before plain content, any calls to this function must come before anything is output by your script. The file size is specified with a Content-length header:
chapter12/filestore/index.php (excerpt)
header('Content-length: ' . strlen($filedata));
strlen is a built–in PHP function that returns the length of the given string. Since binary data is just a string of bytes as far as PHP is concerned, you can use this function to count the length (in bytes) of the file data. The file type is specified with a Content-type header:
chapter12/filestore/index.php (excerpt)
header("Content-type: $mimetype");
Finally, the filename is specified with a Content-disposition header:
header("Content-disposition: inline; filename=$filename");
You could use the following code to fetch a file with a given ID from the database, and send it to the browser:
include 'db.inc.php';
try
{
$sql = 'SELECT filename, mimetype, filedata
FROM filestore
WHERE id = :id';
$s = $pdo->prepare($sql);
$s->bindValue(':id', $_GET['id']);
$s->execute();
}
catch (PDOException $e)
{
$error = 'Database error fetching requested file.';
include $_SERVER['DOCUMENT_ROOT'] . '/includes/error.html.php';
exit();
}
$file = $s->fetch();
if (!$file)
{
$error = 'File with specified ID not found in the database!';
include $_SERVER['DOCUMENT_ROOT'] . '/includes/error.html.php';
exit();
}
$filename = $file['filename'];
$mimetype = $file['mimetype'];
$filedata = $file['filedata'];
header('Content-length: ' . strlen($filedata));
header("Content-type: $mimetype");
header("Content-disposition: inline; filename=$filename");
echo $filedata;
exit();
One final trick we can add to this code is to allow a file to be downloaded, instead of viewed, if the user so desires. Web standards suggest that the way to do this is to send a Content-disposition of attachment instead of inline. Here’s the modified code. It checks if $_GET['action'] equals'download', which would indicate that this special file type should be sent:
include 'db.inc.php';
try
{
$sql = 'SELECT filename, mimetype, filedata
FROM filestore
WHERE id = :id';
$s = $pdo->prepare($sql);
$s->bindValue(':id', $_GET['id']);
$s->execute();
}
catch (PDOException $e)
{
$error = 'Database error fetching requested file.';
include $_SERVER['DOCUMENT_ROOT'] . '/includes/error.html.php';
exit();
}
$file = $s->fetch();
if (!$file)
{
$error = 'File with specified ID not found in the database!';
include $_SERVER['DOCUMENT_ROOT'] . '/includes/error.html.php';
exit();
}
$filename = $file['filename'];
$mimetype = $file['mimetype'];
$filedata = $file['filedata'];
$disposition = 'inline';
if ($_GET['action'] == 'download')
{
$disposition = 'attachment';
}
header('Content-length: ' . strlen($filedata));
header("Content-type: $mimetype");
header("Content-disposition: $disposition; filename=$filename");
echo $filedata;
exit();
Unfortunately, many older browsers generally ignore the Content-disposition header, deciding what to do with a file based on the Content-type header instead—especially when it comes after the Content-disposition header. To achieve the desired download behavior in as many browsers as possible, make sure the Content-type header comes before the Content-disposition header. Then replace the file’s actual MIME type with a generic Content-type of application/ octet-stream (which is required to force a download in older browsers):
chapter12/filestore/index.php (excerpt)
include 'db.inc.php';
try
{
$sql = 'SELECT filename, mimetype, filedata
FROM filestore
WHERE id = :id';
$s = $pdo->prepare($sql);
$s->bindValue(':id', $_GET['id']);
$s->execute();
}
catch (PDOException $e)
{
$error = 'Database error fetching requested file.';
include $_SERVER['DOCUMENT_ROOT'] . '/includes/error.html.php';
exit();
}
$file = $s->fetch();
if (!$file)
{
$error = 'File with specified ID not found in the database!';
include $_SERVER['DOCUMENT_ROOT'] . '/includes/error.html.php';
exit();
}
$filename = $file['filename'];
$mimetype = $file['mimetype'];
$filedata = $file['filedata'];
$disposition = 'inline';
if ($_GET['action'] == 'download')
{
$mimetype = 'application/octet-stream';
$disposition = 'attachment';
}
// Content-type must come before Content-disposition
header('Content-length: ' . strlen($filedata));
header("Content-type: $mimetype");
header("Content-disposition: $disposition; filename=$filename");
echo $filedata;
exit();
Putting It All Together
You’ll find the complete file store example following. It combines all the elements given previously with some simple code that will list the files in the database, and allow them to be viewed, downloaded, or deleted. As always, this code is available in the code archive. First, the controller script:
chapter12/filestore/index.php
<?php
include_once $_SERVER['DOCUMENT_ROOT'] .
'/includes/magicquotes.inc.php';
if (isset($_POST['action']) and $_POST['action'] == 'upload')
{
// Bail out if the file isn't really an upload
if (!is_uploaded_file($_FILES['upload']['tmp_name']))
{
$error = 'There was no file uploaded!';
include $_SERVER['DOCUMENT_ROOT'] . '/includes/error.html.php';
exit();
}
$uploadfile = $_FILES['upload']['tmp_name'];
$uploadname = $_FILES['upload']['name'];
$uploadtype = $_FILES['upload']['type'];
$uploaddesc = $_POST['desc'];
$uploaddata = file_get_contents($uploadfile);
include 'db.inc.php';
try
{
$sql = 'INSERT INTO filestore SET
filename = :filename,
mimetype = :mimetype,
description = :description,
filedata = :filedata';
$s = $pdo->prepare($sql);
$s->bindValue(':filename', $uploadname);
$s->bindValue(':mimetype', $uploadtype);
$s->bindValue(':description', $uploaddesc);
$s->bindValue(':filedata', $uploaddata);
$s->execute();
}
catch (PDOException $e)
{
$error = 'Database error storing file!';
include $_SERVER['DOCUMENT_ROOT'] . '/includes/error.html.php';
exit();
}
header('Location: .');
exit();
}
if (isset($_GET['action']) and
($_GET['action'] == 'view' or $_GET['action'] == 'download') and
isset($_GET['id']))
{
include 'db.inc.php';
try
{
$sql = 'SELECT filename, mimetype, filedata
FROM filestore
WHERE id = :id';
$s = $pdo->prepare($sql);
$s->bindValue(':id', $_GET['id']);
$s->execute();
}
catch (PDOException $e)
{
$error = 'Database error fetching requested file.';
include $_SERVER['DOCUMENT_ROOT'] . '/includes/error.html.php';
exit();
}
$file = $s->fetch();
if (!$file)
{
$error = 'File with specified ID not found in the database!';
include $_SERVER['DOCUMENT_ROOT'] . '/includes/error.html.php';
exit();
}
$filename = $file['filename'];
$mimetype = $file['mimetype'];
$filedata = $file['filedata'];
$disposition = 'inline';
if ($_GET['action'] == 'download')
{
$mimetype = 'application/octet-stream';
$disposition = 'attachment';
}
// Content-type must come before Content-disposition
header('Content-length: ' . strlen($filedata));
header("Content-type: $mimetype");
header("Content-disposition: $disposition; filename=$filename");
echo $filedata;
exit();
}
if (isset($_POST['action']) and $_POST['action'] == 'delete' and
isset($_POST['id']))
{
include 'db.inc.php';
try
{
$sql = 'DELETE FROM filestore
WHERE id = :id';
$s = $pdo->prepare($sql);
$s->bindValue(':id', $_POST['id']);
$s->execute();
}
catch (PDOException $e)
{
$error = 'Database error deleting requested file.';
include $_SERVER['DOCUMENT_ROOT'] . '/includes/error.html.php';
exit();
}
header('Location: .');
exit();
}
include 'db.inc.php';
try
{
$result = $pdo->query(
'SELECT id, filename, mimetype, description
FROM filestore');
}
catch (PDOException $e)
{
$error = 'Database error fetching stored files.';
include $_SERVER['DOCUMENT_ROOT'] . '/includes/error.html.php';
exit();
}
$files = array();
foreach ($result as $row)
{
$files[] = array(
'id' => $row['id'],
'filename' => $row['filename'],
'mimetype' => $row['mimetype'],
'description' => $row['description']);
}
include 'files.html.php';
Next, the PHP template that includes the upload form and list of files:
chapter12/filestore/files.html.php
<?php include_once $_SERVER['DOCUMENT_ROOT'] .
'/includes/helpers.inc.php'; ?>
<!DOCTYPE html>
<html lang="en">
<head>
<meta charset="utf-8">
<title>PHP/MySQL File Repository</title>
</head>
<body>
<h1>PHP/MySQL File Repository</h1>
<form action="" method="post" enctype="multipart/form-data">
<div>
<label for="upload">Upload File:
<input type="file" id="upload" name="upload"></label>
</div>
<div>
<label for="desc">File Description:
<input type="text" id="desc" name="desc"
maxlength="255"></label>
</div>
<div>
<input type="hidden" name="action" value="upload">
<input type="submit" value="Upload">
</div>
</form>
<?php if (count($files) > 0): ?>
<p>The following files are stored in the database:</p>
<table>
<thead>
<tr>
<th>Filename</th>
<th>Type</th>
<th>Description</th>
</tr>
</thead>
<tbody>
<?php foreach($files as $f): ?>
<tr>
<td>
<a href="?action=view&id=<?php htmlout($f['id']); ?>
"><?php htmlout($f['filename']); ?></a>
</td>
<td><?php htmlout($f['mimetype']); ?></td>
<td><?php htmlout($f['description']); ?></td>
<td>
<form action="" method="get">
<div>
<input type="hidden" name="action"
value="download"/>
<input type="hidden" name="id"
value="<?php htmlout($f['id']); ?>"/>
<input type="submit" value="Download"/>
</div>
</form>
</td>
<td>
<form action="" method="post">
<div>
<input type="hidden" name="action" value="delete"/>
<input type="hidden" name="id"
value="<?php htmlout($f['id']); ?>"/>
<input type="submit" value="Delete"/>
</div>
</form>
</td>
</tr>
<?php endforeach; ?>
</tbody>
</table>
<?php endif; ?>
</body>
</html>
And just to be thorough, the database connection include file:
chapter12/filestore/db.inc.php
<?php
try
{
$pdo = new PDO('mysql:host=localhost;dbname=filestore',
'filestoreuser', 'mypassword');
$pdo->setAttribute(PDO::ATTR_ERRMODE, PDO::ERRMODE_EXCEPTION);
$pdo->exec('SET NAMES "utf8"');
}
catch (PDOException $e)
{
$error = 'Unable to connect to the database server.';
include 'error.html.php';
exit();
}
Note that this uses a different database (filestore) than the Internet Joke Database site and user (filestoreuser). If you prefer to put the filestore table in the ijdb database along with everything else that’s in there, you can just use the shared db.inc.php include file instead. With all these files in place and the database set up, fire up your browser and take a look. The empty repository should produce a page like the one in Figure 12.1.
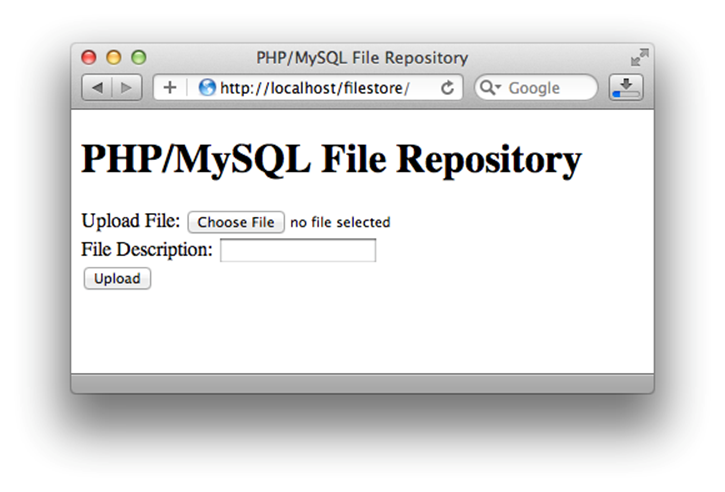
Figure 12.1. The Empty Repository
Upload a few files and you should see them listed in a table, as shown in Figure 12.2.
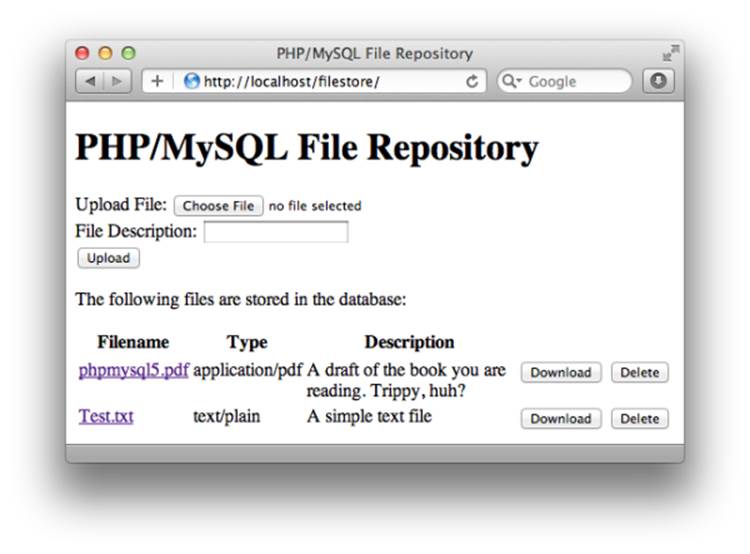
Figure 12.2. A couple of files on board
Click on a filename and the file should be displayed in the browser (assuming the file is of a type that your browser supports). In addition, try out the Download and Delete buttons provided for each file. They should work as you would expect. This example demonstrates all the techniques you need in order to juggle binary files with PHP and MySQL, and I invite you to think of some creative uses of this code. Consider, for example, a file archive to which users must provide a username and password before they’re allowed to view or download the files. If a user enters an incorrect username/password combination, your script can display an error page instead of sending the file data. Another possibility would be a script that sends different files depending on the details submitted by the form.
Large File Considerations
In systems like those we’ve just developed, large files present some unique challenges to the developer. I’ll explain these here briefly, but fully developed solutions to these problems are beyond the scope of this book.
MySQL Packet Size
By default, MySQL rejects commands (packets) that are longer than 1MB. This default puts a reasonably severe limit on the maximum file size you can store, unless you’re prepared to write your file data in 1MB chunks using an INSERT followed by several UPDATEs. Increase the maximum packet size by setting the max_allowed_packet option in your my.cnf or my.ini file. Refer to the MySQL manual for more information on this issue.
PHP Memory Limit
PHP is configured by default to consume no more than 8MB of memory for the processing of any particular request. If your script needs to read a file whose size is close to or even larger than that limit, your browser will likely display an ugly error message about PHP having been unable to allocate memory. To fix this issue, edit your server’s php.ini file and change the value of the memory_limit setting to a more generous figure.
PHP Script Timeout
PHP is configured by default to kill PHP scripts that run for more than 30 seconds. Needless to say, for large downloads over slow connections, this limit will be reached fairly quickly. Use PHP’s set_time_limit function to set an appropriate time limit for the download, or simply set the time limit to zero, which allows the script to run to completion, however long it takes. But only do this if you’re positive your script will always terminate, and not run forever!
The End
In this chapter, we completed our exploration of PHP and MySQL with a practical look at handling file uploads and storing binary data in MySQL databases. Admittedly, this is a rather arbitrary place to end this book; there are plenty of other aspects of PHP and MySQL that you could explore, some of which could be called no less basic or essential than binary data. PHP in particular—with its “batteries included” philosophy of packing as much functionality as possible directly into the language in the form of built-in functions—could fill ten books this size. Exactly which aspects you’ll need to learn before tackling any particular project will vary wildly. Having worked as a professional PHP developer for many years now, I have to admit that I remain unfamiliar with most of the functionality that PHP has to offer. There’s just so much available to explore. That’s why very few people bother to print out the PHP Manual in its entirety. By far the best way to cement your newfound knowledge of PHP and MySQL is to put it to work: build your own database driven website from scratch using the techniques covered in this book. Publish it on the Web, and ask for feedback from real, live users. Chances are they’ll push you to make improvements to the site that you might lack the knowhow to implement right away. These real-world requirements should direct your further exploration of PHP and MySQL—and there’s plenty more to be learned! A great resource on your adventures would be a copy of SitePoint’s PHP Master: Write Cutting-edge Code. Beginning with an exploration of PHP’s object oriented programming features, it builds on that foundation to demonstrate efficient ways of tackling some of the problems we looked at in this book, and many more that we didn’t. If you end up tackling more than one project, you may find yourself writing the same pieces of code over and over again. Rather than spending time perfecting your own collection of shared include files, you might like to spend some time learning a PHP framework such as Zend Framework, CakePHP, or Symfony. Each of these frameworks represent many thousands of hours’ work by PHP experts who’ve developed ready-made solutions for the most common problems tackled by PHP developers. By using these solutions in your own projects, you can focus on writing the code to solve the problems that are unique to your project and waste less time reinventing the wheel. Each framework has its own philosophy, strengths, and weaknesses, and finding the right one for you will take some work. If you plan on becoming a professional PHP developer, however, you’ll find it time well spent. However you proceed from this point, rest assured you’re starting out with a solid grounding in the essentials. That’s more than can be said for many developers working today. Take that advantage and use it. Most importantly, go out there and write some code!
[61] For full details of the available options, check out the PHP Manual.
[62] For a full description of the <link rel="canonical"> tag, check out the Google Webmaster Central Blog.
[63] The exact MIME type depends on the browser in use. Internet Explorer uses image/pjpeg for JPEG images and image/x-png for PNG images, while Firefox and other browsers use image/jpeg and image/png, respectively.
[64] A second restriction, affecting the total size of form submissions, is enforced by the post_max_size setting in php.ini. Its default value is 8MB, so if you want to accept really big uploads you’ll need to modify that setting, too.