Sams Teach Yourself PHP, MySQL and Apache All in One (2012)
Part III. Getting Involved with the Code
Chapter 11. Working with Forms
In this chapter, you learn the following:
• How to access information from form fields
• How to work with form elements that allow multiple selections
• How to create a single document that contains both an HTML form and the PHP code that handles its submission
• How to save state with hidden fields
• How to redirect the user to a new page
• How to build HTML forms and PHP code that send mail
• How to build HTML forms that upload files and write the PHP code to handle the uploads
Until now, the PHP examples in this book have been missing a crucial dimension. Sure, you know the basics, can set variables and arrays, create and call functions, and work with strings. But that’s all meaningless if users cannot interact in a meaningful way with your website. HTML forms are the principal means by which substantial amounts of information pass from the user to the server, so this chapter moves into this dimension and looks at strategies for acquiring and working with user input.
Creating a Simple Input Form
For now, let’s keep the HTML separate from the PHP code. Listing 11.1 builds a simple HTML form.
Listing 11.1 A Simple HTML Form
1: <!DOCTYPE html>
2: <html>
3: <head>
4: <title>A simple HTML form</title>
5: </head>
6: <body>
7: <form method="post" action="send_simpleform.php">
8: <p><label for="user">Name:</label><br/>
9: <input type="text" id="user" name="user"></p>
10: <p><label for="message">Message:</label><br/>
11: <textarea id="message" name="message" rows="5" cols="40"></textarea></p>
12: <button type="submit" name="submit" value="send">Send Message</button>
13: </form>
14: </body>
15: </html>
Put these lines into a text file called simpleform.html and place that file in your web server document root. This listing defines a form that contains a text field with the name "user" on line 9, a text area with the name "message" on line 11, and a submit button on line 12. The FORM element’sACTION argument points to a file called send_simpleform.php, which processes the form information. The method of this form is POST, so the variables are stored in the $_POST superglobal.
Listing 11.2 creates the code that receives user input and displays it within the context of an HTML page.
Listing 11.2 Reading Input from a Form
1: <!DOCTYPE html>
2: <html>
3: <head>
4: <title>A simple response</title>
5: </head>
6: <body>
7: <p>Welcome, <strong><?php echo $_POST['user']; ?></strong>!</p>
8: <p>Your message is:
9: <strong><?php echo $_POST['message']; ?></strong></p>
10: </body>
11: </html>
Put these lines into a text file called send_simpleform.php and place that file in your web server document root. Now access the form itself (simpleform.html) with your web browser, and you should see something like Figure 11.1.
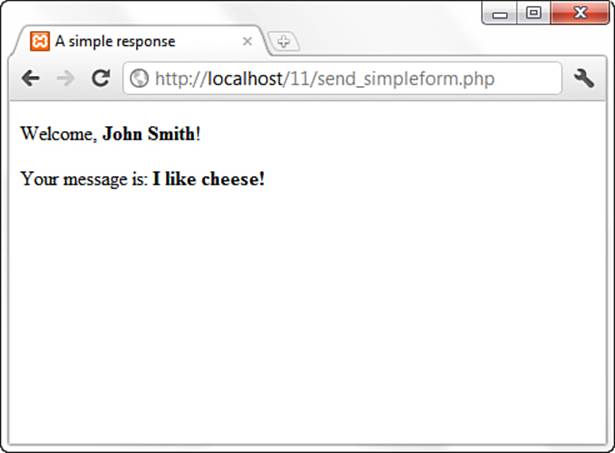
Figure 11.1 The form created by simpleform.html.
The script in Listing 11.2 is called when the user submits the form created in Listing 11.1. The code in Listing 11.2 accesses two variables: $_POST['user'] and $_POST['message']. These are references to the variables in the $_POST superglobal, which contain the values that the user entered in the user text field and the message text area. Forms in PHP really are as simple as that.
Enter some information in the form fields and click the Send Message button. You should see your input echoed to the screen.
Note
You could also use the GET method in this form (and others). POST can handle more data than GET and does not pass the data in the query string. If you use the GET method, be sure to change your superglobal to $_GET and not $_POST.
Accessing Form Input with User-Defined Arrays
The previous example showed how to gather information from HTML elements that submit a single value per element name, such as text fields, text areas, and radio buttons. This leaves you with a problem when working with elements such as checkboxes because it is possible for the user to choose one or more items. If you name the checkbox INPUT element with a plain name, like so
<input type="checkbox" id="products" name="products">
the script that receives this data has access to only a single value corresponding to this name ($_POST['products']) (and therefore only the first checkbox in the list that the user selected). You can change this behavior by renaming an element of this kind so that its name ends with an empty set of square brackets. Listing 11.3 does this.
Listing 11.3 An HTML Form Including Multiple Check Boxes
1: <!DOCTYPE html>
2: <html>
3: <head>
4: <title>An HTML form with checkboxes</title>
5: </head>
6: <body>
7: <form action="send_formwithcb.php" method="POST">
8: <p><label>Name:</label><br/>
9: <input type="text" name="user" /></p>
10: <fieldset>
11: <legend>Select Some Products:</legend><br/>
12: <input type="checkbox" id="tricorder"
13: name="products[]" value="Tricorder">
14: <label for="tricorder">Tricorder</label><br/>
15:
16: <input type="checkbox" id="ORAC_AI"
17: name="products[]" value="ORAC AI">
18: <label for="ORAC_AI">ORAC AI</label><br/>
19:
20: <input type="checkbox" id="HAL_2000"
21: name="products[]" value="HAL 2000">
22: <label for="HAL_2000">HAL 2000</label>
23: </fieldset>
24: <button type="submit" name="submit" value="submit">Submit Form</button>
25: </form>
26: </body>
27: </html>
Put these lines into a text file called formwithcb.html and place that file in your web server document root. Next, in the script that processes the form input, you find that the value of all checked checkboxes with the "products[]" name are available in an array called $_POST['products']. Each checkbox is indicated in lines 12 through 22. That the user’s choices are made available is demonstrated in an array in Listing 11.4.
Listing 11.4 Reading Input from the Form in Listing 11.3
1: <!DOCTYPE html>
2: <html>
3: <head>
4: <title>Reading checkboxes</title>
5: </head>
6: <body>
7: <p>Welcome, <strong><?php echo $_POST['user']; ?></strong>!</p>
8: <p>Your product choices are:
9: <?php
10: if (!empty($_POST['products'])) {
11: echo "<ul>";
12: foreach ($_POST['products'] as $value) {
13: echo "<li>$value</li>";
14: }
15: echo "</ul>";
16: } else {
17: echo "None";
18: }
19: ?>
20: </body>
21: </html>
Put these lines into a text file called send_formwithcb.php and place that file in your web server document root. Now access the form (formwithcb.html) with your web browser and check some checkboxes. Figure 11.2 shows an example.
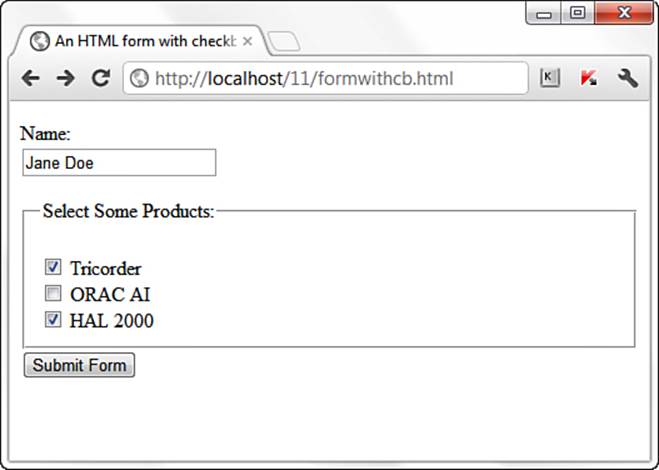
Figure 11.2 The form created in Listing 11.3.
Line 7 of the script in Listing 11.4 accesses the $_POST['user'] variable, which is derived from the user INPUT field in the form. On line 10, the code tests for the $_POST['products'] variable. If $_POST['products'] is present and is not empty, execution loops through it on line 12, and outputs each choice to the browser on line 13. The text within the value attribute of the selected checkbox becomes one of the stored values in the array.
Submit the form, and you might see something like that shown in Figure 11.3.
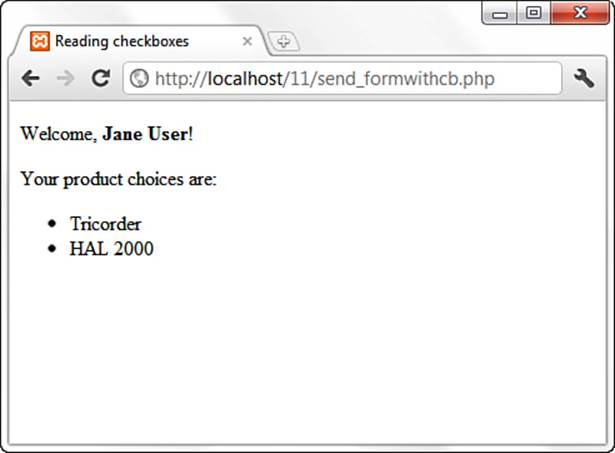
Figure 11.3 Sample output of send_formwithcb.php.
Although the looping technique is particularly useful with checkboxes, it can also work with other types of form elements. For example, if you use a SELECT element that allows for multiple selections, you are also enabling a user to choose many values within a single field name.
As long as the name you choose ends with empty square brackets, PHP compiles the user input for this field into an array.
Combining HTML and PHP Code on a Single Page
In some circumstances, you might want to include the form-parsing PHP code on the same page as a hard-coded HTML form. Such a combination can prove useful if you need to present the same form to the user more than once. You would have more flexibility if you were to write the entire page dynamically, of course, but you would miss out on one of the great strengths of PHP, which is that it mingles well with standard HTML. The more standard HTML you can include in your pages, the easier they are for designers and page builders to amend without asking you, the programmer, for help.
For the following examples, imagine that you’re creating a site that teaches basic math to preschool children and have been asked to create a script that takes a number from form input and tells the user whether it’s larger or smaller than a predefined integer.
Listing 11.5 creates the HTML. For this example, you need only a single text field, but even so, the code listing includes a little PHP.
Listing 11.5 An HTML Form That Calls Itself
1: <!DOCTYPE html>
2: <html>
3: <head>
4: <title>An HTML form that calls itself</title>
5: </head>
6: <body>
7: <form action="<?php echo $_SERVER['PHP_SELF']; ?>" method="POST">
8: <p><label for="guess">Type your guess here:</label> <br/>
9: <input type="text" id="guess" name="guess" /></p>
10: <button type="submit" name="submit" value="submit">Submit</button>
11: </form>
12: </body>
13: </html>
The action of this script is $_SERVER['PHP_SELF'], as shown in line 7. This global variable represents the name of the current script. In other words, the action tells the script to reload itself. The script in Listing 11.5 does not produce any output, but if you upload the script to your web server, access the page, and view the source of the page, you will notice that the form action now contains the name of the script itself.
In Listing 11.6, you begin to build up the PHP element of the page.
Listing 11.6 A PHP Number-Guessing Script
1: <?php
2: $num_to_guess = 42;
3: if (!isset($_POST['guess'])) {
4: $message = "Welcome to the guessing machine!";
5: } elseif (!is_numeric($_POST['guess'])) { // is not numeric
6: $message = "I don't understand that response.";
7: } elseif ($_POST['guess'] == $num_to_guess) { // matches!
8: $message = "Well done!";
9: } elseif ($_POST['guess'] > $num_to_guess) {
10: $message = $_POST['guess']." is too big! Try a smaller number.";
11: } elseif ($_POST['guess'] < $num_to_guess) {
12: $message = $_POST['guess']." is too small! Try a larger number.";
13: } else { // some other condition
14: $message = "I am terribly confused.";
15: }
16: ?>
First, you must define the number that the user guesses, and this is done in line 2 when 42 is assigned to the $num_to_guess variable. Next, you must determine whether the form has been submitted. You can test for submission by looking for the existence of the variable $_POST['guess'], which is available only if the form script has been submitted (with or without a value in the field). If a value for $_POST['guess'] isn’t present, you can safely assume that the user arrived at the page without submitting a form. If the value is present, you can test the value it contains. The test for the presence of the $_POST['guess'] variable takes place on line 3.
Lines 3 through 15 represent an if...elseif...else control structure. Only one of these conditions will be true at any given time, depending on what (if anything) was submitted from the form. Depending on the condition, a different value is assigned to the $message variable. That variable is then printed to the screen in line 23 in Listing 11.6, which is part of the HTML portion of the script.
Listing 11.6 A PHP Number-Guessing Script (Continued)
17: <!DOCTYPE html>
18: <html>
19: <head>
20: <title>A PHP number guessing script</title>
21: </head>
22: <body>
23: <h1><?php echo $message; ?></h1>
24: <form action="<?php echo $_SERVER['PHP_SELF']; ?>" method="POST">
25: <p><label for="guess">Type your guess here:</label><br/>
26: <input type="text" is="guess" name="guess" /></p>
27: <button type="submit" name="submit" value="submit">Submit</button>
28: </form>
29: </body>
30: </html>
Place the PHP anfd HTML code (all the lines in Listing 11.6) into a text file called numguess.php and put this file in your web server document root. Now access the script with your web browser, and you should see something like Figure 11.4.
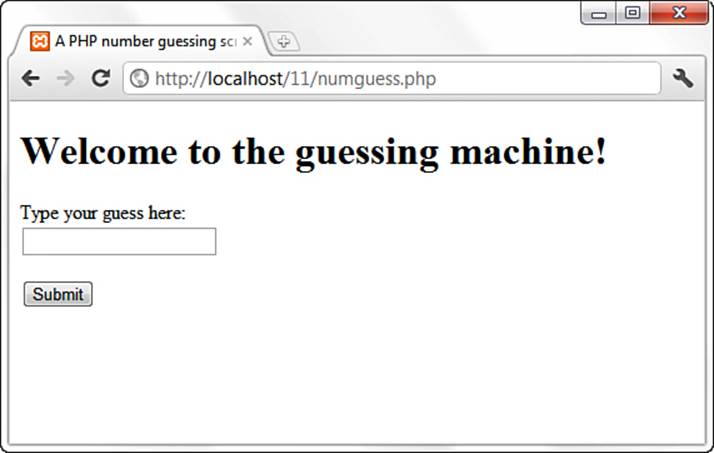
Figure 11.4 The form created in Listing 11.6.
You could still make a few more additions, but you can probably see how simple it would be to hand the code to a designer for aesthetic treatment. The designer can do her part without having to disturb the programming in any way—the PHP code is at the top, and the rest is almost entirely HTML.
Using Hidden Fields to Save State
The script in Listing 11.6 has no way of knowing how many guesses a user has made, but you can use a hidden field to keep track of this value. A hidden field behaves the same as a text field, except that the user cannot see it unless he views the HTML source of the document that contains it.
Take the original numguess.php script and save a copy as numguess2.php. In the new version, add a line after the initial assignment of the $num_to_guess variable:
$num_tries = (isset($_POST['num_tries'])) ? $num_tries + 1 : 1;
This line initializes a variable called $num_tries and assigns a value to it. If the form has not yet been submitted (if $_POST['num_tries'] is empty), the value of the $num_tries variable is 1 because you are on your first attempt at guessing the number. If the form has already been sent, the new value is the value of $_POST['num_tries'] plus 1.
The next change comes after the HTML level H1 heading:
<p><strong>Guess number:</strong> <?php echo $num_tries; ?></p>
This new line simply prints the current value of $num_tries to the screen.
Finally, before the HTML code for the form submission button, add the hidden field. This field saves the incremented value of $num_tries:
<input type="hidden" name="num_tries" value="<?php echo $num_tries; ?>"/>
Listing 11.7 shows the new script in its entirety.
Listing 11.7 Saving State with a Hidden Field
1: <?php
2: $num_to_guess = 42;
3: $num_tries = (isset($_POST['num_tries'])) ? $num_tries + 1 : 1;
4: if (!isset($_POST['guess'])) {
5: $message = "Welcome to the guessing machine!";
6: } elseif (!is_numeric($_POST['guess'])) { // is not numeric
7: $message = "I don't understand that response.";
8: } elseif ($_POST['guess'] == $num_to_guess) { // matches!
9: $message = "Well done!";
10: } elseif ($_POST['guess'] > $num_to_guess) {
11: $message = $_POST['guess']." is too big! Try a smaller number.";
12: } elseif ($_POST['guess'] < $num_to_guess) {
13: $message = $_POST['guess']." is too small! Try a larger number.";
14: } else { // some other condition
15: $message = "I am terribly confused.";
16: }
17: ?>
18: <!DOCTYPE html>
19: <html>
20: <head>
21: <title>A PHP number guessing script</title>
22: </head>
23: <body>
24: <h1><?php echo $message; ?></h1>
25: <p><strong>Guess number:</strong> <?php echo $num_tries; ?></p>
26: <form action="<?php echo $_SERVER['PHP_SELF']; ?>" method="POST">
27: <p><label for="guess">Type your guess here:</label><br/>
28: <input type="text" id="guess" name="guess" /></p>
29: <input type="hidden" name="num_tries" value="<?php echo $num_tries; ?>"/>
30: <button type="submit" name="submit" value="submit">Submit</button>
31: </form>
32: </body>
33: </html>
Save the numguess2.php file and place it in your web server document root. Access the form a few times with your web browser and try to guess the number (pretending you don’t already know it). The counter should increment by 1 each time you access the form.
Redirecting the User
Our simple script still has one major drawback: The form is reloaded whether or not the user guesses correctly. The fact that the HTML is hard-coded makes it difficult to avoid writing the entire page. You can, however, redirect the user to a congratulations page, thereby sidestepping the issue altogether.
When a server script communicates with a client, it must first send some headers that provide information about the document to follow. PHP usually handles this for you automatically, but you can choose to send your own header lines with PHP’s header() function.
To call the header() function, you must be absolutely sure that no output has been sent to the browser. The first time content is sent to the browser, PHP sends out headers of its own, and it’s too late for you to send any more. Any output from your document, even a line break or a space outside your script tags, causes headers to be sent. If you intend to use the header() function in a script, you must make certain that nothing precedes the PHP code that contains the function call. You should also check any libraries that you might be using.
Listing 11.8 shows typical headers sent to the browser by PHP, beginning with line 3, in response to the request in line 1.
Listing 11.8 Typical Server Headers Sent from a PHP Script
1: HTTP/1.1 200 OK
2: Date: Sun, 29 Jan 2012 15:50:28 PST
3: Server: Apache/2.2.21 (Win32) PHP/5.4.0
4: X-Powered-By: PHP/5.4.0
5: Connection: close
6: Content-Type: text/html
By sending a Location header rather than PHP’s default header, you can cause the browser to be redirected to a new page, such as the following:
header("Location: http://www.samspublishing.com");
Assuming that you’ve created a suitably upbeat page called congrats.html, we can amend the number-guessing script to redirect the user if she guesses correctly, as shown in Listing 11.9. The only change between this and Listing 11.7 comes after the elseif clause on line 8.
Listing 11.9 Using header() to Redirect User
1: <?php
2: $num_to_guess = 42;
3: $num_tries = (isset($_POST['num_tries'])) ? $num_tries + 1 : 1;
4: if (!isset($_POST['guess'])) {
5: $message = "Welcome to the guessing machine!";
6: } elseif (!is_numeric($_POST['guess'])) { // is not numeric
7: $message = "I don't understand that response.";
8: } elseif ($_POST['guess'] == $num_to_guess) { // matches!
9: header("Location: congrats.html");
10: exit;
11: } elseif ($_POST['guess'] > $num_to_guess) {
12: $message = $_POST['guess']." is too big! Try a smaller number.";
13: } elseif ($_POST['guess'] < $num_to_guess) {
14: $message = $_POST['guess']." is too small! Try a larger number.";
15: } else { // some other condition
16: $message = "I am terribly confused.";
17: }
18: ?>
19:
20: <!DOCTYPE html>
21: <html>
22: <head>
23: <title>A PHP number guessing script</title>
24: </head>
25: <body>
26: <h1><?php echo $message; ?></h1>
27: <p><strong>Guess number:</strong> <?php echo $num_tries; ?></p>
28: <form action="<?php echo $_SERVER['PHP_SELF']; ?>" method="POST">
29: <p><label for="guess">Type your guess here:</label><br/>
30: <input type="text" id="guess" name="guess" /></p>
31: <input type="hidden" name="num_tries" value="<?php echo $num_tries; ?>"/>
32: <button type="submit" name="submit" value="submit">Submit</button>
33: </form>
34: </body>
35: </html>
The elseif clause of the if statement on line 8 now causes the browser to send the user away to a page called congrats.html. The exit statement on line 10 immediately ends execution and output of this script, which ensures that all output from the current page is aborted.
Sending Mail on Form Submission
You’ve already seen how to take form responses and print the results to the screen, so you’re only one step away from sending those responses in an email message. Before learning about sending mail, however, read through the next section to make sure that your system is properly configured.
System Configuration for the mail() Function
Before you can use the mail() function to send mail, you need to set up a few directives in the php.ini file so that the function works properly. Open php.ini with a text editor and look for these lines:
[mail function]
; For Win32 only.
; http://php.net/smtp
SMTP = localhost
; http://php.net/smtp-port
smtp_port = 25
; For Win32 only.
; http://php.net/sendmail-from
;sendmail_from = me@example.com
; For Unix only. You may supply arguments as well (default: "sendmail -t -i").
; http://php.net/sendmail-path
;sendmail_path =
If you’re using Windows as your web server platform, the first two directives apply to you. For the mail() function to send mail, it must be able to access a valid outgoing mail server. If you plan to use the outgoing mail server of your choosing, the entry in php.ini could look like this:
SMTP = smtp.yourisp.net
The second configuration directive is sendmail_from, which is the email address used in the From header of the outgoing email. It can be overwritten in the mail script itself but normally operates as the default value, as in this example:
sendmail_from = youraddress@yourdomain.com
A good rule of thumb for Windows users is that whatever outgoing mail server you’ve set up in your email client on that machine, you should also use as the value of SMTP in php.ini.
If your web server is running on a Linux/UNIX platform, you use the sendmail functionality of that particular machine. In this case, only the last directive applies to you: sendmail_path. The default is sendmail -t -i, but if sendmail is in an odd place or if you need to specify different arguments, feel free to do so, as in the following example, which does not use real values:
sendmail_path = /opt/sendmail -odd -arguments
After making any changes to php.ini on any platform, you must restart the web server process for the changes to take effect.
Creating the Form
In Listing 11.10, you see the basic HTML for creating a simple feedback form named feedback.html. This form has an action of sendmail.php, which you create in the next section. The fields in feedback.html are simple: Lines 8 and 9 create a name field and label, lines 10 and 11 create the return email address field and label, and lines 12 and 13 contain the text area and label for the user’s message.
Listing 11.10 Creating a Simple Feedback Form
1: <!DOCTYPE html>
2: <html>
3: <head>
4: <title>E-Mail Form</title>
5: </head>
6: <body>
7: <form action="sendmail.php" method="POST">
8: <p><label for="name">Name:</label><br/>
9: <input type="text" size="25" id="name" name="name"/></p>
10: <p><label for="email">E-Mail Address:</label><br/>
11: <input type="text" size="25" id="email" name="email"/></p>
12: <p><label for="msg">Message:</label><br/>
13: <textarea id="msg" name="msg" cols="30" rows="5"></textarea></p>
14: <button type="submit" name="submit" value="send">Send Message</button>
15: </form>
16: </body>
17: </html>
Put all the lines shown in Listing 11.10 into a text file called feedback.html and place this file in your web server document root. Now access the script with your web browser, and you should see something like Figure 11.5.
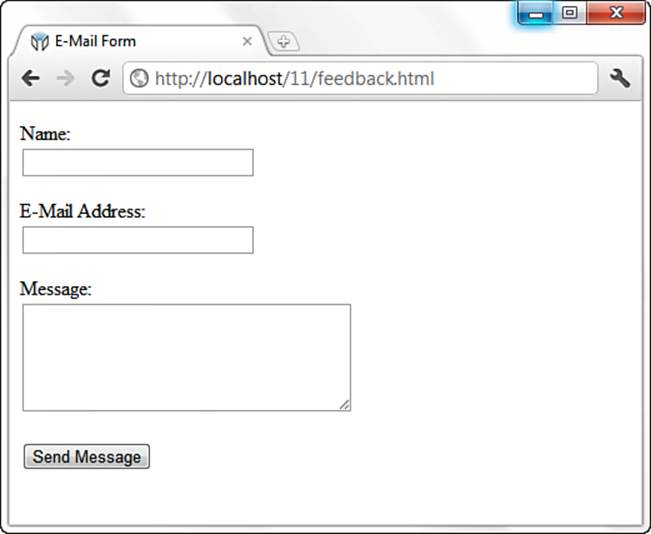
Figure 11.5 The form created in Listing 11.10.
In the next section, you create the script that sends this form to a recipient.
Creating the Script to Send the Mail
This script differs only slightly in concept from the script in Listing 11.4, which simply printed form responses to the screen. In the script shown in Listing 11.11, in addition to printing the responses to the screen, you send them to an email address.
Listing 11.11 Sending the Simple Feedback Form
1: <?php
2: //start building the mail string
3: $msg = "Name: ".$_POST['name']."\n";
4: $msg .= "E-Mail: ".$_POST['email']."\n";
5: $msg .= "Message: ".$_POST['message']."\n";
6:
7: //set up the mail
8: $recipient = "you@yourdomain.com";
9: $subject = "Form Submission Results";
10: $mailheaders = "From: My Web Site <defaultaddress@yourdomain.com> \n";
11: $mailheaders .= "Reply-To: ".$_POST['email'];
12:
13: //send the mail
14: mail($recipient, $subject, $msg, $mailheaders);
15: ?>
16: <!DOCTYPE html>
17: <html>
18: <head>
19: <title>Sending mail from the form in Listing 11.10</title>
20: </head>
21: <body>
22: <p>Thanks, <strong><?php echo $_POST['name']; ?></strong>,
23: for your message.</p>
24: <p>Your e-mail address:
25: <strong><?php echo $_POST['email']; ?></strong></p>
26: <p>Your message: <br/> <?php echo $_POST['message']; ?> </p>
27: </body>
28: </html>
The variables printed to the screen in lines 22–26 are $_POST['name'], $_POST['email'], and $_POST['message']—the names of the fields in the form, their values saved as part of the $_POST superglobal. That’s all well and good for printing the information to the screen, but in this script, you also want to create a string that’s sent in email. For this task, you essentially build the email by concatenating strings to form one long message string, using the newline (\n) character to add line breaks where appropriate.
Lines 3 through 5 create the $msg variable, a string containing the values typed by the user in the form fields (and some label text for good measure). This string forms the body of the email. Note the use of the concatenation operator (.=) when adding to the $msg variable in lines 4 and 5.
Lines 8 and 9 are hard-coded variables for the email recipient and the subject of the email message. Replace you@yourdomain.com with your own email address, obviously. If you want to change the subject, feel free to do that, too!
Lines 10 and 11 set up some mail headers, namely the From: and Reply-to: headers. You could put any value in the From: header; this is the information that displays in the From or Sender column of your email application when you receive this mail.
Caution
If your outbound mail server is a Windows machine, you should replace the \n newline character with \r\n.
The mail() function uses five parameters: the recipient, the subject, the message, any additional mail headers, and any additional sendmail parameters. In our example, we use only the first four parameters. The order of these parameters is shown in line 14.
Put these lines into a text file called sendmail.php and place that file in your web server document root. Use your web browser and go back to the form, enter some information, and click the submission button. You should see something like Figure 11.6 in your browser.
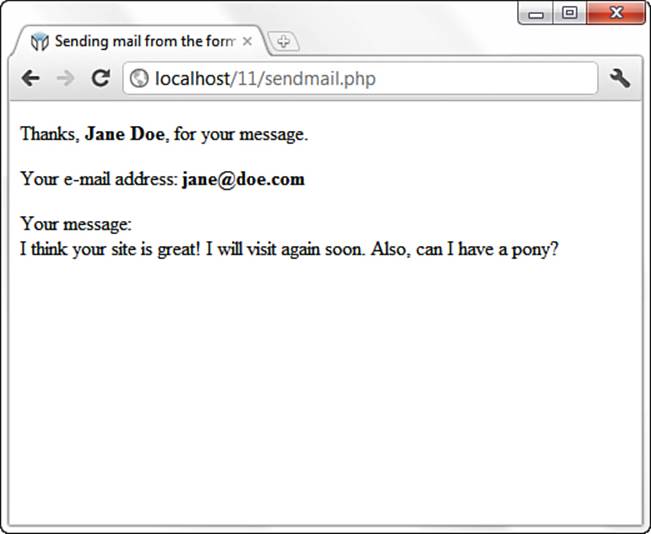
Figure 11.6 Sample results from sendmail.php.
If you then check your email, you should have a message waiting for you. It might look something like Figure 11.7.
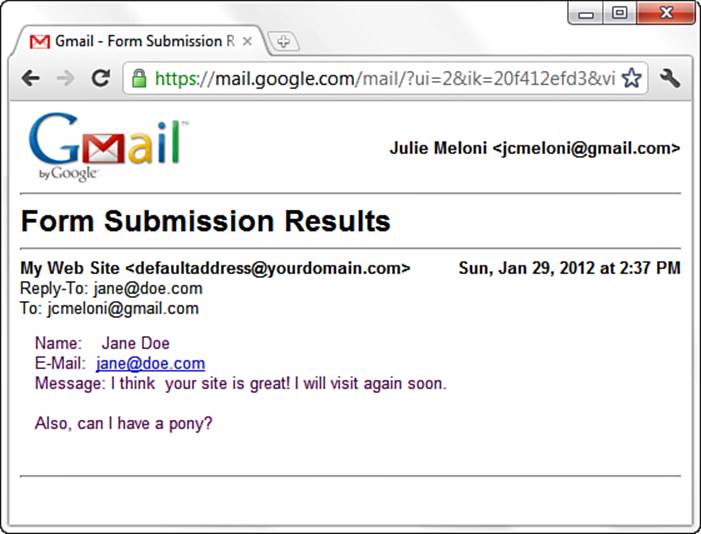
Figure 11.7 Email sent from sendmail.php.
Note
This example does not include any server-side validation of form elements and just assumes that the user has entered values into the form. In a real-life situation, you would check for the presence and validity of the values entered in the form before doing anything with the mail, either through JavaScript or HTML5 form validation.
Formatting Your Mail with HTML
The “trick” to sending HTML-formatted email is not a trick at all. In fact, it only involves writing the actual HTML and modifying the headers sent by the mail() function. In Listing 11.12, a variation of Listing 11.11, changes were made in lines 12–14 and lines 18–19.
Listing 11.12 Sending the Simple Feedback Form: HTML Version
1: <?php
2: //start building the mail string
3: $msg = "<p><strong>Name:</strong> ".$_POST['name']."</p>";
4: $msg .= "<p><strong>E-Mail:</strong> ".$_POST['email']."</p>";
5: $msg .= "<p><strong>Message:</strong> ".$_POST['message']."</p>";
6:
7: //set up the mail
8: $recipient = "you@yourdomain.com";
9: $subject = "Form Submission Results";
10: $mailheaders = "MIME-Version: 1.0\r\n";
11: $mailheaders .= "Content-type: text/html; charset=ISO-8859-1\r\n";
12: $mailheaders = "From: My Web Site <defaultaddress@yourdomain.com> \n";
13: $mailheaders .= "Reply-To: ".$_POST['email'];
14:
15: //send the mail
16: mail($recipient, $subject, $msg, $mailheaders);
17: ?>
18: <!DOCTYPE html>
19: <html>
20: <head>
21: <title>Sending the Simple Feedback Form - HTML Version</title>
22: </head>
23: <body>
24: <p>Thanks, <strong><?php echo $_POST['name']; ?></strong>,
25: for your message.</p>
26: <p>Your e-mail address:
27: <strong><?php echo $_POST['email']; ?></strong></p>
28: <p>Your message: <br/> <?php echo $_POST['message']; ?> </p>
29: </body>
30: </html>
In lines 3–5, the message string now contains HTML code. Additional headers are created in lines 10–11, which set the Mime Version header to 1.0 and the Content-type header to text/html with a character set of ISO-8859-1. When opened in an HTML-enabled mail client, the HTML in the message string appears as intended, as shown in Figure 11.8.
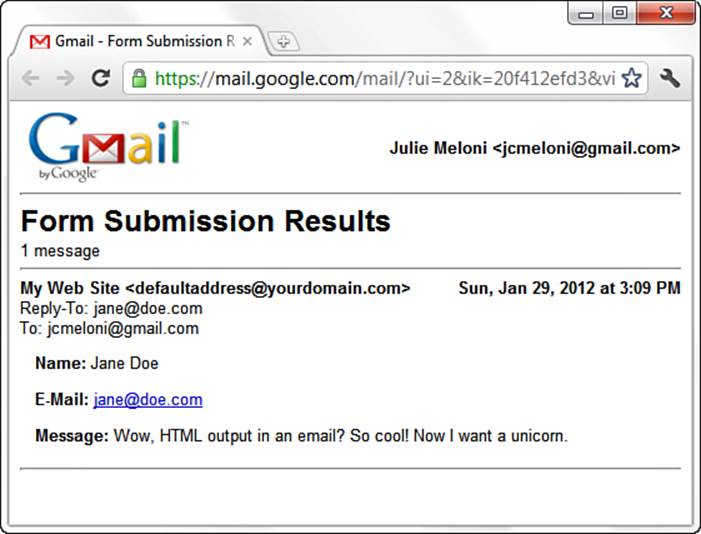
Figure 11.8 Email sent from Listing 11.12.
Working with File Uploads
So far, you’ve looked at simple form input. However, web browsers support file uploads, and so, of course, does PHP. In this section, you examine the features that PHP makes available to deal with this kind of input.
Information about the uploaded file becomes available to you in the $_FILES superglobal, which is indexed by the name of the upload field (or fields) in the form. The corresponding value for each of these keys is an associative array. These fields are described in Table 11.1, using fileuploadas the name of the form field used for the upload.
Table 11.1 File Upload Global Variables
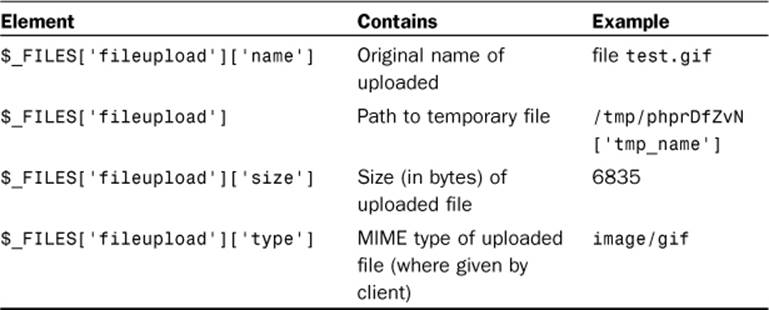
Keep these elements in the back of your mind for a moment while you create the upload form in the next section.
Creating the File Upload Form
First, you must create the HTML form to handle the upload. HTML forms that include file upload fields must include an ENCTYPE argument:
enctype="multipart/form-data"
PHP also works with an optional hidden field that can be inserted before the file upload field. This field must be called MAX_FILE_SIZE and should have a value representing the maximum size in bytes of the file that you’re willing to accept. The MAX_FILE_SIZE field is obeyed at the browser’s discretion, so you should rely on the php.ini setting, upload_max_filesize, to cap unreasonably large uploads. After the MAX_FILE_SIZE field has been entered, you are ready to add the upload field itself. This is simply an INPUT element with a TYPE argument of "file". You can give it any name you want. Listing 11.13 brings all this together into an HTML upload form.
Listing 11.13 A Simple File Upload Form
1: <!DOCTYPE html>
2: <html>
3: <head>
4: <title>A simple file upload form</title>
5: </head>
6: <body>
7: <form action="do_upload.php" enctype="multipart/form-data" method="POST">
8: <input type="hidden" name="MAX_FILE_SIZE" value="1048576" />
9: <p><label for="fileupload">File to Upload:</label>
10: <input type="file" id="fileupload" name="fileupload" /></p>
11: <button type="submit" name="submit" value="send">Upload File</button>
12: </form>
13: </body>
14: </html>
As you can see, file uploads are limited to 1MB (or 1048576 bytes) on line 8, and the name of the file upload field is fileupload, as shown on line 8. Save this listing in a text file called fileupload.html and place that file in your web server document root. Use your web browser to access this form and you should see something like Figure 11.9.
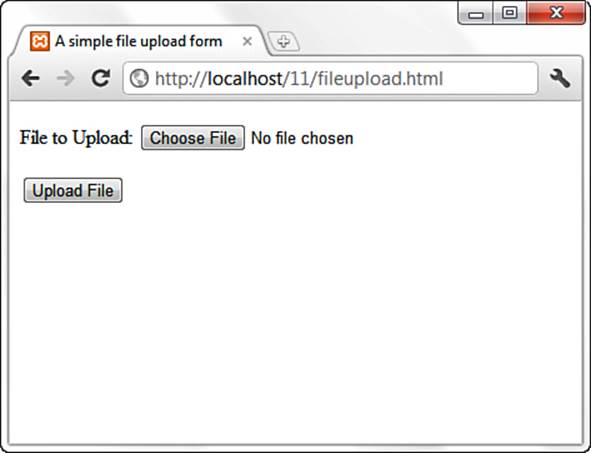
Figure 11.9 The form created by Listing 11.13.
This form calls the do_upload.php script, which you create next.
Creating the File Upload Script
If you remember the information regarding the $_FILES superglobal, you have all the information you need to write a simple file upload script. This script is the backend for the form created in Listing 11.14.
Listing 11.14 A File Upload Script
1: <?php
2: $file_dir = "/path/to/upload/directory";
3:
4: foreach($_FILES as $file_name => $file_array) {
5: echo "path: ".$file_array['tmp_name']."<br/>\n";
6: echo "name: ".$file_array['name']."<br/>\n";
7: echo "type: ".$file_array['type']."<br/>\n";
8: echo "size: ".$file_array['size']."<br/>\n";
9:
10: if (is_uploaded_file($file_array['tmp_name'])) {
11: move_uploaded_file($file_array['tmp_name'],
12: "$file_dir/".$file_array['name'])
13: or die ("Couldn't move file");
14: echo "File was moved!";
15: } else {
16: echo "No file found.";
17: }
18: }
19: ?>
In Listing 11.14, you first create the $file_dir variable on line 2 to store path information. This path should be one that exists on your system, and the web server user (for example, httpd, www, nobody) must have write permissions for it.
Note
The path used in line 2 is a Linux/UNIX path. Windows users would use a path including the drive letter, such as the following:
$file_dir = "C:\Users\You\Desktop";
Line 4 begins a foreach statement that loops through every element in the $_FILES array. A foreach loop is used rather than an if statement to make the script capable of scaling to deal with multiple uploads on the same page. The foreach loop beginning on line 4 stores the upload file’s name in the $file_name variable and the file information in the $file_array variable. You can then output the information you have about the upload.
Before moving the uploaded file from its temporary position to the location specified in line 2, first check that the file exists (has been uploaded). The code does so on line 10, using the is_uploaded_file() function. This function accepts a path to an uploaded file and returns true only if the file in question is a valid upload file. This function therefore enhances the security of your scripts.
Assuming that all is well, the file is copied from its temporary home to a new directory on lines 11 to 13. Another function, move_uploaded_file(), is used for this purpose. This function copies a file from one place to another, first performing the same security checks as those performed byis_uploaded_file(). The move_uploaded_file() function requires a path to the source file and a path to the destination. It returns true if the move is successful and false if the file isn’t a valid upload file or if the file couldn’t be found.
Caution
Beware of the names of uploaded files. Operating systems such as Mac OS and Windows are pretty relaxed when it comes to file naming, so expect uploaded files to come complete with spaces, quotation marks, and all manner of other unexpected characters. Therefore, it’s a good idea to filter filenames.
Put all the code in Listing 11.14 into a text file called do_upload.php and place that file in your web server document root. Use your web browser to go back to the form and then try to upload a file. If successful, you should see something like Figure 11.10 in your browser.
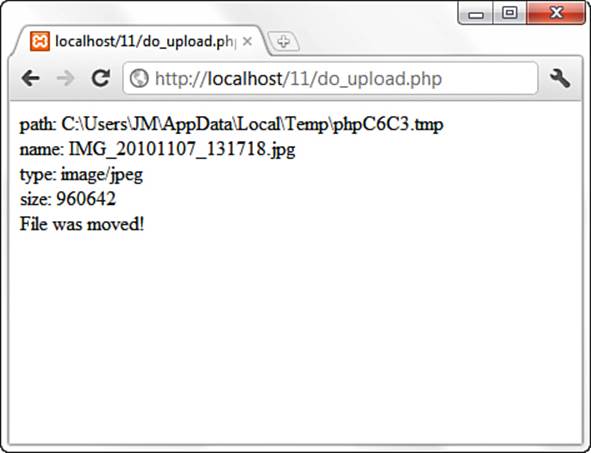
Figure 11.10 Sample results from Listing 11.14.
Summary
Things are really getting exciting now. A few items are still missing, of course, but there’s plenty of book left. Now that you can get information from the user, it would be nice to be able to do something with it—write it to a file, perhaps? That’s the subject of an upcoming chapter.
In this chapter, you learned how to work with various superglobals and form input. You also learned how to send raw headers to the client to redirect a browser. You learned how to acquire list information from form submissions and how to pass information from script call to script call using hidden fields. You also learned how to send your form results in email, and how to upload files through your web browser using a PHP script.
Q&A
Q. When I submit other forms online, sometimes I see all the values I entered in the URL leading to the next page. Why is that?
A. If you submit a form, such as a Google search, and the next URL you see includes the values that you entered, such as a search for “cheese” that might produce a URL like this:
https://www.google.com/#hl=en&output=search&q=cheese
Then what you are seeing is the output of a form that uses a GET action instead of a POST action. In this case, there are at least two fields—one hidden, called “output,” and one that you see, called “q” (for query, presumably). The value of “cheese” is the value you typed in the INPUT field.
Q. Why would I need to limit the upload size on a form?
A. Without restricting the size of an upload in a form designed to upload files, you can run into the situation of leading users toward an action they can never complete, which could freeze up their system and yours. Think about the situation when you are looking to accept file uploads of digital images, and a user has created a very large image—let’s say 10 megabytes. If the intention was to accept only thumbnails of images—something on the order of 350 kilobytes—simply telling the user to adhere to that limit isn’t enough. With a combination of MAX_FILE_SIZE in the form and php.ini settings for upload_max_filesize (among others), you can ensure that a single user’s action won’t clog up the pipes.
Workshop
The workshop is designed to help you review what you’ve learned and begin putting your knowledge into practice.
Quiz
1. Which predefined variable do you use to find the name of the script?
2. Which built-in associative array contains all values submitted as part of a POST request?
3. Which built-in associative array contains all values submitted as part of a file upload?
4. What function do you use to redirect the browser to a new page?
5. What are the five arguments used by the mail() function?
6. On the client side, how do you limit the size of a file that a user can submit via a particular upload form?
Answers
1. The variable $_SERVER['PHP_SELF'] holds the name of the script.
2. The $_POST superglobal.
3. The $_FILES superglobal.
4. The header() function, along with a location.
5. The recipient, the subject, the message string, additional headers, and additional parameters.
6. Use a hidden field called MAX_FILE_SIZE in your form.
Activities
1. Create a calculator script that enables the user to submit two numbers and choose an operation (addition, multiplication, division, or subtraction) to perform on them.
2. Use hidden fields with the script you created in activity 1 to store and display the number of requests that the user submitted.
All materials on the site are licensed Creative Commons Attribution-Sharealike 3.0 Unported CC BY-SA 3.0 & GNU Free Documentation License (GFDL)
If you are the copyright holder of any material contained on our site and intend to remove it, please contact our site administrator for approval.
© 2016-2026 All site design rights belong to S.Y.A.