Sams Teach Yourself PHP, MySQL and Apache All in One (2012)
Part V. Basic Projects
Chapter 25. Restricting Access to Your Applications
In this chapter, you learn the following:
• How to restrict access based on the user, client IP address, domain name, and browser version
• How to use the user management tools provided with Apache
• How to store and retrieve cookie information
• How to use cookies for authentication
This chapter explains how to use Apache to restrict access to parts of a website based on the identity of the user or on information about the request. On the application side of things, you can create your own mechanism for user validation and check the validity of your users through cookies.
Authentication Overview
Authorization and authentication are common requirements for many websites. Before continuing, a few definitions are in order.
Authentication establishes the identity of parties in a communication. You can authenticate yourself through something you know such as a password or a cookie, through something tangible such as an ID card or a key, through something intrinsically part of you such as your fingerprint or your retina, or through any combination of these elements. In the context of a website, authentication is usually restricted to the use of passwords and certificates.
Authorization deals with protecting access to resources. You can authorize access based on several factors, such as the IP address the user is coming from, the user’s browser type, the content the user is trying to access, or who the user is (previously determined via authentication).
Apache includes several modules that provide authentication and access control and that you can use to protect both dynamic and static content. You can either use one of these modules or implement your own access control at the application level and provide customized login screens, single sign-on, and other advanced functionality.
Client Authentication
Users are authenticated for tracking or authorization purposes. The HTTP specification provides two authentication mechanisms: basic and digest. In both cases, the process is the following:
1. A client tries to access restricted content in the web server.
2. Apache checks whether the client is providing a username and password. If not, Apache returns an HTTP 401 status code, indicating that user authentication is required.
3. The client reads the response and prompts the user for the required username and password (usually with a pop-up dialog box).
4. The client retries accessing the web page, this time transmitting the username and password as part of the HTTP request. The client remembers the username and password and transmits them in later requests to the same site, so the user does not need to retype them for every request.
5. Apache checks the validity of the credentials and grants or denies access based on the user identity and other access rules.
In the basic authentication scheme, the username and password are transmitted in cleartext as part of the HTTP request headers. This poses a security risk because an attacker could easily peek at the conversation between server and browser, learn the username and password, and reuse them freely afterward.
The digest authentication provides increased security because it transmits a digest instead of the clear text password. The digest is based on a combination of several parameters, including the username, password, and request method. The server can calculate the digest on its own and check that the client knows the password, even when the password itself is not transmitted over the network.
Note
A digest algorithm is a mathematical operation that takes a text and returns another text, a digest, which uniquely identifies the original one. A good digest algorithm should make sure that, at least for practical purposes, different input texts produce different digests and that the original input text cannot be derived from the digest. MD5 is the name of a commonly used digest algorithm.
Because of potential differences in browser support for digest authentication, you might want to restrict its use to scenarios in which you have control over the browser software of your clients, such as in a corporate intranet.
In any case, for both digest and basic authentication, the requested information itself is transmitted unprotected over the network. A better choice to secure access to your website involves using the HTTP over SSL protocol, as described in Chapter 30, “Setting Up a Secure Web Server.”
User Management Methods
When the authentication module receives the username and password from the client, it needs to verify that they are valid against an existing repository of users. The usernames and passwords can be stored in a variety of ways, including the file-and database-based mechanisms provided for by Apache. Third-party modules provide support for additional mechanisms such as Lightweight Directory Access Protocol (LDAP) and Network Information Services (NIS).
Apache Authentication Module Functionality
Apache provides the basic framework and directives to perform authentication and access control. The authentication modules provide support for validating passwords against a specific back-end method (file, database, and so on). Users can optionally be organized in groups, easing management of access control rules.
Apache provides three built-in directives related to authentication that can be used with any of the authentication modules: AuthName, AuthType, and Require.
AuthName accepts a string argument, the name for the authentication realm. A realm is a logical area of the web server that you are asking the password for. It is displayed in the browser pop-up window.
AuthType specifies the type of browser authentication: basic or digest.
Require enables you to specify a list of users or groups that will be allowed access. The syntax is Require user followed by one or more usernames, or Require group followed by one or more group names. For example
Require user joe bob
or
Require group employee contractor
If you want to grant access to anyone who provides a valid username and password, you can do so as follows:
Require valid-user
With the preceding directives, you can control who has access to specific virtual hosts, directories, files, and so on. Although authentication and authorization are separate concepts, in practice they intertwine in Apache. Access is granted based on specific user identity or group membership. Some third-party modules, such as certain LDAP-based modules, allow for clearer separation between authentication and authorization.
The authentication modules included with Apache provide the following
• Back-end storage—Provides text or database files containing the username and group information
• User management—Supplies tools for creating and managing users and groups in the back-end storage
• Authoritative information—Specifies whether the results of the module are authoritative
Note
Sometimes users will not be allowed access to a particular realm because their information is not found in the user database provided by the module, or because no authentication rules matched their information. In that case, one of two situations will occur:
• If the module specifies its results as authoritative, a user is denied access and Apache returns an error.
• If the module specifies its results as not authoritative, other modules can attempt to authenticate the user.
This enables you to have a main authorization module that knows about most users and have additional modules that can authenticate the rest of the users.
File-Based Authentication
The mod_auth Apache module provides basic authentication via text files containing usernames and passwords, similar to how traditional UNIX authentication works with the /etc/passwd and /etc/groups files.
Back-End Storage
When using back-end storage methods, you need to specify the file containing the list of usernames and passwords and, optionally, the file containing the list of groups.
The users file is a UNIX-style password file, containing names of users and encrypted passwords. The entries look like the following, on UNIX, using the crypt algorithm:
admin:iFrlxqg0Q6RQ6
On Windows, using the MD5 algorithm, they look like this:
admin:$apr1$Ug3.....$jVTedbQWBKTfXsn5jK6UX/
The groups file contains a list of groups and the users who belong to each one of them, separated by spaces, such as in the following entry:
web: admin joe Daniel
The AuthUserFile and the AuthGroupFile directives take a path argument, pointing to the users file and the groups file. The groups file is optional.
User Management
The Apache distribution includes the htpasswd utility on UNIX and htpasswd.exe on Windows; they are designed to help you manage user password files. Both versions are functionally identical, but the Windows version uses a different method to encrypt the password. The encryption is transparent to the user and administrator. On Linux/UNIX, the first time you add a user, you need to type
/usr/local/apache2/bin/htpasswd -c file userid
where file is the password file that will contain the list of usernames and passwords, and userid is the username you want to add. You are then prompted for a password, and the file is created. For example, on Linux/UNIX, the command
/usr/local/apache2/bin/htpasswd -c /usr/local/apache2/conf/htusers admin
creates the password file /usr/local/apache2/conf/htusers and adds the admin user.
Similar functionality exists on Windows, where the command-line operation might look something like this:
htpasswd -c "C:\Program Files\Apache Software Foundation\Apache2.2\conf\htusers" admin
The -c command-line option tells the htpasswd executable that it should create the file. When you want to add users to an existing password file, do not use the -c option; if you do so, the file will be overwritten.
It is important that you store the password file outside the document root and thus make it inaccessible via a web browser. Otherwise, an attacker could download the file and get a list of your usernames and passwords. Although the passwords are encrypted, when you have the file, it is possible to perform a brute-force attack to try to guess them.
Using mod_auth
Listing 25.1 shows a configuration example that restricts access to the private directory in the document root to authenticated users present in the htusers password file. Note that the optional AuthGroupFile directive is not present.
Listing 25.1 File-Based Authentication Example
1: <Directory /usr/local/apache2/htdocs/private>
2: AuthType Basic
3: AuthName "Private Area"
4: AuthUserFile /usr/local/apache2/conf/htusers
5: Require valid-user
6: </Directory>
Database File-Based Access Control
Storing usernames and passwords in plaintext files is convenient, but this method does not scale well. Apache would need to open and read the files sequentially to look for a particular user. When the number of users grows, this operation becomes very time-consuming. The mod_auth_dbmmodule enables you to replace the text-based files with indexed database files, which can handle a much greater number of users without performance degradation. The mod_auth_dbm module is included with Apache, but is not enabled by default. Enabling this module occurs when configuring Apache to be built using the --enable-module=dbm option.
Back-End Storage
The mod_auth_dbm module provides two directives, AuthDBMUserFile and AuthDBMGroupFile, that point to the database files containing the usernames and groups. Unlike plaintext files, both directives can point to the same file, which combines both users and groups.
User Management
Apache provides a utility for both UNIX and Windows users, called htdbm, that enables you to create and manage users and groups stored in a database file.
You can find the utility in the bin directory of the Apache distribution; once there, to add a user to a new database, type the following:
htdbm –c databasename userid
You are then prompted for the password, and the user is added to a new database file.
If you ever need to delete the user daniel, you can issue the following command:
htdbm –x databasename daniel
You can find complete syntax information by invoking htdbm without any arguments.
Using Apache for Access Control
The mod_authz_host module, enabled by default, enables you to restrict access to resources based on parameters of the client request, such as the presence of a specific header or the IP address or hostname of the client.
Implementing Access Rules
You can specify access rules using the Allow and Deny directives. Each of these directives takes a list of arguments such as IP addresses, environment variables, and domain names.
Allow/Deny Access by IP Addresses
You can deny or grant access to a client based on its IP address:
Allow from 10.0.0.1 10.0.0.2 10.0.0.3
You can also specify IP address ranges with a partial IP address or a network/mask pair. In addition, you can specify the first 1, 2, or 3 bytes of an IP address. Any IP address containing those will match this rule. For example, the rule
Deny from 10.0
matches any address starting with 10.0, such as 10.0.1.0 and 10.0.0.1.
You can also use the IP address and the netmask; the IP address specifies the network, and the mask specifies which bits belong to the network prefix and which ones belong to the nodes. The rule
Allow from 10.0.0.0/255.255.255.0
matches IP addresses 10.0.0.1, 10.0.0.2, and so on, to 10.0.0.254.
You can also specify the network mask via high-order bits. For example, you could write the previous rule as follows:
Allow from 10.0.0.0/24
Allow/Deny Access by Domain Name
You can control access based on specific hostnames or partial domain names. For example, Allow from example.com matches www.example.com, foo.example.com, and so on.
Note
Enabling access rules based on domain names forces Apache to do a reverse DNS lookup on the client address, bypassing the settings of the HostName-Lookups directive. This has performance implications.
Allow/Deny Access Based on Environment Variables
You can specify access rules based on the presence of a certain environment variable by prefixing the name of the variable with the string env=. You can use this feature to grant or deny access to certain browsers or browser versions to prevent specific sites from linking to your resources and so on. For this example to work as intended, the client needs to transmit the User-Agent header.
For example:
BrowserMatch MSIE iexplorer
Deny from env=iexplorer
Because the client sends the User-Agent header, it could possibly be omitted or manipulated, but most users will not do so, and this technique will work in most cases.
Allow/Deny Access to All Clients
The keyword all matches all clients. You can specify Allow from all or Deny from all to grant or deny access to all clients.
Evaluating Access Rules
You can have several Allow and Deny access rules. You can choose the order in which the rules are evaluated by using the Order directive. Rules evaluated later have higher precedence. Order accepts one argument, which can be Deny,Allow, Allow,Deny, or Mutual-Failure. Deny,Allow is the default value for the Order directive. Note that there is no space in the value.
Deny,Allow
Deny,Allow specifies that Deny directives are evaluated before Allow directives. With Deny,Allow, the client is granted access by default if there are no Allow or Deny directives or the client does not match any of the rules. If the client matches a Deny rule, it is denied access unless it also matches an Allow rule, which takes precedence because Allow directives are evaluated last and have greater priority.
Listing 25.2 shows how to configure Apache to allow access to the /private location to clients coming from the internal network or the domain example.com and deny access to everyone else.
Listing 25.2 Deny,Allow Access Control Configuration Example
1: <Location /private>
2: Order Deny,Allow
3: Deny from all
4: Allow from 10.0.0.0/255.255.255.0 example.com
5: </Location>
Allow,Deny
Allow,Deny specifies that Allow directives are evaluated before Deny directives. With Allow,Deny, the client is denied access by default if there are no Allow or Deny directives or if the client does not match any of the rules. If the client matches an Allow rule, it is granted access unless it also matches a Deny rule, which takes precedence.
Note that the presence of Order Allow,Deny without any Allow or Deny rules causes all requests to the specified resource to be denied because the default behavior is to deny access.
Listing 25.3 allows access to everyone except a specific host.
Listing 25.3 Allow,Deny Access Control Configuration Example
1: <Location /some/location/>
2: Order Allow,Deny
3: Allow from all
4: Deny from host.example.com
5: </Location>
Mutual-Failure
In the case of Mutual-Failure, the host is granted access only if it matches an Allow directive and does not match any Deny directive.
Combining Apache Access Methods
In previous sections, you learned how to restrict access based on user identity or request information. The Satisfy directive enables you to determine whether both types of access restrictions must be satisfied to grant access. Satisfy accepts one parameter, which can be either all or any.
Satisfy all means that the client will be granted access if it provides a valid username and password and passes the access restrictions. Satisfy any means the client will be granted access if it provides a valid username and password or passes the access restrictions.
Why is this directive useful? For example, you might want to provide free access to your website to users coming from an internal, trusted address, but require users coming from the Internet to provide a valid username and password. Listing 25.4 demonstrates just that.
Listing 25.4 Mixing Authentication and Access Control Rules
1: <Location /restricted>
2: Allow from 10.0.0.0/255.255.255.0
3: AuthType Basic
4: AuthName "Intranet"
5: AuthUserFile /usr/local/apache2/conf/htusers
6: Require valid-user
7: Satisfy any
8: </Location>
Note
Access control based on connection or request information is not completely secure. Although it provides an appropriate level of protection for most cases, the rules rely on the integrity of your DNS servers and your network infrastructure. If an attacker gains control of your DNS servers, or your routers or firewalls are incorrectly configured, he can easily change authorized domain name records to point to his machine or pretend he is coming from an authorized IP address.
Limiting Access Based on HTTP Methods
In general, you want your access control directives to apply to all types of client requests, and this is the default behavior. In some cases, however, you want to apply authentication and access rules to only certain HTTP methods such as GET and HEAD.
The <Limit> container takes a list of methods and contains the directives that apply to requests containing those methods. The complete list of methods that you can use is GET, POST, PUT, DELETE, CONNECT, OPTIONS, PATCH, PROPFIND, PROPPATCH, MKCOL, COPY, MOVE, LOCK, and UNLOCK.
The <LimitExcept> section provides complementary functionality, containing directives that will apply to requests not containing the listed methods.
Listing 25.5 shows an example from the default Apache configuration file. The <Limit> and <LimitExcept> sections allow read-only methods but deny requests to any other methods that can modify the content of the file system, such as PUT. For more information on the myriad options available here, see the Apache documentation at http://httpd.apache.org/docs-2.2/mod/core.html.
Listing 25.5 Restricting Access Based on Rule
1: <Directory /home/*/public_html>
2: AllowOverride FileInfo AuthConfig Limit
3: Options MultiViews Indexes SymLinksIfOwnerMatch IncludesNoExec
4: <Limit GET POST OPTIONS PROPFIND>
5: Order Allow,Deny
6: Allow from all
7: </Limit>
8: <LimitExcept GET POST OPTIONS PROPFIND>
9: Order Deny,Allow
10: Deny from all
11: </LimitExcept>
12: </Directory>
In the next section, you learn about restricting access on the application side based on information found in cookies.
Restricting Access Based on Cookie Values
In Chapter 12, “Working with Cookies and User Sessions,” you learned all about the structure of a cookie and how to set and access cookie variables in PHP. The next few sections show some practical uses of cookies for authentication purposes.
Suppose that you want to create a login form that checks for values against a database. If the user is authorized, you send a cookie that says as much. Then, for all pages you want to restrict only to authorized users, you check for the specific cookie. If the cookie is present, the user can see the page. If the cookie is not present, the user is either sent back to the login form or a message regarding access restrictions can be printed to the screen. The next few sections go through each of these steps.
Creating the Authorized Users Table
When you’re integrating user accounts into a web-based application, it is common to store the user-specific information in a database table. The information in this table can then be used to authorize the user and grant access to areas of the site specifically for these “special” users.
The following table-creation command creates a table called auth_users in your MySQL database, with fields for the ID, first name, last name, email address, username, and password:
CREATE TABLE auth_users (
id int NOT NULL PRIMARY KEY AUTO_INCREMENT,
f_name VARCHAR(50),
l_name VARCHAR(50),
email VARCHAR(150),
username VARCHAR(25),
password VARCHAR(41)
);
The following INSERT command puts a record in the auth_users table for a user named John Doe, with an email address of john@doe.com, a username of jdoe, and a password of doepass:
INSERT INTO auth_users VALUES ('1', 'John', 'Doe', 'john@doe.com',
'jdoe', PASSWORD('doepass'));
This INSERT command should be self-explanatory, with the exception of the use of the PASSWORD() function. When this function is used in the INSERT command, what is stored in the table is in fact not the actual password, but a 41-character hash of the password.
When you view the contents of the auth_users table, you will see the hash in the password field, as follows:
+----------+-------------------------------------------+
| username | password |
+----------+-------------------------------------------+
| jdoe | *0AAD744979343D58A7F17A50E514E6AD6533D04B |
+----------+-------------------------------------------+
Although it might look like it is encrypted, a hash is in fact not an encrypted bit of information. Instead, it is a “fingerprint” of the original information. Hashes are generally used, like fingerprints, to perform matches. In this case, when you check your user’s password, you check that the hash of the input matches the stored hash. Using hashes alleviates the need—and security risk—of storing actual passwords.
Creating the Login Form and Script
After you authorize users in your table, you need to give them a mechanism for proving their authenticity. In this case, a simple two-field form will do, as shown in Listing 25.6.
Listing 25.6 User Login Form
1: <!DOCTYPE html>
2: <html>
3: <head>
4: <title>User Login Form</title>
5: </head>
6: <body>
7: <h1>Login Form</h1>
8: <form method="post" action="userlogin.php">
9: <p><label for="username"><strong>username:</strong><br/>
10: <input type="text" id="username" name="username" /></label></p>
11: <p><label for="password"><strong>password:</strong><br/>
12: <input type="password" id="password" name="password" /></label></p>
13: <button type="submit" name="submit" value="login">Login</button>
14: </form>
15: </body>
16: </html>
Put these lines into a text file called userlogin.html, and place it in your web server document root. Next, you create the script itself, which the form expects to be called userlogin.php (see Listing 25.7).
Listing 25.7 User Login Script
1: <?php
2: //check for required fields from the form
3: if ((!isset($_POST['username'])) || (!isset($_POST['password']))) {
4: header("Location: userlogin.html");
5: exit;
6: }
7:
8: //connect to server and select database
9: $mysqli = mysqli_connect("localhost", "joeuser", "somepass", "testDB")
10: or die(mysqli_error());
11:
12: //use mysqli_real_escape_string to clean the input
13: $username = mysqli_real_escape_string($mysqli, $_POST['username']);
14: $password = mysqli_real_escape_string($mysqli, $_POST['password']);
15:
16: //create and issue the query
17: $sql = "SELECT f_name, l_name FROM auth_users WHERE
18: username = '".$username."' AND
19: password = PASSWORD('".$password."')";
20: $result = mysqli_query($mysqli, $sql) or die(mysqli_error($mysqli));
21:
22: //get the number of rows in the result set; should be 1 if a match
23: if (mysqli_num_rows($result) == 1) {
24:
25: //if authorized, get the values of f_name l_name
26: while ($info = mysqli_fetch_array($result)) {
27: $f_name = stripslashes($info['f_name']);
28: $l_name = stripslashes($info['l_name']);
29: }
30:
31: //set authorization cookie
32: setcookie("auth", "1", 0, "/", "yourdomain.com", 0);
33:
34: //create display string
35: $display_block = "
36: <p>".$f_name." ".$l_name." is authorized!</p>
37: <p>Authorized Users' Menu:</p>
38: <ul>
39: <li><a href=\"secretpage.php\">secret page</a></li>
40: </ul>";
41: } else {
42: //redirect back to login form if not authorized
43: header("Location: userlogin.html");
44: exit;
45: }
46: //close connection to MySQL
47: mysqli_close($mysqli);
48: ?>
49: <!DOCTYPE html>
50: <html>
51: <head>
52: <title>User Login</title>
53: </head>
54: <body>
55: <?php echo $display_block; ?>
56: </body>
57: </html>
Put these lines into a text file called userlogin.php, modify line 32 so that "yourdomain.com" is your actual domain name, and place this file in your web server document root. In a moment, you’ll try it out, but first let’s examine what the script is doing.
Line 3 checks for the two required fields—the only two fields in the form: $_POST['username'] and $_POST['password']. If either of these fields is not present, the script redirects the user back to the original login form. If the two fields are present, the script moves along to line 9, which connects to the database server in preparation for issuing the SQL query to check the authenticity of the user. Before issuing the query, though, lines 13 and 14 sanitize the user input. Once sanitized, the query and its execution are found in lines 17–20. Note that the query checks the hash of the password input from the form against the password stored in the table. These two elements must match each other, and belong to the username in question, to authorize the user.
Line 23 tests the result of the query by counting the number of rows in the resultset. The row count should be exactly 1 if the username and password pair represents a valid login. If this is the case, the mysqli_fetch_array() function is used in lines 26–29 to extract the first and last names of the user. These names are used for aesthetic purposes only.
Line 32 sets the authorization cookie. The name of the cookie is auth, and the value is 1. If a 0 is put in the time slot, the cookie lasts as long as this user’s web browser session is open. When the user closes the browser, the cookie expires. Lines 35–40 create a message for display, including a link to a file you create in a moment.
Finally, lines 41–45 handle a failed login attempt. In this case, the user is simply redirected back to the original login form.
Go ahead and access the login form and input the valid values for the John Doe user. When you submit the form, the result should look like Figure 25.1.
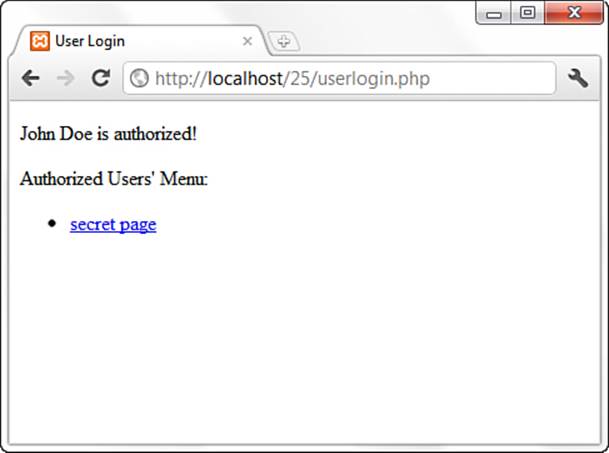
Figure 25.1 Successful login result.
Try to log in with an invalid username and password pair, and you should be redirected to the login form. In the next (and final) section, you create the secretpage.php script, which reads the authentication cookie you have just set and acts accordingly.
Testing for the auth Cookie
The last piece of this puzzle is to use the value of the auth cookie to allow a user to access a private file. In this case, Listing 25.8 shows the file in question.
Listing 25.8 Checking for auth Cookie
1: <?php
2: if ($_COOKIE['auth'] == "1") {
3: $display_block = "<p>You are an authorized user.</p>";
4: } else {
5: //redirect back to login form if not authorized
6: header("Location: userlogin.html");
7: exit;
8: }
9. ?>
10: <!DOCTYPE html>
11: <html>
12: <head>
13: <title>Secret Page</title>
14: </head>
15: <body>
16: <?php echo $display_block; ?>
17: </body>
18: </html>
From the menu shown in Figure 25.1, click the Secret Page link. Because you are an authorized user, you should see a result like Figure 25.2.
Figure 25.2 Accessing the secret page as an authorized user.
Close your browser and attempt to access secretpage.php directly. You will find that you cannot, and you will be redirected to the original login form because the authentication cookie has not been set after a successful login.
Summary
This chapter explained how to use Apache features to restrict access to your website based on the identity of the remote user and information from the HTTP request or network connection. It also covered some authentication modules included with Apache and additional tools that you can use to create and manage your user and group databases.
In addition, you learned one method for using cookie values to allow access to specific parts of your PHP application.
Q&A
Q. I have a UNIX system. Can I use /etc/passwd as my user database?
A. Although using /etc/passwd might seem convenient, it is advisable that you do not use the existing /etc/passwd file for authenticating users of your website. Otherwise, an attacker who gains access to a user of your website will also gain access to the system. Keep separate databases and encourage users to choose different passwords for their system accounts and web access. Periodically run password checkers that scan for weak passwords and accounts in which the username is also the password.
Q. Why am I asked for my password twice in some websites?
A. Your browser keeps track of your password so that you do not have to type it for every request. The stored password is based on the realm (AuthName directive) and the hostname of the website. Sometimes you can access a website via different names, such as yourdomain.com andwww.yourdomain.com. If you are authorized to access a certain restricted area of yourdomain.com but are redirected or follow a link to www.yourdomain.com, you will be asked again to provide the username and password because your browser thinks it is a completely different website.
Q. Are there any serious security or privacy issues raised by cookies?
A. A server can access a cookie set only from its own domain. Although a cookie can be stored on the user’s hard drive, there is no other access to the user’s file system. It is possible, however, to set a cookie in response to a request for an image. So, if many sites include images served from a third-party ad server or counter script, the third party might be able to track a user across multiple domains.
Workshop
The workshop is designed to help you review what you’ve learned and begin putting your knowledge into practice.
Quiz
1. What are the advantages of database files over plaintext files for storing user authentication information?
2. Can you name some disadvantages of HTTP basic authentication?
3. What function is designed to allow you to set a cookie on a visitor’s browser?
Answers
1. Database files are much more scalable because they can be indexed, and also clustered for robustness. This means that Apache does not need to read the file sequentially until a match is found for a particular user but rather can jump to the exact location.
2. One disadvantage is that the information is transmitted in cleartext over the network. This means that unless you are using SSL, it is possible for an attacker to read the packets your browser sends to the server and steal your password. Another disadvantage is that HTTP authentication does not provide a means for customizing the login (except the realm name). It is common for websites to implement custom login mechanisms using HTML forms and cookies.
3. The setcookie() function enables you to set a cookie (although you could also output a Set-Cookie header using the header() function).
Activity
Practice using the various types of authentication—both server based and with PHP—on your development server. Get a feel for the differences between basic HTTP authentication and something you devise on your own.