Foundation ActionScript 3, Second Edition (2014)
Chapter 12. Case Study: Creating a Dynamic Image Viewer
This book has covered so much ground—from the core elements of the ActionScript language, through advanced coding features such as graphic creation and dynamic loading of data, all the way to the use of components and class libraries to extend functionality. Now it’s time to pull all that knowledge together into a single real-world application that shows what you can accomplish easily with your newly acquired ActionScript skills. This chapter will help solidify the concepts that you have been absorbing over the past few hundred pages (and you’ll create something pretty cool and useful, to boot!).
In just a single project, you’ll use many of the skills taught in the past 11 chapters. This chapter’s example demonstrates the following:
· How to use a document class to act as the main entry point for an application
· How to lay out and configure components in the IDE
· How to style and customize components
· How to take advantage of the ActionScript 3.0 event model
· How to use the drawing API to dynamically create graphics
· How to apply graphic filters through ActionScript
· How to modify the display list at runtime
· How to load and parse XML
· How to load and display images
· How to set and retrieve properties from object instances
· How to use loops and conditional constructs
· How to create and instantiate custom classes
· How to extend a class and use inheritance
And that’s just a high-level list. You will use plenty of supporting skills to reach the end goal, including manipulating strings and numbers, using numeric and object operators (including casting objects), applying access modifiers and data type assignments, and exercising a whole list of syntactical skills that should be almost second nature to you by this point. That’s one of the great things about applying your ActionScript knowledge: the more you code, the easier it becomes. Then you can spend less time worrying about the lower-level tasks and more time concentrating on the overall application and how to approach different problems in more elegant ways.
An Overview of the Image Viewer
Loading and displaying images are common tasks in a front-end application, whether it is explicitly for display of media files, or images are loaded and used to render the GUI. This makes an image viewer a great practical application for your ActionScript skills.
This chapter’s case study is an interface built using the Flash ActionScript 3.0 components and tied together with ActionScript. The ActionScript loads an external XML file containing image information such as the name and path to the file, and a thumbnail representation of the file.
The data, once loaded, will be rendered in one of two forms: a text list or a thumbnail grid. Clicking an item in either list will load the relevant image and display it within a scrolling pane. A slider will allow users to zoom into the image. The scrolling pane will allow not only for scrolling but also for panning the image by clicking and dragging. The completed application appears in Figure 12-1.
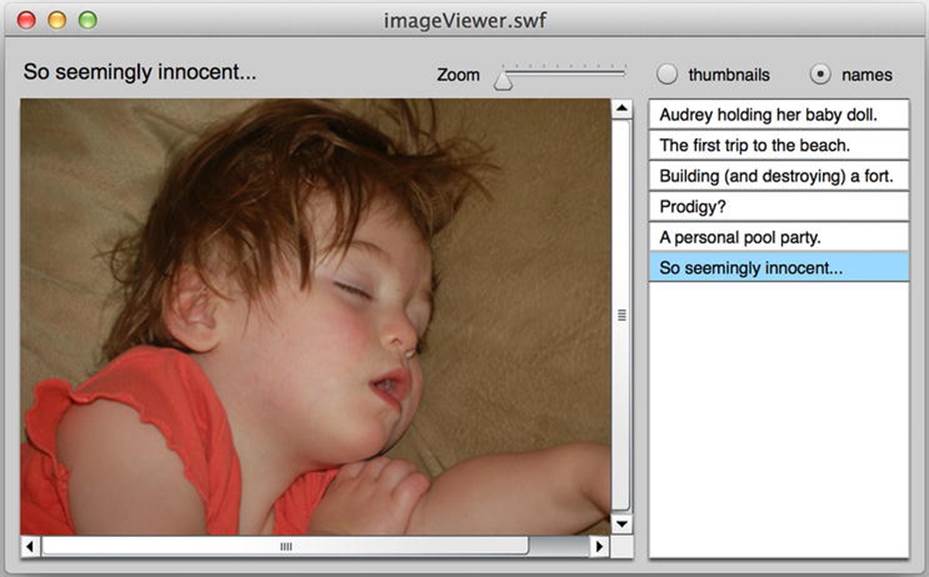
Figure 12-1. The completed image viewer application
When you get to the ActionScript, you’ll see that you won’t need a large number of classes or a huge amount of code to achieve the goal for this application because a good portion of the user interface (UI) logic is encapsulated in the components (which is a great reason to be using the components in the first place). For this project, you will create the following classes:
· An ImageViewer document class, which will kick everything off and handle events from the components
· An ImageData class, which will take care of the loading and formatting of external data
· An ImageHolder class, which will wrap your image-loading code and take care of some simple transition animation
· An Image class, which will hold the metadata for a single image
· A very simple SimpleImageCell class, which will extend the ImageCell class used by the TileList component to control the rendering of the images in the TileList instance
You’ll start by building the interface.
Laying out the Interface
Let’s begin the project by laying out the interface for the application using the drag-and-drop components in the Flash CC integrated development environment (IDE). Before you do this, I want to point out that it is certainly possible to use components in your applications without placing them on stage. The following would attach and position a Label instance:
var label:Label = new Label();
label.x = 50;
label.y = 100;
label.text = "This is a Label instance.";
addChild(label);
There is nothing wrong with this approach. In fact, many would argue that it’s even better because it is easier to manage and develop code stored in external files than to manage FLAs and objects in the timeline. However, visually positioning and configuring items allows you to easily align and tweak your interface without needing to constantly recompile your SWF. Also, it certainly is great for quickly creating prototypes of your interfaces, so that is the approach you will use here. If you want to move the component instantiation, placement, and configuration directly into the code once you are happy with the appearance of an application, it is not a difficult process.
So let’s get started. Follow these steps:
1. Create a new Flash ActionScript 3.0 document and save it into a Chapter 12 project directory as imageViewer.fla.
2. Use the Document Properties dialog box (Modify ![]() Document) to change the dimensions to 600 px and 350 px and to set the background color to #CCCCCC, as shown in Figure 12-2.
Document) to change the dimensions to 600 px and 350 px and to set the background color to #CCCCCC, as shown in Figure 12-2.
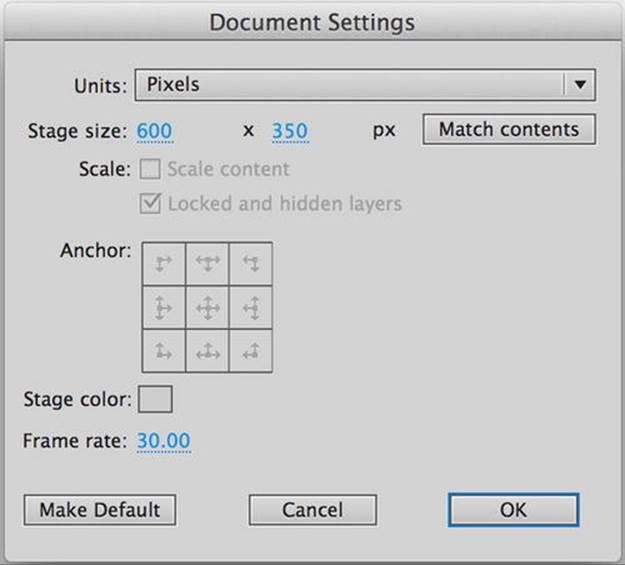
Figure 12-2. Document property settings for the image viewer
3. Open the Components panel if it is not already open (Window ![]() Components). From this panel, drag the following components from the User Interface folder into your file’s Library (Window
Components). From this panel, drag the following components from the User Interface folder into your file’s Library (Window ![]() Library): Label, List, RadioButton, ScrollPane, Slider, andTileList. Your Library should look like Figure 12-3.
Library): Label, List, RadioButton, ScrollPane, Slider, andTileList. Your Library should look like Figure 12-3.
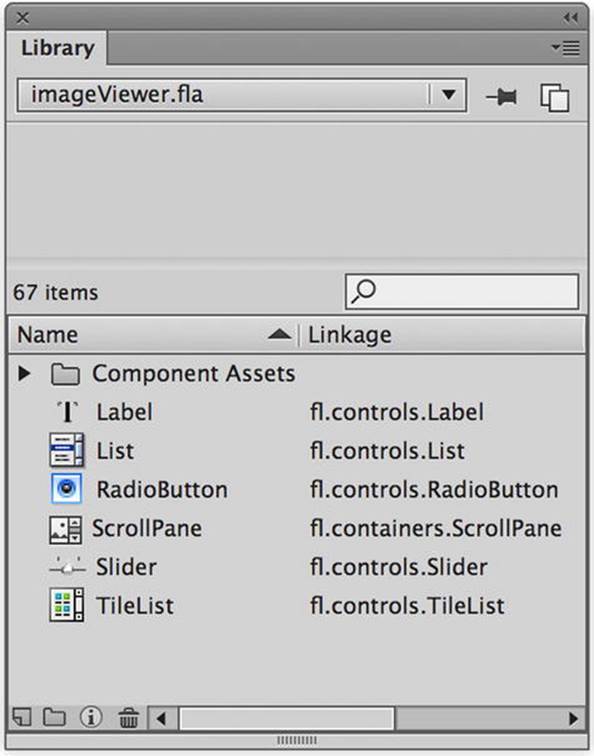
Figure 12-3. The image viewer library with all required components
4. Create five new layers in the main timeline, for a total of six layers. Name the six layers (from top to bottom) Radio, List, TileList, Slider, Labels, and ScrollPane. The timeline should look like Figure 12-4.
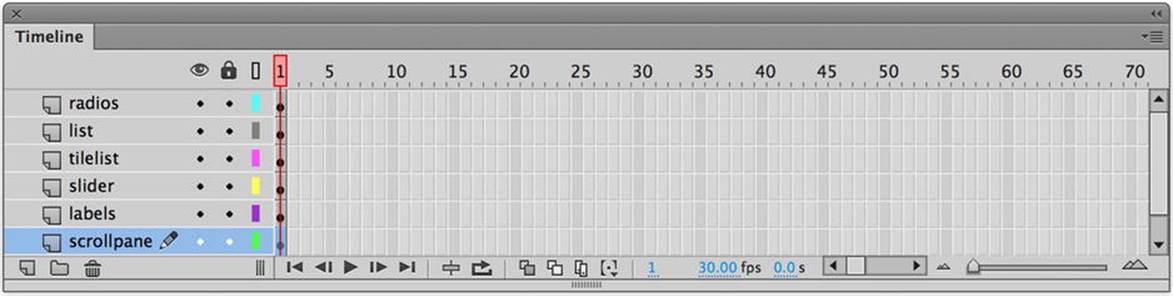
Figure 12-4. The image viewer’s timeline with six layers ready for component placement
5. Drag an instance of the ScrollPane component from your Library into the ScrollPane layer. This will be used to display all loaded images and allow for panning of those images. Using the Properties panel, position the instance at (10, 40) and set its dimensions to 400× 300. Name the instance imagePane_sp.
6. In the Component Parameters (Window ![]() Properties), set the scrollDrag property to true. This property allows a user to pan an image in the scrolling pane by clicking and dragging. The result of these settings is shown in Figure 12-5.
Properties), set the scrollDrag property to true. This property allows a user to pan an image in the scrolling pane by clicking and dragging. The result of these settings is shown in Figure 12-5.

Figure 12-5. The properties set for the ScrollPane instance
7. Drag an instance of the Label component from the Library into the Labels layer. Name the instance title_lbl. In the Component Parameters, position it at (10, 13) and change its dimensions to 250 × 22. In the parameters data grid, set the text property to Choose an image at right. Notice that the Live Preview automatically updates with this new text.
8. Drag another instance of the Label component into the Labels layer. Set this instance at (280, 15) and alter its dimensions to 50 × 20. This instance does not require a name (you will not be manipulating it through ActionScript), but change its text property in theComponent Parameters to Zoom. The result of placing and configuring both labels is shown in Figure 12-6.
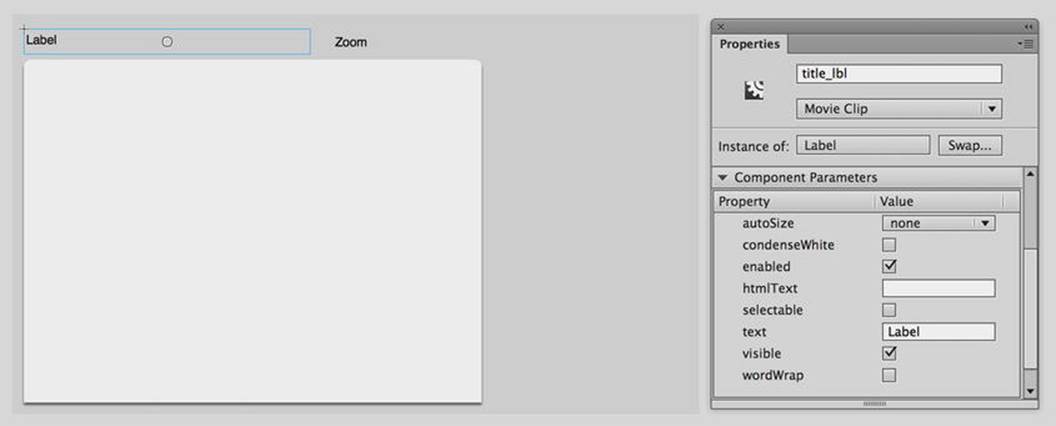
Figure 12-6. Two Label instances are placed and positioned for the interface
9. Drag an instance of the Slider component into the Slider layer and position it at (325, 22). Name the instance zoom_sl. Its dimensions can remain at their defaults. For its parameters, set liveDragging to true. This will send change events while the slider is being dragged instead of waiting until the slider is released. Set its minimum property to 1, while leaving the maximum at 10. minimum and maximum control the range of values available to the slider. Because this slider will be setting the scale of your image, you don’t want its value to go below 1, which is 100 percent. Give the instance a snapInterval setting of .1, which will force its value to be in increments of 0.1. Finally, set both tickInterval and value to 1. tickInterval will set tick marks on the component (you should see them appear in the Live Preview), and value determines the initial value, which you set to 1, or 100 percent scale for the image. The result of all these settings is shown in Figure 12-7.
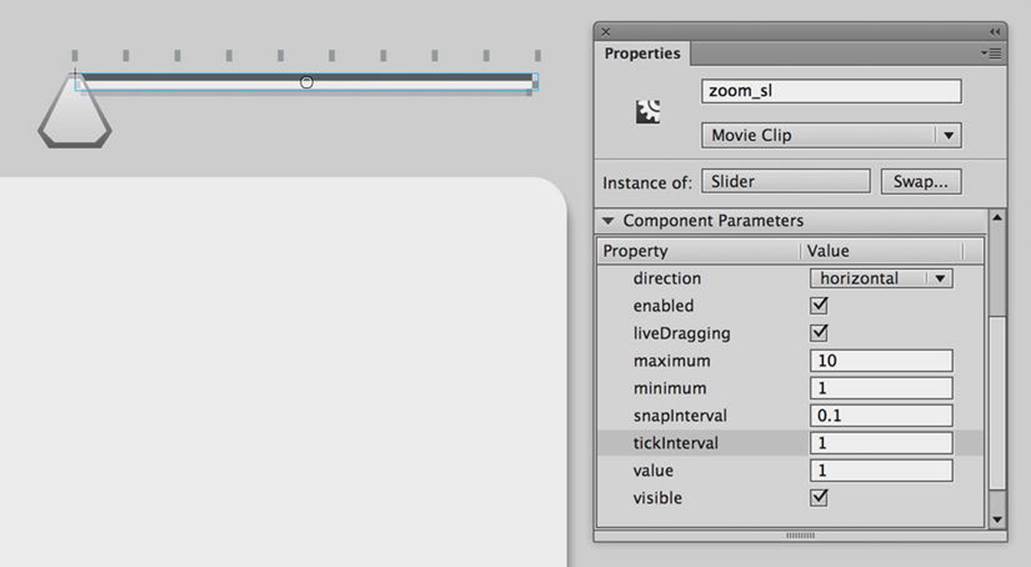
Figure 12-7. The properties set for the Slider instance
10.Going in layer order, the next component to configure is TileList, which will be used to display a grid of thumbnails that the user can click to load an image. Drag an instance from your Library and place it in the TileList layer. Use the Properties Panel to position it at (420, 40) and to set its dimensions to 170 × 300. Name the instance thumbnails_tl. Leave all its parameters at their default values. The stage, with the TileList instance sized and positioned, should look like Figure 12-8.
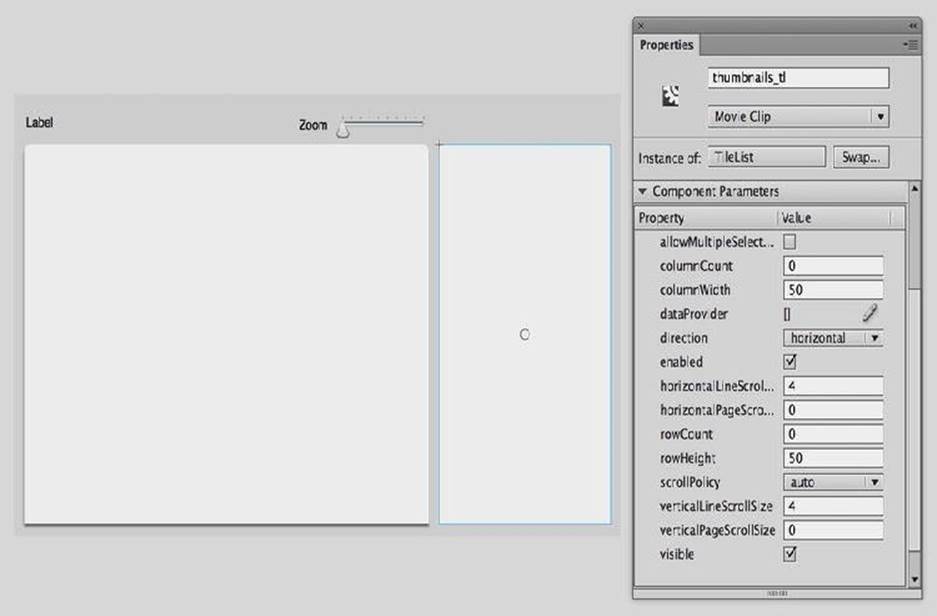
Figure 12-8. The TileList is added to the stage
11.Drag an instance of List from the Library into the List layer. Like the TileList instance, this will be used to show data from which the user can choose, but the List instance will display this data as a list of text. You will code the interface to show the user only one of the two lists, and allow the user to toggle between the views. Because of this, the List instance’s size and position should match exactly that of the TileList instance, so position it at (420, 40) and set its dimensions to 170 × 300. Name the instance names_li. Leave all its parameters at the default values.
Here is a good example of why it is good practice to utilize the timeline layer options in Flash to organize your UI elements. By creating a new layer for each element, or at least type of element, it is easy to toggle visibility or lock certain layers to provide easier access to different elements. Because the TileList and List instances share the same position on the stage, selecting one or the other would be difficult if they were not separated by layers.
12.Drag two instances of the RadioButton component from the Library to the Radio layer. You will use these buttons to allow the user to toggle between the two different list views.
13.Place one RadioButton instance at (420, 13) and set its dimensions to 90 × 22. Name this instance thumbnails_rb. In the Component Parameters, set its label to thumbnails and its groupName to listView. This groupName parameter will tie the two radio buttons together.
14.Set the second RadioButton instance at (520, 13) and set its dimensions to 80 × 22. Give it the instance name names_rb. In the Component Parameters panel, set its label to names and its groupName to listView. Because both instances share the samegroupName, only one of the two instances will be selectable at a time, and selecting one will automatically deselect the other.
You may have noticed that you did not set either radio button as selected. You will set the initial selection through code, which will cause an event to fire. You can catch that event to set the initial state of the interface as well.
The final interface, completed in the IDE, is shown in Figure 12-9.
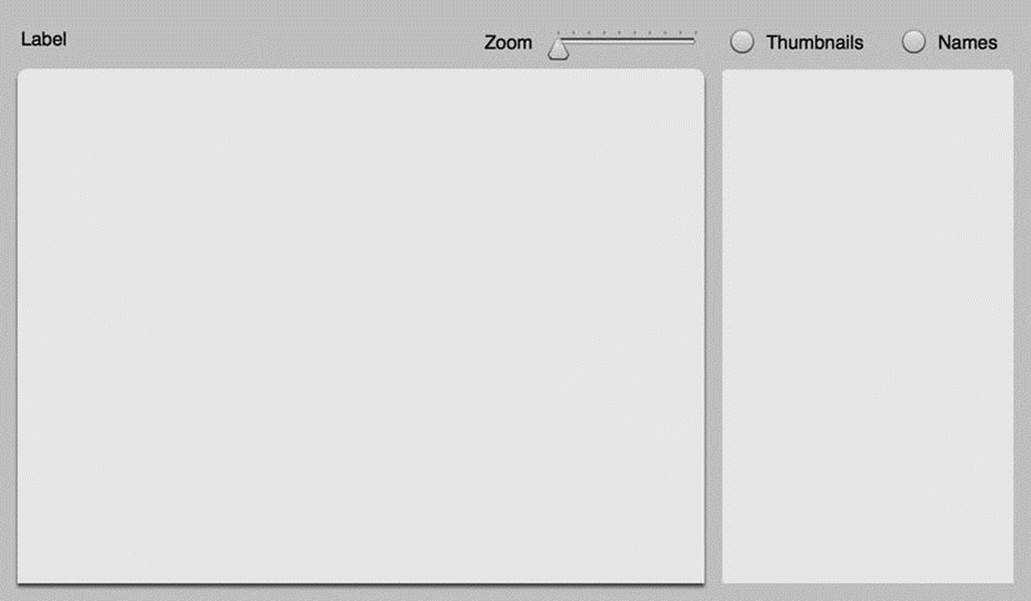
Figure 12-9. The completed interface with all the components laid out and configured on the stage
With the interface complete, you are ready to write some code to plug everything together and load data into it.
Creating the Document Class
First, you will take care of creating the document class that will be your entry point for the application and centralize all the logic.
Create a new ActionScript file and save it as ImageViewer.as into a new com/foundationAS3/ch12 directory within the Chapter 12 project directory you created for the imageViewer.fla file in the previous section. Within this file, you’ll add the package, class, and constructor information. You’ll also set up the standard call to an init() method:
package com.foundationAS3.ch12 {
import flash.display.Sprite;
public class ImageViewer extends Sprite {
public function ImageViewer() {
init();
}
private function init():void {
}
}
}
I truly believe that here, in the depths of Chapter 12, there is nothing in the preceding code that should surprise you!
In previous examples that included objects set in the IDE, you’ve seen how those objects can be directly referenced in the ActionScript code of the document class without error. However, the problem with this approach is that it doesn’t provide all that cool code hinting and code completion as you develop. To enable this, you’ll assign references to your timeline objects to typed properties of your class. Add the following bold lines to your ImageViewer class:
package com.foundationAS3.ch12 {
import flash.display.Sprite;
import fl.containers.ScrollPane;
import fl.controls.Label;
import fl.controls.List;
import fl.controls.RadioButton;
import fl.controls.Slider;
import fl.controls.TileList;
public class ImageViewer extends Sprite {
private var _imagePane_sp:ScrollPane;
private var _title_lbl:Label;
private var _thumbnails_rb:RadioButton;
private var _names_rb:RadioButton;
private var _thumbnails_tl:TileList;
private var _names_li:List;
private var _zoom_sl:Slider;
public function ImageViewer() {
init();
}
private function init():void {
assignComponentReferences();
}
private function assignComponentReferences():void {
_imagePane_sp = imagePane_sp;
_title_lbl = title_lbl;
_thumbnails_rb = thumbnails_rb;
_names_rb = names_rb;
_thumbnails_tl = thumbnails_tl;
_names_li = names_li;
_zoom_sl = zoom_sl;
}
}
}
First, you import all the necessary controls classes at the top of the code. Then each component instance you need to reference is given a private property and typed to the appropriate class. Finally, within the init() method, you call a new assignComponentReferences()method, which simply assigns each component instance reference to the typed private property. Notice that you are using the underscore prefix for all the private properties to differentiate them from the public instance names for the components that you set in the IDE.
As you type within this class, you should get helpful code hints popping up to speed your development. Give it a try. At the end of the init() method, type _zoom_sl. As you type the dot operator, a pop-up window with all of Slider’s public methods and properties should appear. Very nice! (Make sure that you delete this line after you run this test!)
When users interact with the components, you need to account for those events and act accordingly. Add the following bold lines to your code for this purpose:
package com.foundationAS3.ch12 {
import flash.display.Sprite;
import flash.events.Event;
import fl.containers.ScrollPane;
import fl.controls.Label;
import fl.controls.List;
import fl.controls.RadioButton;
import fl.controls.Slider;
import fl.controls.TileList;
public class ImageViewer extends Sprite {
private var _imagePane_sp:ScrollPane;
private var _title_lbl:Label;
private var _thumbnails_rb:RadioButton;
private var _names_rb:RadioButton;
private var _thumbnails_tl:TileList;
private var _names_li:List;
private var _zoom_sl:Slider;
public function ImageViewer() {
init();
}
private function init():void {
assignComponentReferences();
assignHandlers();
}
private function assignComponentReferences():void {
_imagePane_sp = imagePane_sp;
_title_lbl = title_lbl;
_thumbnails_rb = thumbnails_rb;
_names_rb = names_rb;
_thumbnails_tl = thumbnails_tl;
_names_li = names_li;
_zoom_sl = zoom_sl;
}
private function assignHandlers():void {
_thumbnails_rb.addEventListener(Event.CHANGE, onListViewChange);
_thumbnails_tl.addEventListener(Event.CHANGE, onImageSelected);
_names_li.addEventListener(Event.CHANGE, onImageSelected);
_zoom_sl.addEventListener(Event.CHANGE, onZoom);
}
private function onListViewChange(event:Event):void {
}
private function onImageSelected(event:Event):void {
}
private function onZoom(event:Event):void {
}
}
}
Within the init() method, you call another new method, assignHandlers(), which adds four event listeners. The first event listener is for one of your radio buttons to handle toggling the list view between displaying thumbnails and text. Why is it needed for only one of the two radio buttons? Because of the way the two radio buttons are wired, if one is selected, the other is deselected, and its CHANGE event is fired. So no matter which of the two in the interface is clicked, you need to listen for the CHANGE event on only one of them. In fact, if you listened for both, you would receive multiple events.
The next two listeners are for the two different lists: the List and TileList instances. Selection in either list will result in the same action, namely loading an image, so you give the same event handler to both.
The final event listener is set up for when the slider is moved. This event will call an appropriately named onZoom() method within this class.
All three handlers are added at the end of the code, although each is currently empty. And, of course, remember to import the Event class at the top.
Without image data yet available in your code, you cannot yet fill in the onImageSelected() or onZoom() methods. You can toggle the list view based on the radio button selection, though. For that, add the following bold code:
package com.foundationAS3.ch12 {
import flash.display.Sprite;
import flash.events.Event;
import fl.containers.ScrollPane;
import fl.controls.Label;
import fl.controls.List;
import fl.controls.RadioButton;
import fl.controls.Slider;
import fl.controls.TileList;
public class ImageViewer extends Sprite {
private var _imagePane_sp:ScrollPane;
private var _title_lbl:Label;
private var _thumbnails_rb:RadioButton;
private var _names_rb:RadioButton;
private var _thumbnails_tl:TileList;
private var _names_li:List;
private var _zoom_sl:Slider;
public function ImageViewer() {
init();
}
private function init():void {
assignComponentReferences();
configureComponents();
assignHandlers();
}
private function assignComponentReferences():void {
_imagePane_sp = imagePane_sp;
_title_lbl = title_lbl;
_thumbnails_rb = thumbnails_rb;
_names_rb = names_rb;
_thumbnails_tl = thumbnails_tl;
_names_li = names_li;
_zoom_sl = zoom_sl;
}
private function configureComponents():void {
_names_rb.selected = true;
}
private function assignHandlers():void {
_thumbnails_rb.addEventListener(Event.CHANGE, onListViewChange);
_thumbnails_tl.addEventListener(Event.CHANGE, onImageSelected);
_names_li.addEventListener(Event.CHANGE, onImageSelected);
_zoom_sl.addEventListener(Event.CHANGE, onZoom);
}
private function onListViewChange(event:Event):void {
_thumbnails_tl.visible = _thumbnails_rb.selected;
_names_li.visible = !_thumbnails_rb.selected;
}
private function onImageSelected(event:Event):void {
}
private function onZoom(event:Event):void {
}
}
}
You’ll need more component initialization as you develop further, so here you create a configureComponents() method and call it from within the init() method. All you need to configure at this time is which radio button is selected, and you default it to _names_li by setting its selected property. Setting this will automatically cause the CHANGE event to fire on _thumbnails_rb, which will result in onListViewChange() being called.
Within onListViewChange(), you set the visibility of the two list components based on which radio button is selected. If _thumbnails_rb is selected, then _thumbnails_tl will be visible, and _names_li will not. If _thumbnails_rb is not selected, the opposite will occur.
At this point, you should be able to test your movie. Right now, the only testable functionality will be the toggling of the list views, but you should give that a try to ensure that all your syntax is correct before going further. Return to imageViewer.fla and entercom.foundationAS3.ch12.ImageViewer as the document class name in the Property inspector. Test the movie.
Loading Image Data
Now that your document class is effectively hooked up to all the components, you need to get some image data to display into your application. For this project, you will load the data from an XML file that is stored relative to the SWF, which is a common approach. Take a look at the XML file that you will be using, which is included in the files you downloaded for this chapter (unless you really feel like typing all that XML!):
<?xml version="1.0" ?>
<images>
<image>
<name>Audrey holding her baby doll.</name>
<file>images/baby.jpg</file>
<thumb>images/thumbs/baby.jpg</thumb>
</image>
<image>
<name>The first trip to the beach.</name>
<file>images/beach.jpg</file>
<thumb>images/thumbs/beach.jpg</thumb>
</image>
<image>
<name>Building (and destroying) a fort.</name>
<file>images/fort.jpg</file>
<thumb>images/thumbs/fort.jpg</thumb>
</image>
<image>
<name>Prodigy?</name>
<file>images/piano.jpg</file>
<thumb>images/thumbs/piano.jpg</thumb>
</image>
<image>
<name>A personal pool party.</name>
<file>images/pool.jpg</file>
<thumb>images/thumbs/pool.jpg</thumb>
</image>
<image>
<name>So seemingly innocent…</name>
<file>images/sleeping.jpg</file>
<thumb>images/thumbs/sleeping.jpg</thumb>
</image>
</images>
The root node of the XML is <images>. This contains a number of <image> child nodes. Each of these <image> child nodes contains data for a single image in <name>, <file>, and <thumb> child nodes. Your job will be to load in this XML and make it usable by your components. Copy this XML file and the images folder into same directory as imageViewer.fla.
The first thing you will do to handle of this external data is create a class on the ActionScript side that will hold the data for a single image. Create a new ActionScript file and save it into the same directory as ImageViewer.as. The following is the entirety of the class (nice and simple!):
package com.foundationAS3.ch12 {
public class Image {
private var _name:String;
private var _file:String;
private var _thumb:String;
public function Image(name:String, file:String, thumb:String) {
_name = name;
_file = file;
_thumb = thumb;
}
public function get name():String {
return _name;
}
public function get file():String {
return _file;
}
public function get thumb():String {
return _thumb;
}
}
}
This class has three private properties that map exactly to the <image> node in the XML, with public getters to access each of these properties. Setting the properties is handled in the constructor, which takes the three values as arguments.
Loading the XML
Now that you have defined the class that will represent the data, your next task is to load the data and create the necessary Image instances. It is often a good idea to move all code that deals with loading and parsing of data into its own class or classes. This way, if you ever need to change how the data is loaded—for instance, switching from a static XML file to a web service—you do not need to worry about how that change might affect other parts of your code. Abstracting functionality into separate classes that can encapsulate the code to hide the implementation is a common technique in object-oriented programming (OOP) and one that makes sense for most objects. You’ll follow that methodology by creating an ImageData class that will load the XML and prepare it for use by other classes.
Create a new ActionScript file and save it into the same directory as Image.as and ImageViewer.as. Add the following code, which creates the necessary package and class structure, and provides a public method that will kick off the loading of the external data:
package com.foundationAS3.ch12 {
import flash.events.Event;
import flash.events.EventDispatcher;
import flash.net.URLLoader;
import flash.net.URLRequest;
public class ImageData extends EventDispatcher {
private static const DATA_FILE:String = "images.xml";
private function onXMLLoaded(event:Event):void {
}
public function load():void {
var loader:URLLoader = new URLLoader();
loader.addEventListener(Event.COMPLETE, onXMLLoaded);
loader.load(new URLRequest(DATA_FILE));
}
}
}
This class extends the EventDispatcher class, so that you can broadcast events for an ImageData instance, which is necessary to let other classes know when data has loaded and is ready.
Within the public load() method, you use a URLLoader instance to load in an external XML file, the path to which is stored in the constant DATA_FILE. URLLoader’s load() method requires that the parameter passed in is a URLRequest instance. Before you call load(), though, you set up a listener for when the XML has completed loading. It is also a good idea to set up listeners for load errors, but for simplicity, this example doesn’t include those listeners.
Parsing the Data
To handle the parsing of the data upon completion, add the following lines in bold:
public class ImageData extends EventDispatcher {
private static const DATA_FILE:String = "images.xml";
private var _data:Array;
private function onXMLLoaded(event:Event):void {
_data = [];
var loader:URLLoader = event.target as URLLoader;
var xml:XML = new XML(loader.data);
var images:XMLList = xml.child("image");
var numImages:uint = images.length();
var image:XML;
for (var i:uint = 0; i < numImages; i++) {
image = images[i] as XML;
_data.push(
new Image(
image.child("name").toString(),
image.child("file").toString(),
image.child("thumb").toString()
)
);
}
dispatchEvent(new Event(Event.COMPLETE));
}
public function load():void {
var loader:URLLoader = new URLLoader();
loader.addEventListener(Event.COMPLETE, onXMLLoaded);
loader.load(new URLRequest(DATA_FILE));
}
onXMLLoaded() will be called when the XML has successfully loaded. This is a little more complex than methods you have dealt with thus far in this chapter, so let’s break it down bit by bit.
Within this method, you create a new Array instance and assign it to the _data property, which you declared at the top of the class. You then find the data within the URLLoader instance that dispatched the event and pass this to the XML constructor to get the data as XML.
var loader:URLLoader = event.target as URLLoader;
var xml:XML = new XML(loader.data);
At this point, you can use E4X syntax, which was discussed in Chapter 11, to find all the nodes with the name image and assign this resulting XMLList to the images variable:
var images:XMLList = xml.child("image");
Using the length() method of XMLList to determine the number of images, you can then loop through each XML object in the XMLList and create a new Image instance for each one:
var numImages:uint = images.length();
var image:XML;
for (var i:uint = 0; i < numImages; i++) {
To create the Image instances, you can take advantage of a little more E4X syntax. First, you grab a reference to the XML object in the images XMLList and assign this reference to the variable image:
image = images[i] as XML;
You then create a new Image instance and pass the string values for the name, file, and thumb child nodes of the image XML to the Image constructor:
new Image(
image.child("name").toString(),
image.child("file").toString(),
image.child("thumb").toString()
)
The child() method of XML actually returns an XMLList, but if the list has only one item, you can refer to it as a single XML object (pretty sly, but an extremely useful feature). Calling toString() on an XML object will return the node value for that object. The result of all this is that by calling image.child("name").toString(), you get just the text value within the <name> node.
Finally, the new Image() call returns a reference to the Image instance (as is the case whenever using the new operator), so you can push this reference directly into the _data array:
_data.push(
new Image(
image.child("name").toString(),
image.child("file").toString(),
image.child("thumb").toString()
)
);
After all the Image instances have been created and pushed into the _data array, you dispatch an event so that other objects can listen and act accordingly when the data is ready:
dispatchEvent(new Event(Event.COMPLETE));
That’s easily the most complex code you will see in this chapter, so if you got through it and everything made sense, give yourself a pat on the back and know that it’s all downhill from here!
Accessing the Data
To finish the ImageData class, you need to provide two ways of getting the information from the class. You know that the application needs to display the images in the TileList instance and the names in the List instance. Let’s make it easy for the document class and let theImageData class take care of formatting the data to be passed to the different components.
First, add a getNameData() method that returns an array that holds the image names and references to the Image objects. This will be perfect for any lists that need to display just the text data, such as the List instance. Add the following bold lines:
public function load():void {
var loader:URLLoader = new URLLoader();
loader.addEventListener(Event.COMPLETE, onXMLLoaded);
loader.load(new URLRequest(DATA_FILE));
}
public function getNameData():Array {
var nameData:Array = [];
var numImages:uint = _data.length;
var image:Image;
for (var i:uint = 0; i < numImages; i++) {
image = _data[i] as Image;
nameData.push({label:image.name, data:image});
}
return nameData;
}
}
}
Here, you create a new Array instance, nameData, and then loop through all the Image instances stored in _data. For each Image instance, you push into the nameData variable an object with two properties: label and data. label holds the name of the image, and dataholds a reference to the Image itself. The resulting nameData array is returned from the method.
Now you’ll add a getThumbData() method that works similarly to getNameData(), but will return the information that will be used by your TileList instance or any list that needs to display image data. Add the following bold lines:
public function getNameData():Array {
var nameData:Array = [];
var numImages:uint = _data.length;
var image:Image;
for (var i:uint = 0; i < numImages; i++) {
image = _data[i] as Image;
nameData.push({label:image.name, data:image});
}
return nameData;
}
public function getThumbData():Array {
var thumbData:Array = [];
var numImages:uint = _data.length;
var image:Image;
for (var i:uint = 0; i < numImages; i++) {
image = _data[i] as Image;
thumbData.push({label:"", source:image.thumb, data:image});
}
return thumbData;
}
}
}
The structure is similar to getNameData(). In this case, for each iteration of the loop, you create a new object with three properties: label, source, and data. Once again, data will hold a reference to an Image instance; source will hold the path to the thumbnail image. You pass an empty string to label because you don’t want the labels to appear in your TileList, and the easiest way to manage it is to not pass in labels for the tiles. The resulting thumbData is returned from this method.
That finishes the ImageData class. Housing all loading and parsing of data in this class means that if you needed a different implementation for loading data, you could change the code without any ill effects on other classes that use this data. Additionally, dividing responsibilities among multiple classes with specific purposes keeps the code more manageable.
Displaying Images
With data being loaded into the application and formatted for the lists, you can add the code necessary to initiate this process and tie the results to your components. This will be handled in your main ImageViewer class.
Return to ImageViewer.as and add the following code to instantiate the ImageData class and have it load in the XML:
package com.foundationAS3.ch12 {
import flash.display.Sprite;
import flash.events.Event;
import fl.containers.ScrollPane;
import fl.controls.Label;
import fl.controls.List;
import fl.controls.RadioButton;
import fl.controls.Slider;
import fl.controls.TileList;
import fl.data.DataProvider;
public class ImageViewer extends Sprite {
private var _imagePane_sp:ScrollPane;
private var _title_lbl:Label;
private var _thumbnails_rb:RadioButton;
private var _names_rb:RadioButton;
private var _thumbnails_tl:TileList;
private var _names_li:List;
private var _zoom_sl:Slider;
private var _images:ImageData;
public function ImageViewer() {
init();
}
private function init():void {
assignComponentReferences();
configureComponents();
assignHandlers();
loadImageData();
}
private function assignComponentReferences():void {
_imagePane_sp = imagePane_sp;
_title_lbl = title_lbl;
_thumbnails_rb = thumbnails_rb;
_names_rb = names_rb;
_thumbnails_tl = thumbnails_tl;
_names_li = names_li;
_zoom_sl = zoom_sl;
}
private function configureComponents():void {
_names_rb.selected = true;
}
private function assignHandlers():void {
_thumbnails_rb.addEventListener(Event.CHANGE, onListViewChange);
_thumbnails_tl.addEventListener(Event.CHANGE, onImageSelected);
_names_li.addEventListener(Event.CHANGE, onImageSelected);
_zoom_sl.addEventListener(Event.CHANGE, onZoom);
}
private function loadImageData():void {
_images = new ImageData();
_images.addEventListener(Event.COMPLETE, onDataLoaded);
_images.load();
}
private function onDataLoaded(event:Event):void {
_images.removeEventListener(Event.COMPLETE, onDataLoaded);
_thumbnails_tl.dataProvider = new DataProvider(_images.getThumbData());
_names_li.dataProvider = new DataProvider(_images.getNameData());
}
private function onListViewChange(event:Event):void {
_thumbnails_tl.visible = _thumbnails_rb.selected;
_names_li.visible = !_thumbnails_rb.selected;
}
private function onImageSelected(event:Event):void {
}
private function onZoom(event:Event):void {
}
}
}
}
Here, you add one more private property, _images, which will hold a reference to the ImageData instance. Then, within the init() method, you call a new method: loadImageData(). This new method instantiates a new ImageData instance and assigns it to your _imagesproperty. You add an event listener for when the data has loaded and call ImageData’s public load() method to initiate the loading of the external data.
The onDataLoaded() method handles the event that fires when the data is ready in the ImageData instance. When this fires, you first remove the listener and then assign DataProvider instances to the two different lists (remember to import the DataProvider class at the top of the code). To populate the dataProviders, you call the two methods that you created in ImageData—getThumbData() and getNameData()—and pass the results to the DataProvider constructor.
If you test your movie now, you should see the List instance populate with the image names. If you click the thumbnails radio button, the thumbnail images appear in the TileList instance, as shown in Figure 12-10.

Figure 12-10. The interface with thumbnails displayed in the TileList instance, with the data loaded from external XML
Handling Image Selection
Now you need to handle what happens when an item is selected in one of the lists. This will be taken care of in the onImageSelected() method, which is the handler for the lists’ CHANGE events.
Fill in the onImageSelected() method in ImageViewer with the following bold lines:
private function onImageSelected(event:Event):void {
var image:Image = event.target.selectedItem.data as Image;
var index:int = event.target.selectedIndex;
_thumbnails_tl.selectedIndex = index;
_names_li.selectedIndex = index;
_title_lbl.text = image.name;
_imagePane_sp.source = image.file;
}
When an item in either list is clicked, the event will cause this method to fire. You can reference the list clicked by using event.target. The selected item within that list can be obtained through the selectedItem property (thank goodness—or thank good design—that both lists have the same properties or interface). Items in the list will have a data property that will hold a reference to the relevant Image instance. Remember that the arrays you pass to the dataProviders have this reference. These lines are in the ImageData class when you form the arrays:
nameData.push({label:image.name, data:image});
thumbData.push({label:"", source:image.thumb, data:image});
Because the Image instances can be found in the selected item’s data property, you can cast this to Image in your onImageSelected() handler:
var image:Image = event.target.selectedItem.data as Image;
In the next lines, you find the index of the selected item in the clicked list and make sure that both lists set this index as selected, so if the user toggles to the other view, the other list shows the same selection:
var index:int = event.target.selectedIndex;
_thumbnails_tl.selectedIndex = index;
_names_li.selectedIndex = index;
In the next and last two lines of the method, you assign the name of the image to the text property of the _title_lbl label and set the source for the ScrollPane instance to the image file. The result, as can be seen in Figure 12-11, is that an image loads into the pane and can be scrolled, and the name of the same image appears in the label above.
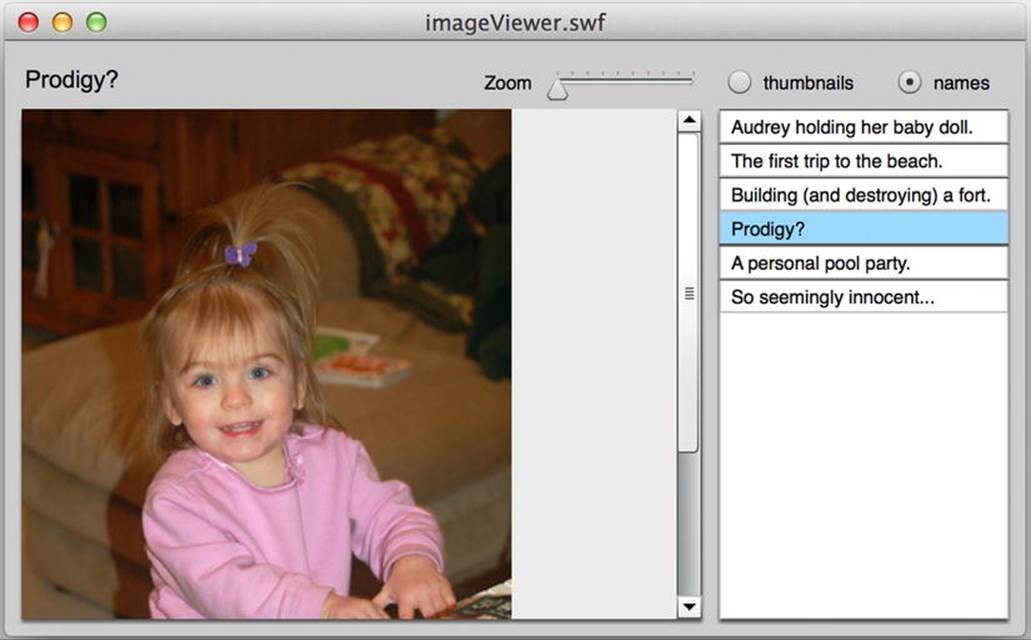
Figure 12-11. The image loads when an item is selected in either list
Scaling an Image
As a final step for the initial working interface, let’s hook up the zoom slider so that dragging the slider will change the scale of the loaded image.
Add the following bold lines to your code to enable zooming of the images:
private function onImageSelected(event:Event):void {
var image:Image = event.target.selectedItem.data as Image;
var index:int = event.target.selectedIndex;
_thumbnails_tl.selectedIndex = index;
_names_li.selectedIndex = index;
_zoom_sl.value = 1;
_title_lbl.text = image.name;
_imagePane_sp.source = image.file;
}
private function onZoom(event:Event):void {
if (_imagePane_sp.content) {
_imagePane_sp.content.scaleX = _imagePane_sp.content.scaleY = _zoom_sl.value;
_imagePane_sp.update();
}
}
Easy enough, isn’t it? In the onZoom() method, if there is currently content in the pane, you set the scaleX and scaleY properties of that content to be the current value of the slider and then call the update() method of ScrollPane so that the scrollbars adjust to the new content size. You also add a line to the onImageSelected() method so that when a new image is loaded, you reset the zoom level to 1.
Test your movie now. You should see image data loaded and displayed in your two lists, which you can display with the radio button toggle. When a list item is clicked, the image appears in the scrolling pane with its name above, and it can be scaled using the slider instance.
That’s not bad output for your work thus far! However, you can make this application more sleek and aesthetically pleasing with a few graphic enhancements.
Adding Graphic Enhancements
To enhance the look of the image viewer application, you’ll make four adjustments:
· Make the label for the image stand out from the other labels for the components.
· Improve the look of the thumbnails within the TileList instance so that they don’t seem so crammed together.
· Add drop shadows to the lists, so they conform to the look of the scrolling pane, which has a drop shadow beneath it by default.
· Create a more gentle transition when an image is loaded by adding animation.
Changing the Image Label
You can make the image label stand out by changing the TextFormat instance for the label. In the ImageViewer class, add the following bold line to assign a new TextFormat to _title_lbl and make its text larger:
private function configureComponents():void {
_names_rb.selected = true;
_title_lbl.setStyle("textFormat", new TextFormat("Arial", 14));
}
Make sure that in addition to adding this line, you import flash.text.TextFormat with the rest of the class imports at the top of the class:
import flash.display.Sprite;
import flash.events.Event;
import flash.text.TextFormat;
Test your movie, and you’ll see the result of these changes, as shown in Figure 12-12.

Figure 12-12. The title for an image is made bigger through the use of a TextFormat applied to a style
Improving the Thumbnail Layout
Next, you’ll improve the thumbnail layout by making the thumbnails larger and adding some space around them.
Add the following bold lines to ImageViewer to make the tiles in the TileList larger to fill the space horizontally:
private function configureComponents():void {
_thumbnails_tl.columnWidth = 85;
_thumbnails_tl.rowHeight = 70;
_names_rb.selected = true;
_title_lbl.setStyle("textFormat", new TextFormat("Arial", 14));
}
Now let’s create more padding around the images within each cell. To accomplish this, you will create a new cell renderer for tiles that will have this new padding setting. Creating a new cell renderer for a list is a simple procedure and allows you to customize exactly how list items appear.
Create a new ActionScript file and save it as SimpleImageCell.as into the same directory as ImageViewer.as. Add the following code (which is by far the easiest class you have created this book!):
package com.foundationAS3.ch12 {
import fl.controls.listClasses.ImageCell;
public class SimpleImageCell extends ImageCell {
public function SimpleImageCell() {
super();
setStyle("imagePadding", 5);
}
}
}
The class extends ImageCell, which a TileList instance will use by default. Within the constructor, you set the imagePadding style property, which is supported by ImageCell, to 5 pixels. All that you need to do now is assign this cell renderer to your tile list.
Return to ImageViewer and add the following bold line to the configureComponents() method:
private function configureComponents():void {
_thumbnails_tl.columnWidth = 85;
_thumbnails_tl.rowHeight = 70;
_names_rb.selected = true;
_title_lbl.setStyle("textFormat", new TextFormat("Arial", 14));
StyleManager.setComponentStyle(TileList, "cellRenderer", SimpleImageCell);
}
For this to compile, you need to import the StyleManager class at the top of your code:
import fl.containers.ScrollPane;
import fl.controls.Label;
import fl.controls.List;
import fl.controls.RadioButton;
import fl.controls.Slider;
import fl.controls.TileList;
import fl.data.DataProvider;
import fl.managers.StyleManager;
With the new cell renderer applying its 5-pixel padding, you should see something similar to Figure 12-13 when you test the movie.
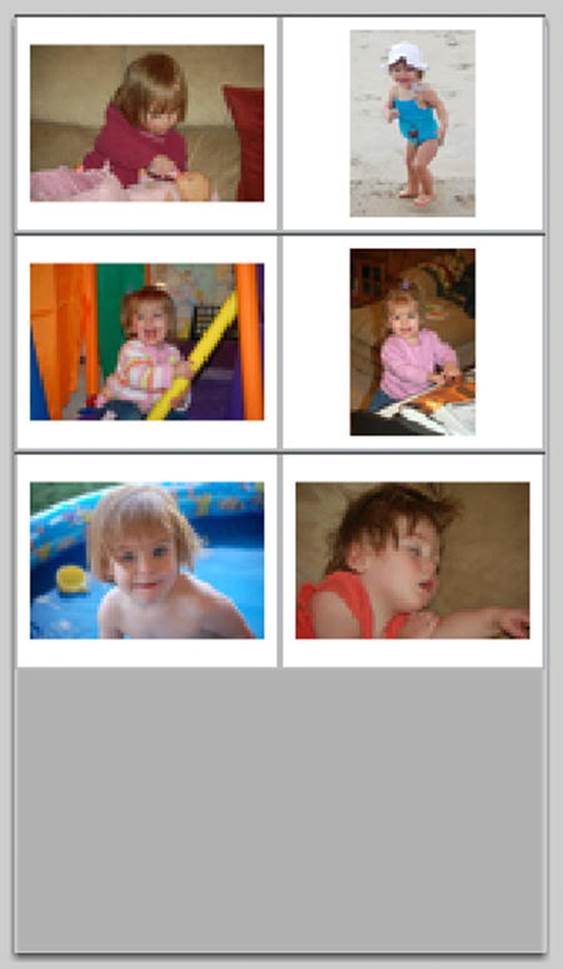
Figure 12-13. A custom cell renderer is used to apply padding around the thumbnail images
Adding Drop Shadows
Next, you’ll add drop shadows beneath the lists to match the shadow of the scrolling pane. To create a shadow, you need a shape. One option is to apply a drop shadow to both list components because either one or the other is visible at all times. If you want to ensure that the shadow remains consistent between the two, another option is to draw a new shape under the lists and use this shape to create the shadow. Let’s take the latter approach.
To create the shape and its shadow, add the following bold lines to the ImageViewer class:
package com.foundationAS3.ch12 {
import flash.display.Shape;
import flash.display.Sprite;
import flash.events.Event;
import flash.filters.DropShadowFilter;
import flash.text.TextFormat;
import fl.containers.ScrollPane;
import fl.controls.Label;
import fl.controls.List;
import fl.controls.RadioButton;
import fl.controls.Slider;
import fl.controls.TileList;
import fl.data.DataProvider;
import fl.managers.StyleManager;
public class ImageViewer extends Sprite {
private var _imagePane_sp:ScrollPane;
private var _title_lbl:Label;
private var _thumbnails_rb:RadioButton;
private var _names_rb:RadioButton;
private var _thumbnails_tl:TileList;
private var _names_li:List;
private var _zoom_sl:Slider;
private var _images:ImageData;
public function ImageViewer() {
init();
}
private function init():void {
assignComponentReferences();
configureComponents();
drawListShadow();
assignHandlers();
loadImageData();
}
private function assignComponentReferences():void {
_imagePane_sp = imagePane_sp;
_title_lbl = title_lbl;
_thumbnails_rb = thumbnails_rb;
_names_rb = names_rb;
_thumbnails_tl = thumbnails_tl;
_names_li = names_li;
_zoom_sl = zoom_sl;
}
private function configureComponents():void {
_thumbnails_tl.columnWidth = 85;
_thumbnails_tl.rowHeight = 70;
_names_rb.selected = true;
_title_lbl.setStyle("textFormat", new TextFormat("Arial", 14));
StyleManager.setComponentStyle(å
TileList, "cellRenderer", SimpleImageCell);
}
private function drawListShadow():void {
var shadowShape:Shape = new Shape();
shadowShape.x = _names_li.x;
shadowShape.y = _names_li.y;
shadowShape.graphics.beginFill(0);
shadowShape.graphics.drawRect(0, 0, _names_li.width, _names_li.height);
shadowShape.graphics.endFill();
shadowShape.filters = [
new DropShadowFilter(
2, 90, 0, 1, 4, 4, .7, 1, false, false, true);
addChildAt(shadowShape, 0);
}
private function assignHandlers():void {
_thumbnails_rb.addEventListener(Event.CHANGE, onListViewChange);
_thumbnails_tl.addEventListener(Event.CHANGE, onImageSelected);
_names_li.addEventListener(Event.CHANGE, onImageSelected);
_zoom_sl.addEventListener(Event.CHANGE, onZoom);
}
In the drawListShadow() method, which you call from the init(), a new Shape instance is created. This can be a Shape instead of a Sprite because you don’t need to allow for any interactivity. This shape is placed at the same screen position as the List instance. Then a solid black rectangle is drawn within the shape, with a width and height to equal the List instance as well. You then create a new DropShadowFilter instance with some settings that mimic the look of the drop shadow used by the scrolling pane. The most important setting to note is the final true, which specifies that the shape itself will not be visible; only the shadow that the shape produces appears, which is great because you want only the shadow!
The final line of the method adds the shape to the display list at the bottom of the stack. This places the shape below the two list instances, effectively creating a shadow for both. Test your movie to see the result, which should look something like Figure 12-14.
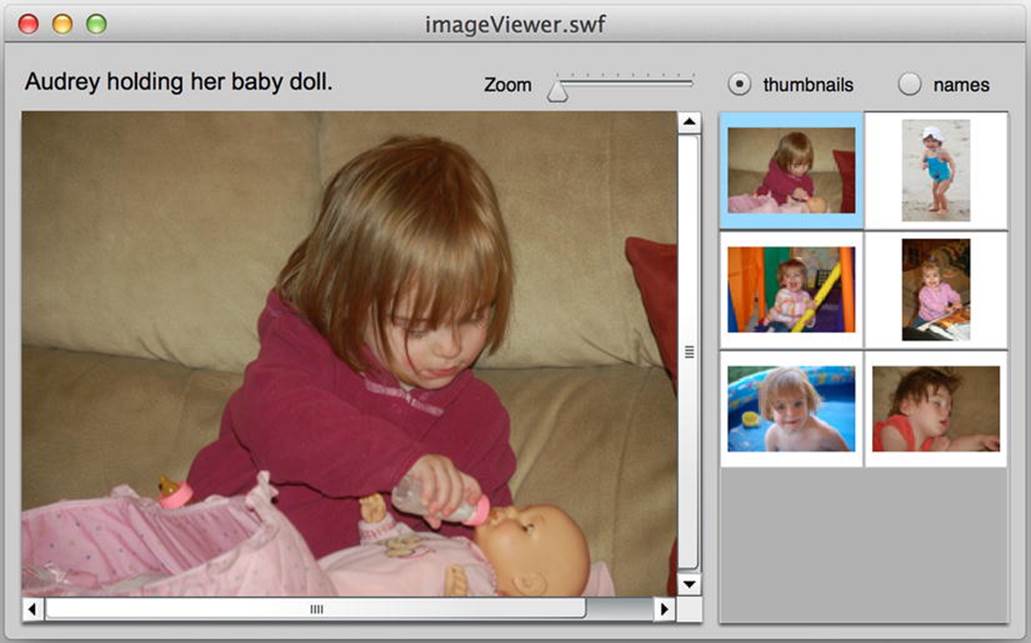
Figure 12-14. A drop shadow is added on a new shape below the list instances
Creating an Animated Transition
The final enhancement is to have loaded images animate in order to create a smoother transition. To accomplish this, you will create a new class to specifically handle loading and animating images.
Create a new ActionScript file and save it as ImageHolder.as into the same directory as ImageViewer.as. Add the following code, which takes care of loading an image:
package com.foundationAS3.ch12 {
import flash.display.Loader;
import flash.display.LoaderInfo;
import flash.display.Sprite;
import flash.events.Event;
import flash.net.URLRequest;
public class ImageHolder extends Sprite {
public function ImageHolder(file:String) {
loadImage(file);
}
private function loadImage(file:String):void {
var loader:Loader = new Loader();
loader.contentLoaderInfo.addEventListener(Event.COMPLETE, onImageLoaded);
loader.load(new URLRequest(file));
}
private function onImageLoaded(event:Event):void {
var loaderInfo:LoaderInfo = event.target as LoaderInfo;
loaderInfo.removeEventListener(Event.COMPLETE, onImageLoaded);
addChild(loaderInfo.content);
dispatchEvent(new Event(Event.COMPLETE));
}
}
}
This class extends Sprite so that you can add other display objects (namely, the loaded image) to it and allows for event dispatching. The constructor for the class takes a path to an image, which is subsequently passed to loadImage().
loadImage() creates a new Loader instance and passes the path to the file, wrapped in a URLRequest instance, to the Loader’s load() method. To be informed when the image has loaded completely, you need to add an event listener, but not to Loader itself. You add the listener to the LoaderInfo instance, which can be found in the contentLoaderInfo property of Loader. You pass onImageLoaded as the handler for the COMPLETE event. Note that it is a good idea to handle load errors as well as successful loads, but that handling is omitted here for brevity and simplicity.
In the onImageLoaded() method, you first remove the event listener and then add the image that was loaded as a child of this ImageHolder instance. This image can be found in the content property of the LoaderInfo instance. Finally, you dispatch a COMPLETE event to inform listeners that the image has loaded.
At this point, you have not added your animation, but you have enough structure in place to ensure that your image loading is working as expected. You just need to return to ImageViewer to add the necessary lines of code to use this ImageHolder class for all the image loading.
Return to ImageViewer.as and add or edit the following bold lines in order to use the ImageHolder class to load and display images in the scrolling pane:
private function onImageSelected(event:Event):void {
var image:Image = event.target.selectedItem.data as Image;
var index:int = event.target.selectedIndex;
_thumbnails_tl.selectedIndex = index;
_names_li.selectedIndex = index;
_zoom_sl.value = 1;
_title_lbl.text = image.name;
var imageHolder:ImageHolder = _imagePane_sp.source as ImageHolder;
if (imageHolder) {
imageHolder.removeEventListener(Event.COMPLETE, onImageLoaded);
}
imageHolder = new ImageHolder(image.file);
imageHolder.addEventListener(Event.COMPLETE, onImageLoaded);
_imagePane_sp.source = imageHolder;
}
private function onImageLoaded(event:Event):void {
var imageHolder:ImageHolder = event.target as ImageHolder;
imageHolder.removeEventListener(Event.COMPLETE, onImageLoaded);
_imagePane_sp.refreshPane();
}
private function onZoom(event:Event):void {
if (_imagePane_sp.content) {
_imagePane_sp.content.scaleX = _imagePane_sp.content.scaleY = _zoom_sl.value;
_imagePane_sp.update();
}
}
In the onImageSelected() method, you no longer pass the image file path directly to the scrolling pane. Instead, you pass an ImageHolder instance. Before this is done, though, you check to see whether the scrolling pane’s current source is an ImageHolder instance. This will be the case for all except when the first image is selected to load. If the ImageHolder instance exists, make sure to remove a previously added event listener. You do this to ensure that if a user clicks quickly and repeatedly on items in the lists, you don’t have errant event listeners waiting to be fired when they are no longer needed:
var imageHolder:ImageHolder = _imagePane_sp.source as ImageHolder;
if (imageHolder) {
imageHolder.removeEventListener(Event.COMPLETE, onImageLoaded);
}
After this initial check and cleanup, a new ImageHolder instance is created and passed the path to the image file to load. You add a listener to receive notification when the image has completed loading and then set the source of the scrolling pane to be the new ImageHolderinstance:
imageHolder = new ImageHolder(image.file);
imageHolder.addEventListener(Event.COMPLETE, onImageLoaded);
_imagePane_sp.source = imageHolder;
You add the listener so you can refresh the scrolling pane when an image has completed loading, allowing the scrollbars to adjust for the size of the loaded image. If you do not do this, the scrolling pane will reset its scrollbars only when its source property is set, which occurs before the image has completed loading and its size is unknown. The refreshing is therefore handled in the event listener for the COMPLETE event of ImageHolder.
If you test your movie now, the image will appear as before with no apparent change. Don’t worry—that’s good! You haven’t added the transition animation yet, and the fact that the image loads as before shows you’ve set up your loading code correctly.
What you’ve done is separate the code for loading an image into its own class to make it easier in the future (or in the next step) to modify that code without needing to worry about the internal workings of other classes, namely your main ImageViewer document class. It is good practice in OOP to separate responsibilities into individual independent classes to create a more modular structure that allows for easier debugging, maintenance, modification, and reuse. Next, you will add lines to ImageHolder to produce a transition effect. If you want to alter the transition in the future, you can modify the code within this class, and the transition will update without you needing to alter code anywhere else.
Return to the ImageHolder class and finish it with the code that will animate the alpha property of the instance from 0 to 1 after the image loads:
package com.foundationAS3.ch12 {
import flash.display.Loader;
import flash.display.LoaderInfo;
import flash.display.Sprite;
import flash.events.Event;
import flash.net.URLRequest;
public class ImageHolder extends Sprite {
public function ImageHolder(file:String) {
alpha = 0;
loadImage(file);
}
private function loadImage(file:String):void {
var loader:Loader = new Loader();
loader.contentLoaderInfo.addEventListener(å
Event.COMPLETE, onImageLoaded);
loader.load(new URLRequest(file));
}
private function onImageLoaded(event:Event):void {
var loaderInfo:LoaderInfo = event.target as LoaderInfo;
loaderInfo.removeEventListener(Event.COMPLETE, onImageLoaded);
addChild(loaderInfo.content);
addEventListener(Event.ENTER_FRAME, onEnterFrame);
dispatchEvent(new Event(Event.COMPLETE));
}
private function onEnterFrame(event:Event):void {
alpha += 0.1;
if (alpha >= 1) {
alpha = 1;
removeEventListener(Event.ENTER_FRAME, onEnterFrame);
}
}
}
}
In the constructor of the class, you set alpha to 0. Once the image loads, within the onImageLoaded() handler, you set up a new listener for the ENTER_FRAME event dispatched by every sprite, each frame of the movie. Each time this onEnterFrame() handler is called, you increment alpha by 0.1. After the alpha value reaches 1, you remove the event listener because the animation is complete.
The approach shown here will produce a linear animation (the alpha increases by the same amount each iteration) that is dependent on the frame rate of the movie because it is using on ENTER_FRAME event. Because it is tied to the frame rate, the fade in will occur much more quickly in a movie set at 30 frames per second (fps) than one at 12 fps. If you want to have more control over the total time for the animation or want to more easily use custom easing equations for less of a linear effect, you might want to look at ActionScript 3.0’s built-in Timer class, which works independently from a movie’s frame rate.
Test your movie and see the final result, with images animating upon loading. Not too much extra code has given you a much smoother application.
Summary
How was that? Not a bad little project for a single chapter! Applying many of the skills presented throughout the earlier chapters, you can now create an application that loads external data in XML form and displays that data in list views that, when clicked, causes images to load and animate into a pannable, zoomable pane.
The Flash ActionScript 3.0 components were used extensively, with styles and properties and even a custom cell renderer to configure and customize instances. Event listening and dispatching were used throughout to inform the interrelated classes when things need to occur. You dynamically created graphics and applied filters, and used ActionScript to create an animated transition for the images, which are all loaded from external sources.
At a higher level, you created custom classes, taking advantage of inheritance to extend the core ActionScript classes, to manage your application and provide much of its functionality. At a lower level, you used an entire arsenal of ActionScript language elements—from variables to operators, statements to expressions, functions to loops to conditionals—all to create an application that serves a very real and functional purpose.
As a new ActionScript developer, you deserve many kudos for getting to this point in the book and in your programming education, and for being able to apply such a wealth of new knowledge!
If you are interested in Flex—what it can offer and how it utilizes ActionScript—keep on turning these pages. All your ActionScript knowledge is immediately applicable to Flex. In the next two chapters, you’ll learn just what Flex adds to the mix and create a Flex application to explore its capabilities, using both the Flex framework and the core ActionScript classes with which you are already familiar.
If Flash is your game, and Flex is for another day, congratulations on reaching this point! There is much more to ActionScript that you can discover, and the best way to do that is to experiment, play, and have fun with the language and what it can offer. Take advantage of the wealth of free tutorials, blogs, forums, and open source code presented by others equally excited by ActionScript and its capabilities. And never stop learning because there is never a point when there isn’t something new to learn and wow you. Good luck!
For all you Flexers, see you at the turn of the page!