Coding for Beginners in Easy Steps: Basic Programming for All Ages (2015)
12. Developing apps
This chapter brings together elements from previous chapters to develop a windowed application.
Generating randoms
Planning needs
Designing layout
Assigning statics
Loading dynamics
Adding functionality
Testing programs
Deploying applications
Summary
Generating randoms
The graphical application developed on subsequent pages of this book will generate six random numbers within a specific range. Initially, its functionality can be developed as a console application then transferred later to illustrate how it can be applied to graphical widget components.
The standard Python library has a random module that provides methods to generate pseudo-random numbers. The current system time is used by default to “seed” the random generator whenever it gets initialized – so it does not repeat its selections.
A pseudo-random floating-point number from 0.0 to 1.0 can be generated by calling the random() method from the random module. The range of generated numbers can be modified using the * multiplication operator to specify a maximum value and can be rounded down to integer values using the built-in int() function. For example, to generate an integer within the range of zero to nine:
int( random.random() * 10 )
Or to generate a whole number within the range of 1 to 10:
int( random.random() * 10 ) + 1

Floating-point numbers cast from the float data type to the int data type by the built-in int() function get truncated at the decimal point.
This statement could be used in a loop to generate multiple random integers within a given range but any number may be repeated in that output – there is no guaranteed uniqueness. Instead, multiple unique random integers within a given range can be generated by the sample() method from the random module. This requires two arguments to specify the range and the number of unique integers to be returned. It is convenient to use the built-in range() function to specify a maximum value. For example, to generate six unique numbers within the range of 1 to 9:
random.sample( range( 10 ) , 6 )
Or to generate six unique numbers within the range of 1 to 10:
random.sample( range( 1 , 11 ) , 6 )
This technique could represent a random lottery entry by choosing, say, six unique numbers between 1 and 49.

The range() function can specify start and end values. If no starting value is supplied, zero is assumed by default.

sample.py
![]() Start a new program by importing two functions from the “random” module
Start a new program by importing two functions from the “random” module
from random import random , sample
![]() Next, assign a random floating-point number to a variable then display its value
Next, assign a random floating-point number to a variable then display its value
num = random()
print( ‘Random Float 0.0-1.0 : ‘ , num )
![]() Now, multiply the floating-point number and cast it to become an integer then display its value
Now, multiply the floating-point number and cast it to become an integer then display its value
num = int( num * 10 )
print( ‘Random Integer 0 - 9 : ‘ , num )
![]() Add a loop to assign multiple random integers to a list, then display the list items
Add a loop to assign multiple random integers to a list, then display the list items
nums = [] ; i = 0
while i < 6 :
nums.append( int( random() * 10 ) + 1 )
i += 1
print( ‘Random Multiple Integers 1-10 :’ , nums )
![]() Finally, assign multiple unique random integers to the list then display the list items
Finally, assign multiple unique random integers to the list then display the list items
nums = sample( range( 1, 49 ) , 6 )
print( ‘Random Integer Sample 1 - 49 : ‘ , nums )
![]() Save the file then run the program several times – to see the generated random numbers
Save the file then run the program several times – to see the generated random numbers
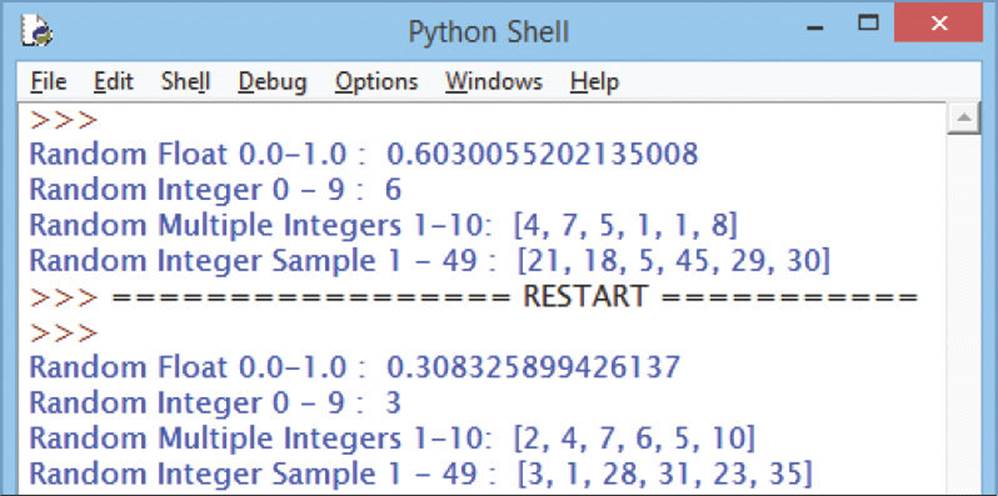

The random.sample() function returns a list but does not actually replace any elements in the specified range.
Planning needs
When creating a new graphical application it is useful to first spend some time planning its design. Clearly define the program’s precise purpose, decide what application functionality will be required, then decide what interface widgets will be needed.

A plan for a simple application to pick numbers for a lottery entry might look like this:
Program purpose
•The program will generate a series of six unique random numbers in the range 1-49 and have the ability to be reset
Functionality required
•A function to generate and display six unique random numbers
•A function to clear the last six random numbers from display
Interface widgets needed
•One non-resizable window to contain all other widgets and to display the application title.
•One Label widget to display a static application logo image – just to enhance the appearance of the interface.
•Six Label widgets to dynamically display the generated series of unique random numbers – one number per Label.
•One Button widget to generate and display the numbers in the Label widgets when this Button gets clicked. This Button will not be enabled when the numbers are on display.
•One Button widget to clear the numbers on display in the Label widgets when this Button gets clicked. This Button will not be enabled when the numbers are not on display.
Having established a program plan means you can now produce the application basics by creating all the necessary widgets.
Toggle the value of a Button widget’s state property from NORMAL to DISABLED to steer the user – in this case the application must be reset before a further series of unique random numbers can be generated.
lotto(widgets).py
![]() Start a new program by importing all features from the “tkinter” module
Start a new program by importing all features from the “tkinter” module
# Widgets:
from tkinter import *
![]() Next, add statements to create a window object and an image object
Next, add statements to create a window object and an image object
window = Tk()
img = PhotoImage( file = ‘lotto.gif’ )

lotto.gif
![]() Now, add statements to create all the necessary widgets
Now, add statements to create all the necessary widgets
imgLbl = Label( window, image = img )
label1 = Label( window, relief = ‘groove’, width = 2 )
label2 = Label( window, relief = ‘groove’, width = 2 )
label3 = Label( window, relief = ‘groove’, width = 2 )
label4 = Label( window, relief = ‘groove’, width = 2 )
label5 = Label( window, relief = ‘groove’, width = 2 )
label6 = Label( window, relief = ‘groove’, width = 2 )
getBtn = Button( window )
resBtn = Button( window )
![]() Then, add the widgets to the window using the grid layout manager – ready to receive arguments to specify how the widgets should be positioned at the design stage next
Then, add the widgets to the window using the grid layout manager – ready to receive arguments to specify how the widgets should be positioned at the design stage next
# Geometry:
imgLbl.grid()
label1.grid()
label2.grid()
label3.grid()
label4.grid()
label5.grid()
label6.grid()
getBtn.grid()
resBtn.grid()
![]() Finally, add a loop statement to sustain the window
Finally, add a loop statement to sustain the window
# Sustain window:
window.mainloop()
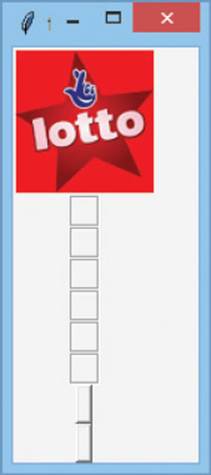
![]() Save the file then run the program – to see the window appear containing all the necessary widgets
Save the file then run the program – to see the window appear containing all the necessary widgets
The relief property specifies a border style and the width property specifies the label width in character numbers.
Designing layout
Having created all the necessary widgets, on the previous page, you can now design the interface layout by adding arguments to specify how the widgets should be positioned. A horizontal design will position the logo Label on the left, and on its right all six other Labels in a row with both Buttons below this. The grid layout manager, which positions widgets in rows and columns, can easily produce this design by allowing the logo Label to span a row containing all six other Labels and also a row containing both Buttons. One Button can span four columns and the other Button can span two columns, arranged like this:
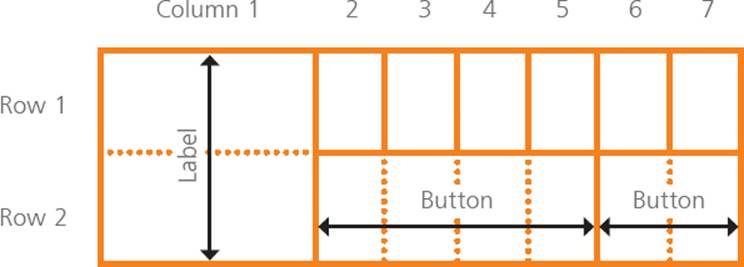
The grid layout manager’s rowspan and columnspan properties work like the HTML rowspan and colspan table cell attributes.
lotto(layout).py
![]() Edit the program started on the previous page – firstly by positioning the Label containing the logo in the first column of the first row, and have it span across the second row
Edit the program started on the previous page – firstly by positioning the Label containing the logo in the first column of the first row, and have it span across the second row
# Geometry:
imgLbl.grid( row = 1, column = 1, rowspan = 2 )
![]() Next, position a Label in the second column of the first row and add 10 pixels of padding to its left and right
Next, position a Label in the second column of the first row and add 10 pixels of padding to its left and right
label1.grid( row = 1, column = 2, padx = 10 )
![]() Now, position a Label in the third column of the first row and add 10 pixels of padding to its left and right
Now, position a Label in the third column of the first row and add 10 pixels of padding to its left and right
label2.grid( row = 1, column = 3, padx = 10 )
![]() Position a Label in the fourth column of the first row and add 10 pixels of padding to its left and right
Position a Label in the fourth column of the first row and add 10 pixels of padding to its left and right
label3.grid( row = 1, column = 4, padx = 10 )
![]() Position a Label in the fifth column of the first row and add 10 pixels of padding to its left and right
Position a Label in the fifth column of the first row and add 10 pixels of padding to its left and right
label4.grid( row = 1, column = 5, padx = 10 )
![]() Position a Label in the sixth column of the first row and add 10 pixels of padding to its left and right
Position a Label in the sixth column of the first row and add 10 pixels of padding to its left and right
label5.grid( row = 1, column = 6, padx = 10 )
![]() Position a Label in the seventh column of the first row then add 10 pixels of padding to the left side of the Label and 20 pixels of padding to the right side of the Label
Position a Label in the seventh column of the first row then add 10 pixels of padding to the left side of the Label and 20 pixels of padding to the right side of the Label
label6.grid( row = 1, column = 7, padx = ( 10, 20 ) )
![]() Next, position a Button in the second column of the second row and have it span across four columns
Next, position a Button in the second column of the second row and have it span across four columns
getBtn.grid( row = 2, column = 2, columnspan = 4 )
![]() Now, position a Button in the sixth column of the second row, and have it span across two columns
Now, position a Button in the sixth column of the second row, and have it span across two columns
resBtn.grid( row = 2, column = 6, columnspan = 2 )
![]() Save the file then run the program – to see the window appear containing all the necessary widgets now arranged in your grid layout design
Save the file then run the program – to see the window appear containing all the necessary widgets now arranged in your grid layout design
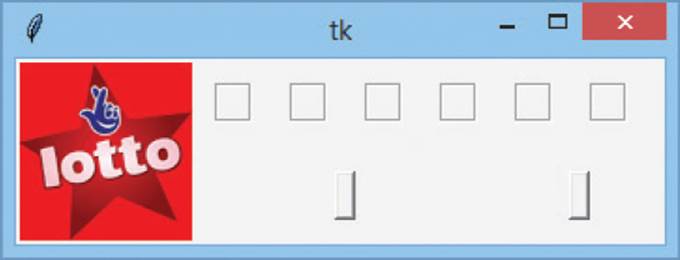
The window size is automatically adjusted to suit the grid contents and the Button widgets are automatically centered in the spanned column width.
Additional padding to the right of the Label in the final column of the first row extends the window width to simply create a small right-hand margin area.
The Buttons will expand to fit static text that will appear on each Button face – specified in the next stage.
Assigning statics
Having arranged all the necessary widgets in a grid layout, on the previous page, you can now assign static values to the widgets. These values will not change during execution of the program.
lotto(static).py
![]() Modify the program on the previous page by inserting a new section just before the final loop statement, which begins with a statement specifying a window title
Modify the program on the previous page by inserting a new section just before the final loop statement, which begins with a statement specifying a window title
# Static Properties:
window.title( ‘Lotto Number Picker’ )
![]() Next, add a statement to prevent the user resizing the window along both the X axis and the Y axis – this will disable the window’s “resize” button
Next, add a statement to prevent the user resizing the window along both the X axis and the Y axis – this will disable the window’s “resize” button
window.resizable( 0, 0 )
![]() Now, add a statement to specify text to appear on the face of the first Button widget
Now, add a statement to specify text to appear on the face of the first Button widget
getBtn.configure( text = ‘Get My Lucky Numbers’ )
![]() Then, add a statement to specify text to appear on the face of the second Button widget
Then, add a statement to specify text to appear on the face of the second Button widget
resBtn.configure( text = ‘Reset’ )
![]() Save the file then execute the program – to see the window now has a title, its resize button is disabled, and the buttons have now been resized to suit their text
Save the file then execute the program – to see the window now has a title, its resize button is disabled, and the buttons have now been resized to suit their text
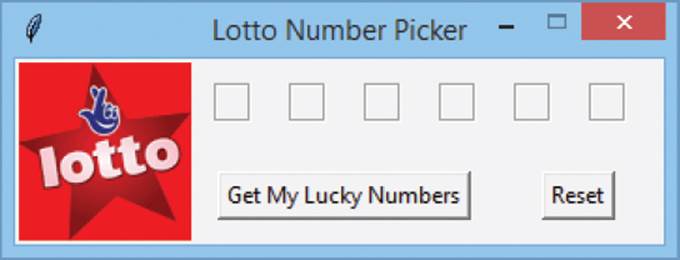
The widget’s configure() method allows properties to be subsequently added or modified after they have been created.
Loading dynamics
Having specified values for static properties, on the facing page, initial values can now be specified for those properties whose values will change dynamically during execution of the program.
lotto(initial).py
![]() Modify the program on the facing page by inserting another new section just before the final loop statement, which specifies that each small empty Label should initially display an ellipsis
Modify the program on the facing page by inserting another new section just before the final loop statement, which specifies that each small empty Label should initially display an ellipsis
# Initial Properties:
label1.configure( text = ‘...’ )
label2.configure( text = ‘...’ )
label3.configure( text = ‘...’ )
label4.configure( text = ‘...’ )
label5.configure( text = ‘...’ )
label6.configure( text = ‘...’ )
![]() Next, add a statement to specify that the second Button widget should initially be disabled
Next, add a statement to specify that the second Button widget should initially be disabled
resBtn.configure( state = DISABLED )
![]() Save the file then run the program – to see each small Label now displays an ellipsis and that the “Reset” Button has been disabled
Save the file then run the program – to see each small Label now displays an ellipsis and that the “Reset” Button has been disabled
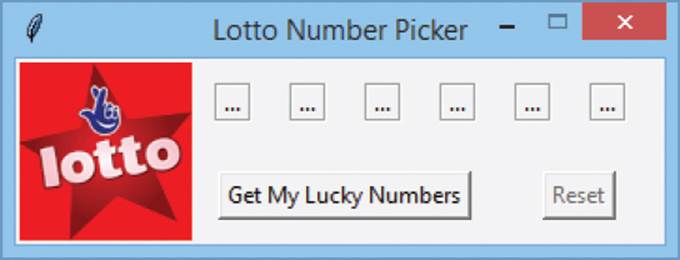
Button states are recognized by tkinter constants of DISABLED (off), NORMAL (on), or ACTIVE (pressed).
Adding functionality
Having created code to initialize dynamic properties, on the previous page, you can now add runtime functionality to respond to clicks on the Button widgets during execution of the program.
lotto.py
![]() Modify the program on the previous page by inserting one more new section just before the final loop statement, which begins by making the sample() function available from the “random” module
Modify the program on the previous page by inserting one more new section just before the final loop statement, which begins by making the sample() function available from the “random” module
# Dynamic Properties:
from random import sample
![]() Next, define a function that generates and assigns six unique random numbers to the small Labels and reverses the state of both Buttons
Next, define a function that generates and assigns six unique random numbers to the small Labels and reverses the state of both Buttons
def pick() :
nums = sample( range( 1, 49 ), 6 )
label1.configure( text = nums[0] )
label2.configure( text = nums[1] )
label3.configure( text = nums[2] )
label4.configure( text = nums[3] )
label5.configure( text = nums[4] )
label6.configure( text = nums[5] )
getBtn.configure( state = DISABLED )
resBtn.configure( state = NORMAL )
![]() Now, define a function to display an ellipsis on each small Label and revert both Buttons to their initial states
Now, define a function to display an ellipsis on each small Label and revert both Buttons to their initial states
def reset() :
label1.configure( text = ‘...’ )
label2.configure( text = ‘...’ )
label3.configure( text = ‘...’ )
label4.configure( text = ‘...’ )
label5.configure( text = ‘...’ )
label6.configure( text = ‘...’ )
getBtn.configure( state = NORMAL )
resBtn.configure( state = DISABLED )
![]() Then, add statements to nominate the relevant function to be called when each Button is pressed by the user
Then, add statements to nominate the relevant function to be called when each Button is pressed by the user
getBtn.configure( command = pick )
resBtn.configure( command = reset )
![]() Finally, save the file – the complete program should look like that shown below
Finally, save the file – the complete program should look like that shown below
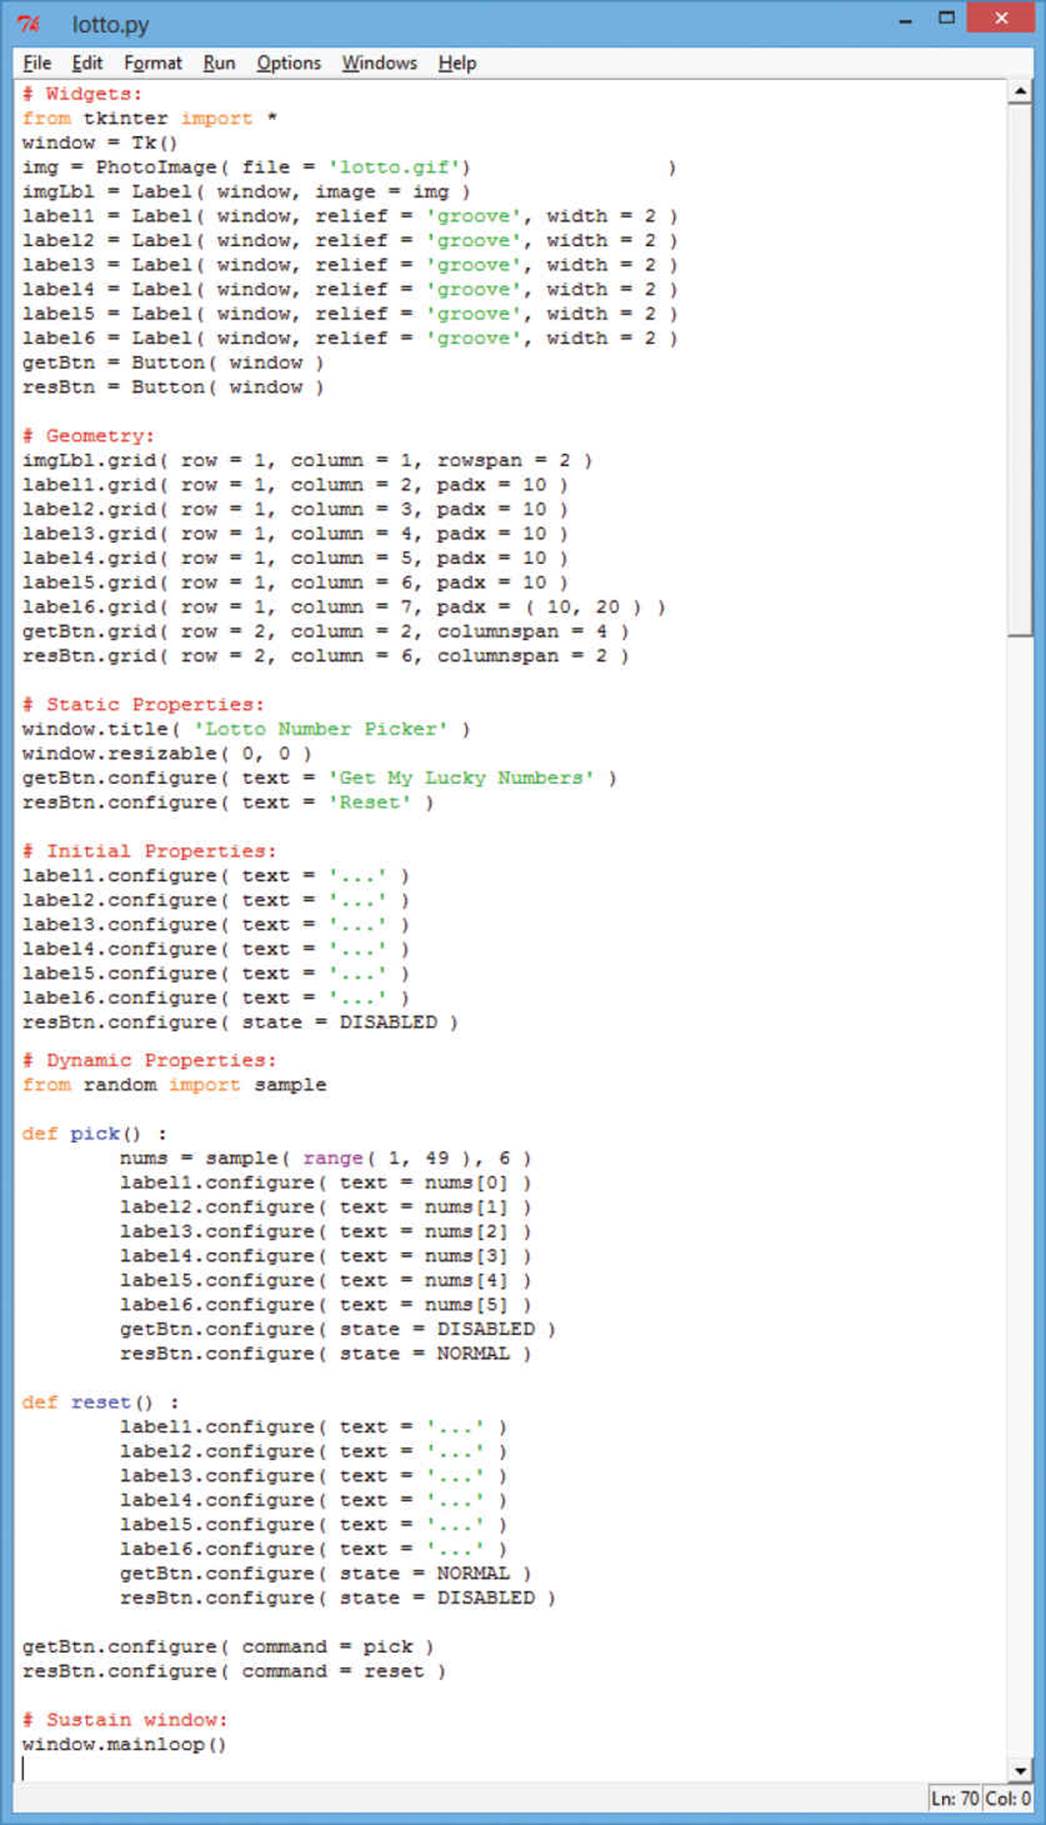
These steps provide comparable functionality to that of the console application here.
It is convention to place all import statements at the start of the script but they can appear anywhere, as listed here.
Testing programs
Having worked through the program plan, on the previous pages, the widgets needed and functionality required have now been added to the application – so it’s ready to be tested.
![]() Launch the application and examine its initial appearance
Launch the application and examine its initial appearance

Static text appears on the window title bar and on the Button widgets, the window’s resize button is disabled, the small Labels contain their initial ellipsis text values, and the “Reset” button is in its initial disabled state.
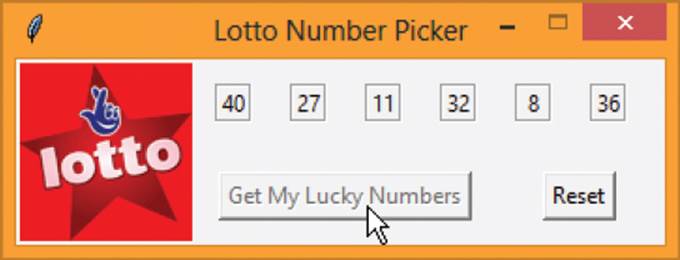
![]() Next, click the “Get My Lucky Numbers” Button widget – to execute all the statements within the pick() function
Next, click the “Get My Lucky Numbers” Button widget – to execute all the statements within the pick() function
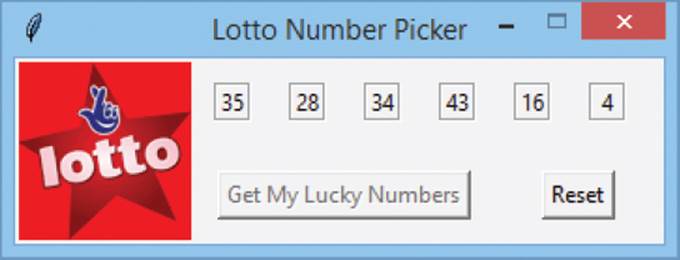
A series of numbers within the desired range is displayed and the Button states have changed as required – a further series of numbers cannot be generated until the application has been reset.
![]() Make a note of the numbers generated in this first series for comparison later
Make a note of the numbers generated in this first series for comparison later
No number is repeated in any series because the random sample() function returns a set of unique random integers.
![]() Click the “Reset” Button widget – to execute all the statements within the reset() function and see the application resume its initial appearance as required
Click the “Reset” Button widget – to execute all the statements within the reset() function and see the application resume its initial appearance as required

![]() Click the “Get My Lucky Numbers” Button widget again – to execute its pick() function again and confirm that the new series of numbers differ from the first series
Click the “Get My Lucky Numbers” Button widget again – to execute its pick() function again and confirm that the new series of numbers differ from the first series

![]() Finally, restart the application and click the “Get My Lucky Numbers” Button widget once more – and confirm that this first series of numbers are different to those noted in the first series when the application last ran
Finally, restart the application and click the “Get My Lucky Numbers” Button widget once more – and confirm that this first series of numbers are different to those noted in the first series when the application last ran

The series of generated numbers are not repeated each time the application gets launched because the random generator is seeded by the current system time – which is different each time the generator gets called.
Deploying applications
Your apps developed in the Python language can be deployed on Windows systems where the Python interpreter is not installed. To do so, all the program files must be “frozen” into a bundle that includes an executable (.exe) file to create a simple MSI installer. The “cx_Freeze” tool is a free set of scripts and modules for freezing Python programs available at cx-freeze.sourceforge.net
The cx_Freeze tool uses Python’s “distutils” package and requires a setup script to describe your module distribution in order to bundle appropriate support for your application. The setup script is traditionally named setup.py and consists mainly of a call to a cx_Freeze setup() function – supplying information as parameter pairs. This specifies any required build options, such as image files or modules to be included, and identifies the executable script and system platform type. For example, the setup script for the application developed throughout this chapter must include the logo image file lotto.gif and specify the final code script named lotto.py as the executable script. Once cx_Freeze is installed, a setup script can be executed from a Windows Command Prompt with the argument bdist-msi – to create a sub-directory named “dist” containing a distributable MSI installer for your app.
The cx_Freeze tool can also create executable files for Mac and Linux systems. Discover more on cx_Freeze online at cx_freeze.readthedocs.org setup.py
setup.py
![]() In IDLE start a Python setup script by making available the “sys” module and items from the “cx_Freeze” module
In IDLE start a Python setup script by making available the “sys” module and items from the “cx_Freeze” module
import sys
from cx_Freeze import setup, Executable
![]() Next, add statements to identify the base platform in use
Next, add statements to identify the base platform in use
base = None
if sys.platform == ‘win32’ : base = ‘Win32GUI’
![]() Now, add a statement listing options to be included
Now, add a statement listing options to be included
opts = { ‘include_files’ : [ ‘lotto.gif’ ] , ‘includes’ : [ ‘re’ ] }
![]() Finally, add a call to the setup() function passing all information as parameter pairs
Finally, add a call to the setup() function passing all information as parameter pairs
setup( name = ‘Lotto’,
version = ‘1.0’,
description = ‘Lottery Number Picker’,
author = ‘Mike McGrath’,
options = { ‘build_exe’ : opts },
executables = [ Executable( ‘lotto.py’, base= base ) ] )
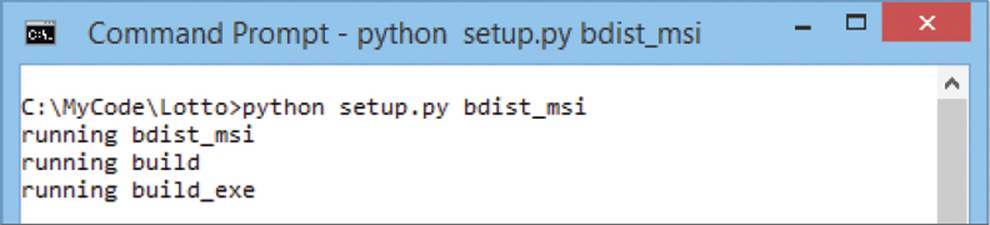
![]() Save the setup script alongside the application files then run the script command to create the Windows installer
Save the setup script alongside the application files then run the script command to create the Windows installer
![]() Wait until the process creates the installer in a “dist” sub-directory then copy the installer onto portable media, such as a USB flash drive
Wait until the process creates the installer in a “dist” sub-directory then copy the installer onto portable media, such as a USB flash drive
![]() Now, copy the installer onto another Windows computer where Python may not be present and run the installer
Now, copy the installer onto another Windows computer where Python may not be present and run the installer
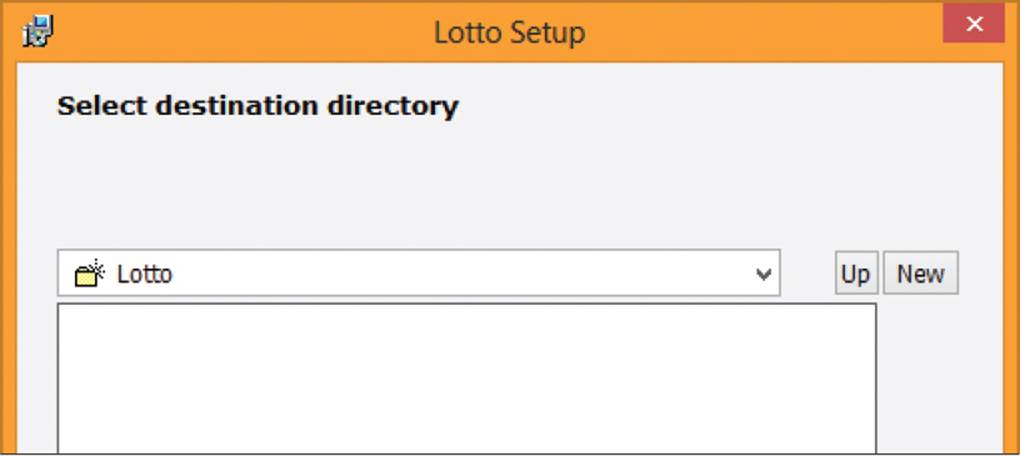
![]() Then, select an installation location, or accept the suggested default location
Then, select an installation location, or accept the suggested default location
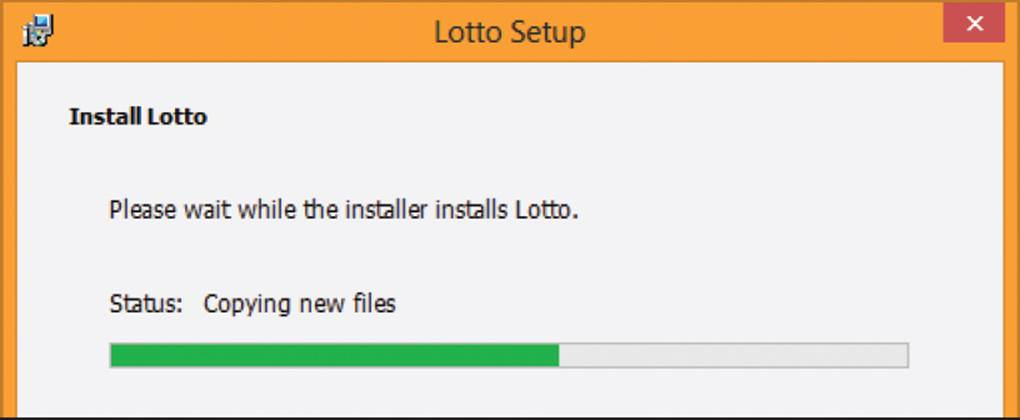
![]() When the installer has finished copying files, navigate to your chosen installation location and run the executable file – to see the application launch
When the installer has finished copying files, navigate to your chosen installation location and run the executable file – to see the application launch

Lotto-1.0-win32.msi

lotto.exe
Summary
•The standard Python library has a random module that provides functions to generate pseudo-random numbers
•A pseudo-random floating-point number from 0.0 to 1.0 can be generated by the random module’s random() function
•Multiple unique random integers within a given range can be generated by the random module’s sample() function
•A program plan should define the program’s Purpose, required Functionality, and the Interface widgets needed
•In designing a program interface the grid() layout manager positions widgets in rows and columns
•Static properties do not change during execution of a program
•Dynamic properties do change during execution of a program using runtime functionality to respond to a user action
•Upon completion, a program should be tested to ensure it performs as expected in every respect
•Program files can be “frozen” into a bundle for distribution to other computers where the Python interpreter is not present
•The cx_Freeze tool uses Python’s “disutils” package to freeze programs into executables for Windows, Mac, or Linux
•A setup script describes your module distribution so cx_Freeze will bundle appropriate support for the application
•Traditionally, a setup script is named setup.py and consists mainly of a call to the cx_Freeze setup() function
•Applications can be deployed on Windows systems using the cx_Freeze tool to create a simple installer
•When a setup script is executed with the bdist_msi command an MSI installer is created that will copy the distribution bundle onto the host computer, including an executable file
All materials on the site are licensed Creative Commons Attribution-Sharealike 3.0 Unported CC BY-SA 3.0 & GNU Free Documentation License (GFDL)
If you are the copyright holder of any material contained on our site and intend to remove it, please contact our site administrator for approval.
© 2016-2026 All site design rights belong to S.Y.A.