Lightning Fast Animation in Element 3D (2014)
Chapter 6. Animating Your Geometry
We've learned to build. We've learned to texture. We've also learned to position, light, and set up cameras. Now, it's finally time to animate our objects in this scene. Let's get started!
Let's simulate an earthquake!
We're going to make it look like there's an earthquake making everything move across the table. Some items will fall off, while others will fall over. Let's start by duplicating our "shaker setup" composition and naming it Shaker Animate 1. Now we have the base project separated from our animation project, so things can move along easier.
Animating with nulls
First, let's start with the lamp. Due to an earthquake, the camera shakes. The High Frequency Oscillation (HFO) of an earthquake wouldn't necessarily be visible on the lamp (that is, it will not shake); rather, it would slide across the table while the camera shakes. Great, that makes it easy. We'll make the objects slide across the table and add a camera shake later to complete the scene.
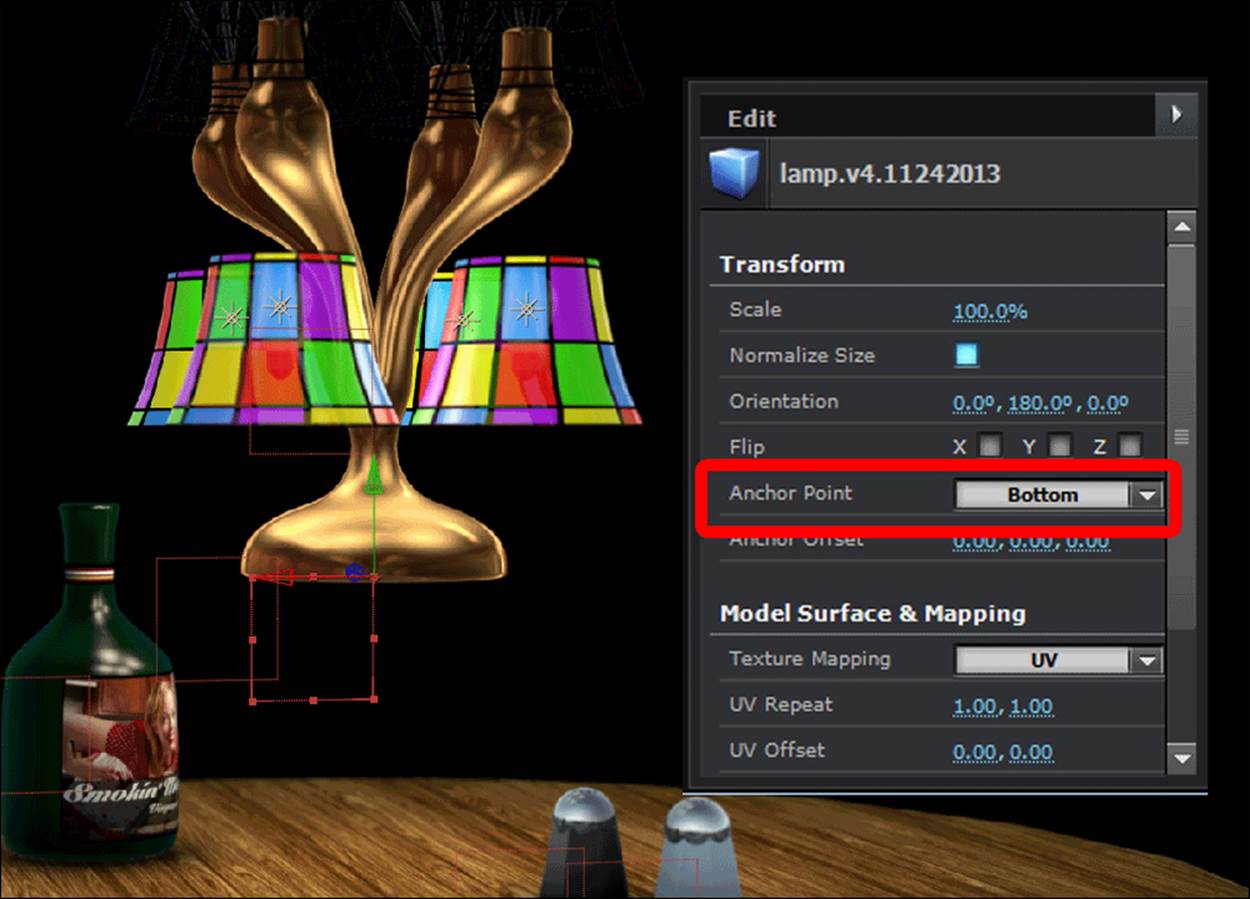
We parented all of the original lamp parts together through null objects. So, all we have to do is move the Lamp Control null, and we're good, right? Wrong. Notice that the Lamp control null is directly at the center of the lamp. If we move the lamp until it falls off the table, it would actually rotate at the point of the base touching the table as it falls and not from the center. This is called the pivot point. It's easy enough to change the pivot point of an object. We could go back into the scene setup for the Element layer and change the Anchor Point to Bottom in the Edit window.
However, we'd have to re-setup our objects because the lamp base object would shift, as shown in the following screenshot:
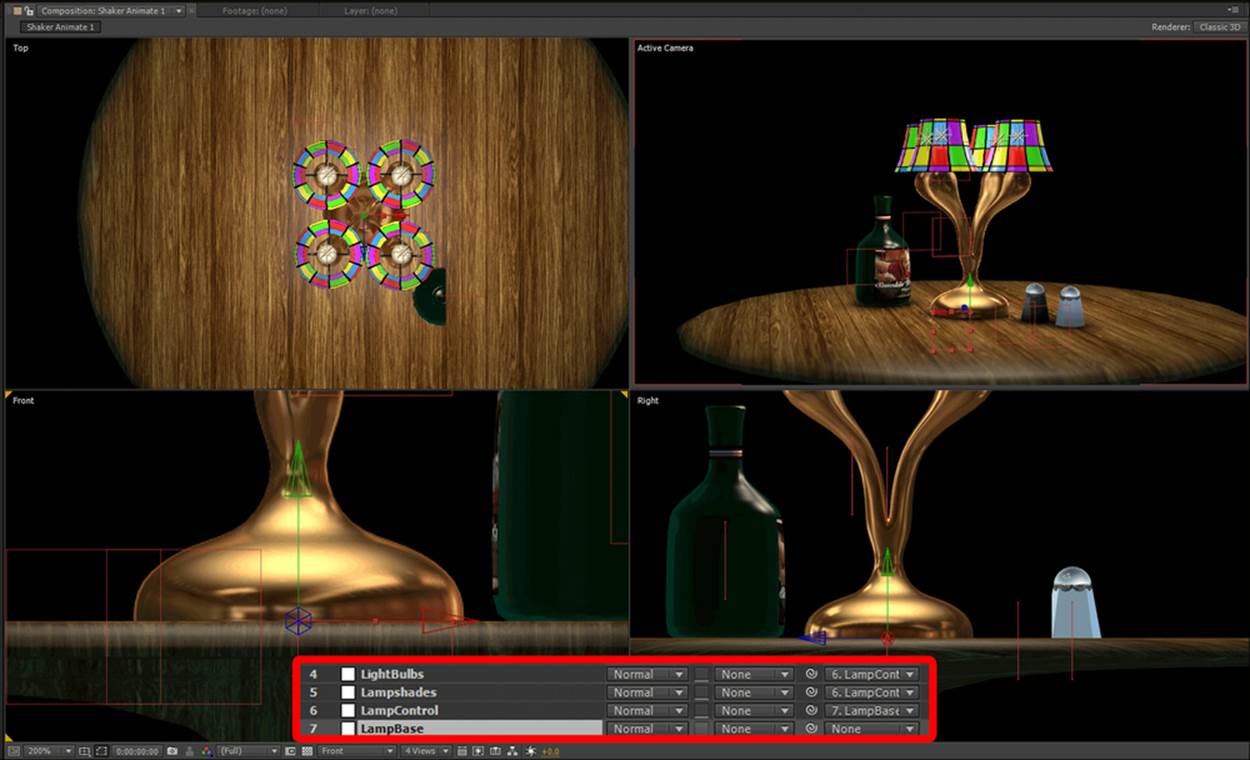
So, how do we make a new pivot point? Simple. Instead of changing the anchor, we perform the following steps:
1. Create a new null object called Lamp Base and place it at the bottom center of the lamp.
2. Parent the Lamp Control null to it.
3. Then, use the Lamp Base null to move the lamp around.
The result should look as follows:
Keyframing the lamp
Let's make the lamp move and fall by performing the following steps:
1. Open the Position (p) and Rotation (r) parameters in the timeline.
2. Make sure you separate dimensions of the position (right-click the position and click on Separate dimensions) so that we can move and keyframe the dimensions independently. You would generally want to do this when working in 3D.
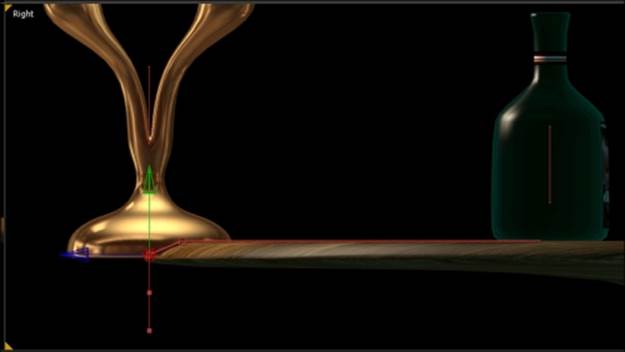
3. Now, set a keyframe for all of the position parameters at 10 seconds.
4. Then, at 20 seconds, move the lamp straight back to the edge of the table and set a keyframe on all the position and rotation parameters.
5. Finally, set keyframe interpolation for all of these parameters to Bezier.
The result should look as follows:
Realism in animation
Back when I was in college, one of my mentors had me stop and watch a person standing in line. He said, "Notice that nothing about that person moves at the same time, nor does anything move equally. That's how it is with everything." That's also why we separate dimensions. This lamp isn't going to just topple off the table. It's going to tip a bit and slide off that 45-degree slope at the edge of the table. This is the "KA-BOOM" principle. If it just toppled, it would only go "BOOM". The "KA" is the anticipation of action and then the "BOOM" is the action. This is how animation is. This is also how life is. So, let's make it slide and fall; we'll make the rotations to fit the movement later.
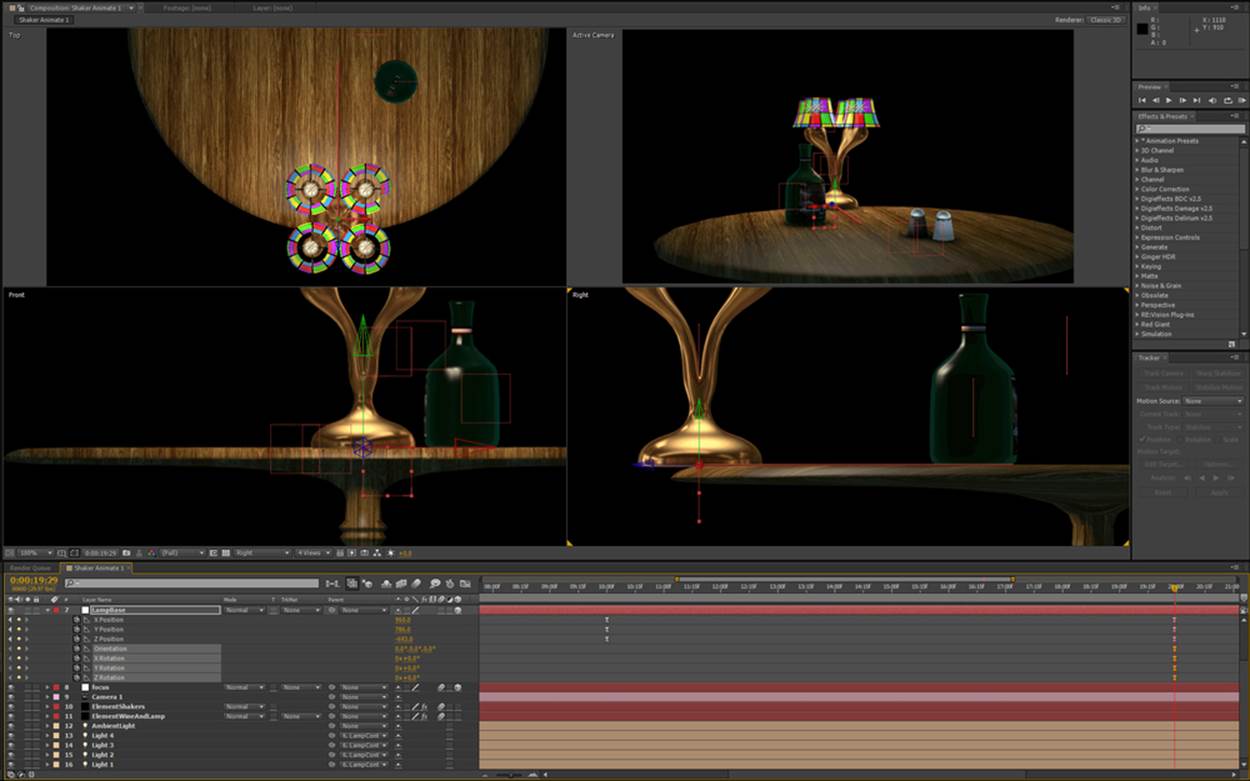
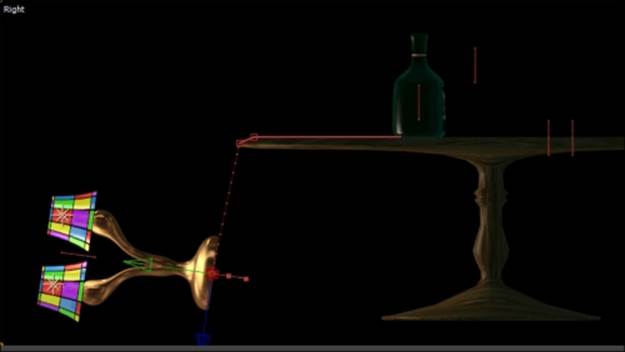
Let's add the "KA" with a 1 second slide down the table. At 21 seconds, add a keyframe down to the bottom edge of the slope as shown in the following screenshot:
Wait; but it's falling off the table! Patience grasshopper, we'll get there. Now, at 21:15, complete the fall as shown in the following screenshot. Make sure the rotation is on the X Rotation parameter, not the Orientation parameter.
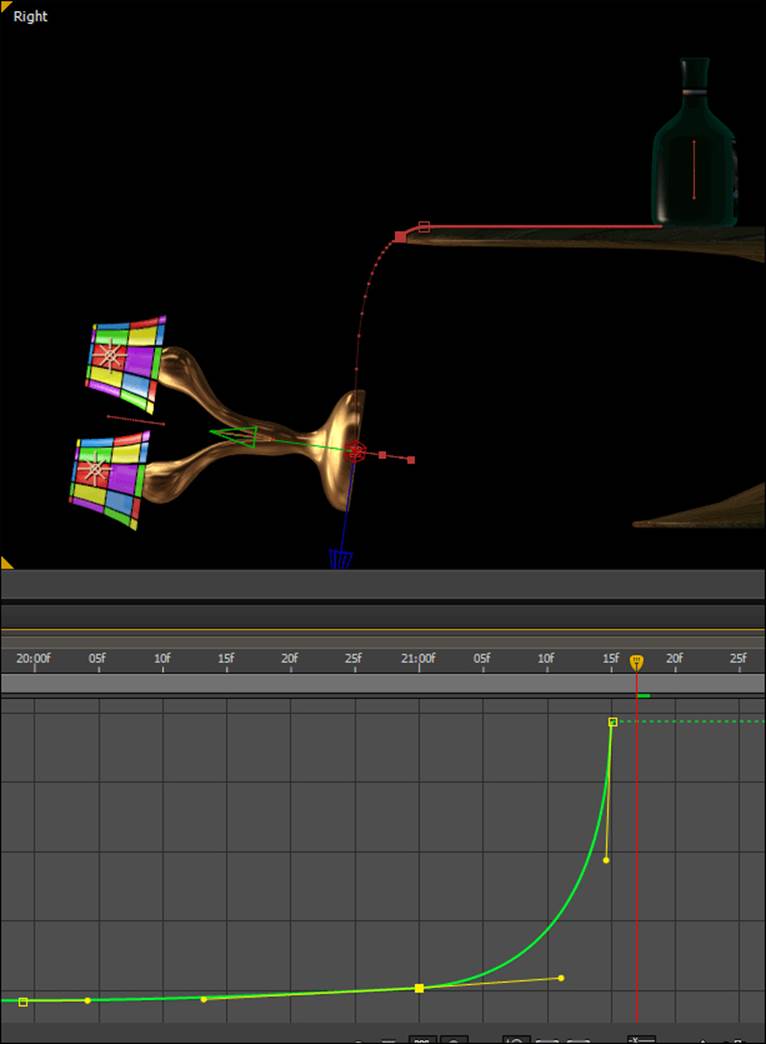
The fall is too linear though. We can see by the dots in the path that it moves equidistantly in every frame. It needs to start slow and end fast; just like a real fall. So, open the graph editor for the Y Position parameter and adjust the graph as shown in the following screenshot:
Also, remember that X Rotation would have a similar graph (nothing is moved by gravity linearly). So, go adjust that graph to make it look similar to the Y Position graph shown in the preceding screenshot. Also, just for giggles, go adjust the Z Position graph so that it looks smooth. It doesn't have to be like the other graphs, just so that it doesn't snake all over the place.
Finally, if the lamp falls below the table's surface, the table would block the light. However, as there's no ray tracing in Element 3D, we need to turn off the lights as the lamp falls out of sight (else, the salt shakers and wine bottle will still be lit).
Set a hold keyframe on each of the lamp's light's intensity parameters at 20 seconds. Then, at 21:15 (when the lamp hits the ground), set the intensity to zero percent (this should automatically create another hold keyframe at this marker). Now, as soon as the lamp hits the ground, the lights go out as shown in the following screenshot:

Summary
Ok, so we've got our lamp animated. Use the same techniques to animate your shakers and wine bottle. Remember, we learned how to change the axis point using another null that we can parent our object's null to. For instance, if you want to have the wine bottle fall over on the table and roll, just add a null at the bottom corner, animate that falling over, and then use the object's null (at the center of the object) to animate the rolling on the table. You can combine this technique in a lot of ways. Play around and create your own animations for the bottle and shakers.
We also learned about different keyframe interpolations (hold and Bezier). With Bezier curves, we can get much more control over how things move than we get with simple eases (as we saw while using the graph editor). We also talked about getting some realism when using these techniques. When we get into some more advanced techniques (in Chapter 9, Some Other Techniques), we'll go further into adding realism with bounces, squashing and stretching soft bodies, and so on. We'll also delve further into masking our shaker scene and optimizing our render in Chapter 8, Optimizing Performance. So don't worry; we'll come back to the shaker aniation and really make it sing later.
In the next chapter, we're going to set aside our shaker animation for a bit and move into an area where Element 3D really shines. Let's tackle the particle replicator.